环境准备
3个节点,都是 Centos 7.6 系统,内核版本:3.10.0-957.12.2.el7.x86_64,在每个节点上添加 hosts 信息:
$ cat /etc/hosts
172.16.1.128 k8s-master172.16.1.129 k8s-node01172.16.1.130 k8s-node02
禁用防火墙:
$ systemctl stop firewalld$ systemctl disable firewalld
禁用SELINUX:
$ setenforce 0$ cat /etc/selinux/configSELINUX=disabled
创建/etc/sysctl.d/k8s.conf文件,添加如下内容:
net.bridge.bridge-nf-call-ip6tables = 1net.bridge.bridge-nf-call-iptables = 1net.ipv4.ip_forward = 1
执行如下命令使修改生效:
$ modprobe br_netfilter$ sysctl -p /etc/sysctl.d/k8s.conf
安装 ipvs
$ cat > /etc/sysconfig/modules/ipvs.modules <<EOF#!/bin/bashmodprobe -- ip_vsmodprobe -- ip_vs_rrmodprobe -- ip_vs_wrrmodprobe -- ip_vs_shmodprobe -- nf_conntrack_ipv4EOF$ chmod 755 /etc/sysconfig/modules/ipvs.modules && bash /etc/sysconfig/modules/ipvs.modules && lsmod | grep -e ip_vs -e nf_conntrack_ipv4
上面脚本创建了的/etc/sysconfig/modules/ipvs.modules文件,保证在节点重启后能自动加载所需模块。使用lsmod | grep -e ip_vs -e nf_conntrack_ipv4命令查看是否已经正确加载所需的内核模块。
接下来还需要确保各个节点上已经安装了 ipset 软件包:
$ yum install ipset -y
为了便于查看 ipvs 的代理规则,最好安装一下管理工具 ipvsadm:
$ yum install ipvsadm -y
同步服务器时间
$ yum install chrony -y$ systemctl enable chronyd$ systemctl start chronyd$ chronyc sources
关闭 swap 分区:
$ swapoff -a
修改/etc/fstab文件,注释掉 SWAP 的自动挂载,使用free -m确认 swap 已经关闭。swappiness 参数调整,修改/etc/sysctl.d/k8s.conf添加下面一行:
vm.swappiness=0
执行sysctl -p /etc/sysctl.d/k8s.conf使修改生效。
接下来可以安装 Docker
$ yum install -y yum-utils \device-mapper-persistent-data \lvm2$ yum-config-manager \--add-repo \https://download.docker.com/linux/centos/docker-ce.repo$ yum list docker-ce --showduplicates | sort -r
可以选择安装一个版本,比如我们这里安装最新版本:
$ yum install docker-ce-18.09.8-3.el7 -y
配置 Docker 镜像加速器
$ vi /etc/docker/daemon.json
{"exec-opts": ["native.cgroupdriver=systemd"],"registry-mirrors" : ["https://ot2k4d59.mirror.aliyuncs.com/"]}
启动 Docker
$ systemctl start docker$ systemctl enable docker
在确保 Docker 安装完成后,上面的相关环境配置也完成了,现在我们就可以来安装 Kubeadm 了,我们这里是通过指定yum 源的方式来进行安装的:
cat <<EOF > /etc/yum.repos.d/kubernetes.repo[kubernetes]name=Kubernetesbaseurl=https://packages.cloud.google.com/yum/repos/kubernetes-el7-x86_64enabled=1gpgcheck=1repo_gpgcheck=1gpgkey=https://packages.cloud.google.com/yum/doc/yum-key.gpghttps://packages.cloud.google.com/yum/doc/rpm-package-key.gpgEOF
当然了,上面的 yum 源是需要科学上网的,如果不能科学上网的话,我们可以使用阿里云的源进行安装:
cat <<EOF > /etc/yum.repos.d/kubernetes.repo[kubernetes]name=Kubernetesbaseurl=http://mirrors.aliyun.com/kubernetes/yum/repos/kubernetes-el7-x86_64enabled=1gpgcheck=0repo_gpgcheck=0gpgkey=http://mirrors.aliyun.com/kubernetes/yum/doc/yum-key.gpghttp://mirrors.aliyun.com/kubernetes/yum/doc/rpm-package-key.gpgEOF
然后安装 kubeadm、kubelet、kubectl(我安装的是最新版,有版本要求自己设定版本):
$ yum install -y kubelet-1.17.2 kubeadm-1.17.2 kubectl-1.17.2 --disableexcludes=kubernetes
可以看到我们这里安装的是 v1.17.2 版本,然后将 kubelet 设置成开机启动:
$ systemctl enable kubelet.service
到这里为止上面所有的操作都需要在所有节点执行配置。
初始化集群
然后接下来在 master 节点配置 kubeadm 初始化文件,可以通过如下命令导出默认的初始化配置:
$ kubeadm config print init-defaults > kubeadm.yaml
然后根据我们自己的需求修改配置,比如修改 imageRepository 的值,kube-proxy 的模式为 ipvs,另外需要注意的是我们这里是准备安装 calico 网络插件的,需要将 networking.podSubnet 设置为192.168.0.0/16:
apiVersion: kubeadm.k8s.io/v1beta2bootstrapTokens:- groups:- system:bootstrappers:kubeadm:default-node-tokentoken: abcdef.0123456789abcdefttl: 24h0m0susages:- signing- authenticationkind: InitConfigurationlocalAPIEndpoint:advertiseAddress: 172.16.1.128bindPort: 6443nodeRegistration:criSocket: /var/run/dockershim.sockname: k8s-mastertaints:- effect: NoSchedulekey: node-role.kubernetes.io/master---apiServer:timeoutForControlPlane: 4m0sapiVersion: kubeadm.k8s.io/v1beta2certificatesDir: /etc/kubernetes/pkiclusterName: kubernetescontrollerManager: {}dns:type: CoreDNSetcd:local:dataDir: /var/lib/etcdimageRepository: registry.cn-hangzhou.aliyuncs.com/google_containerskind: ClusterConfigurationkubernetesVersion: v1.17.2networking:dnsDomain: cluster.localpodSubnet: 192.168.0.0/16serviceSubnet: 10.96.0.0/12scheduler: {}---apiVersion: kubeproxy.config.k8s.io/v1alpha1kind: KubeProxyConfigurationmode: ipvs
然后使用上面的配置文件进行初始化:
$ kubeadm init --config kubeadm.yaml[init] Using Kubernetes version: v1.17.2[preflight] Running pre-flight checks[WARNING SystemVerification]: this Docker version is not on the list of validated versions: 19.03.1. Latest validated version: 18.09[preflight] Pulling images required for setting up a Kubernetes cluster[preflight] This might take a minute or two, depending on the speed of your internet connection[preflight] You can also perform this action in beforehand using 'kubeadm config images pull'[kubelet-start] Writing kubelet environment file with flags to file "/var/lib/kubelet/kubeadm-flags.env"[kubelet-start] Writing kubelet configuration to file "/var/lib/kubelet/config.yaml"[kubelet-start] Activating the kubelet service[certs] Using certificateDir folder "/etc/kubernetes/pki"[certs] Generating "etcd/ca" certificate and key[certs] Generating "etcd/server" certificate and key[certs] etcd/server serving cert is signed for DNS names [ydzs-master localhost] and IPs [10.151.30.11 127.0.0.1 ::1][certs] Generating "etcd/peer" certificate and key[certs] etcd/peer serving cert is signed for DNS names [ydzs-master localhost] and IPs [10.151.30.11 127.0.0.1 ::1][certs] Generating "apiserver-etcd-client" certificate and key[certs] Generating "etcd/healthcheck-client" certificate and key[certs] Generating "ca" certificate and key[certs] Generating "apiserver" certificate and key[certs] apiserver serving cert is signed for DNS names [ydzs-master kubernetes kubernetes.default kubernetes.default.svc kubernetes.default.svc.cluster.local] and IPs [10.96.0.1 10.151.30.11][certs] Generating "apiserver-kubelet-client" certificate and key[certs] Generating "front-proxy-ca" certificate and key[certs] Generating "front-proxy-client" certificate and key[certs] Generating "sa" key and public key[kubeconfig] Using kubeconfig folder "/etc/kubernetes"[kubeconfig] Writing "admin.conf" kubeconfig file[kubeconfig] Writing "kubelet.conf" kubeconfig file[kubeconfig] Writing "controller-manager.conf" kubeconfig file[kubeconfig] Writing "scheduler.conf" kubeconfig file[control-plane] Using manifest folder "/etc/kubernetes/manifests"[control-plane] Creating static Pod manifest for "kube-apiserver"[control-plane] Creating static Pod manifest for "kube-controller-manager"[control-plane] Creating static Pod manifest for "kube-scheduler"[etcd] Creating static Pod manifest for local etcd in "/etc/kubernetes/manifests"[wait-control-plane] Waiting for the kubelet to boot up the control plane as static Pods from directory "/etc/kubernetes/manifests". This can take up to 4m0s[kubelet-check] Initial timeout of 40s passed.[apiclient] All control plane components are healthy after 42.012149 seconds[upload-config] Storing the configuration used in ConfigMap "kubeadm-config" in the "kube-system" Namespace[kubelet] Creating a ConfigMap "kubelet-config-1.15" in namespace kube-system with the configuration for the kubelets in the cluster[upload-certs] Skipping phase. Please see --upload-certs[mark-control-plane] Marking the node ydzs-master as control-plane by adding the label "node-role.kubernetes.io/master=''"[mark-control-plane] Marking the node ydzs-master as control-plane by adding the taints [node-role.kubernetes.io/master:NoSchedule][bootstrap-token] Using token: abcdef.0123456789abcdef[bootstrap-token] Configuring bootstrap tokens, cluster-info ConfigMap, RBAC Roles[bootstrap-token] configured RBAC rules to allow Node Bootstrap tokens to post CSRs in order for nodes to get long term certificate credentials[bootstrap-token] configured RBAC rules to allow the csrapprover controller automatically approve CSRs from a Node Bootstrap Token[bootstrap-token] configured RBAC rules to allow certificate rotation for all node client certificates in the cluster[bootstrap-token] Creating the "cluster-info" ConfigMap in the "kube-public" namespace[addons] Applied essential addon: CoreDNS[addons] Applied essential addon: kube-proxyYour Kubernetes control-plane has initialized successfully!To start using your cluster, you need to run the following as a regular user:mkdir -p $HOME/.kubesudo cp -i /etc/kubernetes/admin.conf $HOME/.kube/configsudo chown $(id -u):$(id -g) $HOME/.kube/configYou should now deploy a pod network to the cluster.Run "kubectl apply -f [podnetwork].yaml" with one of the options listed at:https://kubernetes.io/docs/concepts/cluster-administration/addons/Then you can join any number of worker nodes by running the following on each as root:kubeadm join 172.16.1.128:6443 --token abcdef.0123456789abcdef \--discovery-token-ca-cert-hash sha256:deb5158b39948a4592ff48512047ea6e45b288c248872724a28f15008962178b
可以看到最新验证的 docker 版本是18.09,虽然是一个 warning,所以最好还是安装18.09版本的 docker。
拷贝 kubeconfig 文件
$ mkdir -p $HOME/.kube$ sudo cp -i /etc/kubernetes/admin.conf $HOME/.kube/config$ sudo chown $(id -u):$(id -g) $HOME/.kube/config
添加节点
记住初始化集群上面的配置和操作要提前做好,将 master 节点上面的 $HOME/.kube/config 文件拷贝到 node 节点对应的文件中,安装 kubeadm、kubelet、kubectl,然后执行上面初始化完成后提示的 join 命令即可:
kubeadm join 172.16.1.128:6443 --token abcdef.0123456789abcdef \--discovery-token-ca-cert-hash sha256:deb5158b39948a4592ff48512047ea6e45b288c248872724a28f15008962178b[preflight] Reading configuration from the cluster...[preflight] FYI: You can look at this config file with 'kubectl -n kube-system get cm kubeadm-config -oyaml'[kubelet-start] Downloading configuration for the kubelet from the "kubelet-config-1.15" ConfigMap in the kube-system namespace[kubelet-start] Writing kubelet configuration to file "/var/lib/kubelet/config.yaml"[kubelet-start] Writing kubelet environment file with flags to file "/var/lib/kubelet/kubeadm-flags.env"[kubelet-start] Activating the kubelet service[kubelet-start] Waiting for the kubelet to perform the TLS Bootstrap...This node has joined the cluster:* Certificate signing request was sent to apiserver and a response was received.* The Kubelet was informed of the new secure connection details.Run 'kubectl get nodes' on the control-plane to see this node join the cluster.
如果忘记了上面的 join 命令可以使用命令kubeadm token create —print-join-command重新获取。
执行成功后运行 get nodes 命令:
# kubectl get nodesNAME STATUS ROLES AGE VERSIONk8s-master Ready master 3d18h v1.17.2k8s-node01 Ready node01 3d18h v1.17.2k8s-node02 Ready node02 3d17h v1.17.2
可以看到是 NotReady 状态,这是因为还没有安装网络插件,接下来安装网络插件,可以在文档 https://kubernetes.io/docs/setup/production-environment/tools/kubeadm/create-cluster-kubeadm/ 中选择我们自己的网络插件,这里我们安装 calio:
$ wget https://docs.projectcalico.org/v3.8/manifests/calico.yaml
因为有节点是多网卡,所以需要在资源清单文件中指定内网网卡
$ vi calico.yaml
......spec:containers:- env:- name: DATASTORE_TYPEvalue: kubernetes- name: IP_AUTODETECTION_METHOD # DaemonSet中添加该环境变量value: interface=ens33 # 指定内网网卡- name: WAIT_FOR_DATASTOREvalue: "true"......
$ kubectl apply -f calico.yaml # 安装calico网络插件
隔一会儿查看 Pod 运行状态:
# kubectl get pod -n kube-systemNAME READY STATUS RESTARTS AGEcalico-kube-controllers-64d7686ff8-q4wwg 1/1 Running 0 10mcalico-node-92b29 1/1 Running 0 3d17hcalico-node-f8shx 1/1 Running 7 3d17hcalico-node-jsk9r 1/1 Running 0 3d17hcoredns-6cd559f5d5-448x5 1/1 Running 0 3d18hcoredns-6cd559f5d5-tprrj 1/1 Running 0 3d18hetcd-k8s-master 1/1 Running 1 3d18hkube-apiserver-k8s-master 1/1 Running 4 3d18hkube-controller-manager-k8s-master 1/1 Running 18 3d18hkube-proxy-7hk2n 1/1 Running 1 3d18hkube-proxy-ffslj 1/1 Running 1 3d17hkube-proxy-txhcq 1/1 Running 1 3d18hkube-scheduler-k8s-master 1/1 Running 17 3d18h
网络插件运行成功了,node 状态也正常了:
# kubectl get nodesNAME STATUS ROLES AGE VERSIONk8s-master Ready master 3d18h v1.17.2k8s-node01 Ready node01 3d18h v1.17.2k8s-node02 Ready node02 3d17h v1.17.2
用同样的方法添加另外一个节点即可。
安装 Dashboard
$ wget https://raw.githubusercontent.com/kubernetes/dashboard/v1.10.1/src/deploy/recommended/kubernetes-dashboard.yaml$ vi kubernetes-dashboard.yaml
修改镜像名称
......containers:- args:- --auto-generate-certificatesimage: gcr.azk8s.cn/google_containers/kubernetes-dashboard-amd64:v1.10.1imagePullPolicy: IfNotPresent......
修改Service为NodePort类型
......selector:k8s-app: kubernetes-dashboardtype: NodePort......
直接创建:
$ kubectl apply -f kubernetes-dashboard.yaml$ kubectl get pods -n kube-system -l k8s-app=kubernetes-dashboardNAME READY STATUS RESTARTS AGEkubernetes-dashboard-fcfb4cbc-t462n 1/1 Running 0 50m$ kubectl get svc -n kube-system -l k8s-app=kubernetes-dashboardNAME TYPE CLUSTER-IP EXTERNAL-IP PORT(S) AGEkubernetes-dashboard NodePort 10.110.172.49 <none> 443:32497/TCP 55m
然后可以通过上面的 32497 端口去访问 Dashboard,要记住使用 https,Chrome不生效可以使用Firefox测试: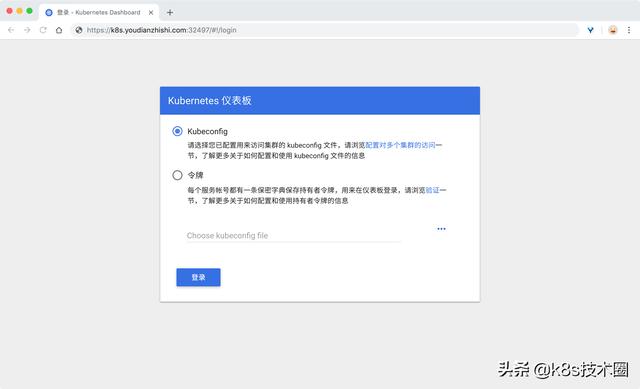
k8s dashboard login
然后创建一个具有全局所有权限的用户来登录Dashboard:(admin.yaml)
kind: ClusterRoleBindingapiVersion: rbac.authorization.k8s.io/v1beta1metadata:name: adminannotations:rbac.authorization.kubernetes.io/autoupdate: "true"roleRef:kind: ClusterRolename: cluster-adminapiGroup: rbac.authorization.k8s.iosubjects:- kind: ServiceAccountname: adminnamespace: kube-system---apiVersion: v1kind: ServiceAccountmetadata:name: adminnamespace: kube-systemlabels:kubernetes.io/cluster-service: "true"addonmanager.kubernetes.io/mode: Reconcile
直接创建:
$ kubectl apply -f admin.yaml$ kubectl get secret -n kube-system|grep admin-tokenadmin-token-d5jsg kubernetes.io/service-account-token 3 1d$ kubectl get secret admin-token-d5jsg -o jsonpath={.data.token} -n kube-system |base64 -d# 会生成一串很长的base64后的字符串
然后用上面的base64解码后的字符串作为token登录Dashboard即可:
最终我们就完成了使用 kubeadm 搭建 v1.17.2 版本的 kubernetes 集群、coredns、ipvs、calico。
配置命令自动补全
yum install -y bash-completionsource /usr/share/bash-completion/bash_completionsource <(kubectl completion bash)echo "source <(kubectl completion bash)" >> ~/.bashrc

若有收获,就点个赞吧
0 人点赞
