概述
服务注册中心: 存储服务实例和服务负载均衡策略的数据库
本节通过实现一个简单的echo service演示如何在您的 Spring Cloud 项目中启用 Nacos 的服务发现功能,如下图示: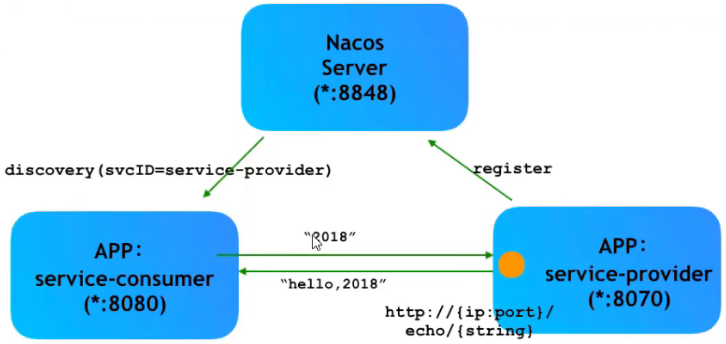
需要服务提供者和服务消费者注册到 Nacos 注册中心,服务消费者通过 discovery 发现服务提供者,通过不使用ip 的方式进行访问。
服务提供者
POM
创建一个工程名为 hello-spring-cloud-alibaba-nacos-provider 的服务提供者项目,pom.xml 配置如下:
<?xml version="1.0" encoding="UTF-8"?><project xmlns="http://maven.apache.org/POM/4.0.0" xmlns:xsi="http://www.w3.org/2001/XMLSchema-instance"xsi:schemaLocation="http://maven.apache.org/POM/4.0.0 http://maven.apache.org/xsd/maven-4.0.0.xsd"><modelVersion>4.0.0</modelVersion><parent><groupId>com.funtl</groupId><artifactId>hello-spring-cloud-alibaba-dependencies</artifactId><version>1.0.0-SNAPSHOT</version><relativePath>../hello-spring-cloud-alibaba-dependencies/pom.xml</relativePath></parent><artifactId>hello-spring-cloud-alibaba-nacos-provider</artifactId><packaging>jar</packaging><name>hello-spring-cloud-alibaba-nacos-provider</name><url>http://www.funtl.com</url><inceptionYear>2018-Now</inceptionYear><dependencies><!-- Spring Boot Begin --><dependency><groupId>org.springframework.boot</groupId><artifactId>spring-boot-starter-web</artifactId></dependency><dependency><groupId>org.springframework.boot</groupId><artifactId>spring-boot-starter-actuator</artifactId></dependency><dependency><groupId>org.springframework.boot</groupId><artifactId>spring-boot-starter-test</artifactId><scope>test</scope></dependency><!-- Spring Boot End --><!-- Spring Cloud Begin --><dependency><groupId>com.alibaba.cloud</groupId><artifactId>spring-cloud-starter-alibaba-nacos-discovery</artifactId></dependency><dependency><groupId>com.alibaba.cloud</groupId><artifactId>spring-cloud-starter-alibaba-nacos-config</artifactId></dependency><!-- Spring Cloud End --></dependencies><build><plugins><plugin><groupId>org.springframework.boot</groupId><artifactId>spring-boot-maven-plugin</artifactId><configuration><mainClass>com.funtl.hello.spring.cloud.alibaba.nacos.provider.NacosProviderApplication</mainClass></configuration></plugin></plugins></build></project>
application.yml
spring:
  application:
    # 服务名
    name: nacos-provider
  cloud:
    nacos:
      discovery:
        # 服务注册中心
        server-addr: 127.0.0.1:8848

server:
  # 服务端口
  port: 8081

management:
  # 端点检查(健康检查)
  endpoints:
    web:
      exposure:
        include: "*"
  endpoint:
    health:
      show-details: always
Application
通过 @EnableDiscoveryClient 注解表明是一个 Nacos 客户端,该注解是 Spring Cloud 提供的原生注解
package com.funtl.hello.spring.cloud.alibaba.nacos.provider;

import org.springframework.boot.SpringApplication;
import org.springframework.boot.autoconfigure.SpringBootApplication;
import org.springframework.cloud.client.discovery.EnableDiscoveryClient;
import org.springframework.web.bind.annotation.GetMapping;
import org.springframework.web.bind.annotation.PathVariable;
import org.springframework.web.bind.annotation.RestController;

@SpringBootApplication
@EnableDiscoveryClient
public class NacosProviderApplication {
    public static void main(String[] args) {
        SpringApplication.run(NacosProviderApplication.class, args);
    }
}
Controller
package com.funtl.hello.spring.cloud.alibaba.nacos.provider.controller;

import org.springframework.web.bind.annotation.PathVariable;
import org.springframework.web.bind.annotation.RequestMapping;
import org.springframework.web.bind.annotation.RequestMethod;
import org.springframework.web.bind.annotation.RestController;

@RestController
public class EchoController {

    @RequestMapping(value = "/echo/{string}", method = RequestMethod.GET)
    public String echo(@PathVariable String string) {
        return "Hello Nacos Discovery " + string;
    }
}
启动工程
通过浏览器访问 http://localhost:8848/nacos,即 Nacos Server 网址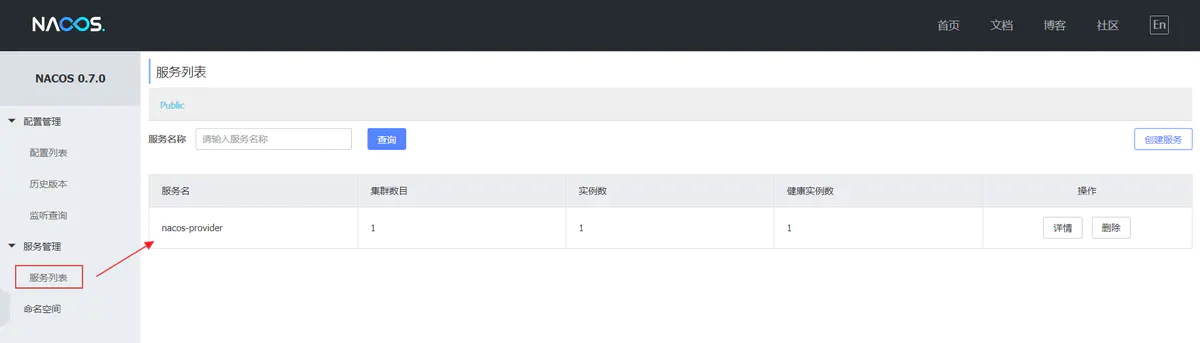
你会发现一个服务已经注册在服务中了,服务名为 nacos-provider
这时打开 http://localhost:8081/echo/你好 ,你会在浏览器上看到: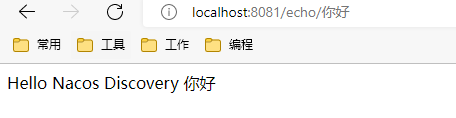
服务消费者
服务消费方: 是指会发起对某个服务调用的应用方
服务消费者的创建与服务提供者大同小异,这里采用最原始的一种方式,即显示的使用 LoadBalanceClient 和 RestTemplate 结合的方式来访问。
POM
创建一个工程名为 hello-spring-cloud-alibaba-nacos-consumer 的服务消费者项目,pom.xml 配置如下:
<?xml version="1.0" encoding="UTF-8"?>
<project xmlns="http://maven.apache.org/POM/4.0.0" xmlns:xsi="http://www.w3.org/2001/XMLSchema-instance"
         xsi:schemaLocation="http://maven.apache.org/POM/4.0.0 http://maven.apache.org/xsd/maven-4.0.0.xsd">
    <modelVersion>4.0.0</modelVersion>

    <parent>
        <groupId>com.funtl</groupId>
        <artifactId>hello-spring-cloud-alibaba-dependencies</artifactId>
        <version>1.0.0-SNAPSHOT</version>
        <relativePath>../hello-spring-cloud-alibaba-dependencies/pom.xml</relativePath>
    </parent>

    <artifactId>hello-spring-cloud-alibaba-nacos-consumer</artifactId>
    <packaging>jar</packaging>

    <name>hello-spring-cloud-alibaba-nacos-consumer</name>
    <url>http://www.funtl.com</url>
    <inceptionYear>2018-Now</inceptionYear>

    <dependencies>
        <!-- Spring Boot Begin -->
        <dependency>
            <groupId>org.springframework.boot</groupId>
            <artifactId>spring-boot-starter-web</artifactId>
        </dependency>
        <dependency>
            <groupId>org.springframework.boot</groupId>
            <artifactId>spring-boot-starter-actuator</artifactId>
        </dependency>
        <dependency>
            <groupId>org.springframework.boot</groupId>
            <artifactId>spring-boot-starter-test</artifactId>
            <scope>test</scope>
        </dependency>
        <!-- Spring Boot End -->

        <!-- Spring Cloud Begin -->
        <dependency>
            <groupId>com.alibaba.cloud</groupId>
            <artifactId>spring-cloud-starter-alibaba-nacos-discovery</artifactId>
        </dependency>
        <!-- Spring Cloud End -->
    </dependencies>

    <build>
        <plugins>
            <plugin>
                <groupId>org.springframework.boot</groupId>
                <artifactId>spring-boot-maven-plugin</artifactId>
                <configuration>
                    <mainClass>com.funtl.hello.spring.cloud.alibaba.nacos.consumer.NacosConsumerApplication</mainClass>
                </configuration>
            </plugin>
        </plugins>
    </build>
</project>
Application
package com.funtl.hello.spring.cloud.alibaba.nacos.consumer;

import org.springframework.boot.SpringApplication;
import org.springframework.boot.autoconfigure.SpringBootApplication;
import org.springframework.cloud.client.discovery.EnableDiscoveryClient;

@SpringBootApplication
@EnableDiscoveryClient
public class NacosConsumerApplication {
    public static void main(String[] args) {
        SpringApplication.run(NacosConsumerApplication.class, args);
    }
}
Configuration
创建一个名为 NacosConsumerConfiguration 的 Java 配置类,主要作用是为了注入 RestTemplate
package com.funtl.hello.spring.cloud.alibaba.nacos.consumer.config;

import org.springframework.context.annotation.Bean;
import org.springframework.context.annotation.Configuration;
import org.springframework.web.client.RestTemplate;

@Configuration
public class NacosConsumerConfiguration {

    /**
     * @LoadBalanced 表示要具备负载均衡功能
     */
    @Bean
    @LoadBalanced
    public RestTemplate restTemplate() {
        return new RestTemplate();
    }
}
Controller
创建一个名为 NacosConsumerController 测试用的 Controller
package com.funtl.hello.spring.cloud.alibaba.nacos.consumer.controller;

import org.springframework.beans.factory.annotation.Autowired;
import org.springframework.beans.factory.annotation.Value;
import org.springframework.cloud.client.ServiceInstance;
import org.springframework.cloud.client.loadbalancer.LoadBalancerClient;
import org.springframework.web.bind.annotation.GetMapping;
import org.springframework.web.bind.annotation.RestController;
import org.springframework.web.client.RestTemplate;

@RestController
public class NacosConsumerController {

    @Autowired
    private RestTemplate restTemplate;

    @RestController
    public class TestController {

        private final RestTemplate restTemplate;

        @Autowired
        public TestController(RestTemplate restTemplate) {this.restTemplate = restTemplate;}

        @RequestMapping(value = "/echo/{str}", method = RequestMethod.GET)
        public String echo(@PathVariable String str) {
            return restTemplate.getForObject("http://nacos-provider/echo/" + str, String.class);
        }
    }
}
application.yml
spring:
  application:
    name: nacos-consumer
  cloud:
    nacos:
      discovery:
        server-addr: 127.0.0.1:8848

server:
  port: 9091

management:
  endpoints:
    web:
      exposure:
        include: "*"
  endpoint:
    health:
      show-details: always
启动工程
通过浏览器访问 http://localhost:8848/nacos,即 Nacos Server 网址
你会发现多了一个名为 nacos-consumer 的服务
这时打开 http://localhost:9091/echo/hi ,你会在浏览器上看到: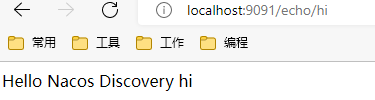
服务的端点检查
通过浏览器访问 http://localhost:9091/actuator/nacos-discovery 你会在浏览器上看到: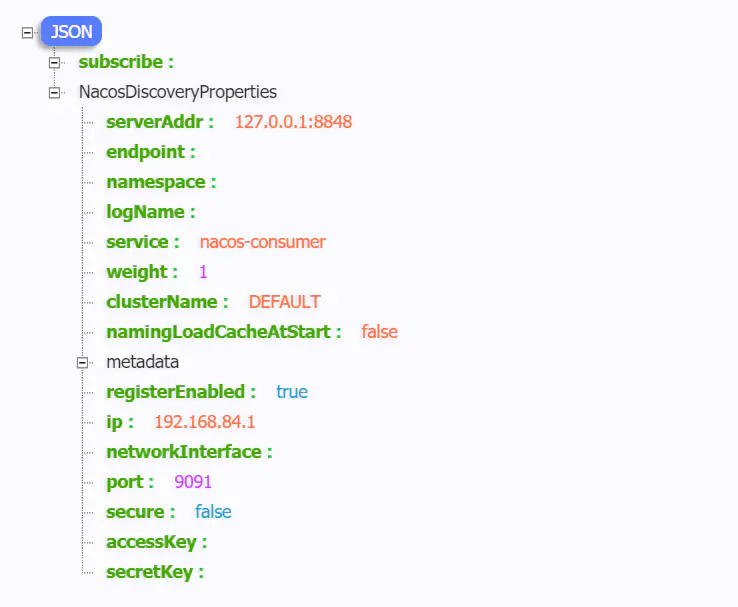
http://localhost:9091/actuator/nacosdiscovery 可以看到: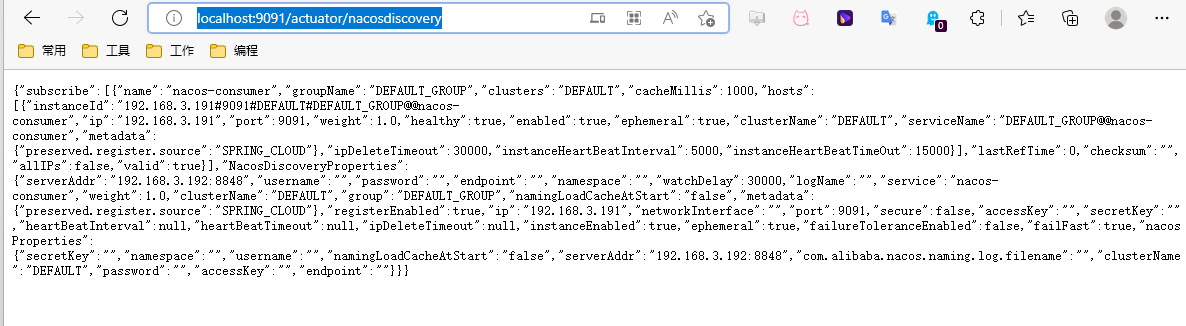
错误信息
如果服务消费者访问 http://localhost:9091/echo/hi 报如下错误:
Servlet.service() for servlet [dispatcherServlet] in context with path [] threw exception [Request processing failed; nested exception is org.springframework.web.client.ResourceAccessException: I/O error on GET request for “http://nacos-provider/echo/hi”: nacos-provider; nested exception is java.net.UnknownHostException: nacos-provider] with root cause
由于配置类配置了@LoadBalanced负载均衡注解,因为2020版本就已经不再使用netflix,自然也就没有了ribbon。怎么办?使用Spring Cloud Load Balancer代替
pom.xml add dependency:
<dependency>
    <groupId>org.springframework.cloud</groupId>
    <artifactId>spring-cloud-starter-loadbalancer</artifactId>
</dependency>
application.yml下增加禁用ribbon配置
spring:
  application:
    name: nacos-client
  cloud:
    loadbalancer:
      ribbon:
        enabled: false
创建服务消费者(Feign)
概述
Feign 是一个声明式的伪 Http 客户端,它使得写 Http 客户端变得更简单。使用 Feign,只需要创建一个接口并注解。它具有可插拔的注解特性,可使用 Feign 注解和 JAX-RS 注解。Feign 支持可插拔的编码器和解码器。Feign 默认集成了 Ribbon,Nacos 也很好的兼容了 Feign,默认实现了负载均衡的效果
- Feign 采用的是基于接口的注解
-
POM
创建一个工程名为 hello-spring-cloud-alibaba-nacos-consumer-feign 的服务消费者项目,pom.xml 配置如下:
<?xml version="1.0" encoding="UTF-8"?>
<project xmlns="http://maven.apache.org/POM/4.0.0" xmlns:xsi="http://www.w3.org/2001/XMLSchema-instance"
       xsi:schemaLocation="http://maven.apache.org/POM/4.0.0 http://maven.apache.org/xsd/maven-4.0.0.xsd">
  <modelVersion>4.0.0</modelVersion>

  <parent>
      <groupId>com.funtl</groupId>
      <artifactId>hello-spring-cloud-alibaba-dependencies</artifactId>
      <version>1.0.0-SNAPSHOT</version>
      <relativePath>../hello-spring-cloud-alibaba-dependencies/pom.xml</relativePath>
  </parent>

  <artifactId>hello-spring-cloud-alibaba-nacos-consumer-feign</artifactId>
  <packaging>jar</packaging>

  <name>hello-spring-cloud-alibaba-nacos-consumer-feign</name>
  <url>http://www.funtl.com</url>
  <inceptionYear>2018-Now</inceptionYear>

  <dependencies>
      <!-- Spring Boot Begin -->
      <dependency>
          <groupId>org.springframework.boot</groupId>
          <artifactId>spring-boot-starter-web</artifactId>
      </dependency>
      <dependency>
          <groupId>org.springframework.boot</groupId>
          <artifactId>spring-boot-starter-actuator</artifactId>
      </dependency>
      <dependency>
          <groupId>org.springframework.boot</groupId>
          <artifactId>spring-boot-starter-test</artifactId>
          <scope>test</scope>
      </dependency>
      <!-- Spring Boot End -->

      <!-- Spring Cloud Begin -->
      <dependency>
          <groupId>org.springframework.cloud</groupId>
          <artifactId>spring-cloud-starter-alibaba-nacos-discovery</artifactId>
      </dependency>
      <dependency>
          <groupId>org.springframework.cloud</groupId>
          <artifactId>spring-cloud-starter-openfeign</artifactId>
      </dependency>
    <dependency>
          <groupId>org.springframework.cloud</groupId>
          <artifactId>spring-cloud-starter-loadbalancer</artifactId>
      </dependency>
      <!-- Spring Cloud End -->
  </dependencies>

  <build>
      <plugins>
          <plugin>
              <groupId>org.springframework.boot</groupId>
              <artifactId>spring-boot-maven-plugin</artifactId>
              <configuration>
                  <mainClass>com.funtl.hello.spring.cloud.alibaba.nacos.consumer.feign.NacosConsumerFeignApplication</mainClass>
              </configuration>
          </plugin>
      </plugins>
  </build>
</project>
主要增加了 org.springframework.cloud:spring-cloud-starter-openfeign 和 spring-cloud-starter-loadbalancer依赖
Application
通过 @EnableFeignClients 注解开启 Feign 功能 ```java package com.funtl.hello.spring.cloud.alibaba.nacos.consumer.feign;
import org.springframework.boot.SpringApplication; import org.springframework.boot.autoconfigure.SpringBootApplication; import org.springframework.cloud.client.discovery.EnableDiscoveryClient; import org.springframework.cloud.openfeign.EnableFeignClients;
@SpringBootApplication @EnableDiscoveryClient @EnableFeignClients public class NacosConsumerFeignApplication { public static void main(String[] args) { SpringApplication.run(NacosConsumerFeignApplication.class, args); } }
<a name="HfEhj"></a>
## 创建 Feign 接口
通过 @FeignClient("服务名") 注解来指定调用哪个服务。代码如下:
```java
package com.funtl.hello.spring.cloud.alibaba.nacos.consumer.feign.service;

import org.springframework.cloud.openfeign.FeignClient;
import org.springframework.web.bind.annotation.GetMapping;
import org.springframework.web.bind.annotation.PathVariable;

@FeignClient(value = "nacos-provider")
public interface EchoService {

    @GetMapping(value = "/echo/{message}")
    String echo(@PathVariable("message") String message);
}
Controller
package com.funtl.hello.spring.cloud.alibaba.nacos.consumer.feign.controller;

import com.funtl.hello.spring.cloud.alibaba.nacos.consumer.feign.service.EchoService;
import org.springframework.beans.factory.annotation.Autowired;
import org.springframework.web.bind.annotation.GetMapping;
import org.springframework.web.bind.annotation.RestController;

@RestController
public class NacosConsumerFeignController {

    @Autowired
    private EchoService echoService;

    @GetMapping(value = "/feign/echo/{str}")
    public String echo(@PathVariable String str) {
        return echoService.echo(str);
    }
}
application.yml
spring:
  application:
    name: nacos-consumer-feign
  cloud:
    nacos:
      discovery:
        server-addr: 127.0.0.1:8848

server:
  port: 9091

management:
  endpoints:
    web:
      exposure:
        include: "*"
这时打开 http://localhost:9091/feign/echo/hi ,你会在浏览器上看到: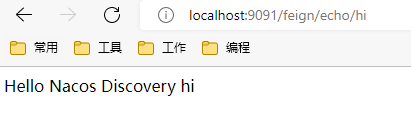
测试负载均衡
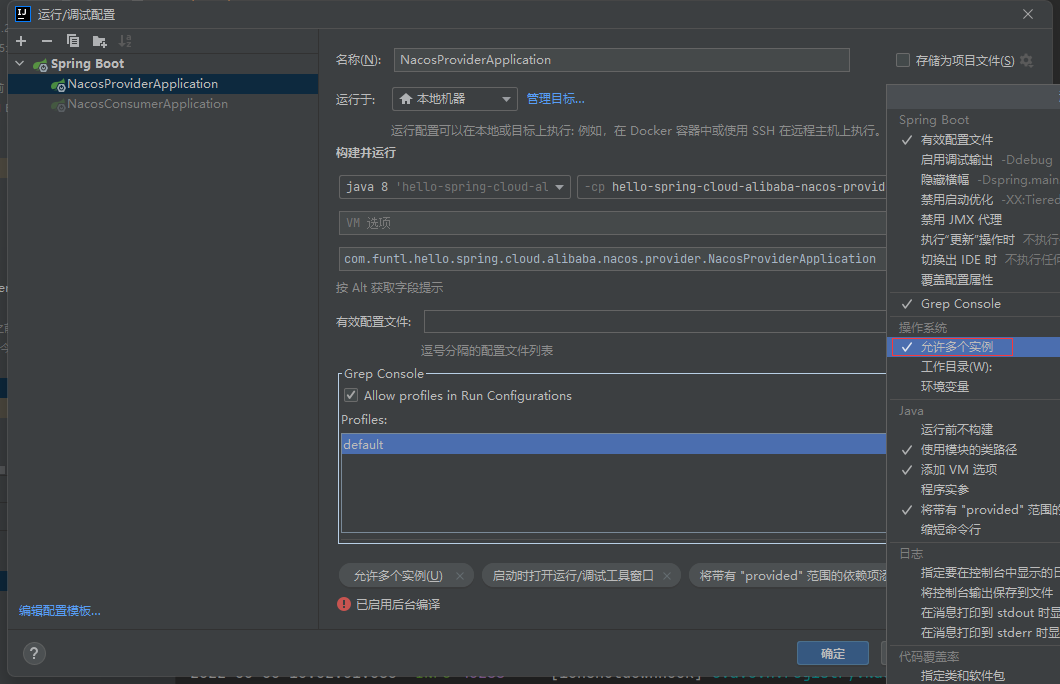
- 修改服务提供 nacos-provider 服务的端口号如8081,并启动多个实例,IDEA中依次点击Run -> Editconfigurations 并勾选 Allow parallel run 以允许IDEA多实例运行项目
Controller
修改 hello-spring-cloud-alibaba-nacos-provider 服务提供者的Controller ```java package com.funtl.hello.spring.cloud.alibaba.nacos.provider.controller;
import org.springframework.beans.factory.annotation.Value; import org.springframework.web.bind.annotation.*;
@RestController public class EchoController {
@Value("${server.port}")
private String port;

@RequestMapping(value = "/echo/{string}", method = RequestMethod.GET)
public String echo(@PathVariable String string) {
    return "Hello Nacos Discovery " + string;
}

@GetMapping(value = "/lb")
public String lb(){

    return "Hello Nacos Provider i am from port:"+port;
}
}
先用8081端口启动一个实例后,再修改 application.yml 配置文件里的端口8082再启动一次,这样就可以有两个实例了。<br />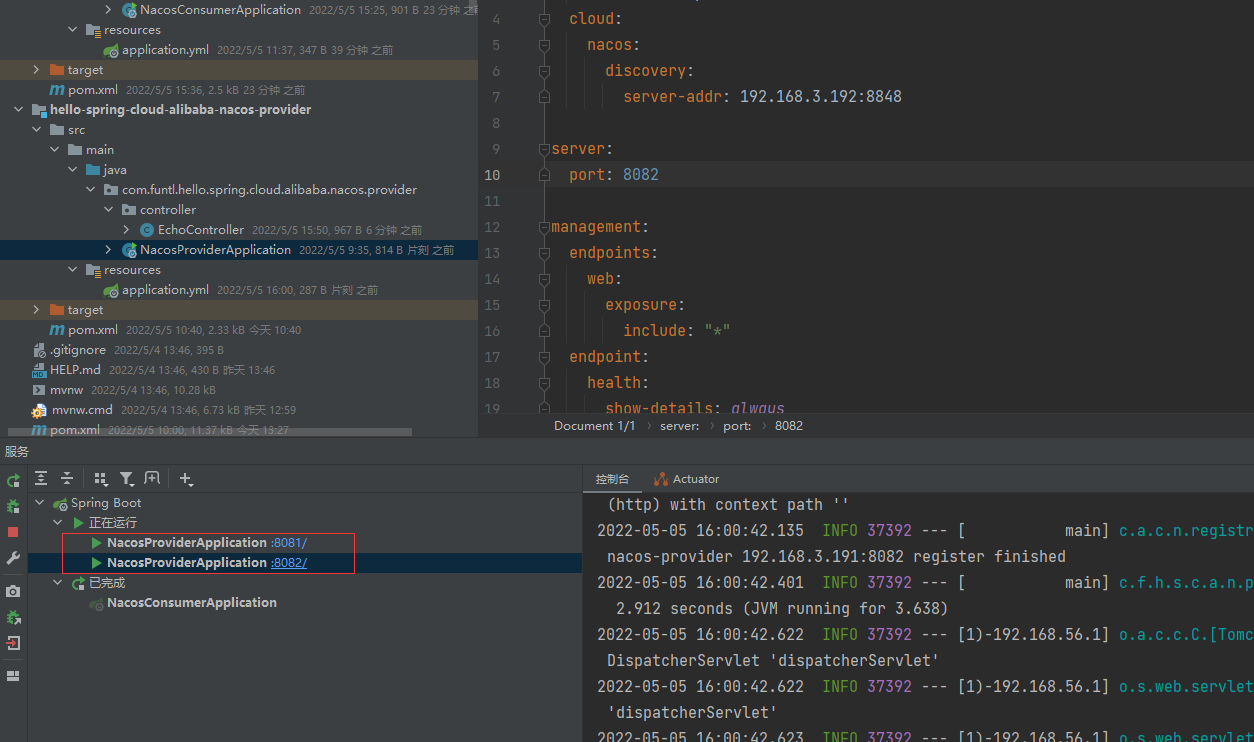<br />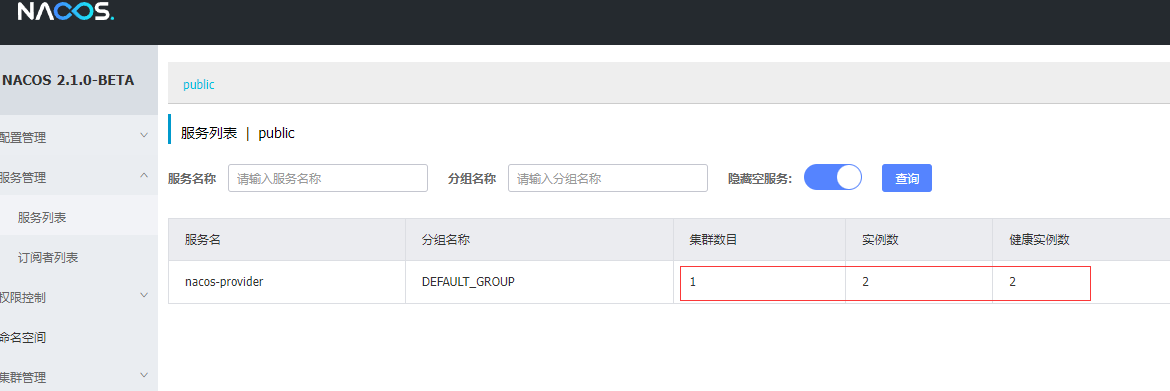<br />修改 hello-spring-cloud-alibaba-nacos-consumer 服务消费者的 Feign接口和Controller
<a name="S2UEY"></a>
## Feign接口
修改 hello-spring-cloud-alibaba-nacos-provider 服务消费者的Feign接口
```java
package com.funtl.hello.spring.cloud.alibaba.nacos.consumer.service;
import org.springframework.cloud.openfeign.FeignClient;
import org.springframework.web.bind.annotation.GetMapping;
import org.springframework.web.bind.annotation.PathVariable;
@FeignClient(value = "nacos-provider")
public interface EchoService {
@GetMapping(value = "/echo/{message}")
String echo(@PathVariable("message") String message);
@GetMapping(value = "/lb")
public String lb();
}
Controller
修改 hello-spring-cloud-alibaba-nacos-consumer 服务消费者的 Controller
package com.funtl.hello.spring.cloud.alibaba.nacos.consumer.controller;

import com.funtl.hello.spring.cloud.alibaba.nacos.consumer.service.EchoService;
import org.springframework.beans.factory.annotation.Autowired;
import org.springframework.web.bind.annotation.GetMapping;
import org.springframework.web.bind.annotation.PathVariable;
import org.springframework.web.bind.annotation.RestController;

@RestController
public class NacosConsumerFeignController {

    @Autowired
    private EchoService echoService;

    @GetMapping(value = "/feign/echo/{str}")
    public String echo(@PathVariable String str) {
        return echoService.echo(str);
    }

    @GetMapping(value = "/lb")
    public String lb(){

        return echoService.lb();
    }

}
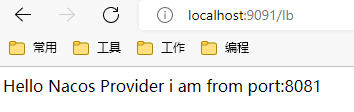
在浏览器上多次访问 http://localhost:9091/lb ,浏览器交替显示: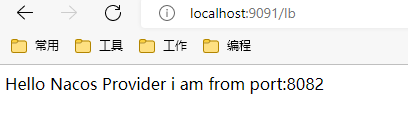
常见负载均衡策略
- 轮循
- 加权轮循
- 最少连接数
- 源 IP 哈希
负载主机可以提供很多种负载均衡方法,也就是我们常说的调度方法或算法
轮循
Round Robin: 这种方法会将收到的请求循环分配到服务器集群中的每台机器,即有效服务器。如果使用这种方式,所有的标记进入虚拟服务的服务器应该有相近的资源容量以及负载形同的应用程序。如果所有的服务器有相同或者相近的性能那么选择这种方式会使服务器负载形同。基于这个前提,轮循调度是一个简单而有效的分配请求的方式。然而对于服务器不同的情况,选择这种方式就意味着能力比较弱的服务器也会在下一轮循环中接受轮循,即使这个服务器已经不能再处理当前这个请求了。这可能导致能力较弱的服务器超载。
加权轮循
Weighted Round Robin: 这种算法解决了简单轮循调度算法的缺点:传入的请求按顺序被分配到集群中服务器,但是会考虑提前为每台服务器分配的权重。管理员只是简单的通过服务器的处理能力来定义各台服务器的权重。例如,能力最强的服务器A给的权重是100,同时能力最低的服务器给的权重是50。这意味着在服务器B接收到第一个请求之前前,服务器A会连续的接受到2个请求,以此类推。
最少连接数
Least Connection: 以上两种方法都没有考虑的是系统不能识别在给定的时间里保持了多少连接。因此可能发生,服务器B服务器收到的连接比服务器A少但是它已经超载,因为服务器B上的用户打开连接持续的时间更长。这就是说连接数即服务器的负载是累加的。这种潜在的问题可以通过“最少连接数”算法来避免:传入的请求是根据每台服务器当前所打开的连接数来分配的。即活跃连接数最少的服务器会自动接收下一个传入的请求。接本上和简单轮询的原则相同:所有拥有虚拟服务的服务器资源容量应该相近。值得注意的是,在流量率低的配置环境中,各服务器的流量并不是相同的,会优先考虑第一台服务器。这是因为,如果所有的服务器是相同的,那么第一个服务器优先,直到第一台服务器有连续的活跃流量,否则总是会优先选择第一台服务器。
最少连接数慢启动时间
Least Connection Slow Start Time: 对最少连接数和带权重的最小连接数调度方法来说,当一个服务器刚加入线上环境是,可以为其配置一个时间段,在这段时间内连接数是有限制的而且是缓慢增加的。这为服务器提供了一个过渡时间以保证这个服务器不会因为刚启动后因为分配的连接数过多而超载。这个值在L7配置界面设置。
加权最少连接
Weighted Least Connection: 如果服务器的资源容量各不相同,那么“加权最少连接”方法更合适:由管理员根据服务器情况定制的权重所决定的活跃连接数一般提供了一种对服务器非常平衡的利用,因为他它借鉴了最少连接和权重两者的优势。通常,这是一个非常公平的分配方式,因为它使用了连接数和服务器权重比例;集群中!例最低的服务器自动接收下一个请求。但是请注意,在低流量情况中使用这种方法时,请参考“最小连接数”方法中的注意事项。
固定权重
Fixed Weighted: 最高权重只有在其他服务器的权重值都很低时才使用。然而,如果最高权重的服务器下降,则下一个最高优先级的服务器将为客户端服务。这种方式中每个真实服务器的权重需要基于服务器优先级来配置。
加权响应
Weighted Response: 流量的调度是通过加权轮循方式。加权轮循中所使用的权重是根据服务器有效性检测的响应时间来计算。每个有效性检测都会被计时,用来标记它响应成功花了多长时间。但是需要注意的是,这种方式假定服务器心跳检测是基于机器的快慢,但是这种假设也许不总是能够成立。所有服务器在虚拟服务上的响应时间的总和加在一起,通过这个值来计算单个服务物理服务器的权重;这个权重值大约每15秒计算一次。
源IP哈希
Source lP Hash: 这种方式通过生成请求源IP的哈希值,并通过这个哈希值来找到正确的真实服务器。这意味着对于同一主机来说他对应的服务器总是相同。使用这种方式,你不需要保存任何源IP。但是需要注意,这种方式可能导致服务器负载不平衡。

若有收获,就点个赞吧
0 人点赞
