WPF入门第一篇 基础布局与简单样式
首先,创建WPF项目,在自动打开的MainWindow.xaml里面,找到Grid标签,并将它替换为:
<Grid><Grid.RowDefinitions><RowDefinition></RowDefinition><RowDefinition></RowDefinition></Grid.RowDefinitions><Grid.ColumnDefinitions><ColumnDefinition></ColumnDefinition><ColumnDefinition></ColumnDefinition></Grid.ColumnDefinitions><TextBlock Name="t1" Grid.Row="0" Grid.Column="0" Text="t1"></TextBlock><TextBlock Name="t2" Grid.Row="0" Grid.Column="1" Text="t2"></TextBlock><Button Name="btn1" Grid.Row="1" Grid.Column="0" Content="btn1"></Button><Button Name="btn2" Grid.Row="1" Grid.Column="1" Content="btn2"></Button></Grid>
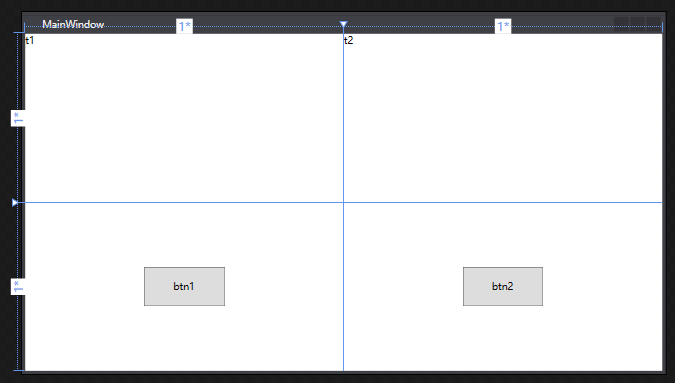
修改好之后,界面会变成这样:

可以看到 MainWindow被分成一个“田”字,上面两个格子的左上角分别显示t1和t2,下面两个格子颜色有变化,并且中间显示btn1和btn2。
对比代码可以看出,WPF中Grid是用来布局的,我们使用RowDefinition和ColumnDefinition来定义Grid有几行几列,之后再在Grid标签中定义了两个TextBlock和两个Button,它们的位置是通过Grid.Row和Grid.Column确定的。同时,这四个控件的默认大小是填充了整个格子,且TextBlock中文本的显示位于左上角,Button中文本的显示位于居中位置。
下面我们写样式代码来使btn2变成我们常见的按钮样式,并且居中显示。
将btn2的代码替换为如下代码:
<Button Name="btn2" Grid.Row="1" Grid.Column="1" Content="btn2" Width="100" Height="40"></Button>
为了让btn1和btn2的样式一样,且不用写重复的代码,我们可以将Width=”100”,Height=”40”单独拎出来,写成样式,并且给btn1和btn2引用该样式即可。
<Window x:Class="WpfTest.MainWindow"xmlns="http://schemas.microsoft.com/winfx/2006/xaml/presentation"xmlns:x="http://schemas.microsoft.com/winfx/2006/xaml"xmlns:d="http://schemas.microsoft.com/expression/blend/2008"xmlns:mc="http://schemas.openxmlformats.org/markup-compatibility/2006"xmlns:local="clr-namespace:WpfTest"mc:Ignorable="d"Title="MainWindow" Height="450" Width="800"><Window.Resources><Style TargetType="Button" x:Key="btn"><Setter Property="Width" Value="100"></Setter><Setter Property="Height" Value="48"></Setter></Style></Window.Resources><Grid><Grid.RowDefinitions><RowDefinition></RowDefinition><RowDefinition></RowDefinition></Grid.RowDefinitions><Grid.ColumnDefinitions><ColumnDefinition></ColumnDefinition><ColumnDefinition></ColumnDefinition></Grid.ColumnDefinitions><TextBlock Name="t1" Grid.Row="0" Grid.Column="0" Text="t1"></TextBlock><TextBlock Name="t2" Grid.Row="0" Grid.Column="1" Text="t2"></TextBlock><Button Name="btn1" Grid.Row="1" Grid.Column="0" Content="btn1" Style="{StaticResource btn}"></Button><Button Name="btn2" Grid.Row="1" Grid.Column="1" Content="btn2" Style="{StaticResource btn}"></Button></Grid></Window>
可以看出,样式可以在Window.Resources中定义,通过TargetType属性来限制适用类型,通过x:Key属性来被引用。
修改后效果是这样的:
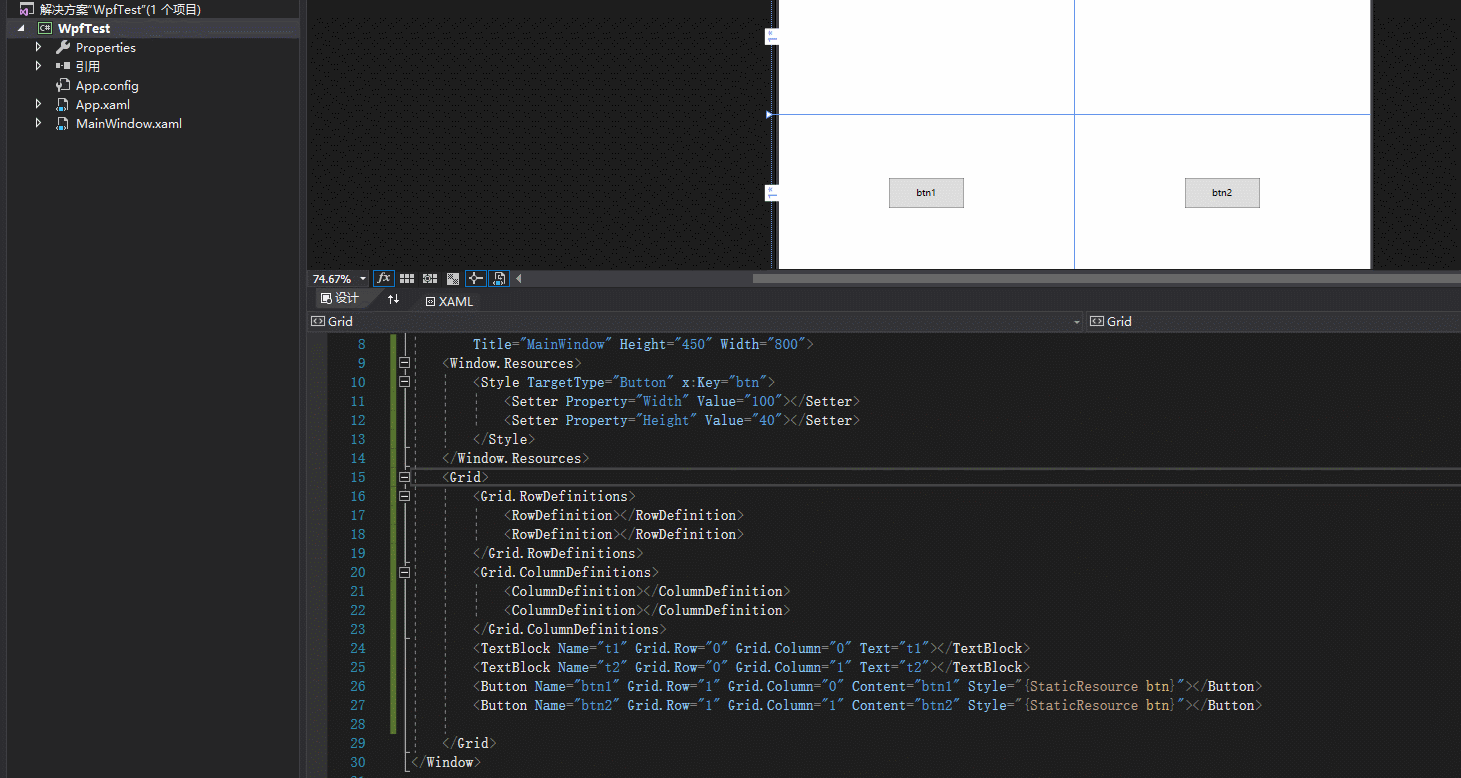
类似Web前端的css文件,我们常常将Style写在单独的文件中,并在页面中引用。在资源管理器中右键点击项目名,添加一个资源字典文件,命名为styles。
将styles.xaml代码替换为以下代码:
<ResourceDictionary xmlns="http://schemas.microsoft.com/winfx/2006/xaml/presentation"xmlns:x="http://schemas.microsoft.com/winfx/2006/xaml"xmlns:local="clr-namespace:WpfTest"><Style TargetType="Button" x:Key="btn"><Setter Property="Width" Value="100"></Setter><Setter Property="Height" Value="48"></Setter></Style></ResourceDictionary>
可以看出,我们将MainWindow.xaml中定义的btn样式复制到了styles.xaml中。为了在MainWindow中使用该样式,我们需要下面两点,二选一:1. 在App.xaml中引用styles.xaml(全局样式,所有界面都适用)2. 在MainWindow.xaml中引用styles.xaml(仅适用给MainWindow)
分别对应上面的 i 和 ii。
下面我们来分别实现上面两个步骤:
①首先,打开App.xaml,将代码替换为如下代码:
<Application x:Class="WpfTest.App"xmlns="http://schemas.microsoft.com/winfx/2006/xaml/presentation"xmlns:x="http://schemas.microsoft.com/winfx/2006/xaml"xmlns:local="clr-namespace:WpfTest"StartupUri="MainWindow.xaml"><Application.Resources><ResourceDictionary Source="styles.xaml"></ResourceDictionary></Application.Resources></Application>
②或者,在MainWindow.xaml文件中,将Window.Resources段代码改为如下代码:
<Window.Resources><ResourceDictionary Source="styles.xaml"></ResourceDictionary></Window.Resources>
如果MainWindow中需要引用两个及以上的样式文件,则需要将Window.Resources段改为下面格式:
<Window.Resources><ResourceDictionary><ResourceDictionary.MergedDictionaries><ResourceDictionary Source="styles.xaml"></ResourceDictionary><!-- 在这里添加更多的样式文件引用 --></ResourceDictionary.MergedDictionaries></ResourceDictionary></Window.Resources>
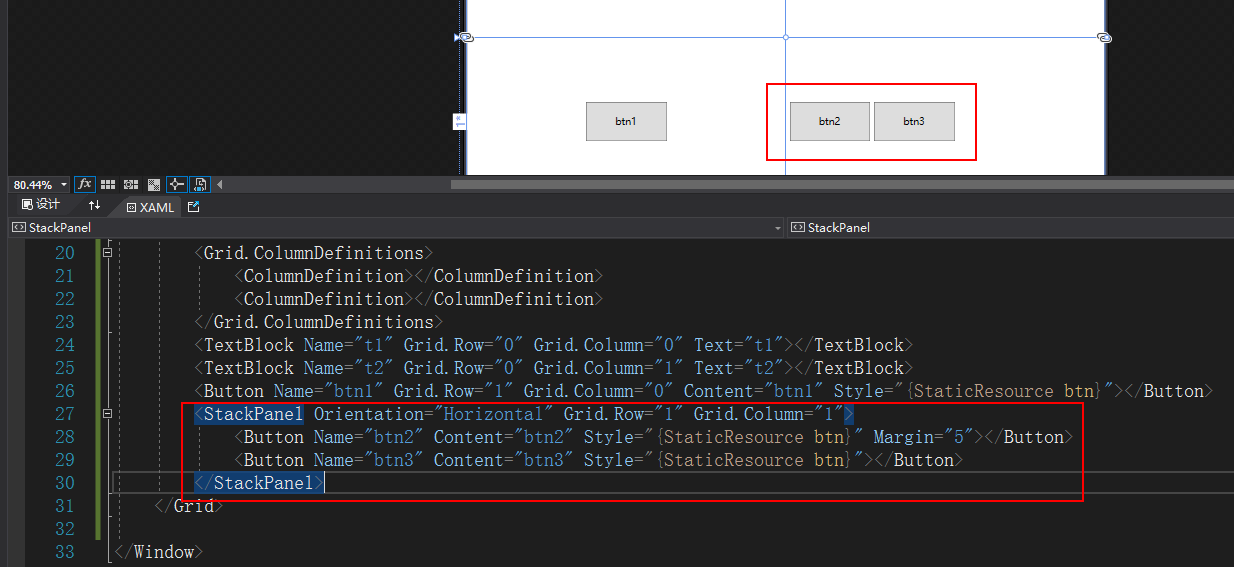
常用的布局标签还有StackPanel(与Grid对应),它支持横向或纵向布局,我们可以将btn2的代码替换为如下代码:
<StackPanel Orientation="Horizontal" Grid.Row="1" Grid.Column="1"><Button Name="btn2" Content="btn2" Style="{StaticResource btn}" Margin="5"></Button><Button Name="btn3" Content="btn3" Style="{StaticResource btn}"></Button></StackPanel>
将刚才上面修改的代码添加到MainWindow中,效果是这样的:
巧妙地使用Grid和StackPanel,以及简单的样式设置,即可设计出漂亮的WPF界面了。关于布局还有更多的标签可以使用,样式设置也可以设置更多的属性,不过用起来都类似,所以关于布局与样式,还需要更深入的学习。

关于布局容器Grid、StackPanel、GroupBox、DockPanel、WrapPanel:https://www.cnblogs.com/xixixing/p/10959455.html
WPF入门第二篇 MVVM与Binding
MVVM,即Model-View-ViewModel的首字母缩写,在这种开发模式下常用binding来对View和ViewModel进行绑定。
添加三个文件夹,分别命名为Models、Views、ViewModels。
在Model文件夹中,添加Student类,并将Student.cs代码替换为如下代码:
using System;using System.Collections.Generic;using System.Linq;using System.Text;using System.Threading.Tasks;namespace WpfTest2.Models{public class Student{//以下两个都是属性,不是字段;因为教程的不规范没有首字母大写public string id { get; set; }public string name { get; set; }}}
在Models文件夹中,添加Score类,并将Score.cs代码替换为如下代码:
using System;using System.Collections.Generic;using System.Linq;using System.Text;using System.Threading.Tasks;namespace WpfTest2.Models{public class Score{public string stuId { get; set; }public string subject { get; set; }public int score { get; set; }}}
在ViewModels文件夹中添加CardViewModel类,并将代码替换为如下代码:
using System;using System.Collections.Generic;using System.Linq;using System.Text;using System.Threading.Tasks;using WpfTest2.Models; //注意这里namespace WpfTest2.ViewModels{public class CardViewModel{public Student student { get; set; }public Score score { get; set; }}}
从上面的步骤可以看出,我们有了两个Model,一个ViewModel。实际开发中,Model一般是数据库表映射的实体,而ViewModel是我们自定义的与一个View完全绑定的数据模型。下面我们在Views文件夹中,添加一个用户控件,命名为Card。并将Card.xaml代码替换为:
<UserControl x:Class="WpfTest2.Views.Card"xmlns="http://schemas.microsoft.com/winfx/2006/xaml/presentation"xmlns:x="http://schemas.microsoft.com/winfx/2006/xaml"xmlns:mc="http://schemas.openxmlformats.org/markup-compatibility/2006"xmlns:d="http://schemas.microsoft.com/expression/blend/2008"xmlns:local="clr-namespace:WpfTest2.Views"mc:Ignorable="d"d:DesignHeight="300" d:DesignWidth="300"><UserControl.Resources><Style TargetType="TextBlock"><Setter Property="FontSize" Value="20"></Setter><Setter Property="Margin" Value="10"></Setter><Setter Property="Foreground" Value="White"></Setter><Setter Property="Width" Value="100"></Setter><Setter Property="Height" Value="35"></Setter></Style><Style TargetType="StackPanel" x:Key="sp-h"><Setter Property="Background" Value="Black"></Setter><Setter Property="Margin" Value="5"></Setter></Style></UserControl.Resources><Grid Margin="10"><Grid.RowDefinitions><RowDefinition Height="50"></RowDefinition><RowDefinition></RowDefinition></Grid.RowDefinitions><Border Grid.RowSpan="2" BorderThickness="0" Background="Black" CornerRadius="20"></Border><StackPanel Orientation="Horizontal" Grid.Row="0" Style="{StaticResource sp-h}" Margin="10,5,10,5"><TextBlock Text="{Binding student.name}"></TextBlock></StackPanel><StackPanel Orientation="Vertical" Grid.Row="1" Margin="5,10,5,10"><StackPanel Orientation="Horizontal" Style="{StaticResource sp-h}"><TextBlock Text="id:"></TextBlock><TextBlock Text="{Binding score.stuId}"></TextBlock></StackPanel><StackPanel Orientation="Horizontal" Style="{StaticResource sp-h}"><TextBlock Text="subject:"></TextBlock><TextBlock Text="{Binding score.subject}"></TextBlock></StackPanel><StackPanel Orientation="Horizontal" Style="{StaticResource sp-h}"><TextBlock Text="score:"></TextBlock><TextBlock Text="{Binding score.score}"></TextBlock></StackPanel></StackPanel></Grid></UserControl>
将Card.xaml.cs代码替换为以下代码:
using System;using System.Collections.Generic;using System.Linq;using System.Text;using System.Threading.Tasks;using System.Windows;using System.Windows.Controls;using System.Windows.Data;using System.Windows.Documents;using System.Windows.Input;using System.Windows.Media;using System.Windows.Media.Imaging;using System.Windows.Navigation;using System.Windows.Shapes;using WpfTest2.ViewModels; //注意这里namespace WpfTest2.Views{/// <summary>/// Card.xaml 的交互逻辑/// </summary>public partial class Card : UserControl{public Card(){InitializeComponent();}//这里是构造函数的重载,有参数的构造函数需要执行无参构造器中的代码,为了省去重复代码的编写,这里就继承了。public Card(CardViewModel vm) : this(){//DataContext属性是绑定的默认源。它允许指定一个绑定的基。//详细的在这里:https://blog.csdn.net/seanbei/article/details/53207620this.DataContext = vm;}}}
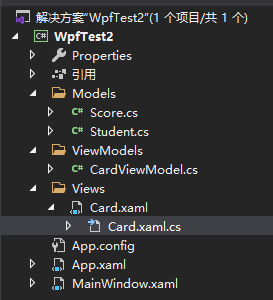
此时,我们的解决方案视图如下:
下面我们将在MainWindow中使用我们的Card。
打开MainWindow.xaml,将代码替换为:
<Window x:Class="WpfTest2.MainWindow"xmlns="http://schemas.microsoft.com/winfx/2006/xaml/presentation"xmlns:x="http://schemas.microsoft.com/winfx/2006/xaml"xmlns:d="http://schemas.microsoft.com/expression/blend/2008"xmlns:mc="http://schemas.openxmlformats.org/markup-compatibility/2006"xmlns:local="clr-namespace:WpfTest2"mc:Ignorable="d"Title="MainWindow" Height="450" Width="800"><Grid><WrapPanel Name="wpCardList"></WrapPanel></Grid></Window>
WrapPanel用法:https://blog.csdn.net/seanbei/article/details/52893767
打开MainWindow.xaml.cs,将代码替换为:
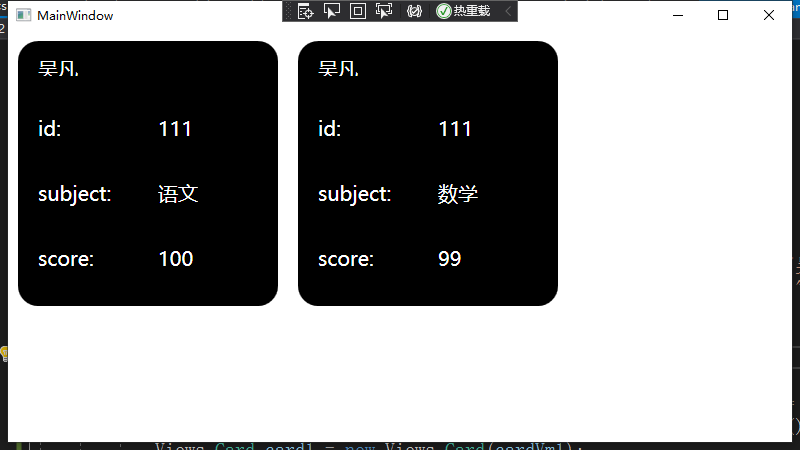
using System;using System.Collections.Generic;using System.Linq;using System.Text;using System.Threading.Tasks;using System.Windows;using System.Windows.Controls;using System.Windows.Data;using System.Windows.Documents;using System.Windows.Input;using System.Windows.Media;using System.Windows.Media.Imaging;using System.Windows.Navigation;using System.Windows.Shapes;namespace WpfTest2{/// <summary>/// MainWindow.xaml 的交互逻辑/// </summary>public partial class MainWindow : Window{public MainWindow(){InitializeComponent();Models.Student stu = new Models.Student() { id = "111", name = "吴凡" };Models.Score sc = new Models.Score() { stuId = "111", subject = "语文", score = 100 };ViewModels.CardViewModel cardVm = new ViewModels.CardViewModel() { student = stu, score = sc };Views.Card card = new Views.Card(cardVm);wpCardList.Children.Add(card);Models.Score sc1 = new Models.Score() { stuId = "111", subject = "数学", score = 99 };ViewModels.CardViewModel cardVm1 = new ViewModels.CardViewModel() { student = stu, score = sc1 };Views.Card card1 = new Views.Card(cardVm1);wpCardList.Children.Add(card1);}}}
运行效果:
分析以上代码,不难发现,通过MVVM的开发模式,使用数据库表映射实体作为Models,使用UserControl作为Views,使用自定义类作为ViewModel,可以让代码整体结构非常清晰,而且通过UserControl的动态创建、删除等操作,可以很容易的实现子页面的跳转、复杂的自定义列表等操作。
关于Binding的使用,在上面的代码中也有体现。对于用户控件Card,首先在后台代码中设置this.DataContext = vm,然后在xaml页面中使用{Binding 属性值}进行数据绑定。这其实是简写方式,写全后为{Binding Path=属性值}。除了使用这种方法绑定后台设置的DataContext的值外,还可以通过{Binding ElementName=name Path=prop}来绑定页面内的其他控件的指定属性值。如:
<TextBlock Text={Binding ElementName="btn1" Path="Content"}></TextBlock>
比如,使MainWindow的title显示为wpCardList的Children的数量,则可以将MainWindow.xaml替换为如下代码:
<Window x:Class="WpfTest2.MainWindow"xmlns="http://schemas.microsoft.com/winfx/2006/xaml/presentation"xmlns:x="http://schemas.microsoft.com/winfx/2006/xaml"xmlns:d="http://schemas.microsoft.com/expression/blend/2008"xmlns:mc="http://schemas.openxmlformats.org/markup-compatibility/2006"xmlns:local="clr-namespace:WpfTest2"mc:Ignorable="d"Title="{Binding ElementName=wpCardList, Path=Children.Count}" Height="800" Width="1000">//这里是新增的<Grid><WrapPanel Name="wpCardList"></WrapPanel></Grid></Window>
WPF入门第三篇 ControlTemplate、Trigger与Storyboard
ControlTemplate通常用在Style中,Trigger通常作为ControlTemplate的一部分,StoryBoard表示动画效果,下面将通过对Button按钮设置这几项来简单说明这几项的用法。
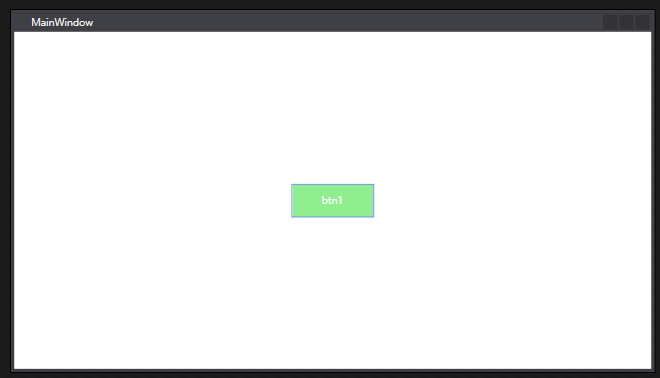
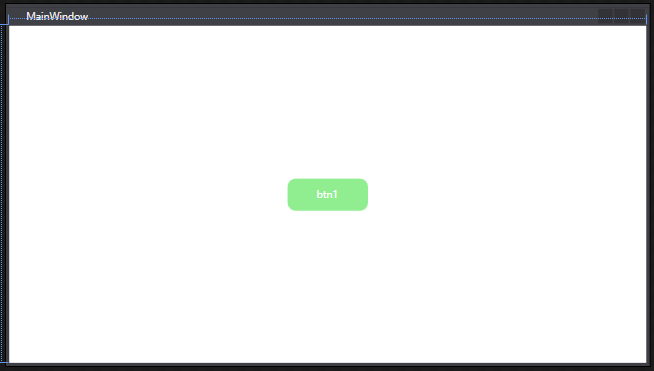
在MainWindow中添加一个Button按钮;在Window段添加resource段,并在其中添加一个Style:
<Window x:Class="WpfControlTemplateTest.MainWindow"xmlns="http://schemas.microsoft.com/winfx/2006/xaml/presentation"xmlns:x="http://schemas.microsoft.com/winfx/2006/xaml"xmlns:d="http://schemas.microsoft.com/expression/blend/2008"xmlns:mc="http://schemas.openxmlformats.org/markup-compatibility/2006"xmlns:local="clr-namespace:WpfControlTemplateTest"mc:Ignorable="d"Title="MainWindow" Height="450" Width="800"><Window.Resources><ResourceDictionary><Style TargetType="Button"><Setter Property="Width" Value="100"></Setter><Setter Property="Height" Value="40"></Setter><Setter Property="Background" Value="LightGreen"></Setter><Setter Property="BorderThickness" Value="0"></Setter><Setter Property="Foreground" Value="White"></Setter></Style></ResourceDictionary></Window.Resources><Grid><Button Name="btn1" Content="btn1"></Button></Grid></Window>
此时的显示效果是这样的:
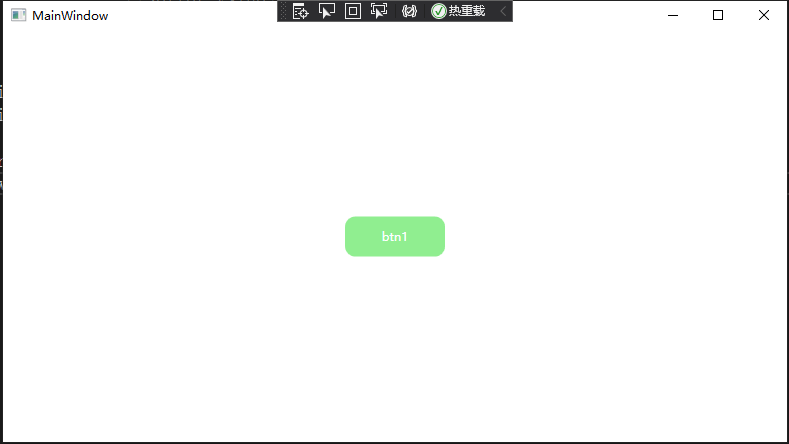
按钮样式改变了很多,但是很多时候我们都需要圆角按钮,为了让按钮变成圆角,我们需要设置按钮的Template属性。将下面的setter添加到我们的style中即可。
<Window x:Class="WpfControlTemplateTest.MainWindow"xmlns="http://schemas.microsoft.com/winfx/2006/xaml/presentation"xmlns:x="http://schemas.microsoft.com/winfx/2006/xaml"xmlns:d="http://schemas.microsoft.com/expression/blend/2008"xmlns:mc="http://schemas.openxmlformats.org/markup-compatibility/2006"xmlns:local="clr-namespace:WpfControlTemplateTest"mc:Ignorable="d"Title="MainWindow" Height="450" Width="800"><Window.Resources><ResourceDictionary><Style TargetType="Button"><Setter Property="Width" Value="100"></Setter><Setter Property="Height" Value="40"></Setter><Setter Property="Background" Value="LightGreen"></Setter><Setter Property="BorderThickness" Value="0"></Setter><Setter Property="Foreground" Value="White"></Setter>//添加的代码<Setter Property="Template"><Setter.Value><ControlTemplate TargetType="Button"><Grid><Border CornerRadius="10" Background="LightGreen"></Border><ContentPresenterContent="{TemplateBinding Content}"HorizontalAlignment="{TemplateBinding HorizontalContentAlignment}"Margin="{TemplateBinding Padding}"VerticalAlignment="{TemplateBinding VerticalContentAlignment}"/></Grid></ControlTemplate></Setter.Value></Setter>//到此为止</Style></ResourceDictionary></Window.Resources><Grid><Button Name="btn1" Content="btn1"></Button></Grid></Window>
现在的显示效果:
通过使用ControlTemplate,可以定制化控件的模板样式。
下面我们来看Triggers。
Trigger通常在ControlTemplate中定义,用来实现Hover、Press等效果。
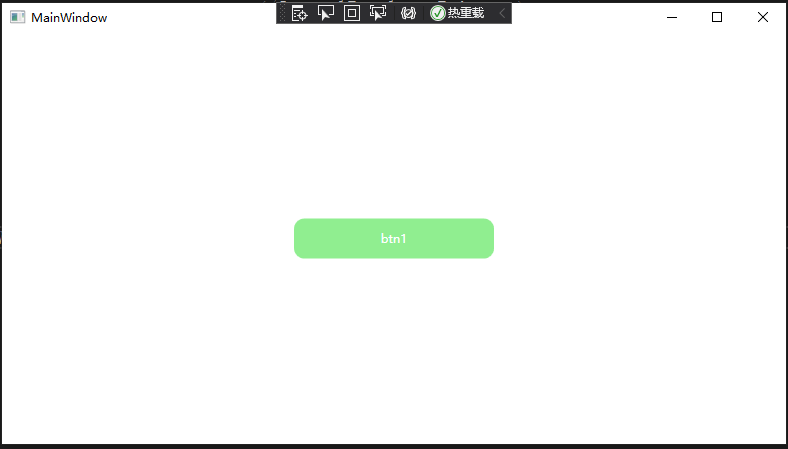
比如,我们希望btn1在hover时,width变为200,(翻译成人话:鼠标悬停在按钮上的时候,按钮长度变为200)则可以在ControlTemplate段中添加下面代码:
<Window x:Class="WpfControlTemplateTest.MainWindow"xmlns="http://schemas.microsoft.com/winfx/2006/xaml/presentation"xmlns:x="http://schemas.microsoft.com/winfx/2006/xaml"xmlns:d="http://schemas.microsoft.com/expression/blend/2008"xmlns:mc="http://schemas.openxmlformats.org/markup-compatibility/2006"xmlns:local="clr-namespace:WpfControlTemplateTest"mc:Ignorable="d"Title="MainWindow" Height="450" Width="800"><Window.Resources><ResourceDictionary><Style TargetType="Button"><Setter Property="Width" Value="100"></Setter><Setter Property="Height" Value="40"></Setter><Setter Property="Background" Value="LightGreen"></Setter><Setter Property="BorderThickness" Value="0"></Setter><Setter Property="Foreground" Value="White"></Setter><Setter Property="Template"><Setter.Value><ControlTemplate TargetType="Button"><Grid><Border CornerRadius="10" Background="LightGreen"></Border><ContentPresenterContent="{TemplateBinding Content}"HorizontalAlignment="{TemplateBinding HorizontalContentAlignment}"Margin="{TemplateBinding Padding}"VerticalAlignment="{TemplateBinding VerticalContentAlignment}"/></Grid>//添加的代码<ControlTemplate.Triggers><Trigger Property="IsMouseOver" Value="True"><Setter Property="Width" Value="200"></Setter></Trigger></ControlTemplate.Triggers>//到此为止</ControlTemplate></Setter.Value></Setter></Style></ResourceDictionary></Window.Resources><Grid><Button Name="btn1" Content="btn1"></Button></Grid></Window>
运行后的悬停前、悬停后效果对比:
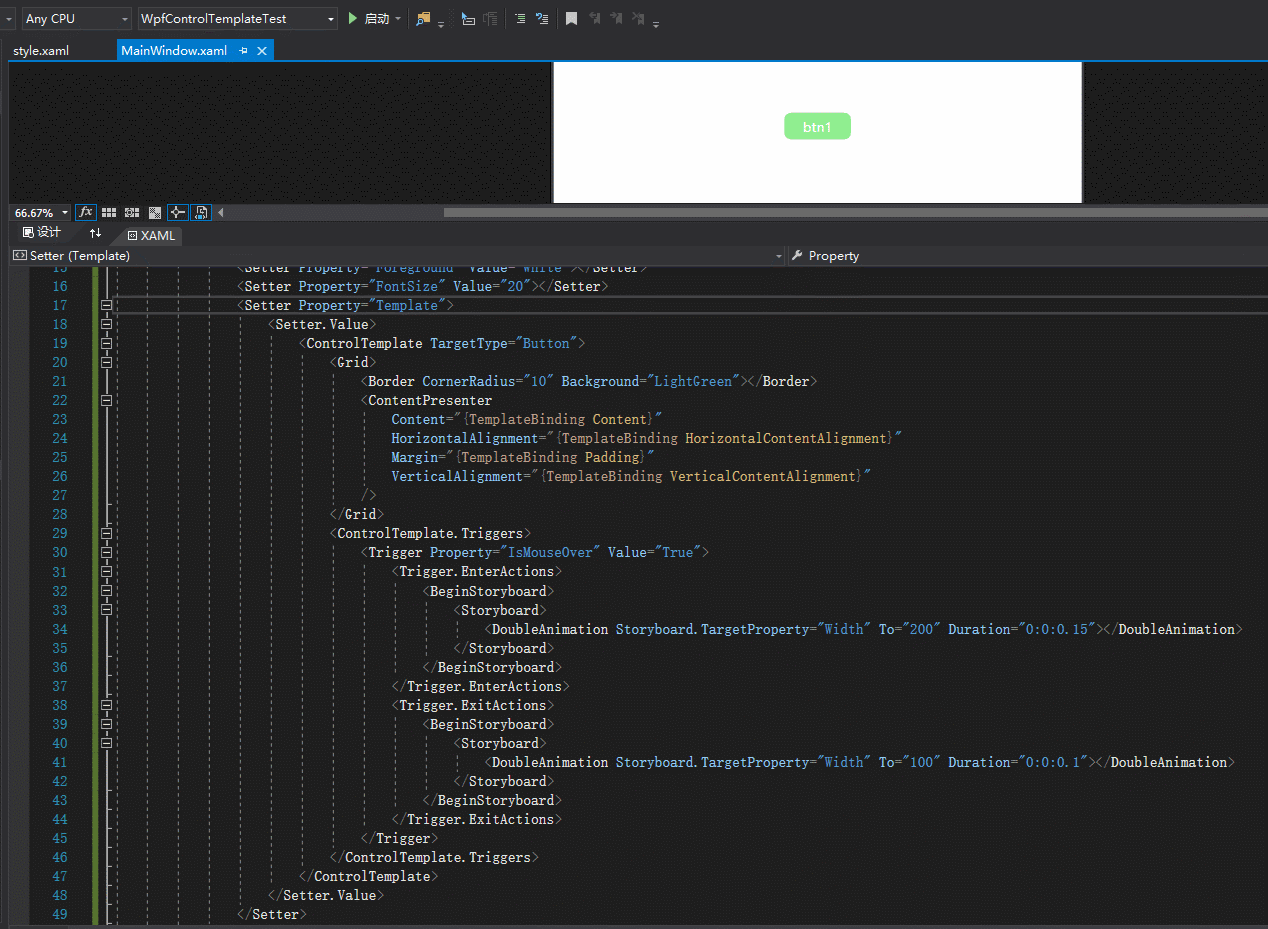
此时,如果想为按钮的变化添加动画效果,就需要设置Storyboard。我们需要将ControlTemplate.Triggers段替换为如下代码:
<ControlTemplate.Triggers><Trigger Property="IsMouseOver" Value="True"><Trigger.EnterActions><BeginStoryboard><Storyboard><DoubleAnimation Storyboard.TargetProperty="Width" To="200" Duration="0:0:0.15"></DoubleAnimation></Storyboard></BeginStoryboard></Trigger.EnterActions><Trigger.ExitActions><BeginStoryboard><Storyboard><DoubleAnimation Storyboard.TargetProperty="Width" To="100" Duration="0:0:0.1"></DoubleAnimation></Storyboard></BeginStoryboard></Trigger.ExitActions></Trigger></ControlTemplate.Triggers>
这里的DoubleAnimation指的是数字变化的动画,若需要颜色变化,则需要ColorAnimation。DoubleAnimation的Duration属性是一个时间,分别被设置了0.15秒和0.1秒。
运行效果:
WPF入门第六篇 界面绑定属性刷新 INotifyPropertyChanged
新建WPF项目,命名为VMTest(VM是ViewModel的简称)。右击项目添加一个类,命名为Person。将Person类进行修改:
using System;using System.Collections.Generic;using System.Linq;using System.Text;using System.Threading.Tasks;namespace VMTest{public class Person{public int Id { get; set; }public string Name { get; set; }public int Age { get; set; }}}
将MainWindow.xaml代码替换为下面代码:
<Window x:Class="VMTest.MainWindow"xmlns="http://schemas.microsoft.com/winfx/2006/xaml/presentation"xmlns:x="http://schemas.microsoft.com/winfx/2006/xaml"xmlns:d="http://schemas.microsoft.com/expression/blend/2008"xmlns:mc="http://schemas.openxmlformats.org/markup-compatibility/2006"xmlns:local="clr-namespace:VMTest"mc:Ignorable="d"Title="MainWindow" Height="450" Width="800"><Grid><StackPanel Orientation="Vertical"><StackPanel Orientation="Horizontal"><TextBlock Text="Id:"></TextBlock><TextBlock Text="{Binding Id}"></TextBlock></StackPanel><StackPanel Orientation="Horizontal"><TextBlock Text="Name:"></TextBlock><TextBlock Text="{Binding Name}"></TextBlock></StackPanel><StackPanel Orientation="Horizontal"><TextBlock Text="Age:"></TextBlock><TextBlock Text="{Binding Age}"></TextBlock></StackPanel><StackPanel Orientation="Vertical"><Button Content="btn1" Width="100" HorizontalAlignment="Left" Click="Button_Click"></Button></StackPanel></StackPanel></Grid></Window>
将MainWindow.xaml.cs代码替换为:
using System;using System.Collections.Generic;using System.Linq;using System.Text;using System.Threading.Tasks;using System.Windows;using System.Windows.Controls;using System.Windows.Data;using System.Windows.Documents;using System.Windows.Input;using System.Windows.Media;using System.Windows.Media.Imaging;using System.Windows.Navigation;using System.Windows.Shapes;namespace VMTest{/// <summary>/// MainWindow.xaml 的交互逻辑/// </summary>public partial class MainWindow : Window{Person p;public MainWindow(){InitializeComponent();p = new Person(){Id = 1,Name = "Wufan",Age = 25};this.DataContext = p;}private void Button_Click(object sender,RoutedEventArgs e){p.Age = 26;}}}
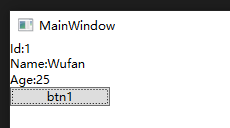
测试项目简单的准备完毕了,分析一下代码:
MainWindow作为View,被它内部定义的Person p控制着显示的数据,在MainWindow的初始化代码中,我们new了一个Person赋值给p,并设置MainWindow的DataContext等于p。在MainWindow的ButtonClick事件中,我们改变了p.Age的值,期望界面上绑定值也能随着绑定模型的属性的变化而变化。
此时运行程序,可以看到界面显示了Person的三个属性值,但是点击btn1时,Age却没有随着变化,未达到我们的预期。
为了解决这个问题,最笨的方法就是对DataContext重新赋值,来刷新整个界面的所有Binding值。这种方法的具体做法是将ButtonClick代码改为:
private void Button_Click(object sender, RoutedEventArgs e){p.Age = 26;Person temp = new Person(){Id = p.Id,Name = p.Name,Age = p.Age};this.DataContext = temp;p = temp;}
这样做确实可以解决问题,但却不是一个好的方法。因为重新给DataContext复制后,界面的所有Binding值都要刷新,这不符合我们的开发要求,也不符合设计者的初衷。
为了避免这种方法,设计者提供了INotifyPropertyChanged。
INotifyPropertyChanged的作用和用法
对于INotifyPropertyChanged的作用说明:向客户端发出某一属性值已更改的通知。简单来说,可以在不给DataContext重新赋值的情况下,界面Binding值可以随着绑定模型的属性的变化而变化。
将ButtonClick按钮的代码改为:
private void Button_Click(object sender, RoutedEventArgs e){p.Age = 26;}
为Person类添加接口继承,并添加相应的引用及接口实现;修改Age属性的实现方式,并使用PropertyChanged来将Age属性的改变通知到界面:
using System;using System.Collections.Generic;using System.ComponentModel;//新增的引用using System.Linq;using System.Text;using System.Threading.Tasks;namespace VMTest{public class Person:INotifyPropertyChanged{public int Id { get; set; }public string Name { get; set; }//Age属性的改变private int _age;public int Age{get => _age;set{_age = value;if(PropertyChanged != null){PropertyChanged(this, new PropertyChangedEventArgs("Age"));}}}//新增代码public event PropertyChangedEventHandler PropertyChanged;}}
此时,点击btn1后,Age属性的改变被通知到了界面。
为了让Id和Name属性也能实现这种效果,则需要将这两个属性的写法也改成上面介绍的Age属性的写法。
如果直接修改会让我们的代码非常繁琐,我们可以将INotifyPropertyChanged相关代码封装起来使用,使得ViewModel(本文中的Person类)的代码看起来更加简洁。
INotifyPropertyChanged的封装使用
我们对INotifyPropertyChanged做一个封装,封装到VM类,其他的ViewModel类只需要继承VM类,即可方便的实现属性变更通知的效果。
VM类代码参考了开源框架ReactiveUI,git地址:https://github.com/reactiveui/reactiveui
在项目中添加一个类,命名为VM。VM类代码如下:
using System;using System.Collections.Generic;using System.ComponentModel;using System.Linq;using System.Runtime.CompilerServices;using System.Text;using System.Threading.Tasks;namespace VMTest{public class VM : INotifyPropertyChanged{public event PropertyChangedEventHandler PropertyChanged;public void RaisePropertyChanged(string p){if (PropertyChanged != null){PropertyChanged(this, new PropertyChangedEventArgs(p));}}public void RaiseAndSetIfChanged<T>(ref T a, T v, [CallerMemberName] string propertyName = null){a = v;if (propertyName != null){RaisePropertyChanged(propertyName);}}}}
将Person类代码替换为下面的代码:
using System;using System.Collections.Generic;using System.ComponentModel;using System.Linq;using System.Text;using System.Threading.Tasks;namespace VMTest{public class Person : VM{private int _id;public int Id{get => _id;set => this.RaiseAndSetIfChanged(ref _id, value);//说明:这里没有把方法定义时的第三个参数也放进来,原因是:系统特性。//因为[CallerMemberName]这样的特性,系统会自动帮你获取到调用堆栈的对象名称。//所以这里的代码等价于:// set => this.RaiseAndSetIfChanged(ref _id, value,"Id");}private string _name;public string Name{get => _name;set => this.RaiseAndSetIfChanged(ref _name, value);//同理}private int _age;public int Age{get => _age;set => this.RaiseAndSetIfChanged(ref _age, value);//同理}}}
此时,Id、Name、Age属性的改变都可以被通知到界面。
修改Button按钮的点击事件如下:
private void Button_Click(object sender, RoutedEventArgs e){p.Age = 26;p.Name = "wf";p.Id = 2;}
到此为止,代码已经可以实现预期的效果了。
(了解)WPF入门第四篇 VisualState
https://blog.csdn.net/wf824284257/article/details/88989991
(了解)WPF入门第五篇 WPF图表与ECharts
https://blog.csdn.net/wf824284257/article/details/89002133
(了解)WPF入门第七篇 使用Squirrel自动更新应用

若有收获,就点个赞吧
0 人点赞
