因为上一篇的案例是没实现的,我感觉很不爽,因为我不知道怎么处理这个,所以我去找博主的视频看了,结果视频做的是实现了一个页面的增删改查操作,跟文档里的是不一样的。不过这个是运行成功的,所以我要记录一下。
设计
功能点
①使用GataGrid控件显示数据
②使用了Command命令
③上下文关联的理解
④较为标准的MVVM,只是有点简单,但是用于理解MVVM还是够的
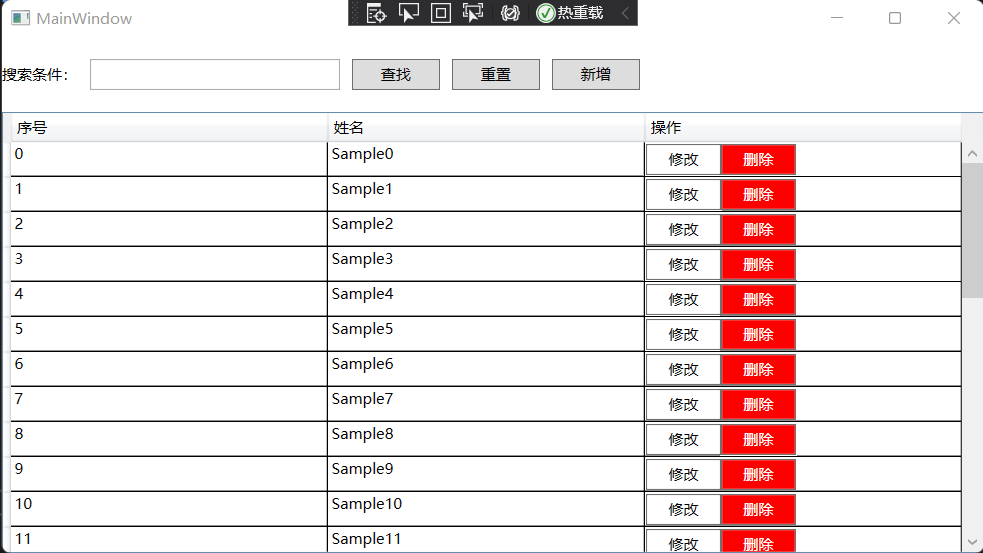
实现效果
具体实现
1、导入NuGet包
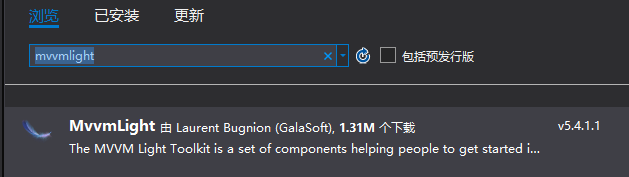
该包已经弃用了,因为视频已经很老了,不过还是可以用的,现在WPF主流框架应该是Prism,不过没用过,留一个坑在这。
这个包导进来之后,默认会在目录下创建ViewModel层的示例代码。
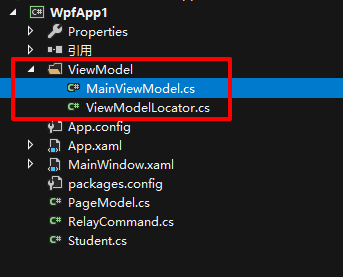
删除ViewModelLocator.cs文件,因为本案例中用不到,还会报错!同时将MainViewModel.cs中不必要的注释、App.xaml资源引用删掉。
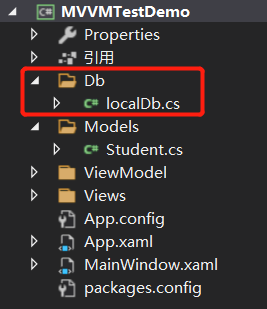
2、Model
新建一个Model文件夹,里面添加一个Student类:
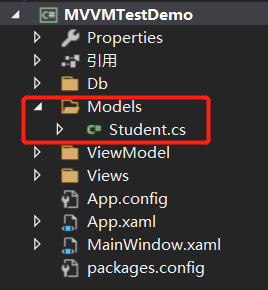
本案例中就以Student作为MVVM中的Model。
using GalaSoft.MvvmLight;using System;using System.Collections.Generic;using System.Linq;using System.Text;using System.Threading.Tasks;namespace MVVMTestDemo.Models{public class Student : ViewModelBase{private int _id;private string _name;public int Id{get { return _id; }set{_id = value;RaisePropertyChanged();}}public string Name{get { return _name; }set{_name = value;RaisePropertyChanged();}}}}
3、创建数据源
新建一个Db文件夹,添加一个localDb类:
这个类就充当案例中DataGrid的数据源。
using MVVMTestDemo.Models;using System;using System.Collections.Generic;using System.Linq;using System.Text;using System.Threading.Tasks;namespace MVVMTestDemo.Db{/// <summary>/// 该类就是充当数据源/// </summary>public class localDb{public localDb(){Init();}private List<Student> Students;/// <summary>/// 初始化一个学生列表,里面包含30条数据/// </summary>private void Init(){Students = new List<Student>();for (int i = 0; i < 30; i++){Students.Add(new Student(){Id = i,Name = $"Sample{i}"});}}/// <summary>/// 公共的方法用来获取学生列表/// </summary>/// <returns>学生列表</returns>public List<Student> GetStudents(){return Students;}/// <summary>/// 往学生列表中添加学生/// </summary>/// <param name="stu"></param>public void AddStudent(Student stu){Students.Add(stu);}/// <summary>/// 通过输入的Id来查找学生进行删除操作/// </summary>/// <param name="id"></param>public void DelStudent(int id){var model = Students.FirstOrDefault(t => t.Id == id);if(model != null){Students.Remove(model);}}/// <summary>/// 通过学生姓名来"模糊"查找学生/// </summary>/// <param name="name">学生姓名</param>/// <returns>返回叫这个名字的学生列表</returns>public List<Student> GetStudentsByName(string name){return Students.Where(q => q.Name.Contains(name)).ToList();}public Student GetStudentById(int id){var model = Students.FirstOrDefault(t => t.Id == id);if (model != null){return new Student(){Id = model.Id,Name = model.Name};}return null;}}}
**视频作者在书写这个类的时候,给了我一些启发**:
- 首先在构造器里,使用了一个封装的
Init()方法,而不是直接将Init()方法中的内容直接写进构造器里面,按我目前的理解,这应该是一种习惯吧,封装的习惯,我也应该培养一下。作用都差不多,在其他类中声明这个类的对象的时候,都会用到构造器,然后对一些属性进行初始化。作者这里的封装Init()方法也可以起到相同的作用。同时,封装的这个private的Init()方法也可以在localDb这个类中继续使用。 - 多次使用Lambda表达式,虽然都是很简单的,但是对于一个不怎么用Lambda的人来说,这是个很好的机会来进行理解和锻炼。
- 这个类中的最后一个
GetStudentById(int id)方法,是作者修改后的版本了,原本是一句很简单的return语句://return Students.FirstOrDefault(t => t.Id == id);//这里最好不要使用查到的"引用",因为会涉及到一个"同步改变"的情况。这个语句时候来作者实现其他功能的时候发现的bug,因为这里获取到的直接是List中的Student对象,所以会直接对这个对象进行修改,造成一种TwoWay的效果,但是实际上我们不想这样。总结下来的话就是一句话,代码刚写出的来的不用考虑那么多,先实现就好,不用考虑太多细节,后面再修改就可以了。
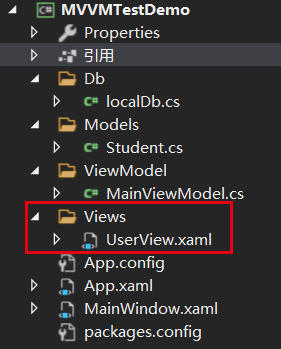
4、ViewModel
本案例的重点部分:这个类也是导入包的时候自动生成的。
using GalaSoft.MvvmLight;using GalaSoft.MvvmLight.Command;using MVVMTestDemo.Db;using MVVMTestDemo.Models;using MVVMTestDemo.Views;using System.Collections.ObjectModel;using System.Linq;using System.Windows;namespace MVVMTestDemo.ViewModel{public class MainViewModel : ViewModelBase{public MainViewModel(){localDb = new localDb();QueryCommand = new RelayCommand(Query);ResetCommand = new RelayCommand(() =>{Search = string.Empty;this.Query();});EditCommand = new RelayCommand<int>(t => Edit(t));DelCommand = new RelayCommand<int>(t => Del(t));AddCommand = new RelayCommand(Add);}localDb localDb;private string _search = string.Empty;public string Search{get { return _search; }set{_search = value;RaisePropertyChanged();}}private ObservableCollection<Student> _gridModelList;public ObservableCollection<Student> GridModelList{get { return _gridModelList; }set{_gridModelList = value;RaisePropertyChanged();}}#region Commandpublic RelayCommand QueryCommand { get; set; }public RelayCommand ResetCommand { get; set; }public RelayCommand<int> EditCommand { get; set; }public RelayCommand<int> DelCommand { get; set; }public RelayCommand AddCommand { get; set; }#endregion/// <summary>/// 将localDb中的学生列表传给GridModelList属性,用于给DataGrid控件显示数据/// </summary>public void Query(){var models = localDb.GetStudentsByName(Search);GridModelList = new ObservableCollection<Student>();if (models != null){models.ForEach(arg =>{GridModelList.Add(arg);});}}public void Edit(int id){var model = localDb.GetStudentById(id);if (model != null){UserView view = new UserView(model);var r = view.ShowDialog();if (r.Value){var newModel = GridModelList.FirstOrDefault(t => t.Id == model.Id);if (newModel != null){newModel.Name = model.Name;}}}}public void Del(int id){var model = localDb.GetStudentById(id);if (model != null){var r = MessageBox.Show($"确认删除当前用户:{model.Name}?", "操作提示", MessageBoxButton.OK, MessageBoxImage.Question);if (r == MessageBoxResult.OK)localDb.DelStudent(model.Id);this.Query();}}public void Add(){Student student = new Student();UserView view = new UserView(student);var r = view.ShowDialog();if (r.Value){student.Id = GridModelList.Max(t => t.Id) + 1;localDb.AddStudent(student);this.Query();}}}}
<Window x:Class="MVVMTestDemo.MainWindow"xmlns="http://schemas.microsoft.com/winfx/2006/xaml/presentation"xmlns:x="http://schemas.microsoft.com/winfx/2006/xaml"xmlns:d="http://schemas.microsoft.com/expression/blend/2008"xmlns:mc="http://schemas.openxmlformats.org/markup-compatibility/2006"xmlns:local="clr-namespace:MVVMTestDemo"mc:Ignorable="d"Title="MainWindow" Height="450" Width="800"><Grid><Grid.RowDefinitions><RowDefinition Height="60"/><RowDefinition/></Grid.RowDefinitions><StackPanel Orientation="Horizontal"><TextBlock Text="搜索条件:" VerticalAlignment="Center"/><TextBox Width="200" Text="{Binding Search}" Height="25" Margin="10 0 0 0"/><Button Content="查找" Command="{Binding QueryCommand}" Width="70" Height="25" Margin="10 0 0 0"/><Button Content="重置" Command="{Binding ResetCommand}" Width="70" Height="25" Margin="10 0 0 0"/><Button Content="新增" Command="{Binding AddCommand}" Width="70" Height="25" Margin="10 0 0 0"/></StackPanel><DataGrid Grid.Row="1" ColumnWidth="*" AutoGenerateColumns="False"CanUserAddRows="False" ItemsSource="{Binding GridModelList}"><DataGrid.Columns><DataGridTextColumn Header="序号" Binding="{Binding Id}"/><DataGridTextColumn Header="姓名" Binding="{Binding Name}"/><DataGridTemplateColumn Header="操作"><DataGridTemplateColumn.CellTemplate><DataTemplate><StackPanel Orientation="Horizontal"><Button Content="修改" Width="60" Height="25" Background="White" Foreground="Black"CommandParameter="{Binding Id}"Command="{Binding DataContext.EditCommand,RelativeSource={RelativeSource Mode=FindAncestor,AncestorType=DataGrid}}"/><Button Content="删除" Width="60" Height="25" Background="Red" Foreground="White"CommandParameter="{Binding Id}"Command="{Binding DataContext.DelCommand,RelativeSource={RelativeSource Mode=FindAncestor,AncestorType=DataGrid}}"/></StackPanel></DataTemplate></DataGridTemplateColumn.CellTemplate></DataGridTemplateColumn></DataGrid.Columns></DataGrid></Grid></Window>
MainViewModel这个类很多的命令、方法都是根据页面进展一点一点填充起来的。这里也用到了一些高级的用法。需要慢慢嚼透。
using MVVMTestDemo.ViewModel;using System;using System.Collections.Generic;using System.Linq;using System.Text;using System.Threading.Tasks;using System.Windows;using System.Windows.Controls;using System.Windows.Data;using System.Windows.Documents;using System.Windows.Input;using System.Windows.Media;using System.Windows.Media.Imaging;using System.Windows.Navigation;using System.Windows.Shapes;namespace MVVMTestDemo{/// <summary>/// MainWindow.xaml 的交互逻辑/// </summary>public partial class MainWindow : Window{public MainWindow(){InitializeComponent();MainViewModel viewModel = new MainViewModel();viewModel.Query();//添加上下文绑定,MainViewModel用于后台逻辑,MainWindow用于数据展示this.DataContext = viewModel;}}}
5、View
新建一个View文件夹,新建一个UserView的页面,用来展示”编辑用户信息”页面。
<Window x:Class="MVVMTestDemo.Views.UserView"xmlns="http://schemas.microsoft.com/winfx/2006/xaml/presentation"xmlns:x="http://schemas.microsoft.com/winfx/2006/xaml"xmlns:d="http://schemas.microsoft.com/expression/blend/2008"xmlns:mc="http://schemas.openxmlformats.org/markup-compatibility/2006"xmlns:local="clr-namespace:MVVMTestDemo.Views"mc:Ignorable="d" WindowStyle="None" AllowsTransparency="True" WindowStartupLocation="CenterScreen"Title="UserView" Height="350" Width="400"><Grid><Grid.RowDefinitions><RowDefinition Height="60"/><RowDefinition/><RowDefinition Height="60"/></Grid.RowDefinitions><TextBlock Text="编辑用户信息" FontWeight="Bold" FontSize="30" Margin="10 0 0 0" VerticalAlignment="Center"/><StackPanel Grid.Row="1" VerticalAlignment="Center" HorizontalAlignment="Center"><TextBlock Text="姓名:" VerticalAlignment="Center"/><TextBox Width="200" Height="25" Text="{Binding Model.Name}"/></StackPanel><StackPanel Orientation="Horizontal" Grid.Row="2" HorizontalAlignment="Right"><Button Width="70" Height="25" Content="确定" Click="btn_Save"/><Button Width="70" Height="25" Content="取消" Margin="10 0 10 0" Click="btn_Cancel"/></StackPanel></Grid></Window>
using MVVMTestDemo.Models;using System;using System.Collections.Generic;using System.Linq;using System.Text;using System.Threading.Tasks;using System.Windows;using System.Windows.Controls;using System.Windows.Data;using System.Windows.Documents;using System.Windows.Input;using System.Windows.Media;using System.Windows.Media.Imaging;using System.Windows.Shapes;namespace MVVMTestDemo.Views{/// <summary>/// UserView.xaml 的交互逻辑/// </summary>public partial class UserView : Window{public UserView(Student stu){InitializeComponent();this.DataContext = new{Model = stu};}private void btn_Save(object sender, RoutedEventArgs e){this.DialogResult = true;}private void btn_Cancel(object sender, RoutedEventArgs e){this.DialogResult = false;}}}
小结
案例中用到了很多许久没接触过的知识点,当然还要在熟悉熟悉。然后再来补

若有收获,就点个赞吧
0 人点赞
