前面了解了这么多基础知识,现在终于到了介绍如何使用 Fetch 了。老规矩,我们先来看下规范定义的接口。
partial interface mixin WindowOrWorkerGlobalScope {[NewObject] Promise<Response> fetch(RequestInfo input, optional RequestInit init);};
规范中定义的接口我们可以对应着 MDN 进行查看,你可以点击这里更直观的看看它的用法。
从规范中我们可以看到 fetch 属于 WindowOrWorkerGlobalScope 的一部分,暴露在 Window 或 WorkerGlobalScope 对象上。所以在浏览器中,你可以直接调用 fetch。
规范中定义了 fetch 返回一个 Promise,它最多可接收两个参数( input 和 init )。为了能够对它的使用方法有个更全面的了解,下面来讲一下这两个参数。
- input 参数类型为
RequestInfo,我们可以回到前面的Request部分,来回顾一下它的定义。
typedef (Request or USVString) RequestInfo;
发现它是一个 Request 对象或者是一个字符串,因此你可以传 Request 实例或者资源地址字符串,这里一般我们推荐使用字符串。
- init 参数类型为
RequestInit,我们回顾前面Requst部分,它是一个字典类型。在JavaScript中你需要传递一个Object对象。
dictionary RequestInit {
ByteString method;
HeadersInit headers;
BodyInit? body;
USVString referrer;
ReferrerPolicy referrerPolicy;
RequestMode mode;
RequestCredentials credentials;
RequestCache cache;
RequestRedirect redirect;
DOMString integrity;
boolean keepalive;
AbortSignal? signal;
any window; // can only be set to null
};
在本小节之前我们都没有介绍 fetch 的使用方式,但是在其他章节中或多或少出现过它的容貌。现在,我们终于可以在这里正式介绍它的使用方式了。
fetch 它返回一个 Promise,意味着我们可以通过 then 来获取它的返回值,这样我们可以链式调用。如果配合 async/await 使用,我们的代码可读性会更高。下面我们先通过一个简单的示例来熟悉下它的使用。
示例
示例代码位置:https://github.com/GoDotDotDot/fe9-fetch-demo/blob/master/views/index.html#L19
// 客户端const headers = new Headers({'X-Token': 'fe9',});setTimeout(() => {fetch('/data?name=fe', {method: 'GET', // 默认为 GET,不写也可以headers,}).then(response => response.json()).then(resData => {const { status, data } = resData;if (!status) {window.alert('发生了一个错误!');return;}document.getElementById('fetch').innerHTML = data;});}, 1000);
上面的示例中,我们自定义了一个 headers 。为了演示方便,这里我们设定了一个定时器。在请求成功时,服务器端会返回相应的数据,我们通过 Response 实例的 json 方法来解析数据。细心的同学会发现,这里 fetch 的第一个参数我们采用的是字符串,在第二个参数我们提供了一些 RequestInit 配置信息,这里我们指定了请求方法(method)和自定义请求头(headers)。当然你也可以传递一个 Request 实例对象,下面我们也给出一个示例。
代码位置:https://github.com/GoDotDotDot/fe9-fetch-demo/blob/master/views/index.html#L39
const headers = new Headers({'X-Token': 'fe9',});const request = new Request('/api/request', {method: 'GET',headers,});setTimeout(() => {fetch(request).then(res => res.json()).then(res => {const { status, data } = res;if (!status) {alert('服务器处理失败');return;}document.getElementById('fetch-req').innerHTML = data;});}, 1200);
在浏览器中打开:http://127.0.0.1:4000/, 如果上面的示例运行成功,你将会看到如下界面: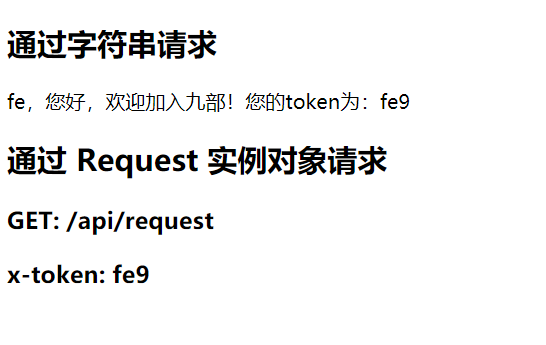
好,在运行完示例后,相信你应该对如何使用 fetch 有个基本的掌握。在上一章节,我们讲过 fetch 有一定的缺点,下面我们针对部分缺点来尝试着处理下。
解决超时
当网络出现异常,请求可能已经超时,为了使我们的程序更健壮,提供一个较好的用户 体验,我们需要提供一个超时机制。然而,fetch 并不支持,这在上一小节中我们也聊到过。庆幸的是,我们有 Promise ,这使得我们有机可趁。我们可以通过自定义封装来达到支持超时机制。下面我们尝试封装下。
const defaultOptions = {headers: {'Content-Type': 'application/json',},};function request(url, options = {}) {return new Promise((resolve, reject) => {const headers = { ...defaultOptions.headers, ...options.headers };let abortId;let timeout = false;if (options.timeout) {abortId = setTimeout(() => {timeout = true;reject(new Error('timeout!'));}, options.timeout || 6000);}fetch(url, { ...defaultOptions, ...options, headers }).then((res) => {if (timeout) throw new Error('timeout!');return res;}).then(checkStatus).then(parseJSON).then((res) => {clearTimeout(abortId);resolve(res);}).catch((e) => {clearTimeout(abortId);reject(e);});});}
上面的代码中,我们需要注意下。就是我们手动根据超时时间来 reject 并不会阻止后续的请求,由于我们并没有关闭掉此次连接,属于是伪取消。fetch 中如果后续接受到服务器的响应,依然会继续处理后续的处理。所以这里我们在 fetch 的第一个 then 中进行了超时判断。
取消
const controller = new AbortController();const signal = controller.signal;fetch('/data?name=fe', {method: 'GET',signal,}).then(response => response.json()).then(resData => {const { status, data } = resData;if (!status) {window.alert('发生了一个错误!');return;}document.getElementById('fetch-str').innerHTML = data;});controller.abort();
我们回过头看下 fetch 的接口,发现有一个属性 signal, 类型为AbortSignal,表示一个信号对象( signal object ),它允许你通过 AbortController 对象与DOM请求进行通信并在需要时将其中止。你可以通过调用 AbortController.abort 方法完成取消操作。
当我们需要取消时,fetch 会 reject 一个错误( AbortError DOMException ),中断你的后续处理逻辑。具体可以看规范中的解释。
由于目前 AbortController 兼容性极差,基本不能使用,但是社区有人帮我们提供了 polyfill(这里我不提供链接,因为目前来说还不适合生产使用,会出现下面所述的问题),我们可以通过使用它来帮助我们提前感受新技术带来的快乐。但是你可能会在原生支持 Fetch 但是又不支持 AbortController 的情况下,部分浏览器可能会报如下错误:
Chrome: “Failed to execute ‘fetch’ on ‘Window’: member signal is not of type AbortSignal.”
Firefox: “‘signal’ member of RequestInit does not implement interface AbortSignal.”
如果出现以上问题,我们也无能为力,可能原因是浏览器内部做了严格验证,对比发现我们提供的 signal 类型不对。
但是我们可以通过手动 reject 的方式达到取消,但是这种属于伪取消,实际上连接并没有关闭。我们可以通过自定义配置,例如在 options 中增加配置,暴露出 reject,这样我们就可以在外面来取消掉。这里本人暂时不提供代码。有兴趣的同学可以尝试一下,也可以在下面的评论区评论。
前面提到过的获取进度目前我们还无法实现。
拦截器
示例代码位置:https://github.com/GoDotDotDot/fe9-fetch-demo/blob/master/request.js
下面我们讲一讲如何做一个简单的拦截器,这里的拦截器指对响应做拦截。假设我们需要对接口返回的状态码进行解析,例如 403 或者 401 需要跳转到登录页面,200 正常放行,其他报错。由于 fetch 返回一个 Promise ,这就使得我们可以在后续的 then 中做些简单的拦截。我们看一下示例代码:
function parseJSON(response) {const { status } = response;if (status === 204 || status === 205) {return null;}return response.json();}function checkStatus(response) {const { status } = response;if (status >= 200 && status < 300) {return response;}// 权限不允许则跳转到登陆页面if (status === 403 || status === 401) {window ? (window.location = '/login.html') : null;}const error = new Error(response.statusText);error.response = response;throw error;}/*** @description 默认配置* 设置请求头为json*/const defaultOptions = {headers: {'Content-Type': 'application/json',},// credentials: 'include', // 跨域传递cookie};/*** Requests a URL, returning a promise** @param {string} url The URL we want to request* @param {object} [options] The options we want to pass to "fetch"** @return {object} The response data*/function request(url, options = {}) {return new Promise((resolve, reject) => {const headers = { ...defaultOptions.headers, ...options.headers };let abortId;let timeout = false;if (options.timeout) {abortId = setTimeout(() => {timeout = true;reject(new Error('timeout!'));}, options.timeout || 6000);}fetch(url, { ...defaultOptions, ...options, headers }).then((res) => {if (timeout) throw new Error('timeout!');return res;}).then(checkStatus).then(parseJSON).then((res) => {clearTimeout(abortId);resolve(res);}).catch((e) => {clearTimeout(abortId);reject(e);});});}
从上面的 checkStatus 代码中我们可以看到,我们首先检查了状态码。当状态码为 403 或 401 时,我们将页面跳转到了 login 登录页面。细心的同学还会发现,我们多了一个处理方法就是 parseJSON,这里由于我们的后端统一返回 json 数据,为了方便,我们就直接统一处理了 json 数据。

若有收获,就点个赞吧
0 人点赞
