一、组件
//Tips:每一个页面级的组件第一行必须加import React from 'react'
二、无状态组件
//就是一个函数,无状态组件中不能写事件,不能对数据进行直接的改变
App.js
import React from 'react';import './App.css'import Header from '../Header'function App() {return (<div className="App">hello world{/* <p>haha</p> */}<Header/></div>);}export default App;
Header.js
import React from 'react';function Header(){return (<div>头部</div>)}export default Header
2-1 传参
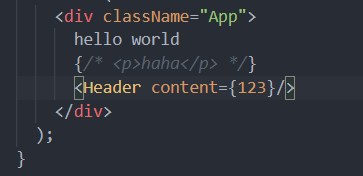
2-1-1 直接传参
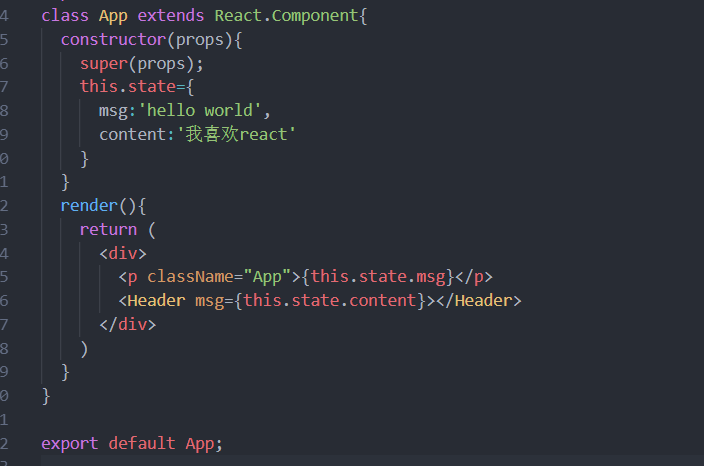
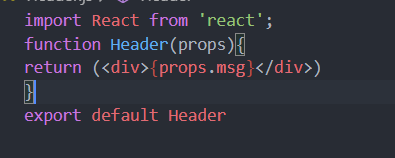
2-1-2 传state里的参数
三、有状态组件
Tip:rcc快捷键
import React from 'react';class App extends React.Component{//数据放在构造函数的state属性constructor(props){super(props);this.state = {msg:"hello world"}}render(){return (//使用数据 {this.state.msg}<div>{this.state.msg}</div>)}}// jsxexport default App;
this.setState({ data: newData },() => {//这里打印的是最新的state值console.log(that.state.data);});
3-1 事件
3-1-1 第一种
//1.改变事件内部this指向的问题 bind(this)render(){return (//bind(this)改变this关键字的指向<div onClick={this.handleClick.bind(this)}>{this.state.msg}</div>)}handleClick(){this.setState({msg:"change"})}
3-1-2 第二种
//2.使用箭头函数 改变this指向render(){return (<div onClick={this.handleClick}>{this.state.msg}</div>)}handleClick=()=>{this.setState({msg:"change"})}
3-2 事件参数
//Tips:传递参数一定加bind bind(this,params)render(){return (<div onClick={this.handleClick.bind(this,"10001")}>{this.state.msg}</div>)}handleClick=(id)=>{console.log(id)this.setState({msg:"change"})}
四、组件传参
4-1 父组件向子组件传参
父组件
import React from 'react';import Title from '../components/Title'class App extends React.Component{constructor(props){super(props);this.state={msg:'hello world',}}render(){return (<div><Title msg={this.state.msg}></Title></div>)}}export default App;
子组件
import React from 'react';class Title extends React.Component{constructor(props){super(props)}render(){return(<h1>{this.props.msg}</h1>)}}export default Title
4-2 子组件向父组件传参
父组件自定义方法给子组件
import React from 'react';import Title from '../components/Title'class App extends React.Component{constructor(props){super(props);this.state={msg:'hello world',}}render(){return (<div><TitledeleteItem = {this.handleDelete.bind(this)}msg={this.state.msg}></Title></div>)}handleDelete(id){console.log(id)var index = this.state.musics.findIndex(item=>{if(item.id==id){return true}})var musics = this.state.musicsmusics.splice(index,1)this.setState({musics})}}export default App;
子组件的属性接收父组件传递过来的方法
import React from 'react';class Title extends React.Component{constructor(props){super(props)}render(){return(<h1 onClick={this.handleClick.bind(this,"1355")}>{this.props.msg}</h1>)}handleClick=(id)=>{console.log(id)this.props.deleteItem(id)}}export default Title
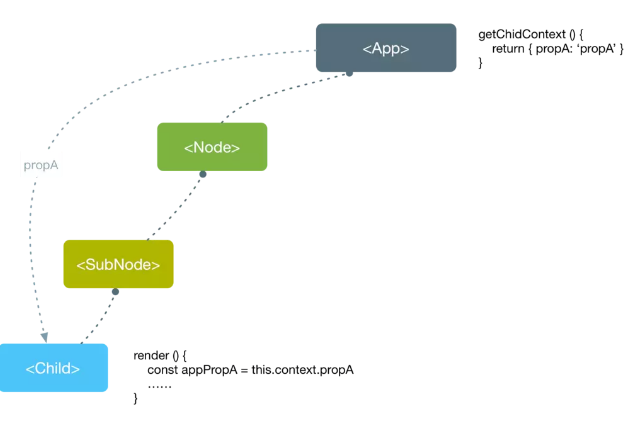
4-3 父组件跨级传参

// 最外层的父组件import PropTypes from 'prop-types';export default class Com1 extends React.Component {constructor(props) {super(props)this.state = {color: 'red'}}// 1. 在父组件中定义一个function叫做getChildContext ,方法内部返回的对象就是要共享给所有子孙组件的数据getChildContext() {return {color: this.state.color}}// 2. 使用属性校验规定一下传递给子组件的数据类型,需要是静态方法static childContextTypes = {color: PropTypes.string}render() {return <div><h1>这是 父组件 </h1><Com2></Com2></div>}}// 中间的子组件class Com2 extends React.Component {render() {return <div><h3>这是 子组件 </h3><Com3></Com3></div>}}// 内部的孙子组件import PropTypes from 'prop-types';class Com3 extends React.Component {// 3. 子组件在使用父组件context数据的时候首先需要对父组件传递过来的数据做类型校验static contextTypes = {color: PropTypes.string}render() {return <div><h5 style={{ color: this.context.color }}>这是 孙子组件 --- {this.context.color} </h5></div>}}
4-3-1 关于prop-types的使用
import PropTypes from 'prop-types';MyComponent.propTypes = {// 你可以声明一个 prop 是一个特定的 JS 原始类型。 默认情况下,这些都是可选的。optionalArray: PropTypes.array,optionalBool: PropTypes.bool,optionalFunc: PropTypes.func,optionalNumber: PropTypes.number,optionalObject: PropTypes.object,optionalString: PropTypes.string,optionalSymbol: PropTypes.symbol,// 任何东西都可以被渲染:numbers, strings, elements,数组或者是包含这些类型的片段。optionalNode: PropTypes.node,// 一个 React 元素 例如 <MyComponent />optionalElement: PropTypes.element,// 你也可以声明一个 prop 是类的一个实例。// 使用 JS 的 instanceof 运算符。optionalMessage: PropTypes.instanceOf(Message),// 你可以声明 prop 是特定的值,类似于枚举optionalEnum: PropTypes.oneOf(['News', 'Photos']),// 一个对象可以是多种类型其中之一optionalUnion: PropTypes.oneOfType([PropTypes.string,PropTypes.number,PropTypes.instanceOf(Message)]),// 一个某种类型的数组optionalArrayOf: PropTypes.arrayOf(PropTypes.number),// 属性值为某种类型的对象optionalObjectOf: PropTypes.objectOf(PropTypes.number),// 一个特定形式的对象optionalObjectWithShape: PropTypes.shape({color: PropTypes.string,fontSize: PropTypes.number}),// 你可以使用 `isRequired' 链接上述任何一个,以确保在没有提供 prop 的情况下显示警告。requiredFunc: PropTypes.func.isRequired,// 任何数据类型的值requiredAny: PropTypes.any.isRequired,}
五、关于props和state
5-1 定义
- Props 是组件的输入。它们是单个值或包含一组值的对象,由于React是单向数据流,所以props基本上也就是从父级组件向子组件传递的数据。
- State是组件的状态,用于组件保存、控制以及修改自己的状态。状态State是私有的,完全由组件控制,不可通过外部访问和修改,只能通过组件内部的this.setState来修改,修改state属性会导致组件的重新渲染。
5-2 区别
- state是组件自己管理数据,控制自己的状态,在组件内部可变;
- props是外部传入的数据参数,在组件内部不可变,如果要修改,需要在父组件中修改
六、条件渲染
6-1 通过if进行条件渲染
function Greeting(props) {const isLoggedIn = props.isLoggedIn;if (isLoggedIn) {return <UserGreeting />;}return <GuestGreeting />;}ReactDOM.render(// Try changing to isLoggedIn={true}:<Greeting isLoggedIn={false} />,document.getElementById('root'));
6-2 三元运算符渲染
render() {const isLoggedIn = this.state.isLoggedIn;return (<div>{isLoggedIn ? (<LogoutButton onClick={this.handleLogoutClick} />) : (<LoginButton onClick={this.handleLoginClick} />)}</div>);}
6-3 通过&&进行条件渲染
function Mailbox(props) {const unreadMessages = props.unreadMessages;return (<div><h1>Hello!</h1>{unreadMessages.length > 0 &&<h2>You have {unreadMessages.length} unread messages.</h2>}</div>);}const messages = ['React', 'Re: React', 'Re:Re: React'];ReactDOM.render(<Mailbox unreadMessages={messages} />,document.getElementById('root'));
6-4 阻止渲染
在极少数情况下,你可能希望能隐藏组件,即使它已经被其他组件渲染。若要完成此操作,你可以让 render 方法直接返回 null,而不进行任何渲染。
render() {const isLoggedIn = this.state.isLoggedIn;if (!isLoggedIn) {return null;}return (<div><LoginButton onClick={this.handleLoginClick} /></div>);}
七、列表渲染
实例详见Http请求
function NumberList(props) {const numbers = props.numbers;const listItems = numbers.map((number) =><li key={number.toString()}>{number}</li>);return (<ul>{listItems}</ul>);}const numbers = [1, 2, 3, 4, 5];ReactDOM.render(<NumberList numbers={numbers} />,document.getElementById('root'));//key 帮助 React 识别哪些元素改变了,比如被添加或删除。因此你应当给数组中的每一个元素赋予一个确定的标识。//一个元素的 key 最好是这个元素在列表中拥有的一个独一无二的字符串。通常,我们使用来自数据 id 来作为元素的 key。key在兄弟节点之间必须唯一//当元素没有确定 id 的时候,万不得已你可以使用元素索引 index 作为 key:const todoItems = todos.map((todo, index) =>// Only do this if items have no stable IDs<li key={index}>{todo.text}</li>);
八、Fragment
import React, { Fragment } from 'react';//子组件function ListItem({ item }) {return (<Fragment><dt>{item.term}</dt><dd>{item.description}</dd></Fragment>);}//父组件function Glossary(props) {return (<dl>{props.items.map(item => (<ListItem item={item} key={item.id} />))}</dl>);}
8-1 实例:
class Table extends React.Component {render() {return (<table><tr><Columns /></tr></table>);}}
<Columns /> 需要返回多个 <td> 元素以使渲染的 HTML 有效。如果在 <Columns /> 的 render() 中使用了父 div,则生成的 HTML 将无效。
class Columns extends React.Component {render() {return (<div><td>Hello</td><td>World</td></div>);}}
得到一个 <Table /> 输出:
<table><tr><div><td>Hello</td><td>World</td></div></tr></table>
8-2 用法:
class Columns extends React.Component {render() {return (<React.Fragment><td>Hello</td><td>World</td></React.Fragment>);}}
短语法:
你可以像使用任何其他元素一样使用 <> </>,除了它不支持 key 或属性。
class Columns extends React.Component {render() {return (<><td>Hello</td><td>World</td></>);}}
带 key 的 Fragments:
使用显式 <React.Fragment> 语法声明的片段可能具有 key。一个使用场景是将一个集合映射到一个 Fragments 数组 - 举个例子,创建一个描述列表:
function Glossary(props) {return (<dl>{props.items.map(item => (// 没有`key`,React 会发出一个关键警告<React.Fragment key={item.id}><dt>{item.term}</dt><dd>{item.description}</dd></React.Fragment>))}</dl>);}
九、React组合
参考文档 官方文档
react组合类似于Vue中的slot(插槽),子组件的内容由父组件来指定
function FancyBorder(props) {return (<div className={'FancyBorder FancyBorder-' + props.color}>{/*子组件:占坑*/}{props.children}</div>);}function WelcomeDialog() {return (<FancyBorder color="blue">{/*父组件中填坑*/}<h1 className="Dialog-title">Welcome</h1><p className="Dialog-message">Thank you for visiting our spacecraft!</p></FancyBorder>);}
少数情况下,你可能需要在一个组件中预留出几个“洞”。这种情况下,我们可以不使用 children,而是自行约定:将所需内容传入 props,并使用相应的 prop。
function SplitPane(props) {return (<div className="SplitPane"><div className="SplitPane-left">{props.left}</div><div className="SplitPane-right">{props.right}</div></div>);}function App() {return (<SplitPaneleft={<Contacts />}right={<Chat />} />);}


