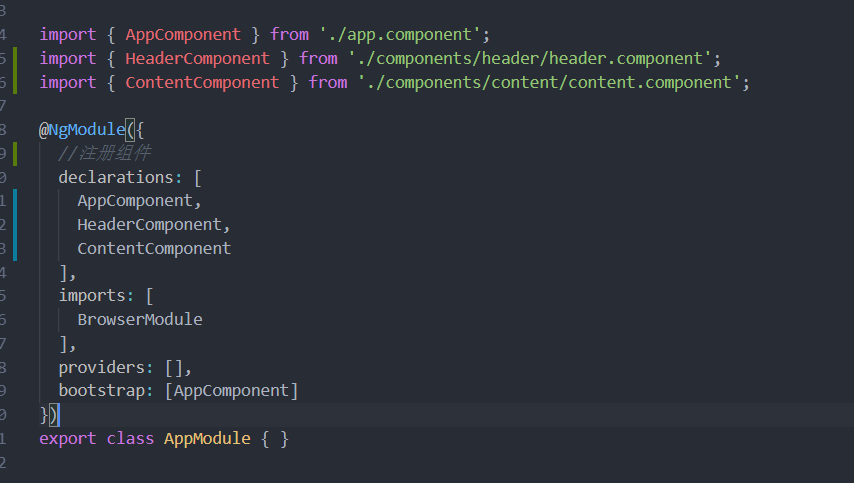
一、入口文件App
在app.module.ts中注册组件
二、生成组件
新建终端,命令行输入命令生成组件
ng g component components/header
三、父子组件传值
一、父向子传值
1 在父组件中定义一个参数
export class AppComponent {public movies:any[]}
2 子组件中引入Input模块
import { Component, OnInit,Input } from '@angular/core';
3 @Input注册
export class HeaderComponent implements OnInit {@Input() data:anyconstructor() { }ngOnInit() {}}
4 在父组件中,子组件通过属性接收父组件传递过来的参数
<app-item *ngFor="let item of movies" [data]="item"></app-item>
二、子向父传值
1 在父组件中定义一个方法
<app-header [title]="title" [run]="run"></app-header>
2 在子组件中获取方法
import { Component, OnInit,Input } from '@angular/core';export class HeaderComponent implements OnInit {@Input() run:anyconstructor() { }ngOnInit() {}}
3 子组件通过事件传递参数给父组件
<button (click)="handleClick()">向父传参</button>handleClick(){this.run("1234")}
4 父组件接收子组件传过来的参数
export class AppComponent {run(id:string){console.log(id)}}
1 子组件中引入模块
import { Component, OnInit, Output, EventEmitter } from '@angular/core';export class HeaderComponent implements OnInit {@Output() private outer = new EventEmitter<string>()constructor() { }}
2 子组件事件传参
<button (click)="handleClick()">向父传参</button>handleClick(){this.outer.emit("1997")}
3 父组件自定义方法接收
<app-header (outer)="getId($event)"></app-header>getId(id:string){console.log(id)}
四、在父组件中使用子组件的数据
ViewChild可以在父组件中使用子组件的数据或者方法
4-1 子组件中的数据
export class ContentComponent implements OnInit {public msg:string="我是你爸爸"constructor() { }ngOnInit() {}}
4-2 给子组件一个名称
<app-content #content></app-content>
4-3 在父组件中配置
import { Component, ViewChild } from '@angular/core';export class AppComponent {@ViewChild('content',{static:false}) content:any}
<p>{{content.msg}}</p>


