Part I Introduction to a problem
Programming Bittle wouldn’t be as much fun if we only could use pre-defined movements and poses. Of course, since movements and poses are just sequences of numbers in Bittle’s mainboard memory, they can easily be changed - but understanding which number change by how much is the toughest part. Fortunately, Codecraft offers a visualization interface, where you can preview poses and movements before uploading them to Bittle. Let’s learn how to use it to animate BIttle.
Part II Explaining the knowledge
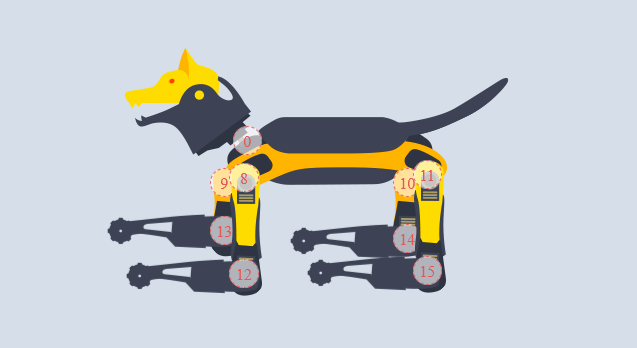
Bittle joints schematic
Bittle has 9 joints: 1 for head pan servo and the rest 8 for hip and leg joints. Head joint can move -60 to 60 degrees from its starting point(the middle), while hip and leg joints can only move -30 to 60 degrees from their starting point. The starting point for joints is defined during calibration process - you can check it if you move BIttle into calibration pose.
Movement arrays
A variable is a memory location that can store a value. It can be thought of as a box in which values are stored. The value held in the box can change, or vary. But each variable can only hold one item of data.
An array is a series of memory locations – or ‘boxes’ – each of which holds a single item of data, but with each box sharing the same name. All data in an array must be of the same data type.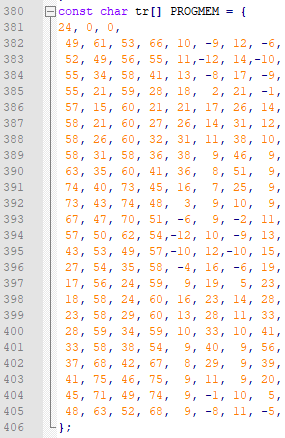
Here is an array for Bittle’s trot movement. The first line of the array has 3 numbers in it: the number of rows in a movement array(24 in this case), desired yaw and desired pitch during movement - zero desired yaw and desired pitch means we want Bittle’s mainboard to be parallel to the ground during movement. Every line after the first is joint angles one step of the movement. You might notice that there are only 8 joints and not 9. This is because head during continuous movement serves the purpose of balancing and cannot be controlled the same way as other joints.
Next is an array for balance fixed pose. First three numbers are the same - the number of rows in a movement array(1 in this case, since this is a static pose), desired yaw and desired pitch. The second line is different however, it contains 16 angles. Bittle’s mainboard has extra connections for servos that are not used in current model of the robot. This is why the unused joint angles are set to zeros.
Fortunately, as we mentioned before, despite we do need to understand BIttle’s structure and movement basics, we don’t need to manually edit these numbers. We can use Codecraft’s Create Skill extension for BIttle for that!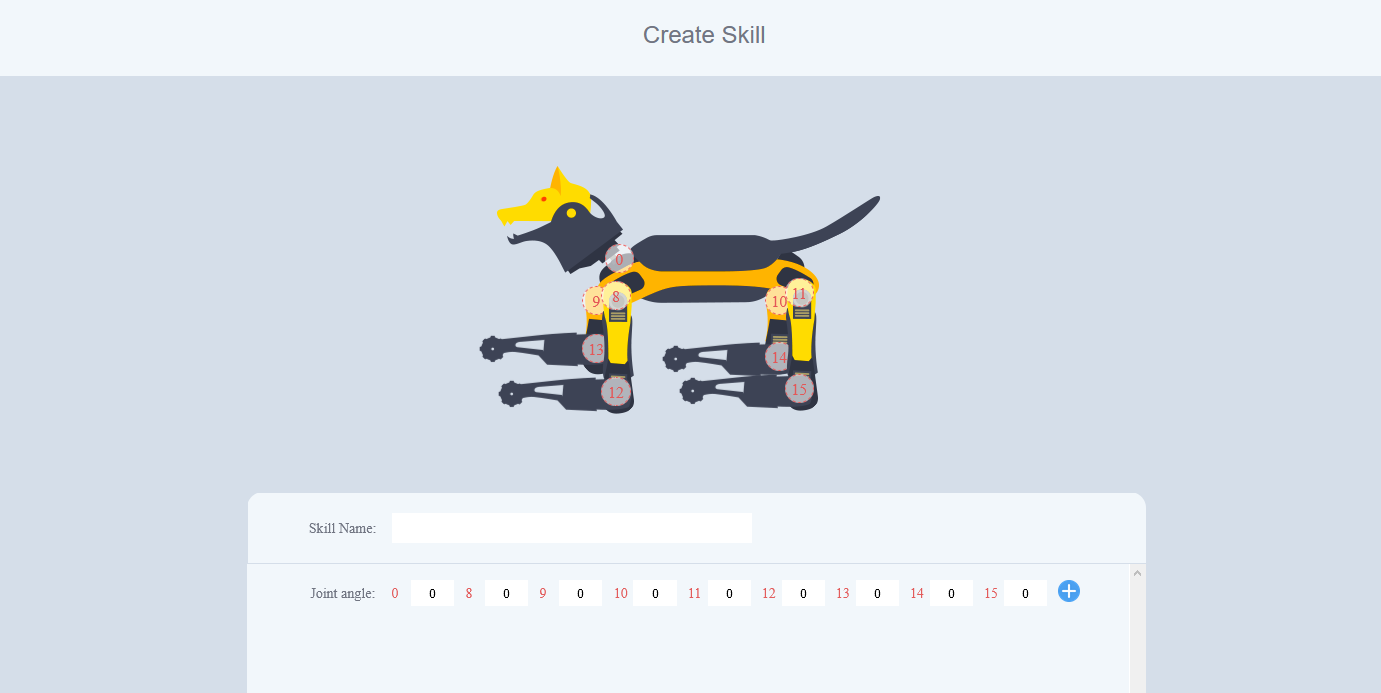
Part III Solving a problem
Task 1: Move joints manually with blocks
We can control each joint individually, by using Servo ID and Head servo blocks 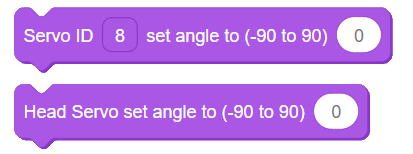
Let’s try setting head joint angle to a random number from -90 to 90 with the following blocks: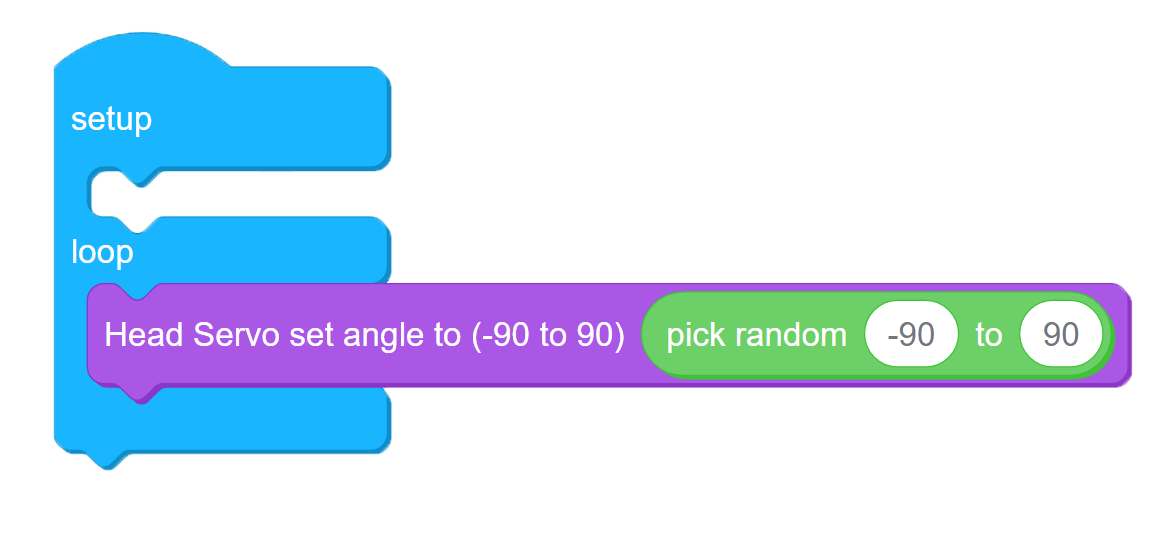
7-1
Task 2: Create a fixed pose
However creating complex movements block by block wound be terribly inefficient. Let’s try using Create Skill extension instead. Before you add extension, connect Bittle to your PC, then press on Connect button in Codecraft with Bittle as device.
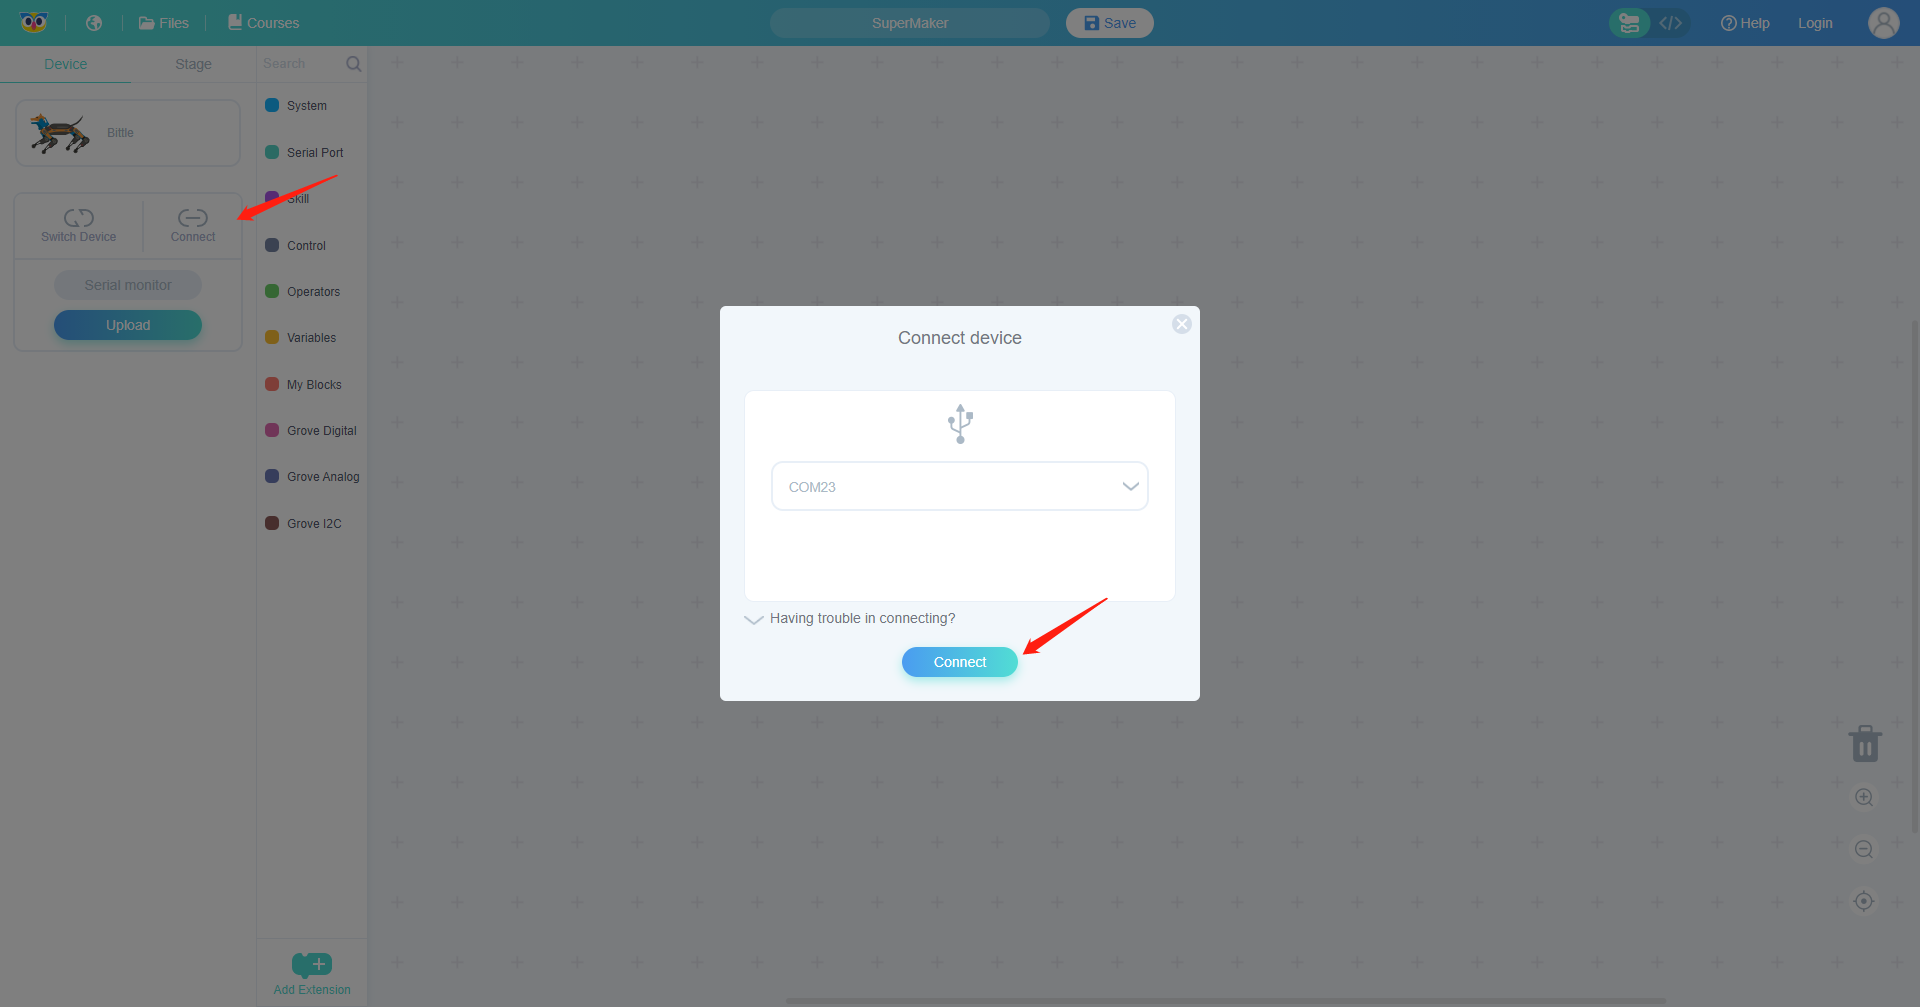
Choose the corresponding COM port and press Connect button. Then click on Add Extension button in the bottom of Category section and choose Create Skill extension.
Then press on Create Skill.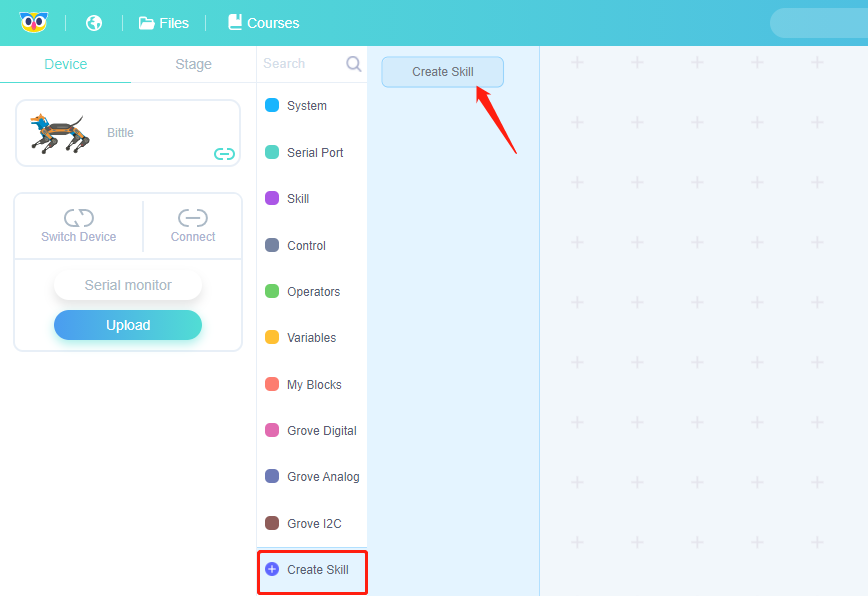
To create a fixed pose, you need to fill just one row with angles for that fixed pose. Enter the numbers for joint angles and watch Bittle rendering change on the screen. You can preview action by pressing Preview button.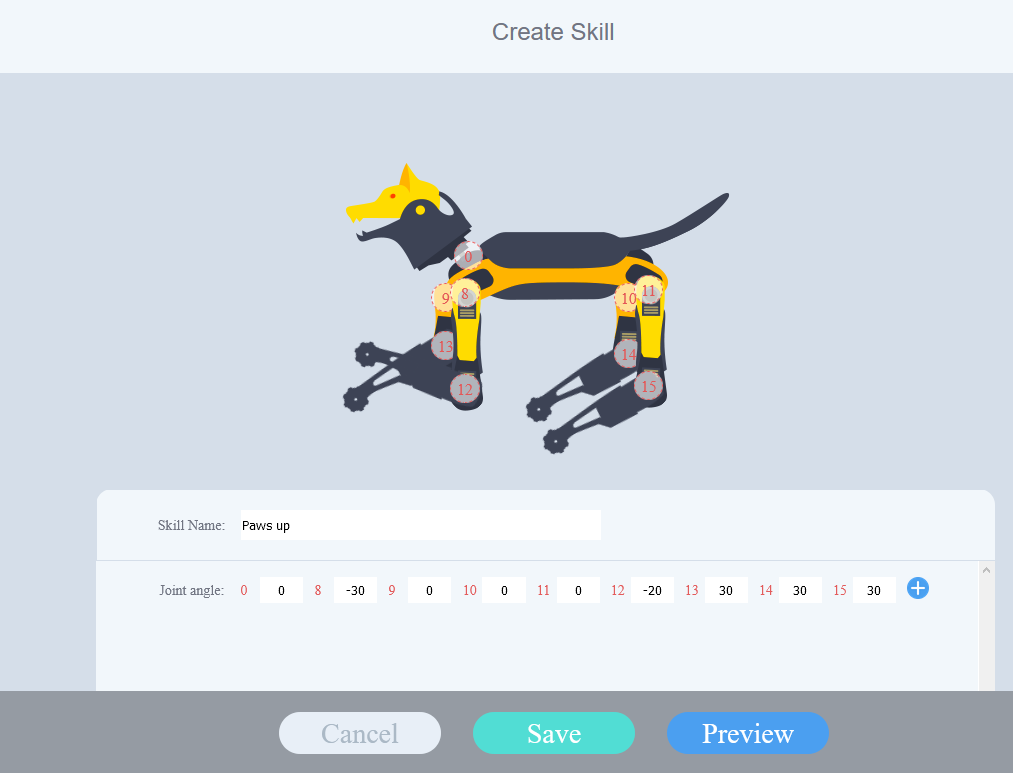
After you’re satisfied with the pose, press on Save button and use the appearing block in your code, for example as in the following screenshot:
7-2
This is what you should see after uploading the code: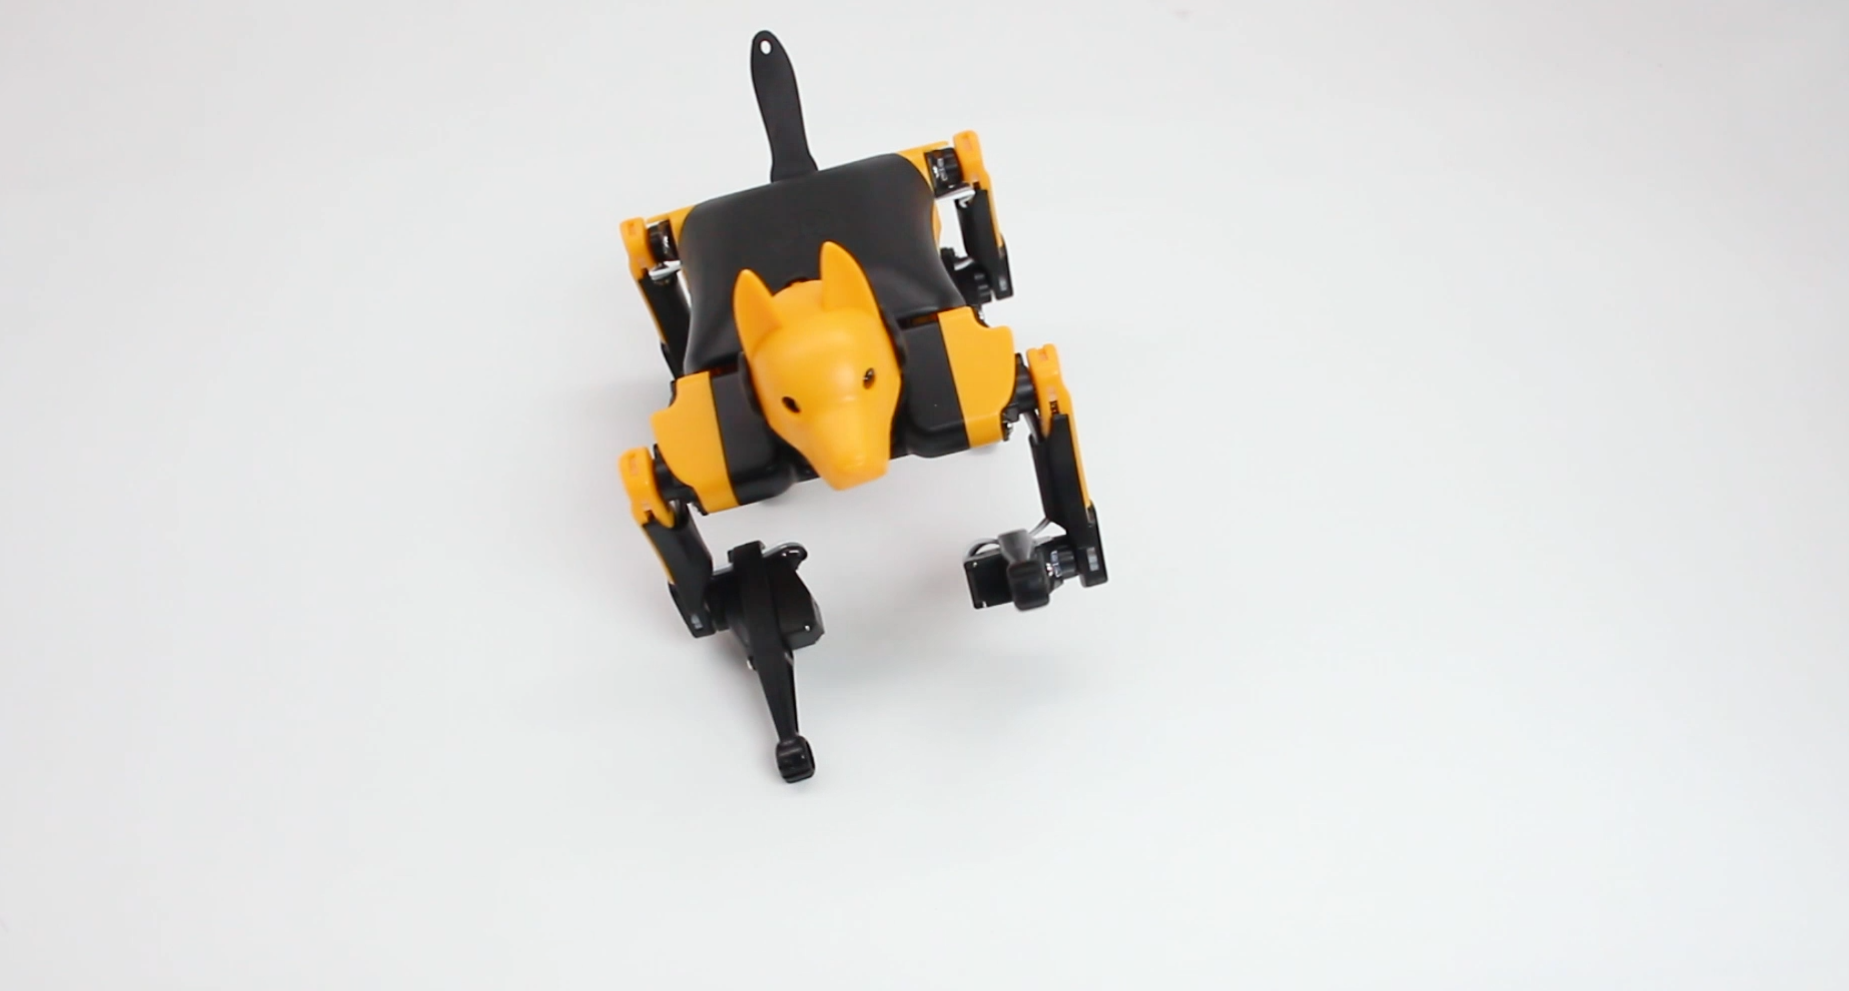
Task 3: Create a movement
To create a movement, you need to specify a series of actions, you can add frames to sequence by pressing + button in Create Skill interface. For example as in following picture:
When you’re using newly appeared block for movement, remember two things:
- add a delay block to avoid movement executing too fast
- add execute movement block
as in following example code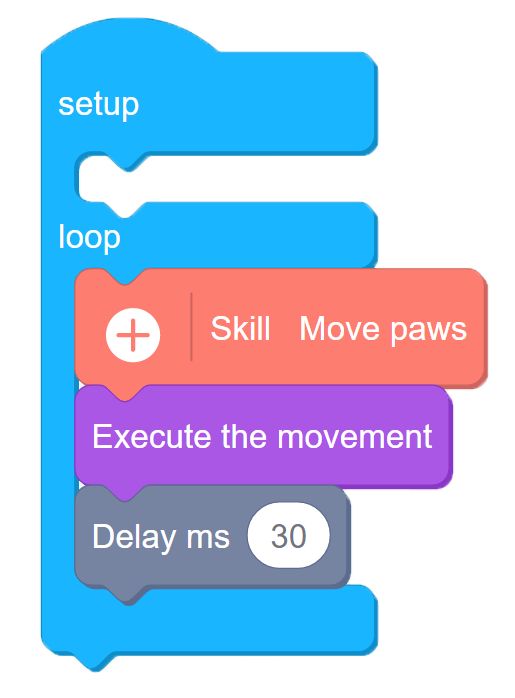
7-3
 Excellent! We taught new dog new tricks!
Part IV Expanding the knowledge
As an optional add-on you purchase Bittle Bluetooth dongle, that can be plugged in in place of USB-TTL converter to allow for wireless programming debugging and control. If you already have Bittle Bluetooth dongle and a computer with Bluetooth interface, plug in the dongle in place of USB-TTL converter and switch Bittle on. On your computer, switch on Bluetooth and search for devices. You’ll see a Bittle-* device, pair with it by entering 1234 as passcode. Then, in Codecraft you will see two ports available for program upload and connection. Choose the lower port number on Windows and Bittle port on Mac.
Your Bittle is now ready for wireless program upload!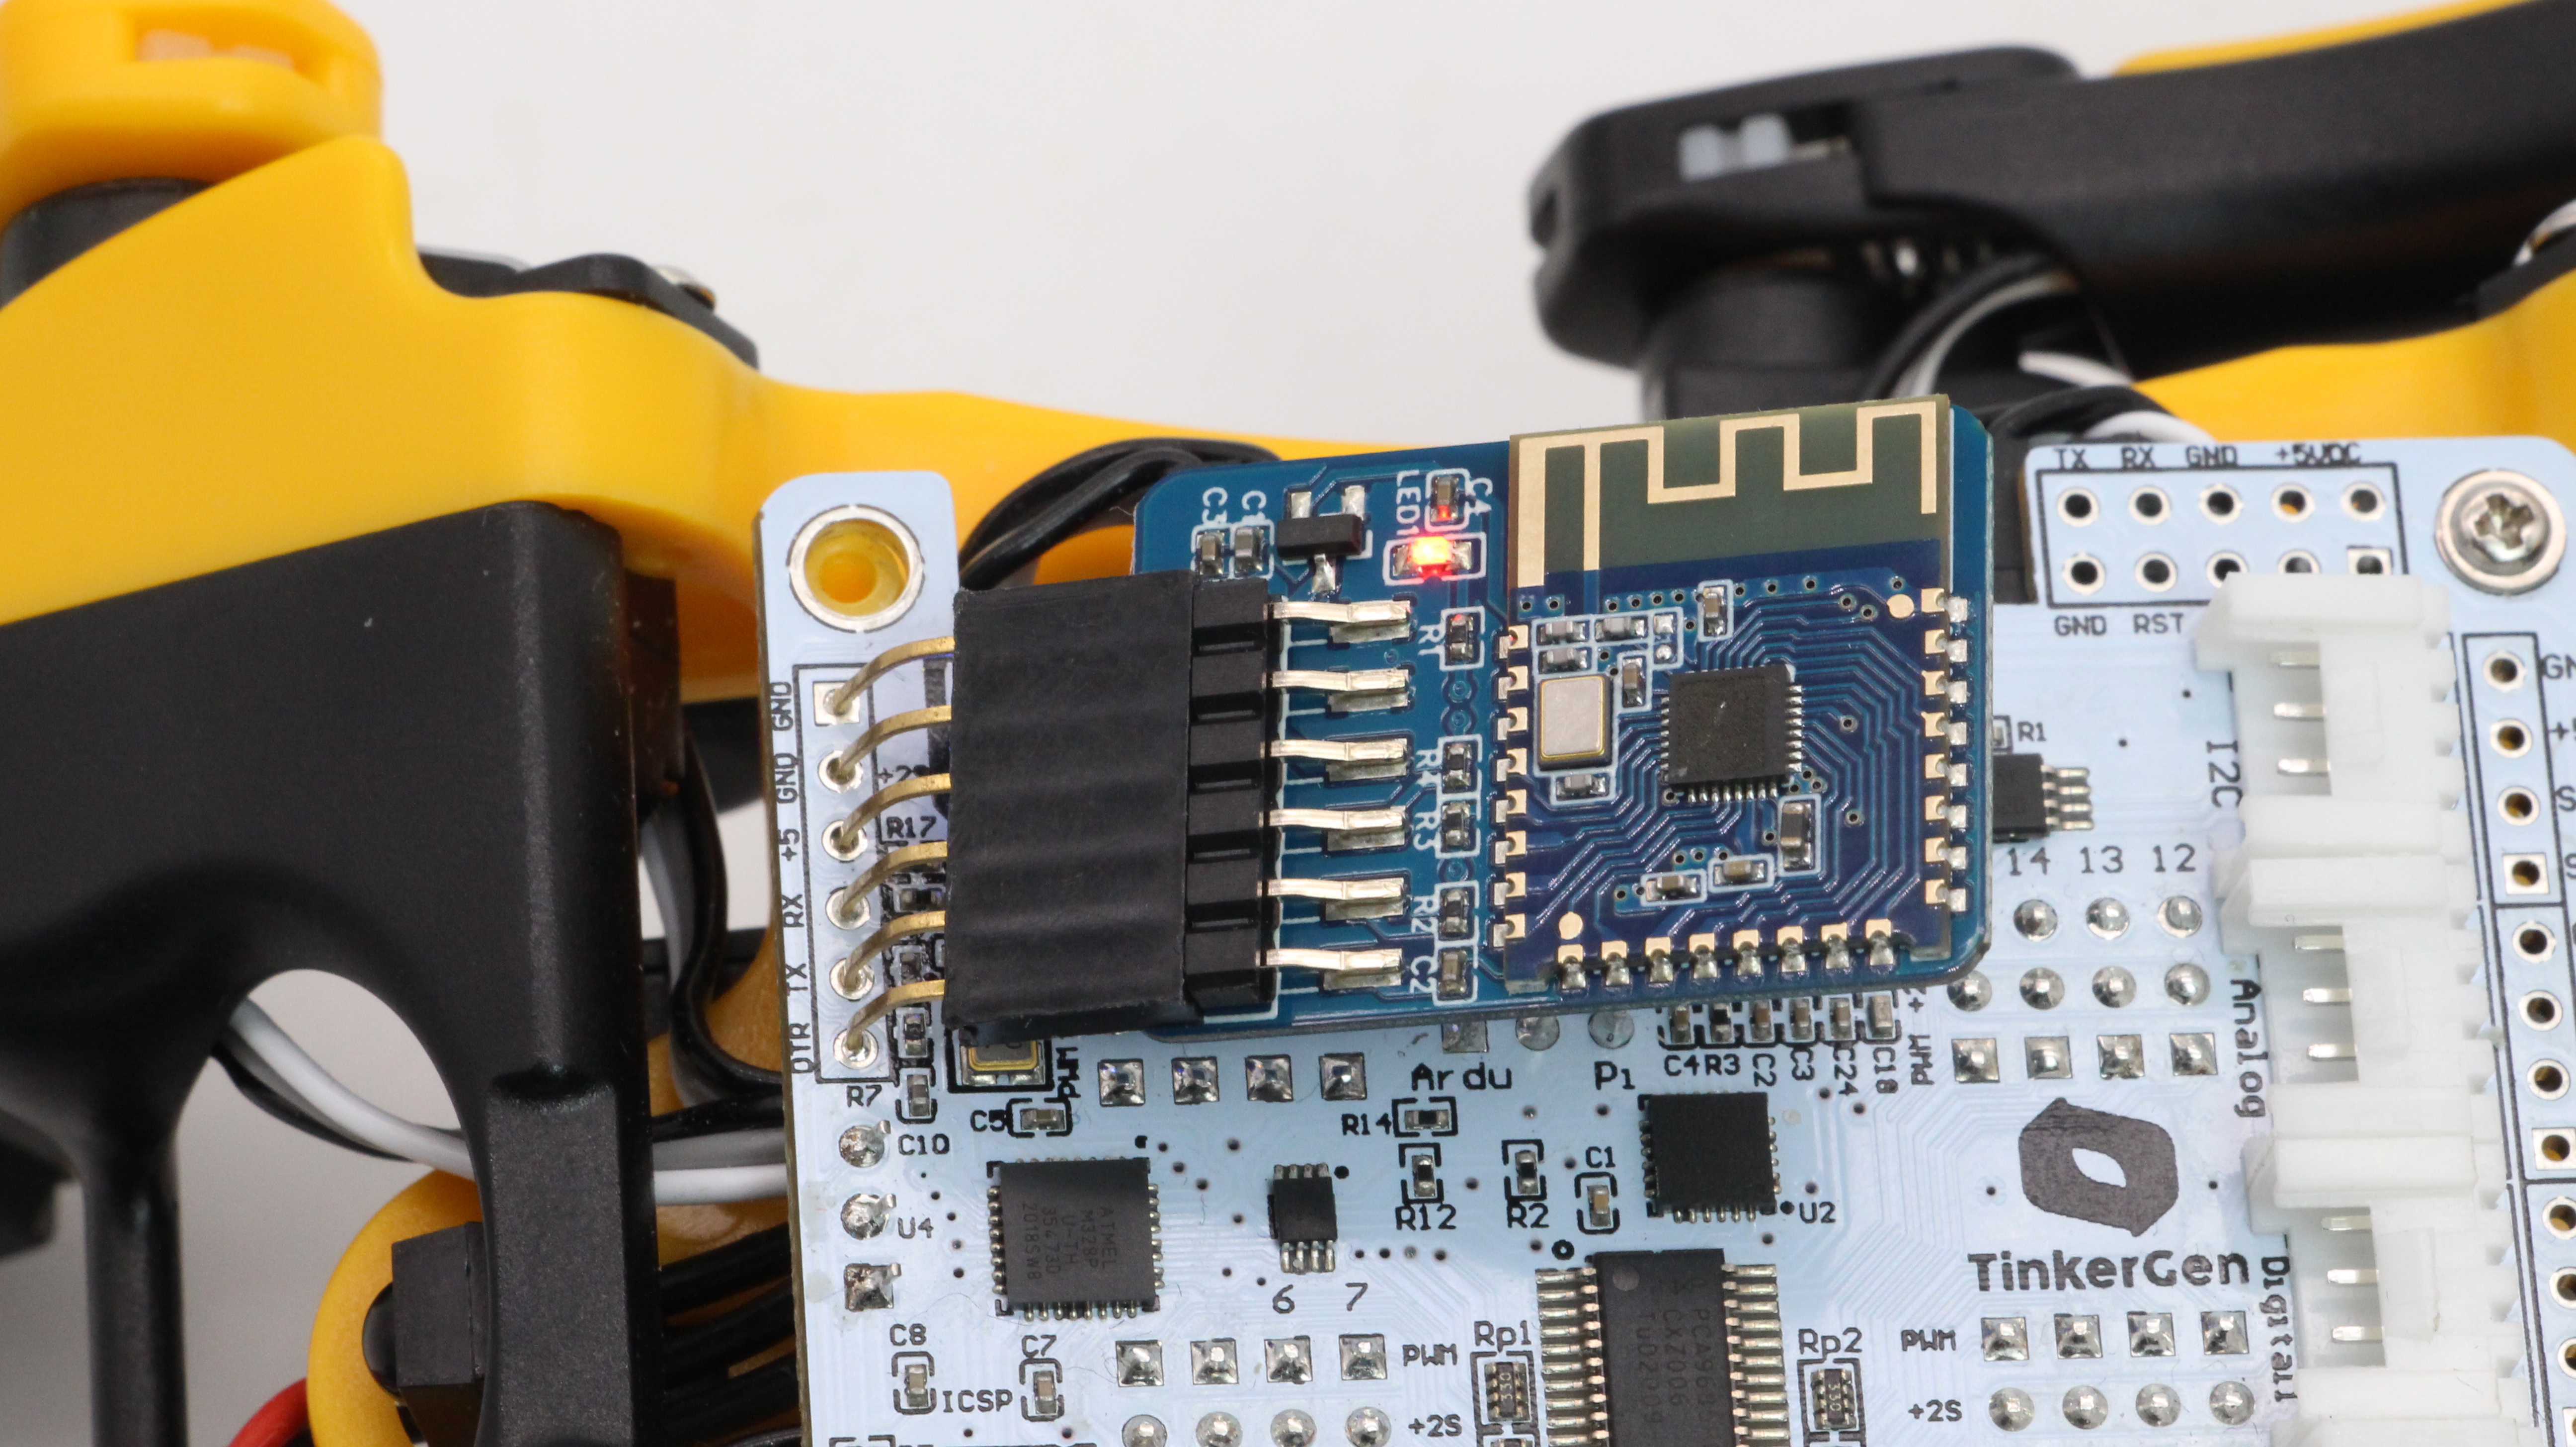
Note
It is still necessary to use wired connection for Calibration and Create Skill operations, since wired connection provides faster feedback and more stability.

若有收获,就点个赞吧
0 人点赞
