接下来我们开发主体功能. 通过文章内容的增删改查的实现,来帮助大家快速的掌握ant design pro的常规功能开发.
接口
文章列表功能
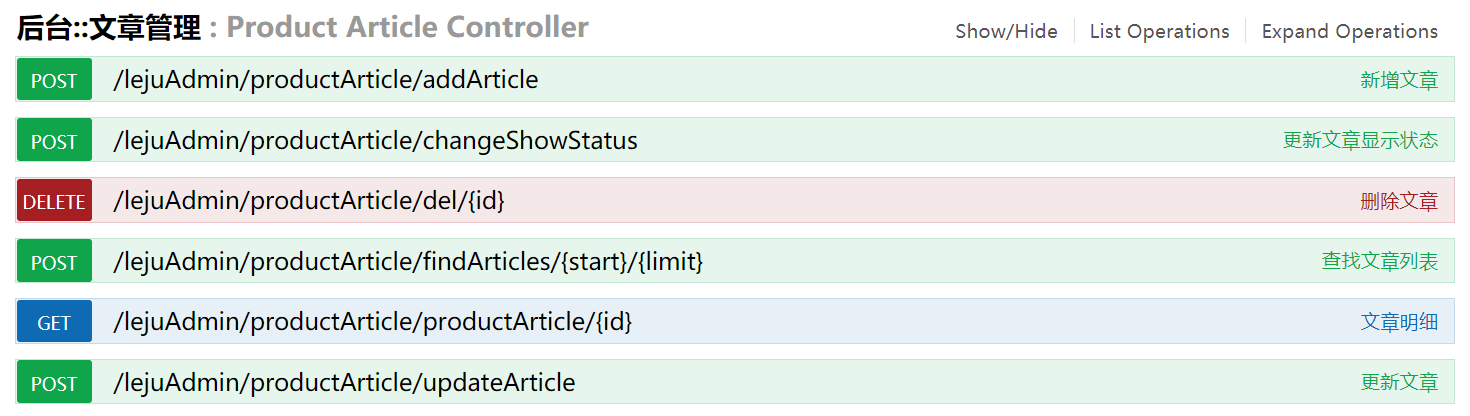
接口: /lejuAdmin/productArticle/findArticles/{start}/{limit}
功能说明: 这是一个典型的分页查询功能,另外还包含条件查询. 由于后台实现的需求,虽然是查询功能,但接口请求类型为post.
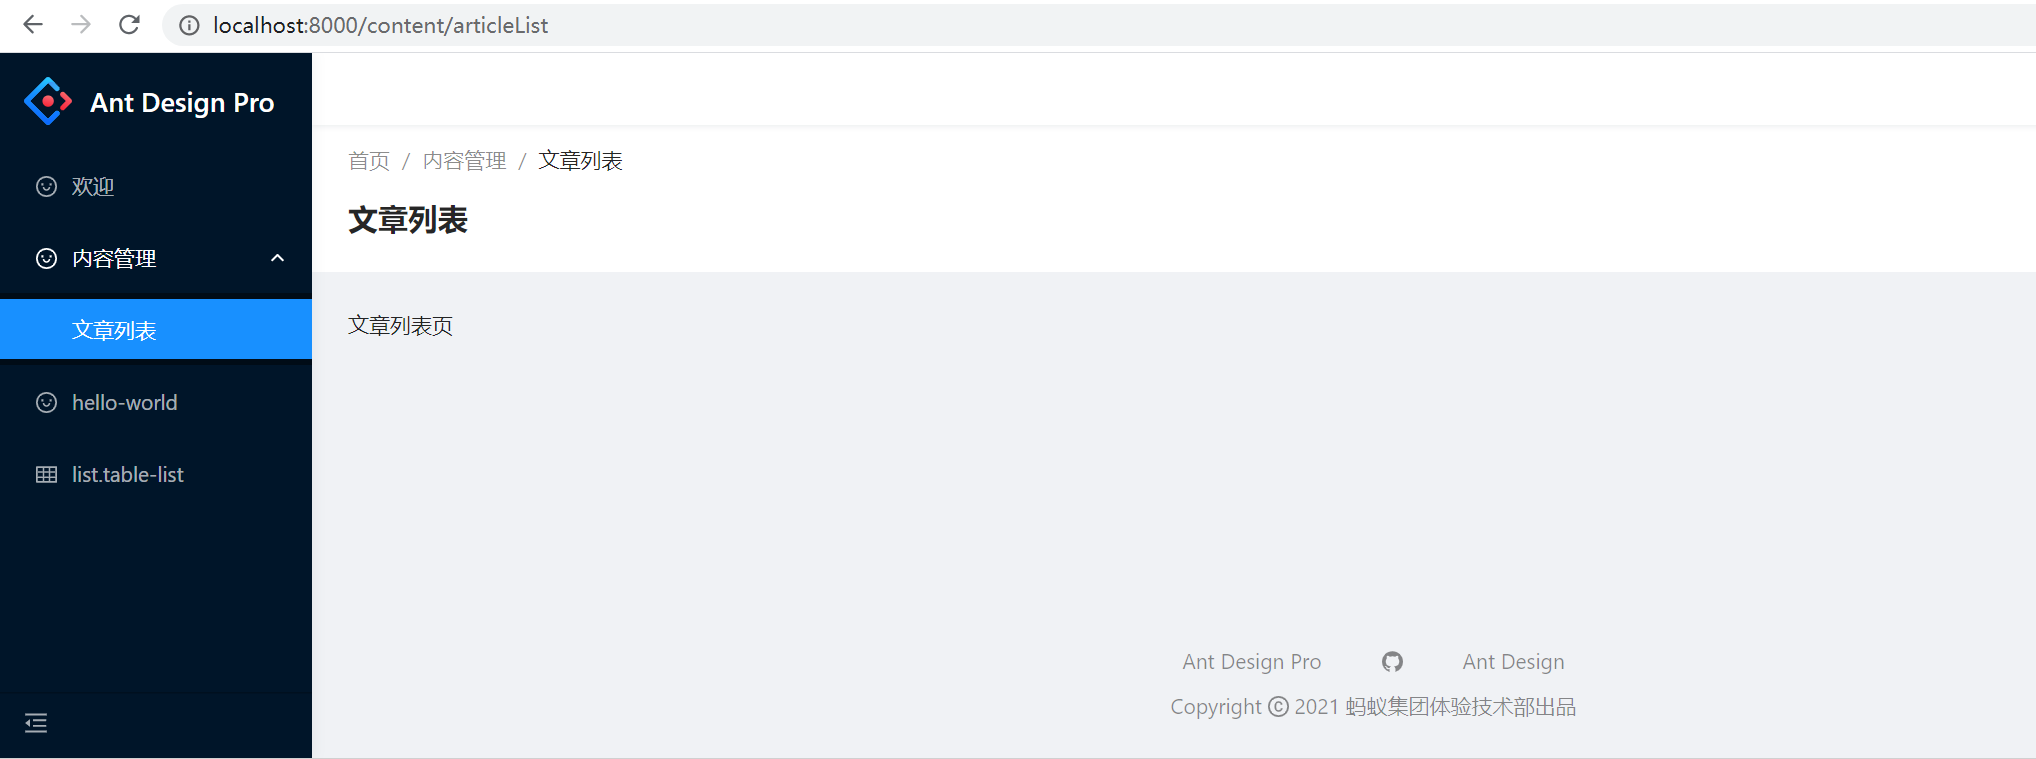
1. 创建页面:
文件: src\pages\content\Article\index.tsxPageContainer : 是antd pro的内容容器布局, 由 pro-layout 实现.
import React from 'react';// # https://procomponents.ant.design/components/page-containerimport {PageContainer} from '@ant-design/pro-layout';const ArticleList: React.FC = ()=>{return (<PageContainer>文章列表页</PageContainer>)}export default ArticleList;
2. 添加路由配置
文件: config\routes.ts
....{path: '/welcome',name: 'welcome',icon: 'smile',component: './Welcome',},// 在此添加 内容管理/文章管理路由//考虑后续还会追加 内容管理/图片管理 等功能{path: '/content',name: 'content',icon: 'smile',routes: [{path: '/content/articleList',name: 'articleList',icon: 'smile',component: './content/Article'}]},...
国际化说明: 此时后台可以访问但会报国际化错误, 这里我们用不到国际化,所以取消国际化配置. 
于是再次修改路由配置为:
...{path: '/welcome',name: '欢迎',icon: 'smile',component: './Welcome',},{path: '/content',name: '内容管理',icon: 'smile',routes: [{path: '/content/articleList',name: '文章列表',icon: 'smile',component: './content/Article'}]},...
3. 携带token
文件: utils\request.ts
// 假设umi-requset也有拦截器 可以把token的获取放到拦截器中request.interceptors.request.use((url, options) => {// 定义新的options 拦截原来的配置const useOptions = {...options};// 如果有token直接添加if(getToken()){useOptions.headers = {token: getToken() || ''}}return {url,options: { ...useOptions, interceptors: true },};});
4. 创建接口
文件: src\services\content\article.ts
import request from '@/utils/request';// 条件查询,可以根据title,author查询export type ArticleListSearchType = {start: number;limit: number;params?: {title?: string;author?: string;}}/*** 分页条件查询 文章列表* @param param0*/export async function articleList({start, limit, params}: ArticleListSearchType) {return request(`/lejuAdmin/productArticle/findArticles/${start}/${limit}`, {method: 'POST',data: params,});}
5. 创建model
文件: src\pages\content\Article\model.ts
import {articleList as articleListApi} from '@/services/content/article';import {message} from 'antd';import type {Effect,Reducer} from 'umi';// 文章类型 参照接口export type ArticleType = {id?: string;title: string;author: string;collectCount: number;content1?: string;content2?: string;coverImg?: string;createTime?: string;editorType?: number;isShow?: number;modifyTime?: string;summary?: string;viewCount?: number;zanCount?: number;}export type MType = {namespace: string;state: {articleList: ArticleType[];articleTotalCount: number;};effects: {findArticleList: Effect},reducers: {setArticleList: Reducer}}const M: MType = {namespace: 'article',state: {articleList: [],articleTotalCount: 0},effects: {*findArticleList({payload},{call,put}){// 解构返回结果,判断是否成功const {success,data,message: errMsg} = yield call(articleListApi,payload);if(success){yield put({type: 'setArticleList',payload: data})}else{// 失败提示错误message.error(errMsg);}}},reducers: {setArticleList(state, {payload}){const {total,rows} = payload;return {...state,articleTotalCount: total,articleList: rows}}}}export default M;
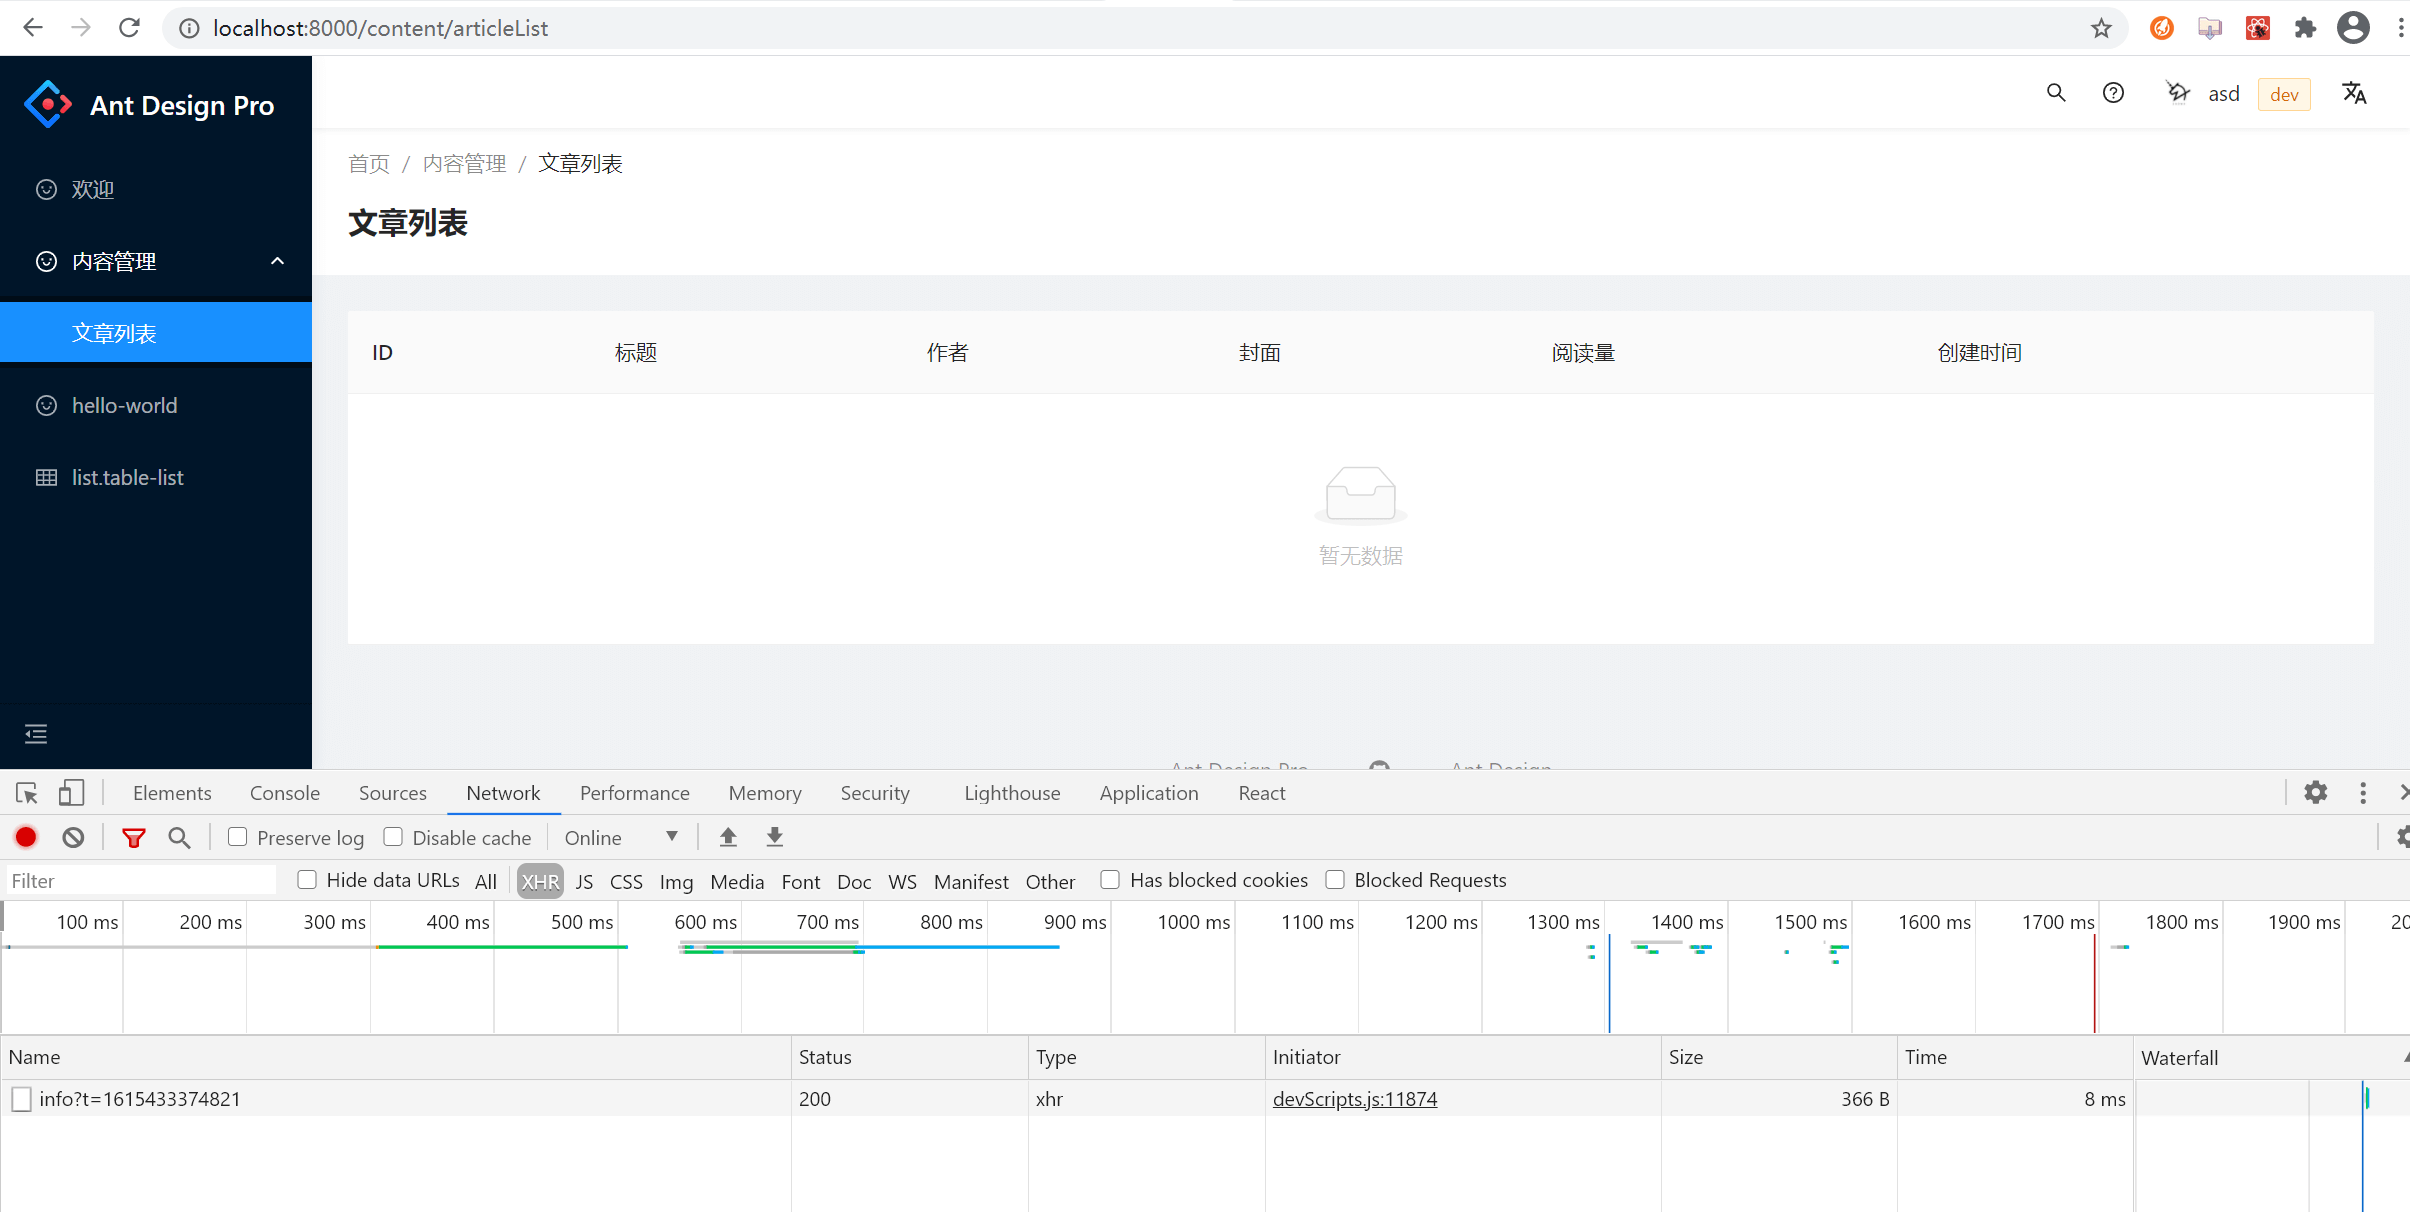
6. 页面添加表格
此时我们需要从 ant design 中查找table组件, 参照 基础表格 样式实现:
我们需要文章列表,所以需要关联model :
修改 src\pages\content\Article\index.tsx :
import React from 'react';// # https://procomponents.ant.design/components/page-containerimport {PageContainer} from '@ant-design/pro-layout';import type {ArticleType} from './model';import {Table} from 'antd';import {connect} from 'umi';import type {Dispatch} from 'umi';// 定义model命名空间const namespace = 'article';type StateType = {articleList: ArticleType[];dispatch: Dispatch}type PropsType = {articleList: ArticleType[];dispatch: Dispatch;}const colums = [{title: 'ID',dataIndex: 'id'},{title: '标题',dataIndex: 'title'},{title: '作者',dataIndex: 'author'},{title: '封面',render: ({coverImg}: ArticleType) => <img src={coverImg} alt="" />,},{title: '阅读量',dataIndex: 'viewCount'},{title: '创建时间',dataIndex: 'createTime'}]const ArticleList: React.FC<PropsType> = props =>{const {articleList, dispatch} = props;return (<PageContainer>{/* rowKey 表格行 key 的取值,可以是字符串或一个函数 标识唯一性,这里我们用每一条数据的id作为key */}<Table rowKey="id" columns={colums} dataSource={articleList}/></PageContainer>)}/*** 提取需要的属性* @param param0*/const mapStateToProps = (state: StateType) =>{return {articleList: state[namespace].articleList,dispatch: state.dispatch}}// 自定义的state不符合,但是可以合并connect.d.ts中的connectStatetype StateType = {[namespace]: MStateType;}&ConnectState;const mapStateToProps = (state: StateType)=>({articleList: state[namespace].articleList,totalCount: state[namespace].totalCount})export default connect(mapStateToProps)(ArticleList);
7. useEffect useState
useEffect :
在vue项目中,组件初始化的外部数据请求操作, 我们会在 create() 或者 mounted() 中处理,. 在react中也存在这么一个生命周期函数: componentDidMount , 但是 [useEffect()](https://react.docschina.org/docs/hooks-effect.html) 可以更加方便的处理这种业务逻辑.
提示: 如果你熟悉 React class 的生命周期函数,你可以把
useEffectHook 看做componentDidMount,componentDidUpdate和componentWillUnmount这三个函数的组合。注意: 如果你要使用此优化方式,请确保数组中包含了所有外部作用域中会随时间变化并且在 effect 中使用的变量,否则你的代码会引用到先前渲染中的旧变量。参阅文档,了解更多关于如何处理函数以及数组频繁变化时的措施内容。 如果想执行只运行一次的 effect(仅在组件挂载和卸载时执行),可以传递一个空数组(
[])作为第二个参数。这就告诉 React 你的 effect 不依赖于 props 或 state 中的任何值,所以它永远都不需要重复执行。这并不属于特殊情况 —— 它依然遵循依赖数组的工作方式。 如果你传入了一个空数组([]),effect 内部的 props 和 state 就会一直拥有其初始值。尽管传入[]作为第二个参数更接近大家更熟悉的componentDidMount和componentWillUnmount思维模式,但我们有更好的方式来避免过于频繁的重复调用 effect。除此之外,请记得 React 会等待浏览器完成画面渲染之后才会延迟调用useEffect,因此会使得额外操作很方便。
useState : useState 就是一个 Hook (等下我们会讲到这是什么意思)。通过在函数组件里调用它来给组件添加一些内部 state。React 会在重复渲染时保留这个 state。useState 会返回一对值:当前状态和一个让你更新它的函数,你可以在事件处理函数中或其他一些地方调用这个函数。它类似 class 组件的 this.setState,但是它不会把新的 state 和旧的 state 进行合并。
简单来说: useState 可以创建一个需要被页面及时响应的变量(跟vue在data中声明一个响应式对象一样).
我们需要在页面加载完毕后,发送请求,所以请求的方法应该写在 useEffect中, 而携带的参数是变化, 所以用 useState来创建:
import React,{useEffect,useState} from 'react';const ArticleList: React.FC<PropsType> = props =>{const {articleList, dispatch} = props;const [params,setParams] = useState({});useEffect(()=>{dispatch({type: `${namespace}/findArticleList`,payload: {start: 1,limit: 5,params}})},[])return (<PageContainer>{/* rowKey 表格行 key 的取值,可以是字符串或一个函数 标识唯一性,这里我们用每一条数据的id作为key */}<Table rowKey="id" columns={colums} dataSource={articleList}/></PageContainer>)}
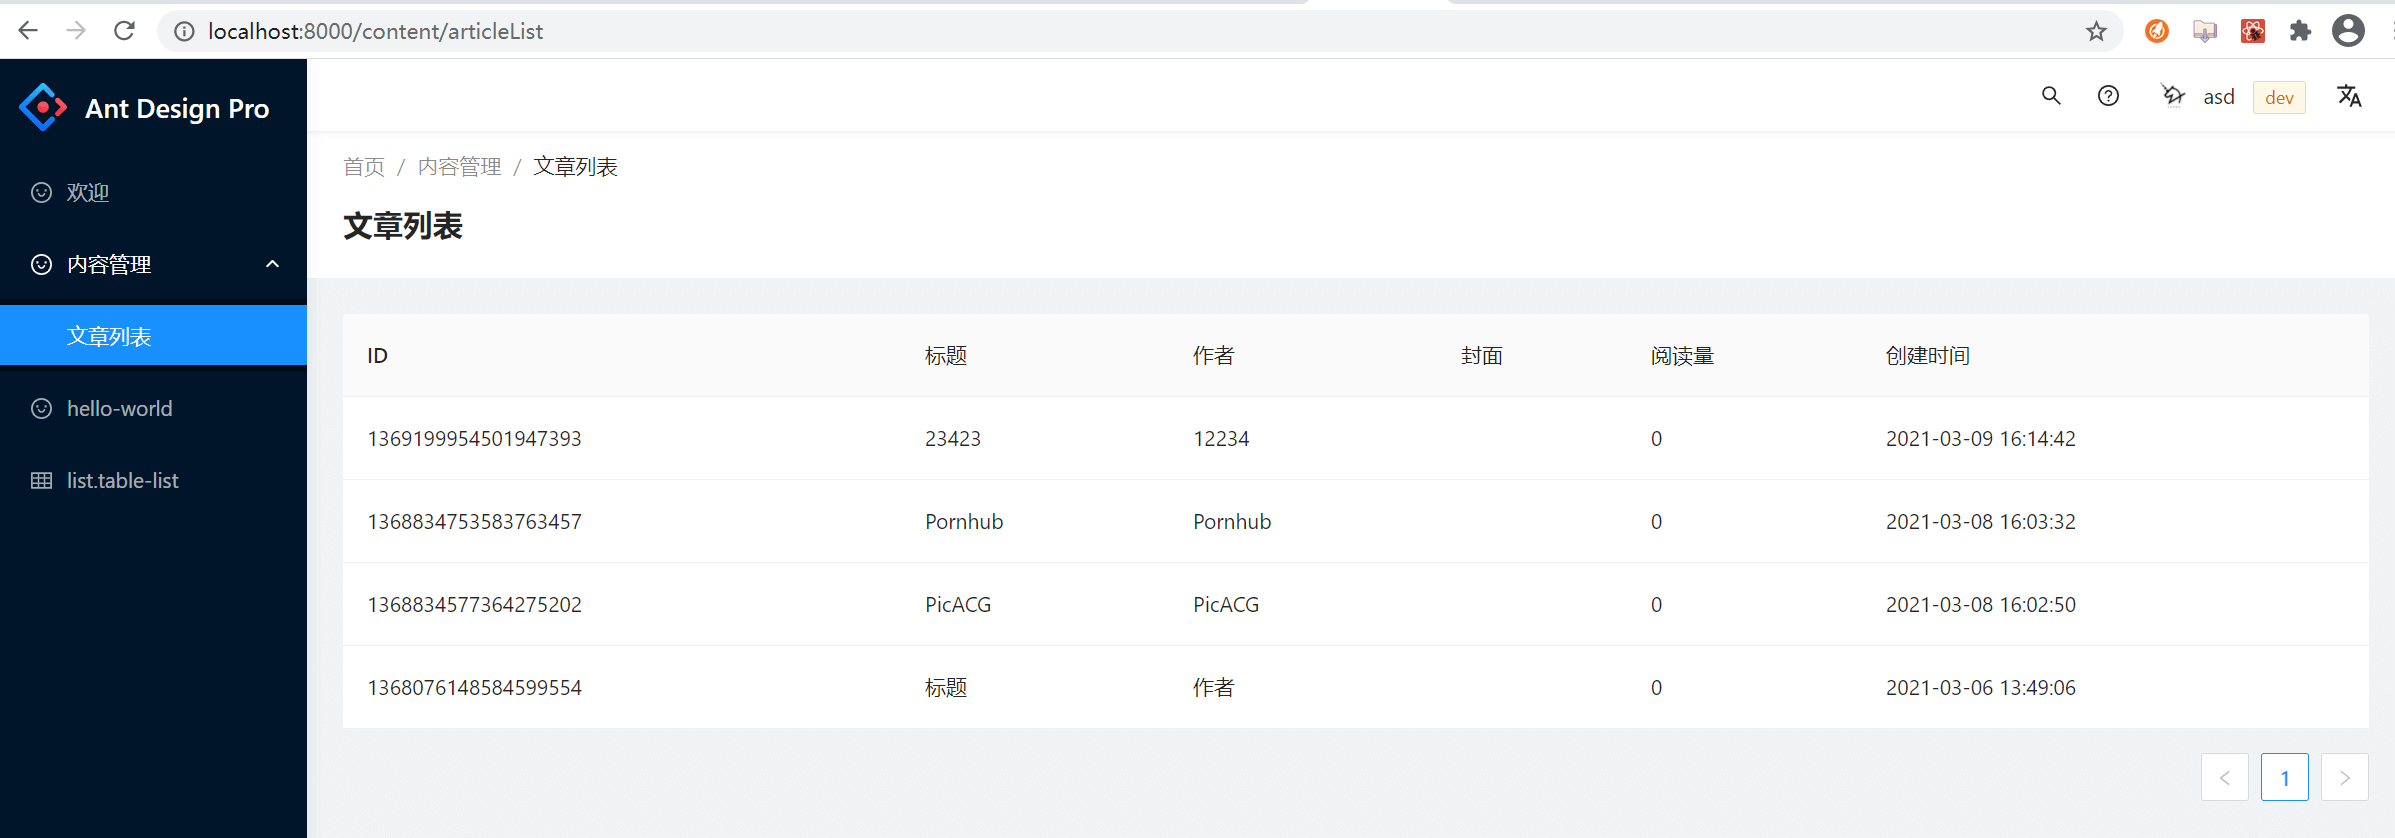
8. 完善分页功能
import React,{useEffect,useState} from 'react';// # https://procomponents.ant.design/components/page-containerimport {PageContainer} from '@ant-design/pro-layout';import type {ArticleType} from './model';import {Table} from 'antd';import {connect} from 'umi';import type {Dispatch} from 'umi';import type {ConnectState} from '@/models/connect.d';// 定义model命名空间const namespace = 'article';type StateType = {articleList: ArticleType[];totalCount: number;dispatch: Dispatch;loading: any;}type PropsType = {articleList: ArticleType[];articleTotalCount: number;dispatch: Dispatch;loading: boolean;}const colums = [{title: 'ID',dataIndex: 'id'},{title: '标题',dataIndex: 'title'},{title: '作者',dataIndex: 'author'},{title: '封面',render: (coverImg: string)=>(<img src={coverImg} alt=""/>)},{title: '阅读量',dataIndex: 'viewCount'},{title: '创建时间',dataIndex: 'createTime'}]const ArticleList: React.FC<PropsType> = props =>{const {articleList, totalCount, dispatch ,loading} = props;// 条件查询,可以根据title,author查询const [params] = useState({});// 分页起始页肯定是 1const [current,setCurrent] = useState(1);// 数据量不大 为了体现分页 暂时控制每页2条数据const [pageSize,setPageSize] = useState(2);// 监听current和pageSize的变化重新发送请求useEffect(()=>{dispatch({type: `${namespace}/findArticleList`,payload: {start: current,limit: pageSize,params}})},[current,pageSize])return (<PageContainer>{/* rowKey 表格行 key 的取值,可以是字符串或一个函数 标识唯一性,这里我们用每一条数据的id作为key */}<Table loading={loading} rowKey="id" columns={colums} dataSource={articleList}pagination = {{showQuickJumper: true,current,pageSize,total: totalCount,showSizeChanger:true,onShowSizeChange(curr,size){// console.log(v)setPageSize(size);},onChange(v){setCurrent(v);}}}/></PageContainer>)}// 自定义的state不符合,但是可以合并connect.d.ts中的connectStatetype StateType = {[namespace]: MStateType;}&ConnectState;const mapStateToProps = (state: StateType)=>({articleList: state[namespace].articleList,totalCount: state[namespace].totalCount,loading: state.loading.effects['article/findArticleList'] as boolean})export default connect(mapStateToProps)(ArticleList);export default connect(mapStateToProps)(ArticleList);

若有收获,就点个赞吧
0 人点赞
