为什么使用Spring
先看一个示例
有一个Address类
package com.lff;public class Address {private String city;public String getCity() {return city;}public void setCity(String city) {this.city = city;}public Address(String city) {this.city = city;}public Address(){}}
有一个Person类
package com.lff;public class Person {private Address address = Factory.getAddress();public void setAddress(Address address) {this.address = address;}}
上面Person类强依赖了Address类
private Address address = new Address("BeiJing");
如果上面的地址发生变化,从BeiJing变为TianJing,就需要改这部分的代码。
private Address address = new Address("TianJing");
这就产生了耦合。
耦合:我依赖你,你不见了,对我影响很大,我就需要改代码。
我们可以进一步优化,使用工厂设计模式
新建工厂类
package com.lff;public class Factory {public static Address getAddress(){return new Address("TianJing");}}
Person类使用工厂获取相应的Address实例。
private Address address = Factory.getAddress();
工厂设计模式降低耦合性
只依赖工厂,一般工厂不经常变动。工厂生产的产品可以随时改变。以后想变动产品(这里指Address实例),统一改工厂就可以了
但这样还是有耦合性,如果想换工厂生产的产品,还是要改代码,还是有耦合性。
更进一步
使用配置文件解决上面的问题。把所有的类放在配置文件里面,利用反射技术动态生成类以及对象。如果以后换工厂里面的产品,只需修改配置就可以了。这样在最大限度的办到解耦的目的(不需要修改代码,只需要修改配置就可以)。
新建配置文件factory.properties
address=com.lff.Addresscity="TianJing"
修改工厂类
package com.lff;import java.io.InputStream;import java.util.Properties;public class Factory {private static Properties properties;static {//加载配置文件try (InputStream is = Factory.class.getClassLoader().getResourceAsStream("factory.properties")) {properties = new Properties();properties.load(is);} catch (Exception e) {e.printStackTrace();}}//根据配置文件里面的内容修动态生成Address的实例public static Address getAddress(){try {String city = properties.getProperty("city");// 类名String clsName = properties.getProperty("address");Class cls = Class.forName(clsName);// 实例化对象Address address = (Address) cls.newInstance();address.setCity(city);System.out.println(city);return address;} catch (Exception e) {e.printStackTrace();;}return null;}}
外界使用
public class Main {public static void main(String[] args) throws BeansException {Person person = new Person();System.out.println(person);}}
这样外界想改变Person类的address只需修改配置文件就可以了,代码一点都不用动。这样就把耦合降到最低了。
上面是我们自己创建的工厂,Spring内部就提供了一个功能更加强大的工厂。我们可以使用Spring进行改造
使用方式
maven依赖
<dependency><groupId>org.springframework</groupId><artifactId>spring-context</artifactId><version>5.2.8.RELEASE</version></dependency>
类似于MyBatis,Spring也很容易集成日子框架:比如logback,只需添加依赖即可
<dependency><groupId>ch.qos.logback</groupId><artifactId>logback-classic</artifactId><version>1.2.3</version></dependency>
新建一个核心配置文件applicationContext.xml,为什么要这样写,以后就明白了,先看一下效果。
<?xml version="1.0" encoding="UTF-8"?><beans xmlns="http://www.springframework.org/schema/beans"xmlns:xsi="http://www.w3.org/2001/XMLSchema-instance"xsi:schemaLocation="http://www.springframework.org/schema/beans http://www.springframework.org/schema/beans/spring-beans.xsd"><bean id="address" class="com.lff.Address"><constructor-arg value="fff"/><property name="city" value="BeiJing"/></bean><bean id="person" class="com.lff.Person"><property name="address" ref="address" /></bean></beans>
对上面的Person类进行改造
package com.lff;public class Person {private Address address; //注意:这里并没有赋值public void setAddress(Address address) {this.address = address;}}
外界使用
import com.lff.Person;import org.springframework.beans.BeansException;import org.springframework.context.ApplicationContext;import org.springframework.context.support.ClassPathXmlApplicationContext;public class Main {public static void main(String[] args) throws BeansException {ApplicationContext context = new ClassPathXmlApplicationContext("applicationContext.xml");Person person = (Person) context.getBean("person");System.out.println(person);}}
这样就创建了一个person对象,并且person的address属性已经有值了。
IoC容器
在没有Spring的时候,创建Person以及Address类的实例是我们手动创建的。而在使用Spring后创建Person以及Address类的实例交给Spring来管理了,spring决定在什么时候创建以及怎么创建,把这个控制权都交给了Spring进行管理。在Spring核心配置文件里面的所有Bean都放在一个容器里面,这个容器叫IoC容器。
这篇文章比较通俗详细介绍了控制反转的内容
依赖注入(Dependency Injection)
可以理解设置实例对象的属性。比如Person类有个属性address。我需要给address属性赋值,赋值的过程就叫注入。
比如我们通过下面的配置
<bean id="person" class="com.lff.Person"><property name="address" ref="address" /></bean>
调用Person类address属性的setter方法
public void setAddress(Address address) {this.address = address;}
把配置文件的property引用的实例注入到上面的setAddress方法里面,这样属性address就有值了。这种注入方式我们称为Setter属性方式注入,还有一种就是constructor构造方法的方式注入(这种我们后面会讲到)。
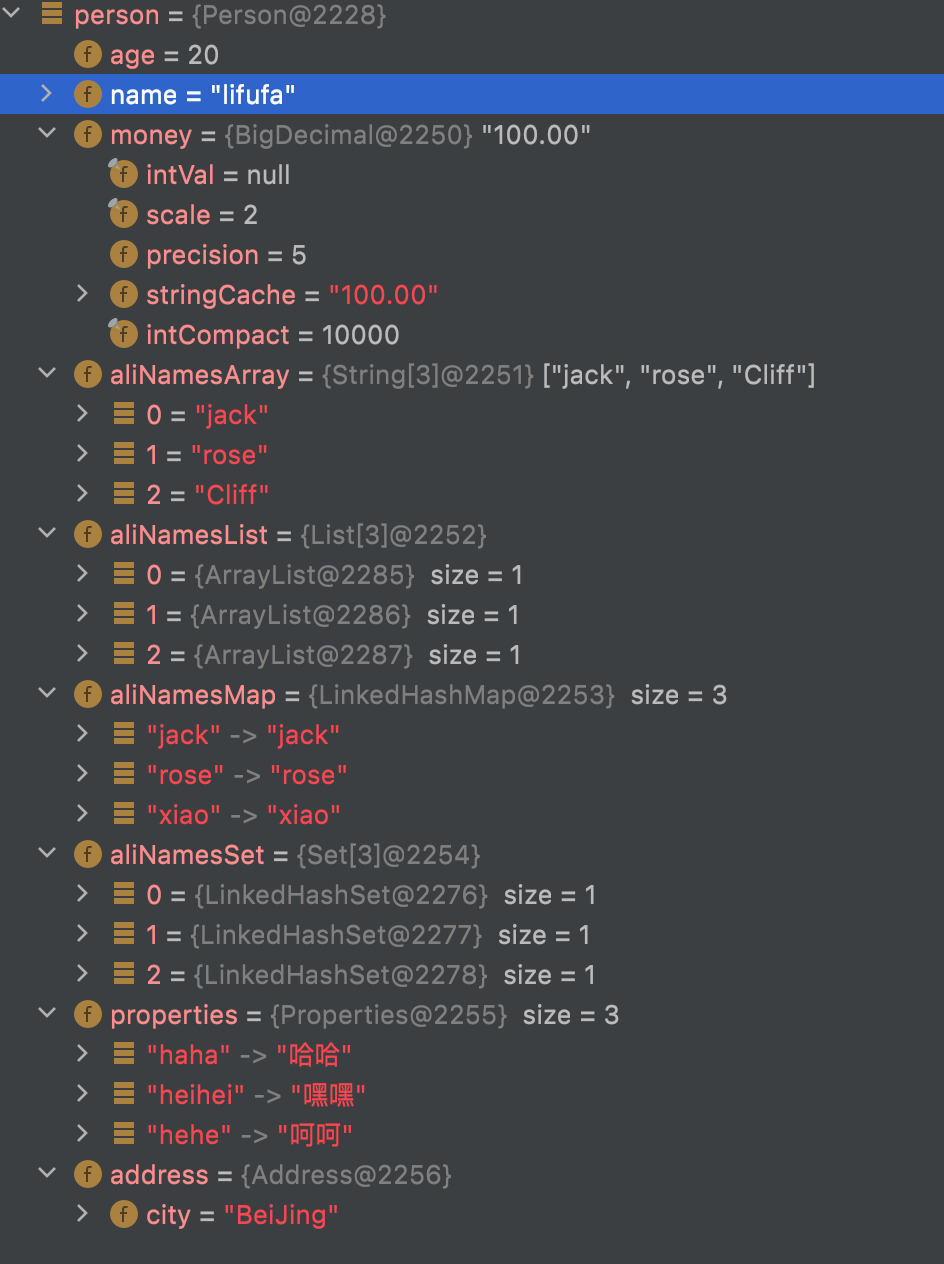
我们改造Person类,对不同类型的属性进行注入
package com.lff;import java.math.BigDecimal;import java.util.List;import java.util.Map;import java.util.Properties;import java.util.Set;public class Person {//注入基本类型private int age;private String name;private BigDecimal money;//注入集合类型(数组、Map、List、Set、Properties)private String[] aliNamesArray;private List[] aliNamesList;private Map<String,String> aliNamesMap;private Set[] aliNamesSet;private Properties properties;//注入Bean自定义类型private Address address;public int getAge() {return age;}public void setAge(int age) {this.age = age;}public String getName() {return name;}public void setName(String name) {this.name = name;}public BigDecimal getMoney() {return money;}public void setMoney(BigDecimal money) {this.money = money;}public String[] getAliNamesArray() {return aliNamesArray;}public void setAliNamesArray(String[] aliNamesArray) {this.aliNamesArray = aliNamesArray;}public List[] getAliNamesList() {return aliNamesList;}public void setAliNamesList(List[] aliNamesList) {this.aliNamesList = aliNamesList;}public Map<String, String> getAliNamesMap() {return aliNamesMap;}public void setAliNamesMap(Map<String, String> aliNamesMap) {this.aliNamesMap = aliNamesMap;}public Set[] getAliNamesSet() {return aliNamesSet;}public void setAliNamesSet(Set[] aliNamesSet) {this.aliNamesSet = aliNamesSet;}public Properties getProperties() {return properties;}public void setProperties(Properties properties) {this.properties = properties;}public Address getAddress() {return address;}public void setAddress(Address address) {this.address = address;}}
核心配置文件如下
<?xml version="1.0" encoding="UTF-8"?><beans xmlns="http://www.springframework.org/schema/beans"xmlns:xsi="http://www.w3.org/2001/XMLSchema-instance"xsi:schemaLocation="http://www.springframework.org/schema/beans http://www.springframework.org/schema/beans/spring-beans.xsd"><bean id="address" class="com.lff.Address"><property name="city" value="BeiJing"/></bean><bean id="person" class="com.lff.Person"><!-- 注入Bean--><property name="address" ref="address" /><!-- 注入基本类型--><property name="name" value="lifufa" /><property name="money" value="100.00" /><property name="age" value="20" /><!-- 注入集合类型--><property name="aliNamesArray" ><array><value>jack</value><value>rose</value><value>Cliff</value></array></property><property name="aliNamesList"><list><value>jack</value><value>rose</value><value>Cliff</value></list></property><property name="aliNamesMap"><map><entry key="jack" value="jack" /><entry key="rose" value="rose" /><entry key="xiao" value="xiao" /></map></property><property name="properties"><props><prop key="haha">哈哈</prop><prop key="hehe">呵呵</prop><prop key="heihei">嘿嘿</prop></props></property><property name="aliNamesSet"><set><value>jack</value><value>rose</value><value>cliff</value></set></property></bean></beans>
外界使用
import com.lff.Person;import org.springframework.beans.BeansException;import org.springframework.context.ApplicationContext;import org.springframework.context.support.ClassPathXmlApplicationContext;public class Main {public static void main(String[] args) throws BeansException {ApplicationContext context = new ClassPathXmlApplicationContext("applicationContext.xml");Person person = (Person) context.getBean("person");System.out.println(person);}}
还有的人是这样写的,在xml根标签加p标签xmlns:p=”http://www.springframework.org/schema/p”
<?xml version="1.0" encoding="UTF-8"?><beans xmlns="http://www.springframework.org/schema/beans"xmlns:xsi="http://www.w3.org/2001/XMLSchema-instance"xmlns:p="http://www.springframework.org/schema/p"xsi:schemaLocation="http://www.springframework.org/schema/beans http://www.springframework.org/schema/beans/spring-beans.xsd"><bean id="address" class="com.lff.Address" p:city="Beijing" /><bean id="person" class="com.lff.Person"p:name="lifufa" p:age="20" p:money="100.00"p:address-ref="address" /></beans>
写法上会简单一点
上面使用的是Setter属性的方式注入,如果想使用构造函数的方式注入核心配置文件应该怎么写呢?
比如下面的Person类
package com.lff;public class Person {//注入基本类型private int age;private String name;public int getAge() {return age;}public void setAge(int age) {this.age = age;}public String getName() {return name;}public void setName(String name) {this.name = name;}public Person(int age, String name) {this.age = age;this.name = name;}}
使用XML的方式
<bean id="person" class="com.lff.Person"><constructor-arg index="0" value="20" /><constructor-arg index="1" value="lifufa" /></bean>
使用index标识传入构造函数哪个位置。
相对复杂的方式创建对象
在很多情况下,创建对象并不是简单的new一下,而是通过比较复杂的方式创建或者通过别人写好的方式去调用获取一个对象。
使用工厂方法进行依赖注入
静态工厂
比如创建Person对象,我们使用以下工厂创建
package com.lff;public class PersonFactory {//类方法,使用类来调用public static Person getPerson(){return new Person(20,"hahaha");}//实例方法,通过PersonFactory的实例来调用public Person getPersonInstance(){return new Person(18,"哈哈");}}
配置文件,我们添加factory-method工厂方法
<bean id="person" class="com.lff.PersonFactory" factory-method="getPerson"/>
外界使用person这个id的时候,就会调用PersonFactory类的getPerson方法
外界使用
public class Main {public static void main(String[] args) throws BeansException {ApplicationContext context = new ClassPathXmlApplicationContext("applicationContext.xml");Person person = (Person) context.getBean("person");System.out.println(person);}}
实例工厂
<?xml version="1.0" encoding="UTF-8"?><beans xmlns="http://www.springframework.org/schema/beans"xmlns:xsi="http://www.w3.org/2001/XMLSchema-instance"xsi:schemaLocation="http://www.springframework.org/schema/beans http://www.springframework.org/schema/beans/spring-beans.xsd"><!-- <bean id="person" class="com.lff.PersonFactory" factory-method="getPerson"/>--><!-- 这种情况会创建PersonFactory的实例--><bean id="personFactory" class="com.lff.PersonFactory" /><!-- 通过factory-bean拿到PersonFactory的实例,调用factory-method的方法--><bean id="person" factory-bean="personFactory" factory-method="getPersonInstance" /></beans>
通过FactoryBean接口创建对象
实现FactoryBean接口,实现接口的时候需要一个泛型,泛型的内容就是要创建的实例类型
package com.lff;import org.springframework.beans.factory.FactoryBean;public class PersonFactoryBean implements FactoryBean<Person> {@Overridepublic Person getObject() throws Exception { //返回创建的对象return new Person(18,"哈哈");}@Overridepublic Class<?> getObjectType() { //创建对象的类型return Person.class;}}
xml配置直接写这样就可以了,因为已经实现了FactoryBean这个接口
<?xml version="1.0" encoding="UTF-8"?><beans xmlns="http://www.springframework.org/schema/beans"xmlns:xsi="http://www.w3.org/2001/XMLSchema-instance"xsi:schemaLocation="http://www.springframework.org/schema/beans http://www.springframework.org/schema/beans/spring-beans.xsd"><!-- 以前这样写会创建PersonFactoryBean类型的对象,但是这里由于PersonFactoryBean已经实现了FactoryBean接口,所以外界通过id取的时候,会调用FactoryBean接口的getObject()方法--><bean id="person" class="com.lff.PersonFactoryBean" /></beans>
外界使用
public class Main {public static void main(String[] args) throws BeansException {ApplicationContext context = new ClassPathXmlApplicationContext("applicationContext.xml");Person person = (Person) context.getBean("person");System.out.println(person);}}
上面就获取了一个person对象。
当然如果你确实想返回对应的工厂实例而不是person对象,需要这样获取
public class Main {public static void main(String[] args) throws BeansException {ApplicationContext context = new ClassPathXmlApplicationContext("applicationContext.xml");System.out.println(context.getBean("&person")); //这里person前面加了一个&符合,Spring内部会获取对应工厂实例}}
Spring配置文件中引入外部配置文件
新建配置文件user.properties
name=lifufaage=20
xml配置
<?xml version="1.0" encoding="UTF-8"?><beans xmlns="http://www.springframework.org/schema/beans"xmlns:xsi="http://www.w3.org/2001/XMLSchema-instance"xmlns:context="http://www.springframework.org/schema/context"xsi:schemaLocation="http://www.springframework.org/schema/beans http://www.springframework.org/schema/beans/spring-beans.xsdhttp://www.springframework.org/schema/contexthttp://www.springframework.org/schema/context/spring-context.xsd"><context:property-placeholder location="user.properties" /><bean id="person" class="com.lff.Person"><property name="name" value="${name}" /><property name="age" value="${age}" /></bean></beans>

若有收获,就点个赞吧
0 人点赞
