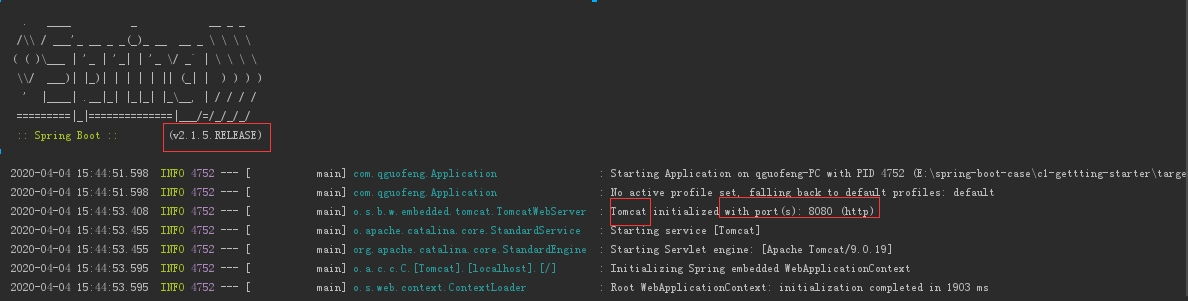
写于:2018-12-03 05:50:37 2020年 文章进行升级,相关版本为:2.1.5.RELEASE
一、Introduce
Spring Boot makes it easy to create stand-alone, production-grade Spring based Applications that you can “just run”. We take an opinionated view of the Spring platform and third-party libraries so you can get started with minimum fuss. Most Spring Boot applications need very little Spring configuration.
Spring boot 是 在 Spring framwork 之上的封装。Spring boot 将所有日常通用配置已经写好,用户只需要很少的配置,如果不需要定制,几乎可以说是0配置方式,直接启动一个具有各种功能的应用程序。
Spring Boot 是构建微服务的底层依赖组件,Spring Boot创建的应用,通过内嵌的 容器(tomcat 等)启动,通过 启动类,或者打包成 jar 包,通过java -jar xx.jar 便能够简单便捷的启动应用。
Spring Boot 开箱即用、便捷、丰富的第三方支持、自动化配置的优点,深受广大开发者喜爱。其配套的 Spring Cloud 为中小企业提供了一整套完整的分布式解决方案。
Spring Boot 的发展非常快速,目前已经2.x版本。我所在公司有一些应用使用的认识 1.x 版本,且1.x 和 2.x 的API也相差较大。同时 Spring-Cloud 技术扩展更迭也很快,例如在 Eureka服务发现,Netflix 宣布闭源,服务熔断 hystrix 停止开发维护不久,Spring Cloud Alibaba 就跟着出现了,提供了如 nacos 等的替代方案。
总的来说,Spring Boot 开箱即用给开发带来了很多好处,不过 spring Boot 简单便捷的外表下确实一整套复杂的运行体系,需要开发人员深入底层的 spring framework 和 spring boot 本身的运行机制进行深入学习,才能够对 spring Boot 乃至 Spring Cloud 的使用得心应手。
二、Getting Starter
直接通过 Eclipse / 或者 IDEA 提供的 Spring Boot 快速创建工具创建 Spring Boot 项目
1、创建一个 Spring Boot Web 项目,并启动测试
目录结构: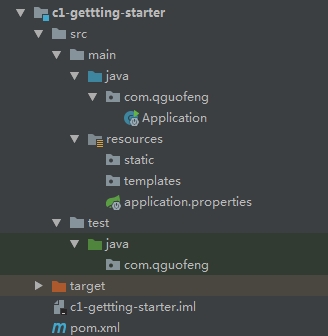
- step1、使用idea 创建 项目,并需要提供如下组件
spring-boot-starter-web: Web 全栈开发依赖 Spring Boot stater 依赖
<?xml version="1.0" encoding="UTF-8"?><project xmlns="http://maven.apache.org/POM/4.0.0" xmlns:xsi="http://www.w3.org/2001/XMLSchema-instance"xsi:schemaLocation="http://maven.apache.org/POM/4.0.0 https://maven.apache.org/xsd/maven-4.0.0.xsd"><modelVersion>4.0.0</modelVersion><parent><groupId>org.springframework.boot</groupId><artifactId>spring-boot-starter-parent</artifactId><version>2.1.5.RELEASE</version><relativePath/> <!-- lookup parent from repository --></parent><groupId>com.xxx</groupId><artifactId>c1-gettting-starter</artifactId><version>0.0.1-SNAPSHOT</version><name>c1-gettting-starter</name><description>Demo project for Spring Boot</description><properties><java.version>1.8</java.version></properties><dependencies><!-- web 组件 --><dependency><groupId>org.springframework.boot</groupId><artifactId>spring-boot-starter-web</artifactId></dependency></dependencies><build><plugins><plugin><groupId>org.springframework.boot</groupId><artifactId>spring-boot-maven-plugin</artifactId></plugin></plugins></build></project>
- step2、编写配置文件
application.properties(暂时为空)
默认端口号为:8080
step3、编写启动类
Application.java@SpringBootApplication // 启动类标注@RestController // Spring MVC 控制器 标注public class Application {public static void main(String[] args) {// 真实启动的方法SpringApplication.run(Application.class, args);}/** web 服务测试 **/@RequestMapping("/hello")public String hello(){return "hello";}}
step4、直接启动 run 方法
访问 http://localhost:8080/hello
$ curl http://localhost:8080/hello% Total % Received % Xferd Average Speed Time Time Time CurrentDload Upload Total Spent Left Speed100 5 100 5 0 0 5000 0 --:--:-- --:--:-- --:--:-- 5000hello

若有收获,就点个赞吧
0 人点赞
