写于:2018-12-21 12:11:30
一、什么是 spring boot starter?
其实 spring boot starter 就是我们项目中的某一模块,比如:web 依赖的 starter ,就是将所有web开发需要用到的 JAR 包整合,并进行相关自动化配置设定。
而区别 模块 和 starter 的重点在于:starter 提供了自动化配置功能。
二、自定义 spring boot starter
自定义 spring boot starter 模拟生成支付宝订单 其中:模拟生成支付宝订单中只是读取配置的 appid 和 secrect 进行输出。
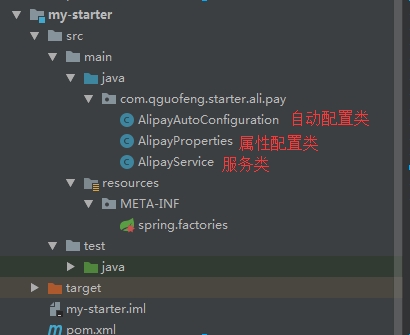
step1、创建 spring boot 项目 my-starter
step2、pom 文件追加依赖
<!-- springframework 相关注解 --><dependency><groupId>org.springframework</groupId><artifactId>spring-context</artifactId></dependency><!-- @Conditionxx 相关注解 --><dependency><groupId>org.springframework.boot</groupId><artifactId>spring-boot-autoconfigure</artifactId></dependency><!-- @ConfigurationProperties 注解 读取配置 --><dependency><groupId>org.springframework.boot</groupId><artifactId>spring-boot-configuration-processor</artifactId><optional>true</optional></dependency><!-- 自动生成 getter setter 等 --><dependency><groupId>org.projectlombok</groupId><artifactId>lombok</artifactId><scope>provided</scope></dependency>
step3、创建 配置属性类 AlipayProperties.class
/*** <p> 支付宝配置文件 </p>** @author WTF名字好难取*/@Getter@Setter@ToString@ConfigurationProperties(prefix = "alipay")public class AlipayProperties {/** 模拟:appid接收 **/private String appId;/** 模拟:appSecrect接收 **/private String secrect;}
step4、创建 alipay 服务类提供生成订单服务 AlipayService.class
/*** <p> 支付宝 服务类 </p>** @author WTF名字好难取*/@Getter@Setter@ToString@AllArgsConstructorpublic class AlipayService {private AlipayProperties alipayProperties;/*** <p> 模拟生成支付宝订单 </p>* @return*/public String generatorOrder(){return alipayProperties.getAppId() + "," + alipayProperties.getSecrect();}}
step5、创建 自动配置类 AlipayAutoConfiguration.class
/*** <p> 支付宝自动配置类 </p>** @author WTF名字好难取*/@Configuration/** 标识为配置类 **/@EnableConfigurationProperties(value = {AlipayProperties.class}) /** 需要启动的配置文件 **/@ConditionalOnClass(AlipayService.class) /** 当 AlipayService 存在时,该配置类才有效 **/@ConditionalOnProperty(prefix = "alipay", value = "enable", matchIfMissing = true)public class AlipayAutoConfiguration {@Autowiredprivate AlipayProperties alipayProperties;@Bean@ConditionalOnClass(AlipayService.class)public AlipayService alipayService(){AlipayService alipayService = new AlipayService(alipayProperties);return alipayService;}}
step6、创建 /resource/META-INF/spring.factories 并追加 自动配置信息
org.springframework.boot.autoconfigure.EnableAutoConfiguration=com.qguofeng.pay.alipay.AlipayAutoConfiguration
三、使用自定义的 starter

step1、创建 Spring Boot 项目: common-project
step2、pom 文件追加依赖
<!-- web 依赖 --><dependency><groupId>org.springframework.boot</groupId><artifactId>spring-boot-starter-web</artifactId></dependency><!-- 自定义 starter 依赖 --><dependency><groupId>com.qguofeng</groupId><artifactId>my-starter</artifactId><version>0.0.1-SNAPSHOT</version></dependency>
step3、启动类 Application.java 追加测试 API
@SpringBootApplication@RestControllerpublic class Application {public static void main(String[] args) {SpringApplication.run(Application.class, args);}@Autowiredprivate AlipayService alipayService;/** web 服务测试 **/@RequestMapping("/alipay")public String process(){return alipayService.generatorOrder();}}
step4、配置文件 application.properties 增加配置
spring.application.name=common-projectserver.port = 9528## 自定义 ali配置 (对应 starter 中的配置属性)alipay.appId = AppIDalipay.secrect = SECRECT
step5、访问测试 API http://localhost:9528/alipay
$ curl http://localhost:9528/alipay% Total % Received % Xferd Average Speed Time Time Time CurrentDload Upload Total Spent Left Speed100 13 100 13 0 0 76 0 --:--:-- --:--:-- --:--:-- 76AppID,SECRECT

若有收获,就点个赞吧
0 人点赞
