1.前言
我们想构建一个对外提供的 Api 接口的 Web server 肯定是离不开 路由的,路由可以标记每个 Api 的地址,打个比方,你是地主家的儿子,你们家有几百套房子,那需要一个有个本子(路由)记录每套房子(资源)在哪,不然收租都找不大地方,对应下就是,路由就是这个记录的索引,方便我们找到需要的资源,服务。
所以这章我们来学习下路由的使用,包含以下 2 个方面:
- 原生路由的使用
- koa-router 中间件
一般我们写完接口肯定是需要测试下的,假设我们写一个页面来调试每个请求肯定是很麻烦的,一般我们会用 Postman 这个工具来调试接口,大家有时间也可以看看Postman使用。
2. 原生路由
比如我们现在要实现用户管理的增删改查接口编写,用 Koa 写会有下面一段代码。
/** @Author: hucheng* @Date: 2020-06-22 06:41:21* @Description: here is des*/const Koa = require('koa')const fs = require('fs')const app = new Koa()const storeArray = []app.use( async ( ctx ) => {let url = ctx.request.urllet html = await route( url )ctx.body = html})async function route( url ) {let view = '404.html'switch ( url ) {case '/':view = 'index.html'breakcase '/index':view = 'index.html'breakcase '/todo':view = 'todo.html'breakdefault:break}let html = await render( view )return html}app.use( async ( ctx ) => {let url = ctx.request.urllet data = await route( url )ctx.body = data})app.listen(3000, () => {console.log(' starting at port 3000')})function render( page ) {return new Promise(( resolve, reject ) => {let viewUrl = `./view/${page}`fs.readFile(viewUrl, "binary", ( err, data ) => {if ( err ) {reject( err )} else {resolve( data )}})})}
这里我就实现了一个简单的路由,然后问题来了,真实的项目里面,路由肯定是非常多的,上面这种处理方式,写到最后估计会疯掉,代码可读性也比较差,如是社区就出来个中间件 koa-router 来定义一套路由的处理规范。
Demo 对应github连接,大家可以拉下来本地跑起来,体会下。
3. koa-router
3.1 简单使用
把上面的例子,我们用 koa-router 改下一遍。
/** @Author: hucheng* @Date: 2020-06-22 06:41:21* @Description: here is des*/const Koa = require('koa')const Router = require('koa-router');const fs = require('fs')const app = new Koa()const router = new Router();router.get('/', async (ctx, next) => {ctx.body = await render('index.html')});router.get('/index', async (ctx, next) => {ctx.body = await render('index.html')});router.get('/todo', async (ctx, next) => {ctx.body = await render('todo.html')});app.use(router.routes()).use(router.allowedMethods());app.listen(3000, () => {console.log(' starting at port 3000')})function render( page ) {return new Promise(( resolve, reject ) => {let viewUrl = `./view/${page}`fs.readFile(viewUrl, "binary", ( err, data ) => {if ( err ) {reject( err )} else {resolve( data )}})})}
大家看到我们这里 我们用 koa-router 重写了一遍,代码逻辑是不是清晰了很多,可读行大大增强。
在实际业务开发过程中,我们都是用 koa-router 来做 请求的url管理,接下来讲讲常用的方法。
3.2常用方法
3.2.1 url 带参数
比如有这样的一个场景,我们需要查询某个用户 Id 为 21 的详情信息,请求的url 可以有下面2种组织方式。
第一种: http://localhost:3000/user/detail?userId=21第二种: http://localhost:3000/user/detail/21
那在实际开发过程中,我们更推荐第二种,这种看起来更加清晰,koa-router 支持这种带参数的方式,设置如下:
router.get('/user/detail/:id', (ctx, next) => {const id = ctx.params.idctx.body = 'Hello World!';})
3.2.2 http 常见method
那我们在开发过程中经常会有 get,post,put 等请求的 method ,koa-router 都有对应设置。
router.get('/', (ctx, next) => {ctx.body = 'Hello World!';})router.post('/users', (ctx, next) => {// ...})router.put('/users/:id', (ctx, next) => {// ...})router.del('/users/:id', (ctx, next) => {// ...})
以上就是 koa-router常见使用,在平常开发中,koa-router 会贯穿整个开发流程,这里我们简单的梳理下,它更多的使用是和 request 上下文结合起来使用。
3.3 路由配合中间件使用
有时候我们写的接口,用户登录后,返回个 Token 给前端页面,后面其他请求 都要校验 Request header 是否带了 这个Token,来确保权限,那这个就需要配和中间件了。
login.js
// login.jsfunction login(ctx) {const token = '121212-45dfgffgfg'ctx.res.header.token = tokenctx.body = {token: token}}module.exports = {login}
auth.js ,是认证中间件,中间件我们一般放到 midware 这个目录下面。
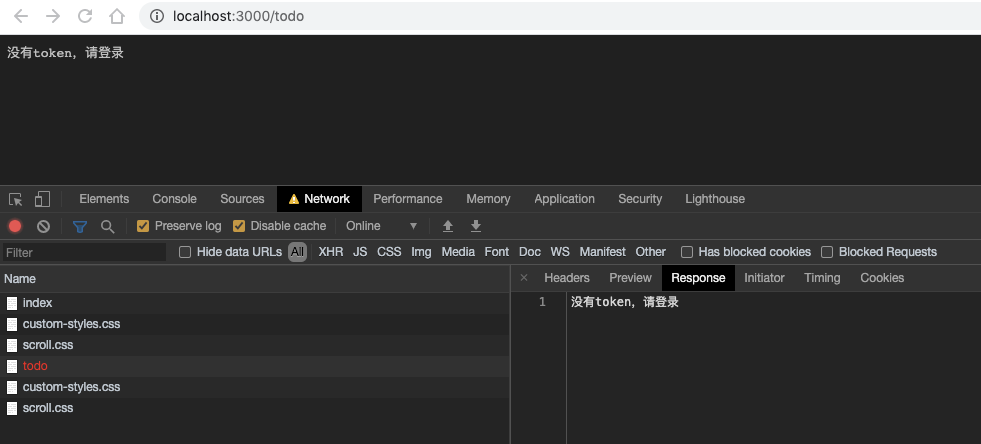
// /midware/auth.jsasync function auth(ctx, next) {const whiteList = ['/', '/index', '/login'] // 这里我们标记白名单,不走认证的if(!whiteList.includes(ctx.request.path) && !ctx.request.headers['token']) {ctx.throw(401, '没有token,请登录')}await next()}module.exports = auth
// router.jsconst { login } = require('./controller/login')const auth = require('./midware/auth')const {list, detail} = require('./controller/user')router.use(auth)router.get('/', async (ctx, next) => {ctx.body = await render('index.html')});router.post('/login', login);router.get('/index', async (ctx, next) => {ctx.body = await render('index.html')});router.get('/todo', async (ctx, next) => {ctx.body = await render('todo.html')});
启动项目访问下 http://localhost:3000/todo。
有的时候我们需要对某个接口做些处理,比如有一个接口有包含文件,那我们肯定不想每个这样的接口都处理下文件,这样单独的接口可以用单独的中间件,例如:
// 单独的路由处理用到中间件router.use('/users', operateFile());// 多个接口都要用到某个中间件router.use(['/users', '/admin'], operateFile());app.use(router.routes());
3.4 常用规范
一般在实际开发过程中,我们会把 路由相关的,会归总放到 router.js,这样统一管理,代码结构性好, 可读性强。
// 目录结构|__koa-router-demo|app.js|router.js|constroller // constroller层|midware // 这个放中间件
app.js
const Koa = require('koa')const app = new Koa()const router = require('./router')app.use(router.routes()).use(router.allowedMethods());app.listen(3000, () => {console.log(' starting at port 3000')})
router.js
const Koa = require('koa')const Router = require('koa-router');const app = new Koa()const router = new Router();const {list,detail} = require('./controller/user')router.get('/user/list', list)router.get('/user/detail/:id', detail)module.exports = router
cotroller/user.js
const array = [{id: 0, name: '王二'}, {id: 1, name: '赵三'}]function list(ctx) {ctx.body = {data: array,success: true};}function detail(ctx) {const id = ctx.params.id;ctx.body = {data: array[id],success: true}}module.exports = {detail,list}
4.小结
这节我们简单的梳理了路由的概念,使用起来还是比较简单,相关代码在 https://github.com/hucheng91/koa-workshop/tree/master/koa-router 接下来我们会结合 request,response 来使用路由。

