前言
机器人上小电脑计算环境太杂了,LibTorch在arm架构上无法直接使用官方编译好的包。我之前也尝试过自己编译,踩了不少坑也没解决。此外,LibTorch作为C++接口居然跑得比PyTorch还慢,github上有人说慢2倍,我上机测试时有时单帧推理非常诡异的要跑几百毫秒,而用PyTorch推理只需要2ms。
总之各种大问题小错误不断,室友推荐我尝试一下Darknet,几乎没有依赖库,完全由C和Cuda构成,速度也很快。
安装
官方文档写得非常简洁明了:https://pjreddie.com/darknet/install/
直接安装
从Github上下载项目然后直接make即可,得到可执行文件 ./darknet 。
git clone https://github.com/pjreddie/darknet.gitcd darknetmake
与CUDA联合编译
训练还是直接上GPU要快不少。需要先装好CUDA环境。
打开项目根目录下的 Makefile 并修改成一下内容,然后执行make命令。
GPU=1
后续训练时默认使用GPU0,也可以通过命令行参数指定,作者官网有详细说明。(反正我只有一个GPU,略过)
训练
作者官网对于图片分类器训练的一些说明:https://pjreddie.com/darknet/imagenet/
我使用的是mnist数据集。
制作数据集
mnist数据集直接提供的是二进制文件,需要将其转换成普通的图片文件。darknet训练时对于图片的名称有要求,需要包含标签名,且不可重复出现多次,否则会带来歧义。我采用如下命名格式: <图片序号>_<标签名>
改了一下以前的程序,用到了PyTorch的接口。
import osimport torchvision.datasets.mnist as mnistfrom skimage import ioprint(os.getcwd())root = os.getcwd()train_set = (mnist.read_image_file(os.path.join(root+"/src_data", 'train-images.idx3-ubyte')),mnist.read_label_file(os.path.join(root+"/src_data", 'train-labels.idx1-ubyte')))test_set = (mnist.read_image_file(os.path.join(root+"/src_data", 't10k-images.idx3-ubyte')),mnist.read_label_file(os.path.join(root+"/src_data", 't10k-labels.idx1-ubyte')))print("train set:", train_set[0].size())print("test set:", test_set[0].size())labels = ["zero", "one", "two", "three", "four","five", "six", "seven", "eight", "nine"]root = root+"/dataset"def convert_to_img(train=True):if (train):data_path = root + '/train/'if (not os.path.exists(data_path)):os.makedirs(data_path)for i, (img, label) in enumerate(zip(train_set[0], train_set[1])):img_path = data_path + str(i)+'_'+labels[label.item()] + '.jpg'io.imsave(img_path, img.numpy())else:data_path = root + '/test/'if (not os.path.exists(data_path)):os.makedirs(data_path)for i, (img, label) in enumerate(zip(test_set[0], test_set[1])):img_path = data_path + str(i)+'_'+labels[label.item()] + '.jpg'io.imsave(img_path, img.numpy())convert_to_img(True)convert_to_img(False)
处理后得到训练集train和测试集test两个文件夹,内容大致如下。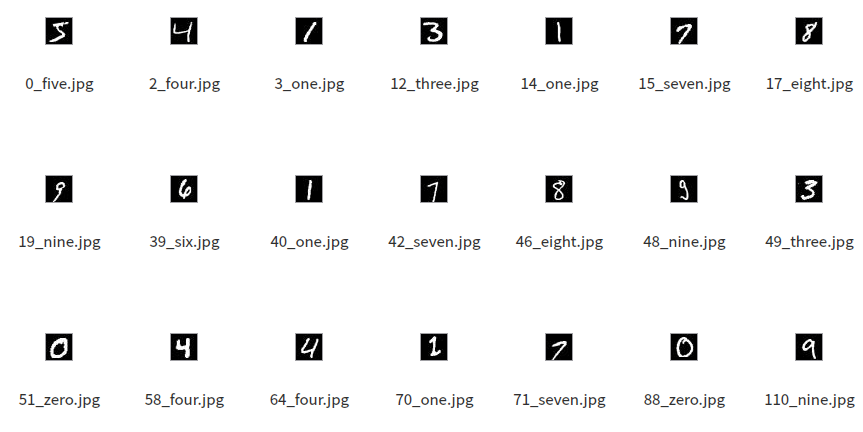
数据集概览
将两个数据集移动到darknet项目的data目录下,然后也在该目录下,用以下命令行生成图片的路径描述文件。
find `pwd`/train -name \*.jpg > train.listfind `pwd`/test -name \*.jpg > test.list
创建标签文件 labels.list ,存放标签名,内容如下
zeroonetwothreefourfivesixseveneightnine
创建类别名文件 names.list ,在预测阶段有用,训练阶段不需要,可以将标签名映射成你想要显示的名称,这里我保持不变。
zeroonetwothreefourfivesixseveneightnine
至此,data目录下有以下内容
.├── labels.list├── names.list├── test├── test.list├── train└── train.list2 directories, 4 files
配置文件
在darknet的cfg目录下,写两个 .data 和 .cfg 配置文件。.data 文件主要用于描述数据集信息,内容如下
classes=10train = /home/luzhan/My-Project/RM2020/deploy/darknet_gpu/data/train.listvalid = /home/luzhan/My-Project/RM2020/deploy/darknet_gpu/data/test.listbackup = /home/luzhan/My-Project/RM2020/deploy/darknet_gpu/backup/labels = /home/luzhan/My-Project/RM2020/deploy/darknet_gpu/data/labels.listnames = /home/luzhan/My-Project/RM2020/deploy/darknet_gpu/data/names.listtop=1
属性说明
- classes:类别数
- train:训练集图片路径描述文件
- vaild:测试集图片路径描述文件
- backup:模型参数保存路径
- labels:标签名文件
- names:类别名文件
- top:top=n表示概率最高的前n个输出中有正确标签就视为分类正确
.cfg 文件描述网络,我直接复制了darknet提供的 cifar.cfg
[net]batch=128subdivisions=1height=28width=28channels=3max_crop=32min_crop=32hue=.1saturation=.75exposure=.75learning_rate=0.1policy=polypower=4max_batches = 5000momentum=0.9decay=0.0005[convolutional]batch_normalize=1filters=32size=3stride=1pad=1activation=leaky[maxpool]size=2stride=2[convolutional]batch_normalize=1filters=16size=1stride=1pad=1activation=leaky[convolutional]batch_normalize=1filters=64size=3stride=1pad=1activation=leaky[maxpool]size=2stride=2[convolutional]batch_normalize=1filters=32size=1stride=1pad=1activation=leaky[convolutional]batch_normalize=1filters=128size=3stride=1pad=1activation=leaky[convolutional]batch_normalize=1filters=64size=1stride=1pad=1activation=leaky[convolutional]filters=10size=1stride=1pad=1activation=leaky[avgpool][softmax]
至此,在cfg目录下有以下文件
.├── mnist_cifar10.cfg└── mnist.data0 directories, 2 files
开始训练
先进入darknet根目录,执行以下命令,指定配置文件即可开始训练。
./darknet classifier train cfg/mnist.data cfg/mnist_cifar10.cfg
每训练到一定阶段,会在指定的backup目录下保存 .weights 后缀的权重参数文件,也会有 .backup 后缀的备份文件。本次训练中断或结束,可以使用这两类文件进行继续训练。如使用下列命令
./darknet classifier train cfg/mnist.data cfg/mnist_cifar10.cfg backup/mnist_cifar10_10.weights
训练过程中以 avg 值随着模型的迭代逐渐向0 收敛为优,如果不符合应考虑修改网络结构及训练超参数。
可以使用 valid 参数统计在测试集上的准确率。
./darknet classifier valid cfg/mnist.data cfg/mnist_cifar10.cfg backup/mnist_cifar10_10.weights
推理
指定配置文件,权重参数文件,待分类图片进行推理。
./darknet classifier predict cfg/mnist.data cfg/mnist_cifar10.cfg backup/mnist_cifar10_10.weights data/test/0_seven.jpg
以下为示例结果。
layer filters size input output0 conv 32 3 x 3 / 1 28 x 28 x 3 -> 28 x 28 x 32 0.001 BFLOPs1 max 2 x 2 / 2 28 x 28 x 32 -> 14 x 14 x 322 conv 16 1 x 1 / 1 14 x 14 x 32 -> 14 x 14 x 16 0.000 BFLOPs3 conv 64 3 x 3 / 1 14 x 14 x 16 -> 14 x 14 x 64 0.004 BFLOPs4 max 2 x 2 / 2 14 x 14 x 64 -> 7 x 7 x 645 conv 32 1 x 1 / 1 7 x 7 x 64 -> 7 x 7 x 32 0.000 BFLOPs6 conv 128 3 x 3 / 1 7 x 7 x 32 -> 7 x 7 x 128 0.004 BFLOPs7 conv 64 1 x 1 / 1 7 x 7 x 128 -> 7 x 7 x 64 0.001 BFLOPs8 conv 10 1 x 1 / 1 7 x 7 x 64 -> 7 x 7 x 10 0.000 BFLOPs9 avg 7 x 7 x 10 -> 1010 softmax 10Loading weights from backup/mnist_cifar10_10.weights...Done!data/test/0_seven.jpg: Predicted in 0.147498 seconds.99.96%: seven
部署至OpenCV项目
这一步实现提供一张 cv::Mat 类型的图片,进行推理并返回分类结果。
作者官网上并没有提供关于C/C++接口的说明文档,但是通过命令行执行的函数和examples目录下的各个文件息息相关。比如处理 classifier 命令的相关函数可以在 classifier.c 文件中找到。根据这个文件中的 predict_classifier 函数和网上查到的资料,可以实现自己调用推理接口。
此外,darknet作者自己定义了图片文件类型,与OpenCV中常用的 Mat 不同,需要进行额外的转换。
编写CMakeLists.txt
cmake_minimum_required(VERSION 3.7)project(deploy)set(CMAKE_CXX_STANDARD 11)# 指定文件夹位置set(OPENCV_DIR /usr/local/share/OpenCV)# 自动查找包find_package(OpenCV REQUIRED)# 添加源程序add_executable(deploysrc/main.cppsrc/timer.cppsrc/Classifier.cpp)# 添加头文件include_directories(${OpenCV_INCLUDE_DIRS})include_directories(./include)include_directories(darknet_gpu/include)link_directories(darknet_gpu/)# 加入库文件位置target_link_libraries(deploy${OpenCV_LIBS}-pthread-lMVSDK/lib/libMVSDK.so)target_link_libraries(deploylibdarknet_gpu.so)
添加动态库
直接建立CMake工程会出现以下报错。
/usr/bin/ld: 找不到 -ldarknet
一般Linux把/lib和/usr/lib两个目录作为默认的库搜索路径。在这里我们需要用到 libdarknet.so 这个动态链接库,这个文件是之前编译库时得到的(注意CPU版和GPU版编译产生的文件是不同的)。可以通过 locate 命令直接找到这个库。
$ locate libdarknet.so/home/luzhan/My-Project/RM2020/darknet/darknet_cpu/libdarknet.so/home/luzhan/My-Project/RM2020/darknet/darknet_gpu/libdarknet.so
进入/usr/lib/目录中,输入以下命令(CPU版本同理),创建一个软链接,链接到已有的库路径。
sudo ln -s /home/luzhan/My-Project/RM2020/darknet/darknet_cpu/libdarknet.so libdarknet_gpu.so
实现Classifier类
Classifier.h
//// Created by luzhan on 2020/10/3.//#ifndef CLASSIFIER_H#define CLASSIFIER_H#include <opencv2/opencv.hpp>#include <darknet.h>class Classifier {public:std::vector<std::string> labels;private:network *net;constexpr static int TOP = 1;float *input;public:Classifier(char *cfg_file, char *weight_file, const char *name_list);int predict(const cv::Mat &src);private:void imgConvert(const cv::Mat &img, float *dst);};#endif //CLASSIFIER_H
Classifier.cpp
//// Created by luzhan on 2020/10/3.//#include "Classifier.h"using namespace cv;using namespace std;Classifier::Classifier(char *cfg_file, char *weight_file, const char *name_file) {net = load_network(cfg_file, weight_file, 0);set_batch_network(net, 1);srand(2222222);// 标签文件ifstream f_label(name_file);if (f_label.is_open()) {string label;while (getline(f_label, label)) {labels.emplace_back(label);}}size_t srcSize = 28 * 28 * 3 * sizeof(float);input = (float *) malloc(srcSize);}int Classifier::predict(const cv::Mat &src) {// 将图像转为yolo形式imgConvert(src, input);// 网络推理float *predictions = network_predict(net, input);if (net->hierarchy) {hierarchy_predictions(predictions, net->outputs, net->hierarchy, 1, 1);}int *indexes = (int *) calloc(TOP, sizeof(int));top_k(predictions, net->outputs, TOP, indexes);for (int i = 0; i < TOP; ++i) {int index = indexes[i];printf("%5.2f%%: %s\n", predictions[index] * 100, labels[index].c_str());}return indexes[0];}void Classifier::imgConvert(const cv::Mat &img, float *dst) {uchar *data = img.data;int h = img.rows;int w = img.cols;int c = img.channels();for (int k = 0; k < c; ++k) {for (int i = 0; i < h; ++i) {for (int j = 0; j < w; ++j) {dst[k * w * h + i * w + j] = data[(i * w + j) * c + k] / 255.;}}}}
使用Classifier类进行推理
推理单张图片
main.cpp
#include <vector>#include <opencv2/opencv.hpp>#include <iostream>#include "timer.h"#include "Classifier.h"using namespace cv;using namespace std;int main() {Classifier classifier("../darknet_gpu/cfg/mnist_cifar10.cfg","../darknet_gpu/backup/mnist_cifar10_10.weights","../darknet_gpu/data/names.list");classifier.predict(src);}
输出结果
layer filters size input output0 conv 32 3 x 3 / 1 28 x 28 x 3 -> 28 x 28 x 32 0.001 BFLOPs1 max 2 x 2 / 2 28 x 28 x 32 -> 14 x 14 x 322 conv 16 1 x 1 / 1 14 x 14 x 32 -> 14 x 14 x 16 0.000 BFLOPs3 conv 64 3 x 3 / 1 14 x 14 x 16 -> 14 x 14 x 64 0.004 BFLOPs4 max 2 x 2 / 2 14 x 14 x 64 -> 7 x 7 x 645 conv 32 1 x 1 / 1 7 x 7 x 64 -> 7 x 7 x 32 0.000 BFLOPs6 conv 128 3 x 3 / 1 7 x 7 x 32 -> 7 x 7 x 128 0.004 BFLOPs7 conv 64 1 x 1 / 1 7 x 7 x 128 -> 7 x 7 x 64 0.001 BFLOPs8 conv 10 1 x 1 / 1 7 x 7 x 64 -> 7 x 7 x 10 0.000 BFLOPs9 avg 7 x 7 x 10 -> 1010 softmax 10Loading weights from ../darknet_gpu/backup/mnist_cifar10_10.weights...Done!99.96%: seven
检验模型正确率
更新:用 valid 命令给出top1的准确率。
./darknet classifier valid cfg/hero.data cfg/hero.cfg backup/hero.backup
darknet训练的时候不显示推理准确率,也没有提供相关接口(可能是我没有找到)。部署时也验证一下整个模型的准确率。
#include <vector>#include <opencv2/opencv.hpp>#include <iostream>#include "timer.h"#include "Classifier.h"using namespace cv;using namespace std;int main() {Classifier classifier("../darknet_gpu/cfg/mnist_cifar10.cfg","../darknet_gpu/backup/mnist_cifar10_10.weights","../darknet_gpu/data/names.list");//Mat src = imread("../darknet_gpu/data/test/0_seven.jpg");//classifier.predict(src);int cnt = 0;vector<string> image_set;ifstream f_path("../darknet_gpu/data/test.list");Timer timer;timer.start();if (f_path.is_open()) {string img_path;while (getline(f_path, img_path)) {int pos1 = img_path.find_last_of('_');int pos2 = img_path.find_last_of('.');string label = img_path.substr(pos1 + 1, pos2 - pos1 - 1);Mat src = imread(img_path);int ans = classifier.predict(src);//cout << label << ' ' << ans << '\n';if (classifier.labels[ans] == label) {cnt++;}}}cout << cnt << '\n';cout << cnt / 10000.0 << '\n';timer.printTime("分类推理");}
输出结果(我把Classifier类中的标准输出部分注释了)
/home/luzhan/My-Project/RM2020/deploy/cmake-build-default/deploylayer filters size input output0 conv 32 3 x 3 / 1 28 x 28 x 3 -> 28 x 28 x 32 0.001 BFLOPs1 max 2 x 2 / 2 28 x 28 x 32 -> 14 x 14 x 322 conv 16 1 x 1 / 1 14 x 14 x 32 -> 14 x 14 x 16 0.000 BFLOPs3 conv 64 3 x 3 / 1 14 x 14 x 16 -> 14 x 14 x 64 0.004 BFLOPs4 max 2 x 2 / 2 14 x 14 x 64 -> 7 x 7 x 645 conv 32 1 x 1 / 1 7 x 7 x 64 -> 7 x 7 x 32 0.000 BFLOPs6 conv 128 3 x 3 / 1 7 x 7 x 32 -> 7 x 7 x 128 0.004 BFLOPs7 conv 64 1 x 1 / 1 7 x 7 x 128 -> 7 x 7 x 64 0.001 BFLOPs8 conv 10 1 x 1 / 1 7 x 7 x 64 -> 7 x 7 x 10 0.000 BFLOPs9 avg 7 x 7 x 10 -> 1010 softmax 10Loading weights from ../darknet_gpu/backup/mnist_cifar10_10.weights...Done!97940.9794分类推理用时: 2452.01ms
10000张测试集图片一张张从文件读入并完成推理,共花了2452ms,速度上相当可观。准确率为97.94%。
效果小结
训练得到的 .weights 权重参数文件是通用的,无论是CPU还是GPU,只需要修改CMake项目链接的动态库即可。
单就推理任务计时,CPU推理单张图片耗时1.5ms左右,GPU推理单张图片在0.2-0.3ms左右(刚启动会需要不少时间,但是到第二张就迅速降下来,最终稳定在0.2ms左右)
本人测试机器配置:
- CPU:i7-8750H 2.20GHz*12Core
- GPU:GeForce GTX 1050
在NUC上部署(CPU推理),单张1.8ms左右;在妙算2上部署(GPU推理),单张1.2ms左右。
从最近的实际测试中,装甲板数字分类选用彩色图像作为样本训练效果较好,可以有效分类出误识别的目标。
遭遇问题
Q1 GPU推理出错
在妙算2上部署,直接执行编译好的项目文件出现以下报错。
$ ./deploylayer filters size input output0 CUDA Error: unknown errordeploy: ./src/cuda.c:36: check_error: Assertion `0' failed.Aborted (core dumped)
解决方法:执行时加上 sudo 。
sudo ./deploy
Q2 实际部署与命令行测试结果不同
在实际项目中部署后推理结果与使用命令行推理同一张图片的结果不同。因为OpenCV默认的通道顺序为BGR,而Darknet使用的通道顺序为RGB,需要先进行转换。
而且Darknet将图片均视为3通道图。
参考链接

若有收获,就点个赞吧
0 人点赞
