Linux systemctl
Systemctl是systemd用于管理系统和管理服务的工具。许多现代Linux发行版,如Ubuntu、Debian、Fedora、Linux Mint、OpenSuSE、Redhat都采用systemd作为默认的init系统。
使用systemctl,可以启动、停止、重新加载、重启服务、列出服务单元、检查服务状态、启用/禁用服务、管理运行级别和电源管理。
服务:常驻系统内存中的进程且可以提供一些系统和网络功能;现在最新的Linux系统都统一使用systemctl进行服务的管理
1、运行级别的分类 runlevel
> 运行级别0:系统停机状态> 运行级别1:单用户工作状态,root权限,用于系统维护,禁止远程登陆> 运行级别2:多用户状态(没有NFS)> 运行级别3:完全的多用户状态(有NFS)> 运行级别4:系统未使用,保留> 运行级别5:X11控制台> 运行级别6:系统正常关闭并重启
2、管理服务 systemctl (root权限)
> systemctl [opt] xxx.service
> status  查看当前服务状态
> start  启动服务
> stop  关闭服务
> restart 重启服务
> enable 设置开机启动
> disable 设置开机不启动
> reload  后面不接具体服务名,重新加载配置文件
> mask 注销服务
> unmask 取消注销
3、一些常用的 systemctl 命令
- 查看当前已经启动的服务
systemctl list-units - 查看所有服务
systemctl list-unit-files - 查看服务有哪些依赖
systemctl list-dependencies xx.service - 查看服务有哪些依赖(反向)
systemctl list-dependencies --reverse xx.service重新加载配置文件
systemctl daemon-reload服务管理的命令
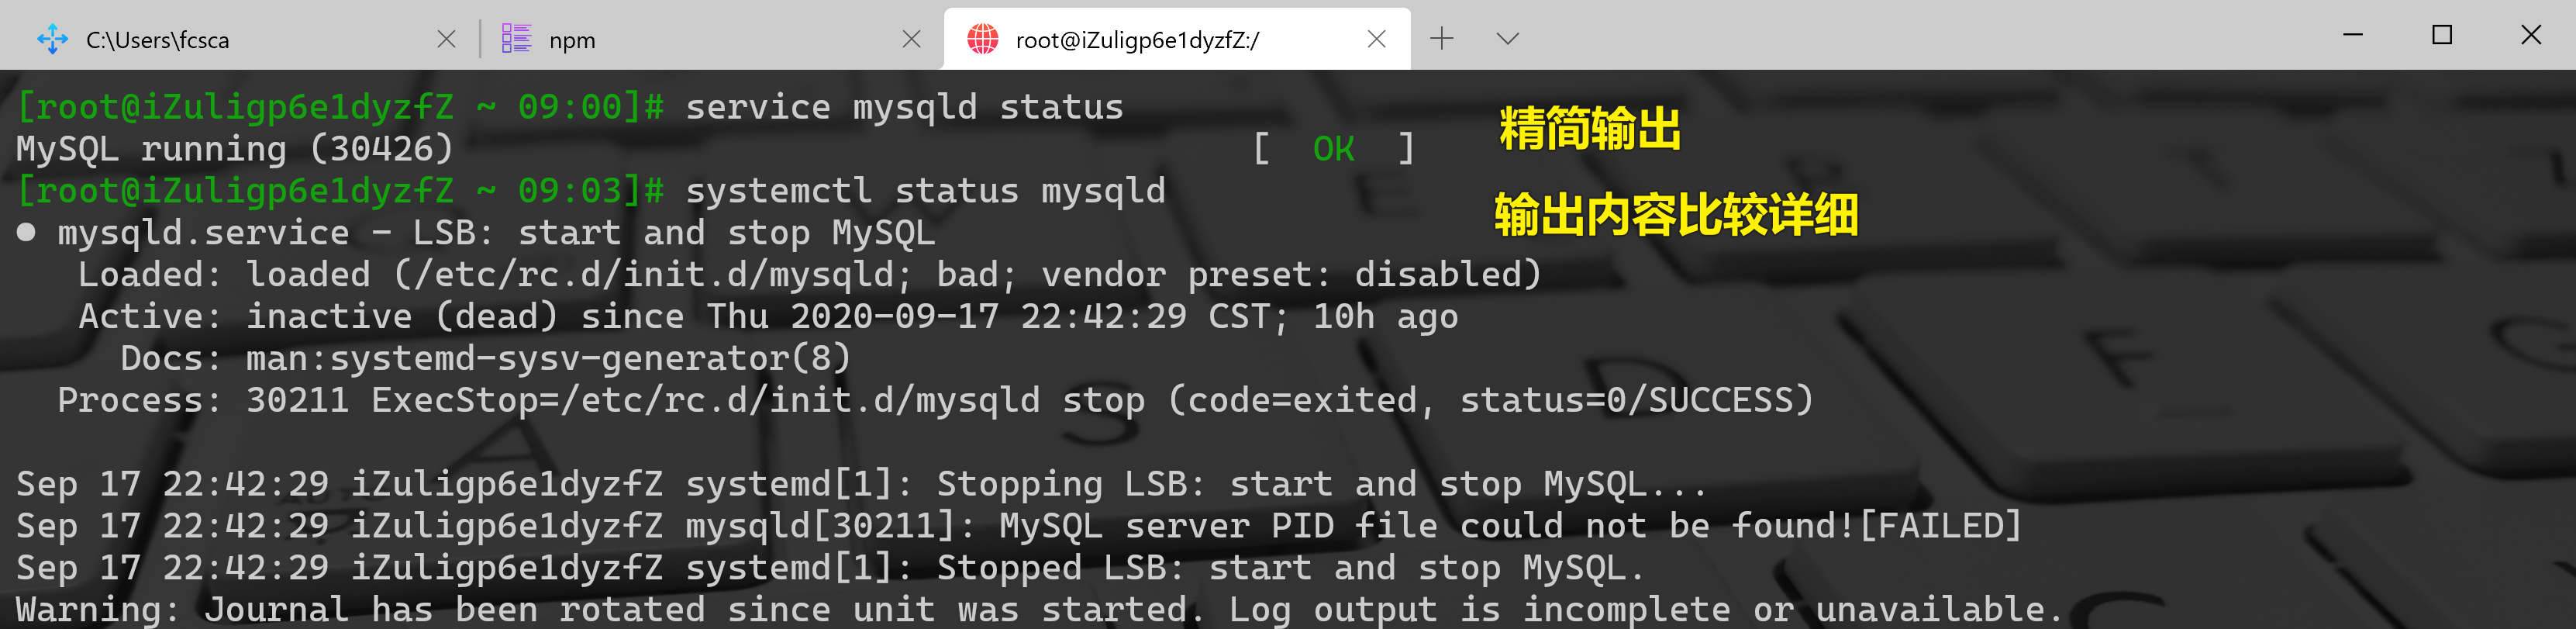
```bash systemctl start/stop/restart/status [服务名] 操作服务启动/停止/重启/查看状态
service mysqld status service mysqld start
<a name="g8TfC"></a>
#### 使用`is-enabled`选项检查开机是否启动该服务
```bash
systemctl is-enabled httpd.service
设置服务开机启动
systemctl enable 服务名.service
设置服务开机不启动
systemctl disable 服务名.service
使用systemctl重启、关机系统
像poweroff、shutdown命令一样,systemctl命令可以关闭系统,重启或进入休眠状态。
关机:
[root@localhost ~]# systemctl poweroff
重启:
[root@localhost ~]# systemctl reboot
系统休眠:
[root@localhost ~]# systemctl hibernate
使用systemclt管理远程系统
通常,上述所有systemctl命令都可以用于通过systemctl命令本身管理远程主机。这将使用ssh与远程主机进行通信。如下所示:
[root@localhost ~]# systemctl status httpd -H root@192.168.0.12
管理Targets
Systemd具有Targets的概念,这些Targets的目的与sysVinit系统中的运行级别相似。sysVinit中的运行级别主要是数字(0,1,2,-6)。以下是sysVinit中的运行级别及其对应的systemd中的target:
0   runlevel0.target, poweroff.target
1  runlevel1.target, rescue.target
2,3,4 runlevel2.target, runlevel3.target,runlevel4.target, multi-user.target
5   runlevel5.target, graphical.target
6   runlevel6.target, reboot.target
如果想要查看当前的运行级别,可以使用如下命令:
[root@localhost ~]# systemctl get-default
multi-user.target
设置默认的运行级别为graphical,命令如下:
[root@localhost ~]# systemctl set-default graphical.target
Removed symlink /etc/systemd/system/default.target.
Created symlink from /etc/systemd/system/default.target to /usr/lib/systemd/system/graphical.target.
想要列出所有激活的target,可以使用下面命令:
[root@localhost ~]# systemctl list-units -t target
systemd工具的其他命令journalctl日志收集
systemd有自己的日志系统,称为journald。它替换了sysVinit中的syslogd。
[root@localhost ~]# journalctl
要查看所有引导消息,请运行命令journalctl -b
[root@localhost ~]# journalctl -b
以下命令实时跟踪系统日志(类似于tail -f):
[root@localhost ~]# journalctl -f
查询系统启动过程的持续时间
[root@localhost ~]# systemd-analyze
Startup finished in 497ms (kernel) + 1.836s (initrd) + 6.567s (userspace) = 8.901s
最后显示系统启动时间为8.901秒。查看服务的启动时间:
[root@localhost ~]# systemd-analyze blame
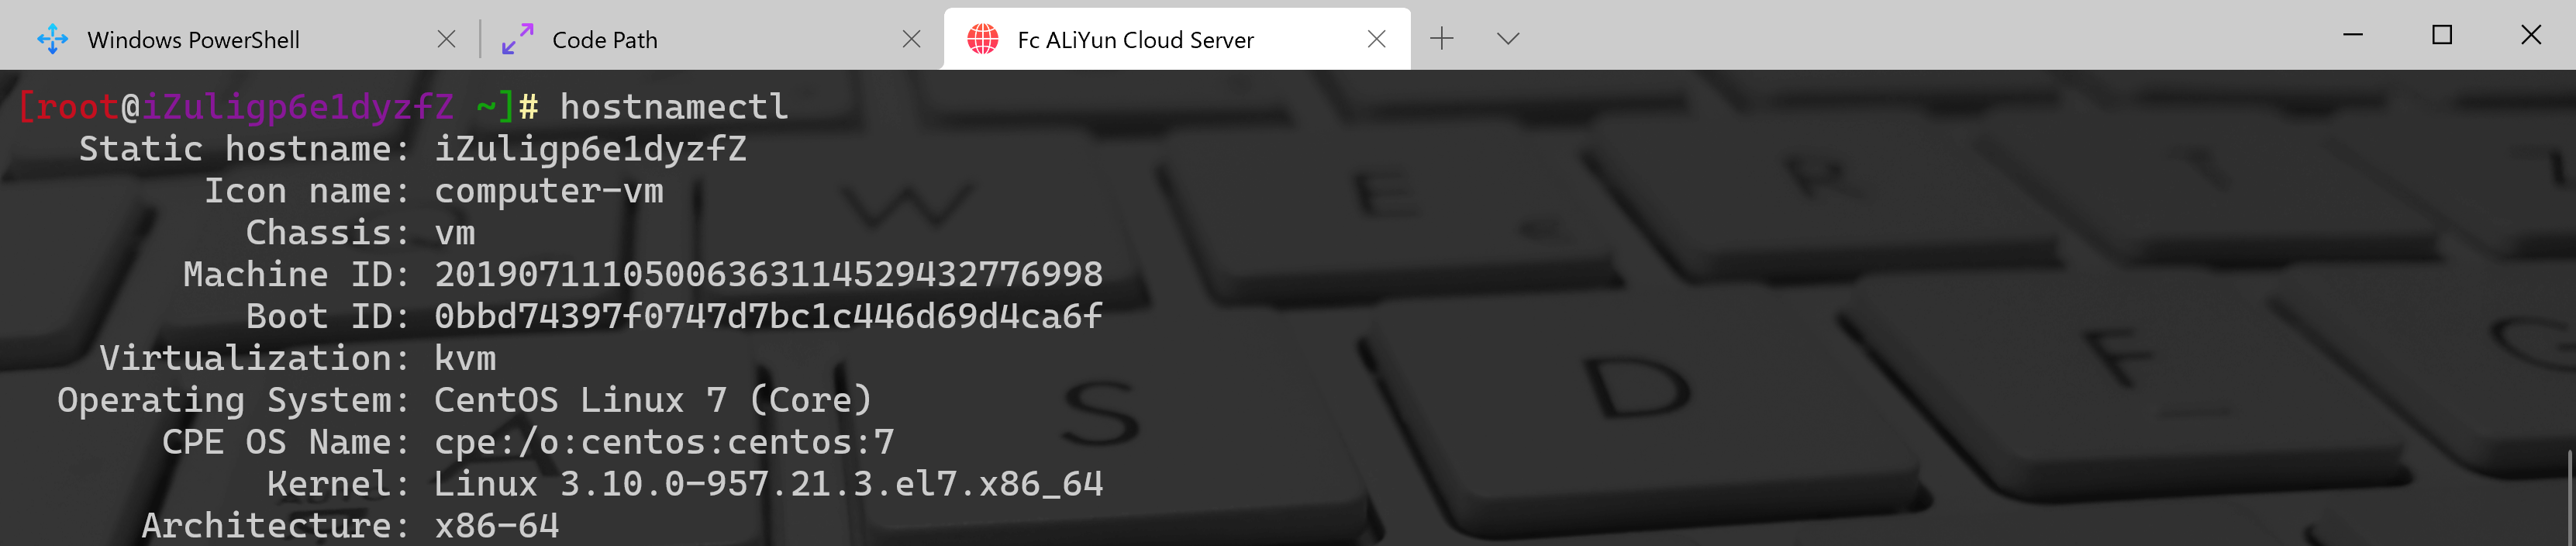
hostnamectl命令查看主机名称
[root@localhost ~]# hostnamectl
   Static hostname: iZuligp6e1dyzfZ
         Icon name: computer-vm
           Chassis: vm
        Machine ID: 20190711105006363114529432776998
           Boot ID: 0bbd74397f0747d7bc1c446d69d4ca6f
    Virtualization: kvm
  Operating System: CentOS Linux 7 (Core)
       CPE OS Name: cpe:/o:centos:centos:7
            Kernel: Linux 3.10.0-957.21.3.el7.x86_64
      Architecture: x86-64
4、System 服务相关的一些目录( Centos 环境,Debian 类的环境可能会有稍许不同)
/usr/lib/systemd/system/ 系统安装的软件默认启动脚本目录
/etc/systemd/system/ 用户根据自己需要建立的启动脚本目录
/etc/sysconfig/ 服务初始化选项目录
/var/lib/ 服务运行时产生的数据存储目录
/etc/xxx/ 各服务配置目录
5、结合一个例子来分析,一台机器开启两个ssh服务
最常使用的ssh服务,系统默认ssh服务22端口,现在想再开一个ssh服务,端口8888
1.系统服务启动脚本 /usr/lib/systemd/system/sshd.service,将其复制到 /etc/systemd/system/ 下,并改名为 sshd2.service,文件内容如下
[Unit]
Description=OpenSSH server daemon
Documentation=man:sshd(8) man:sshd_config(5)
After=network.target sshd-keygen.service
Wants=sshd-keygen.service
[Service]
Type=notify
EnvironmentFile=/etc/sysconfig/sshd
ExecStart=/usr/sbin/sshd -D $OPTIONS
ExecReload=/bin/kill -HUP $MAINPID
KillMode=process
Restart=on-failure
RestartSec=42s

[Install]
WantedBy=multi-user.target
因为要重启一个新的服务,所以要修改一下ExecStart这一行,读取新的配置文件 sshd2_config,改为
ExecStart=/usr/sbin/sshd -D $OPTIONS -f /etc/ssh/sshd2_config
2.到 /etc/ssh/ 下,将 sshd_config 复制到 sshd2_config,并修改端口那一行
Port 8888
3.运行命令 systemctl reload 重新加载一下配置
4.运行命令 systemctl status sshd2.service 查看状态
5 运行命令 systemctl start sshd2.service 开启服务
6.运行命令 systemctl enable sshd2.service 设置开机启动
7.在另一台机器上登录 ssh fancy@ip -p8888 就可以登录了
- 注意1,防火墙要打开8888端口
- 注意2,官方建议用户自己新建的服务脚本最好存放在 /etc/systemd/system/ 目录下,实际情况下存放在系统服务目录 /usr/lib/systemd/system/ 下也是没有问题的,看个人选择。
6、举例,开发一个自己的服务
1.在 /root/bin/ 下创建一个shell脚本 fancy_test.sh,并修改其权限,chmod u+x fancy_test.sh,内容如下
该脚本的意思是,运行该服务时,在 /root/log/ 目录下创建一个日志文件#!/bin/bash logdate=$(date +%s) logdir="/root/log/" logname=fancy.${logdate}.log #echo $logname touch ${logdir}${logname}
2.在 /etc/systemd/system/ 下创建启动脚本 fancy_test.service,输入一下内容 ``` [Unit] Description=fancy_test server daemon [Service] Type=simple ExecStart=/root/bin/fancy_test.sh
[Install]
WantedBy=multi-user.target
``
3.运行命令
systemctl reload<br />4.运行命令systemctl start fancy_test.service`
5.此时会看到在 /root/log/ 目录下创建了一个日志文件

若有收获,就点个赞吧
0 人点赞
