- Specification
- Button description
- Programming guidelines
- Set the detection mode
- Obtain the output values
- Change the color of the fill lights
- Line detection scenarios
- Basic calibration
- Scenario 1: Black line + white margin around line + white background
- Scenario 2: Black line with colored sections + white margin around line + white background
- Scenario 3: Single-colored line + white margin around line + white background
- Scenario 4: Black line + white margin around line + colored background/illustrations
- Scenario 5: Black line + single-colored margin around line + white background

The quad RGB sensor uses visible light as fill lights, which significantly reduce the interference of ambient light. In addition, it provides the function for recognizing colors. The new ambient light calibration function also reduces the interference of the ambient light in line following. With four light sensors, it can support more programming scenarios.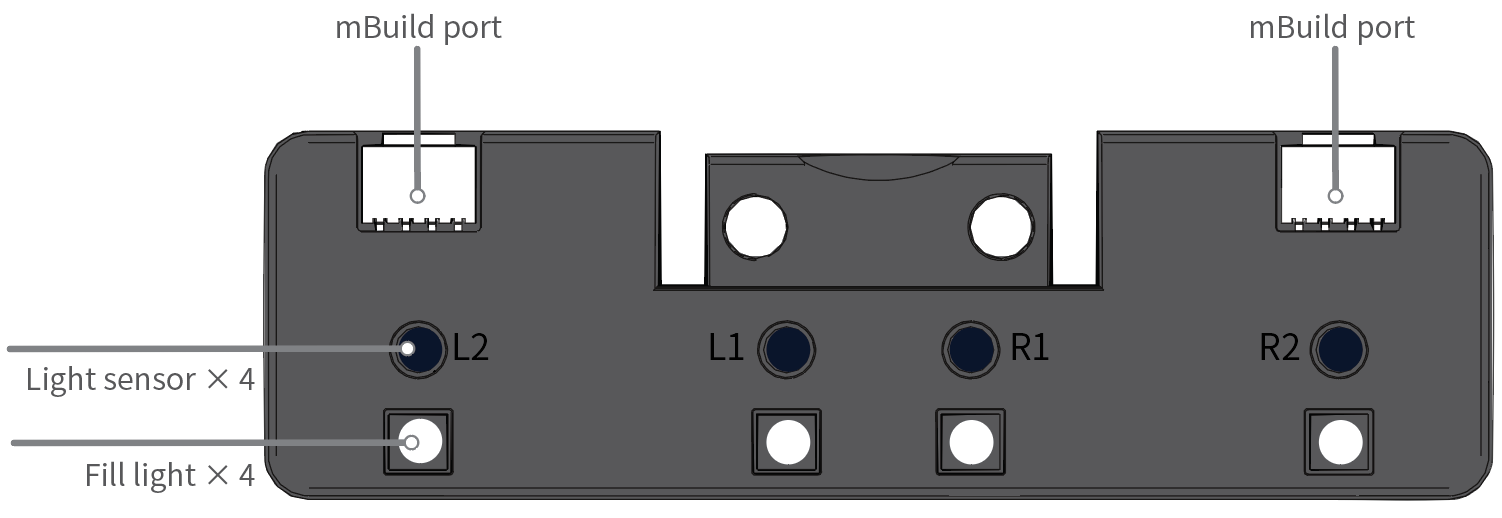
| Quad RGB sensor | Dual RGB color sensor | |
|---|---|---|
| Plastic casing to improve the durability and quality | Yes | No |
| Line-following sensor | 4 | 2 |
| Color sensor | 4 (also serve as line-following sensors) |
No |
| Light sensor | 4 (also serve as line-following sensors) |
No |
| Fill light | Visible light | IR light |
| Ambient light calibration to significantly reduce the interference of ambient light | Yes | No |
Specification
Detection range: 5–15 (mm) from the object to be detected
Button description
- Double-press: When the button is double-pressed, the quad RGB sensor starts to learn the background and line for line following.
Place the light sensors on the background of the line-following track map and double-press the button. When you see the LEDs indicating the line-following state blink quickly, sway the sensors from side to side above the background and line until the LEDs stop blinking. It takes about 2.5 seconds. The parameter values obtained are automatically stored. If the learning fails, the LEDs blink slowly, and you need to start the learning again.
- Long-press: When the button is long-pressed, the quad RGB sensor switches the color of the fill lights. Generally, you don’t need to change the color. The color is set automatically after the learning is complete.
Programming guidelines
You can use mBlock 5 to program the quad RGB sensor.
Connect the quad RGB sensor to CyberPi, add CyberPi and connect it to mBlock 5, and then add the Quad RGB Sensor extension. For details about how to add CyberPi and connect it to mBlock 5 and how to add the extension, see “Add and connect mBot2“ and “Add extensions.”
Set the detection mode
The quad RGB sensor can be programmed to detect either of the following:
- color
- grayscale
For color detection, the quad RGB sensor measures the light reflected by an object in terms of its Red, Green, and Blue (RGB) values. Eight colors are available.
To detect a color, you need to select a color in the block to be used, for example: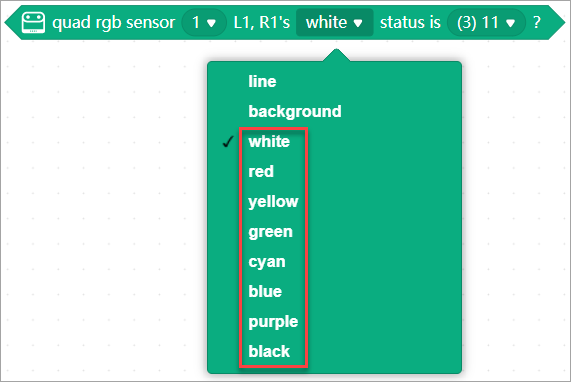
For grayscale detection, the quad RGB sensor measures the intensity of the light reflected by an object regardless of its color.
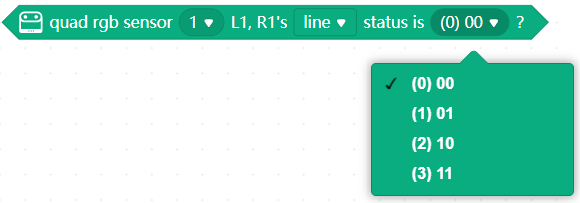
To detect grayscale, you need to select line or background in the block to be used, for example: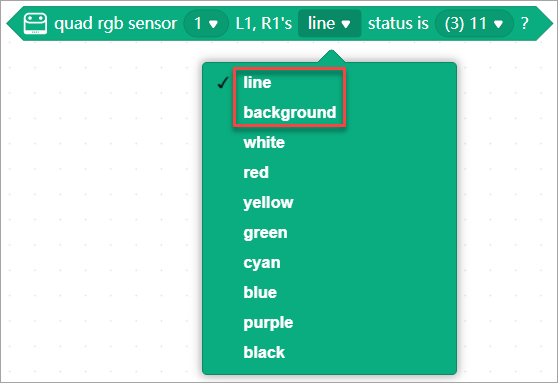
Obtain the output values
The quad RGB sensor can output values based on the color or grayscale it detects, and you can obtain these values by using the reporter blocks, for example:
Change the color of the fill lights
You can change the color of the fill lights between green, red, and blue by long-pressing the button or by using the following block: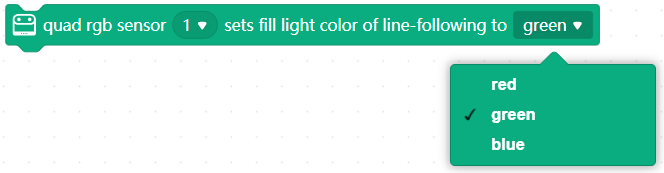
:::info Note: The quad RGB sensor can detect colors regardless of what color the fill lights is. :::
You need to change the color of the fill lights in some application scenarios. For details, see “Line detection scenarios.”
Line detection scenarios
Before you use the quad RGB sensor to detect lines, you need to perform basic calibration on it.
Basic calibration
- Place the sensor on the background and double-press the button on the sensor, and then swipe the sensor horizontally over the line and background.
- Check the two light sensors in the middle (L1 and R1). If the robot is on the line, the blue LEDs of both the light sensors are supposed to be off. The two LEDs are turned on and off alternately when you swipe the robot over the line. :::tips Tips: The quad RGB sensor can detect dark lines on light backgrounds regardless of the color of the illumination. :::
The following describes multiple line detection scenarios, and the blocks and setup recommended for each scenario.
Scenario 1: Black line + white margin around line + white background
For example:
Perform basic calibration on the quad RGB sensor, so that it can recognize the line and background.
| Level | Purpose and block(s) recommended | Remarks |
|---|---|---|
| 1a: junior | - To determine whether the quad RGB sensor detects the specific line state: |

- To obtain the state of the line detected
 |
|
|
| 1b: middle | 
To detect crossings | The quad RGB sensor can’t overlook the line, and therefore it can’t determine whether a T-junction is actually a crossing (“+” shape, the actual line continues after the T…). This can only be checked by driving straight over the T and check if the line continues. |
| 1c: advanced | To implement smooth line following:
| The quad RGB sensor can’t overlook the line, and therefore it can’t determine whether a T-junction is actually a crossing (“+” shape, the actual line continues after the T…). This can only be checked by driving straight over the T and check if the line continues. |
| 1c: advanced | To implement smooth line following: | Check the output value of this block.
Switch the color of the fill lights to make sure that the output value is 0 when the robot is put in the middle of the line.
The color of the fill light may have slight impact on the output value. |
Scenario 2: Black line with colored sections + white margin around line + white background
For example:
The purposes and blocks recommended are the same as those in Scenario 1, but special preparation is required.
Either of the following ways can be used:
- Perform the basic calibration on the lightest color among the colored sections, for example, yellow, so that all darker colors are recognized as black.
Perform basic calibration on the black line, and then long-press the button on the sensor to change the fill light and see if the sensor recognizes the different colored sections as the line to be followed.
- red section: use the green or blue/white fill light
- yellow section: use the blue/white fill light
- green & blue section: all fill lights work :::warning Important to know:
If you have set the color of the fill lights on mBlock 5, the calibration resets the fill lights (each fill light cycles through r/g/b illumination fast).
- Colored sections inside the line to be followed may affect the advanced, smooth line following (recognized as the deviation from the line). For example, when the basic calibration is done on yellow, the blue section may be reported as a deviation even if it is 100% on the line. :::
Scenario 3: Single-colored line + white margin around line + white background
For example: 
Perform basic calibration on the quad RGB sensor, so that it can recognize the line and background.
The purposes and blocks recommended are the same as those in Scenario 1.
:::info
Note:
- If you use the deviation reporter block, long-press the button on the quad RGB sensor to switch the color of the fill lights to make sure that the output value is 0 when you put the robot in the middle of the line.
- It is not recommended to use the deviation reporter block when the contrast between the line and background is low. :::
Scenario 4: Black line + white margin around line + colored background/illustrations
For example: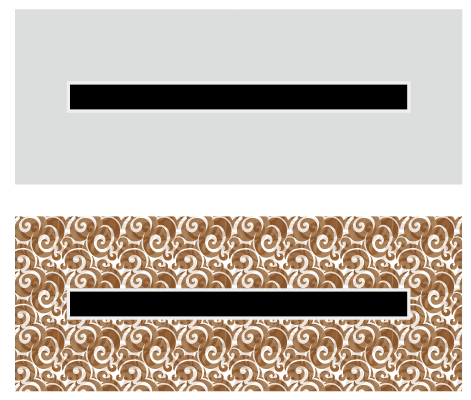
Perform basic calibration on the quad RGB sensor, so that it can recognize the line and background.
| Level | Purpose and block(s) recommended | Remarks |
|---|---|---|
| 4a: junior | - To determine whether the quad RGB sensor detects the specific line state: |
- To obtain the state of the line detected
 |
|
|
| 4b: middle | 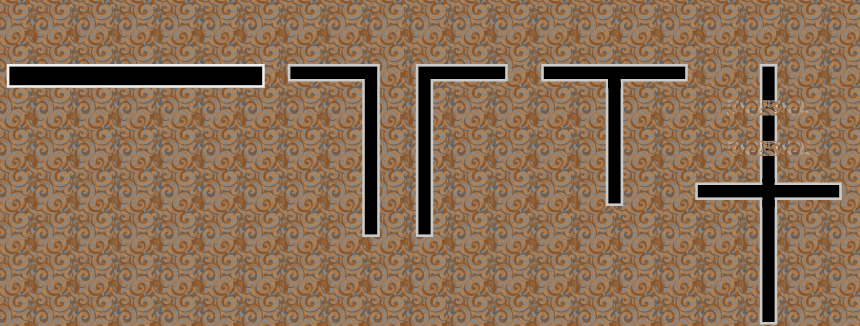
To detect crossings: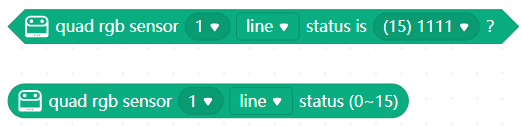 | The outer areas (background) may be recognized as the line to be followed, depending on the light conditions.
When this happens, you can use only the L1 and R1 light sensors to detect lines, or make sure that the white margin around line is wide enough to keep the sensors from detecting the outer background. |
| 4c: advanced | To detect deviation from the line: | If the colors of the outer areas are close enough to the color of the line to be followed, the output value of the deviation reporter block may be affected, and thus line following may fail.
In this case, long-press the button on the quad RGB sensor to change the color of the fill lights, making sure that the difference between the line and background is recognized. The blue LEDs are turned on and off alternately when you swipe the robot over the line.
If you use the deviation reporter block, switch the color of the fill lights to make sure that the output value is 0 when the robot is put in the middle of the line.
The color of the fill light may have large impact on the output value. |
Scenario 5: Black line + single-colored margin around line + white background
For example:
Perform basic calibration on the quad RGB sensor, so that it can recognize the line and background.
The purpose and blocks recommended are the same as those in 1a of Scenario 1. Crossing and deviation detection are not recommended, because the margin around lines may be recognized by L2 or R2 as the line to be followed.
:::tips Tips: You can also program the quad RGB sensor to detect white lines on black or colored backgrounds. :::

若有收获,就点个赞吧
0 人点赞
