This page describes how to write a simple obstacle avoidance program for mBot2 with the mBlock 5 client on your PC.
Before you start, make sure that you’ve got:
 or or  A computer |
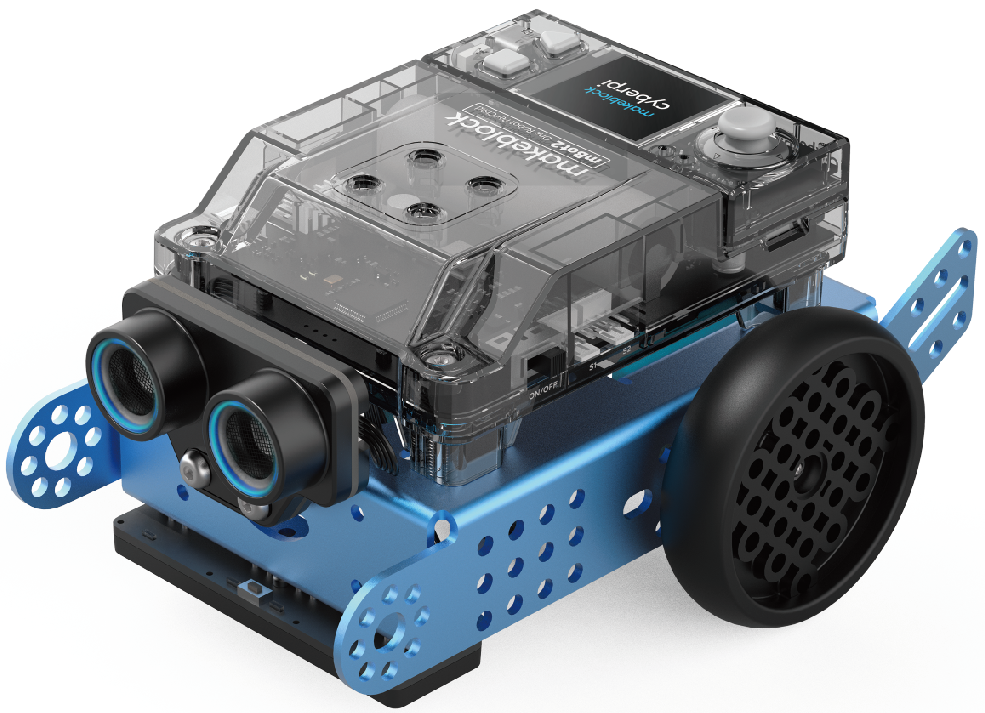 mBot2 If you haven’t completed the building of mBot2, refer to “Build mBot2“ to build it first. |
|---|---|
1. Download and install mBlock 5 on your PC
(Skip this step if you have already downloaded and installed mBlock 5 on your PC.)
(1) Go to https://mblock.makeblock.com/en-us/download/ to download mBlock 5 to a local disk.
Download the version compatible to the system running on your PC.
(2) Double-click the software you’ve downloaded to install it.
Click Yes when the system asks you “Do you want to aloow this app to make changes to your device?” and click to install drivers if prompted.
2. Connect mBot2 to mBlock 5
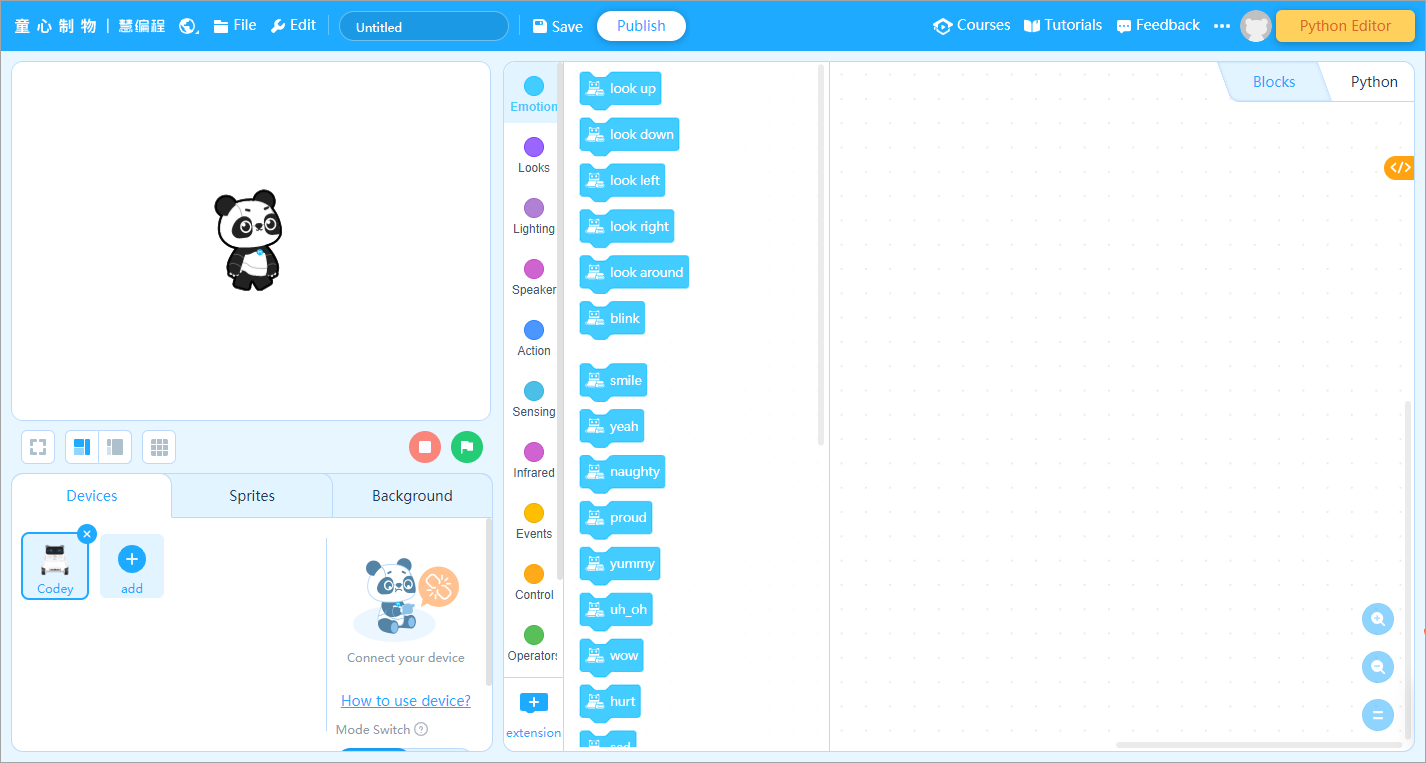
(1) Double-click the mBlock 5 icon on your PC to open it.

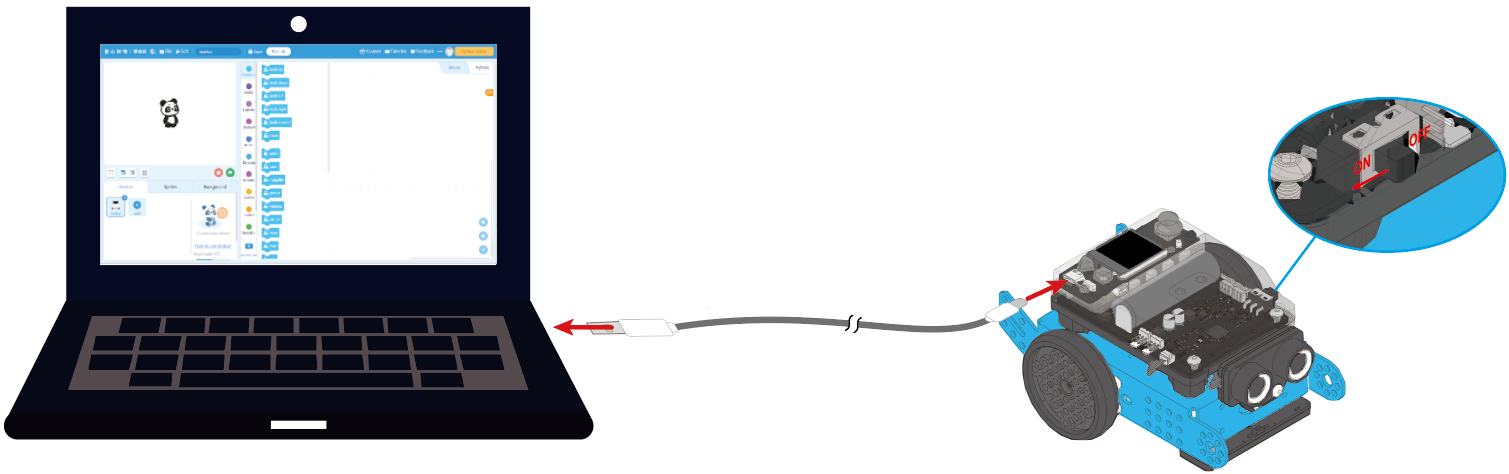
(2) Use a Micro USB cable (Type-C) to connect mBot2 to your PC, and power on mBot2.
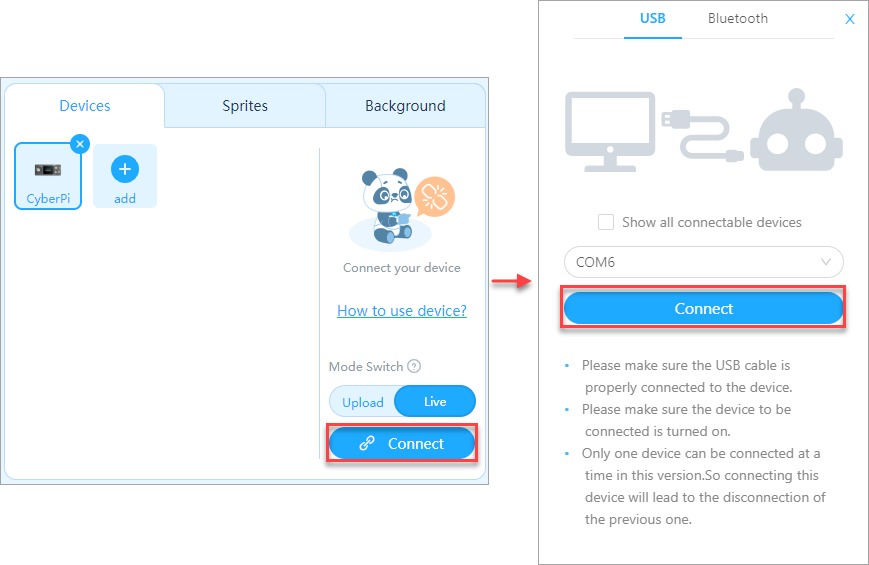
(3) Click “+ add” on the “Devices” tab, select “CyberPi” in the device library, and click “OK”.
:::info
Note: mBlock 5 displays the most frequently used device by default, and you can neglect it or delect it before adding a device.
:::

(4) Click “Connect” to connect CyberPi to mBlock 5.
3. Add the extensions required in the obstacle avoidance program
To avoid obstacles, mBot2 uses its ultrasonic sensor 2 to detect obstacles in its way and then respond to them by using the motors and wheels connected to mBot2 Shield. Therefore, you need to add the mBot2 and Ultrasonic Sensor 2 extensions.
(1) Add the “mBot2” extension.
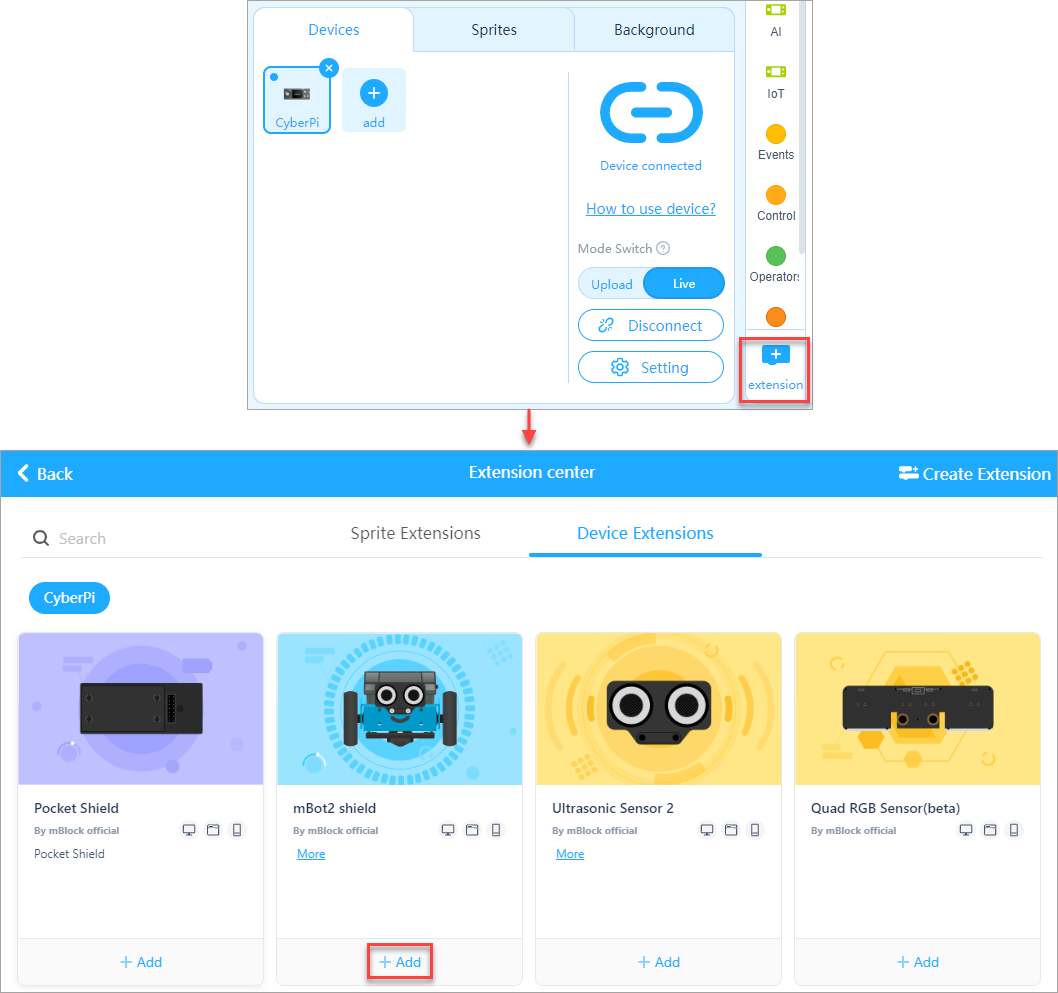
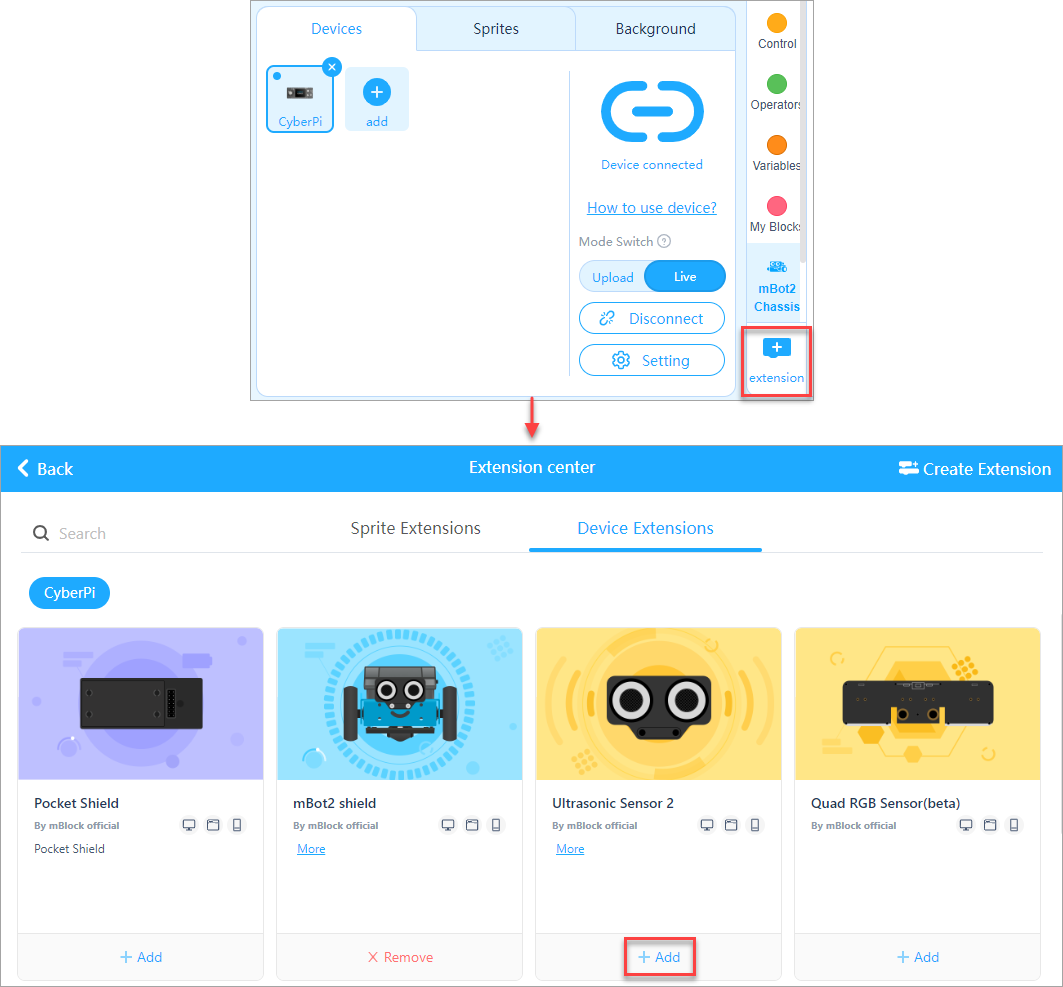
(2) Add the “Ultrasonic Sensor 2” extension.
After adding the extensions, you can find the blocks in the blocks area.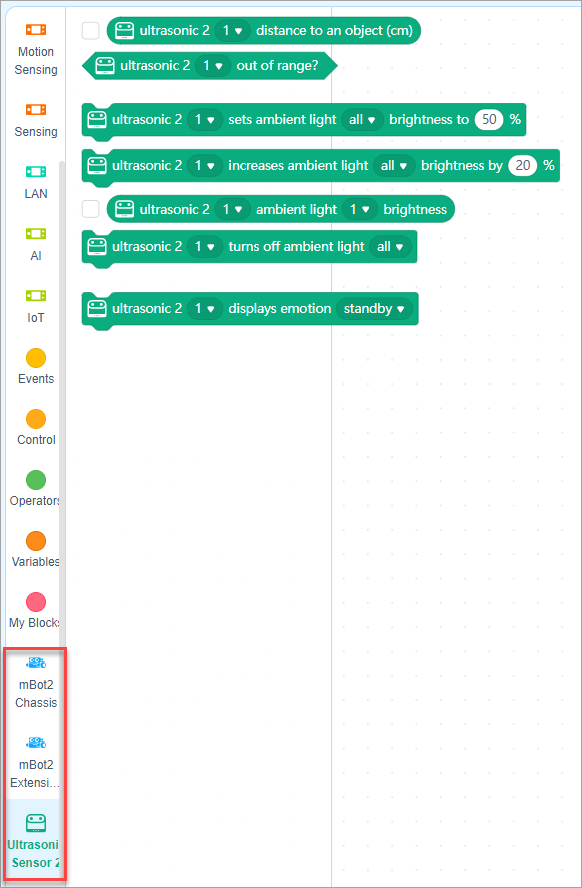
4. Start to write the program
(1) Set the programming mode to “Upload”.
Live: In this mode, you can view the program execution effect in real time, which facilitates the debugging of the program. In this mode, you must keep mBot2 connected to mBlock 5. If they are disconnected, the program cannot be executed.
Upload: In this mode, you need to upload the compiled program to mBot2. After being successfully uploaded, the program can still run properly on mBot2 when it is disconnected from mBlock 5.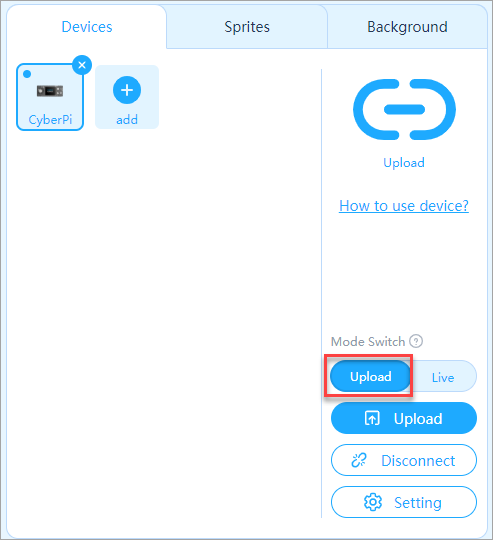
(2) Drag the blocks required to the scripts area.
a. First, define the event for triggering the execution of the obstacle avoidance program. For example, trigger the program by pressing button B.
Click the Events category, drag the block when button () pressed to the scripts area, and click the drop-down list box to select button B.
b. Define how many times the program is to be executed. For example, keep executing the program after it is triggered.
Click the Control category and drag the block forever to the scripts area.
c. Define the specific conditions for avoidance and how mBot2 responds to an obstacle.
Define the condition
For example, mBot2 starts to avoid an obstacle when it is 9cm or less away from mBot2; and mBot2 keeps moving forward when no obstacle is found or an obstacle is more than 9cm away from it.
Click the Control category and drag the block if () then () else () to the scripts area.
The condition involves the operation of distance.
Click the Operators category and drag the block () > () to the scripts area and put it into the condition block.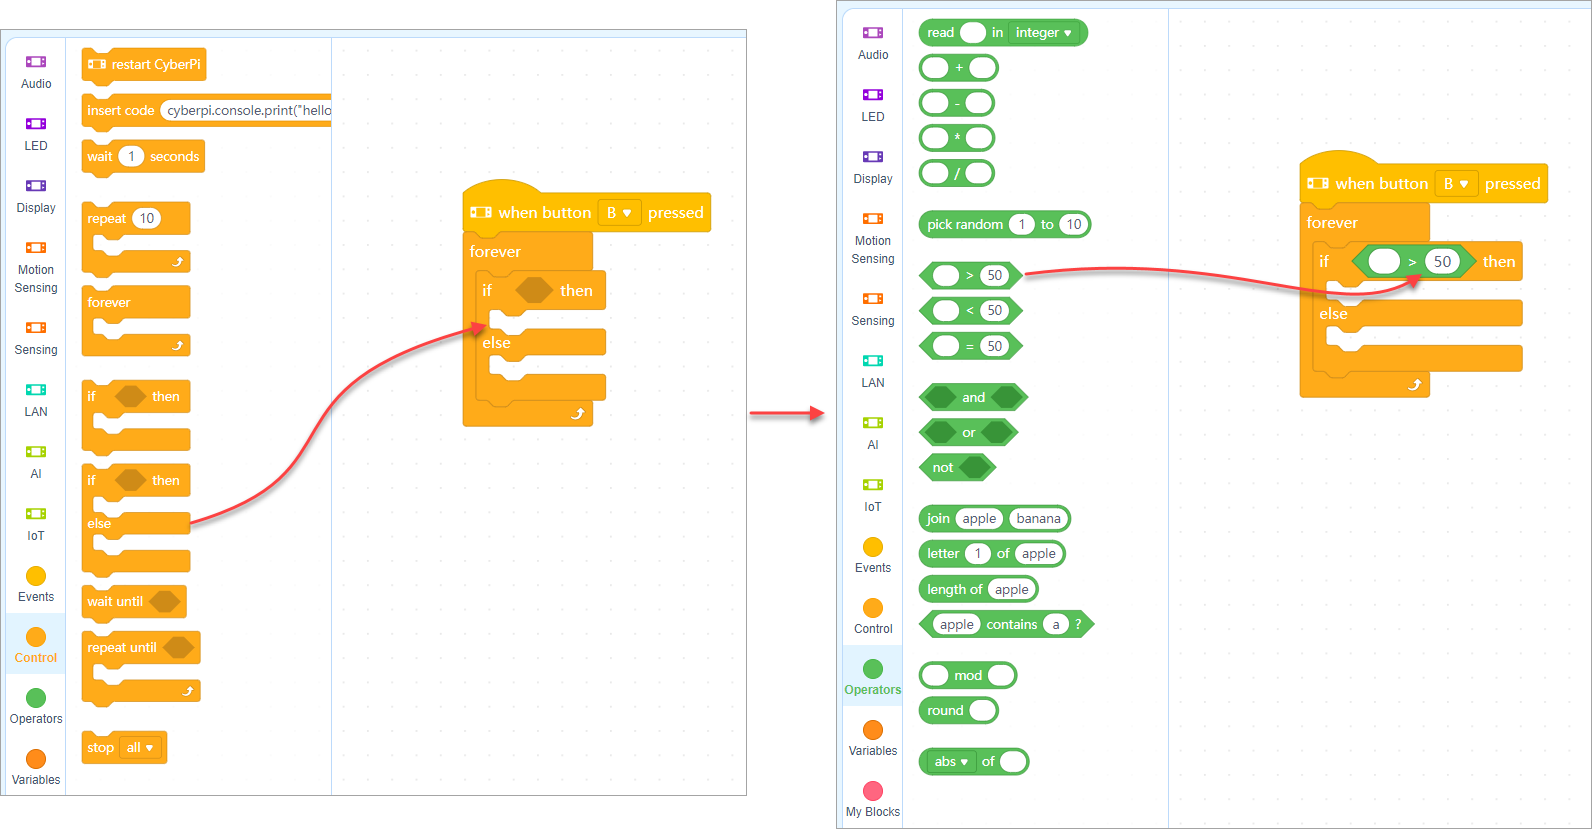
Click the value 50 to change it to 9.
Click the Ultrasonic Sensor 2 category and drag the block ultrasonic 2 () distance to an object (cm) to the scripts area and put it into the operation block.
Define the responses
When an obstacle is more than 9cm away from mBot2, mBot2 keeps moving forward.
Click the mBot2 Chassis category and drag the block () at () RPM to the scripts area and put it into the condition block.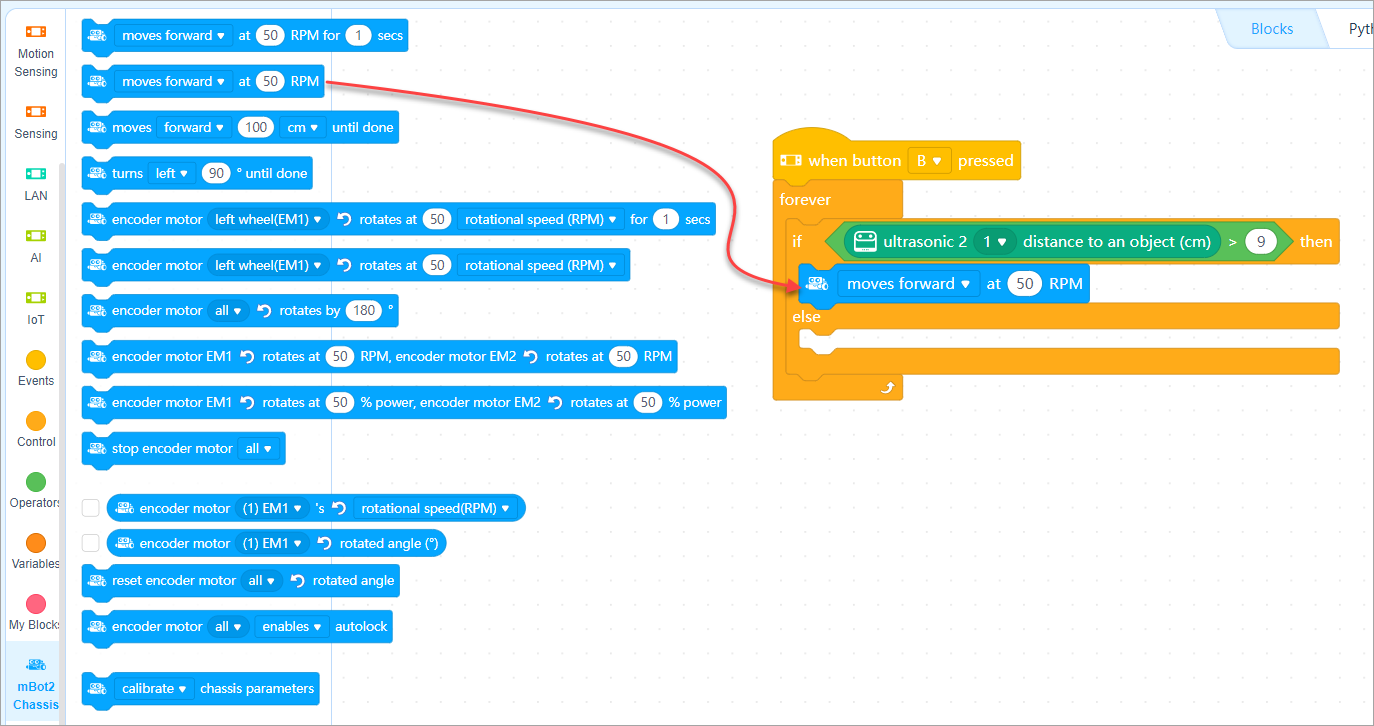
When an obstacle is 9cm or less away from mBot2, mBot2 turns left.
Drag the block () at () RPM for () secs to the scripts area, put it into the condition block, and click the drop-down list box to select turns left.
Now, a simple obstacle avoidance program is completed.
5. Upload the program to mBot2
:::info
Note: The program you upload will replace the last program you execute on mBot2.
:::
Click Upload and wait till the uploading is complete.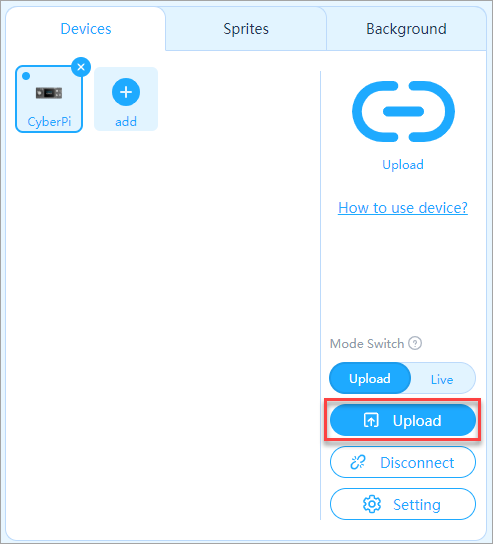 :::info
About program overriding
:::info
About program overriding
You can find two program categories on CyberPi, namely Preset and My programs. Choose Switch Program and then pull the joystick to the left or right to switch betweem them. 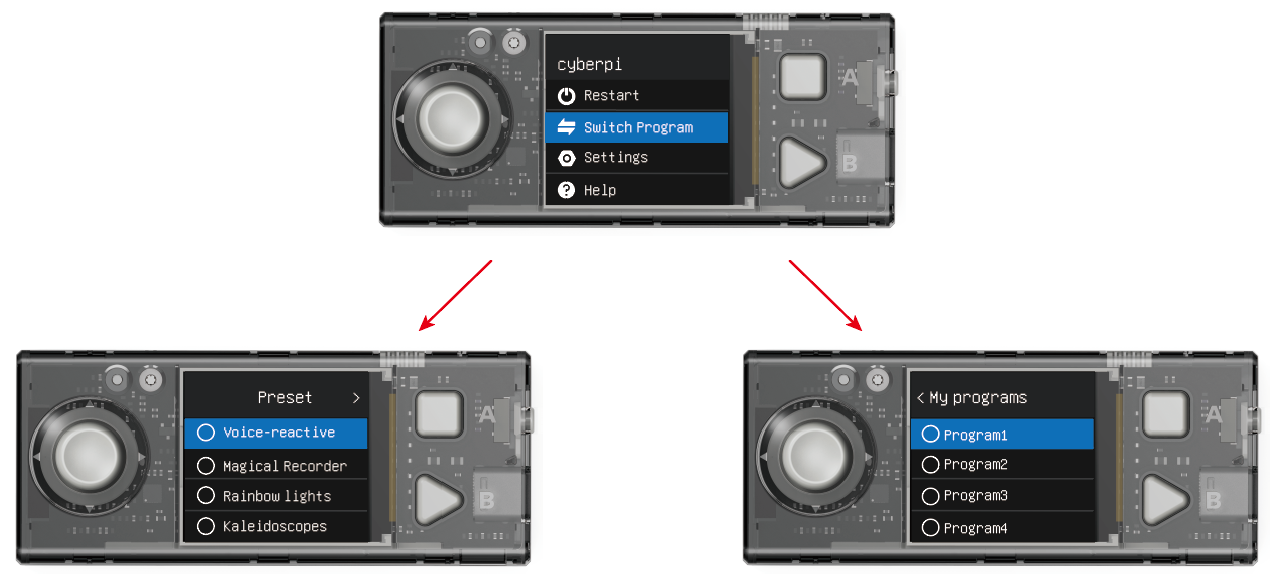
An uploaded program can override a program only in My programs.
If you upload a program when you are running a preset program, the program you uploaded override Program1 in My programs. You need to enter My programs to find it and can press button B to run it.
If you upload a program when you are running a program in My Programs, the program you upload override the program you are running. For example, you upload a program when you are running Program2, Porgam2 is overridden by the program you upload.
To change the name of a program, see “How to change program names on CyberPi?“ :::
6. Execute the program
Press button B on CyberPi.
mBot2 starts to move forward and detect obstacles. When an obstacle is found and it’s 9cm or less away from mBot2, mBot2 turns left for one second and then moves forward.
:::tips Tips:
- You can change the parameter values on the blocks (such as changing the distance threshold or responses) or add more conditions to compile your own obstacle avoidance programs.
- You can also compile other programs (such as a line following program) in the similar way.
- To learn more from example programs, choose Tutorials > Example Programs on the menu bar of mBlock 5. :::

若有收获,就点个赞吧
0 人点赞
