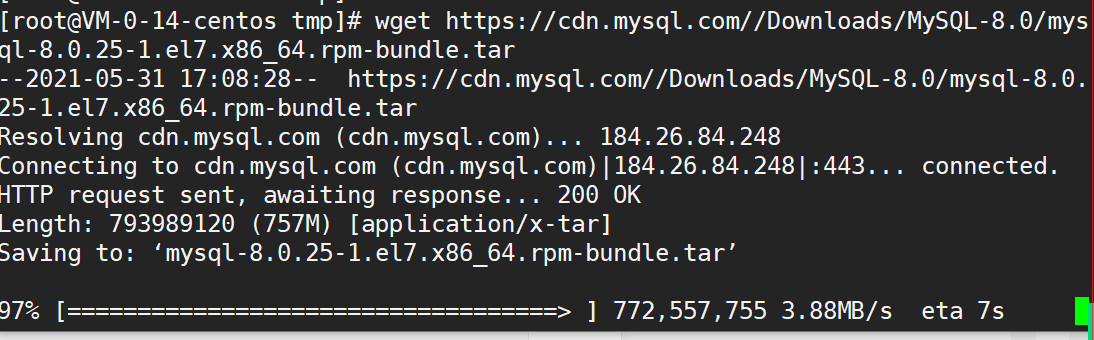
1. 下载安装文件
cd /tmpwget https://cdn.mysql.com//Downloads/MySQL-8.0/mysql-8.0.25-1.el7.x86_64.rpm-bundle.tar
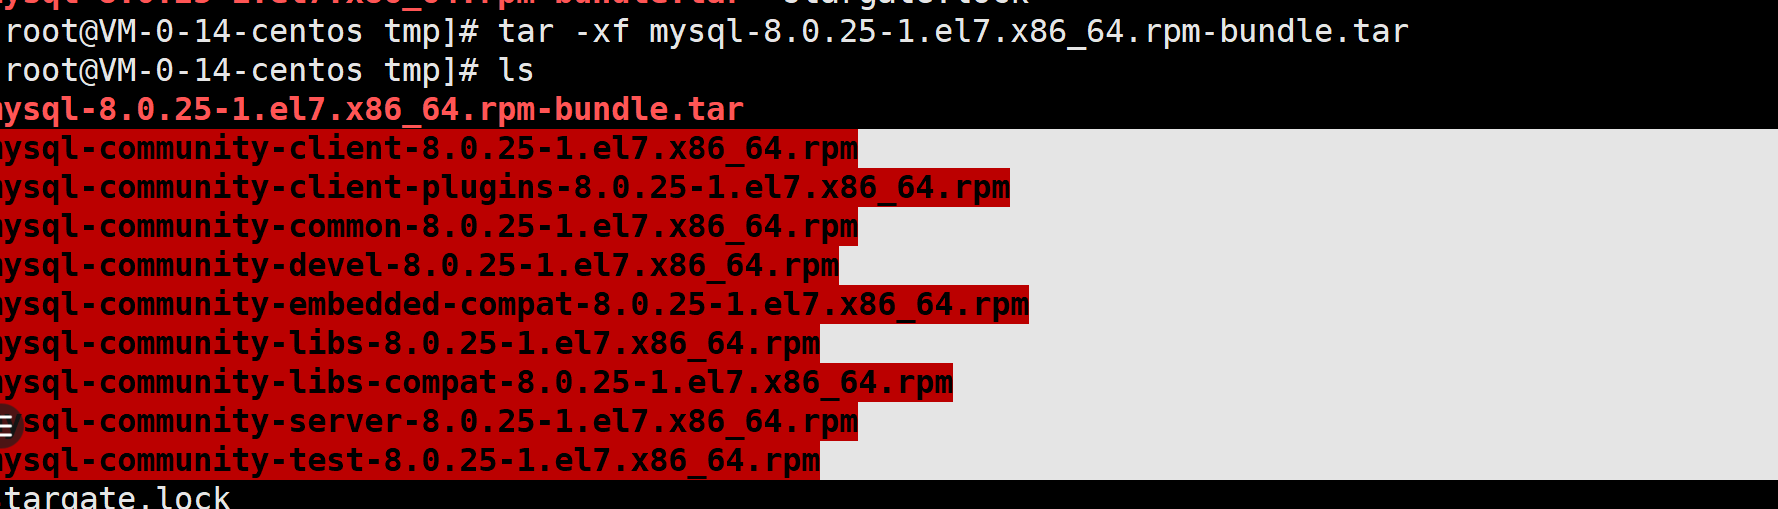
2. 解压文件
下载完成之后
tar -xf mysql-8.0.25-1.el7.x86_64.rpm-bundle.tar
解压完成之后 会有对应 rpm 文件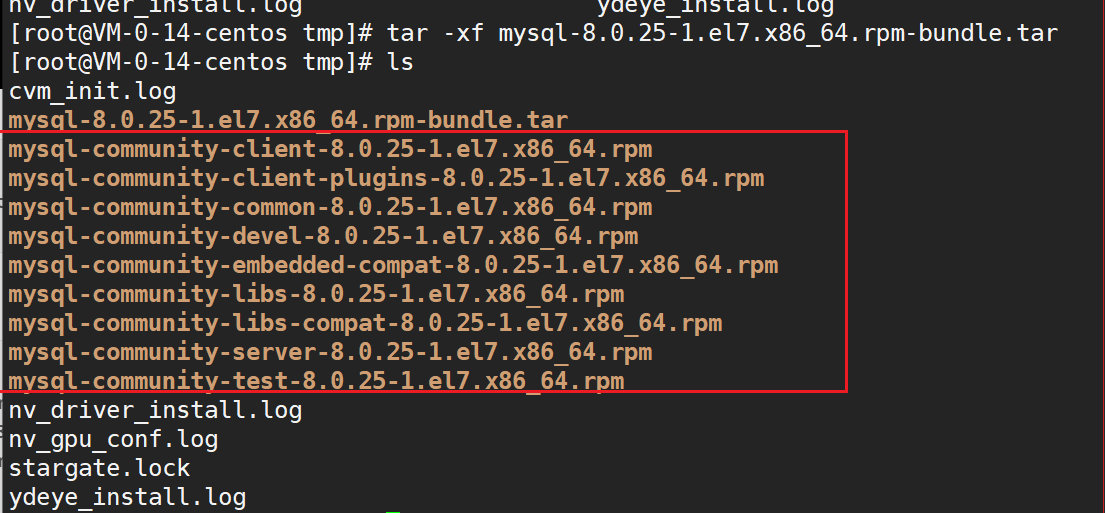
mysql-community-client-8.0.25-1.el7.x86_64.rpmmysql-community-client-plugins-8.0.25-1.el7.x86_64.rpmmysql-community-common-8.0.25-1.el7.x86_64.rpmmysql-community-devel-8.0.25-1.el7.x86_64.rpmmysql-community-embedded-compat-8.0.25-1.el7.x86_64.rpmmysql-community-libs-8.0.25-1.el7.x86_64.rpmmysql-community-libs-compat-8.0.25-1.el7.x86_64.rpmmysql-community-server-8.0.25-1.el7.x86_64.rpmmysql-community-test-8.0.25-1.el7.x86_64.rpm
3. rpm 安装
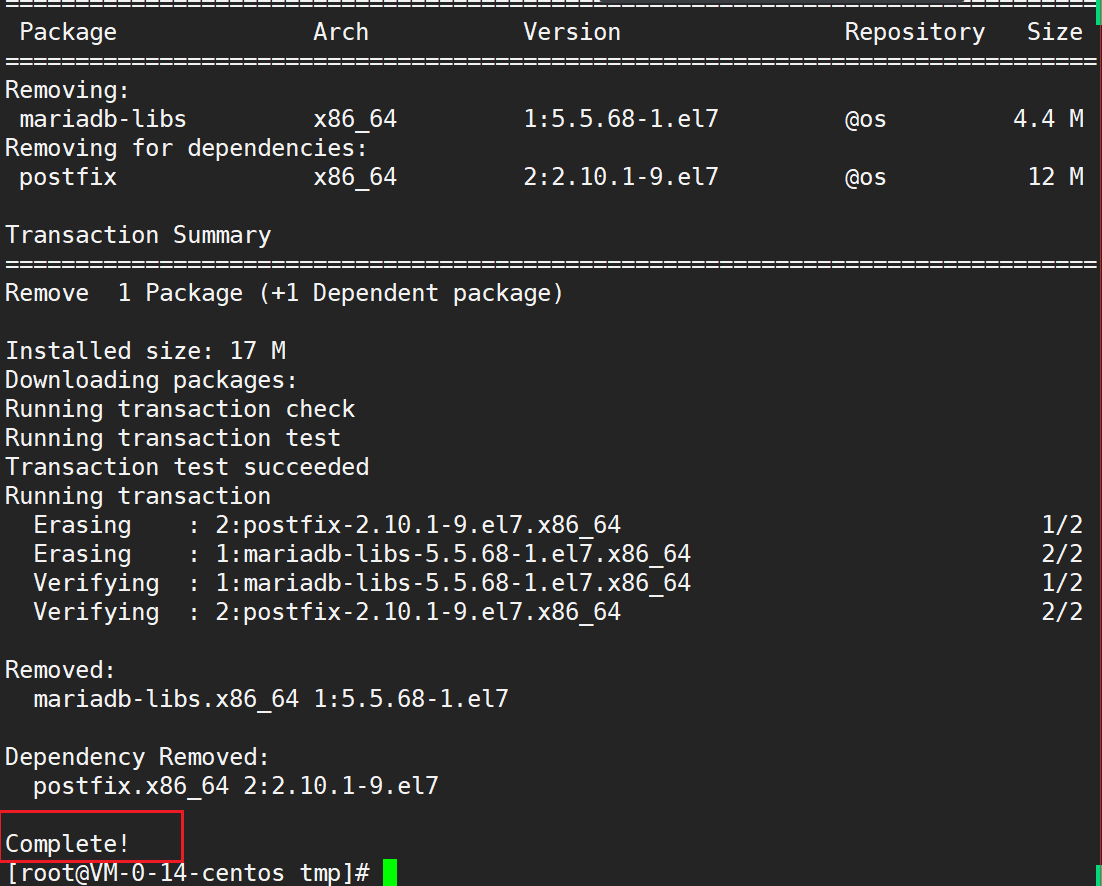
卸载自带的老版本
yum remove -y mariadb-libs.x86_64
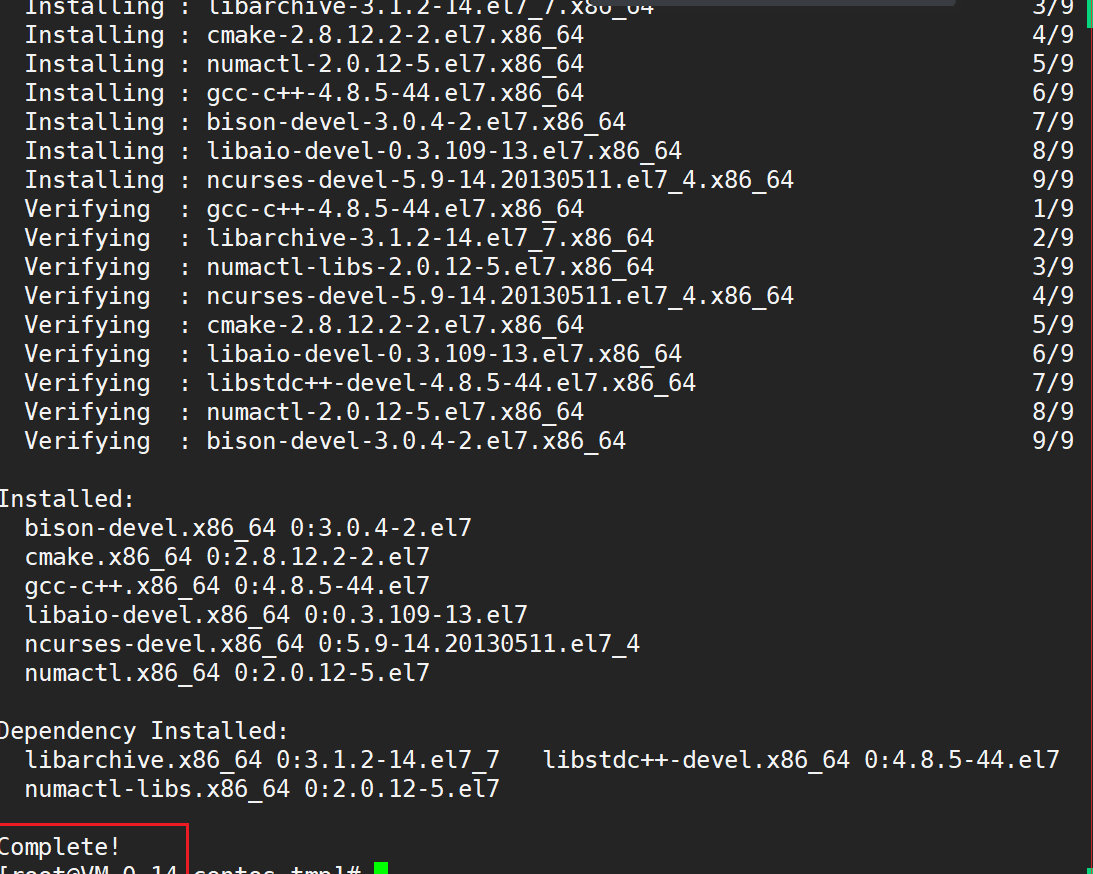
安装依赖库
yum -y install make gcc-c++ cmake bison-devel ncurses-devel libaio libaio-devel numactl
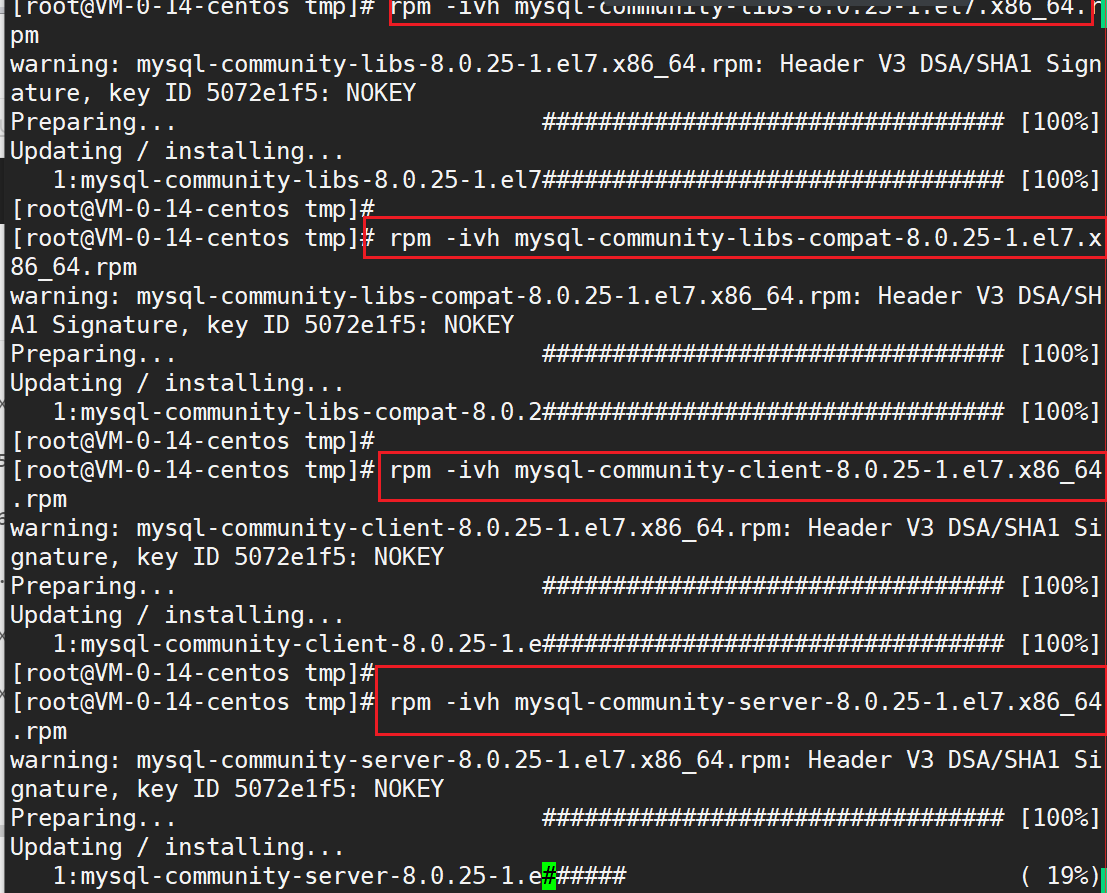
安装上面解压的文件
一次性复制下面所有命令 并执行
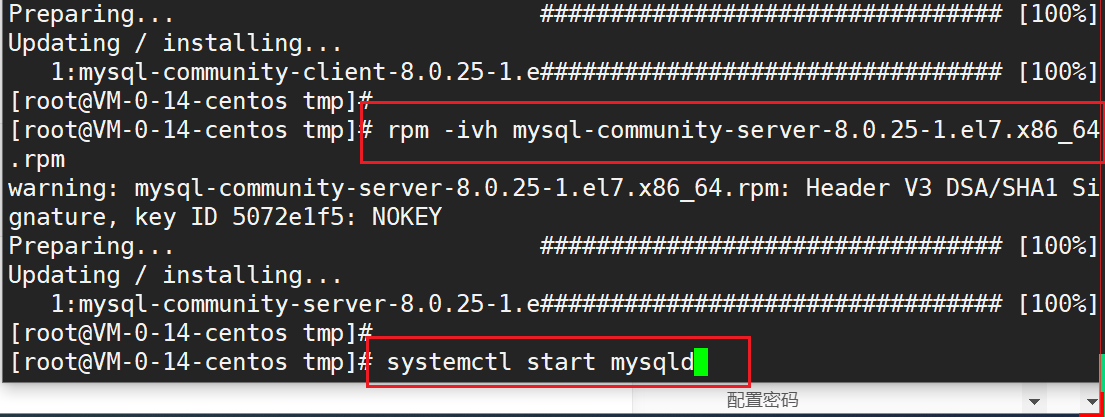
rpm -ivh mysql-community-common-8.0.25-1.el7.x86_64.rpmrpm -ivh mysql-community-client-plugins-8.0.25-1.el7.x86_64.rpmrpm -ivh mysql-community-libs-8.0.25-1.el7.x86_64.rpmrpm -ivh mysql-community-libs-compat-8.0.25-1.el7.x86_64.rpmrpm -ivh mysql-community-client-8.0.25-1.el7.x86_64.rpmrpm -ivh mysql-community-server-8.0.25-1.el7.x86_64.rpm
配置数据库
启动数据库
systemctl start mysqld
检查mysql 进程
ps -aux | grep mysqld

查看数据库的默认密码
cat /var/log/mysqld.log | grep password

配置密码
执行命令
mysql_secure_installation

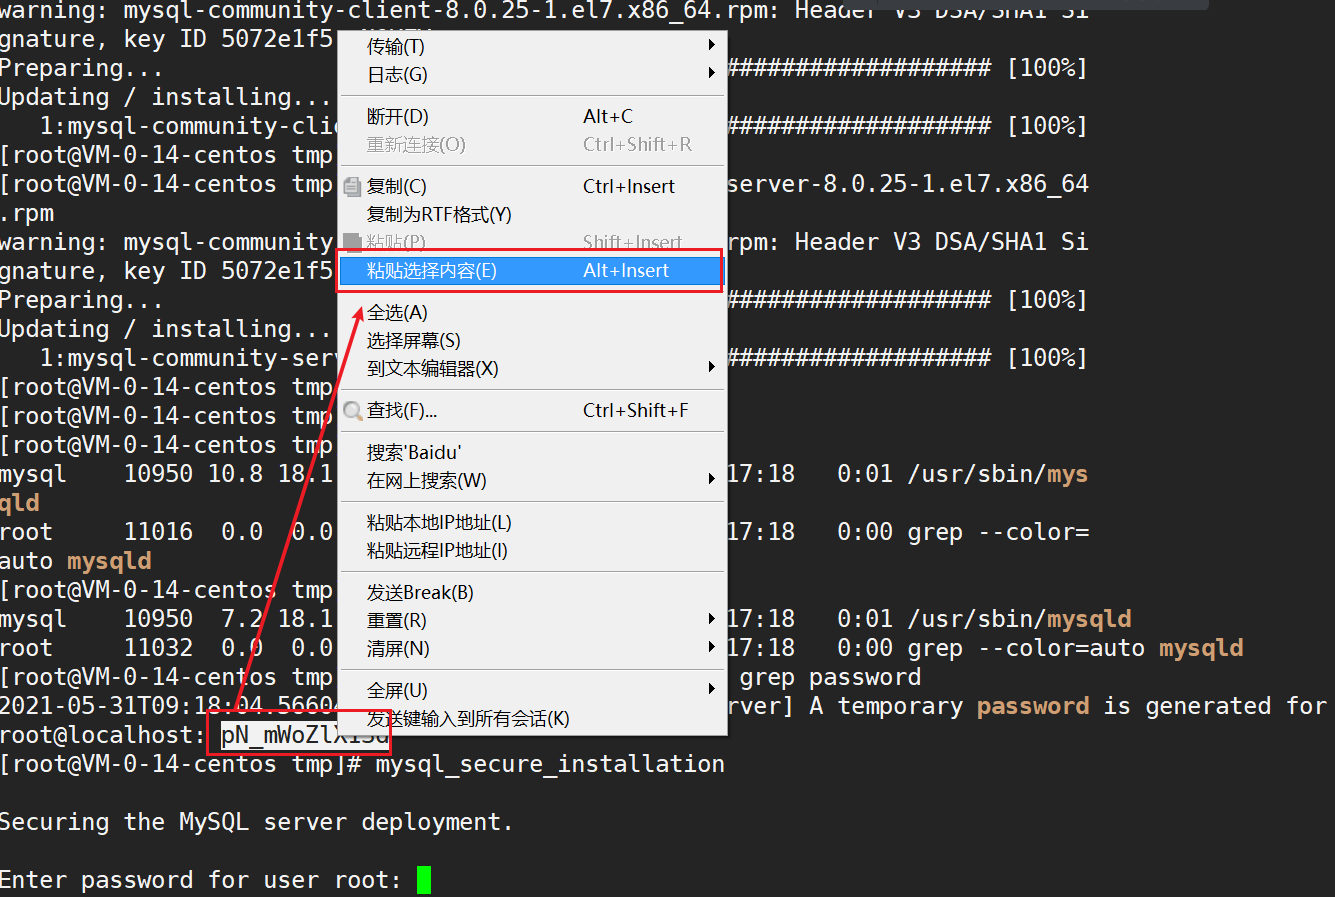
根据提示输入新密码: 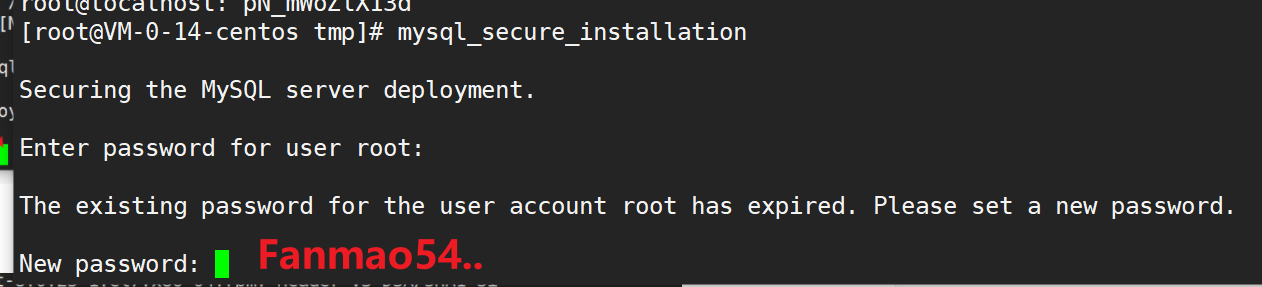
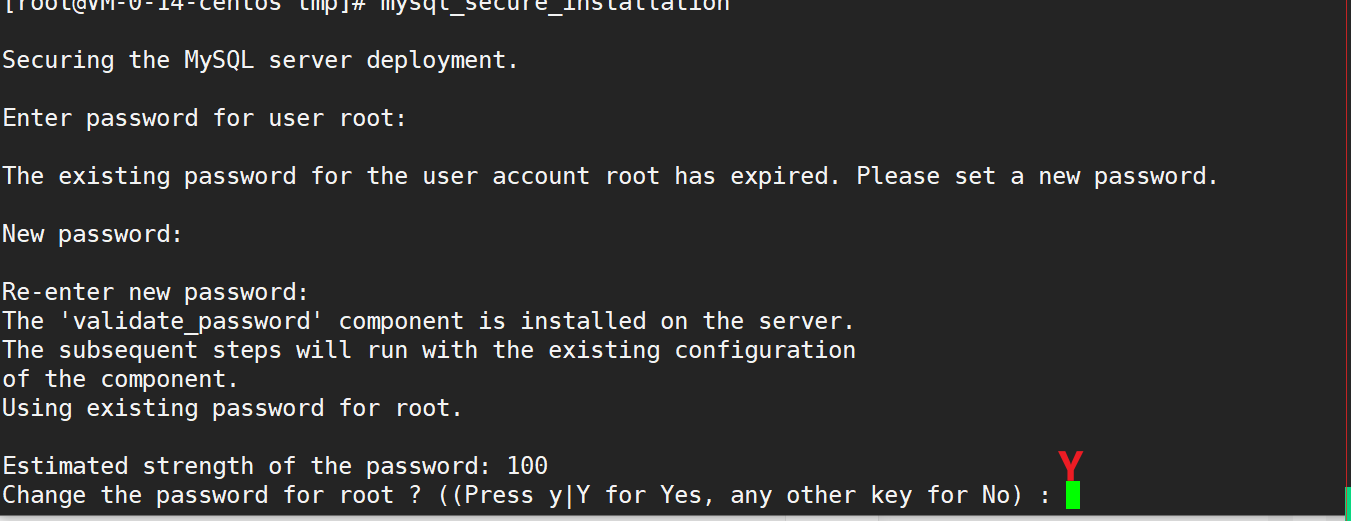
再次输入密码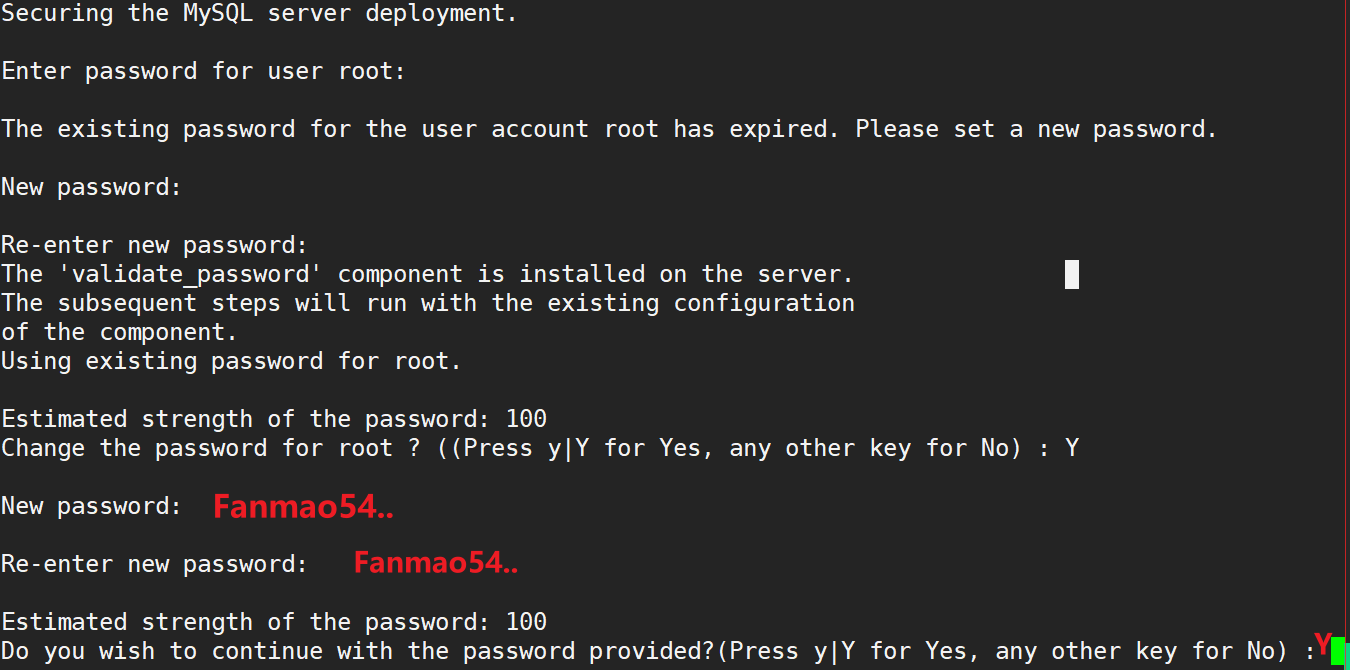
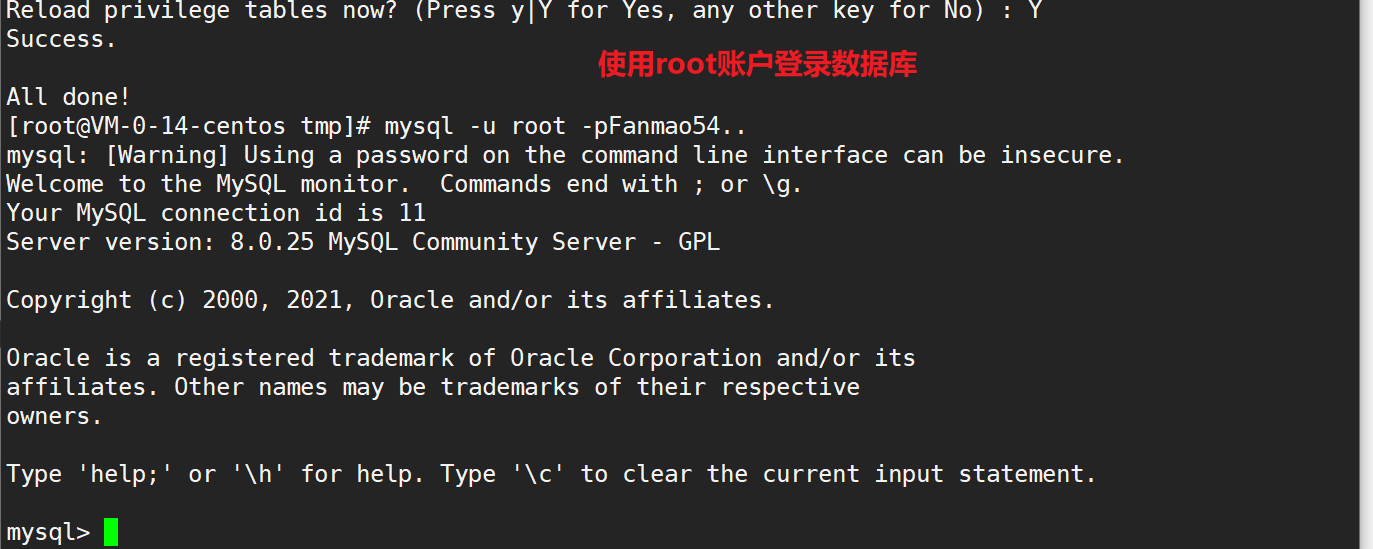
Estimated strength of the password: 100Do you wish to continue with the password provided?(Press y|Y for Yes, any other key for No) : YBy default, a MySQL installation has an anonymous user,allowing anyone to log into MySQL without having to havea user account created for them. This is intended only fortesting, and to make the installation go a bit smoother.You should remove them before moving into a productionenvironment.Remove anonymous users? (Press y|Y for Yes, any other key for No) : YSuccess.Normally, root should only be allowed to connect from'localhost'. This ensures that someone cannot guess atthe root password from the network.Disallow root login remotely? (Press y|Y for Yes, any other key for No) : YSuccess.By default, MySQL comes with a database named 'test' thatanyone can access. This is also intended only for testing,and should be removed before moving into a productionenvironment.Remove test database and access to it? (Press y|Y for Yes, any other key for No) : Y- Dropping test database...Success.- Removing privileges on test database...Success.Reloading the privilege tables will ensure that all changesmade so far will take effect immediately.Reload privilege tables now? (Press y|Y for Yes, any other key for No) : YSuccess.All done!
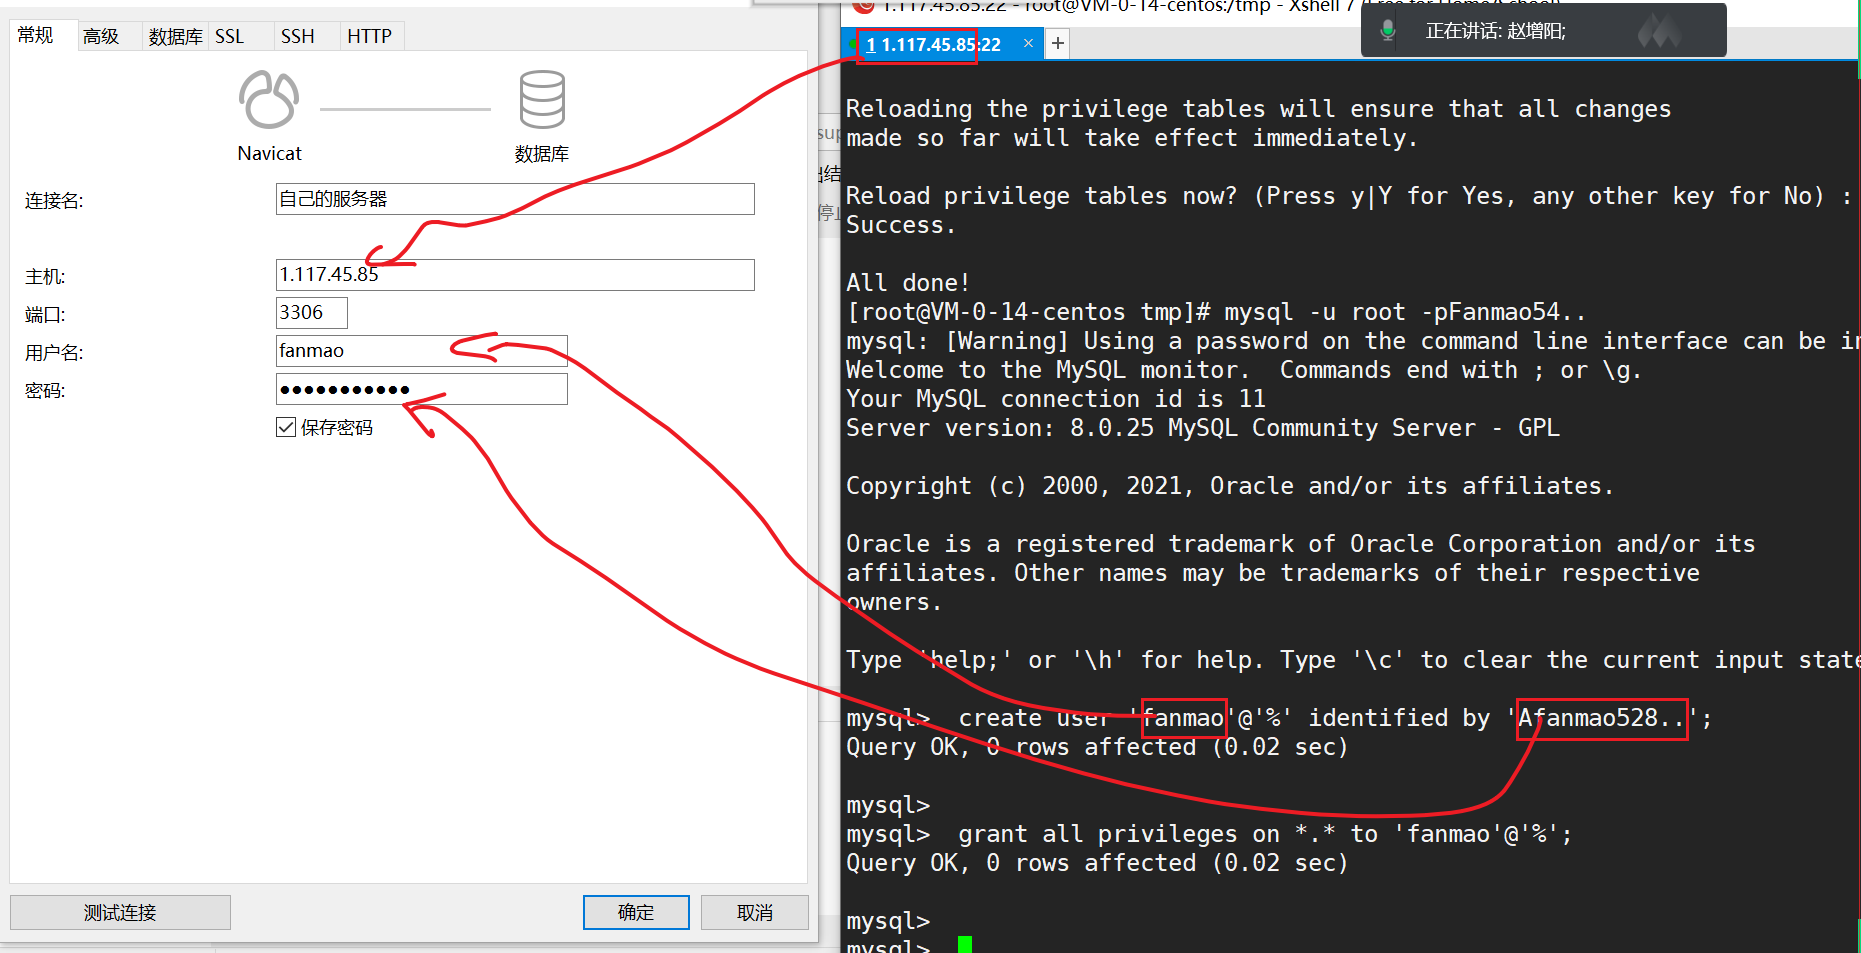
设置远程登录用户
登录mysql 数据库
mysql -u root -pFanmao54..
创建远程登录用户:
create user 'fanmao'@'%' identified by 'Afanmao528..';grant all privileges on *.* to 'fanmao'@'%';

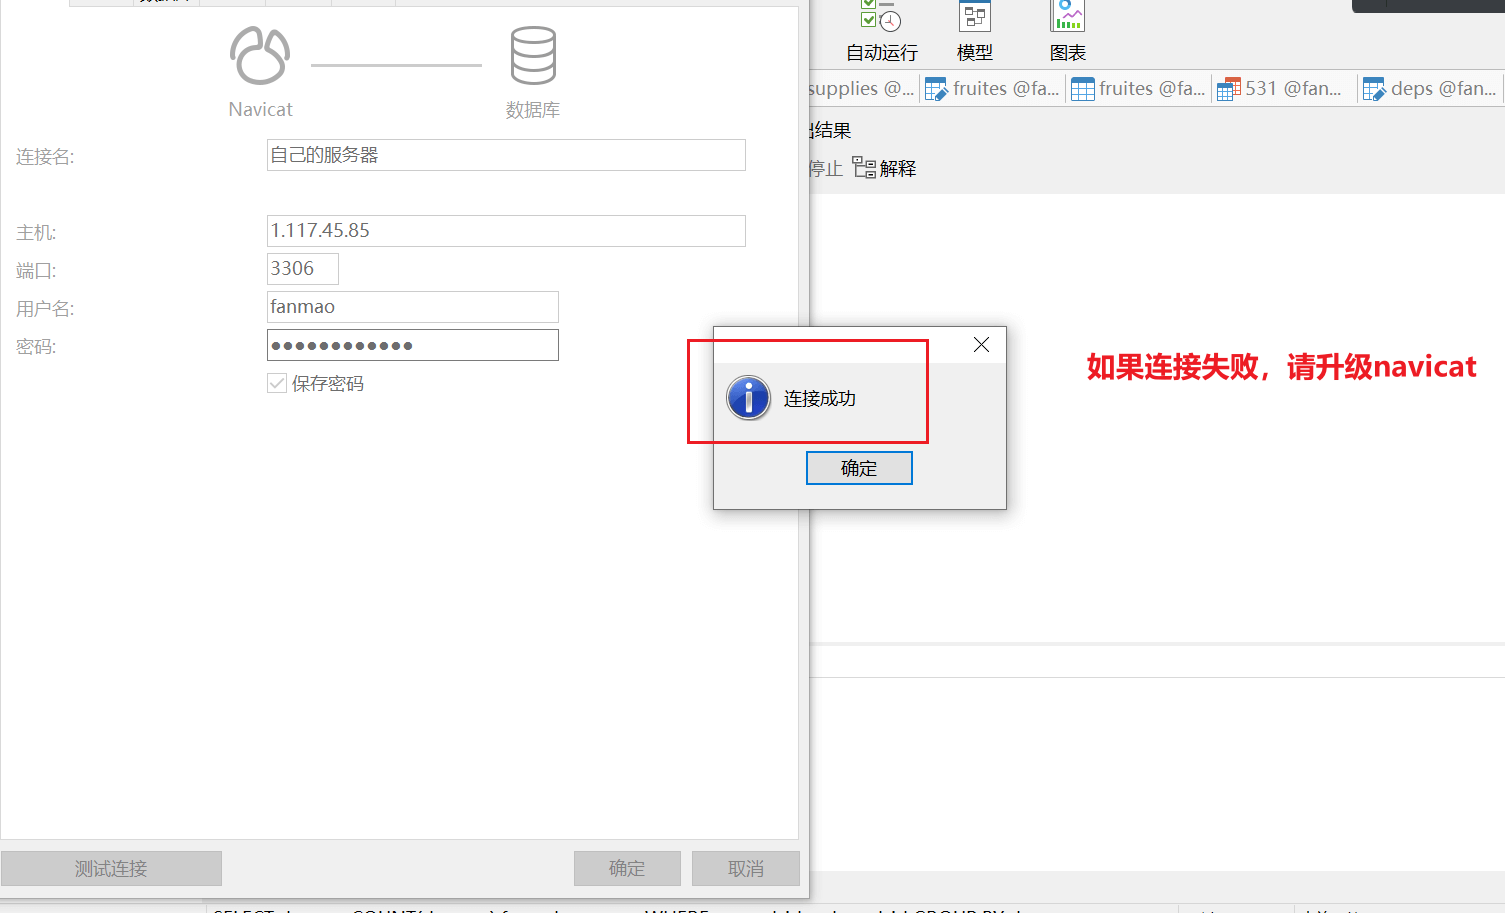
使用用户fanmao
密码 Afanmao528..
登录

若有收获,就点个赞吧
0 人点赞
