基本使用
发送get 请求
使用 requests 库进行模拟发送请求。
所有的测试用例 函数名都以 test_ 开始
def test_home_topic():
# 请求的urlhome_url = "http://47.100.175.62:3000/api/v1/topics"# 发送get请求r = requests.get(url=home_url)# 打印 服务器返回状态码 status_codeprint(r.status_code)# 打印 服务器返回的结果print(r.json())
在pycharm 中执行。可以看到对应的效果。<br />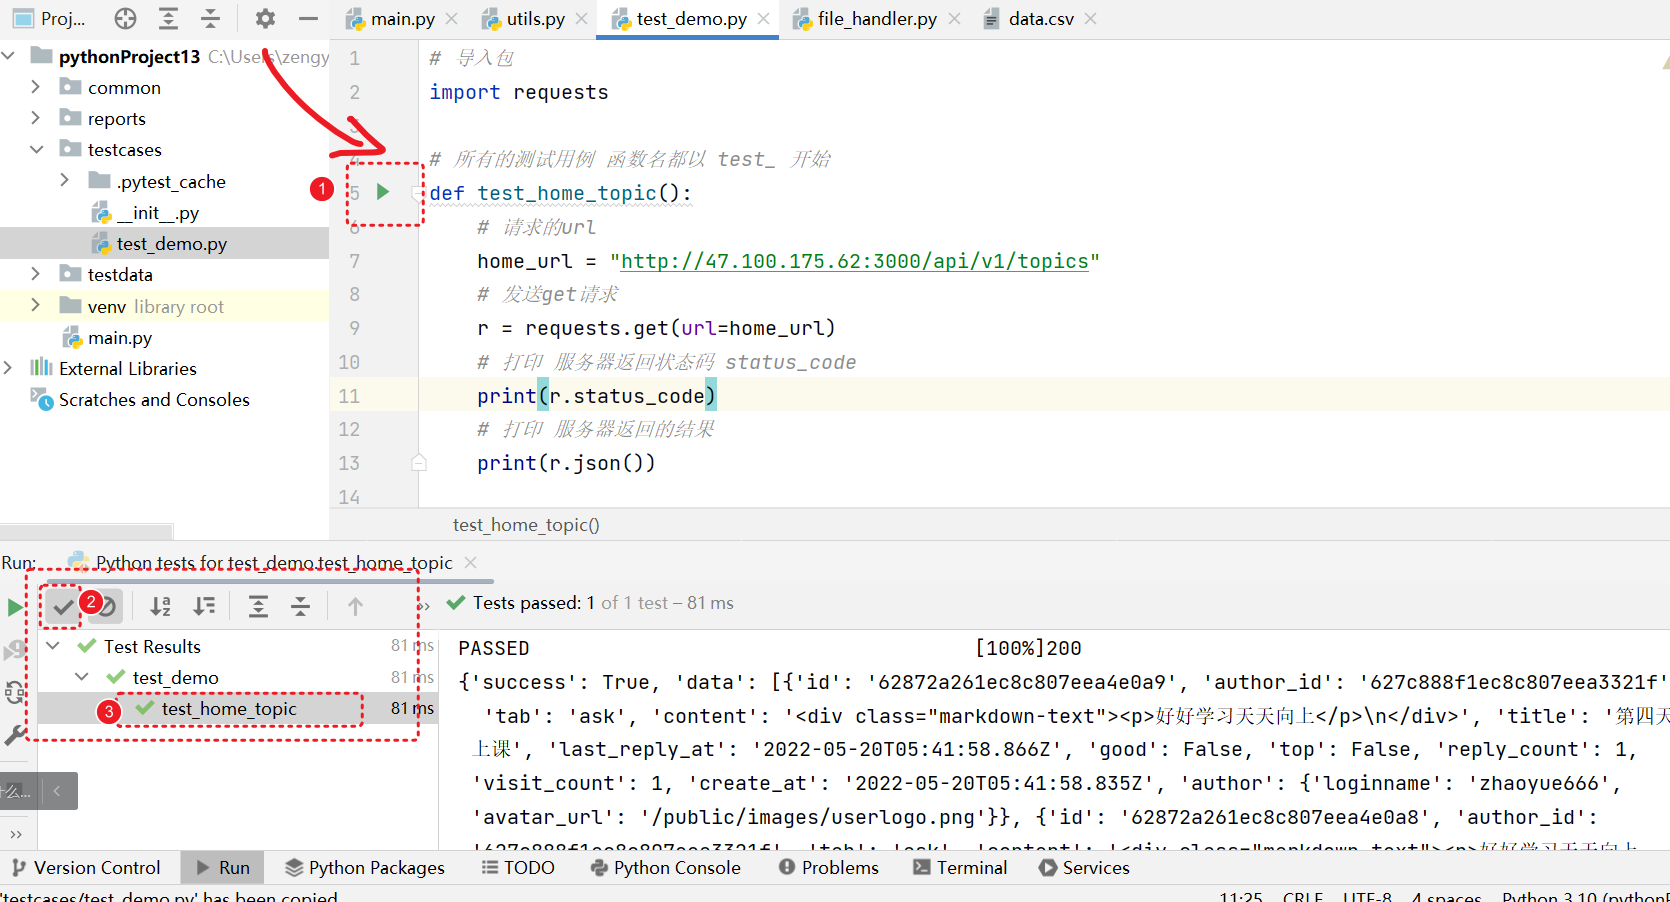<br />pycharm 正常情况下会自动识别 test_ 开头的函数名作为测试用例来执行。 如果你的pycharm 没有识别出来。
<a name="GI3aF"></a>
## 命令行运行
命令行使用pytest 命令来执行。<br />点击 【Terminal 命令行】<br />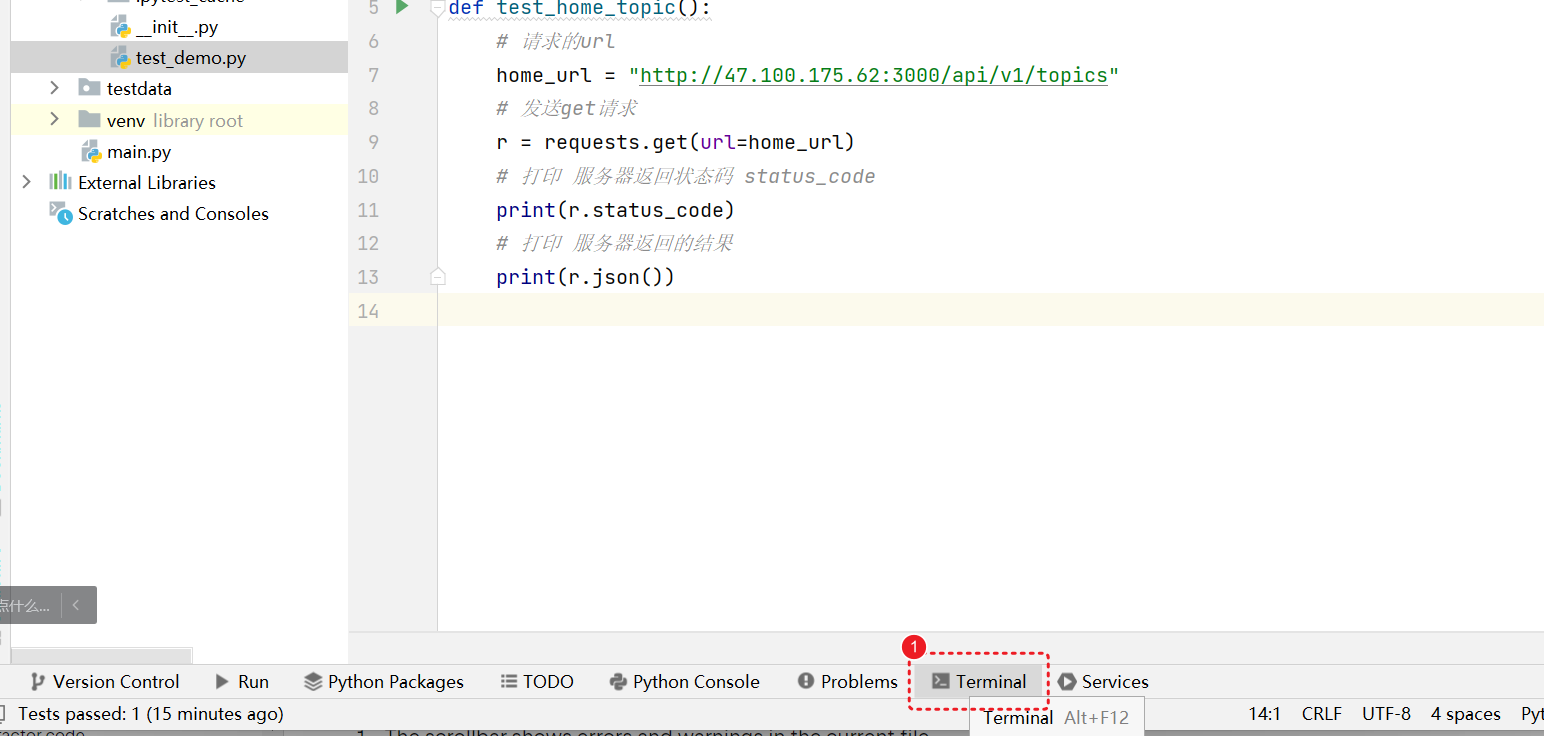
```python
pytest .\testcases\test_demo.py -s -v
- testcases\test_demo.py 文件路径
- -s 显示代码中打印的内容
- -v 日志的级别
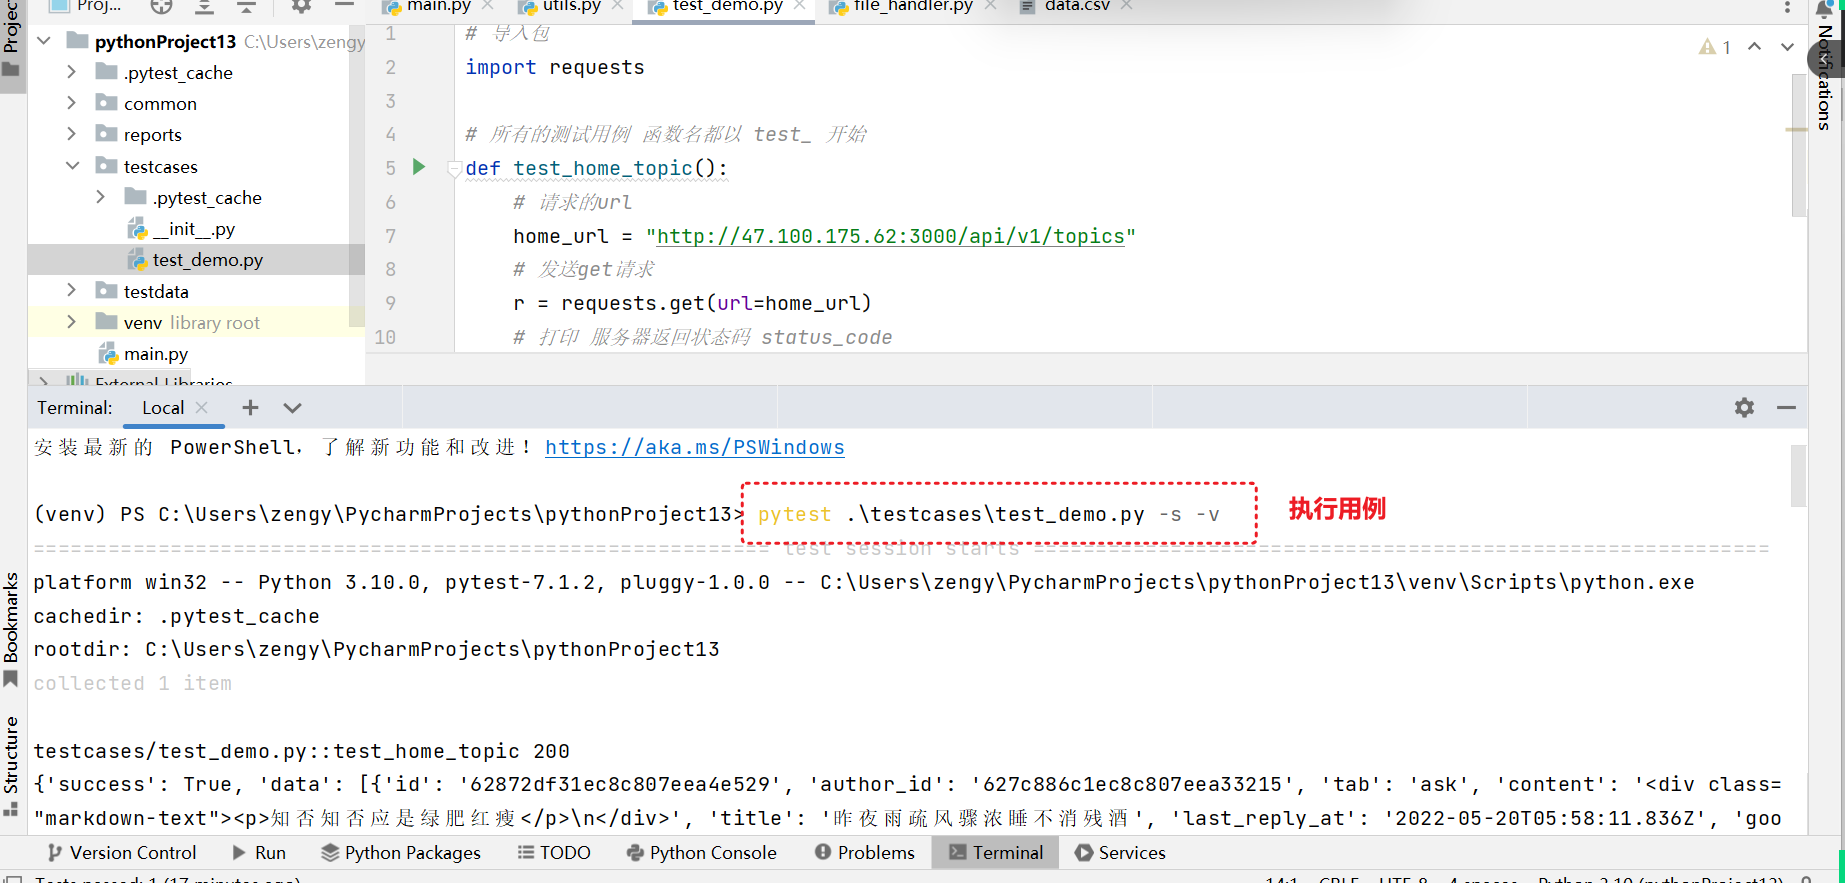
执行之后,可以在pytest 中看到对应的执行结果。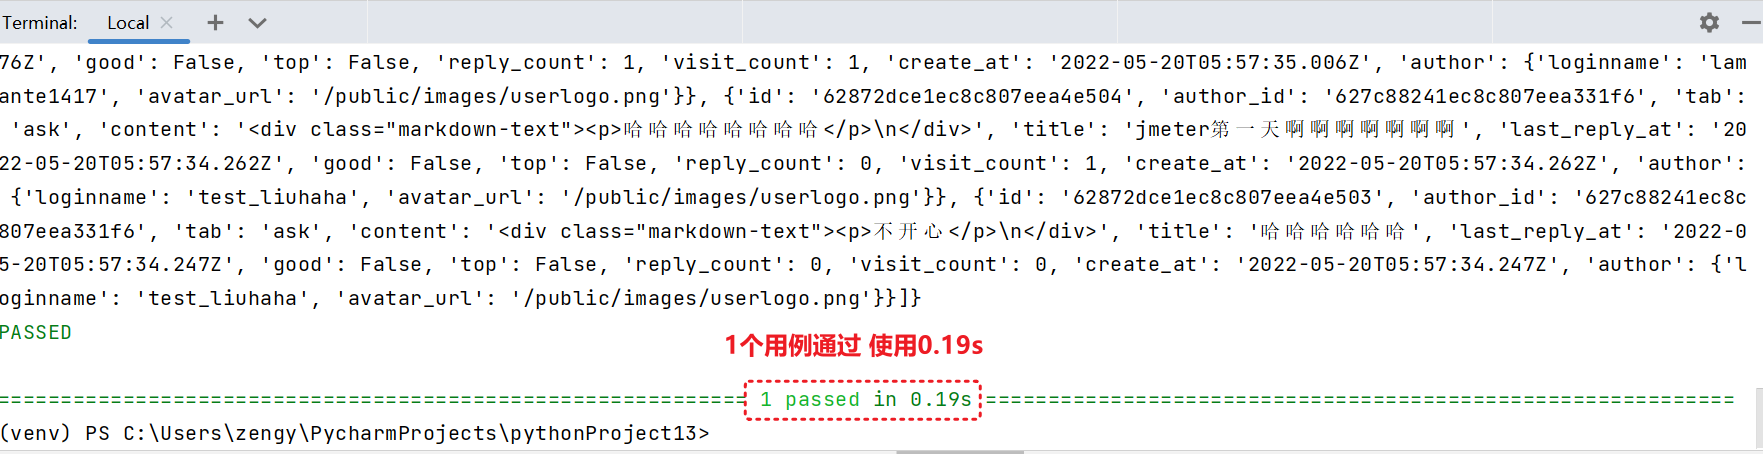
在命令行中执行 和 在 pycharm 执行 最终的结果都是一样的。同学们可以根据自己喜好选择运行,能运行就可以了。
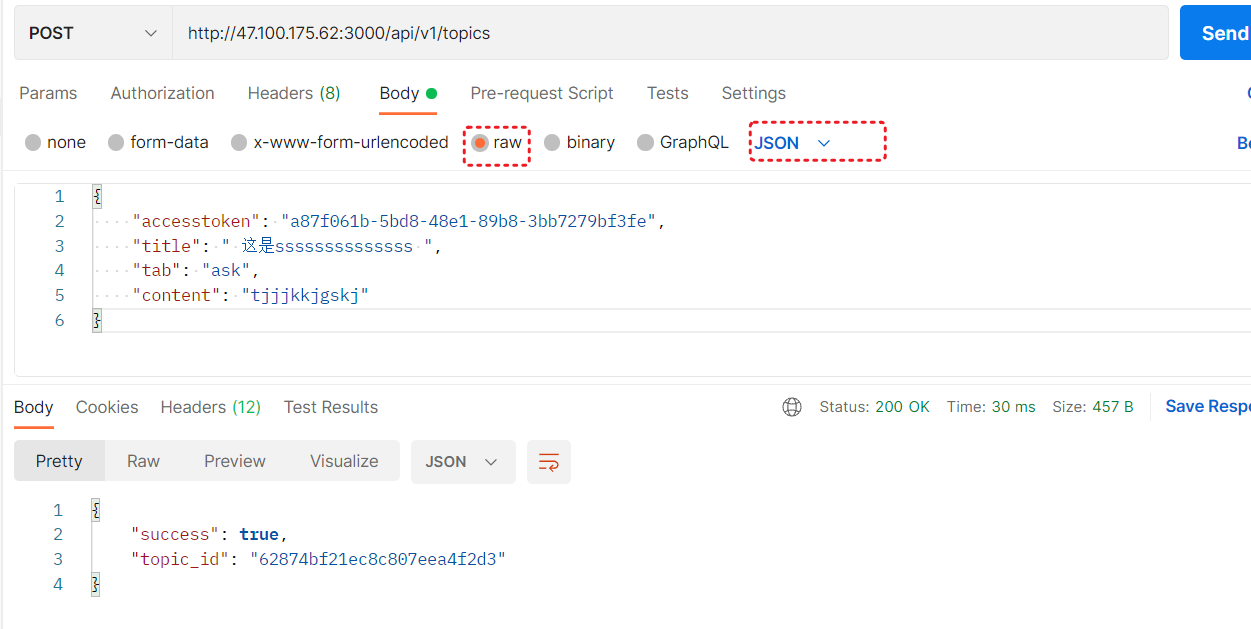
发送post请求
# 导入包
import requests

# 所有的测试用例 函数名都以 test_ 开始

def test_create_topic():
    create_url = "http://47.100.175.62:3000/api/v1/topics"
    body_data = {
        "accesstoken":"e18de36f-d9ce-47e6-a2aa-1cf6508ec10b",
        "title":"hell000o",
        "tab":"ask",
        "content":"123456"
    }
    # 发送post请求  json=body_data 传入数据。
    r = requests.post(url=create_url,json=body_data)
    # 打印 返回结果的状态码
    print(r.status_code)
    # 打印 服务器返回的结果
    print(r.json())
get 请求参数
get请求有参数的时候,需要添加对应的请求参数。
# 导入包
import requests


def test_get_home_page():
    homeurl = "http://47.100.175.62:3000/api/v1/topics"
    querydata = {
        "page":1,
        "limit":1
    }
    # 发送get请求, params表示请求的参数
    resp = requests.get(url=homeurl,params=querydata)
    # 断言  状态码为 200
    assert resp.status_code == 200
    # 打印 服务器返回结果
    print(resp.json())
    # 断言 服务器返回结果只有1条数据
添加请求参数。
定义请求数据为字典格式。
querydata = {
     "page":1,
     "limit":1
 }
在get() 函数中传参 params=querydata
- assert resp.status_code == 200 添加状态码断言
断言练习
def test_get_home_page2():
    homeurl = "http://47.100.175.62:3000/api/v1/topics"
    querydata = {
        "page": 1,
        "limit": 20,
        "tab": "ask"
    }
    # 发送get请求, params表示请求的参数
    resp = requests.get(url=homeurl, params=querydata)
    # 断言  状态码为 200
    assert resp.status_code == 200
    # 打印 服务器返回结果
    print(resp.json())
    # 添加断言 服务器会返回20条数据
    alltopics = resp.json()["data"]
    assert len(alltopics) == 20
    # 添加断言 返回的结果中 话题,20个话题,每个话题的 tab 值都是 ask
    # 循环列表,获取每个话题
    for topic in alltopics:
        # 打印
        print(topic["tab"])
        # 进行断言
        assert topic["tab"] == "ask"
post请求两种数据格式:表单格式、json格式
发送表单格式
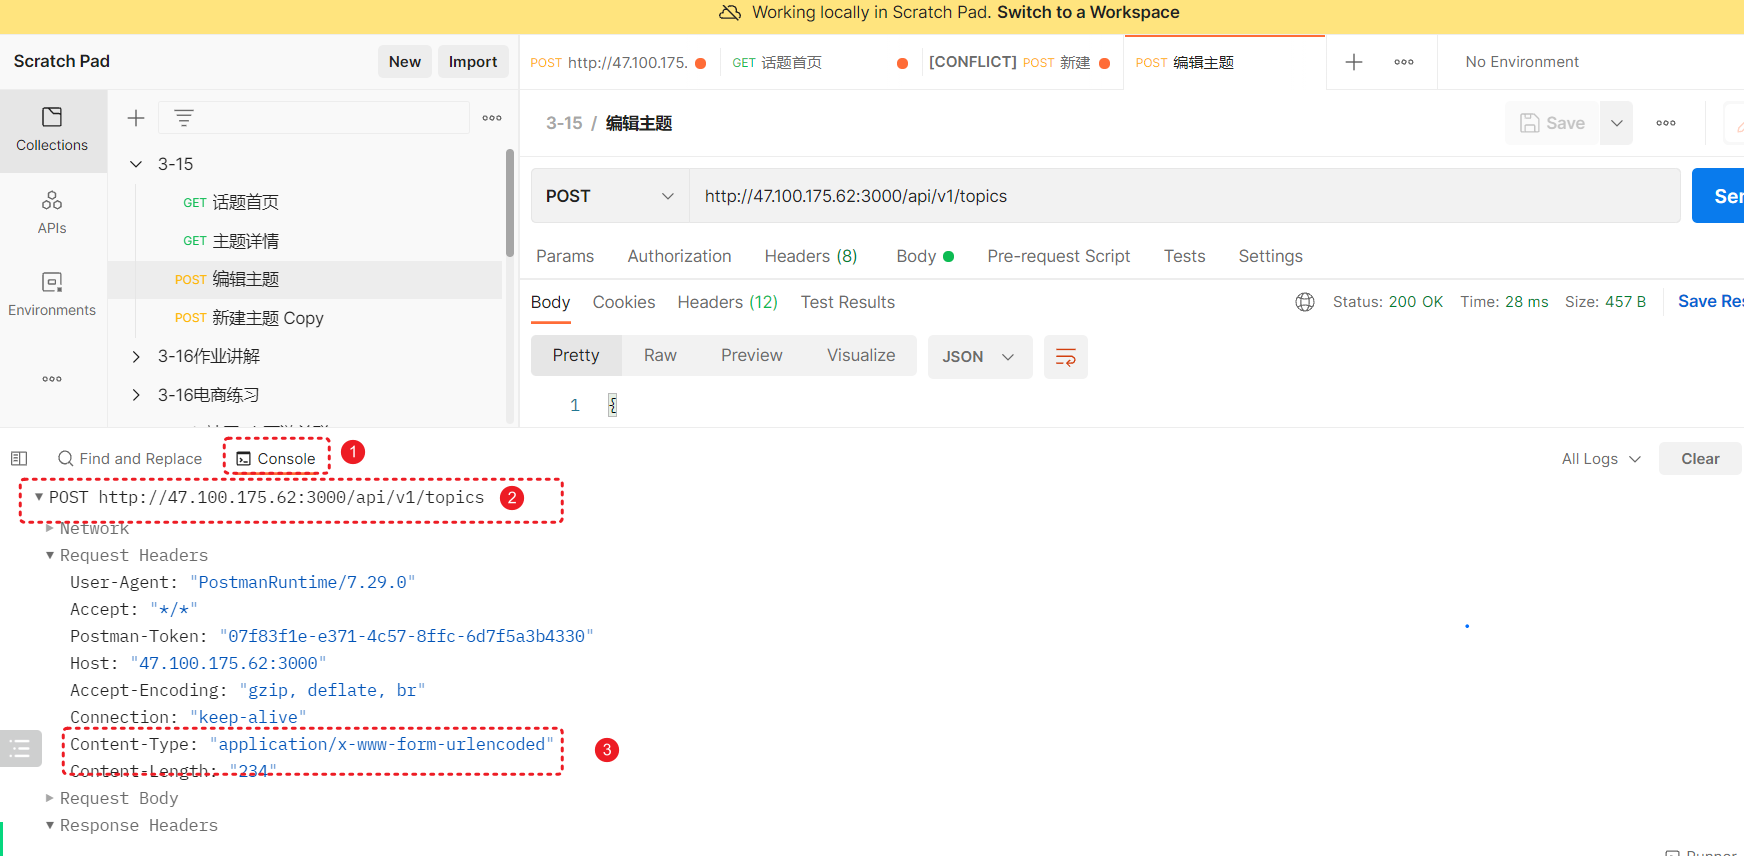
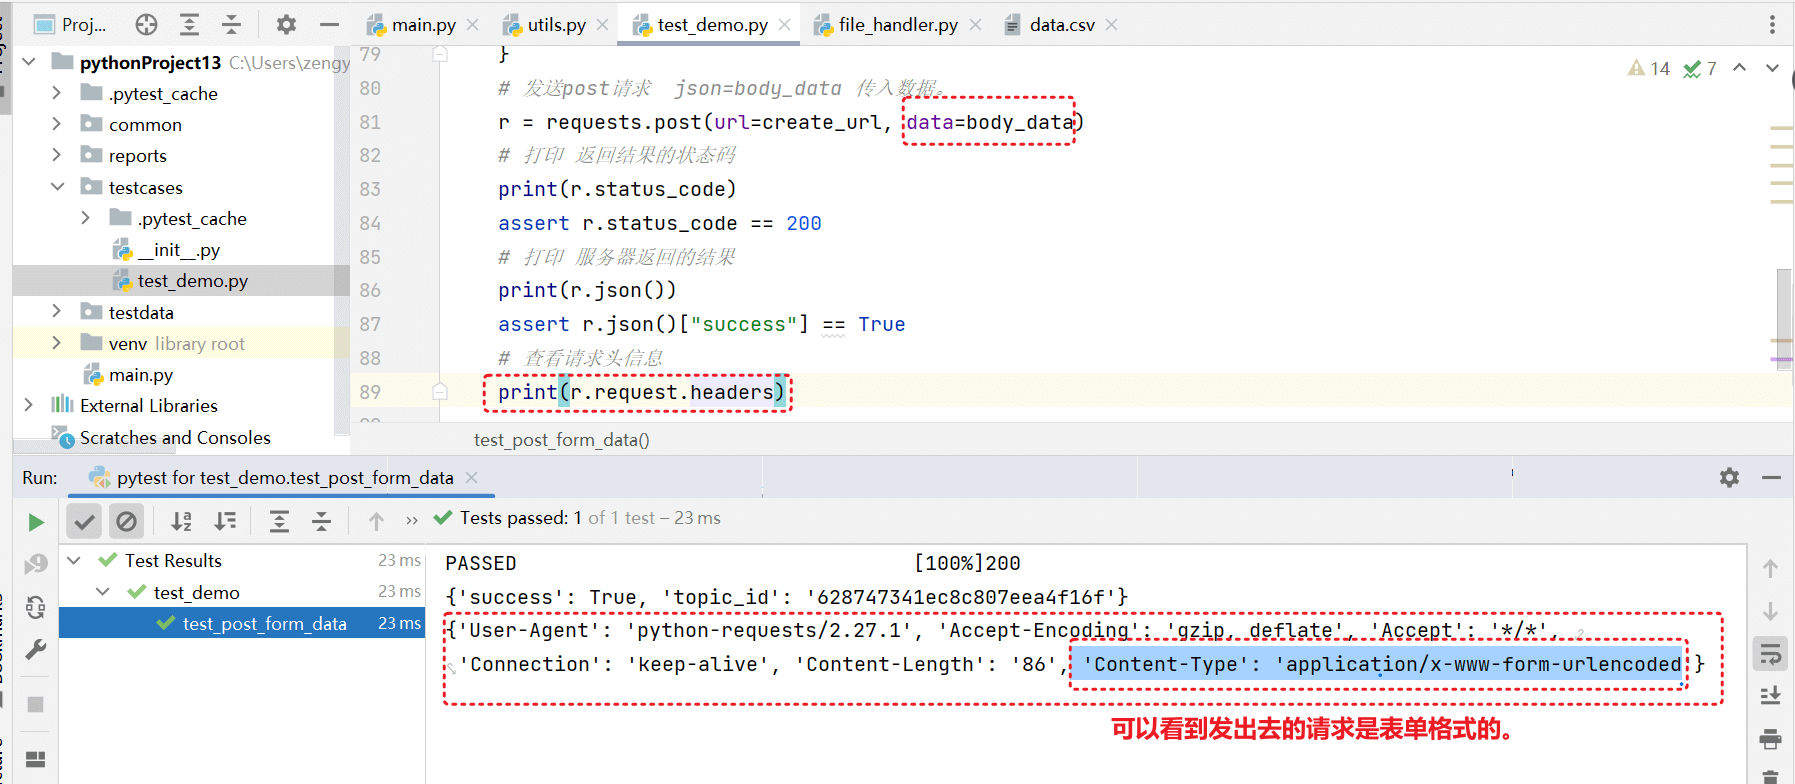
数据类型选择 x-www-form-urlencoded 的时候 ,数据类型为表单格式。
python中发送表单格式,在post 请求中将值传递给 data.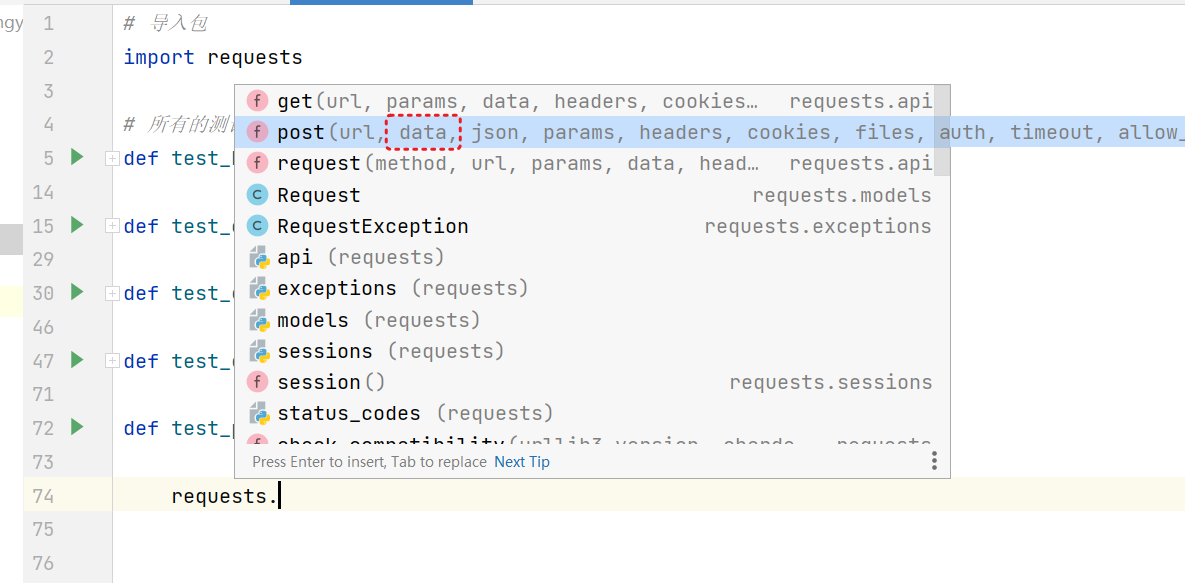 发送表单数据。
def test_post_form_data():
    create_url = "http://47.100.175.62:3000/api/v1/topics"
    body_data = {
        "accesstoken": "e18de36f-d9ce-47e6-a2aa-1cf6508ec10b",
        "title": "hell000o",
        "tab": "ask",
        "content": "123456"
    }
    # 发送post请求  json=body_data 传入数据。
    r = requests.post(url=create_url, data=body_data)
    # 打印 返回结果的状态码
    print(r.status_code)
    assert r.status_code == 200
    # 打印 服务器返回的结果
    print(r.json())
    assert r.json()["success"] == True
    # 查看请求头信息
    print(r.request.headers)
发送json格式
如果发送的请求数据格式为json, 那么我们就将数据传递给json.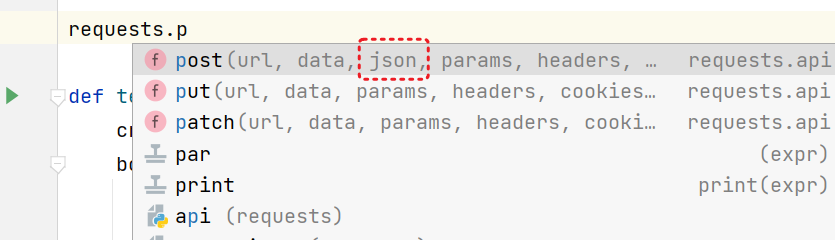
对应的代码。
import requests
def test_post_json():
    create_url = "http://47.100.175.62:3000/api/v1/topics"
    body_data = {
        "accesstoken": "e18de36f-d9ce-47e6-a2aa-1cf6508ec10b",
        "title": "hell000o",
        "tab": "ask",
        "content": "123456"
    }
    # 发送post请求  json=body_data 传入数据。
    r = requests.post(url=create_url, json=body_data)
    # 打印 返回结果的状态码
    print(r.status_code)
    assert r.status_code == 200
    # 打印 服务器返回的结果
    print(r.json())
    assert r.json()["success"] == True
    # 查看请求头信息
    print(r.request.headers)
可以看到结果, 请求使用的数据格式为json 格式。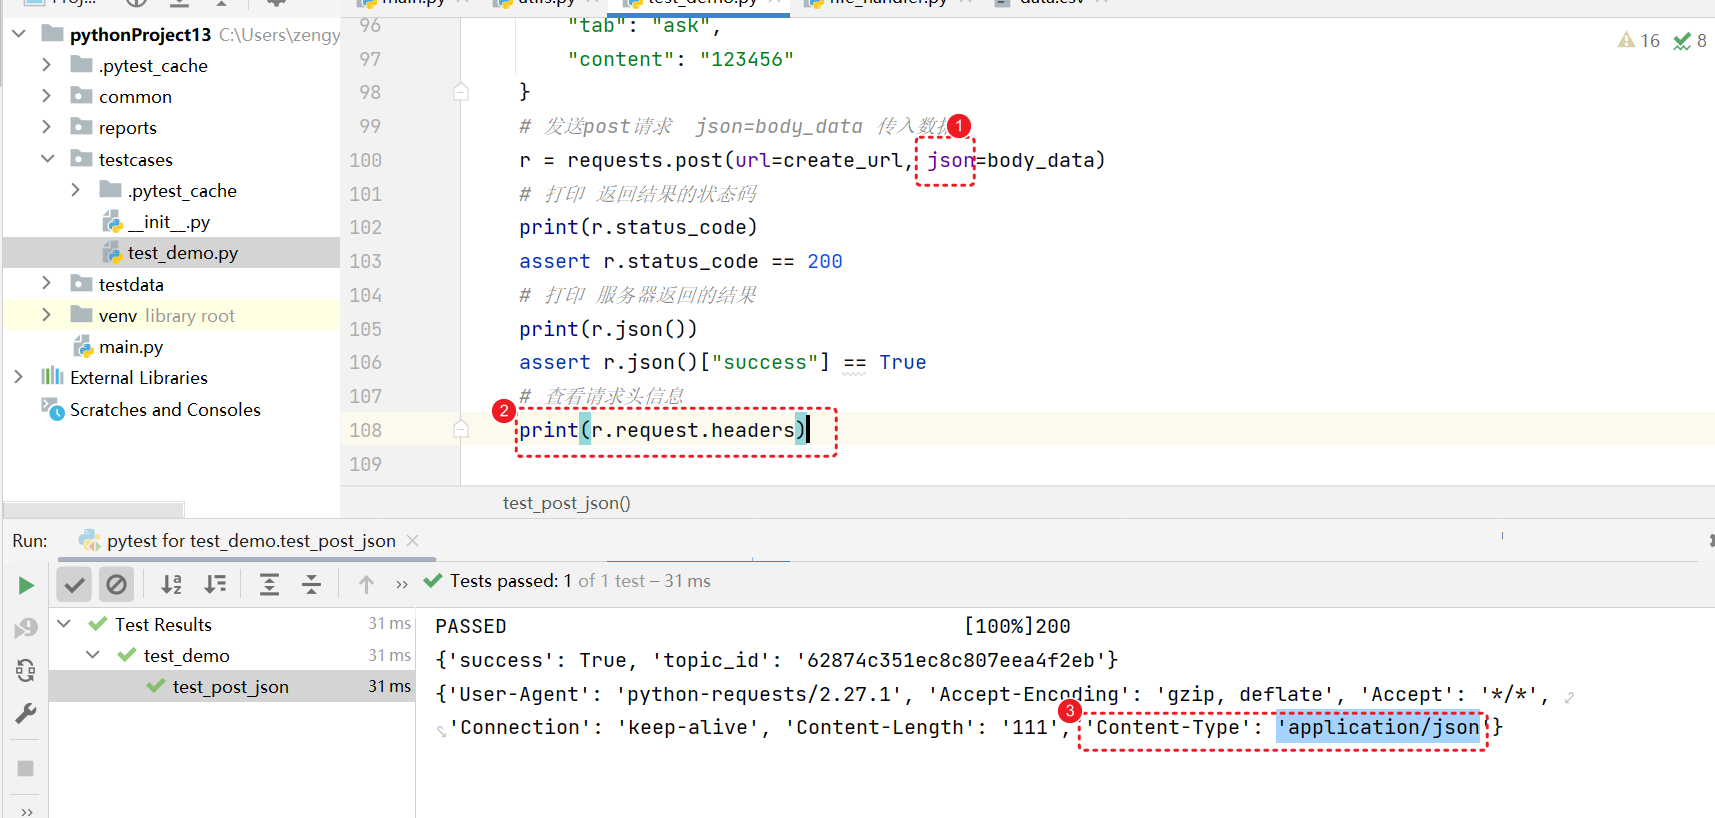
对于我们编写测试用例的时候,接口使用 表单格式还是使用 json 格式。取决于公司的开发,根据开发的定义,选择对应的格式。
发送带有信息头headers 的请求
新建一个文件, testcases/test_shopping.py 编写新丰商城接口
"""
接口地址: http://49.233.108.117:28019/swagger-ui.html#/
"""
import requests

base_url = "http://49.233.108.117:28019"

def test_register():
    """
    测试注册用户
    :return:
    """
    register_url = base_url+"/api/v1/user/register"
    jsondata = {
      "loginName": "13310001229",
      "password": "123456"
    }
    # 发送json格式数据
    r = requests.post(url=register_url,json=jsondata)
    # 打印状态码
    print(r.status_code)
    # 打印返回结果
    print(r.json())
    # 添加对应的断言
    assert r.status_code == 200
    assert r.json()["message"] == 'SUCCESS'

def test_login():
    """
    测试登录
    :return:
    """
    login_url = base_url+"/api/v1/user/login"
    login_data = {
      "loginName": "13310001229",
      "passwordMd5": "E10ADC3949BA59ABBE56E057F20F883E"
    }
    r = requests.post(url=login_url,json=login_data)
    print(r.status_code)
    print(r.json())
现在可以进行注册登录。但是有个问题, 注册的账号 每次都要手动修改。
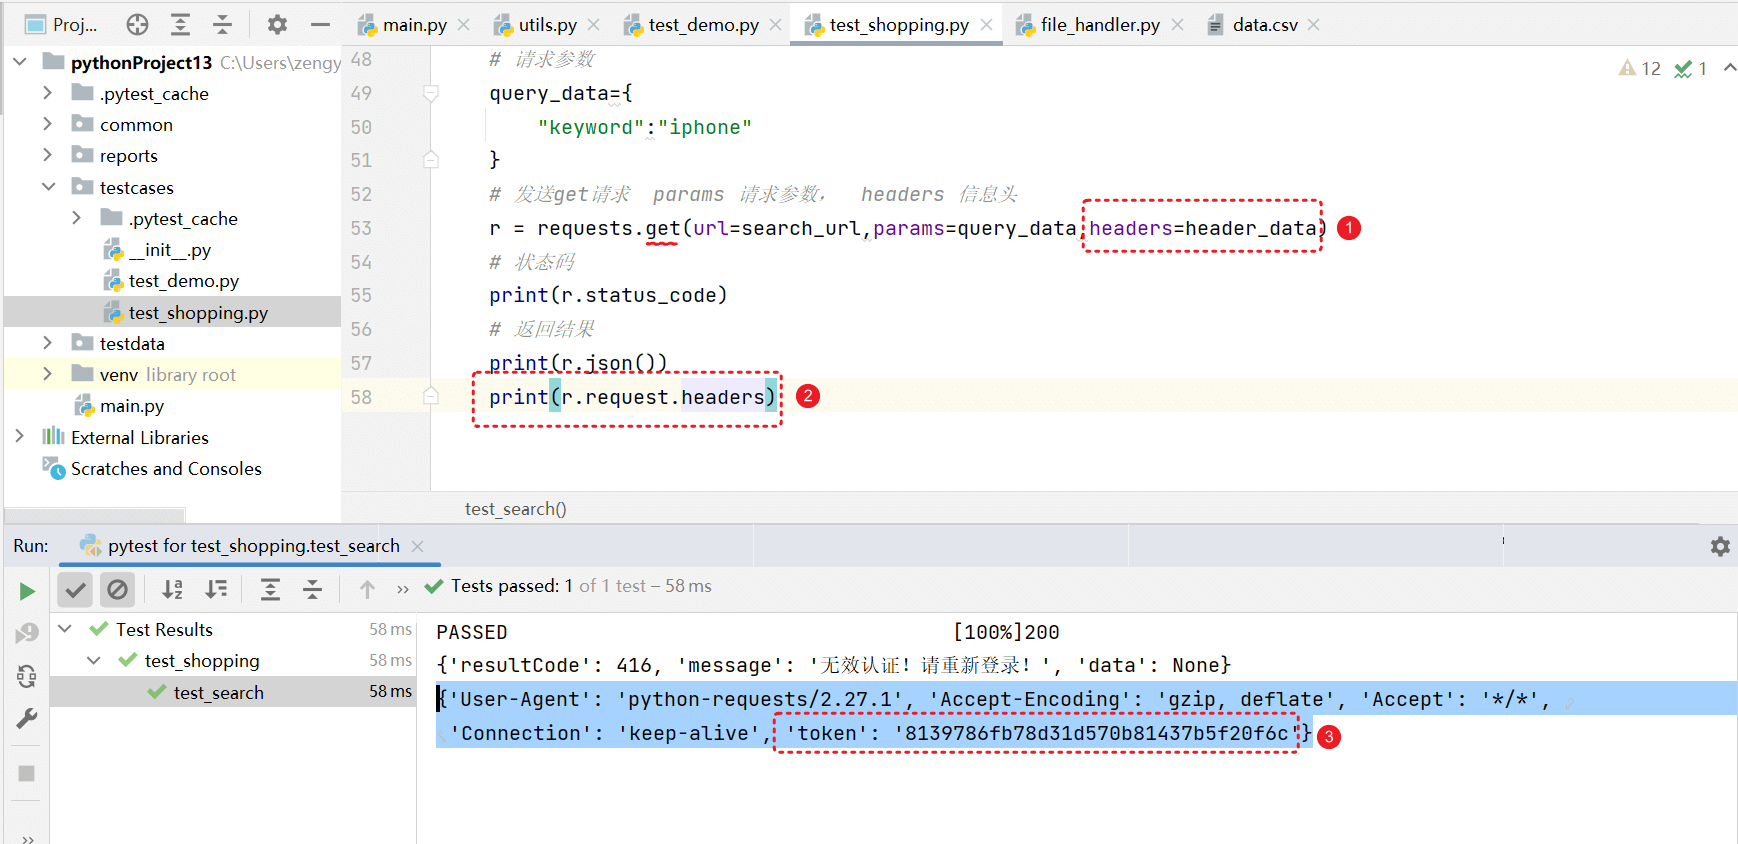
GET请求带有信息头
根据接口文档,接口文档中 header 表示信息头。 在做这个接口的时候,需要将token值放在信息头中。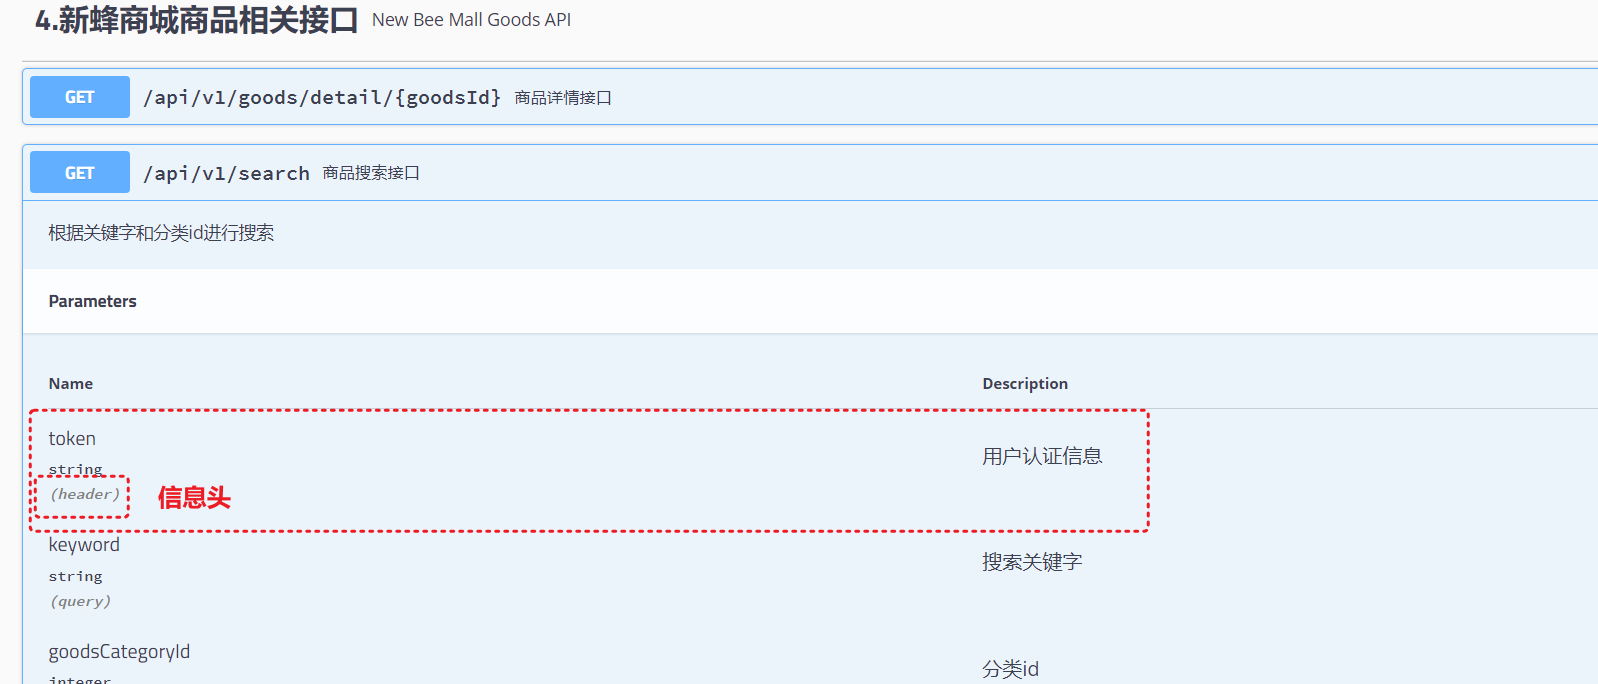
将token放在信息头中。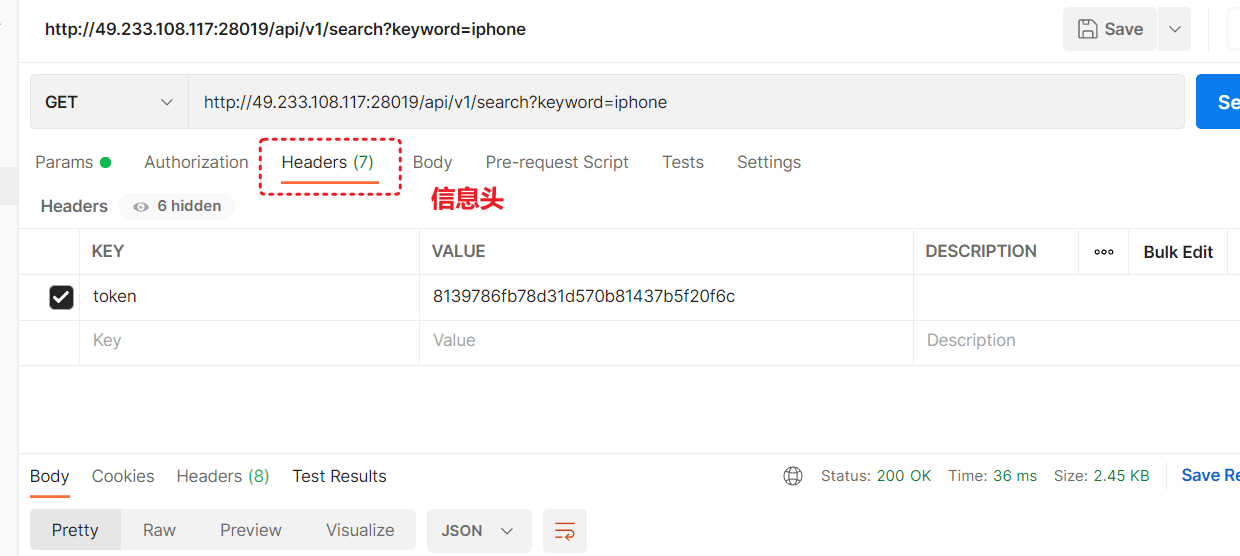
在发送请求的时候,将 token放在信息头中,发送。
使用 python requests 来实现。
import requests

def test_search():
    search_url = base_url+"/api/v1/search"
    # 定义信息头
    header_data ={
        "token":"8139786fb78d31d570b81437b5f20f6c"
    }
    # 请求参数
    query_data={
        "keyword":"iphone"
    }
    # 发送get请求  params 请求参数,  headers 信息头
    r = requests.get(url=search_url,params=query_data,headers=header_data)
    # 状态码
    print(r.status_code)
    # 返回结果
    print(r.json())

    print(r.request.headers)
可以看到对应的请求头信息
- headers= 请求头部分
Post请求带有信息头
post请求和get请求中的信息头 是一样的用法。
也是将数据传递给 headers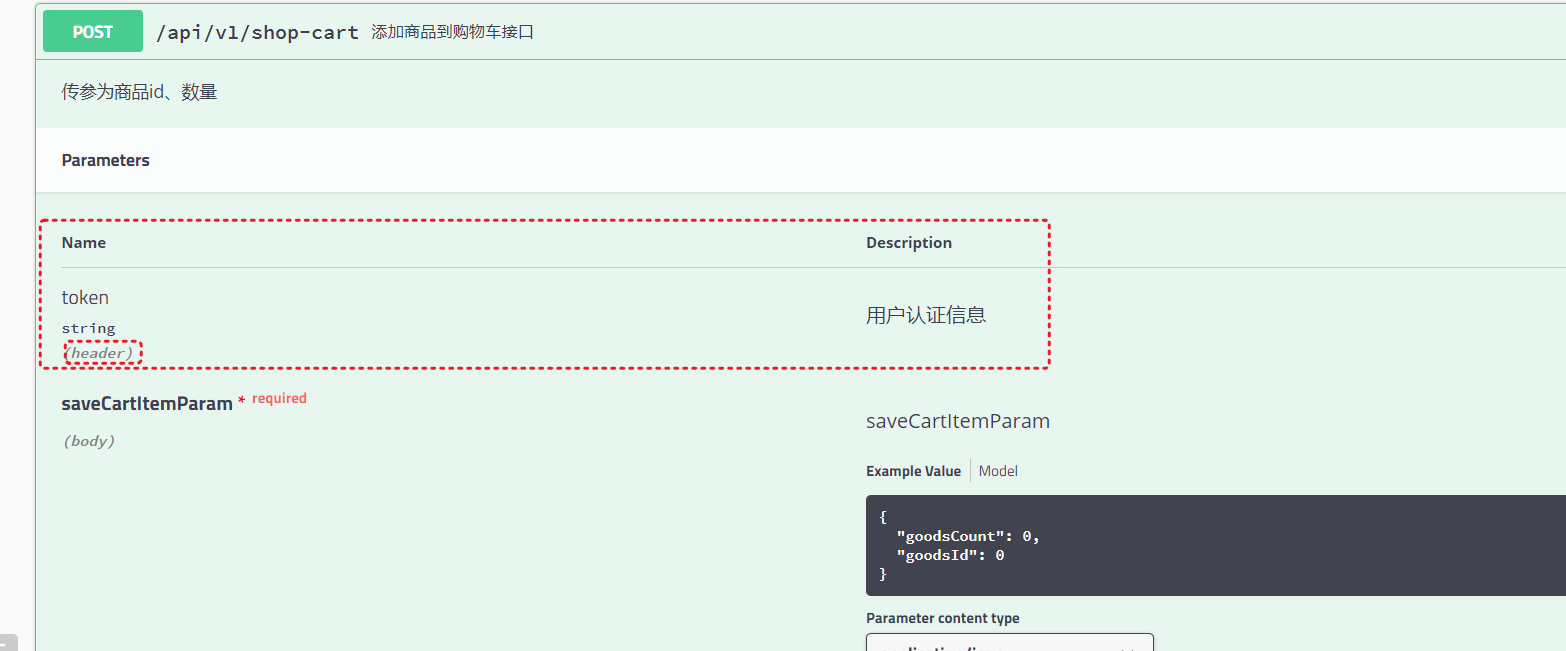
import requests

base_url = "http://49.233.108.117:28019"
def test_add_cart():
    add_cart_url = base_url+"/api/v1/shop-cart"
    header_data = {
        "token":"429054b175e70c0510e55ddaecf5995b",
    }
    post_data = {
      "goodsCount": 1,
      "goodsId": 10278
    }
    # 发送post请求
    r = requests.post(url=add_cart_url,headers=header_data,json=post_data)
    print(r.status_code)
    print(r.json())
    # 查看信息头 ,请求body 数据 r.request.body
    print(r.request.headers,r.request.body)
不管是 是get 还是 post ,或者 put 这些方法,传入信息头时 值都传给 headers。

若有收获,就点个赞吧
0 人点赞
