组件间关系
定义和使用组件间关系
有时需要实现这样的组件:
这个例子中, custom-ul 和 custom-li 都是自定义组件,它们有相互间的关系,相互间的通信往往比较复杂。此时在组件定义时加入 relations 定义段,可以解决这样的问题。示例:
在开发者工具中预览效果
// path/to/custom-ul.js
Component({
relations: {
‘./custom-li’: {
type: ‘child’, // 关联的目标节点应为子节点
linked: function(target) {
// 每次有custom-li被插入时执行,target是该节点实例对象,触发在该节点attached生命周期之后
},
linkChanged: function(target) {
// 每次有custom-li被移动后执行,target是该节点实例对象,触发在该节点moved生命周期之后
},
unlinked: function(target) {
// 每次有custom-li被移除时执行,target是该节点实例对象,触发在该节点detached生命周期之后
}
}
},
methods: {
_getAllLi: function(){
// 使用getRelationNodes可以获得nodes数组,包含所有已关联的custom-li,且是有序的
var nodes = this.getRelationNodes(‘path/to/custom-li’)
}
},
ready: function(){
this._getAllLi()
}
})
// path/to/custom-li.js
Component({
relations: {
‘./custom-ul’: {
type: ‘parent’, // 关联的目标节点应为父节点
linked: function(target) {
// 每次被插入到custom-ul时执行,target是custom-ul节点实例对象,触发在attached生命周期之后
},
linkChanged: function(target) {
// 每次被移动后执行,target是custom-ul节点实例对象,触发在moved生命周期之后
},
unlinked: function(target) {
// 每次被移除时执行,target是custom-ul节点实例对象,触发在detached生命周期之后
}
}
}
})
注意:必须在两个组件定义中都加入relations定义,否则不会生效。
**
关联一类组件
在开发者工具中预览效果
有时,需要关联的是一类组件,如:
input
custom-form 组件想要关联 custom-input 和 custom-submit 两个组件。此时,如果这两个组件都有同一个behavior:
// path/to/custom-form-controls.jsmodule.exports = Behavior({
// …
})
// path/to/custom-input.jsvar customFormControls = require(‘./custom-form-controls’)
Component({
behaviors: [customFormControls],
relations: {
‘./custom-form’: {
type: ‘ancestor’, // 关联的目标节点应为祖先节点
}
}
})
// path/to/custom-submit.jsvar customFormControls = require(‘./custom-form-controls’)
Component({
behaviors: [customFormControls],
relations: {
‘./custom-form’: {
type: ‘ancestor’, // 关联的目标节点应为祖先节点
}
}
})
则在 relations 关系定义中,可使用这个behavior来代替组件路径作为关联的目标节点:
// path/to/custom-form.jsvar customFormControls = require(‘./custom-form-controls’)
Component({
relations: {
‘customFormControls’: {
type: ‘descendant’, // 关联的目标节点应为子孙节点
target: customFormControls
}
}
})
relations 定义段
relations 定义段包含目标组件路径及其对应选项,可包含的选项见下表。
| 选项 | 类型 | 是否必填 | 描述 |
|---|---|---|---|
| type | String | 是 | 目标组件的相对关系,可选的值为 parent 、 child 、 ancestor 、 descendant |
| linked | Function | 否 | 关系生命周期函数,当关系被建立在页面节点树中时触发,触发时机在组件attached生命周期之后 |
| linkChanged | Function | 否 | 关系生命周期函数,当关系在页面节点树中发生改变时触发,触发时机在组件moved生命周期之后 |
| unlinked | Function | 否 | 关系生命周期函数,当关系脱离页面节点树时触发,触发时机在组件detached生命周期之后 |
| target | String | 否 | 如果这一项被设置,则它表示关联的目标节点所应具有的behavior,所有拥有这一behavior的组件节点都会被关联 |
自定义组件扩展
为了更好定制自定义组件的功能,可以使用自定义组件扩展机制。从小程序基础库版本 2.2.3 开始支持。
扩展后的效果
为了更好的理解扩展后的效果,先举一个例子:
在开发者工具中预览效果
// behavior.jsmodule.exports = Behavior({
definitionFilter(defFields) {
defFields.data.from = ‘behavior’
},
})
// component.js
Component({
data: {
from: ‘component’
},
behaviors: [require(‘behavior.js’)],
ready() {
console.log(this.data.from) // 此处会发现输出 behavior 而不是 component
}
})
通过例子可以发现,自定义组件的扩展其实就是提供了修改自定义组件定义段的能力,上述例子就是修改了自定义组件中的 data定义段里的内容。
使用扩展
Behavior() 构造器提供了新的定义段 definitionFilter ,用于支持自定义组件扩展。 definitionFilter 是一个函数,在被调用时会注入两个参数,第一个参数是使用该 behavior 的 component/behavior 的定义对象,第二个参数是该 behavior 所使用的 behavior 的 definitionFilter 函数列表。
以下举个例子来说明:
// behavior3.jsmodule.exports = Behavior({
definitionFilter(defFields, definitionFilterArr) {},
})
// behavior2.jsmodule.exports = Behavior({
behaviors: [require(‘behavior3.js’)],
definitionFilter(defFields, definitionFilterArr) {
// definitionFilterArr0
},
})
// behavior1.jsmodule.exports = Behavior({
behaviors: [require(‘behavior2.js’)],
definitionFilter(defFields, definitionFilterArr) {},
})
// component.js
Component({
behaviors: [require(‘behavior1.js’)],
})
上述代码中声明了1个自定义组件和3个 behavior,每个 behavior 都使用了 definitionFilter 定义段。那么按照声明的顺序会有如下事情发生:
- 当进行 behavior2 的声明时就会调用 behavior3 的 definitionFilter 函数,其中 defFields 参数是 behavior2 的定义段, definitionFilterArr 参数即为空数组,因为 behavior3 没有使用其他的 behavior 。
- 当进行 behavior1 的声明时就会调用 behavior2 的 definitionFilter 函数,其中 defFields 参数是 behavior1 的定义段, definitionFilterArr 参数是一个长度为1的数组,definitionFilterArr[0] 即为 behavior3 的 definitionFilter 函数,因为 behavior2 使用了 behavior3。用户在此处可以自行决定在进行 behavior1 的声明时要不要调用 behavior3 的 definitionFilter 函数,如果需要调用,在此处补充代码 definitionFilterArr0 即可,definitionFilterArr 参数会由基础库补充传入。
- 同理,在进行 component 的声明时就会调用 behavior1 的 definitionFilter 函数。
简单概括,definitionFilter 函数可以理解为当 A 使用了 B 时,A 声明就会调用 B 的 definitionFilter 函数并传入 A 的定义对象让 B 去过滤。此时如果 B 还使用了 C 和 D ,那么 B 可以自行决定要不要调用 C 和 D 的 definitionFilter 函数去过滤 A 的定义对象。
代码示例:
在开发者工具中预览效果
真实案例
下面利用扩展简单实现自定义组件的计算属性功能:
// behavior.jsmodule.exports = Behavior({
lifetimes: {
created() {
this._originalSetData = this.setData // 原始 setData
this.setData = this._setData // 封装后的 setData
}
},
definitionFilter(defFields) {
const computed = defFields.computed || {}
const computedKeys = Object.keys(computed)
const computedCache = {}
// 计算 computed
const calcComputed = (scope, insertToData) => {
const needUpdate = {}
const data = defFields.data = defFields.data || {}
for (let key of computedKeys) {
const value = computed[key].call(scope) // 计算新值
if (computedCache[key] !== value) needUpdate[key] = computedCache[key] = value
if (insertToData) data[key] = needUpdate[key] // 直接插入到 data 中,初始化时才需要的操作
}
return needUpdate
}
// 重写 setData 方法
defFields.methods = defFields.methods || {}
defFields.methods._setData = function (data, callback) {
const originalSetData = this._originalSetData // 原始 setData
originalSetData.call(this, data, callback) // 做 data 的 setData
const needUpdate = calcComputed(this) // 计算 computed
originalSetData.call(this, needUpdate) // 做 computed 的 setData
}
// 初始化 computed
calcComputed(defFields, true) // 计算 computed
}
})
在组件中使用:
const beh = require(‘./behavior.js’)
Component({
behaviors: [beh],
data: {
a: 0,
},
computed: {
b() {
return this.data.a + 100
},
},
methods: {
onTap() {
this.setData({
a: ++this.data.a,
})
}
}
})
实现原理很简单,对已有的 setData 进行二次封装,在每次 setData 的时候计算出 computed 里各字段的值,然后设到 data 中,已达到计算属性的效果。
此实现只是作为一个简单案例来展示,请勿直接在生产环境中使用。
官方扩展包
如何自定义组件
一、定义组件“四件套”
1、MyComponent.js:注册组件<br /> // Component()方法注册组件<br /> // 属性定义:用于wxml的渲染,可组件外部传入<br /> // 内部数据:用于wxml的渲染<br /> // 自定义方法<br /> 2、MyComponent.json:声明这是组件<br /> 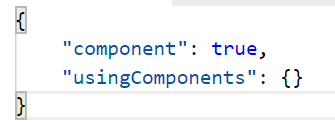<br /> 3、MyComponent.wxml:组件布局<br /> 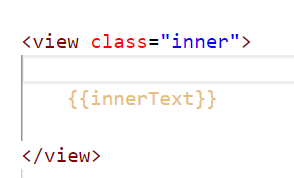4、MyComponent.wxss:组件样式<br /> <br />
二、使用组件的界面
1、json中声明使用哪个组件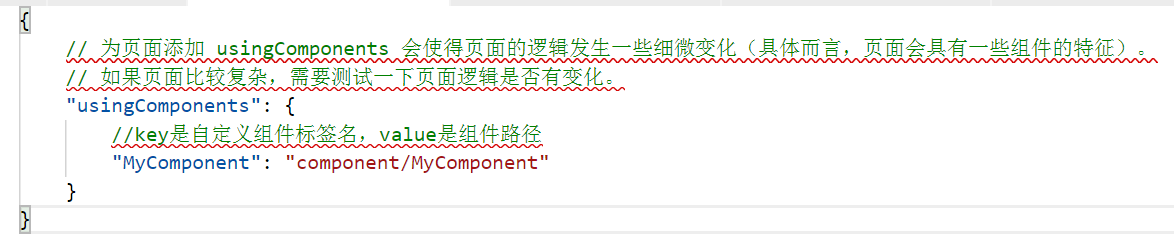<br /> 2、wxml中就可以使用了,<MyComponent> ...... </MyComponent>
第三方组件
小程序从基础库版本 2.2.1 开始支持使用 npm 安装第三方包,因此也支持开发和使用第三方自定义组件包。关于 npm 功能的详情可先阅读相关文档。
准备
开发一个开源的自定义组件包给他人使用,首先需要明确他人是要如何使用这个包的,如果只是拷贝小程序目录下直接使用的话,可以跳过此文档。此文档中后续内容是以 npm 管理自定义组件包的前提下进行说明的。
在开发之前,要求开发者具有基础的 node.js 和 npm 相关的知识,同时需要准备好支持 npm 功能的开发者工具,点此下载。
下载模板
为了方便开发者能够快速搭建好一个可用于开发、调试、测试的自定义组件包项目,官方提供了一个项目模板,下载使用模板的方式有三种:
- 直接从 github 上下载 zip 文件并解压。
- 直接将 github 上的仓库 clone 下来。
- 使用官方提供的命令行工具初始化项目,下面会进行介绍。
项目模板中的构建是基于 gulp + webpack 来执行的,支持开发、构建、测试等命令,详情可参阅项目模板的 README.md 文件。
PS:测试部分因为有部分自定义组件功能仍未支持(如抽象节点等),故测试工具暂无法全部覆盖自定义组件的特性,后续会继续完善。
命令行工具
官方提供了命令行工具,用于快速初始化一个项目。执行如下命令安装命令行工具:
npm install -g @wechat-miniprogram/miniprogram-cli
然后新建一个空目录作为项目根目录,在此根目录下执行:
miniprogram init —type custom-component
命令执行完毕后会发现项目根目录下生成了许多文件,这是根据官方的项目模板生成的完整项目,之后开发者可直接在此之上进行开发修改。
命令行工具的更多用法可以查看 github 仓库上的 README.md 文件。
PS:第一次使用 miniprogram init 初始化项目会去 github 上拉取模板,因此需要保证网络畅通。
自定义组件示例
以下为官方提供的自定义组件,可以参考并使用:
- slide-view
- navigation-bar
- recycle-view
自定义组件扩展示例
以下为官方提供的自定义组件扩展,可以参考并使用:
抽象节点
这个特性自小程序基础库版本 1.9.6 开始支持。
在组件中使用抽象节点
有时,自定义组件模板中的一些节点,其对应的自定义组件不是由自定义组件本身确定的,而是自定义组件的调用者确定的。这时可以把这个节点声明为“抽象节点”。
例如,我们现在来实现一个“选框组”(selectable-group)组件,它其中可以放置单选框(custom-radio)或者复选框(custom-checkbox)。这个组件的 wxml 可以这样编写:
其中,“selectable”不是任何在 json 文件的 usingComponents 字段中声明的组件,而是一个抽象节点。它需要在 componentGenerics 字段中声明:
{
“componentGenerics”: {
“selectable”: true
}
}
使用包含抽象节点的组件
在使用 selectable-group 组件时,必须指定“selectable”具体是哪个组件:
这样,在生成这个 selectable-group 组件的实例时,“selectable”节点会生成“custom-radio”组件实例。类似地,如果这样使用:
“selectable”节点则会生成“custom-checkbox”组件实例。
注意:上述的 custom-radio 和 custom-checkbox 需要包含在这个 wxml 对应 json 文件的 usingComponents 定义段中。
{
“usingComponents”: {
“custom-radio”: “path/to/custom/radio”,
“custom-checkbox”: “path/to/custom/checkbox”
}
}
抽象节点的默认组件
抽象节点可以指定一个默认组件,当具体组件未被指定时,将创建默认组件的实例。默认组件可以在 componentGenerics 字段中指定:
{
“componentGenerics”: {
“selectable”: {
“default”: “path/to/default/component”
}
}
}
Tips:
- 节点的 generic 引用 generic:xxx=”yyy” 中,值 yyy 只能是静态值,不能包含数据绑定。因而抽象节点特性并不适用于动态决定节点名的场景。
behaviors
定义和使用 behaviors
behaviors 是用于组件间代码共享的特性,类似于一些编程语言中的“mixins”或“traits”。
每个 behavior 可以包含一组属性、数据、生命周期函数和方法,组件引用它时,它的属性、数据和方法会被合并到组件中,生命周期函数也会在对应时机被调用。每个组件可以引用多个 behavior 。 behavior 也可以引用其他 behavior 。
behavior 需要使用 Behavior() 构造器定义。
代码示例:
// my-behavior.jsmodule.exports = Behavior({
behaviors: [],
properties: {
myBehaviorProperty: {
type: String
}
},
data: {
myBehaviorData: {}
},
attached: function(){},
methods: {
myBehaviorMethod: function(){}
}
})
组件引用时,在 behaviors 定义段中将它们逐个列出即可。
代码示例:
在开发者工具中预览效果
// my-component.jsvar myBehavior = require(‘my-behavior’)
Component({
behaviors: [myBehavior],
properties: {
myProperty: {
type: String
}
},
data: {
myData: {}
},
attached: function(){},
methods: {
myMethod: function(){}
}
})
在上例中, my-component 组件定义中加入了 my-behavior ,而 my-behavior 中包含有 myBehaviorProperty 属性、 myBehaviorData 数据字段、 myBehaviorMethod 方法和一个 attached 生命周期函数。这将使得 my-component 中最终包含 myBehaviorProperty 、 myProperty 两个属性, myBehaviorData 、 myData 两个数据字段,和 myBehaviorMethod 、 myMethod 两个方法。当组件触发 attached 生命周期时,会依次触发 my-behavior 中的 attached 生命周期函数和 my-component 中的 attached 生命周期函数。
字段的覆盖和组合规则
组件和它引用的 behavior 中可以包含同名的字段,对这些字段的处理方法如下:
- 如果有同名的属性或方法,组件本身的属性或方法会覆盖 behavior 中的属性或方法,如果引用了多个 behavior ,在定义段中靠后 behavior 中的属性或方法会覆盖靠前的属性或方法;
- 如果有同名的数据字段,如果数据是对象类型,会进行对象合并,如果是非对象类型则会进行相互覆盖;
- 生命周期函数不会相互覆盖,而是在对应触发时机被逐个调用。如果同一个 behavior 被一个组件多次引用,它定义的生命周期函数只会被执行一次。
内置 behaviors
自定义组件可以通过引用内置的 behavior 来获得内置组件的一些行为。
代码示例:
在开发者工具中预览效果
Component({
behaviors: [‘wx://form-field‘]
})
在上例中, wx://form-field 代表一个内置 behavior ,它使得这个自定义组件有类似于表单控件的行为。
内置 behavior 往往会为组件添加一些属性。在没有特殊说明时,组件可以覆盖这些属性来改变它的 type 或添加 observer 。
wx://form-field
使自定义组件有类似于表单控件的行为。 form 组件可以识别这些自定义组件,并在 submit 事件中返回组件的字段名及其对应字段值。这将为它添加以下两个属性。
| 属性名 | 类型 | 描述 | 最低版本 |
|---|---|---|---|
| name | String | 在表单中的字段名 | 1.6.7 |
| value | 任意 | 在表单中的字段值 | 1.6.7 |
wx://component-export
在开发者工具中预览效果
从基础库版本 2.2.3 开始提供支持。
使自定义组件支持 export 定义段。这个定义段可以用于指定组件被 selectComponent 调用时的返回值。
未使用这个定义段时, selectComponent 将返回自定义组件的 this (插件的自定义组件将返回 null )。使用这个定义段时,将以这个定义段的函数返回值代替。
代码示例:
// 自定义组件 my-component 内部
Component({
behaviors: [‘wx://component-export‘],
export() {
return { myField: ‘myValue’ }
}
})
this.selectComponent(‘#the-id’) // 等于 { myField: ‘myValue’ }

若有收获,就点个赞吧
0 人点赞
