一、下载安装
1、官网地址:
https://help.sonatype.com/repomanager3/download
cd /usr/nexus
wget https://download.sonatype.com/nexus/3/latest-unix.tar.gz
官网经常超时,百度云上分享了一个3.9.0版本的 , 大家也可以下载再上传到自己的服务器上
链接:https://pan.baidu.com/s/1mvs4M76cWeQh7VmkQXx9EA
提取码:zfb5
2、解压
tar zxvf nexus-3.9.0-01-unix.tar.gz
3、启动
cd /usr/nexus/nexus-3.9.0-01/bin
启动
./nexus start
#停止
./nexus stop
启动后 , 可以使用 http://ip:8081 打开
默认用户名/密码为 : admin/admin123
默认端口是8001,在/usr/nexus/nexus-3.9.0-01/etc/nexus-default.properties中可以修改默认的端口
二、配置nexus
1、使用admin账户登录 , 然后点击齿轮(Configuration) > Repositories(仓库)
如下图,仓库有3类 :
proxy(代理仓库-也就是别人的仓库)
hosted(私有仓库 - 也就是自己的仓库)
group(聚合仓库 - 一般引用都是使用这个库) 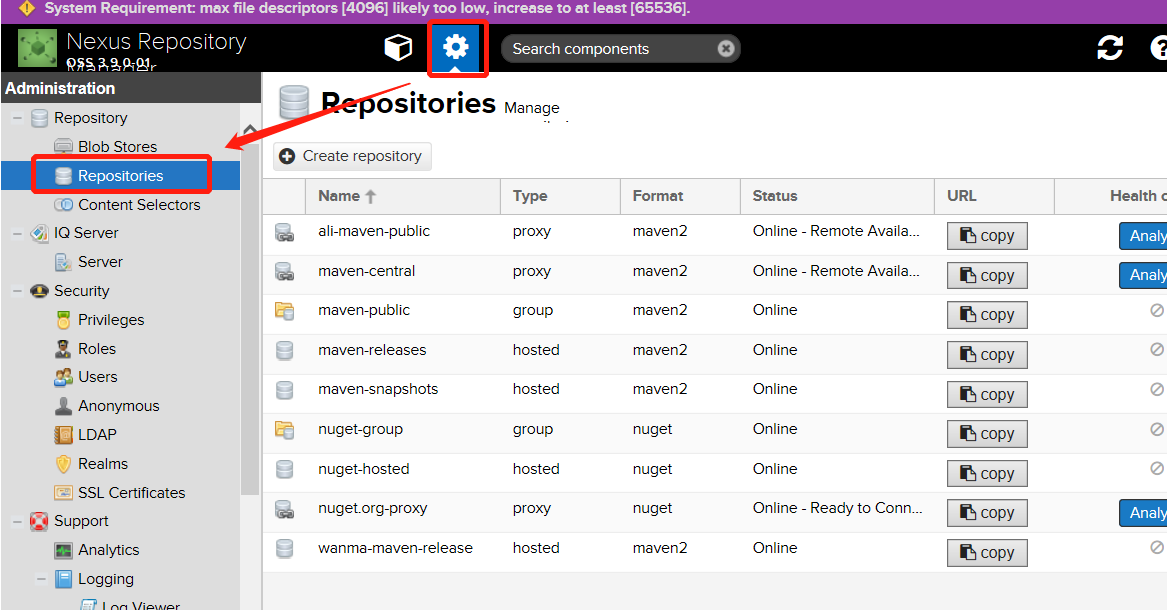
2、配置ali的maven镜像,提高速度 (代理库)
阿里rep地址 : http://maven.aliyun.com/nexus/content/groups/public/
点击 Create repository , 选择maven2(proxy)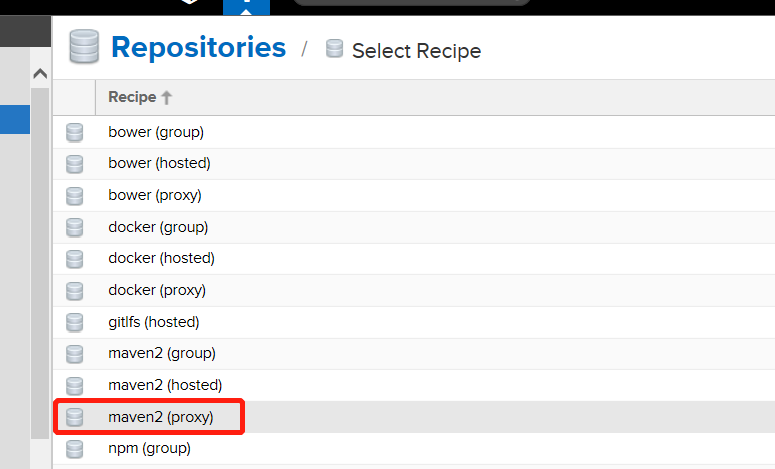
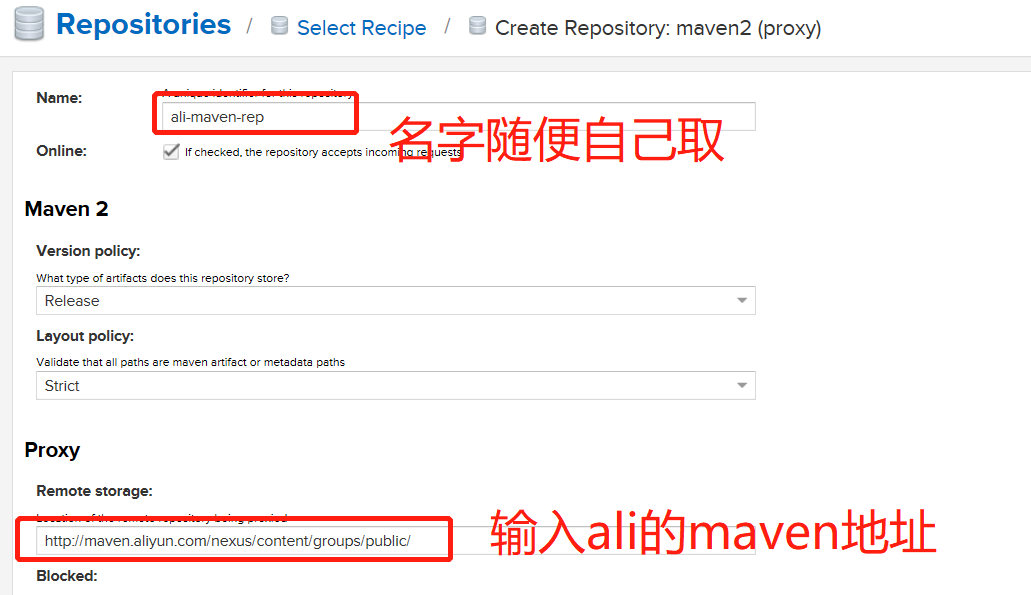
http://maven.aliyun.com/nexus/content/groups/public/
点击 Create repository即可
3、在group中加入ali镜像
找到maven-public的group仓库 , 点右边的>进入修改
在最下面 Group处 , 把ali的镜像加入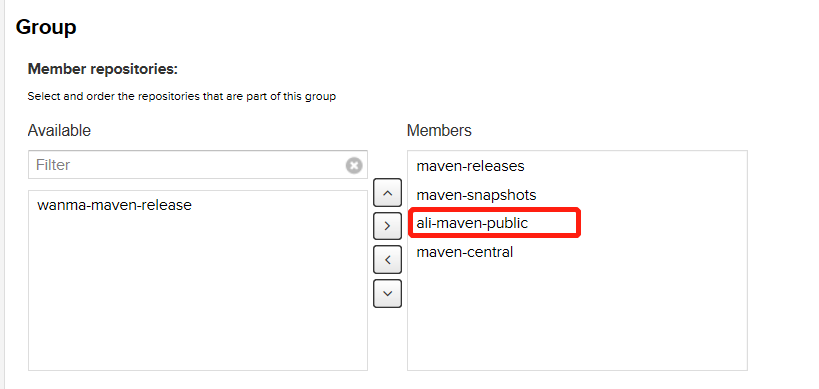
4、 私有仓库(hosted), 不创建,使用原有的 maven-releases 和 maven-snapshots亦可
1、创建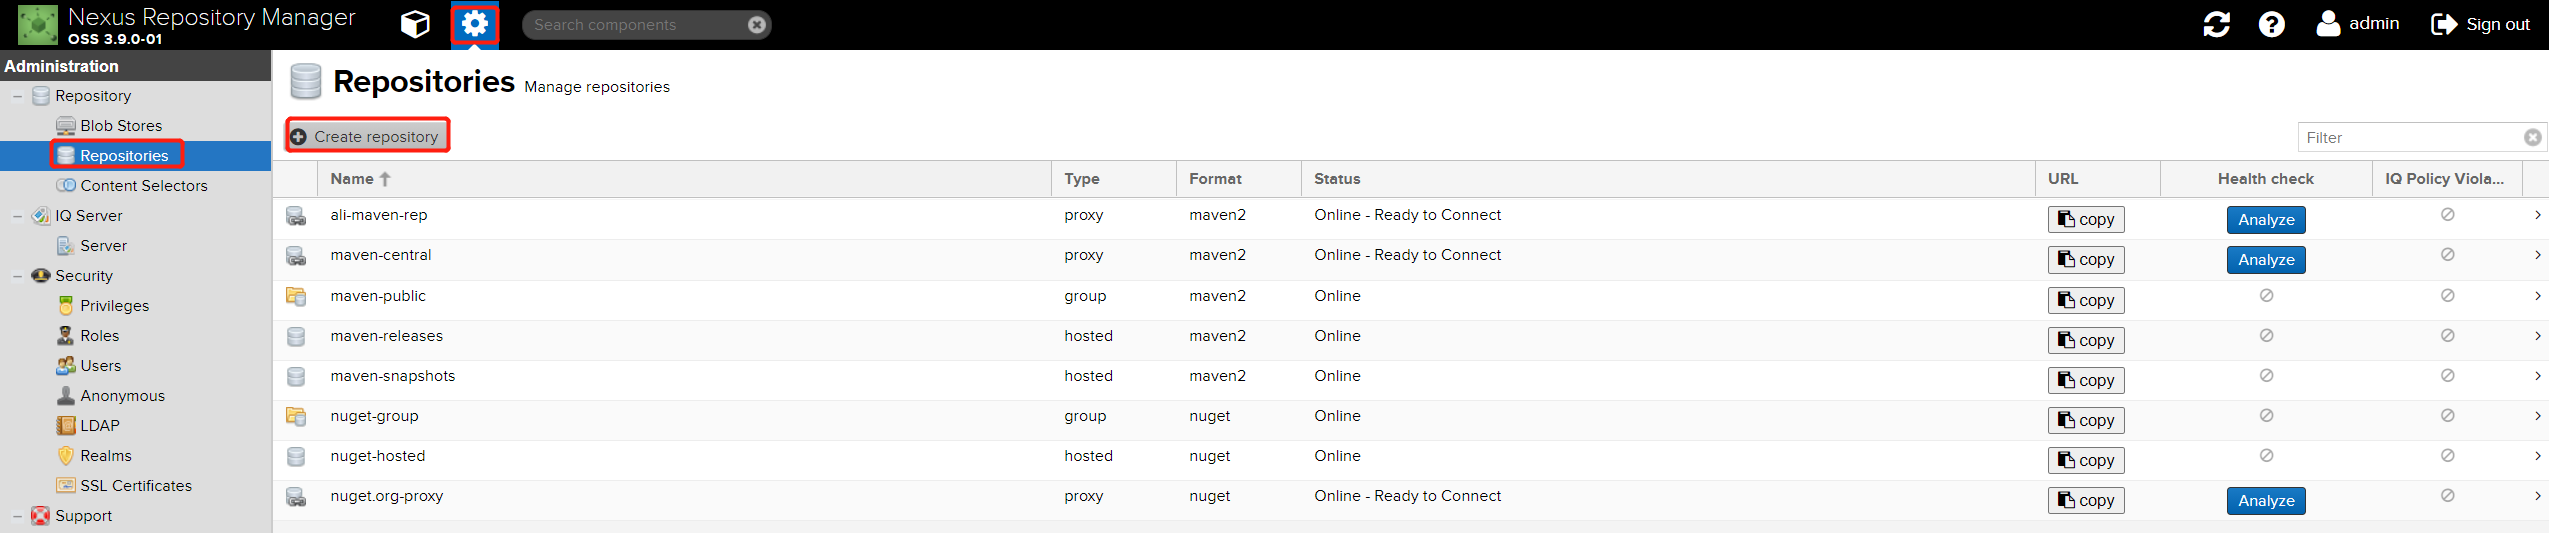
2、选择raw(hosted)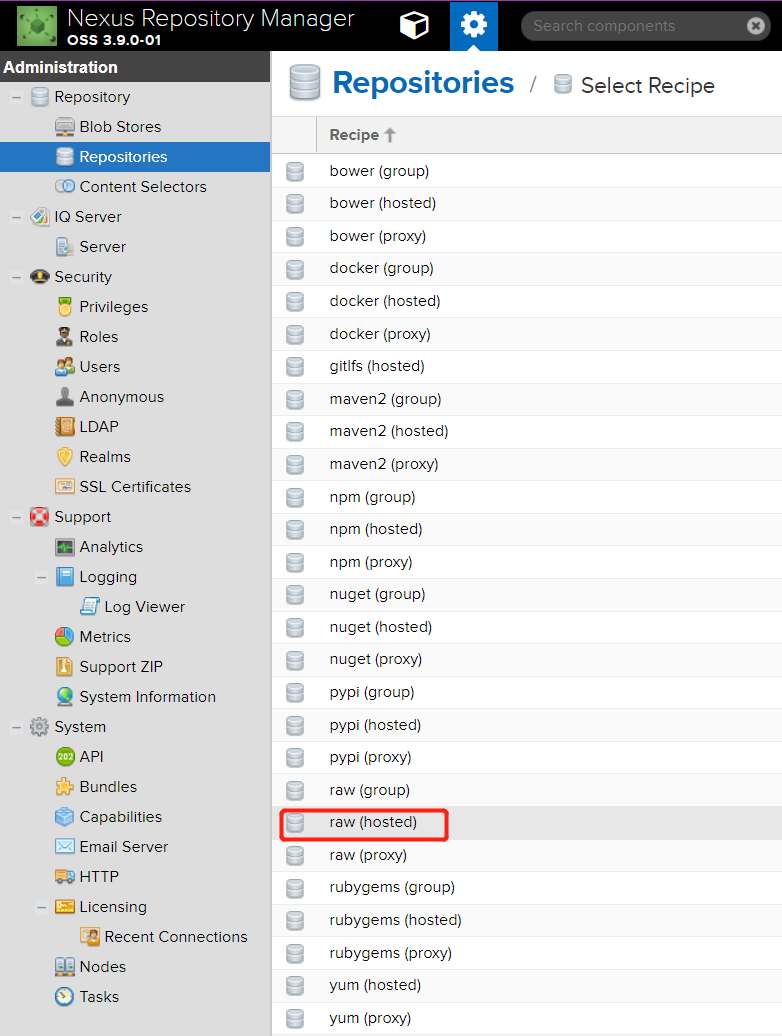
3、设置仓库名称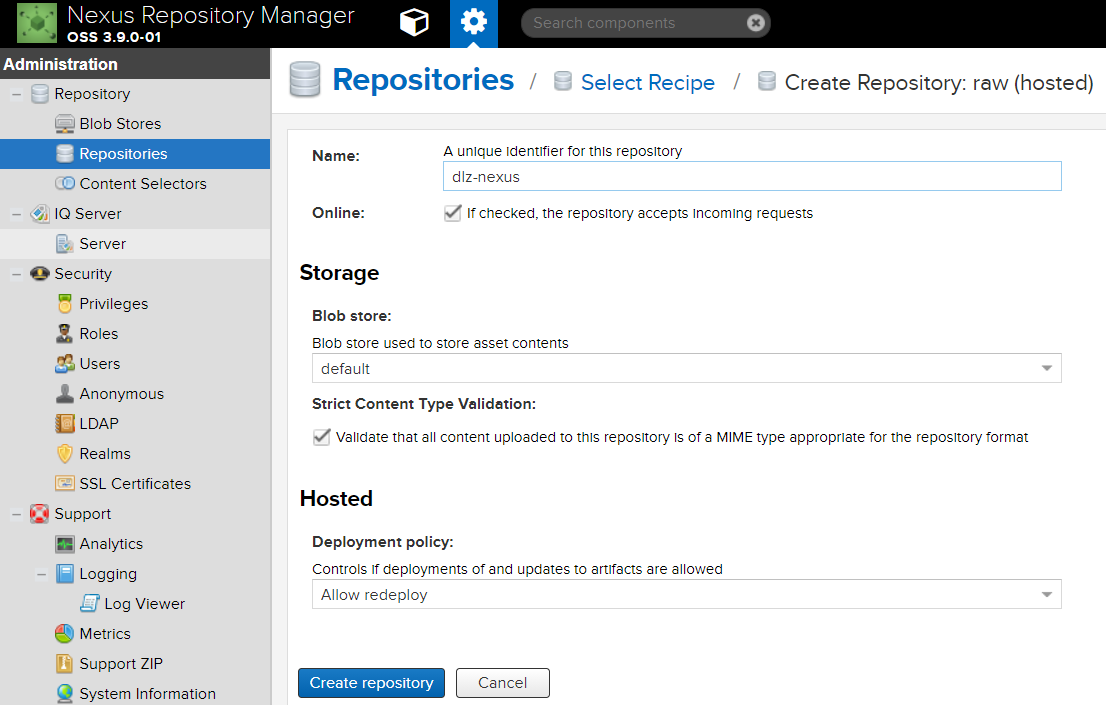
三、私服使用
1. 在maven中配置setting.xml来使用私服
<settingsxmlns="http://maven.apache.org/SETTINGS/1.0.0"xmlns:xsi="http://www.w3.org/2001/XMLSchema-instance"xsi:schemaLocation="http://maven.apache.org/SETTINGS/1.0.0 http://maven.apache.org/xsd/settings-1.0.0.xsd"><!--存放地址--><localRepository>D:\WorkSpace\Maven\m2\repository</localRepository><interactiveMode /><usePluginRegistry>true</usePluginRegistry><offline>false</offline><pluginGroups /><servers><server><!--注意这个id 需要和pom.xml的对应--><id>maven-releases</id><username>admin</username><password>admin123</password></server><server><!--注意这个id 需要和pom.xml的对应--><id>maven-snapshots</id><username>admin</username><password>admin123</password></server></servers><mirrors><!--刚才配置的group的地址--><mirror><id>maven-public</id><mirrorOf>central</mirrorOf><url>http://172.18.0.122:8081/repository/maven-public/</url></mirror><!--这2个备用 以免在外网环境连不上私服--><mirror><id>alimaven</id><mirrorOf>central</mirrorOf><url>http://maven.aliyun.com/nexus/content/groups/public/</url></mirror><mirror><id>alimaven_central</id><mirrorOf>central</mirrorOf><url>http://maven.aliyun.com/nexus/content/repositories/central/</url></mirror></mirrors><proxies /><profiles><profile><id>maven-public</id><activation><activeByDefault>true</activeByDefault></activation><repositories><repository><id>maven-public</id><url>http://172.18.0.122:8081/repository/maven-public/</url></repository></repositories><pluginRepositories><pluginRepository><id>maven-public</id><url>http://172.18.0.122:8081/repository/maven-public/</url></pluginRepository></pluginRepositories></profile></profiles><activeProfiles /></settings>
2.在项目中配置pom.xml来使用私服
<distributionManagement><repository><!--注意这个ID和setting中的对应--><id>maven-releases</id><name>Wanma Maven Repository</name><url>http://172.18.0.122:8081/repository/maven-releases/</url></repository><snapshotRepository><!--注意这个ID和setting中的对应--><id>maven-snapshots</id><name>Wanma Maven Repository</name><url>http://172.18.0.122:8081/repository/maven-snapshots/</url></snapshotRepository></distributionManagement>

若有收获,就点个赞吧
0 人点赞
