可参考: https://github.com/le5le-com/topology/tree/master/packages/flow-diagram
自定义图形库,主要指自定义节点。
节点组成
形状(边框)
图标/图片
文字
锚点
自定义图形的过程,就是如何实现上面组成部分。锚点可以使用默认的上下左右4个点。
编写自定义图形组件(4步)
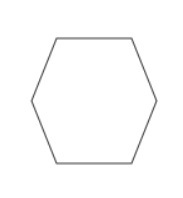
1. 绘制形状
import { Node } from '@topology/core';export function myShape(ctx: CanvasRenderingContext2D, node: Node) {ctx.beginPath();// Make my shape..........// 必须判空再填充(node.fillStyle || node.bkType) && ctx.fill();ctx.stroke();}
1)定义一个可导出的函数,例如:myShape
参数
| 名称 | 类型 | 是否必选 | 描述 |
|---|---|---|---|
| ctx | CanvasRenderingContext2D | 是。 | canvas的绘画上下文。 你想怎么画,你决定。 |
| node | Node | 是 | 节点信息。参考 节点 |
2)建立一个新绘画路径,避免干扰其他图形绘画。【必须】
ctx.beginPath();
3)利用ctx和node,开始自己的canvas图形绘画
4)可选性的,总结性的,填充或涂边框
ctx.fill();
ctx.stroke();
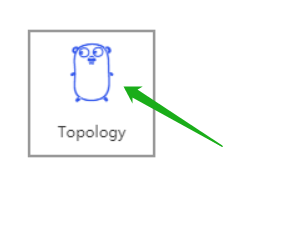
2. 计算图标/图片位置
可省略,用默认位置。默认上面2/3为图片区域,下面1/3为文字区域。
import { Node, Rect } from '@topology/core';export function myIconRect(node: Node) {node.iconRect = new Rect(node.rect.x, node.rect.y + 10, node.rect.width, (node.rect.height * 2) / 3 - 20);node.fullIconRect = node.rect;}
传入node节点参数,计算并赋值iconRect、fullIconRect。其中:
- iconRect - 有文字存在时的区域。
- fullIconRect - 没有文字时的区域。
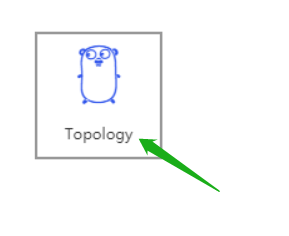
3. 文字位置
可省略,用默认位置。默认为节点底部1/3的区域。
import { Node, Rect } from '@topology/core';export function myTextRect(node: Node) {node.textRect = new Rect(node.rect.x + 10,node.rect.y + (node.rect.height * 2) / 3,node.rect.width - 20,node.rect.height / 3 - 5);node.fullTextRect = node.rect;}
传入node节点参数,计算并赋值textRect、fullTextRect。其中:
- textRect- 有图片存在时的区域。
- fullTextRect- 没有图片时的区域。
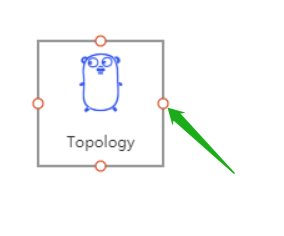
4. 计算锚点
可省略,用默认锚点,上下左右4个点。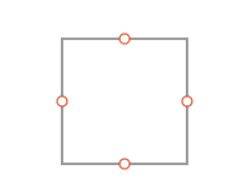
import { Point, Node, Direction } from '@topology/core';export function myAnchors(node: Node) {node.anchors.push(new Point(node.rect.x, node.rect.y + node.rect.height / 2, Direction.Left));node.anchors.push(new Point(node.rect.x + node.rect.width / 2, node.rect.y, Direction.Up));node.anchors.push(new Point(node.rect.x + node.rect.width, node.rect.y + node.rect.height / 2, Direction.Right));node.anchors.push(new Point(node.rect.x + node.rect.width / 2, node.rect.y + node.rect.height, Direction.Bottom));// demo,其他自定义锚点。这里只是示例。for (let i = 10; i < 360; i += 10) {if (i % 90 === 0) {continue;}const direction = Math.floor(i / 90);const pt = new Point(node.rect.center.x + (Math.sin((i / 180) * Math.PI) * node.rect.width) / 2,node.rect.center.y + (Math.cos((i / 180) * Math.PI) * node.rect.height) / 2,direction);pt.hidden = true;node.anchors.push(pt);}}
传入node节点参数,计算并赋值anchors。其中:如果point.hidden为true,表示鼠标移动到节点时,不显示锚点;仅到鼠标移动到锚点自身才显示。
例如上面代码:默认鼠标移动到节点,显示4个锚点,其他锚点只有鼠标在锚点位置才显示。
发布图形库 (可选)
主要指发布到npm上。
可以参考: https://github.com/le5le-com/topology/tree/master/packages/flow-diagram
配置好package.json、tsconfig.json相关配置,然后编译,用npm发布即可。
使用自定义图形库
1. 注册自定义函数
向画布注册一个自定义图形,让画布知道如何绘制你的图像。
// 导入画布的注册函数import { registerNode } from '@topology/core';// 导入自己的图形库函数(前面编写的4个函数)import {myShape, // 形状myIconRect, // 图片位置区域myTextRect, //文字位置区域myAnchors //锚点} from 'topology-flow-diagram';// 注册到画布registerNode('唯一的图形名,参考node.name', myShape, myAnchors, myIconRect, myTextRect);
其中,注册函数用法:
// name - node名称.
// drawFn - node渲染函数。上面的myShape
// anchorsFn - 计算node的锚点,如果为null,表示使用缺省计算锚点方法
// iconRectFn - 计算node的图标区域,如果为null,表示使用缺省计算图标区域方法
// textRectFn - 计算node的文字区域,如果为null,表示使用缺省计算文字区域方法
// project - 如果已经存在同名node,不要覆盖.
export function registerNode(
name: string, // myShape
drawFn: (ctx: CanvasRenderingContext2D, node: Node) => void,
anchorsFn?: (node: Node) => void,
iconRectFn?: (node: Node) => void,
textRectFn?: (node: Node) => void,
project?: boolean
);
2. 调用,使用自定义图形
当向画布添加节点时,就会使用自定义图形的相关函数。例如:
canvas.addNode({name: '唯一的图形名,参考node.name', // registerNode的第一个参数。text: '自定义图形',rect: {x: 100,y: 100width: 150,height: 400}})
左侧工具栏拖曳的数据,也是上面的addNode参数,参考: https://www.yuque.com/alsmile/topology/faq#O7ntD
修改默认图形锚点
例如,修改矩形锚点方法,为自己的锚点计算函数myAnchorFn。直接重新注册即可。
import { registerNode, rectangle } from '@topology/core';// 覆盖已经存在节点,需要传最后一个force参数registerNode('rectangle', rectangle , myAnchorFn, null, null);// 或直接使用window对象下的注册函数window.registerTopologyNode('rectangle', rectangle , myAnchorFn, null, null);
Topology-vue企业版中自定义图形库
window.registerTopologyNode
window.registerTopologyNode('thermometer', myShape)
参考示例: https://github.com/le5le-com/topology-vue-ts/tree/master/src/components

若有收获,就点个赞吧
0 人点赞
