1 索引Index入门
1.1 为什么我们要手动创建索引?
- 在生产上,我们需要自己手动建立索引和映射,是为了更好的管理索引,就像数据库的建表数据一样。
1.2 索引管理
1.2.1 创建索引
- 创建索引的语法:
PUT /index{"settings":{...},"mappings":{"properties":{...}},"aliases":{"default_index":{}}}
- 示例:
- 创建索引:
PUT /my_index{"settings": {"number_of_shards": 1,"number_of_replicas": 1},"mappings": {"properties": {"field1":{"type": "text"},"field2":{"type": "text"}}},"aliases": {"default_index": {}}}
- 插入数据:
PUT /my_index/_doc/1{"field1":"java","field2":"js"}
- 查询数据:
GET /my_index/_doc/1
GET /default_index/_doc/1
1.2.2 查询索引
- 语法:查询索引:
GET /index
- 语法:查询索引中的映射信息
GET /index/_mapping
- 语法:查询索引中的设置信息
GET /index/_settings
- 示例:
GET /my_index
GET /my_index/_mapping
GET /my_index/_settings
1.2.3 修改索引
- 语法:
PUT /index/_settings{"index" : {"number_of_replicas" : 5}}
- 示例:修改副本分片数
PUT /my_index/_settings{"index" : {"number_of_replicas" : 5}}
1.2.4 删除索引
- 语法:删除索引
DELETE /index
- 语法:删除多个索引
DELETE /index1,index2
- 语法:删除多个索引
DELETE /index*
- 语法:删除全部索引(危险)
DELETE /_all
- 示例:删除索引
DELETE /book
- 示例:删除多个索引
DELETE /book,my_index
- 示例:
DELETE /book*
- 示例:删除所有索引
DELETE /_all
为了安全起见,防止恶意删除索引,删除的时候必须指定索引名,我们可以在elasticsearch.yml中配置action.destructive_requires_name: true。
1.3 定制分词器
1.3.1 默认分词器
- 分词器有三个组件,分别为:character filter,tokenizer和token filter。
- 默认的分词器是:standard 分词器。
- standard tokenizer:以单词边界进行切分。
- standard token filter:什么都不做。
- lowercase token filter:将所有字母都转换为小写。
- stop token filter(默认被禁用):移除停用词,比如a、the、it等等。
1.3.2 修改分词器的位置
- 启用english停用词token filter:
PUT /my_index{"settings": {"analysis": {"analyzer": {"es_std":{"type":"standard","stopwords":"_english_"}}}}}
- 使用标准分词器测试分词:
GET /my_index/_analyze{"analyzer": "standard","text": "a dog is in the house"}
- 使用english停用词测试分词:
GET /my_index/_analyze{"analyzer": "es_std","text":"a dog is in the house"}
1.3.3 定制自己的分词器
- 定制自己的分词器:
PUT /my_index{"settings": {"analysis": {"char_filter": {"&_to_and": {"type": "mapping","mappings": ["&=> and"]}},"filter": {"my_stopwords": {"type": "stop","stopwords": ["the", "a"]}},"analyzer": {"my_analyzer": {"type": "custom","char_filter": ["html_strip", "&_to_and"],"tokenizer": "standard","filter": ["lowercase", "my_stopwords"]}}}}}
- 测试自定义分词器:
GET /my_index/_analyze{"analyzer": "my_analyzer","text": "tom&jerry are a friend in the house, <a>, HAHA!!"}
- 设置字段使用自定义分词器:
PUT /my_index/_mapping/{"properties": {"content": {"type": "text","analyzer": "my_analyzer"}}}
1.4 type底层结构及弃用原因
1.4.1 type是什么?
- type是一个Index中用来区分类似的数据的。这些类似的数据,可能有不同的fields,而且有不同的属性来控制索引和分词器的建立。
- field的value,在底层的Lucene中建立索引的时候,全都是opaque bytes类型,是不区分类型的。
- Lucene是没有type的概念的,在document(文档)中,实际上是将type作为document(文档)的field来存储的,即
_type,ES通过_type来进行type的过滤和筛选。
1.4.2 ES中不同的type存储机制
- 一个Index中的多个type,实际上是放在一起存储的,因此同一个Index下,不能有多个type重名,因为那样是无法处理的。
- 比如:创建索引:
{"goods": {"mappings": {"electronic_goods": {"properties": {"name": {"type": "string",},"price": {"type": "double"},"service_period": {"type": "string"}}},"fresh_goods": {"properties": {"name": {"type": "string",},"price": {"type": "double"},"eat_period": {"type": "string"}}}}}}
- 插入数据:
PUT /goods/electronic_goods/1{"name": "小米空调","price": 1999.0,"service_period": "one year"}
PUT /goods/fresh_goods/1{"name": "澳洲龙虾","price": 199.0,"eat_period": "one week"}
- ES文档在底层的存储是这个样子的:
{"goods": {"mappings": {"_type": {"type": "text","index": "false"},"name": {"type": "text"}"price": {"type": "double"}"service_period": {"type": "text"},"eat_period": {"type": "text"}}}}
- 那么插入的数据在底层的数据存储格式:
{"_type": "electronic_goods","name": "小米空调","price": 1999.0,"service_period": "one year","eat_period": ""}
{"_type": "fresh_goods","name": "澳洲龙虾","price": 199.0,"service_period": "","eat_period": "one week"}
1.4.3 type弃用的原因
- 同一个索引下,不同type的数据存储其他type的field的大量空值,会造成资源浪费。
- 所以,不同类型的数据,要放在不同的索引中。
- ES9中,将彻底删除type。
1.5 定制动态映射(dynamic mapping)
1.5.1 定制动态映射(dynamic mapping)策略
- 语法:
PUT /index{"settings": {...},"mappings": {"dynamic": "xxx","properties": {"filed1": {"type": ""},"filed2": {"type": "","dynamic": "xxx"},...}},"aliases": {"default_index": {}}}
dynamic:
- true,遇到陌生字段,就进行dynamic mapping,默认值。
- false:新检测到的字段将被忽略。这些字段将不会被索引,因此将无法搜索,但仍将出现在返回的源字段中。这些字段不会添加到映射中,必须显示的添加新字段。
- strict:遇到陌生字段,就报错。
- 示例:
- 创建索引
PUT /my_index{"mappings": {"dynamic": "strict","properties": {"title": {"type": "text"},"address": {"type": "object","dynamic": "true"}}}}
- 测试插入数据
PUT /my_index/_doc/1{"title": "my article","content": "this is my article","address": {"province": "guangdong","city": "guangzhou"}}
- 报错:
{"error" : {"root_cause" : [{"type" : "strict_dynamic_mapping_exception","reason" : "mapping set to strict, dynamic introduction of [content] within [_doc] is not allowed"}],"type" : "strict_dynamic_mapping_exception","reason" : "mapping set to strict, dynamic introduction of [content] within [_doc] is not allowed"},"status" : 400}
1.5.2 自定义动态映射(dynamic mapping)策略
- ES会根据传入的值,自动推断类型。
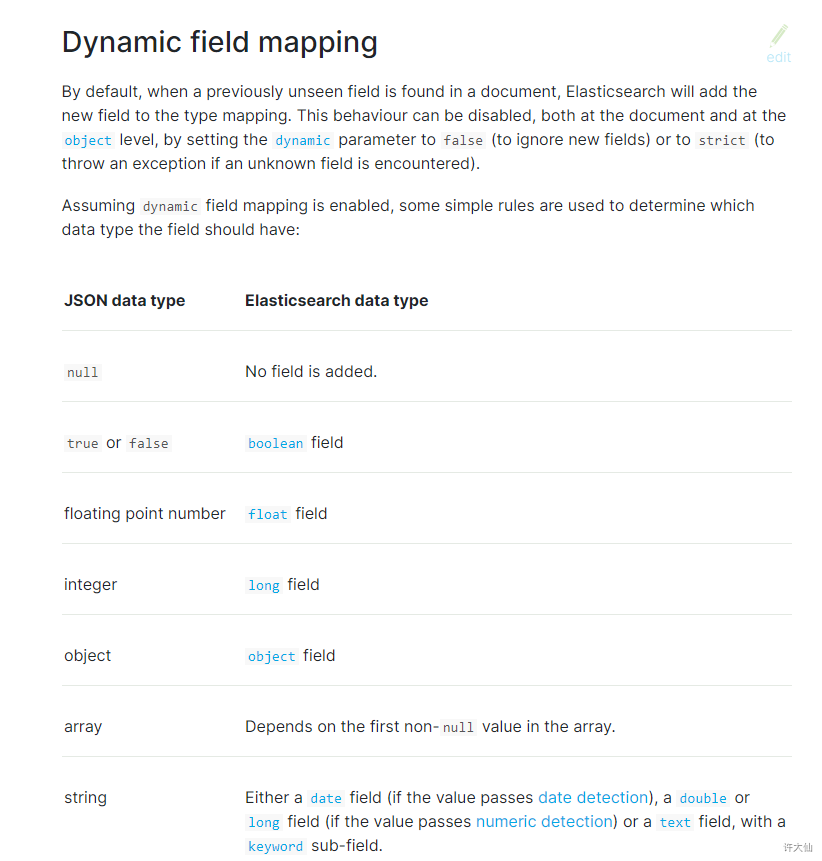
- 日期探测(Date Detection):默认会按照一定格式识别date,比如yyyy-MM-dd,但是如果某个field先过来一个”2019-11-11”的值,就会自动被dynamic mapping识别成date,后面如果在过来一个”hello world”之类的值,就会报错。可以手动关闭某个type的date detection,如果有需要,自己手动指定某个field为date类型。
- 语法:
PUT /index{"mappings": {"date_detection": false,"properties": {"filed1": {"type": ""},"filed2": {"type": ""},...}}}
- 示例:关闭日期探测
PUT /my_index{"mappings": {"date_detection": false,"properties": {"title": {"type": "text"},"address": {"type": "object","dynamic": "true"}}}}
- 测试插入数据:
PUT /my_index/_doc/1{"title": "my article","content": "this is my article","address": {"province": "guangdong","city": "guangzhou"},"post_date":"2019-09-10"}
- 自定义日期格式:dynamic_date_formats可以定制自己的格式。
- 语法:
PUT /index{"mappings": {"dynamic_date_formats": ["MM/dd/yyyy"],"properties": {"filed1": {"type": ""},"filed2": {"type": ""},...}}}
- 示例:自定义日期格式
PUT /my_index{"mappings": {"dynamic_date_formats": ["MM/dd/yyyy"]}}
- 测试插入数据:
PUT /my_index/_doc/1{"create_date": "09/25/2019"}
- 数字探测(Numeric Detection):虽然JSON支持本机浮点和整数数据类型,但是某些应用程序或语言有时候可能将数字呈现为字符串。通常正确的解决方案是显示的映射这些字段,那么就可以启用数字检测(默认情况下禁用)来自动完成这些操作。
- 语法:
PUT /index{"mappings": {"numeric_detection": true,"properties": {"filed1": {"type": ""},"filed2": {"type": ""},...}}}
- 示例:开启数字探测
PUT /my_index{"mappings": {"numeric_detection": true}}
- 测试插入数据:
PUT /my_index/_doc/1{"my_float": "1.0","my_integer": "1"}
1.5.3 定义自己的dynamic mapping template(动态映射模板)
- 动态映射模板允许我们自定义映射,这些映射可以应用到动态添加的字段。
- 语法:
PUT index{"mappings": {"dynamic_templates": [{"template_name": {... match conditions ..."mapping": { ... }}},...]}}
- template_name:模板名称可以是任何字符串。
- match conditions:匹配条件,包括match_mapping_type、match、match_pattern、unmatch、path_match、path_unmatch。
- mapping:匹配字段应该使用的映射。
- 示例:
- 定制自己的映射模块:
PUT /my_index{"mappings": {"dynamic_templates": [{"en": {"match": "*_en","match_mapping_type": "string","mapping": {"type": "text","analyzer": "english"}}}]}}
- 插入数据:
PUT /my_index/_doc/1{"title": "this is my first article"}
PUT /my_index/_doc/2{"title_en": "this is my first article"}
- 搜索:
GET /my_index/_search?q=article
GET /my_index/_search?q=is
- title没有匹配到任何的动态模块,默认就是standard分词器,不会过滤掉停用词,像is会进入到倒排索引,用is来搜索是可以搜索到的。
- title_en匹配到了动态模块,就是english分词器,会过滤掉停用词,is这种停用词会被过滤掉,用is来搜索是搜索不到的。
- 模块写法:
PUT my_index{"mappings": {"dynamic_templates": [{"integers": {"match_mapping_type": "long","mapping": {"type": "integer"}}},{"strings": {"match_mapping_type": "string","mapping": {"type": "text","fields": {"raw": {"type": "keyword","ignore_above": 256}}}}}]}}
- 模板参数:
"match": "long_*",
"unmatch": "*_text",
"match_mapping_type": "string",
"path_match": "name.*",
"path_unmatch": "*.middle",
"match_pattern": "regex",
"match": "^profit_\d+$"
- 动态模块的应用场景:
①结构化搜索:
- 默认情况下,ElasticSearch将字符串字段映射为带有子关键字字段的文本字段。但是,如果只对结构化内容进行索引,而对全文检索不感兴趣,则可以仅将字段映射为关键字。注意:为了能够搜索这些字段,必须搜索索引的时候用完全相同的值。
{"strings_as_keywords": {"match_mapping_type": "string","mapping": {"type": "keyword"}}}
- 默认情况下,ElasticSearch将字符串字段映射为带有子关键字字段的文本字段。但是,如果只对结构化内容进行索引,而对全文检索不感兴趣,则可以仅将字段映射为关键字。注意:为了能够搜索这些字段,必须搜索索引的时候用完全相同的值。
②仅搜索:
- 如果只关系字符串字段的全文检索,并且不打算对字符串字段进行聚合、排序或精确搜索,可以将其映射为文本字段。
{"strings_as_text": {"match_mapping_type": "string","mapping": {"type": "text"}}}
- 如果只关系字符串字段的全文检索,并且不打算对字符串字段进行聚合、排序或精确搜索,可以将其映射为文本字段。
③norms :不关心评分。
- norms是指标时间的评分因素。如果不关心评分,比如:不按评分对文档进行排序,则可以在索引中禁用这些评分因子的存储以便节省一些空间。
{"strings_as_keywords": {"match_mapping_type": "string","mapping": {"type": "text","norms": false,"fields": {"keyword": {"type": "keyword","ignore_above": 256}}}}}
- norms是指标时间的评分因素。如果不关心评分,比如:不按评分对文档进行排序,则可以在索引中禁用这些评分因子的存储以便节省一些空间。
1.6 零停机重建索引
1.6.1 零停机重建索引
- 场景:index被确定以后,一个field的设置是不能被修改的,如果要修改一个field,应该重新按照新的mapping,建立新的index,并将数据批量查询出来,重新用bulk api写入到index中。
- 批量查询的时候,建议采用scroll api,并且采用多线程并发的方式来重建索引数据,每次scroll就查询执行日期的一段数据,交给一个线程即可。
- 示例:
- ①一开始,依据动态映射(dynamic mapping)插入数据,但是不小心有些数据是诸如”2019-11-11”之类的日期格式,所以会被映射为date类型,实际上它是string类型。
PUT /my_index/_doc/1{"title": "2019-11-11"}
PUT /my_index/_doc/2{"title": "2019-11-12"}
- ②当后期向索引中插入string类型的title值的时候,会报错。
PUT /my_index/_doc/3{"title": "this is my first article"}
- 报错:
{"error" : {"root_cause" : [{"type" : "mapper_parsing_exception","reason" : "failed to parse field [title] of type [date] in document with id '3'. Preview of field's value: 'this is my first article'"}],"type" : "mapper_parsing_exception","reason" : "failed to parse field [title] of type [date] in document with id '3'. Preview of field's value: 'this is my first article'","caused_by" : {"type" : "illegal_argument_exception","reason" : "failed to parse date field [this is my first article] with format [strict_date_optional_time||epoch_millis]","caused_by" : {"type" : "date_time_parse_exception","reason" : "Failed to parse with all enclosed parsers"}}},"status" : 400}
- ③此时,想修改title的类型,是不可能的:
PUT /my_index/_mapping{"properties":{"title":{"type":"text"}}}
- 报错:
{"error" : {"root_cause" : [{"type" : "illegal_argument_exception","reason" : "mapper [title] cannot be changed from type [date] to [text]"}],"type" : "illegal_argument_exception","reason" : "mapper [title] cannot be changed from type [date] to [text]"},"status" : 400}
- ④此时,唯一的办法,就是重建索引,即重新建立一个新的索引,将旧索引的数据查询出来,再导入新的索引。
- ⑤如果说就索引的名字是old_index,新索引的名字是new_index。终端Java应用已经在使用old_index操作了,难道我们需要停止Java应用,修改使用的index为new_index,再重新启动Java应用?这个过程中,必然会导致Java应用停机,可用性也降低。
- ⑥给索引起一个别名,Java应用指向这个别名,那么此时Java应用指向的是旧索引。
PUT /my_index/_alias/prod_index
- ⑦创建新的Index,调整title的类型为string:
PUT /my_index_new{"mappings": {"properties": {"title": {"type": "text"}}}}
- ⑧使用scroll api将数据批量查询出来:
GET /my_index/_search?scroll=1m{"query": {"match_all": {}},"size": 1}
- 返回:
{"_scroll_id" : "FGluY2x1ZGVfY29udGV4dF91dWlkDXF1ZXJ5QW5kRmV0Y2gBFnRRN1doOHVhUktXQllGZGlHRjN3bFEAAAAAAAANOhZzenoyWWlMd1I2T1kyMWtzMDExYVl3","took" : 0,"timed_out" : false,"_shards" : {"total" : 1,"successful" : 1,"skipped" : 0,"failed" : 0},"hits" : {"total" : {"value" : 1,"relation" : "eq"},"max_score" : 1.0,"hits" : [{"_index" : "my_index","_type" : "_doc","_id" : "1","_score" : 1.0,"_source" : {"title" : "2019-11-11"}}]}}
- ⑨采用bulk api将scoll查出来的一批数据,批量写入新索引:
POST /_bulk{ "index": { "_index": "my_index_new", "_id": "1" }}{ "title": "2019-11-11" }
- ⑩反复循环8~9,查询一批批数据出现,采用bulk api将每一批数据批量写入到新索引。
- ⑪将prod_index这个alias切换到my_index_new上,Java应用会直接通过index别名使用新的索引中的数据,Java应用程序不需要停机,高可用。
POST /_aliases{"actions": [{ "remove": { "index": "my_index", "alias": "prod_index" }},{ "add": { "index": "my_index_new", "alias": "prod_index" }}]}
- ⑫直接通过pro_index别名查询:
GET /prod_index/_search
1.6.2 生产实践,基于alias对client透明切换index
- 对索引进行别名操作:
PUT /my_index_v1/_alias/my_index
- Java客户端对别名(my_index)进行操作。
- 重建索引后,切换v1到v2:
POST /_aliases{"actions": [{ "remove": { "index": "my_index_v1", "alias": "my_index" }},{ "add": { "index": "my_index_v2", "alias": "my_index" }}]}
2 中文分词器之IK分词器
2.1 IK分词器的安装和使用
2.1.1 中文分词器
- 默认的standard分词器,仅适用于英文。
GET /_analyze{"analyzer": "standard","text": ["中华人民共和国人民大会堂"]}
- 返回:
{"tokens" : [{"token" : "中","start_offset" : 0,"end_offset" : 1,"type" : "<IDEOGRAPHIC>","position" : 0},{"token" : "华","start_offset" : 1,"end_offset" : 2,"type" : "<IDEOGRAPHIC>","position" : 1},{"token" : "人","start_offset" : 2,"end_offset" : 3,"type" : "<IDEOGRAPHIC>","position" : 2},{"token" : "民","start_offset" : 3,"end_offset" : 4,"type" : "<IDEOGRAPHIC>","position" : 3},{"token" : "共","start_offset" : 4,"end_offset" : 5,"type" : "<IDEOGRAPHIC>","position" : 4},{"token" : "和","start_offset" : 5,"end_offset" : 6,"type" : "<IDEOGRAPHIC>","position" : 5},{"token" : "国","start_offset" : 6,"end_offset" : 7,"type" : "<IDEOGRAPHIC>","position" : 6},{"token" : "人","start_offset" : 7,"end_offset" : 8,"type" : "<IDEOGRAPHIC>","position" : 7},{"token" : "民","start_offset" : 8,"end_offset" : 9,"type" : "<IDEOGRAPHIC>","position" : 8},{"token" : "大","start_offset" : 9,"end_offset" : 10,"type" : "<IDEOGRAPHIC>","position" : 9},{"token" : "会","start_offset" : 10,"end_offset" : 11,"type" : "<IDEOGRAPHIC>","position" : 10},{"token" : "堂","start_offset" : 11,"end_offset" : 12,"type" : "<IDEOGRAPHIC>","position" : 11}]}
- 我们想要的效果是:中华人民共和国,人民大会堂。而standard分词器不能满足我们的要求。
- IK分词器是目前最流行的ES中文分词器。
2.1.2 IK分词器的安装
2.1.3 IK分词器的基本知识
- ik_smart:会做最粗颗粒度的拆分,比如会将“中华人民共和国人民大会堂”拆分为“中华人民共和国“和“人民大会堂”。
- ik_max_word:会将文本做最细粒度的拆分,比如会将“中华人民共和国人民大会堂”拆分为“中华人民共和国”、“中华人民”、“中华”、“华人”、“人民共和国”、“人民大会堂”、“人民大会”、“大会堂”,会穷尽各种可能的组合;
2.1.4 IK分词器的使用
- 示例:
- 创建索引,存储的时候,使用ik_max_word,搜索的时候,使用ik_smart
PUT /my_index{"mappings": {"properties": {"name":{"type": "text","analyzer": "ik_max_word","search_analyzer": "ik_smart"}}}}
- 插入数据:
PUT /my_index/_doc/1{"name":"中华人民共和国人民大会堂"}
- 搜索数据:
GET /my_index/_search?q=共和国
2.2 IK配置文件
2.2.1 IK分词器配置文件
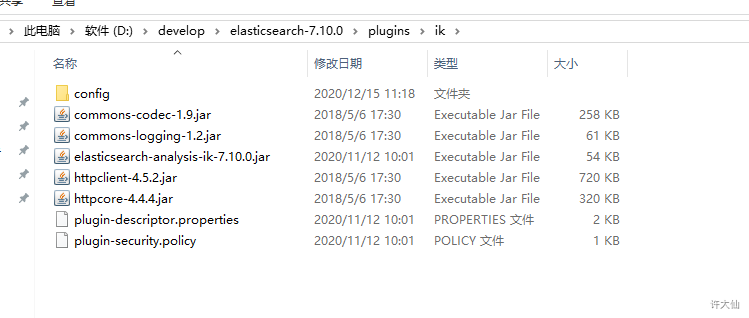
- IK分词器配置文件地址:ES/plugins/ik/config目录。
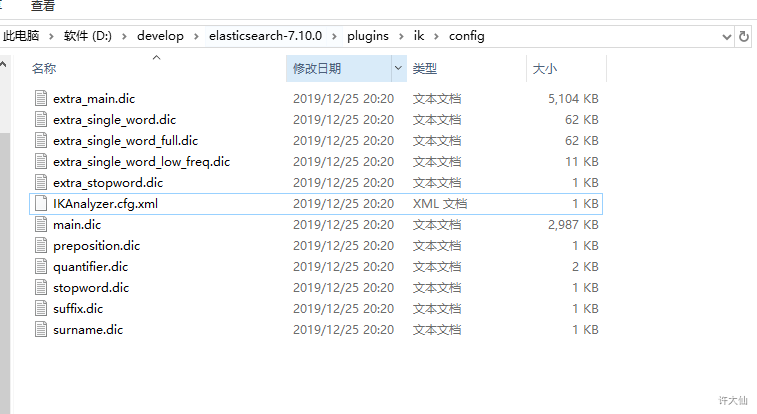
- IKAnalyzer.cfg.xml:用来配置自定义词库。
- main.dic(重要):IK原生内置的中文词库,总共有27万多条,只要是这些单词,都会被分在一起。
- preposition.dic:介词。
- quantifier.dic:放了一些单位相关的词,量词。
- suffix.dic:放了一些后缀。
- surname.dic:中国的姓氏。
- stopword.dic(重要):英文停用词。
2.2.2 自定义词库
 自己建立词库:
- 每年都会涌现一些特殊的流行的词,比如网红、蓝瘦香菇、喊麦等,一般不会出现在原生词典中。
步骤:
- ①创建mydict.dic文件,补充最新的词语。
②IKAnalyzer.cfg.xml文件中,配置mydict.dic。
<?xml version="1.0" encoding="UTF-8"?><!DOCTYPE properties SYSTEM "http://java.sun.com/dtd/properties.dtd"><properties><comment>IK Analyzer 扩展配置</comment><!--用户可以在这里配置自己的扩展字典 --><entry key="ext_dict">mydict.dic</entry><!--用户可以在这里配置自己的扩展停止词字典--><entry key="ext_stopwords"></entry><!--用户可以在这里配置远程扩展字典 --><!-- <entry key="remote_ext_dict">words_location</entry> --><!--用户可以在这里配置远程扩展停止词字典--><!-- <entry key="remote_ext_stopwords">words_location</entry> --></properties>
③重启ES。
 自己建立停用词:
- 比如了、的、地、得等,我们可能并不想去建立索引,让别人搜索。
步骤:
- ①创建ext_stopword.dic,补充常见的中文停用词。
②IKAnalyzer.cfg.xml文件中,配置ext_stopword.dic。
<?xml version="1.0" encoding="UTF-8"?><!DOCTYPE properties SYSTEM "http://java.sun.com/dtd/properties.dtd"><properties><comment>IK Analyzer 扩展配置</comment><!--用户可以在这里配置自己的扩展字典 --><entry key="ext_dict">mydict.dic</entry><!--用户可以在这里配置自己的扩展停止词字典--><entry key="ext_stopwords">ext_stopword.dic</entry><!--用户可以在这里配置远程扩展字典 --><!-- <entry key="remote_ext_dict">words_location</entry> --><!--用户可以在这里配置远程扩展停止词字典--><!-- <entry key="remote_ext_stopwords">words_location</entry> --></properties>
③重启ES。
2.3 使用MySQL热更新词库
2.3.1 热更新
- 每次都是在ES的扩展词典中,手动添加新词语,很坑:
- 每次添加完,都要重启ES,才能生效,非常麻烦。
- ES是分布式的,可能有数百个节点,我们不可能每次都是一个一个节点去修改。
- 热更新:ES不停机,我们直接在外部的某个地方添加新的词语,ES就立即加载到这些新的词语。
- 热更新的方案:
- 基于IK分词器的原生支持的热更新方案,部署一个web服务器,提供一个http接口,通过modified和tag两个http响应头,来提供词语的热更新。
- 修改IK分词器的源码,然后手动支持从MySQL中每隔一段时间,自动加载新的词库,推荐方案。
2.3.2 步骤
- 下载源码。
- 修改源码:
- ①创建HotDictReloadThread线程,不断的去调用Dictionary.getSingleton().reLoadMainDict()。 ```java package org.wltea.analyzer.dic;
import org.apache.logging.log4j.Logger; import org.wltea.analyzer.help.ESPluginLoggerFactory;
/**
- 加载字典线程 *
- @author 许大仙
- @version 1.0
@since 2020-12-15 14:02 */ public class HotDictReloadThread implements Runnable {
private static Logger logger = ESPluginLoggerFactory.getLogger(HotDictReloadThread.class.getName());
@Override public void run() {
while (true) {logger.info("----------reload hot dict from mysql--------------");Dictionary.getSingleton().reLoadMainDict();}
} }
- ②在pom.xml中添加mysql的驱动依赖:```xml<dependency><groupId>mysql</groupId><artifactId>mysql-connector-java</artifactId><version>8.0.21</version></dependency>
- ③数据库中新增es数据库以及对应的表的脚本: ```sql SET NAMES utf8mb4; SET FOREIGN_KEY_CHECKS = 0;
— Table structure for hot_stopwords
DROP TABLE IF EXISTS hot_stopwords;
CREATE TABLE hot_stopwords (
stopword varchar(255) CHARACTER SET utf8mb4 COLLATE utf8mb4_general_ci NULL DEFAULT NULL,
id bigint(20) NOT NULL AUTO_INCREMENT,
PRIMARY KEY (id) USING BTREE
) ENGINE = InnoDB AUTO_INCREMENT = 1 CHARACTER SET = utf8mb4 COLLATE = utf8mb4_general_ci ROW_FORMAT = Dynamic;
— Table structure for hot_words
DROP TABLE IF EXISTS hot_words;
CREATE TABLE hot_words (
word varchar(255) CHARACTER SET utf8mb4 COLLATE utf8mb4_general_ci NULL DEFAULT NULL,
id bigint(20) NOT NULL AUTO_INCREMENT,
PRIMARY KEY (id) USING BTREE
) ENGINE = InnoDB AUTO_INCREMENT = 1 CHARACTER SET = utf8mb4 COLLATE = utf8mb4_general_ci ROW_FORMAT = Dynamic;
SET FOREIGN_KEY_CHECKS = 1;
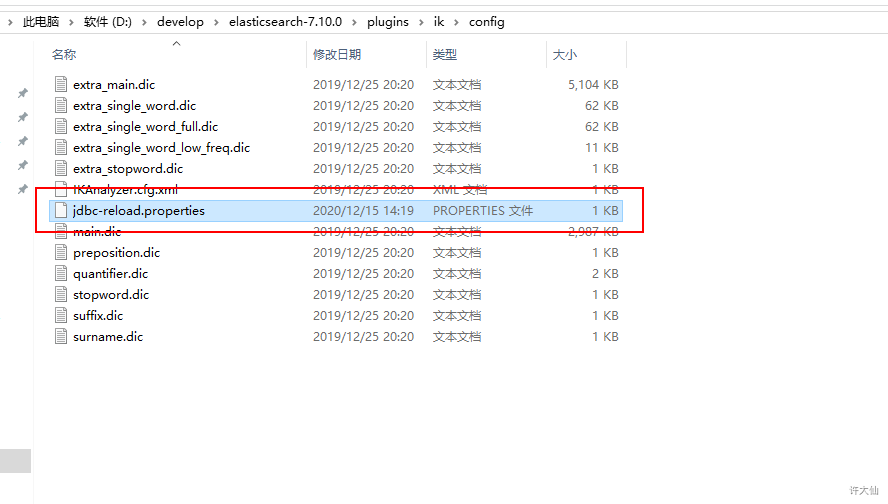
- ④在项目的config目录下新建jdbc-reload.properties文件:```propertiesjdbc.url=jdbc:mysql://localhost:3306/es?useUnicode=true&characterEncoding=UTF-8&autoReconnect=true&useSSL=false&serverTimezone=GMT%2B8&allowPublicKeyRetrieval=true&nullCatalogMeansCurrent=truejdbc.user=rootjdbc.password=123456jdbc.reload.sql=select word from hot_wordsjdbc.reload.stopword.sql=select stopword as word from hot_stopwordsjdbc.reload.interval=5000
⑤修改Dictionary中的initial()方法:
/*** 词典初始化 由于IK Analyzer的词典采用Dictionary类的静态方法进行词典初始化* 只有当Dictionary类被实际调用时,才会开始载入词典, 这将延长首次分词操作的时间 该方法提供了一个在应用加载阶段就初始化字典的手段** @return Dictionary*/public static synchronized void initial(Configuration cfg) {if (singleton == null) {synchronized (Dictionary.class) {if (singleton == null) {singleton = new Dictionary(cfg);singleton.loadMainDict();singleton.loadSurnameDict();singleton.loadQuantifierDict();singleton.loadSuffixDict();singleton.loadPrepDict();singleton.loadStopWordDict();//*********mysql监控线程*********new Thread(new HotDictReloadThread()).start();if (cfg.isEnableRemoteDict()) {// 建立监控线程for (String location : singleton.getRemoteExtDictionarys()) {// 10 秒是初始延迟可以修改的 60是间隔时间 单位秒pool.scheduleAtFixedRate(new Monitor(location), 10, 60, TimeUnit.SECONDS);}for (String location : singleton.getRemoteExtStopWordDictionarys()) {pool.scheduleAtFixedRate(new Monitor(location), 10, 60, TimeUnit.SECONDS);}}}}}}
⑥修改Dictionary中的loadMainDict()方法:
/*** 加载主词典及扩展词典*/private void loadMainDict() {// 建立一个主词典实例_MainDict = new DictSegment((char) 0);// 读取主词典文件Path file = PathUtils.get(getDictRoot(), Dictionary.PATH_DIC_MAIN);loadDictFile(_MainDict, file, false, "Main Dict");// 加载扩展词典this.loadExtDict();// 加载远程自定义词库this.loadRemoteExtDict();// ***********从MySQL中加载词典***********this.loadMySQLExtDict();}
```java private static Properties prop = new Properties();
static { try { Class.forName(“com.mysql.jdbc.Driver”); } catch (ClassNotFoundException ex) { logger.error(“mysql driver not found exception”, ex); } } /**
从mysql加载热更新词典 */ private void loadMySQLExtDict() { Connection conn = null; Statement stmt = null; ResultSet rs = null;
try {
Path file = PathUtils.get(getDictRoot(), "jdbc-reload.properties");prop.load(new FileInputStream(file.toFile()));logger.info("[==========]jdbc-reload.properties");for(Object key : prop.keySet()) {logger.info("[==========]" + key + "=" + prop.getProperty(String.valueOf(key)));}logger.info("[==========]query hot dict from mysql, " + prop.getProperty("jdbc.reload.sql") + "......");conn = DriverManager.getConnection(prop.getProperty("jdbc.url"),prop.getProperty("jdbc.user"),prop.getProperty("jdbc.password"));stmt = conn.createStatement();rs = stmt.executeQuery(prop.getProperty("jdbc.reload.sql"));while(rs.next()) {String theWord = rs.getString("word");logger.info("[==========]hot word from mysql: " + theWord);_MainDict.fillSegment(theWord.trim().toCharArray());}Thread.sleep(Integer.valueOf(String.valueOf(prop.get("jdbc.reload.interval"))));
} catch (Exception e) {
logger.error("erorr", e);
} finally {
if(rs != null) {try {rs.close();} catch (SQLException e) {logger.error("error", e);}}if(stmt != null) {try {stmt.close();} catch (SQLException e) {logger.error("error", e);}}if(conn != null) {try {conn.close();} catch (SQLException e) {logger.error("error", e);}}
} }
- ⑦修改Dictionary中的loadStopWordDict()方法:```java/*** 加载用户扩展的停止词词典*/private void loadStopWordDict() {// 建立主词典实例_StopWords = new DictSegment((char) 0);// 读取主词典文件Path file = PathUtils.get(getDictRoot(), Dictionary.PATH_DIC_STOP);loadDictFile(_StopWords, file, false, "Main Stopwords");// 加载扩展停止词典List<String> extStopWordDictFiles = getExtStopWordDictionarys();if (extStopWordDictFiles != null) {for (String extStopWordDictName : extStopWordDictFiles) {logger.info("[Dict Loading] " + extStopWordDictName);// 读取扩展词典文件file = PathUtils.get(extStopWordDictName);loadDictFile(_StopWords, file, false, "Extra Stopwords");}}// 加载远程停用词典List<String> remoteExtStopWordDictFiles = getRemoteExtStopWordDictionarys();for (String location : remoteExtStopWordDictFiles) {logger.info("[Dict Loading] " + location);List<String> lists = getRemoteWords(location);// 如果找不到扩展的字典,则忽略if (lists == null) {logger.error("[Dict Loading] " + location + " load failed");continue;}for (String theWord : lists) {if (theWord != null && !"".equals(theWord.trim())) {// 加载远程词典数据到主内存中logger.info(theWord);_StopWords.fillSegment(theWord.trim().toLowerCase().toCharArray());}}}//***********从mysql加载停用词************this.loadMySQLStopwordDict();}
//从mysql加载停用词private void loadMySQLStopwordDict() {Connection conn = null;Statement stmt = null;ResultSet rs = null;try {Path file = PathUtils.get(getDictRoot(), "jdbc-reload.properties");prop.load(new FileInputStream(file.toFile()));logger.info("[==========]jdbc-reload.properties");for(Object key : prop.keySet()) {logger.info("[==========]" + key + "=" + prop.getProperty(String.valueOf(key)));}logger.info("[==========]query hot stopword dict from mysql, " + prop.getProperty("jdbc.reload.stopword.sql") + "......");conn = DriverManager.getConnection(prop.getProperty("jdbc.url"),prop.getProperty("jdbc.user"),prop.getProperty("jdbc.password"));stmt = conn.createStatement();rs = stmt.executeQuery(prop.getProperty("jdbc.reload.stopword.sql"));while(rs.next()) {String theWord = rs.getString("word");logger.info("[==========]hot stopword from mysql: " + theWord);_StopWords.fillSegment(theWord.trim().toCharArray());}Thread.sleep(Integer.valueOf(String.valueOf(prop.get("jdbc.reload.interval"))));} catch (Exception e) {logger.error("erorr", e);} finally {if(rs != null) {try {rs.close();} catch (SQLException e) {logger.error("error", e);}}if(stmt != null) {try {stmt.close();} catch (SQLException e) {logger.error("error", e);}}if(conn != null) {try {conn.close();} catch (SQLException e) {logger.error("error", e);}}}}
- ⑧使用
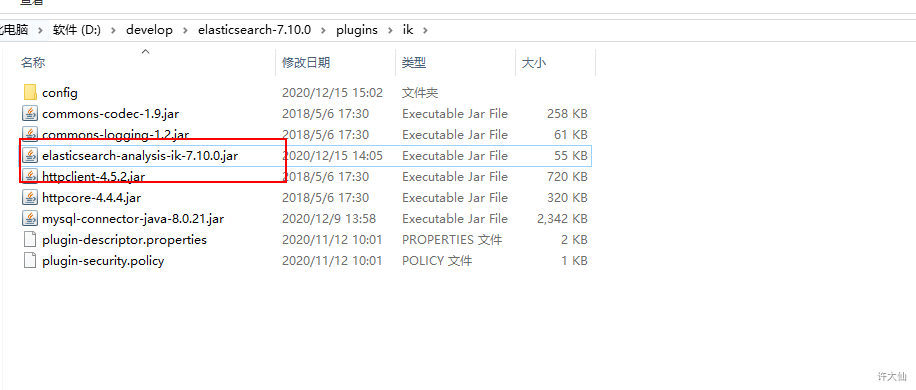
mvn package将项目进行打包。 - ⑨将刚才打包生成的jar包替换release压缩包中的elasticsearch-analysis-ik-7.10.0.jar。
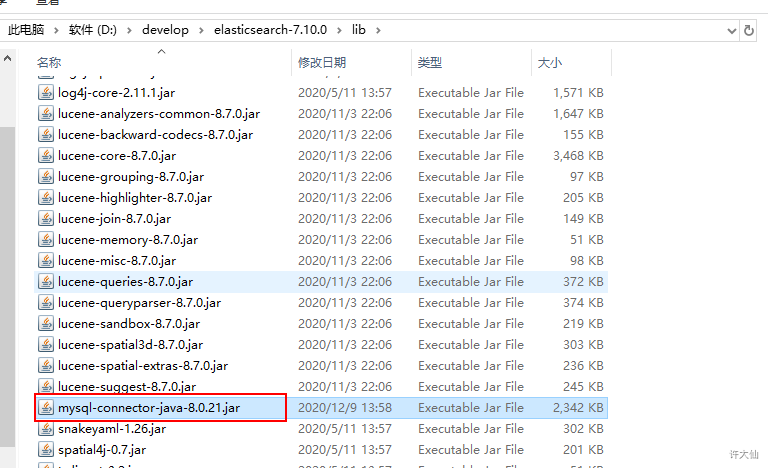
- ⑩将刚才使用的jdbc-reload.properties文件复制到conf目录下,并顺便复制mysql的驱动到ik目录中。
- ⑪重启ES:观察日志,日志中会显示出我们打印的那些东西,比如加载了什么配置等等。
- ⑫在MySQL中添加词库和停用词。
- ⑬测试热更新是否成功:
GET /_analyze{"analyzer": "ik_smart","text": ["江苏苏州大学"]}
3 Java API实现索引管理
3.1 新增索引
- 示例:
package com.sunxiaping.elk;import org.elasticsearch.action.admin.indices.alias.Alias;import org.elasticsearch.action.support.ActiveShardCount;import org.elasticsearch.client.RequestOptions;import org.elasticsearch.client.RestHighLevelClient;import org.elasticsearch.client.indices.CreateIndexRequest;import org.elasticsearch.client.indices.CreateIndexResponse;import org.elasticsearch.common.settings.Settings;import org.elasticsearch.common.unit.TimeValue;import org.junit.jupiter.api.Test;import org.springframework.beans.factory.annotation.Autowired;import org.springframework.boot.test.context.SpringBootTest;import java.io.IOException;import java.util.HashMap;import java.util.Map;@SpringBootTestpublic class ElkApplicationTests {@Autowiredprivate RestHighLevelClient client;/***<pre>* PUT /index* {* "settings":{...},* "mappings":{* "properties":{* ...* }* },* "aliases":{* "default_index":{}* }* }* </pre>*/@Testpublic void testCreateIndex() throws IOException {//创建请求CreateIndexRequest request = new CreateIndexRequest("my_index");//设置参数request.settings(Settings.builder().put("number_of_shards", "1").put("number_of_replicas", "1").build());//设置映射Map<String, Object> field1 = new HashMap<>();field1.put("type", "text");Map<String, Object> field2 = new HashMap<>();field2.put("type", "text");Map<String,Object> properties = new HashMap<>();properties.put("field1", field1);properties.put("field2", field2);Map<String,Object> mappings = new HashMap<>();mappings.put("properties",properties);request.mapping(mappings);//设置别名request.alias(new Alias("default_index"));//---------------可选参数-------------//超时5秒request.setTimeout(TimeValue.timeValueSeconds(5));//主节点超时5秒request.setMasterTimeout(TimeValue.timeValueSeconds(5));//设置创建索引API返回相应之前等待活动分片的数量request.waitForActiveShards(ActiveShardCount.from(1));//执行CreateIndexResponse response = client.indices().create(request, RequestOptions.DEFAULT);//获取返回结果boolean acknowledged = response.isAcknowledged();System.out.println("acknowledged = " + acknowledged);boolean shardsAcknowledged = response.isShardsAcknowledged();System.out.println("shardsAcknowledged = " + shardsAcknowledged);String index = response.index();System.out.println("index = " + index);}}
3.2 查询索引
- 示例:
package com.sunxiaping.elk;import org.elasticsearch.client.RequestOptions;import org.elasticsearch.client.RestHighLevelClient;import org.elasticsearch.client.indices.GetIndexRequest;import org.elasticsearch.client.indices.GetIndexResponse;import org.elasticsearch.cluster.metadata.AliasMetadata;import org.elasticsearch.cluster.metadata.MappingMetadata;import org.elasticsearch.common.settings.Settings;import org.junit.jupiter.api.Test;import org.springframework.beans.factory.annotation.Autowired;import org.springframework.boot.test.context.SpringBootTest;import java.io.IOException;import java.util.List;import java.util.Map;@SpringBootTestpublic class ElkApplicationTests {@Autowiredprivate RestHighLevelClient client;/*** 查询索引是否存在以及查询索引信息*/@Testpublic void testExistIndex() throws IOException {GetIndexRequest request = new GetIndexRequest("my_index");//参数request.local(false);//从主节点返回本地索引信息状态request.humanReadable(true);//以适合人类的格式返回request.includeDefaults(false);//是否返回每个索引的所有默认配置//查询索引是否存在boolean exists = client.indices().exists(request, RequestOptions.DEFAULT);System.out.println("exists = " + exists);//查询索引GetIndexResponse response = client.indices().get(request, RequestOptions.DEFAULT);Map<String, List<AliasMetadata>> aliases = response.getAliases();System.out.println("aliases = " + aliases);Map<String, MappingMetadata> mappings = response.getMappings();System.out.println("mappings = " + mappings);Map<String, Settings> settings = response.getSettings();System.out.println("settings = " + settings);}}
3.3 删除索引
- 示例:
package com.sunxiaping.elk;import org.elasticsearch.action.admin.indices.delete.DeleteIndexRequest;import org.elasticsearch.action.support.master.AcknowledgedResponse;import org.elasticsearch.client.RequestOptions;import org.elasticsearch.client.RestHighLevelClient;import org.junit.jupiter.api.Test;import org.springframework.beans.factory.annotation.Autowired;import org.springframework.boot.test.context.SpringBootTest;import java.io.IOException;@SpringBootTestpublic class ElkApplicationTests {@Autowiredprivate RestHighLevelClient client;/*** 删除索引** @throws IOException*/@Testpublic void testDeleteIndex() throws IOException {DeleteIndexRequest request = new DeleteIndexRequest("my_index");AcknowledgedResponse response = client.indices().delete(request, RequestOptions.DEFAULT);boolean acknowledged = response.isAcknowledged();System.out.println("acknowledged = " + acknowledged);}}
3.4 关闭索引
- 示例:
package com.sunxiaping.elk;import org.elasticsearch.client.RequestOptions;import org.elasticsearch.client.RestHighLevelClient;import org.elasticsearch.client.indices.CloseIndexRequest;import org.elasticsearch.client.indices.CloseIndexResponse;import org.junit.jupiter.api.Test;import org.springframework.beans.factory.annotation.Autowired;import org.springframework.boot.test.context.SpringBootTest;import java.io.IOException;@SpringBootTestpublic class ElkApplicationTests {@Autowiredprivate RestHighLevelClient client;/*** 关闭索引:可以查询索引,但是不可以新增、修改、删除数据** @throws IOException*/@Testpublic void testCloseIndex() throws IOException {CloseIndexRequest request = new CloseIndexRequest("my_index");CloseIndexResponse response = client.indices().close(request, RequestOptions.DEFAULT);boolean acknowledged = response.isAcknowledged();System.out.println("acknowledged = " + acknowledged);}}
3.5 开启索引
- 示例:
package com.sunxiaping.elk;import org.elasticsearch.action.admin.indices.open.OpenIndexRequest;import org.elasticsearch.action.admin.indices.open.OpenIndexResponse;import org.elasticsearch.client.RequestOptions;import org.elasticsearch.client.RestHighLevelClient;import org.junit.jupiter.api.Test;import org.springframework.beans.factory.annotation.Autowired;import org.springframework.boot.test.context.SpringBootTest;import java.io.IOException;@SpringBootTestpublic class ElkApplicationTests {@Autowiredprivate RestHighLevelClient client;/*** 开启索引** @throws IOException*/@Testpublic void testOpenIndex() throws IOException {OpenIndexRequest request = new OpenIndexRequest("my_index");OpenIndexResponse response = client.indices().open(request, RequestOptions.DEFAULT);boolean acknowledged = response.isAcknowledged();System.out.println("acknowledged = " + acknowledged);}}

若有收获,就点个赞吧
0 人点赞
