官方文档:https://docs.spring.io/spring-framework/docs/current/reference/html/web.html#spring-web
Spring MVC 是Spring为展现层提供的基于 MVC 设计理念的优秀的web框架,支持 Rest 风格的 URL 请求。
- M:Model,业务模型,负责完成业务中的数据通信处理,对应项目中的service和dao
- V:View,渲染数据,生成页面,对应项目中的页面模板
- C:Controller,直接对接请求,控制MVC流程,调度模型,选择视图,对应项目中的Servlet
简单使用
1、idea 创建Maven项目,导入Maven依赖:由下图可知 spring-webmvc 依赖已经导入了spring的基础依赖,因此只需在maven中导入 spring-webmvc 的依赖即可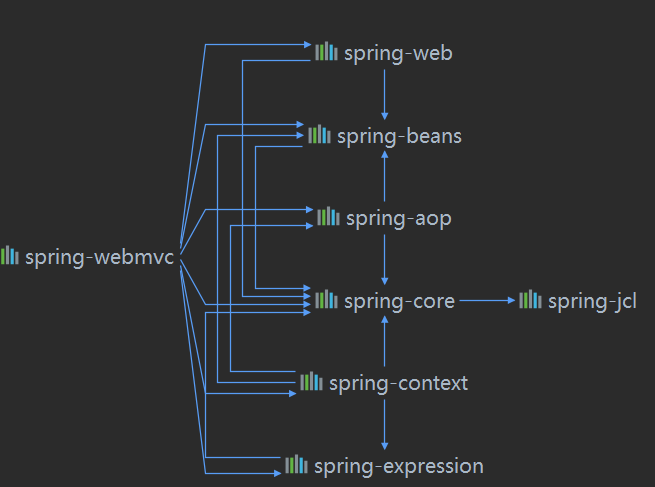
<dependencies><!-- servlet编译环境,采用4.0版本 --><dependency><groupId>javax.servlet</groupId><artifactId>javax.servlet-api</artifactId><version>4.0.1</version><scope>provided</scope></dependency><!-- spring-webmvc含有spring和web的相关依赖 --><dependency><groupId>org.springframework</groupId><artifactId>spring-webmvc</artifactId><version>5.2.9.RELEASE</version></dependency></dependencies><build><plugins><plugin><groupId>org.apache.maven.plugins</groupId><artifactId>maven-compiler-plugin</artifactId><version>3.8.1</version><configuration><encoding>utf-8</encoding><source>1.8</source><target>1.8</target></configuration></plugin></plugins></build>
2、web项目,打包成war包,在pom.xml文件中进行配置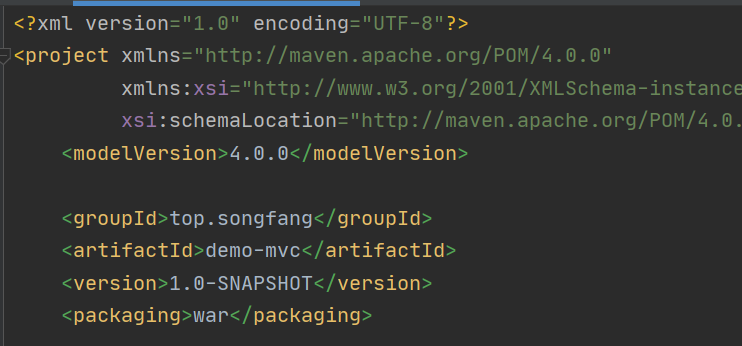
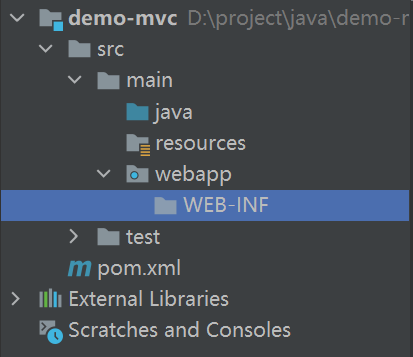
3、创建 web 目录:在 main 目录下创建 webapp 文件夹,然后再 webapp 文件夹内创建 WEB-INF 文件夹
- webapp 目录就是 web 目录,里面存放动态、静态资源和配置文件,如 jsp、css、html等
- WEB-INF 目录下只有一个文件,就是web的配置文件:web.xml
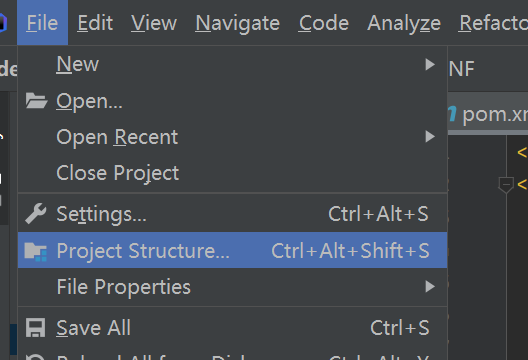
4、idea自动生成 web.xml:
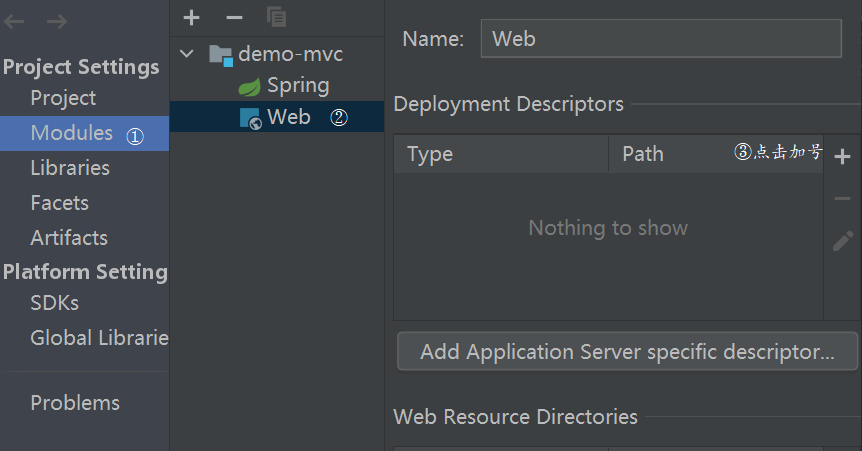
【File】->【Project Structure】
【Modules】->选择当前项目下的 web 文件夹,然后点击右边的加号,选择 web.xml
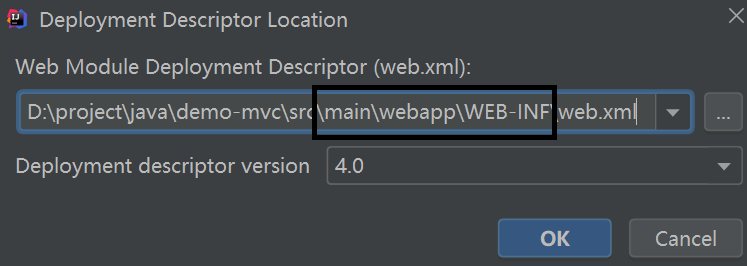
调整 web.xml 文件的位置,然后依次点击 OK 即可
5、在 web.xml 中进行配置前端控制器:dispatcherServlet,前端控制器的作用如下
- 前端,负责接受所有请求
- 加载mvc.xml,启动 Spring MVC 工厂
Spring MVC 流程调度
<?xml version="1.0" encoding="UTF-8"?><web-app xmlns="http://xmlns.jcp.org/xml/ns/javaee"xmlns:xsi="http://www.w3.org/2001/XMLSchema-instance"xsi:schemaLocation="http://xmlns.jcp.org/xml/ns/javaee http://xmlns.jcp.org/xml/ns/javaee/web-app_4_0.xsd"version="4.0"><!-- 前端控制器:1.控制SpringMVC的一切行为2.启动springMVC工厂--><servlet><servlet-name>springDispatcherServlet</servlet-name><servlet-class>org.springframework.web.servlet.DispatcherServlet</servlet-class><init-param><!-- 配置spring-mvc配置文件位置 --><param-name>contextConfigLocation</param-name><param-value>classpath:spring-mvc.xml</param-value></init-param><!-- 在tomcat启动时加载该servlet --><load-on-startup>1</load-on-startup></servlet><!-- 设置接受所有请求 --><servlet-mapping><servlet-name>springDispatcherServlet</servlet-name><url-pattern>/</url-pattern></servlet-mapping></web-app>
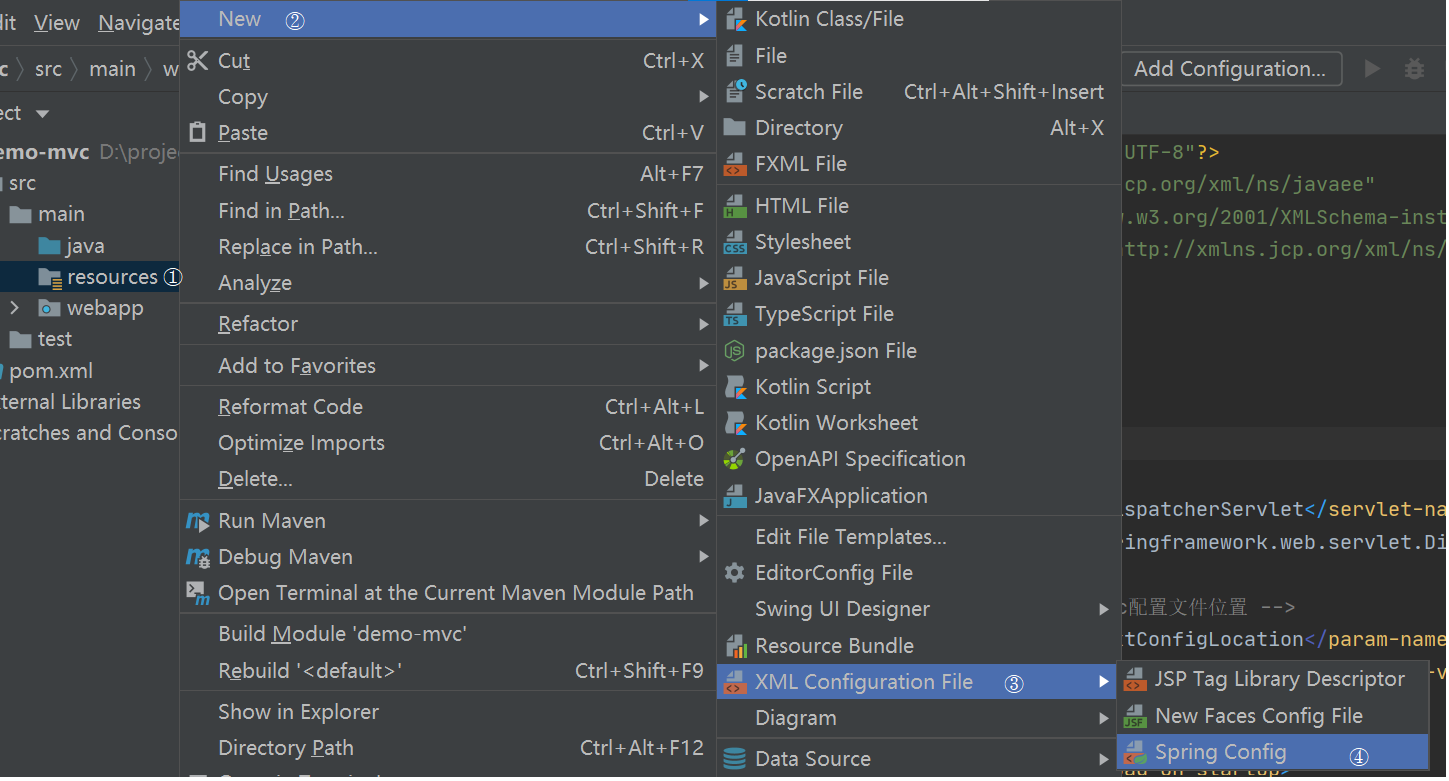
6、idea 自动生成 Spring MVC 配置文件:spring-mvc.xml
- 默认名称:核心控制器名-server.xml
- 默认位置:WEB-INF
- 常用名称:mvc.xml
常用位置:resources
7、编写一个简单的后端控制器:
@Controller // 声明控制器public class MvcController {@RequestMapping(value = "/hello", method = RequestMethod.GET)public String hello() {return "hello";}}
8、在spring-mvc配置文件中配置注解扫描、注解驱动、视图解析器等,同时在 webapp/WEB-INF/ 下创建一个 views 目录,再在该目录中创建一个 hello.jsp
注意看约束条件,tomcat启动时如果报错 No bean named ‘cacheManager’ is defined 错误,则说明约束文件有误(Spring的xml文件中使用到tx标签,idea工具默认引入cache命名空间)
<?xml version="1.0" encoding="UTF-8"?><beans xmlns="http://www.springframework.org/schema/beans"xmlns:xsi="http://www.w3.org/2001/XMLSchema-instance"xmlns:context="http://www.springframework.org/schema/context"xmlns:mvc="http://www.springframework.org/schema/mvc"xsi:schemaLocation="http://www.springframework.org/schema/beans http://www.springframework.org/schema/beans/spring-beans.xsd http://www.springframework.org/schema/context https://www.springframework.org/schema/context/spring-context.xsd http://www.springframework.org/schema/mvc https://www.springframework.org/schema/mvc/spring-mvc.xsd"><!-- 配置扫描路径 --><context:component-scan base-package="top.songfang.controller"/><!-- 注解驱动 --><mvc:annotation-driven/><!-- 视图解析器 --><bean class="org.springframework.web.servlet.view.InternalResourceViewResolver"><!-- 前缀 --><property name="prefix" value="/WEB-INF/views/"/><!-- 后缀 --><property name="suffix" value=".jsp"/></bean></beans>
9、配置 tomcat:
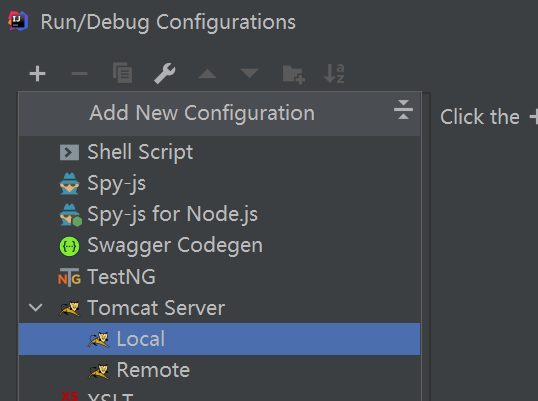
- 【Add Configuration】
- 加号,下拉,展开 tomcat server,选择 Local
- 切换到【Deployment】标签,点击旁边的加号,选择【Artifact…】
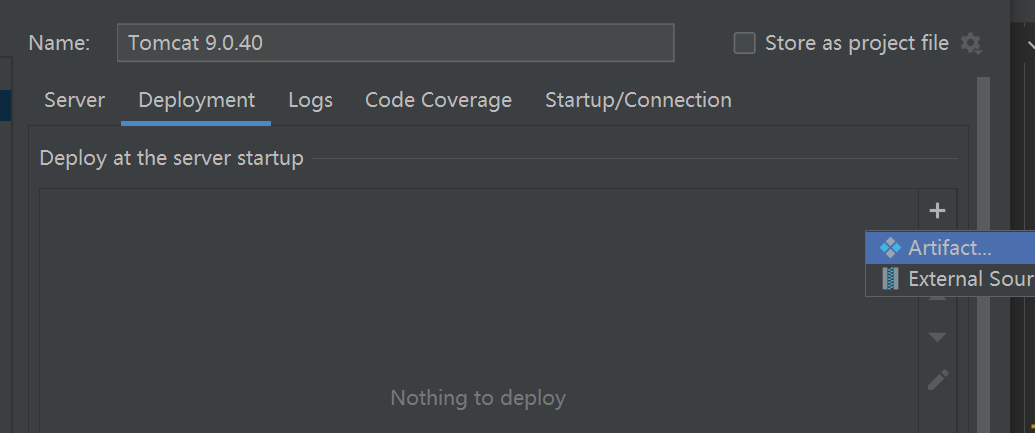
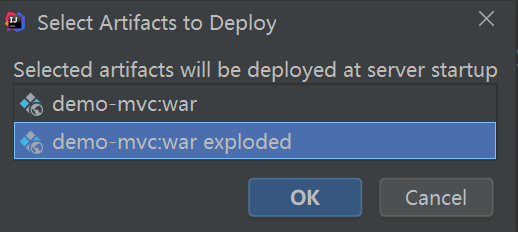
- 在弹出窗口中,选择 war exploded,点击 OK
- 在【Deployment】的OK上面有一栏 Application Context,可以自定义一个简单的应用路径

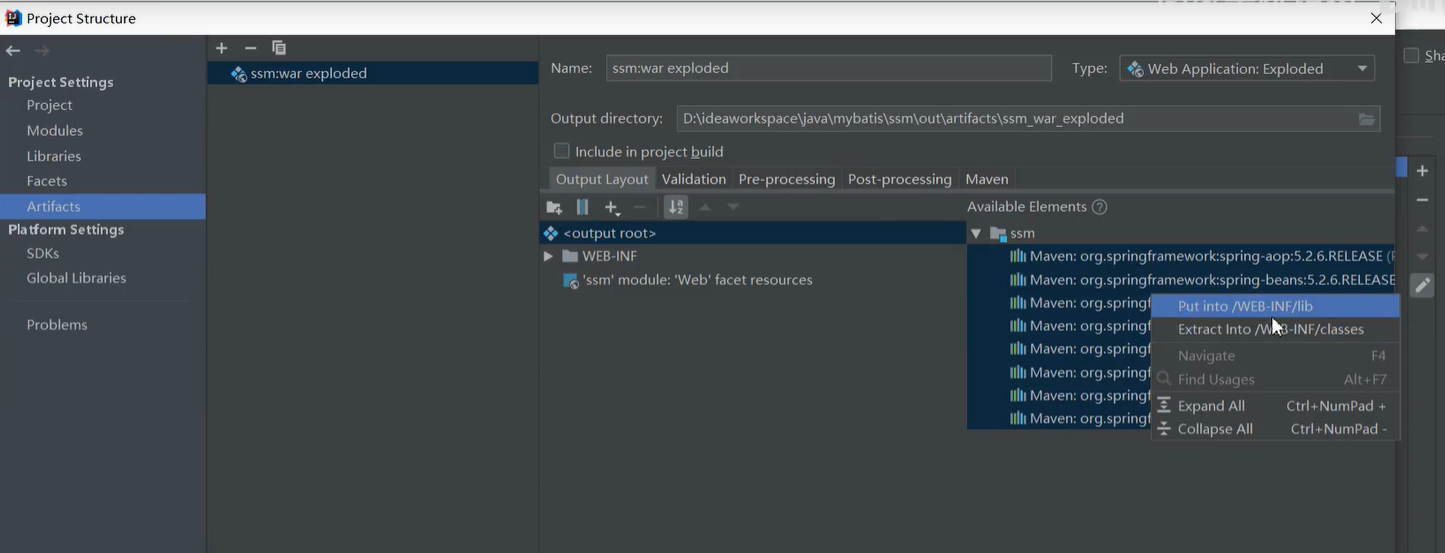
- 点击右侧的笔按钮,如果相关依赖没有自动导入,则全选后右键,选择【Put into /WEB-INF/lib】
10、运行,访问http://localhost:8080/demo/hello

若有收获,就点个赞吧
0 人点赞
