4.1 基础环境搭建与测试
- 在创建向导中选择 web、mysql 和 jdbc 三个依赖模块;

在 application.yml 中配置 mysql 数据源的连接信息
- 数据源的相关配置可参考 springboot 的 DataSourceProperties;
- springboot 2.0 可以不用写驱动,将使用默认驱动,即
driver-class-namespring:dataSource:username: rootpassword: 1234url: jdbc:mysql://localhost:3306/test_jdbc?serverTimezone=UTCdriver-class-name: com.mysql.cj.jdbc.Driver
测试能否连上数据库 ```java @RunWith(SpringRunner.class) @SpringBootTest public class SpringBoot05JdbcApplicationTests { @Autowired DataSource ds; @Test public void contextLoads() throws SQLException {
  System.out.println(ds.getClass());//class com.zaxxer.hikari.HikariDataSource
  Connection conn = ds.getConnection();//HikariProxyConnection@182584006 wrapping com.mysql.cj.jdbc.ConnectionImpl@46aa712c
  System.out.println(conn);
  conn.close();
}}
<a name="wGnM2"></a>
## 4.2 自动配置原理
<a name="U0ZKl"></a>
### 4.2.1 基本介绍

- jdbc 的相关配置都在 org.springframework.boot.autoconfigure.jdbc 包下;
- 参考 DataSourceConfiguration,根据配置创建数据源,默认使用 Hikari 连接池,可以使用spring.datasource.type 来指定自定义的数据源类型;
- springboot默认支持的连接池:

org.apache.commons.dbcp2.BasicDataSource<br />com.zaxxer.hikari.HikariDataSource<br />org.apache.tomcat.jdbc.pool.DataSource

- 自定义数据源类型
```java
  @Configuration(
        proxyBeanMethods = false
    )
    @ConditionalOnMissingBean({DataSource.class})
    @ConditionalOnProperty(
        name = {"spring.datasource.type"}
    )
    static class Generic {
        Generic() {}

        @Bean
        DataSource dataSource(DataSourceProperties properties) {
  //使用DataSourceBuilder创建数据源,利用反射创建响应type的数据源,并且绑定相关属性
            return properties.initializeDataSourceBuilder().build();
        }
    }
SpringBoot 在创建连接池后还会运行预定义的SQL脚本文件,具体参考org.springframework.boot.autoconfigure.jdbc.DataSourceInitializationConfiguration 配置类;
4.2.2 DataSourceInitializer 执行 sql 语句
4.2.2.1 源码理解
class DataSourceInitializer {
  void initSchema() {
      List<Resource> scripts = this.getScripts("spring.datasource.data", this.properties.getData(), "data");
      ....
      this.runScripts(scripts, username, password);

  }

  private List<Resource> getScripts(String propertyName, List<String> resources, String fallback) {
      if (resources != null) {
          return this.getResources(propertyName, resources, true);
      } else {
          String platform = this.properties.getPlatform();
          List<String> fallbackResources = new ArrayList();
          fallbackResources.add("classpath*:" + fallback + "-" + platform + ".sql");
          fallbackResources.add("classpath*:" + fallback + ".sql");
          return this.getResources(propertyName, fallbackResources, false);
      }
  }
作用
准备:在 resources 路径下添加 department.sql,用于新建 department 表;
- 注意:每次启动 springboot 程序,该建表语句都会执行,表的内容都会被清空;
DROP TABLE IF EXISTS `department`;
CREATE TABLE `department` (
`id` int(11) NOT NULL AUTO_INCREMENT,
`departmentName` varchar(255) DEFAULT NULL,
PRIMARY KEY (`id`)
) ENGINE=InnoDB AUTO_INCREMENT=1 DEFAULT CHARSET=utf8;
- 注意:每次启动 springboot 程序,该建表语句都会执行,表的内容都会被清空;
步骤1:由于默认使用的是 schema-all.sql,所以需在 application.yml 中配置该文件的路径; ```yaml spring: dataSource: username: root password: 1234 url: jdbc:mysql://localhost:3306/test_jdbc?serverTimezone=UTC driver-class-name: com.mysql.cj.jdbc.Driver initialization-mode: always #不写这个的话,表无法创建成功 schema:
- classpath:department.sql
注意:classpath:department.sql 冒号后边没有空格,否则会报错
BINDING TO TARGET [BINDABLE@69CAC930 TYPE = JAVA.UTIL.LISTJAVA.LANG.STRING, VALUE = ‘PROVIDED’, AN
- 步骤2:编写一个 controller 来从数据表中获取数据
```java
@Controller
public class HelloController {

    @Autowired
    JdbcTemplate jdbcTemplate;

    @ResponseBody
    @RequestMapping("/query")
    public Map<String, Object> selectData(){
        List<Map<String, Object>> res = jdbcTemplate.queryForList("select * from department");
        return res.get(0);
    }
}
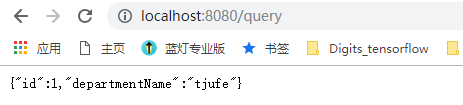
步骤3:启动项目,并在 department 表中插入一条数据
insert into department(id,departmentName) values(1,"tjufe");结果
4.3 整合 druid 数据源 & 配置数据源监控
4.3.1 准备-jar 包导入
        <!-- https://mvnrepository.com/artifact/com.alibaba/druid -->
        <dependency>
            <groupId>com.alibaba</groupId>
            <artifactId>druid</artifactId>
            <version>1.1.21</version>
        </dependency>
4.3.2 创建自定义的 druid 并配置数据源监控
在 application.yml 中添加以下内容
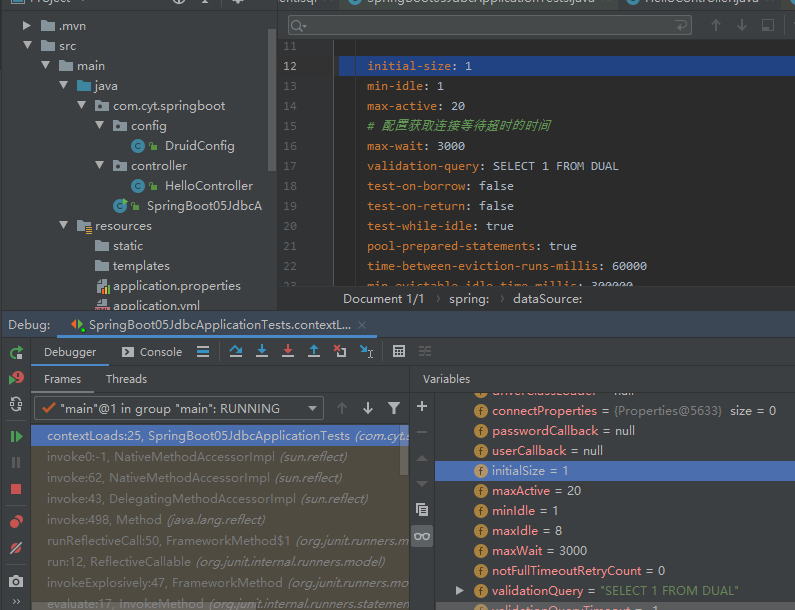
spring:
dataSource:
  username: root
  password: 1234
  url: jdbc:mysql://localhost:3306/test_jdbc?serverTimezone=UTC
  driver-class-name: com.mysql.cj.jdbc.Driver
  initialization-mode: always
#    schema:
#      - classpath:department.sql

  # 新添加的内容
  type: com.alibaba.druid.pool.DruidDataSource
  initial-size: 1
  min-idle: 1
  max-active: 20
  # 配置获取连接等待超时的时间
  max-wait: 3000
  validation-query: SELECT 1 FROM DUAL
  test-on-borrow: false
  test-on-return: false
  test-while-idle: true
  pool-prepared-statements: true
  time-between-eviction-runs-millis: 60000
  min-evictable-idle-time-millis: 300000
  filters: stat,wall,slf4j
为了让 application.yml 有关 druid 的部分被添加到 configuration 中,另写一个 config 类
@Configuration
public class DruidConfig {

  @ConfigurationProperties(prefix = "spring.datasource")
  @Bean
  //使 application.yml 中的自定义的 druid 的参数能够配置到创建的 DruidDataSource 对象中
  public DataSource druid(){
      return new DruidDataSource();
  }

  //配置 druid 的监控
  //1. 配置一个管理后台的 servlet
  @Bean
  public ServletRegistrationBean statViewServlet(){
      ServletRegistrationBean bean = new ServletRegistrationBean(new StatViewServlet(), "/druid/*");
      Map<String, String> map = new HashMap<>();
      map.put("loginUsername", "admain");
      map.put("loginPassword", "1234");
      //“” 表示默认允许所有访问
      map.put("allow", "");
      map.put("deny", "192.168.1.16");
      bean.setInitParameters(map);
      return bean;
  }

  //2. 配置一个监控的 filter
  @Bean
  public FilterRegistrationBean webStatFiletr(){
      FilterRegistrationBean bean = new FilterRegistrationBean();
      bean.setFilter(new WebStatFilter());
      Map<String, String> map = new HashMap<>();
      map.put("exclusions", "*.js, *.css, /druid/*");
      bean.setInitParameters(map);
      bean.setUrlPatterns(Arrays.asList("/*"));
      return bean;
  }
}
4.3.3 结果
application.yml 中的自定义的 druid 的参数配置到了创建的 DruidDataSource 对象中;
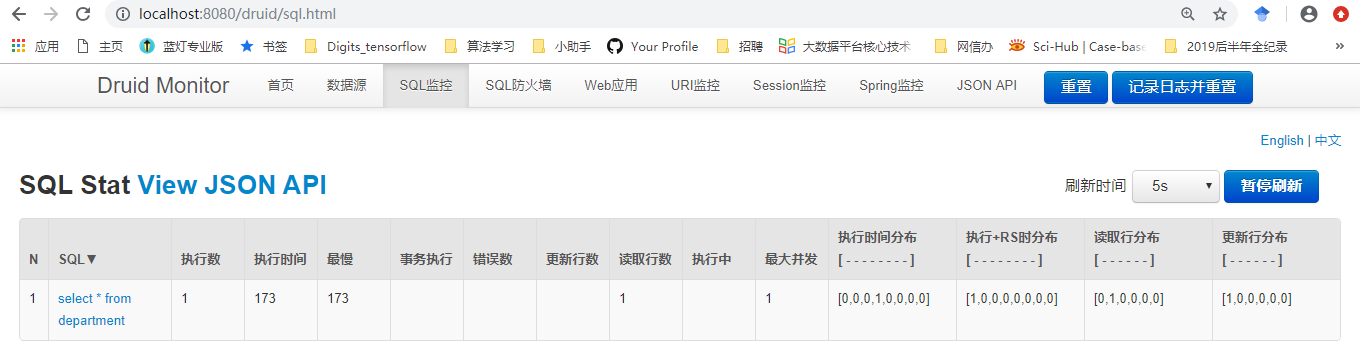
- 访问 druid 管理后台:localhost:8080/druid,登录名和密码如 statViewServlet 定义如是;
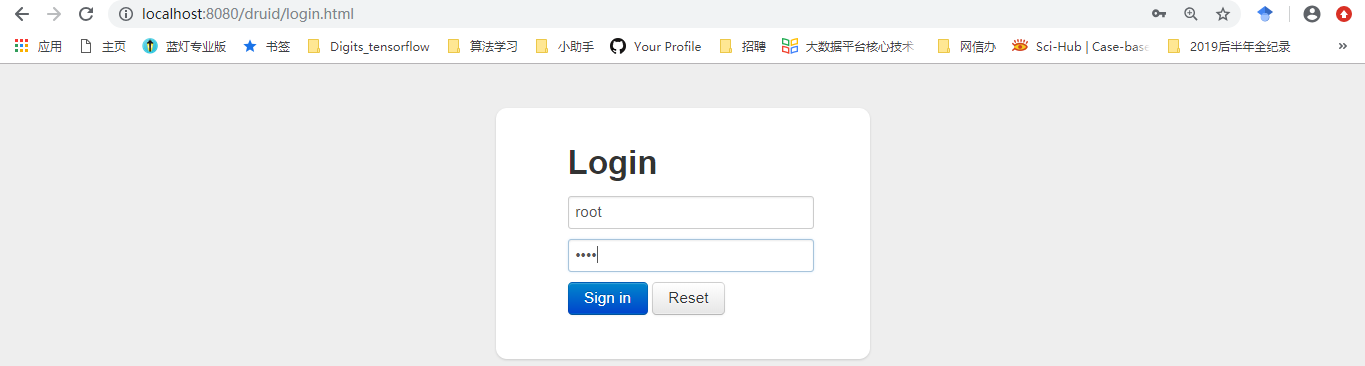
- 登录成功后会进入 druid 的后台管理首页
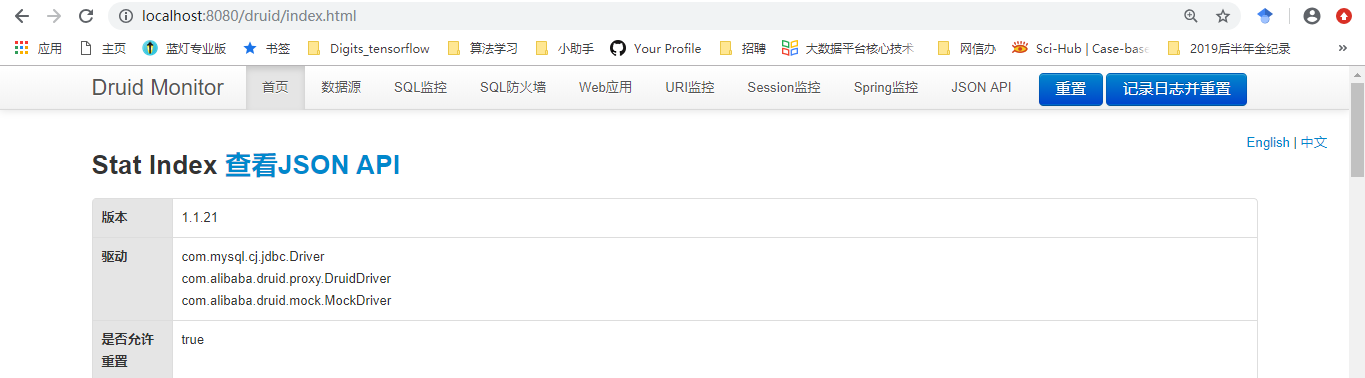
- 如果执行 4.2.2.2 的案例:localhost:8080/query 则会在 druid 的后台监控到;
4.4 整合 mybatis
jar 准备
<dependency> <groupId>org.springframework.boot</groupId> <artifactId>spring-boot-starter-thymeleaf</artifactId> </dependency> <dependency> <groupId>org.mybatis.spring.boot</groupId> <artifactId>mybatis-spring-boot-starter</artifactId> <version>2.1.2</version> </dependency>-
4.4.1 注解版
4.4.1.1 【代码】component + mapper + controller
实体类 department
public class Department implements Serializable {
  private Integer id;
  private String departmentName;

  public Integer getId() {
      return id;
  }

  public void setId(Integer id) {
      this.id = id;
  }

  public String getDepartmentName() {
      return departmentName;
  }

  public void setDepartmentName(String departmentName) {
      this.departmentName = departmentName;
  }

  @Override
  public String toString() {
      return "Department{" +
              "id=" + id +
              ", departmentName='" + departmentName + '\'' +
              '}';
  }
}
mapper : 实现基础的 CRUD 功能
@Mapper
public interface DeptMapper {

  @Select("select * from department")
  public List<Department> selectAll();

  @Select("select * from department where id=#{id}")
  public Department selectById(Integer id);

  @Options(useGeneratedKeys = true, keyProperty = "id")
  @Insert("insert into department(departmentName) values(#{departmentName})")
  public int save(Department department);

  @Update("update department set departmentName=#{departmentName}")
  public int update(Department department);

  @Delete("delete from department where id =#{id}")
  public int delete(Integer id);
}
controller
注意:一定要用 @RestController 或 @Controller+@ResponseBody
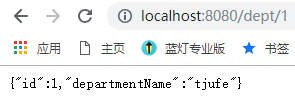
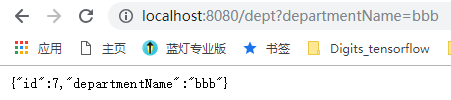
@RestController
public class DeptController {

@Autowired
private DeptMapper deptMapper;

@RequestMapping("/dept/list")
public List<Department> selectAll(){
    return deptMapper.selectAll();
}

@RequestMapping("/dept/{id}")
public Department selectById(@PathVariable("id")Integer id){
   return deptMapper.selectById(id);
}

@GetMapping("/dept")
public Department insertDept(Department department){
   deptMapper.save(department);
   return department;
}
}
4.4.1.2 结果
4.4.1.3 补充-开启驼峰命名法
@Configuration
public class MybatisConfig {

@Bean
public ConfigurationCustomizer mybatisConfigurationCustomizer() {
   return new ConfigurationCustomizer() {
       @Override
       public void customize(org.apache.ibatis.session.Configuration configuration) {
           configuration.setMapUnderscoreToCamelCase(true);
       }
   };
}
}
使用 @mapper 注解的类可以被扫描到容器中,springboot 启动类上加上 @MapperScan 可将 mapper 接口批量导入容器内;
@MapperScan("com.cyt.springboot.mapper")
@SpringBootApplication
public class SpringBoot05JdbcApplication {

  public static void main(String[] args) {
      SpringApplication.run(SpringBoot05JdbcApplication.class, args);
  }
}
4.4.2 xml 版
4.4.2.1 【代码】component + mapper + controller
实体类 com.cyt.springboot.component.User
public class User implements Serializable {
  private Integer userId;
  private String userName;
  private Integer age;

  public Integer getUserId() {
      return userId;
  }

  public void setUserId(Integer userId) {
      this.userId = userId;
  }

  public String getUserName() {
      return userName;
  }

  public void setUserName(String userName) {
      this.userName = userName;
  }

  public Integer getAge() {
      return age;
  }

  public void setAge(Integer age) {
      this.age = age;
  }

  @Override
  public String toString() {
      return "User{" +
              "userId=" + userId +
              ", userName='" + userName + '\'' +
              ", age=" + age +
              '}';
  }
}
接口类 com.cyt.springboot.mapper.UserMapper
public interface UserMapper { public List<User> findAll(); public User findUserByID(Integer id); public int saveUser(User user); public int updateUser(User user); public int deleteUser(User user); }- 注意:在 mapper 类上标注 @Mapper 或在主程序上注解 @MapperScan ,且 @MapperScan 会使@Mapper 失效;
控制类 com.cyt.springboot.controller.UserController
@RestController
@RequestMapping("/user/")
public class UserController {
  @Autowired
  private UserMapper userMapper;

  @RequestMapping("findAll")
  public List<User> findAll(){
      return userMapper.findAll();
  }
  @GetMapping("findById/{id}")
  public User findUserById(@PathVariable("id")Integer id){
      return userMapper.findUserByID(id);
  }
  @GetMapping("save")
  public User saveUser(User user){
      userMapper.saveUser(user);
      return user;
  }
  @GetMapping("update")
  public User updateUser(User user){
      if (user.getUserId() == null) {
          System.out.println("该用户不存在");
      } else{
          userMapper.updateUser(user);
      }
      return userMapper.findUserByID(user.getUserId());
  }
  @GetMapping("delete")
  public void deleteUser(User user){
      userMapper.deleteUser(user);
  }
}
4.4.2.2 配置
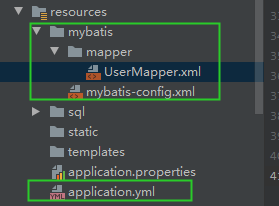
sql 映射文件-UserMapper.xml ```xml <?xml version=”1.0” encoding=”UTF-8”?> <!DOCTYPE mapper
  PUBLIC "-//mybatis.org//DTD Mapper 3.0//EN"
  "http://mybatis.org/dtd/mybatis-3-mapper.dtd">

<select id="findAll" resultMap="userMap">
    select * from user
</select>
<select id="findUserByID" resultMap="userMap" parameterType="integer">
    select * from user where id=#{id}
</select>
<insert id="saveUser" parameterType="user">
    insert into user(id,name,age) values (#{userId},#{userName},#{age});
</insert>
<update id="updateUser" parameterType="com.cyt.springboot.component.User">
    update user
    <trim prefix="set" suffix="where id=#{userId}" suffixOverrides=",">
        <if test="userName != null and userName != ''"> name = #{userName}, </if>
        <if test="age != null and age != ''">age = #{age}, </if>
    </trim>
</update>

<delete id="deleteUser" parameterType="user">
    delete from user
    <where>
        <choose>
            <when test="userId != null and userId != ''"> and id = #{userId} </when>
            <when test="userName != null and userName != ''">and name = #{userName} </when>
        </choose>
    </where>
</delete>
- mybatis 总配置文件,可以在里边针对使用的 bean 类起别名,这样 resultType 或 parameterType 就不用使用其全限定名,而且 bean 类名称的大小写都能识别;
```java
<?xml version="1.0" encoding="UTF-8"?>
<!DOCTYPE configuration PUBLIC "-//mybatis.org//DTD Config 3.0//EN" "http://mybatis.org/dtd/mybatis-3-config.dtd">
<configuration>
    <typeAliases>
        <package name="com.cyt.springboot.component"/>
    </typeAliases>
</configuration>
在 4.3.2 创建自定义的 druid 并配置数据源监控的 application.yml 的基础上加入以下内容,使得主配置程序能够获取 sql 映射文件和 mybatis 主配置文件的位置;
mybatis:
config-location: classpath:mybatis/mybatis-config.xml
mapper-locations: classpath:mybatis/mapper/*.xml
4.5 整合 spring data JPA
4.5.1 案例编写
4.5.1.1 jar 包准备

自动生成的 pom.xml ```xml <?xml version=”1.0” encoding=”UTF-8”?>
4.0.0 <groupId>org.springframework.boot</groupId> <artifactId>spring-boot-starter-parent</artifactId> <version>2.2.5.RELEASE</version> <relativePath/> <!-- lookup parent from repository -->com.cyt.springboot.jpa spring-boot-06-jpa 0.0.1-SNAPSHOT spring-boot-06-jpa Demo project for Spring Boot 1.8 org.springframework.boot spring-boot-starter-data-jdbc org.springframework.boot spring-boot-starter-data-jpa org.springframework.boot spring-boot-starter-web mysql mysql-connector-java runtime org.springframework.boot spring-boot-starter-test test org.junit.vintage junit-vintage-engine org.springframework.boot spring-boot-maven-plugin
<a name="bTgxP"></a>
#### 4.5.1.2 【代码】entity + repository + controller

- com.cyt.springboot.entity.Employee
   - 注意:@Id 为 javax.persistence.* 下的注解,否则会报错:org.hibernate.AnnotationException: No identifier specified for entity
```java
//使用 JPA 注解配置映射关系
@Entity //告诉 JPA 这是一个实体类(和数据表映射的类)
@Table(name="tbl_employee") //指定对应的数据表,默认表明为类名的小写,即 "employee"
public class Employee {

    @Id //这是一个主键
    @GeneratedValue(strategy = GenerationType.IDENTITY)//自增主键
    private Integer id;

    @Column(name = "last_name", length = 50)//这是和数据表对应的一个列
    private String lastName;

    @Column //省略默认列名就是属性名
    private Integer gender;

    @Column
    private String address;

    public Integer getId() {
        return id;
    }

    public void setId(Integer id) {
        this.id = id;
    }

    public String getLastName() {
        return lastName;
    }

    public void setLastName(String lastName) {
        this.lastName = lastName;
    }

    public Integer getGender() {
        return gender;
    }

    public void setGender(Integer gender) {
        this.gender = gender;
    }

    public String getAddress() {
        return address;
    }

    public void setAddress(String address) {
        this.address = address;
    }

    @Override
    public String toString() {
        return "Employee{" +
                "id=" + id +
                ", lastName='" + lastName + '\'' +
                ", gender=" + gender +
                ", address='" + address + '\'' +
                '}';
    }
}
- com.cyt.springboot.repository.EmployeeRepository
```java
//继承 JpaRepository 来完成对数据库的操作
public interface EmployeeRepository extends JpaRepository
}
- com.cyt.springboot.controller.EmployeeController
```java
@RestController
public class EmployeeController {
@Autowired
EmployeeRepository employeeRepository;//因为继承了 JpaRepository 所以会自动被加载到容器中
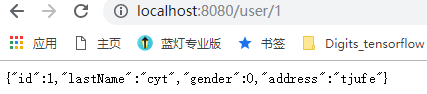
@GetMapping("/user/{id}")
public Employee getEmployee(@PathVariable("id") Integer id){
Employee employee = new Employee();
Optional<Employee> one = employeeRepository.findById(id);
if (one.isPresent()){
employee = one.get();
}
return employee;
}
@GetMapping("/user")
public Employee insertEmployee(Employee employee){
Employee employee1 = employeeRepository.save(employee);
return employee1;
}
}
4.5.1.3 application.yml 配置
创建对应 Employee 实体类的数据表
spring:
datasource:
  url: jdbc:mysql://localhost:3306/test_jdbc?serverTimezone=UTC
  username: root
  password: 1234
  driver-class-name: com.mysql.cj.jdbc.Driver
jpa:
  hibernate:
    ddl-auto: update #更新或创建数据表结构
    show-sql: true
4.5.2 测试结果
4.5.3 补充
Spring Data JPA 中findOne() 和 getOne()的区别
- findOne:当查询一个不存在的 id 数据时,返回的值是null;
- getOne:当查询一个不存在的 id 数据时,直接抛出异常,因为它返回的是一个引用,简单点说就是一个代理对象;
- 使用:如果想无论如何都有一个返回,那么就用 findOne,否则使用 getOne;
- 继承 JpaRepository 后,找不到 findOne() 方法
- 深入理解java8中的Optional 类


若有收获,就点个赞吧
0 人点赞
