前言
本篇的第一部分从源码入手深入了解 springboot 内嵌的 servlet 容器是如何启用定制化配置的,然后依托内嵌的定制化逻辑,尝试去剖析外置 servlet 容器的定义和实现原理;第二部分利用外置 tomcat + springboot 实现一个简单的 demo,第三部分是对 springboot 定制化 servlet 容器的一个初步总结;
1. springboot 的 servlet 容器
为了了解 springboot 创建和启动 servlet 容器的原理,这部分将从 springboot 支持的已有嵌入式 servlet 入手,尤其是 tomcat,深入源码去了解 springboot 的容器定制规范,以及在此规约下如何定制和修改自己的 servlet 容器;
1.1 使用和定制内嵌的 servlet 容器
1.1.1 使用除 tomcat 以外的其他 servlet 容器
springboot 支持嵌入式的 servlet 容器,默认使用 tomcat 容器,如果要换成其他容器,需要把 Tomcat 的依赖排除掉,然后引入其他嵌入式 Servlet 容器,如 Jetty,Undertow;
<dependency><groupId>org.springframework.boot</groupId><artifactId>spring-boot-starter-web</artifactId><!--如果没有 exclusions,就算引入 jetty 的依赖,仍是优先使用 tomcat--><!--第一步:移除 tomcat--><exclusions><exclusion><artifactId>spring-boot-starter-tomcat</artifactId><groupId>org.springframework.boot</groupId></exclusion></exclusions></dependency><!--引入其他 servlet 容器--><dependency><artifactId>spring-boot-starter-undertow</artifactId><groupId>org.springframework.boot</groupId></dependency>
1.1.2 如何定制和修改 Servlet 容器的相关配置
方案一:修改 application.properties
server.port=8081server.context-path=/crudserver.tomcat.uri-encoding=UTF-8server.tomcat.xxx //Tomcat的设置
方案二:通过 WebServerFactoryCustomizer 来定制和修改 server 参数;
@Configuration
public class MyServerConfig{
  //配置嵌入式的 servlet 容器
  @Bean
  public WebServerFactoryCustomizer embeddedServletContainerCustomizer(){
      return new WebServerFactoryCustomizer<ConfigurableServletWebServerFactory>(){
          @Override
          public void customize(ConfigurableServletWebServerFactory factory) {
              factory.setPort(8083);
          }
      };
  }
}
1.2 源码解析内嵌的 servlet 容器
从 ServletWebServerFactoryAutoConfiguration 配置类来了解内嵌 servlet 容器的启动和配置原理;
此处注意 @Import 的两个地方,一个是 EmbeddedXXX.class,另一个是 BeanPostProcessorsRegistrar.class;
- EmbeddedXXX.class 用于创建和配置相应的 servlet 容器;
BeanPostProcessorsRegistrar.class 后置处理器注册器(也是给容器注入一些组件)
//ServletWebServerFactoryAutoConfiguration.java
@Configuration(proxyBeanMethods = false)
@AutoConfigureOrder(-2147483648)
@ConditionalOnClass({ServletRequest.class})
@ConditionalOnWebApplication(type = Type.SERVLET)
@EnableConfigurationProperties({ServerProperties.class})
//---重点在 @Import ---
@Import({ServletWebServerFactoryAutoConfiguration.BeanPostProcessorsRegistrar.class, EmbeddedTomcat.class, EmbeddedJetty.class, EmbeddedUndertow.class})
public class ServletWebServerFactoryAutoConfiguration {
...
}
1.2.1 servlet 容器如何在 springboot 配置中生效
//1. 进入 ServletWebServerFactoryConfiguration.java 中,以内嵌的 EmbeddedTomcat 为例
class ServletWebServerFactoryConfiguration {
@Configuration( proxyBeanMethods = false)
@ConditionalOnClass({Servlet.class, Tomcat.class, UpgradeProtocol.class})//判断当前是否引入了Tomcat依赖;
//创建嵌入式的web服务器,优先使用用户自定义的容器
@ConditionalOnMissingBean(value = {ServletWebServerFactory.class},search = SearchStrategy.CURRENT)
public static class EmbeddedTomcat {
   TomcatServletWebServerFactory factory = new TomcatServletWebServerFactory();
   //创建 TomcatServletWebServerFactory 对象,并向该工厂类中添加定制的 connector、context和 handler
}
/**补充:
1)针对ServletWebServerFactory接口有一个抽象实现AbstractServletWebServerFactory
2)AbstractServletWebServerFactory有三个继承类:TomcatServletWebServerFactory、JettyServletWebServerFactory和UndertowServletWebServerFactory
3)在 ServletWebServerFactoryConfiguration.java 中还有 class EmbeddedJetty {} 和 class EmbeddedUndertow {}
**/
}
//2. TomcatServletWebServerFactory 对象
public class TomcatServletWebServerFactory extends AbstractServletWebServerFactory implements ConfigurableTomcatWebServerFactory, ResourceLoaderAware {
public WebServer getWebServer(ServletContextInitializer... initializers) {
   if (this.disableMBeanRegistry) {
       Registry.disableRegistry();
   }
   Tomcat tomcat = new Tomcat();

   //配置Tomcat的基本环境,(tomcat的配置都是从本类获取的,tomcat.setXXX)
   ...
   this.prepareContext(tomcat.getHost(), initializers);

   //将配置好的Tomcat传入进去,返回一个WebServer;并且启动Tomcat服务器
   return this.getTomcatWebServer(tomcat);
}
}
1.2.2 如何定制和修改 servlet 容器
//1.注册 webServerFactoryCustomizerBeanPostProcessor 来对 factory 进行定制
public class ServletWebServerFactoryAutoConfiguration{
public static class BeanPostProcessorsRegistrar implements ImportBeanDefinitionRegistrar, BeanFactoryAware {
   private ConfigurableListableBeanFactory beanFactory;

   public BeanPostProcessorsRegistrar() {...}

   public void setBeanFactory(BeanFactory beanFactory) throws BeansException {...}

   public void registerBeanDefinitions(AnnotationMetadata importingClassMetadata, BeanDefinitionRegistry registry) {
       if (this.beanFactory != null) {
           //注册了下面两个组件
           this.registerSyntheticBeanIfMissing(registry, "webServerFactoryCustomizerBeanPostProcessor", WebServerFactoryCustomizerBeanPostProcessor.class);
           this.registerSyntheticBeanIfMissing(registry, "errorPageRegistrarBeanPostProcessor", ErrorPageRegistrarBeanPostProcessor.class);
       }
   }

   private void registerSyntheticBeanIfMissing(BeanDefinitionRegistry registry, String name, Class<?> beanClass) {...}
}
}
//2.通过调用 postProcessBeforeInitialization 对相应的容器类进行定制,即调用 customize 方法
public class WebServerFactoryCustomizerBeanPostProcessor implements BeanPostProcessor, BeanFactoryAware {
......
//在Bean初始化之前
public Object postProcessBeforeInitialization(Object bean, String beanName) throws BeansException {
   if (bean instanceof WebServerFactory) {//判断添加的Bean是不是WebServerFactory类型的
       this.postProcessBeforeInitialization((WebServerFactory)bean);
   }
   return bean;
}
public Object postProcessAfterInitialization(Object bean, String beanName) throws BeansException {
   return bean;
}
private void postProcessBeforeInitialization(WebServerFactory webServerFactory) {
   //获取所有的定制器,调用每一个定制器的customize方法来给Servlet容器进行属性赋值;
   ((Callbacks)LambdaSafe.callbacks(WebServerFactoryCustomizer.class, this.getCustomizers(), webServerFactory, new Object[0]).withLogger(WebServerFactoryCustomizerBeanPostProcessor.class)).invoke((customizer) -> {
       customizer.customize(webServerFactory);
   });
}
//3. 以 WebServerFactoryCustomizerBeanPostProcessor 为例
@Configuration(proxyBeanMethods = false)
@ConditionalOnWebApplication
@EnableConfigurationProperties({ServerProperties.class})
public class EmbeddedWebServerFactoryCustomizerAutoConfiguration {
...
@Configuration(proxyBeanMethods = false)
@ConditionalOnClass({Tomcat.class, UpgradeProtocol.class})
public static class TomcatWebServerFactoryCustomizerConfiguration {
   @Bean
   public TomcatWebServerFactoryCustomizer tomcatWebServerFactoryCustomizer(Environment environment, ServerProperties serverProperties) {
       return new TomcatWebServerFactoryCustomizer(environment, serverProperties);
   }
}
}
public class TomcatWebServerFactoryCustomizer implements WebServerFactoryCustomizer<ConfigurableTomcatWebServerFactory>, Ordered {
public TomcatWebServerFactoryCustomizer(Environment environment, ServerProperties serverProperties) {
   this.environment = environment;
   this.serverProperties = serverProperties;//参考ServerProperties.class进行参数修改
}
...
public void customize(ConfigurableTomcatWebServerFactory factory) {}
}
1.3 嵌入式 servlet 容器的优缺点
优点: 简单,便携;
-
2. 使用外置的 servlet 容器
使用外置 Servlet 容器的步骤:
1 必须创建 war 项目,需要建好 web 项目的目录结构;
2 嵌入式 Tomcat 依赖 scope 指定 provided;
3 编写 SpringBootServletInitializer 类子类,并重写 configure 方法;
2.1 案例
需求
- 使用外置 tomcat 的 springboot 实现一个简单的 hello 请求
环境
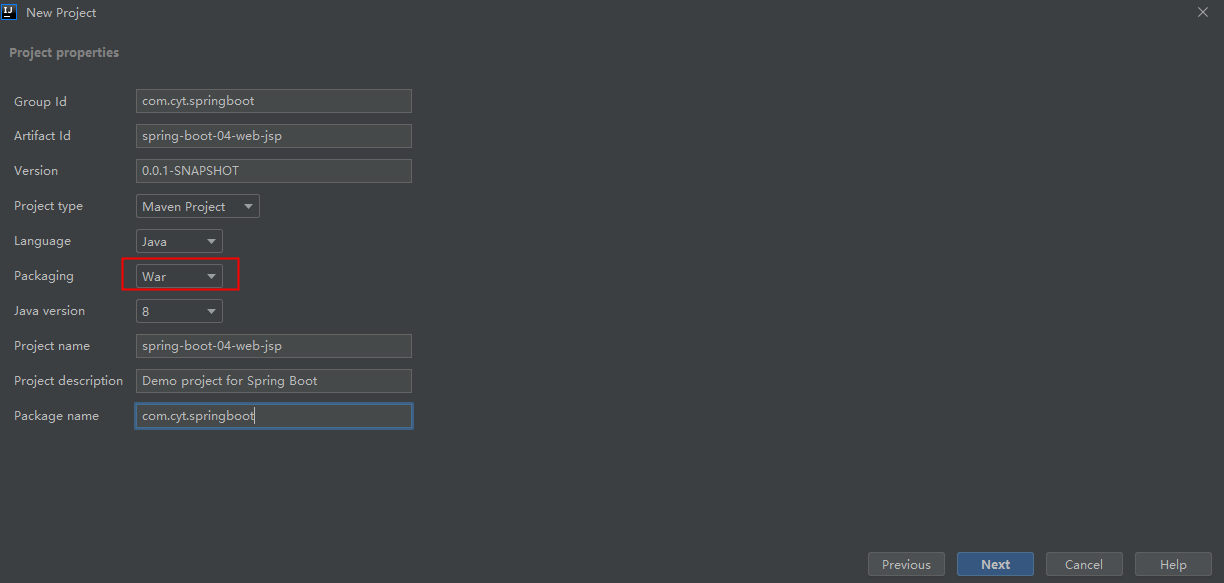
新项目也是通过创建向导 spring assistant 来创建,基本创建流程与之前内嵌 tomcat 的 springboot 保持一致,区别在于将 packaging 改为 war 选项,;
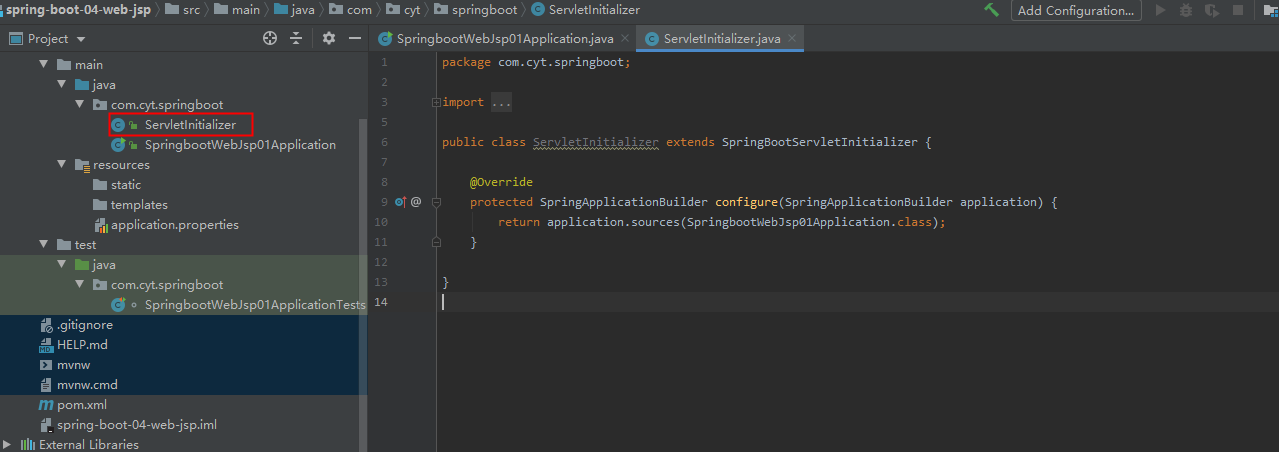
新项目由创建向导生成的目录结构如下所示,其中相较之前的 jar 包方式,多了一个 ServletInitializer 用于将外置的 tomcat 加载到 springboot 的容器中;
自动生成的 pom.xml 配置内容 ```java <?xml version=”1.0” encoding=”UTF-8”?>
4.0.0 <groupId>org.springframework.boot</groupId> <artifactId>spring-boot-starter-parent</artifactId> <version>2.2.5.RELEASE</version> <relativePath/> <!-- lookup parent from repository -->com.cyt.springboot spring-boot-web-jsp 0.0.1-SNAPSHOT //1. 第一个改变war springboot-web-jsp01 Demo project for Spring Boot 1.8 org.springframework.boot spring-boot-starter-web org.springframework.boot spring-boot-starter-tomcat provided org.springframework.boot spring-boot-starter-test test org.junit.vintage junit-vintage-engine org.springframework.boot spring-boot-maven-plugin
<a name="YRUnz"></a>
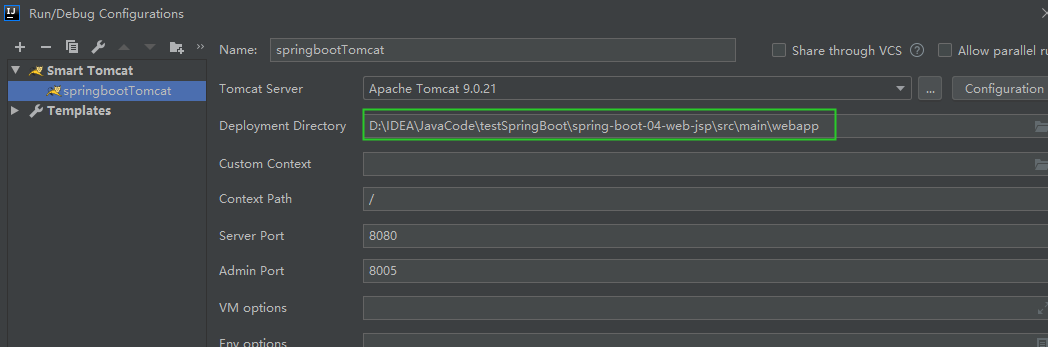
### 2.2.2 将项目添加到 tomcat server 中
<a name="Uo6Mh"></a>
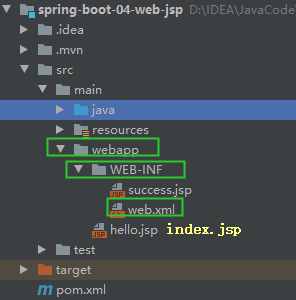
### 2.2.3 创建及配置Tomcat 相关文件
- 新增目录结构
- 注意:此处的 web.xml 可以不用进行配置,会使用 springboot 中的默认配置,并在启动过程中自动创建;
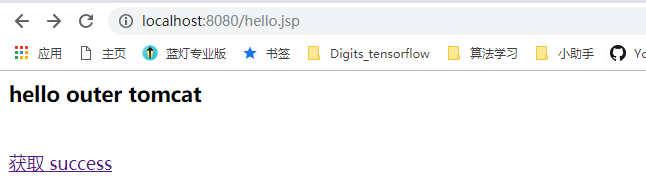
- hello.jsp
```java
<%@ page contentType="text/html;charset=UTF-8" language="java" %>
<html>
<head>
<title>Title</title>
</head>
<body>
<h3>hello outer tomcat</h3>
<br/>
<a href="success">获取 success</a>
</body>
</html>
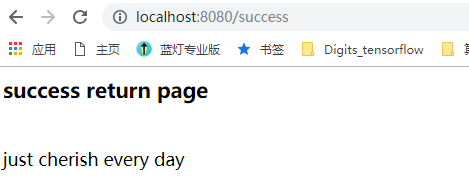
success.jsp
<%@ page contentType="text/html;charset=UTF-8" language="java" %>
<html>
<head>
  <title>Title</title>
</head>
<body>
  <h3>success return page</h3>
  <br/>
  ${cyt}
</body>
</html>
resources 中的 application.properties ```java //在 application.properties 定义视图解析器,即告知 hello.jsp 中的 所对应 controller 的响应视图位置 spring.mvc.view.prefix=/WEB-INF/ spring.mvc.view.suffix=.jsp
//对比:相当于在 springmvc.xml 中配置 视图解析器对象 internalResourceViewResolver
<a name="ALRNZ"></a>
### 2.2.4 实现
<a name="TJLYv"></a>
#### 2.2.4.1 代码-编写controller

- com.cyt.springboot.controller.HelloController.java
```java
package com.cyt.springboot.controller;

import org.springframework.stereotype.Controller;
import org.springframework.ui.Model;
import org.springframework.web.bind.annotation.RequestMapping;

@Controller
public class HelloController {

    @RequestMapping("/success")
    public String success(Model model){
        model.addAttribute("cyt","just cherish every day");
        return "success";
    }
}
2.2.4.2 结果展示
2.2 外置 tomcat 的启动过程及原理
首先,使用外置 tomcat 的过程中,最初由创建向导自动生成的目录结构相比内嵌式 的 springboot 多了一个 ServletInitializer 类,该类继承 SpringBootServletInitializer,而 SpringBootServletInitializer 又实现自 WebApplicationInitializer 接口;
public class ServletInitializer extends SpringBootServletInitializer {

  @Override
  protected SpringApplicationBuilder configure(SpringApplicationBuilder application) {
      return application.sources(SpringbootWebJsp01Application.class);
  }
}
2.2.1 准备知识
2.2.1.1 Servlet 3.0+规则
要了解外置 tomcat 下 springboot 的启动原理,首先要了解一下 Servlet 3.0+规则
- 服务器启动会创建当前 web 应用里面所有 jar 包里面的 ServletContainerlnitializer 实例;
- ServletContainerInitializer 的实现放在 jar 包的 META-INF/services 文件夹下;
- 可以使用 @HandlesTypes 注解,在应用启动的时候加载指定的类;
2.2.1.2 SPI 机制
2.2.1.3 SpringServletContainerInitializer 源码
作用
- SpringServletContainerInitializer 将 @HandlesTypes(WebApplicationInitializer.class) 标注的所有WebApplicationInitializer 这个类型的类都传入到 onStartup方法的 Set 参数中,并通过反射为这些WebApplicationInitializer 类型的类创建实例;
对每一个 WebApplicationInitilizer 的实现类调用相应 onstartup 方法;
@HandlesTypes({WebApplicationInitializer.class})
public class SpringServletContainerInitializer implements ServletContainerInitializer {
public SpringServletContainerInitializer() {
}

public void onStartup(@Nullable Set<Class<?>> webAppInitializerClasses, ServletContext servletContext) throws ServletException {
   List<WebApplicationInitializer> initializers = new LinkedList();
   Iterator var4;
   if (webAppInitializerClasses != null) {
       var4 = webAppInitializerClasses.iterator();

       while(var4.hasNext()) {
           Class<?> waiClass = (Class)var4.next();
           if (!waiClass.isInterface() && !Modifier.isAbstract(waiClass.getModifiers()) && WebApplicationInitializer.class.isAssignableFrom(waiClass)) {
               try {
                   initializers.add((WebApplicationInitializer)ReflectionUtils.accessibleConstructor(waiClass, new Class[0]).newInstance());
               } catch (Throwable var7) {
                   throw new ServletException("Failed to instantiate WebApplicationInitializer class", var7);
               }
           }
       }
   }
   ....
}
2.2.2 外置 tomcat 的启动流程
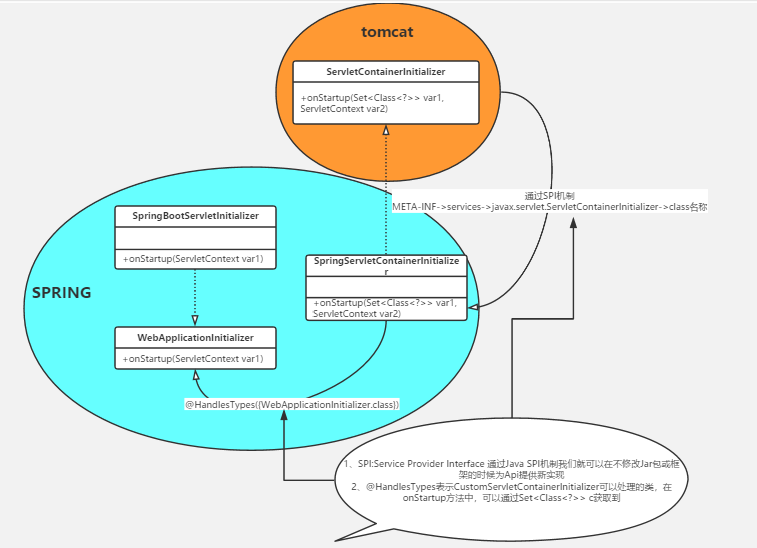
tomcat server 启动一个 web 应用项目;
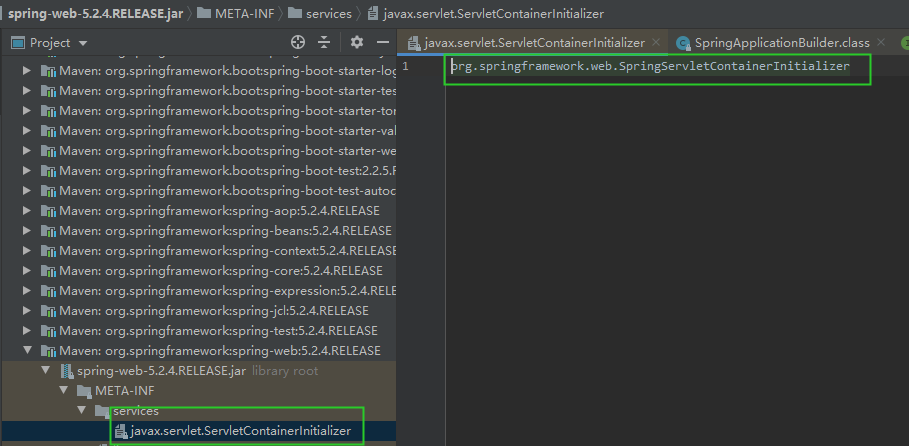
- 基于 Servlet 3.0+在 spring-web 模块下 META-INF/services 中找 javax.servlet.ServletContainerInitializer,根据文件内容来加载 ServletContainerInitializer 在 spring 开发中的实现类 SpringServletContainerInitializer;
- 在 SpringServletContainerInitializer 通过 @HandlesTypes({WebApplicationInitializer.class}) 反射创建WebApplicationInitializer 的实现类,即 SpringBootServletInitializer ,并调用该实现类的 onStartup 方法;
- 在 SpringBootServletInitializer 的 onStartup 方法中通过 createRootApplicationContext 来启动 springboot 的 run 方法; ```java
public abstract class SpringBootServletInitializer implements WebApplicationInitializer {
public void onStartup(ServletContext servletContext) throws ServletException {
    this.logger = LogFactory.getLog(this.getClass());
    WebApplicationContext rootAppContext = this.createRootApplicationContext(servletContext);
    ....
}
...
protected WebApplicationContext createRootApplicationContext(ServletContext servletContext) {
    SpringApplicationBuilder builder = this.createSpringApplicationBuilder();
    builder.main(this.getClass());
    .... 中间省略 builder 的初始化过程
    return this.run(application);//与同以jar包形式启动的应用的run过程一样在内部会创建IOC容器并返回,只是以war包形式的应用在创建IOC容器过程中,不再创建Servlet容器了。
}
2.2.3 启动原理示意图
3. 总结与思考
3.1 springboot 内嵌 servlet 容器的定制化配置过程
- SpringBoot 根据导入的依赖情况,给容器中添加相应的 XXXServletWebServerFactory,容器中某个组件要创建对象就会惊动后置处理器 webServerFactoryCustomizerBeanPostProcessor,只要嵌入的是 Servlet 容器工厂,则后置处理器就会从容器中获取所有的 WebServerFactoryCustomizer,调用定制器的定制方法给工厂类添加配置;
参考
SpringBoot 中的 ServletInitializer
SpringBoot权威教程_spring boot_springboot核心篇+springboot整合篇-雷丰阳

若有收获,就点个赞吧
0 人点赞
