地址:https://github.com/NiceSeason/gulimall-learning/blob/master/docs/%E8%B0%B7%E7%B2%92%E5%95%86%E5%9F%8E%E2%80%94%E5%88%86%E5%B8%83%E5%BC%8F%E9%AB%98%E7%BA%A7.md
Elasticsearch是基于lueue,分布式的,快速的存储、搜索分析海量数据。
es集群对应的mysql,索引对应的数据库,类型对应的数据库表,文档(json)对应的表里面的数据.


1、安装elastic search
(1)下载ealastic search和kibana
docker pull elasticsearch:7.6.2
docker pull kibana:7.6.2
(2)配置
mkdir -p /mydata/elasticsearch/config
mkdir -p /mydata/elasticsearch/data
echo “http.host: 0.0.0.0” >/mydata/elasticsearch/config/elasticsearch.yml
chmod -R 777 /mydata/elasticsearch/
(3)启动Elastic search
docker run —name elasticsearch -p 9200:9200 -p 9300:9300 \
-e “discovery.type=single-node” \
-e ES_JAVA_OPTS=”-Xms64m -Xmx512m” \
-v /mydata/elasticsearch/config/elasticsearch.yml:/usr/share/elasticsearch/config/elasticsearch.yml \
-v /mydata/elasticsearch/data:/usr/share/elasticsearch/data \
-v /mydata/elasticsearch/plugins:/usr/share/elasticsearch/plugins \
-d elasticsearch:7.6.2
设置开机启动elasticsearch
docker update elasticsearch —restart=always
(4)启动kibana:
docker run —name kibana -e ELASTICSEARCH_HOSTS=http://172.17.0.3:9200 -p 5601:5601 -d kibana:7.6.2
设置开机启动kibana
docker update kibana —restart=always
(5)测试
查看elasticsearch版本信息: http://#:9200/
显示elasticsearch 节点信息http://#:9200/_cat/nodes ,
访问Kibana: http://#:5601/app/kibana
2、初步检索
1)_CAT
(1)GET http://39.98.116.120:9200/_cat/nodes:查看所有节点
(2)GET http://39.98.116.120:9200/_cat/cat/health:查看es健康状况
(3)GET http://39.98.116.120:9200/_cat/master:查看主节点
(4)GET http://39.98.116.120:9200/_cat/indicies:查看所有索引 ,等价于mysql数据库的show databases;
2)索引一个文档
在customer索引下的external类型下保存1号数据为
PUT customer/external/1
josn:
{
“name”:”John Doe”
}
PUT和POST都可以新增。 POST如果不指定id,会自动生成id。指定id,第一次为插入,第二次以后就是修改,并新增版本号;PUT可以新增也可以修改。PUT必须指定id,第一次为插入,第二次以后就是修改,并新增版本号;
3)查看文档
GET /customer/external/1
http://#:9200/customer/external/1
“**_seq_no“: 6,**//并发控制字段,每次更新都会+1,用来做乐观锁
通过“if_seq_no=1&if_primary_term=1 ”,当序列号匹配的时候,才进行修改,否则不修改。
列如:http://39.98.116.120:9200/customer/external/1?if_seq_no=8&if_primary_term=1
4)更新文档
(1)POST更新文档,带有_update(和前面的数据进行对比),不带的话则没有对比操作
http://#:9200/customer/external/1/_update
如果执行更新,数据没有任何变化,则“result”:noop表示没有任何变化,”_seq_no”字段序列号也不发生变化

5)删除文档或索引
DELETE customer/external/1DELETE customer
6)eleasticsearch的批量操作——bulk(每条都是独立的,一条错了不影响其他数据)

实例1: 执行多条数据
POST customer/external/_bulk
{“index”:{“_id”:”1”}}
{“name”:”John Doe”}
{“index”:{“_id”:”2”}}
{“name”:”John Doe”}
实例2:对于整个索引执行批量操作
POST /_bulk
{“delete”:{“_index”:”website”,”_type”:”blog”,”_id”:”123”}}
{“create”:{“_index”:”website”,”_type”:”blog”,”_id”:”123”}}
{“title”:”my first blog post”}
{“index”:{“_index”:”website”,”_type”:”blog”}}
{“title”:”my second blog post”}
{“update”:{“_index”:”website”,”_type”:”blog”,”_id”:”123”}}
{“doc”:{“title”:”my updated blog post”}}
3、检索
1)search Api
ES支持两种基本方式检索;
- 通过REST request uri 发送搜索参数 (uri +检索参数);
- 通过REST request body 来发送它们(uri+请求体);

2)Query DSL
(1)基本语法格式
Elasticsearch提供了一个可以执行查询的Json风格的DSL
一个查询语句的典型结构
QUERY_NAME:{
ARGUMENT:VALUE,
ARGUMENT:VALUE,…
}
如果针对于某个字段,那么它的结构如下:
{
QUERY_NAME:{
FIELD_NAME:{
ARGUMENT:VALUE,
ARGUMENT:VALUE,…
}
}
}
GET bank/_search
{
“query“: {
“match_all”: {}
},
“from”: 0,
“size”: 5,
“sort”: [
{
“account_number”: {
“order”: “desc”
}
}
]
}
query定义如何查询;
- match_all查询类型【代表查询所有的所有】,es中可以在query中组合非常多的查询类型完成复杂查询;
- 除了query参数之外,我们可也传递其他的参数以改变查询结果,如sort,size;
- from+size限定,完成分页功能;
- sort排序,多字段排序,会在前序字段相等时后续字段内部排序,否则以前序为准;
(2)match匹配查询
基本类型(非字符串),精确控制

返回account_number =20的数据
字符串,全文检索

全文检索,最终会按照平分进行排序,会对检索条件进行分词匹配(3)match_phrase [短句匹配]
将需要匹配的值当成一整个单词(不分词)进行检索

查出address中包含mill_road的所有记录,并给出相关性得分
修改匹配条件为“990 Mill Road”
文本字段的匹配,使用keyword,匹配的条件就是要显示字段的全部值,要进行精确匹配的。
match_phrase是做短语匹配,只要文本中包含匹配条件,就能匹配到。(4)multi_math【多字段匹配】
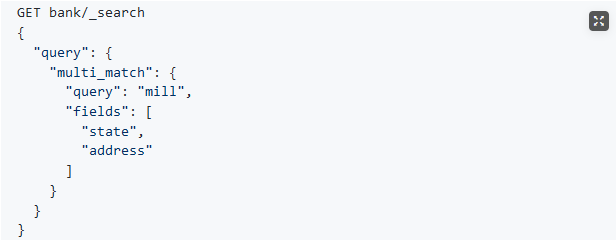<br />state或者address中包含mill,并且在查询过程中,会对于查询条件进行分词
(5)bool用来做复合查询
must:必须达到must所列举的所有条件
must_not,必须不匹配must_not所列举的所有条件。
should,应该满足should所列举的条件。应该达到should列举的条件,如果到达会增加相关文档的评分,并不会改变查询的结果。如果query中只有should且只有一种匹配规则,那么should的条件就会被作为默认匹配条件二区改变查询结果。
must和should匹配度越高,相关度就越高,得分也越高。
(6)Filter【结果过滤】对bool之后的数据做过滤,不增加相关性得分
并不是所有的查询都需要产生分数,特别是哪些仅用于filtering过滤的文档。为了不计算分数,elasticsearch会自动检查场景并且优化查询的执行。
(7)term
和match一样。匹配某个属性的值。全文检索(text字段,需要分析)用match,其他非text字段(比如数字)匹配用term。(8)Aggregation(执行聚合)
聚合提供了从数据中分组和提取数据的能力。最简单的聚合方法大致等于SQL Group by和SQL聚合函数。在elasticsearch中,执行搜索返回this(命中结果),并且同时返回聚合结果,把以响应中的所有hits(命中结果)分隔开的能力。这是非常强大且有效的,你可以执行查询和多个聚合,并且在一次使用中得到各自的(任何一个的)返回结果,使用一次简洁和简化的API啦避免网络往返。
聚合语法如下:
 复杂: 按照年龄聚合,并且求这些年龄段的这些人的平均薪资
 查出所有年龄分布,并且这些年龄段中M的平均薪资和F的平均薪资以及这个年龄段的总体平均薪资GET bank/_search
{
“query”: {
“match_all”: {}
},
“aggs”: {
“ageAgg”: {
“terms”: {
“field”: “age”,
“size”: 100
},
“aggs”: {
“genderAgg”: {
“terms”: {
“field”: “gender.keyword”
},
“aggs”: {
“balanceAvg”: {
“avg”: {
“field”: “balance”
}
}
}
},
“ageBalanceAvg”: {
“avg”: {
“field”: “balance”
}
}
}
}
},
“size”: 0
}3)Mapping
GET bank/_mapping,查看mapping信息新版本改变
ElasticSearch7-去掉type概念
关系型数据库中两个数据表示是独立的,即使他们里面有相同名称的列也不影响使用,但ES中不是这样的。elasticsearch是基于Lucene开发的搜索引擎,而ES中不同type下名称相同的filed最终在Lucene中的处理方式是一样的。两个不同type下的两个user_name,在ES同一个索引下其实被认为是同一个filed,你必须在两个不同的type中定义相同的filed映射。否则,不同type中的相同字段名称就会在处理中出现冲突的情况,导致Lucene处理效率下降。去掉type就是为了提高ES处理数据的效率。Elasticsearch 7.x URL中的type参数为可选。比如,索引一个文档不再要求提供文档类型。Elasticsearch 8.x 不再支持URL中的type参数。解决: 将索引从多类型迁移到单类型,每种类型文档一个独立索引将已存在的索引下的类型数据,全部迁移到指定位置即可。详见数据迁移
创建索引并指定映射
PUT /my_index
{
“mappings”: {
“properties”: {
“age”: {“type”: “integer”},
“email”: {“type”: “keyword”},
“name”: {“type”: “text”}
}
}
}
查看映射:GET /my_index
添加新的字段映射
PUT /my_index/_mapping
{
“properties”: {
“employee-id”: {
“type”: “keyword”,
“index”: false
}
}
}
这里的 “index”: false,表明新增的字段不能被检索,只是一个冗余字段。
更新映射
对于已经存在的字段映射,我们不能更新。更新必须创建新的索引,进行数据迁移。
先创建new_twitter的正确映射。然后使用如下方式进行数据迁移。
列如:PUT /newbank{"mappings": {"properties": {"account_number": {"type": "long"},"address": {"type": "text"},"age": {"type": "integer"},"balance": {"type": "long"},"city": {"type": "keyword"},"email": {"type": "keyword"},"employer": {"type": "keyword"},"firstname": {"type": "text"},"gender": {"type": "keyword"},"lastname": {"type": "text","fields": {"keyword": {"type": "keyword","ignore_above": 256}}},"state": {"type": "keyword"}}}}
数据迁移
```json
POST _reindex [固定写法]
{
“source”:{
“index”:”twitter”
},
“dest”:{
“index”:”new_twitters”
}
}
列如:POST _reindex{"source":{"index":"bank","type": "account"},"dest":{"index":"newbank"}}
4)分词
智能分词POST _analyze{"analyzer": "ik_smart","text":"尚硅谷电商项目"}
精确分词POST _analyze{"analyzer": "ik_max_word","text":"我是中国人"}
5)自定义扩展词库
4、商城业务-商品上架
1)sku在es中的存储模型分析-商品上架接口实现
商品上架需要在es中保存spu信息并更新spu的状态信息,由于SpuInfoEntity与索引的数据模型并不对应,所以我们要建立专门的vo进行数据传输
PUT product{"mappings":{"properties": {"skuId":{"type": "long"},"spuId":{"type": "keyword"},"skuTitle": {"type": "text","analyzer": "ik_smart"},"skuPrice": {"type": "keyword"},"skuImg":{"type": "keyword","index": false,"doc_values": false},"saleCount":{"type":"long"},"hasStock": {"type": "boolean"},"hotScore": {"type": "long"},"brandId": {"type": "long"},"catalogId": {"type": "long"},"brandName": {"type": "keyword","index": false,"doc_values": false},"brandImg":{"type": "keyword","index": false,"doc_values": false},"catalogName": {"type": "keyword","index": false,"doc_values": false},"attrs": {"type": "nested","properties": {"attrId": {"type": "long"},"attrName": {"type": "keyword","index": false,"doc_values": false},"attrValue": {"type": "keyword"}}}}}}
2)nested数据类型场景(数据进行扁平化处理)
PUT my_index/_doc/1
{
“group” : “fans”,
“user” : [
{
“first” : “John”,
“last” : “Smith”
},
{
“first” : “Alice”,
“last” : “White”
}
]
}
GET my_index/_search
{
“query”: {
“bool”: {
“must”: [
{ “match”: { “user.first”: “Alice” }},
{ “match”: { “user.last”: “Smith” }}
]
}
}
}
PUT my_index
{
“mappings”: {
“properties”: {
“user”: {
“type”: “nested”
}
}
}
}
3)首页渲染(模板引擎:thymeleaf)


页面修改不重启实时更新
<dependency><groupId>org.springframework.boot</groupId><artifactId>spring-boot-devtools</artifactId><optional>true</optional></dependency>

若有收获,就点个赞吧
0 人点赞
