
Children will be invited to build a zig-zag bridge and find out what is special about its shape. Children will then use the Actions Cards to make mTiny turn right, turn left, and move forward. To decide when (and whether) to give “turn right” or “turn left” command when mTiny approaches a corner, children should recognize how the zig-zag bridge takes a left turn or right turn.
Intended Learning Outcomes
By the end of this activity, children will be able to:
(1) Understand the representation of the right and left from different points of view;
(2) Use the appropriate Action Cards to make mTiny turn right or left at the corner.
Key Competencies
| Physical | Cognitive | Socio-emotional | ||
|---|---|---|---|---|
| Hand-eye Coordination | Focus and Concentration | Self-reflection | ||
| Fine Motor Skills | Spatial Representation | Persistence and Resilience | ||
| Orientation |
Resources
| For Child | For Educator | ||||
|---|---|---|---|---|---|
 mTiny Toolkit × 1 |
 Forward Card × 1 |
 Turn Right Card × 1 |
 Turn Left Card × 1 |
 Wooden Blocks Plenty |
:::info Note: You need to put wooden blocks on the two sides to set up the Zig-zag Bridge. :::
Setting-up
| The Zig-zag Bridge can be set up in various shapes, for example: The length of each straight part of the bridge is START recommended to be 28cm (or a multiple of 28cm), since mTiny moves 28cm each time when the Forward Card is tapped. The width of the bridge could be slightly broader than that of mTiny. |
 |
|---|---|
Educator-Led Instructions
Main Activity
Introduce the Zig-zag Bridge and encourage children to observe and discuss the shape of the bridge.
Ask children: “How many turns does the bridge have? Imagine that you were a passer-by walking on the bridge, would you turn right or turn left when coming to these turns?”‘
Invite children to the game: “Can you please tell mTiny whether to turn right or turn left when it encounters these turns?”
Introduce the three types of Action Cards.
:::warning
Note: Rotate Action Cards by 90 degrees in the counterclockwise direction so that children can make sense of the representation of the arrow easily. :::
:::
- Instruct children to use different coding tools to direct mTiny’s movements.
- Have children line up their robots one by one at the Starting Point.
- For the first time, children can use Joystick to operate the robot.
- For the second time, children should use Actions Cards to give commends by tapping the appropriate Action Cards.
- Children make the robot move one after another.
Variations
You can also set challenges on children’s spatial scene abilities by inviting them to work in pairs and figure the point of view of other’s right-left orientation.
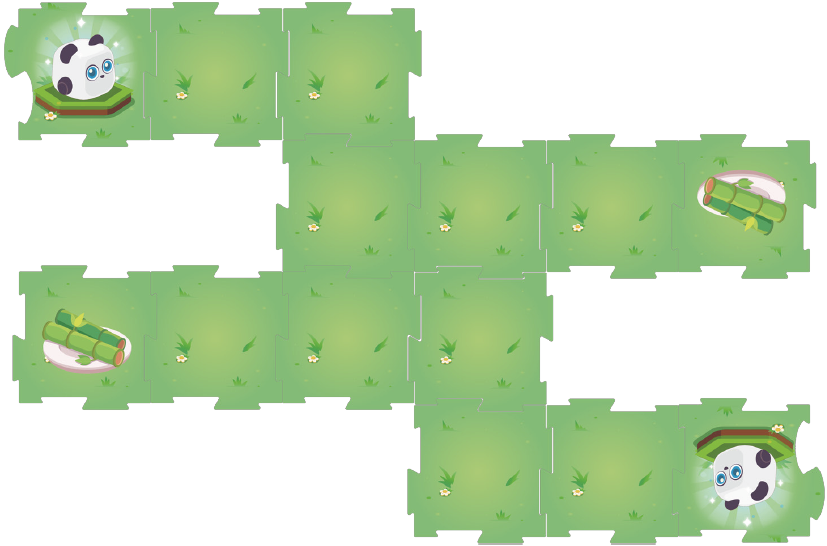
Help assemble the above map, invite children to work in pairs and share the map blocks. Instruct children to direct their robots to the destination on the opposite side (either Bamboo Map Block or mTiny Map Block):
Children should observe and mirror the commands their partners have done, making their robots do the same actions; or
Child A calls out a command (“Turn right”, “Turn left”, or “Move forward”). When receiving the command, Child B should then pick up the corresponding Action Card and give it to Child A. Child A taps the Action Card to make the robot move and sees whether the card is a correct choice.

若有收获,就点个赞吧
0 人点赞
