参考资料
- 官方文档:https://www.elastic.co/guide/en/logstash/7.x/logstash-7-1-1.html 官方文档特别全,我觉得比 Spring 写的还要好
简介
它在 ELK 中扮演的角色是数据加工,一般分为三个步骤:输入、过滤器和输出,相当于一个管道,对文件数据进行加工处理,然后输出。它的一大特点是支持丰富的插件,例如:grok,json 等
下载 Logstash
Logstash 要和 ES 版本保持一致,下载:
wget https://artifacts.elastic.co/downloads/logstash/logstash-7.1.1.tar.gz
使用
命令行配置启动
参考官方文档:
# -e 指定 要执行的配置bin/logstash -e 'input { stdin { } } output { stdout {} }'
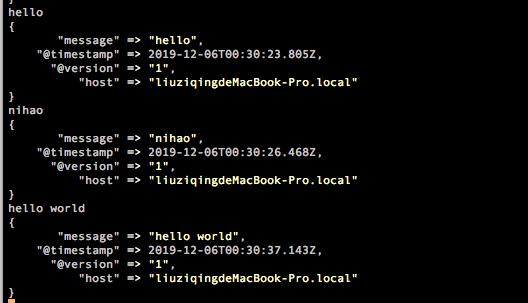
这个意思在控制台进行标准的输入和输出,也就是你在控制台输入什么,同时也会输出,如下:
和 Nginx 一样,也可以检查配置文件是否正确:bin/logstash -f first-pipeline.conf—config.test_and_exit 如果正确会返回:Configuration OK
使用该命令启动,以后修改配置会自动加载,不需要停止或重启 bin/logstash -f first-pipeline.conf —config.reload.automatic
配置文件启动
命令行配置启动,简单的测试还可以,实际上会把配置写在配置文件中启动,参考官方文档。新建文件 logstash-simple.conf:
input { stdin { } }output {elasticsearch { hosts => ["localhost:9200"] }# 在控制台输入保存到 ES 中,同时也在控制台输出stdout { codec => rubydebug }}
执行命令:
# -f 表示指定配置文件启动bin/logstash -f logstash-simple.conf
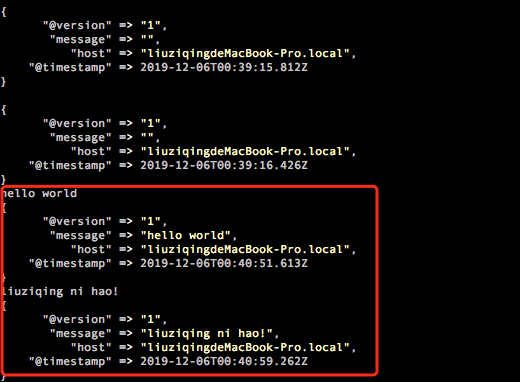
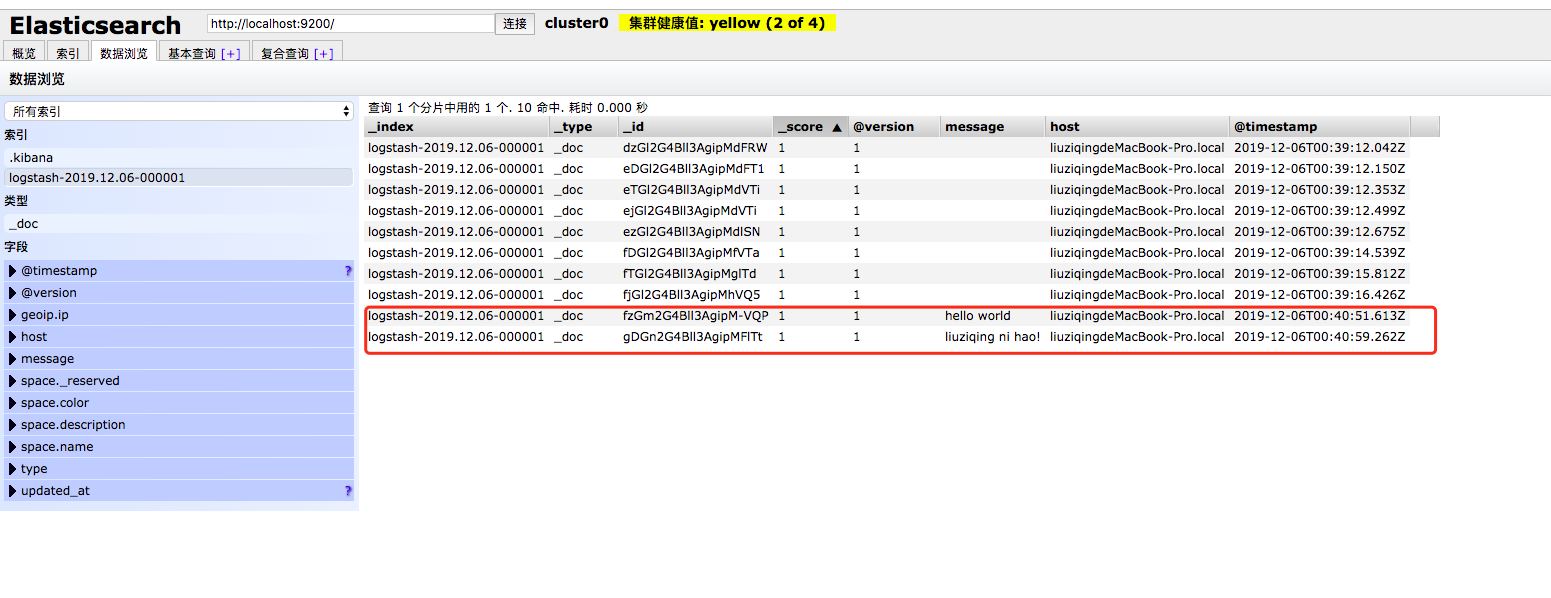
在控制台和 ES 中显示内容:
官方 demo 演示
官方演示了一个 将日志文件从 Filebeat 读取到 Logstash 的 demo,首先下载演示文件,配置 Filebeat,创建 filebeat.yml,添加配置:
filebeat.inputs:- type: logpaths:# 这个路径是你刚才那个演示文件的绝对路径- /app/es/logstash-7.1.1/logstash-tutorial.log# 输出到 Logstash,端口是 5044output.logstash:hosts: ["localhost:5044"]
配置 Logstash,创建 first-pipeline.conf 文件,添加配置:
# 输入源,从 Filebeat 输入进来,Logstash 的端口是 5044input {beats {port => "5044"}}# 插件配置,顺序执行插件filter {# grok 插件grok {# 解析 Apache Web 日志match => { "message" => "%{COMBINEDAPACHELOG}" }}# geo 插件,clientip 这个字段来自message中geoip {source => "clientip"}}# 在控制台输出output {stdout { codec => rubydebug }}
启动 Logstash:
bin/logstash -f first-pipeline.conf --config.reload.automatic
启动 Filebeat:
./filebeat -e -c filebeat.yml -d "publish"
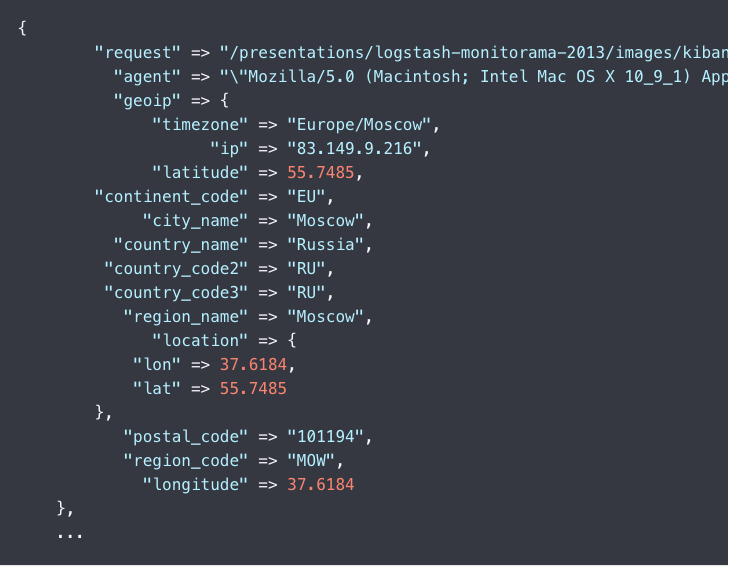
正常的话你在 Logstash 的控制台看到类似格式的数据:
上面只是将数据输出到控制台,接下来将数据保存到 ES 中,继续配置 Filebeat,在 first-pipeline.conf ,如下:
# 输入源,从 Filebeat 输入进来,Logstash 的端口是 5044input {beats {port => "5044"}}# 插件配置,顺序执行插件filter {# grok 插件grok {# 解析 Apache Web 日志match => { "message" => "%{COMBINEDAPACHELOG}" }}# geo 插件,clientip 这个字段来自message中geoip {source => "clientip"}}# 在控制台输出output {# 输出到 ES 中elasticsearch {hosts => [ "localhost:9200" ]}# stdout { codec => rubydebug }}
启动 ES,再重启 Filebeat,也是上面那条命令,但是这里还要删除 Filebeat 目录中的 data/registry 文件夹。
然后你可以通过 Kibana 或者 Head 或者使用 HTTP 请求查看 ES 中刚刚存进来的数据。
通过浏览器查看:
查看索引:localhost:9200/_cat/indices?v
查看某个索引的数据:localhost:9200/${索引名称}/_search?pretty&q=response=200
input 匹配多行
在读取 Java 日志中,打印的堆栈信息经常是多行,但默认是按行读取,所以使用 Multiline 插件:
# 例如一个input 数据源Exception in thread "main" java.lang.ArithmeticException: / by zeroat com.wallet.v2.rpc.EthInfuraRpcServiceTest.print(EthInfuraRpcServiceTest.java:115)at com.wallet.v2.rpc.EthInfuraRpcServiceTest.main(EthInfuraRpcServiceTest.java:111)
multiline.conf 配置:
input {stdin {codec => multiline {# 支持正则pattern => "^\s"what => "previous"}}}output {stdout {codec => rubydebug}}
sprintf 格式
实际上配置中不可能写死,我们希望动态配置信息,例如根据日期来建立索引:
output {# 输出到 ES 中elasticsearch {hosts => [ "localhost:9200" ]# 文档iddocument_id => "%{id}"# 文档类型document_type => "_doc"# 自定义索引index => "custom-index-%{+YYYYMMdd}"}}
上面的 %{+YYYYMMdd} 就是 Logstash 支持的 sprintf 格式,用 %{} 可以获取动态的数据。再比如上面用的 COMBINEDAPACHELOG 则是 grok 预置的表达式。还要就是希望能获取 Filebeat 传过来的字段,可以用 %[fields][字段名称] 的方式来获取。
小结
通过上面的几个案例你会发现,Logstash 的配置文件,一般分为三部分,其中每一部分里面都可以配置 N 个选项,input 插件、filter 插件、output 插件:
# 输入input {file {path => "/var/log/messages"type => "syslog"}file {path => "/var/log/apache/access.log"type => "apache"}...}# 处理过滤filter {# 这里会定义各种插件,进行数据处理,还可以写表达式逻辑判断...}# 输出到文件,或者ES,控制台等等output {...}
同步 MySQL 数据
logstash 同步 MySQL 中数据配置,使用 jdbc 插件,操作方式和上面一样,下面是配置文件介绍 mysql.conf:
input {jdbc {# 数据库地址jdbc_connection_string => "jdbc:mysql://localhost:3306/test_db?characterEncoding=utf-8"# 用户名和密码jdbc_user => "root"jdbc_password => "123456"# mysql-connector-java 驱动 jar 包路径jdbc_driver_library => "/usr/local/java/mysql-connector-java-5.1.6.jar"# the name of the driver class for mysqljdbc_driver_class => "com.mysql.jdbc.Driver"# 是否分页jdbc_paging_enabled => "true"# 分页条数jdbc_page_size => "50"#以下对应着要执行的sql的绝对路径,或者直接执行 sql#statement_filepath => ""statement => "select id,title,content from tb_article"#定时字段 各字段含义(由左至右)分、时、天、月、年,全部为*默认含义为每分钟都更新(测试结果,不同的话请留言指出)# 这里表示每分钟执行一次schedule => "* * * * *"}}output {elasticsearch {#ESIP地址与端口hosts => "127.0.0.1:9200"#ES索引名称(自己定义的)index => "article"#自增ID编号,这里的id对应上面sql语句的iddocument_id => "%{id}"# ES 文档类型document_type => "article"}stdout {#以JSON格式输出codec => json_lines}}
更多基于配置文件的复杂案例,参考官方文档。


