1. Fragment
在vue2中:组件必须有一个跟标签
在vue3中:组件可以没有跟标签, 内部会将多个标签包含在一个Fragment虚拟元素中
好处:减少标签层级, 减小内存占用。
2. teleport
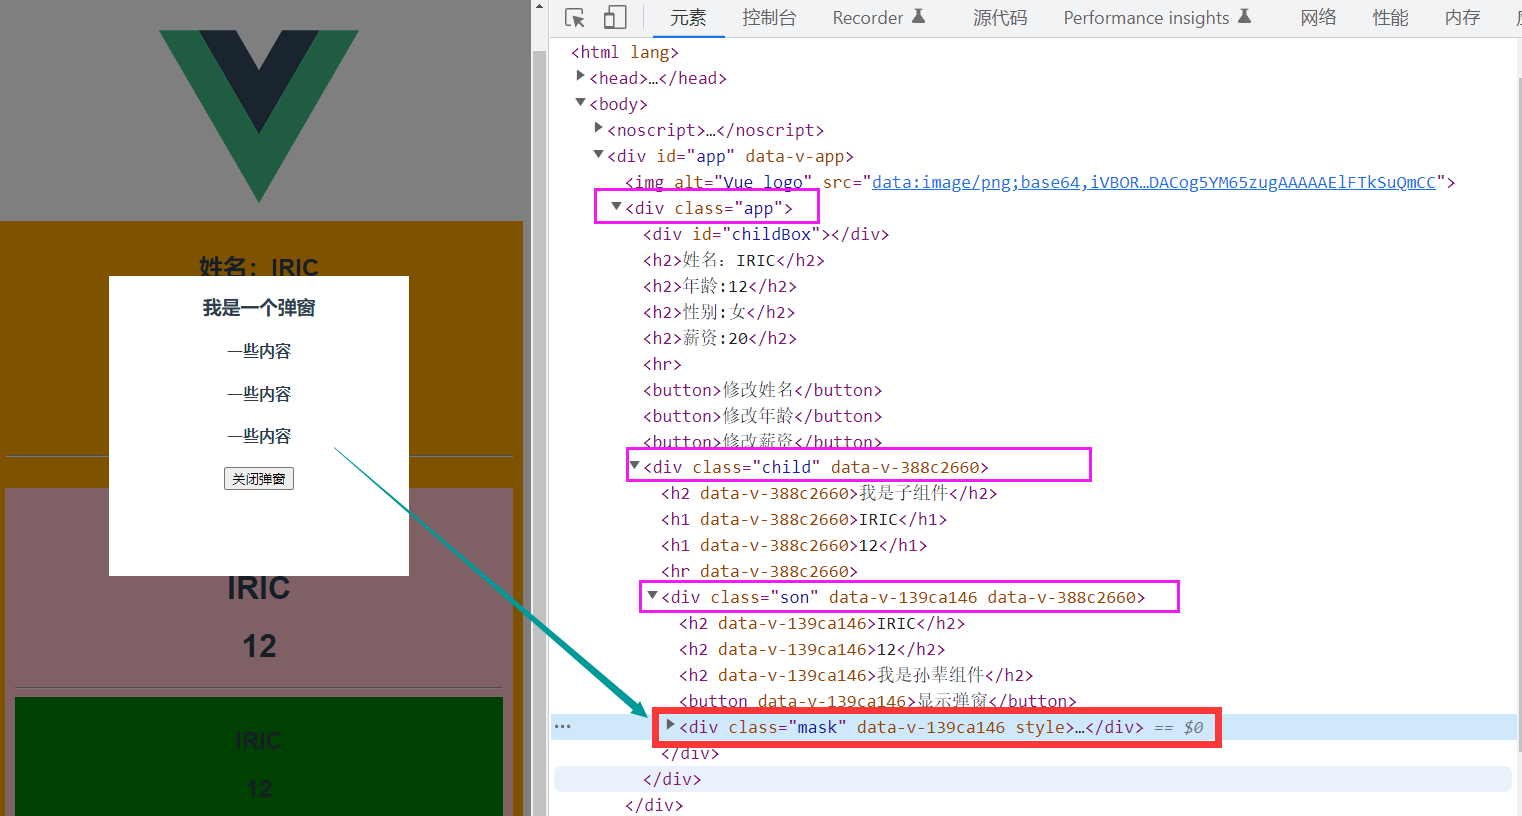
什么是Teleport? ——Teleport是一种能够将我们的组件html结构移动到我们指定的位置的技术.
场景:像modal、tost等这样的元素, 很多情况下, 我们将它完全和我们的vue应用的DOM完全剥离,管理起来反而会方便容器很多。
原因在于如果我们嵌套在VUe的某个部件内部, 那么处理嵌套组件的定位、z-index和样式就变得很困难。
使用方法:to后面可以直接写body也可以写ID选择器。
<button @click="showToast" class="btn">打开 toast</button><!-- to 属性就是目标位置 --><teleport to="#teleport-target"><div v-if="visible" class="toast-wrap"><div class="toast-msg">我是一个 Toast 文案</div></div></teleport>
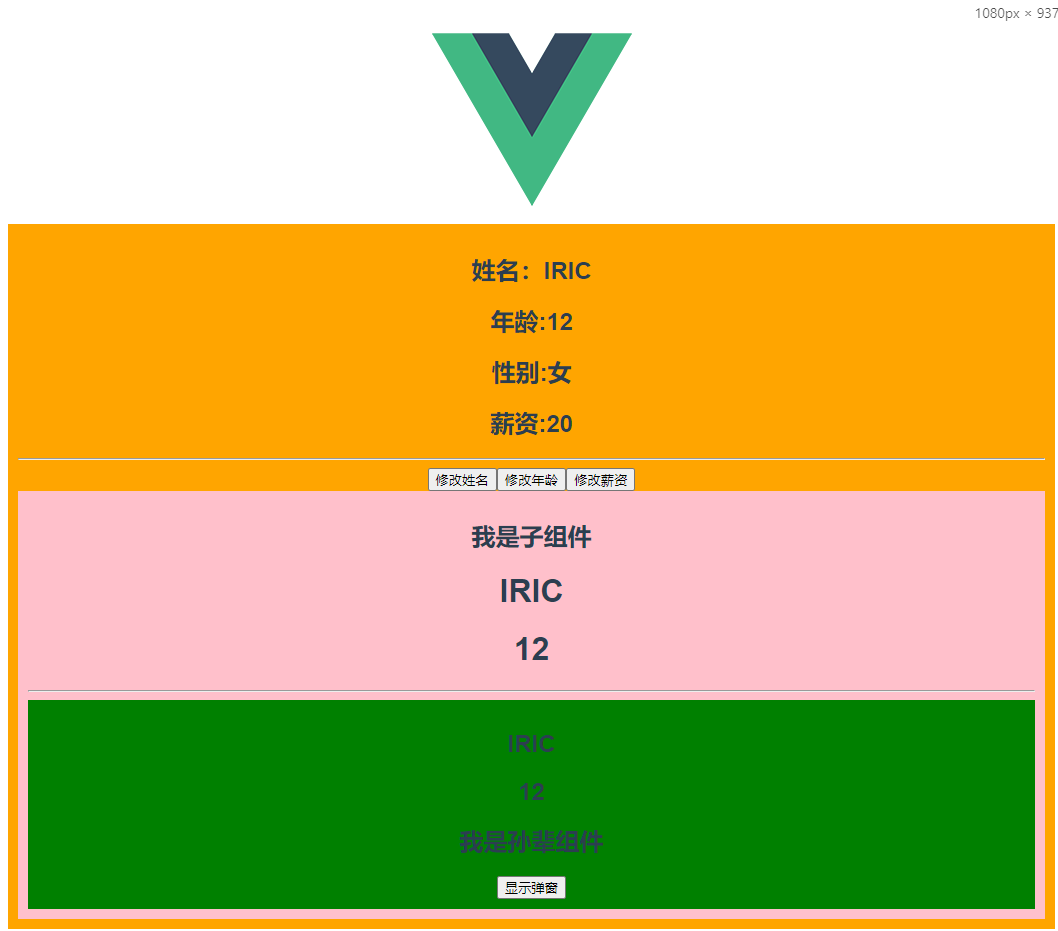
//parent<template><div class="app"><div id="childBox"></div><h2>姓名:{{name}}</h2><h2>年龄:{{age}}</h2><h2>性别:{{sex}}</h2><h2>薪资:{{job.salery}}</h2><hr /><button @click="name += '@'">修改姓名</button><button @click="age ++">修改年龄</button><button @click="job.salery ++">修改薪资</button><my-child></my-child></div><div id='modal'></div></template><script>import MyChild from './MyChild.vue'import {reactive,toRefs,provide,isReactive,readonly,isReadonly,ref,isRef,isProxy,} from 'vue'export default {components: {MyChild,},setup() {let person = reactive({name: 'IRIC',age: 12,sex: '女',job: {salery: 20,},address: '',})provide('person', person)const p = readonly(person)console.log(isReactive(person)) //trueconsole.log(isReadonly(p)) //treuconst count = ref(10)console.log(isRef(count)) //treuconsole.log(isProxy(p)) //treureturn { ...toRefs(person), count }},}</script><style>.app {padding: 10px;background: orange;}.childBox {background: yellowgreen;height: 300px;width: 100%;}</style>
//child<template><div class="child"><h2>我是子组件</h2><h1>{{p.name}}</h1><h1>{{p.age}}</h1><hr /><my-son></my-son></div></template><script>import MySon from './MySon.vue'import { inject, ref } from 'vue'export default {components: {MySon,},setup() {const p = inject('person')const dialogVisible = ref(false)return {p,dialogVisible}},}</script><style scoped>.child {background: pink;padding: 10px;}</style>
//son<template><div class="son"><h2>{{p.name}}</h2><h2>{{p.age}}</h2><h2>我是孙辈组件</h2><button @click="visible=!visible">显示弹窗</button><div class="mask" v-show="visible"><div class="modal"><h3>我是一个弹窗</h3><h4>一些内容</h4><h4>一些内容</h4><h4>一些内容</h4><button @click="visible=!visible">关闭弹窗</button></div></div></div></template><script >import { inject, ref } from 'vue'export default {setup() {const p = inject('person')const visible = ref(false)return {p,visible,}},}</script><style scoped>.son {padding: 10px;background: green;}.mask {position: absolute;top: 0;bottom: 0;left: 0;right: 0;background-color: rgba(0, 0, 0, 0.5);}.modal {width: 300px;height: 300px;background: #fff;position: absolute;left: 50%;top: 50%;transform: translate(-50%, -50%);}</style>

元素结构:
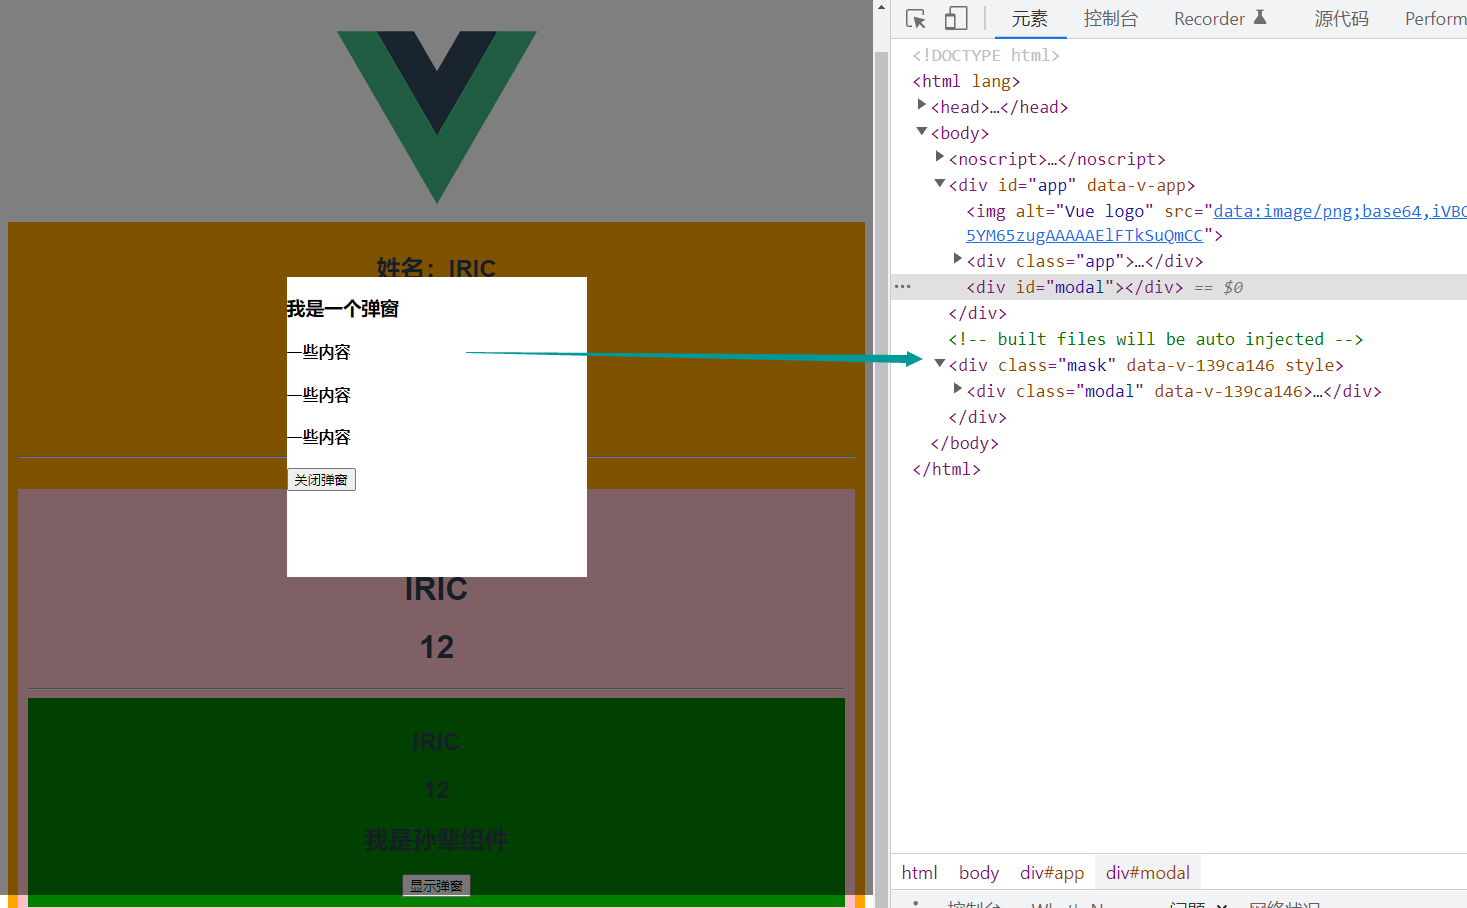
加了teleport标签:
<teleport to="body"><div class="mask" v-show="visible"><div class="modal"><h3>我是一个弹窗</h3><h4>一些内容</h4><h4>一些内容</h4><h4>一些内容</h4><button @click="visible=!visible">关闭弹窗</button></div></div></teleport>
3. Suspense
- 等待异步组件时渲染一些额外内容,让应用有更好的用户体验
- 使用步骤:
- 异步引入组件
使用Suspense包裹组件,并配置好default与 fallback ```javascriptimport {defineAsyncComponent} from 'vue'const Child = defineAsyncComponent(()=>import('./components/Child.vue'))
姓名:{{name}}
年龄:{{age}}
性别:{{sex}}
薪资:{{job.salery}}
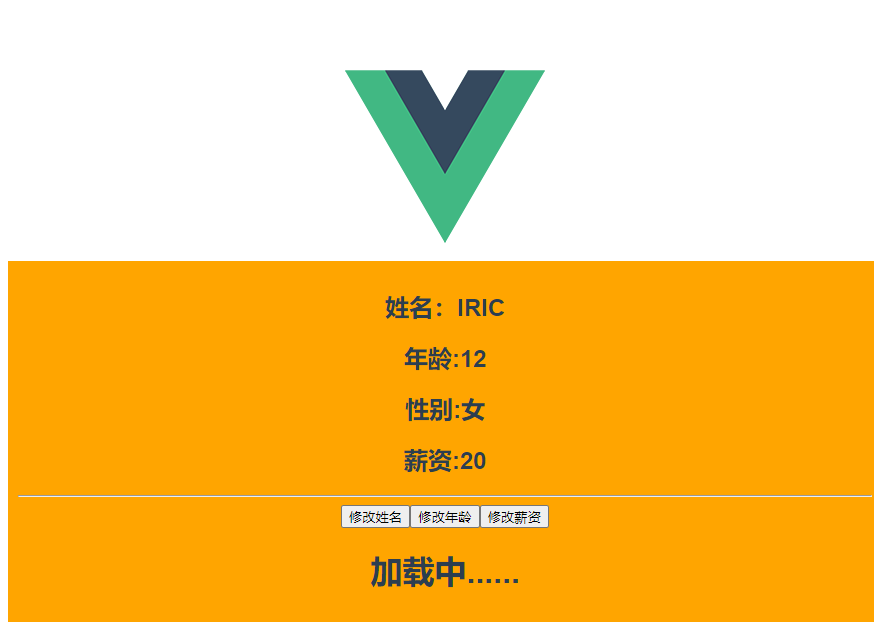
加载中……
**default:**就是组件要显示的内容<br />**fallback:**就是组件没加载完全的“备胎”<br />如果在**child**组件中返回一个**promise**,则出现该情况:```javascript<template><div class="child"><h2>我是子组件</h2><h2>sum当前的值:{{sum}}</h2><hr /><my-son></my-son></div></template><script>import MySon from './MySon.vue'import { ref } from 'vue'export default {components: {MySon,},setup() {const sum = ref(100)return new Promise((resolve) => {setTimeout(() => {resolve({sum})}, 1000)})},}</script>

1s后显示child组件。
或者返回一个await<script>import MySon from './MySon.vue'import { ref } from 'vue'export default {components: {MySon,},async setup() {const sum = ref(100)const p = new Promise((resolve) => {setTimeout(() => {resolve({sum})}, 3000)})return await p},}</script>
- 异步引入组件


