1.概念
1.fixture的使用场景
- 返回值
- 初始化、清理【yield】
- conftest.py【1.fixture的共享;2.使用pytest预设钩子,来补充脚本的能力】
fixture的参数化【@pytest.fixture(params=xx)】
2.fixture函数放置的位置
单独的test_xx.py文件中
- 【推荐】conftest.py文件中
3.pytest检测fixture的顺序
- 优先搜索该测试所在的module(test_xx.py)
- 搜索conftest.py
- 在testcase运行前执行该fixture
2.fixture详细示例
1.fixture_返回值
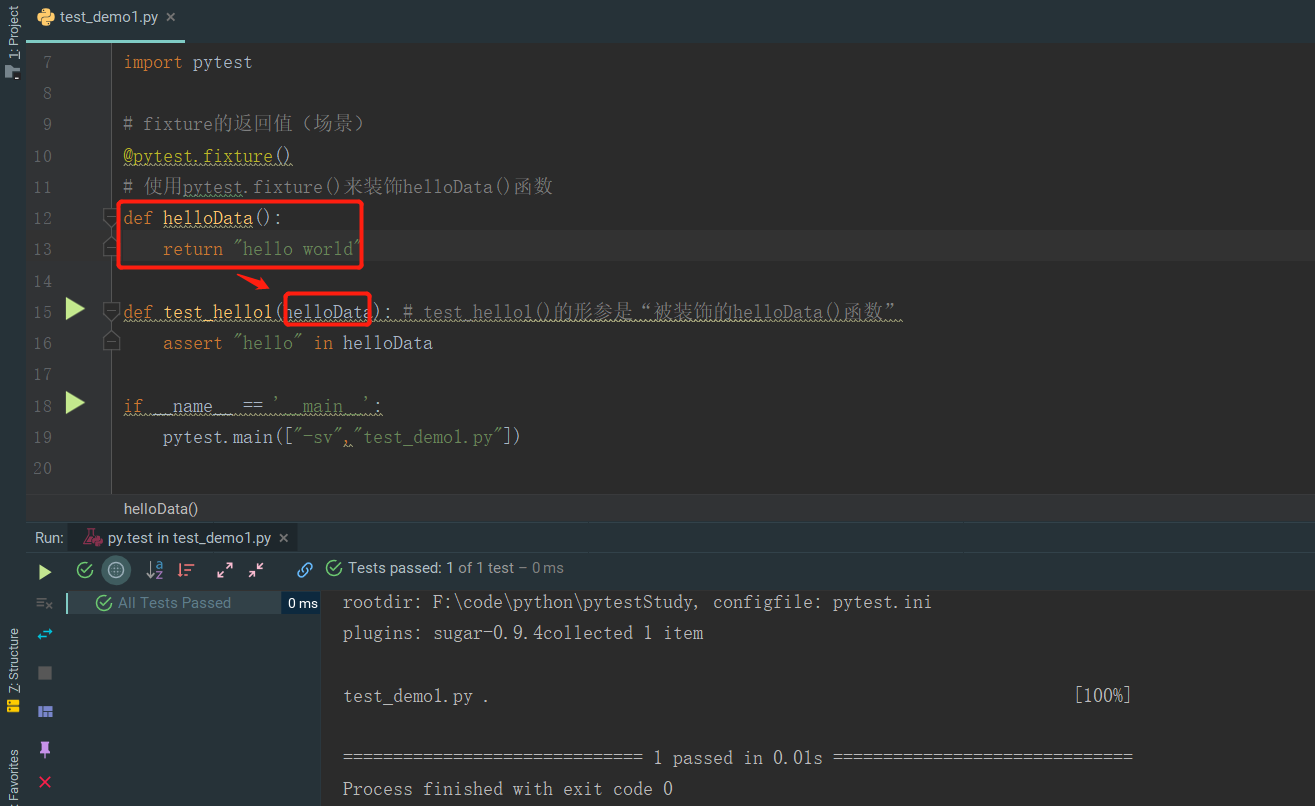
```python import pytest
fixture的返回值(场景)
@pytest.fixture()
使用pytest.fixture()来装饰helloData()函数
def helloData(): return “hello world”
def test_hello1(helloData): # test_hello1()的形参是“被装饰的helloData()函数” assert “hello” in helloData
<a name="DtvRj"></a>## 2.fixture_初始化、清理<a name="KlMyq"></a>### 1.fixture执行的步骤说明 pytest --setup-show # 查看fixture的运行步骤<br />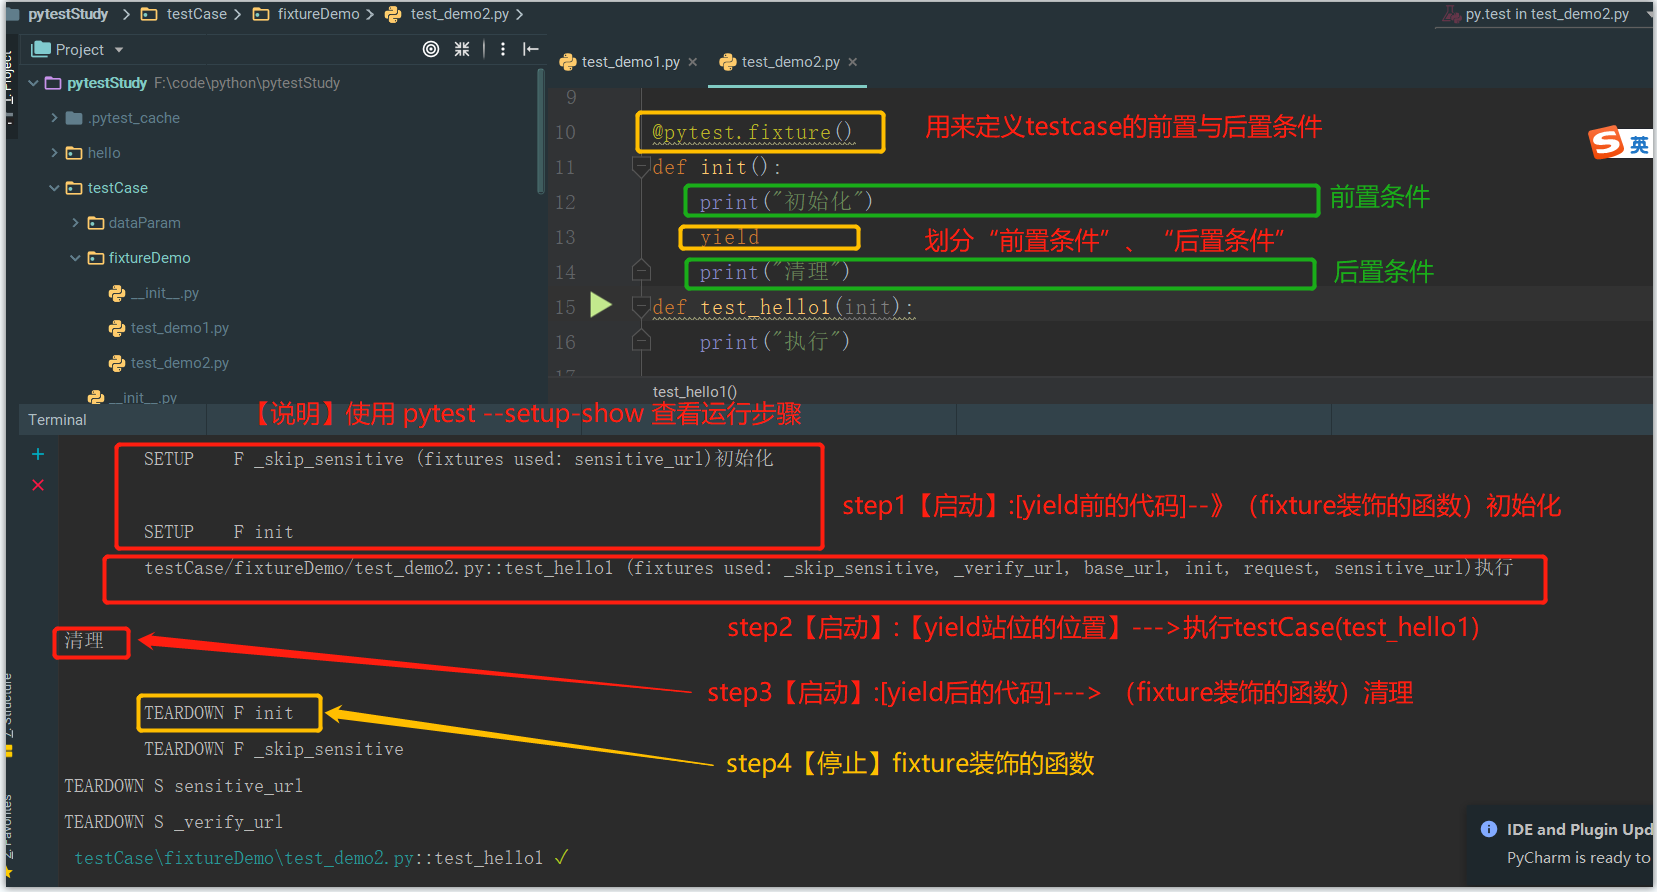<a name="BDnLG"></a>### 2.结合selenium```pythonimport pytestfrom selenium import webdriver@pytest.fixturedef driverOpt(selenium):# 选装pytest-selenium插件selenium.maximize_window()yieldselenium.quit()def test_ui(driverOpt,selenium):selenium.get("https://www.baidu.com")assert selenium.title=="百度一下,你就知道"# 运行命令:pytest -sv --driver=Chrome test_demo2.py::test_ui [chromedriver需配置在系统Path中]
3.fixture_conftest.py
1.conftest.py的主要功能
- 实现fixture函数的共享(多个testcase可引用conftest.py中的fixture函数)
-
2.conftest.py存放的位置
testcase的同级目录
- 【强烈推荐】项目根目录【在不同的目录,【区别】其作用域不同】
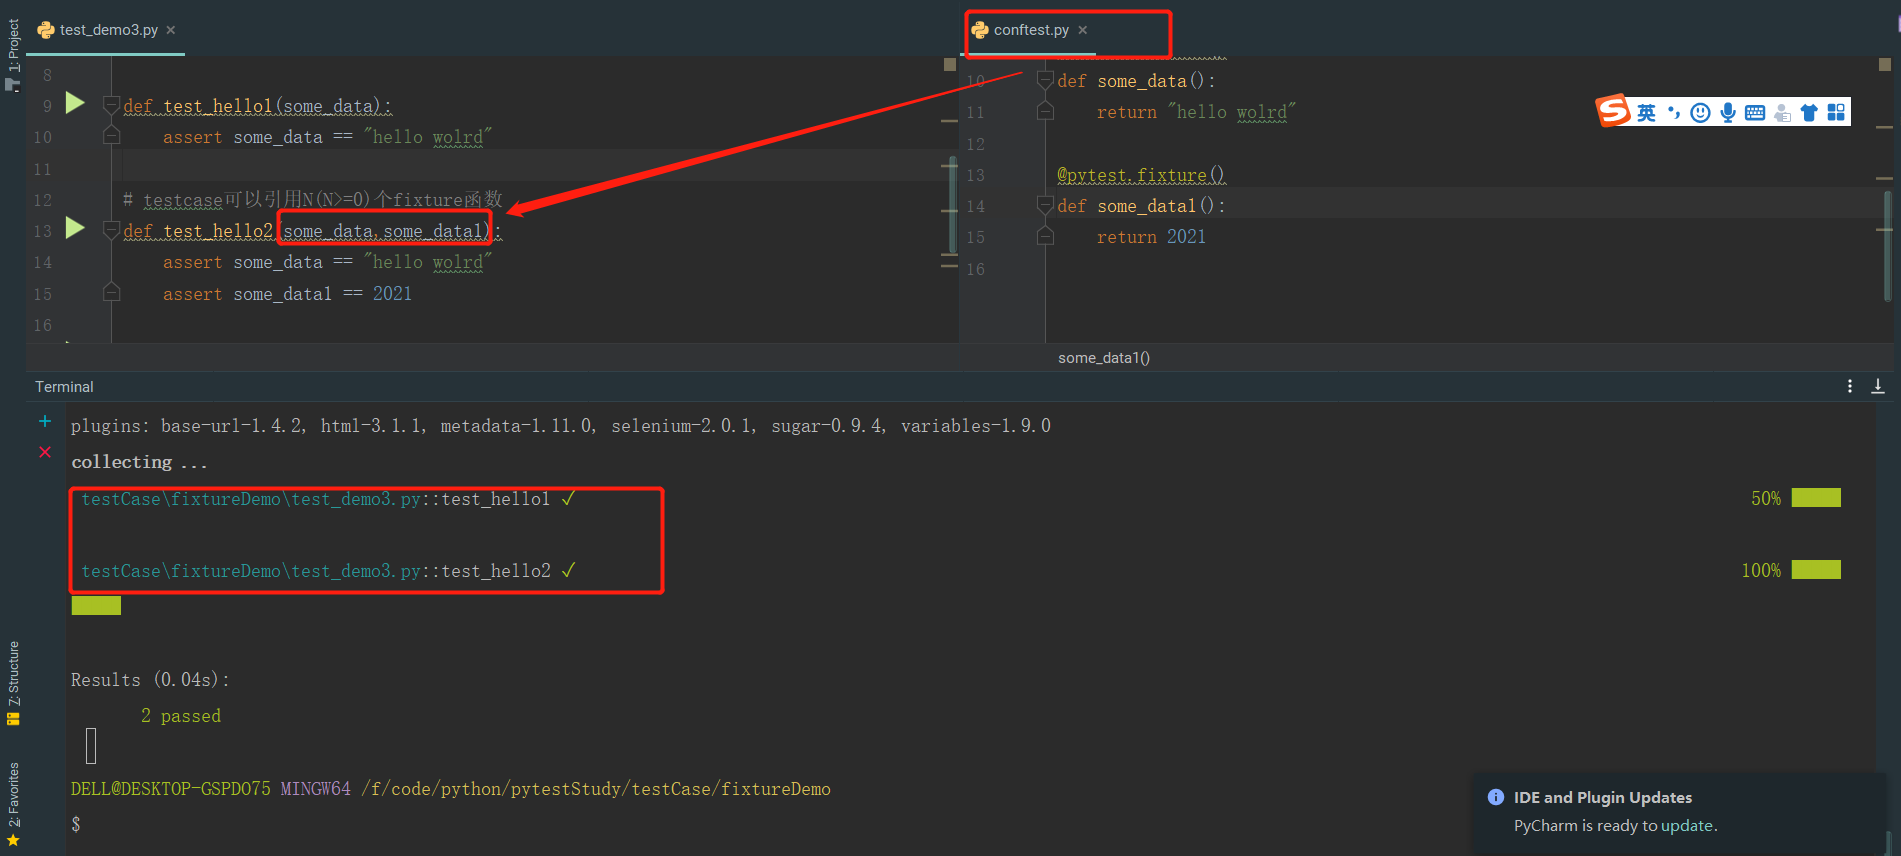
3.testcase引用N个fixture函数
testcase :可以引用N(N>=0)个fixture函数 ```pythontest_demo3.py
def test_hello1(some_data): assert some_data == “hello wolrd”
testcase可以引用N(N>=0)个fixture函数
def test_hello2(some_data,some_data1): assert some_data == “hello wolrd” assert some_data1 == 2021
——————————————————————————-
conftest.py [此conftest.py可以会于testcase的同级目录或项目根目录]
def some_data(): return “hello wolrd”
@pytest.fixture() def some_data1(): return 2021
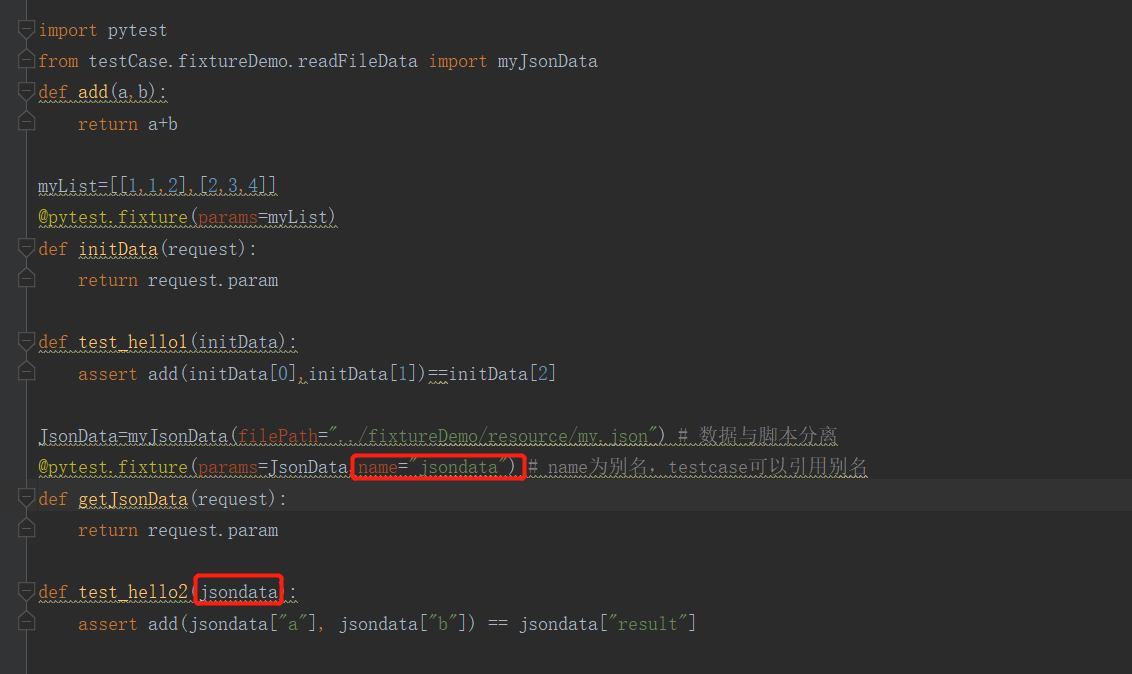
<a name="mbIcb"></a>## 4.fixture_参数化格式 @pytest.fixture(**params**=**[ xxx ]**)<br /> def init(**request**):<br />return** request.param**<br />**说明 paramas的值必须为list类型**```pythonimport pytestfrom testCase.fixtureDemo.readFileData import myJsonDatadef add(a,b):return a+bmyList=[[1,1,2],[2,3,4]]@pytest.fixture(params=myList)def initData(request):return request.paramdef test_hello1(initData):assert add(initData[0],initData[1])==initData[2]JsonData=myJsonData(filePath="../fixtureDemo/resource/my.json") # 数据与脚本分离@pytest.fixture(params=JsonData,name="jsondata") # name为别名,testcase可以引用别名def getJsonData(request):return request.paramdef test_hello2(jsondata):assert add(jsondata["a"], jsondata["b"]) == jsondata["result"]

若有收获,就点个赞吧
0 人点赞
