Introduction
ThingsBoard is an open-source server-side platform that allows you to monitor and control IoT devices. It is free for both personal and commercial usage and you can deploy it anywhere. If this is your first experience with the platform we recommend to review what-is-thingsboard page and getting-started guide.
This sample application performs collection of temperature and humidity values produced by DHT22 sensor and further visualization on the real-time web dashboard. Collected data is pushed via MQTT to ThingsBoard server for storage and visualization. The purpose of this application is to demonstrate ThingsBoard data collection API and visualization capabilities.
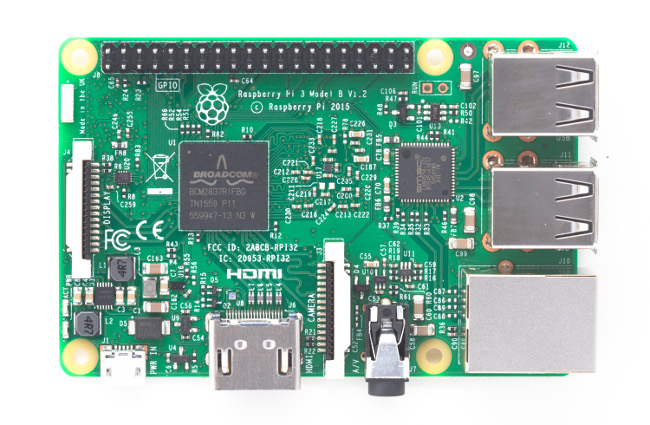
The DHT22 sensor is connected to Raspberry Pi. Raspberry Pi offers a complete and self-contained Wi-Fi networking solution. Raspberry Pi push data to ThingsBoard server via MQTT protocol by using paho mqtt python library. Data is visualized using built-in customizable dashboard. The application that is running on Raspberry Pi is written in Python which is quite simple and easy to understand.
The video below demonstrates the final result of this tutorial.
Once you complete this sample/tutorial, you will see your sensor data on the following dashboard.
Prerequisites
You will need to have ThingsBoard server up and running. The easiest way is to use Live Demo server.
The alternative option is to install ThingsBoard using Installation Guide. Windows users should follow this guide. Linux users that have docker installed should execute the following commands:
mkdir -p ~/.mytb-data && sudo chown -R 799:799 ~/.mytb-datamkdir -p ~/.mytb-logs && sudo chown -R 799:799 ~/.mytb-logsdocker run -it -p 8080:9090 -p 1883:1883 -p 5683:5683/udp -v ~/.mytb-data:/data \-v ~/.mytb-logs:/var/log/thingsboard --name mytb --restart always thingsboard/tb-postgres
These commands install ThingsBoard and load demo data and accounts.
ThingsBoard UI will be available using the URL: http://localhost:8080. You may use username tenant@thingsboard.org and password tenant. More info about demo accounts is available here.
List of hardware and pinouts
- Resistor (between 4.7K and 10K)
- Breadboard
- 2 female-to-female jumper wires
- 10 female-to-male jumper wires
- 3 male-to-male jumper wire
Wiring schemes
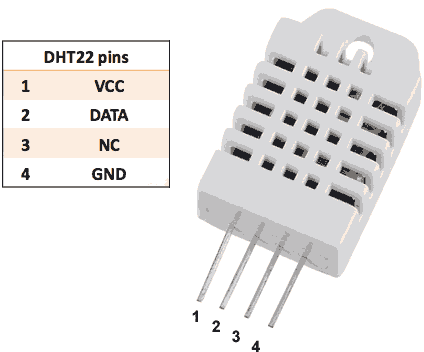
| DHT-22 Pin | Raspberry Pi Pin | | :—- | :—- | | DHT-22 Data | Raspberry Pi GPIO 4 | | DHT-22 VCC | Raspberry Pi 3.3V | | DHT-22 GND (-) | Raspberry Pi GND |
Finally, place a resistor (between 4.7K and 10K) between pin number 1 and 2 of the DHT sensor.
The following picture summarizes the connections for this project: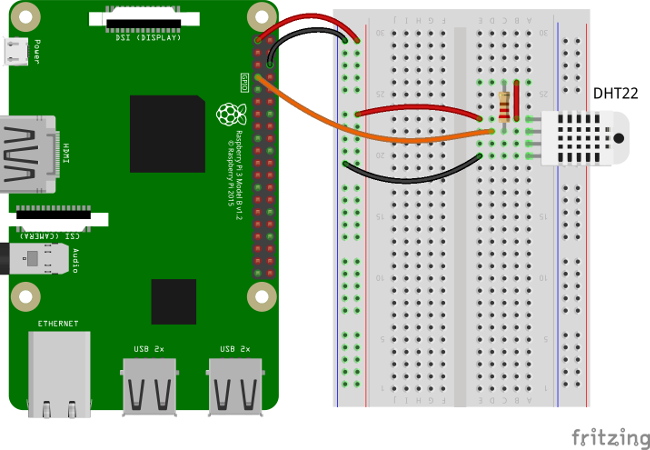
ThingsBoard configuration
Note ThingsBoard configuration steps are necessary only in case of local ThingsBoard installation. If you are using Live Demo instance all entities are pre-configured for your demo account. However, we recommend reviewing this steps because you will still need to get device access token to send requests to ThingsBoard.
Provision your device
This step contains instructions that are necessary to connect your device to ThingsBoard.
Open ThingsBoard Web UI (http://localhost:8080) in browser and login as tenant administrator
- login: tenant@thingsboard.org
- password: tenant
Goto “Devices” section. Click “+” button and create a device with the name “DHT22 Demo Device”.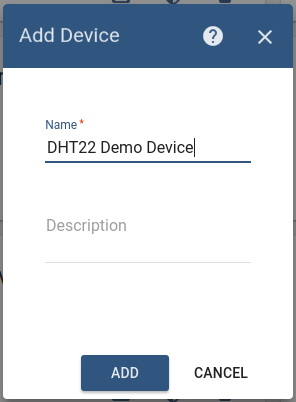
Once device created, open its details and click “Manage credentials”. Copy auto-generated access token from the “Access token” field. Please save this device token. It will be referred to later as $ACCESS_TOKEN.
Click “Copy Device ID” in device details to copy your device id to the clipboard. Paste your device id to some place, this value will be used in further steps.
Provision your dashboard
Download the dashboard file using this link. Use import/export instructions to import the dashboard to your ThingsBoard instance.
Programming the Raspberry Pi
MQTT library installation
The following command will install MQTT Python library:
sudo pip install paho-mqtt
Adafruit DHT library installation
Install python-dev package:
sudo apt-get install python-dev
Downloading and install the Adafruit DHT library:
git clone https://github.com/adafruit/Adafruit_Python_DHT.gitcd Adafruit_Python_DHTsudo python setup.py install
Application source code
Our application consists of a single python script that is well documented. You will need to modify THINGSBOARD_HOST constant to match your ThingsBoard server installation IP address or hostname. Use “demo.thingsboard.io” if you are using live demo server.
The value of ACCESS_TOKEN constant corresponds to sample DHT22 demo device. If you are using live demo server - get the access token for pre-provisioned “DHT22 Demo Device”.
- mqtt-dht22.py
|
resources/mqtt-dht22.py |
| :—- |
| ```
import os
import time
import sys
import Adafruit_DHT as dht
import paho.mqtt.client as mqtt
import json
|
| :—- |
| ```
import os
import time
import sys
import Adafruit_DHT as dht
import paho.mqtt.client as mqtt
import json
THINGSBOARD_HOST = ‘demo.thingsboard.io’ ACCESS_TOKEN = ‘DHT22_DEMO_TOKEN’
_# Data capture and upload interval in seconds. Less interval will eventually hang the DHT22. _INTERVAL=2
sensor_data = {‘temperature’: 0, ‘humidity’: 0}
next_reading = time.time()
client = mqtt.Client()
_# Set access token _client.username_pw_set(ACCESS_TOKEN)
_# Connect to ThingsBoard using default MQTT port and 60 seconds keepalive interval _client.connect(THINGSBOARD_HOST, 1883, 60)
client.loop_start()
try: while True: humidity,temperature = dht.read_retry(dht.DHT22, 4) humidity = round(humidity, 2) temperature = round(temperature, 2) print(u”Temperature: {:g}\u00b0C, Humidity: {:g}%”.format(temperature, humidity)) sensor_data[‘temperature’] = temperature sensor_data[‘humidity’] = humidity
_# Sending humidity and temperature data to ThingsBoard
_ client.publish(‘v1/devices/me/telemetry’, json.dumps(sensor_data), 1)
next_reading **+=** INTERVALsleep_time **=** next_reading**-**time.time()**if** sleep_time **>** 0:time.sleep(sleep_time)
except KeyboardInterrupt: pass
client.loop_stop() client.disconnect()
|<a name="running-the-application"></a>### Running the applicationThis simple command will launch the application:
Data visualization
Finally, open ThingsBoard Web UI. You can access this dashboard by logging in as a tenant administrator.
In case of local installation:
- login: tenant@thingsboard.org
- password: tenant
In case of live-demo server:
- login: your live-demo username (email)
- password: your live-demo password
See live-demo page for more details how to get your account.
Go to “Devices” section and locate “DHT22 Demo Device”, open device details and switch to “Latest telemetry” tab. If all is configured correctly you should be able to see latest values of “temperature” and “humidity” in the table.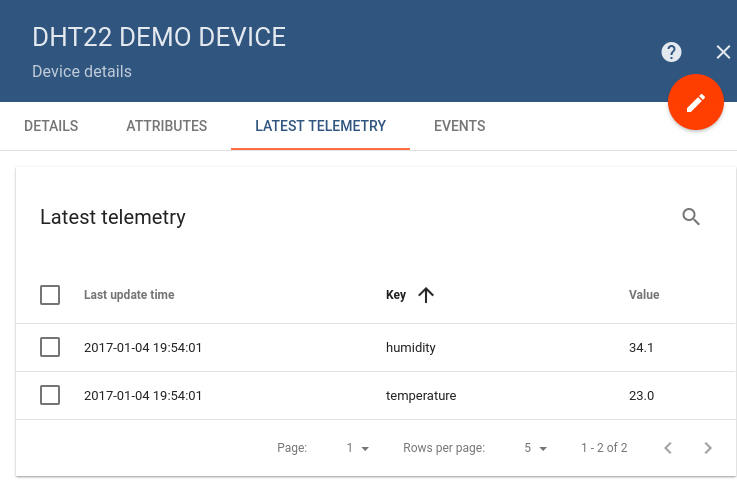
After, open “Dashboards” section then locate and open “DHT22: Temperature & Humidity Demo Dashboard”. As a result you will see two digital gauges and two time-series charts displaying temperature and humidity level (similar to dashboard image in the introduction).
See also
Browse other samples or explore guides related to main ThingsBoard features:
- Device attributes - how to use device attributes.
- Telemetry data collection - how to collect telemetry data.
- Using RPC capabilities - how to send commands to/from devices.
- Rule Engine - how to use rule engine to analyze data from devices.
- Data Visualization - how to visualize collected data.

若有收获,就点个赞吧
0 人点赞
