How to enable remote logging feature on ThingsBoard IoT Gateway
This guide will help you to enable remote logging and read logs from ThingsBoard IoT Gateway on your ThingsBoard platform instance.
For purpose of this guide, we will use following things:
- Locally installed instance of ThingsBoard platform (How to install you can read here).
- ThingsBoard IoT Gateway (How to install you can read here).
Step 1. Remote logging activation and setting the logging level
To activate and set logging level, please follow next steps:
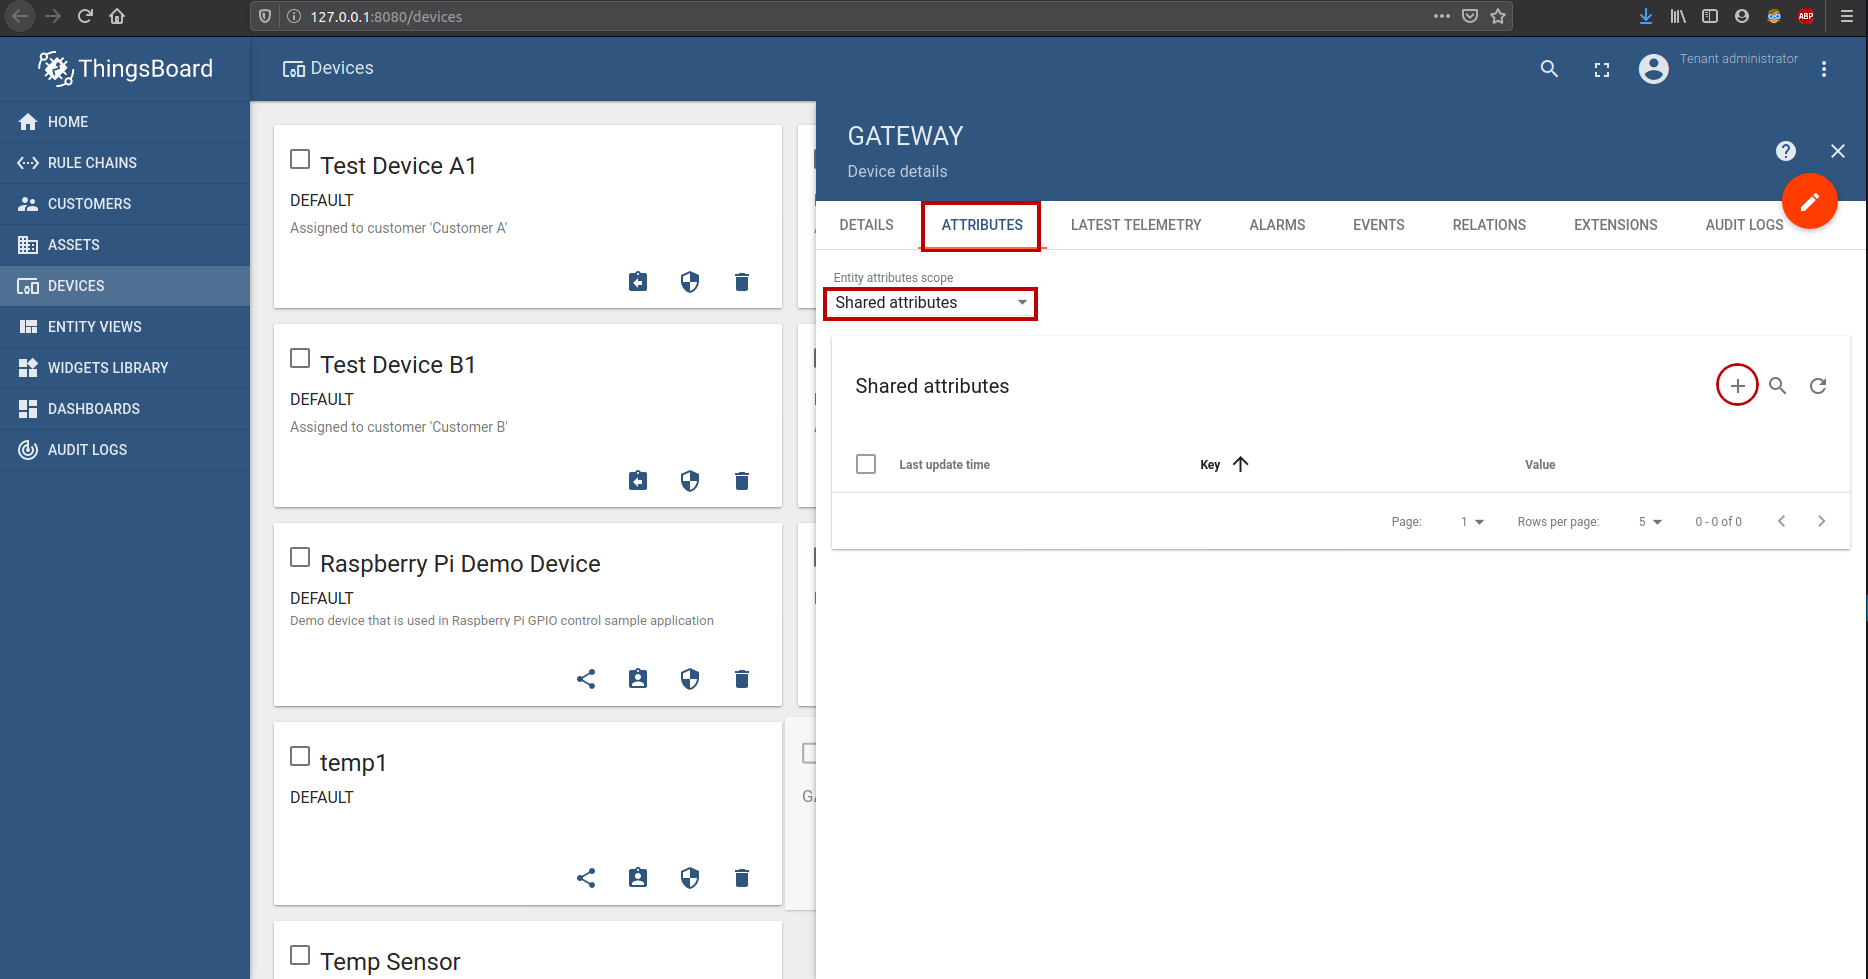
- Open the gateway device in the WEB UI.
- Go to a tab “ATTRIBUTES”.
- Select Shared Attributes from an Entity attribute scope list.
- Click + button.
- Fill a name field as RemoteLoggingLevel and set a value field one of the following logging levels:
Fill fields with the following values:
- The name field must be RemoteLoggingLevel
- The value field sets the logging level, the values can be as follows:
DEBUGINFOWARNINGERRORCRITICALNONE
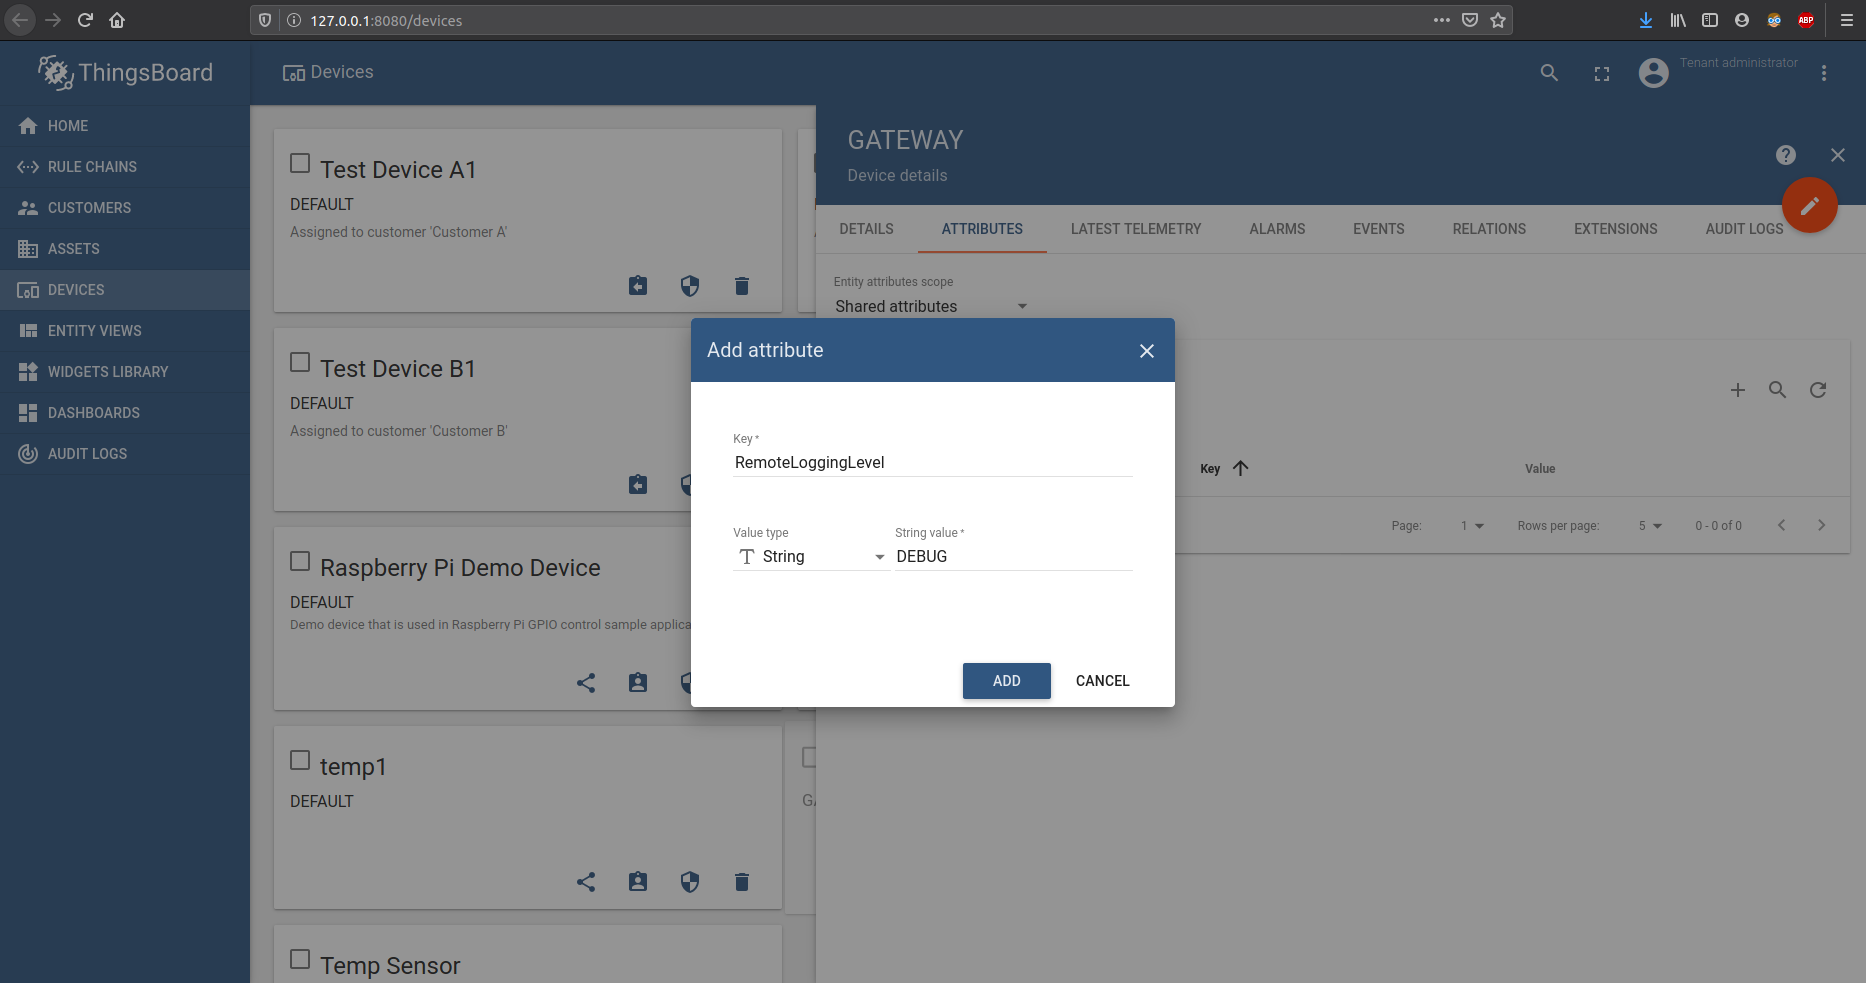
Click ADD
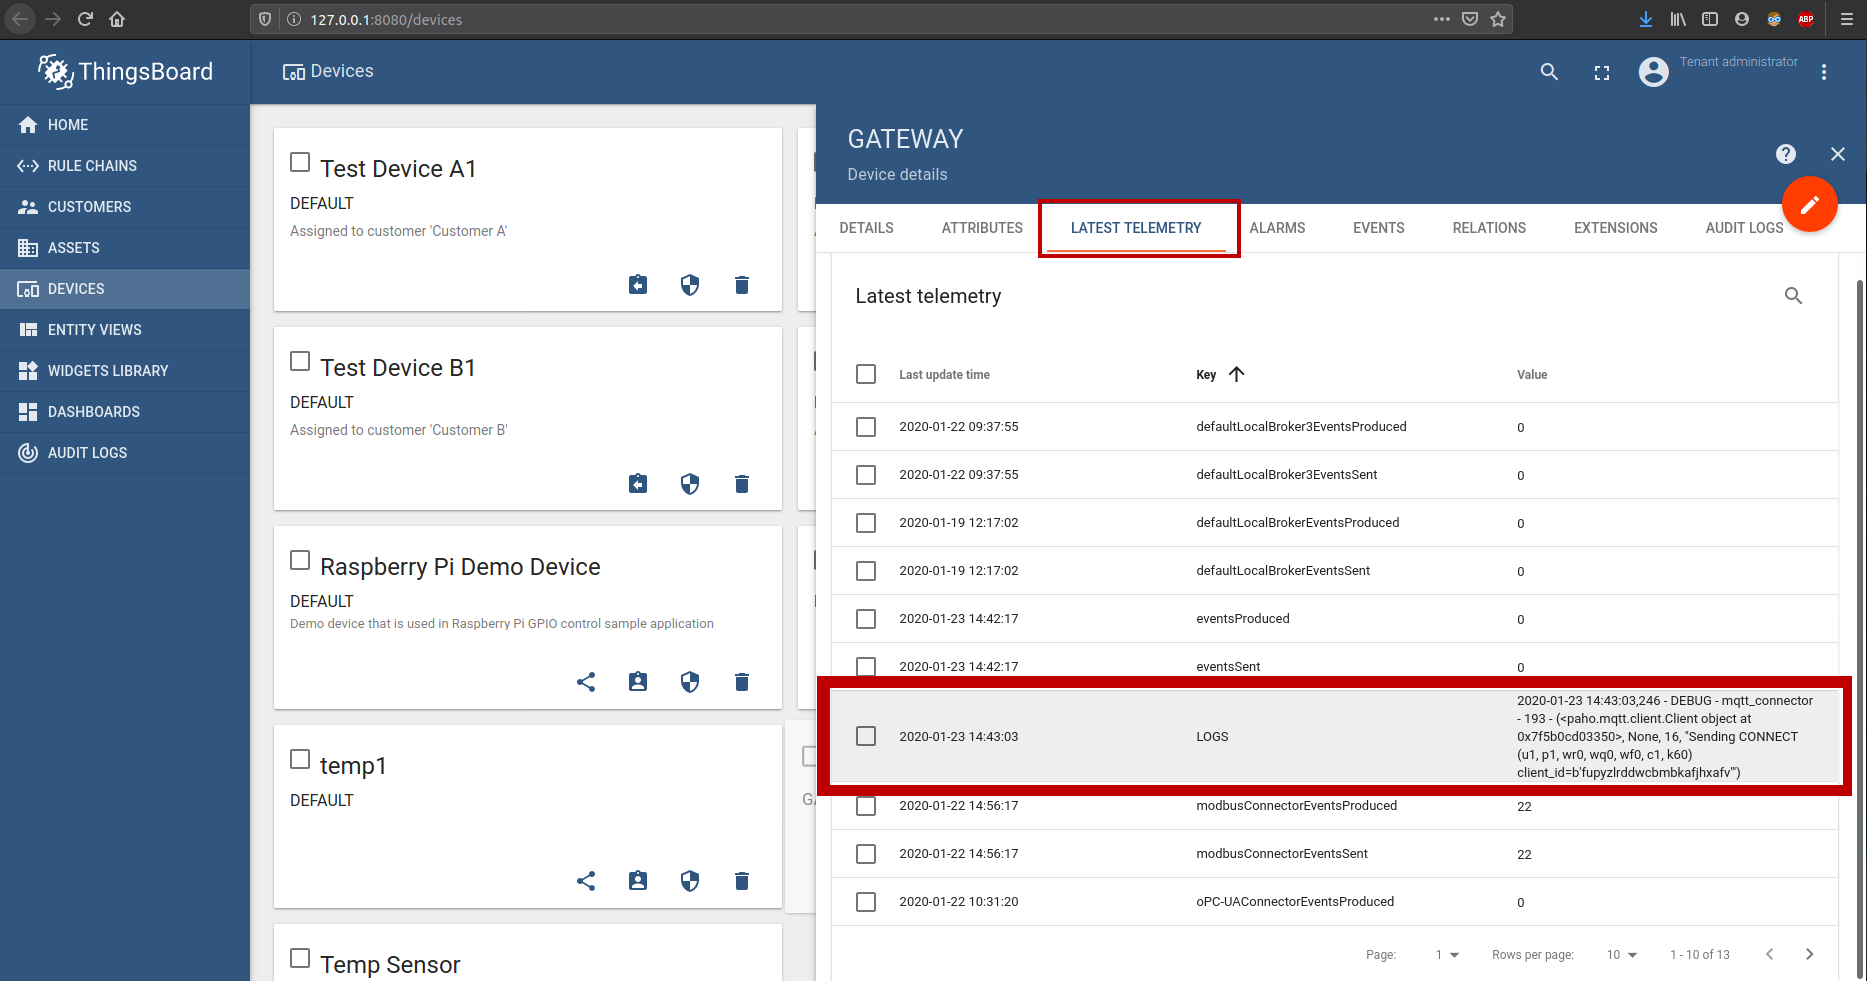
- [Optional] Launch your gateway in case it is not running.
- Open the LATEST TELEMETRY tab of your gateway device, and you will see the new telemetry key – LOGS.
Step 2. Display logs on a dashboard
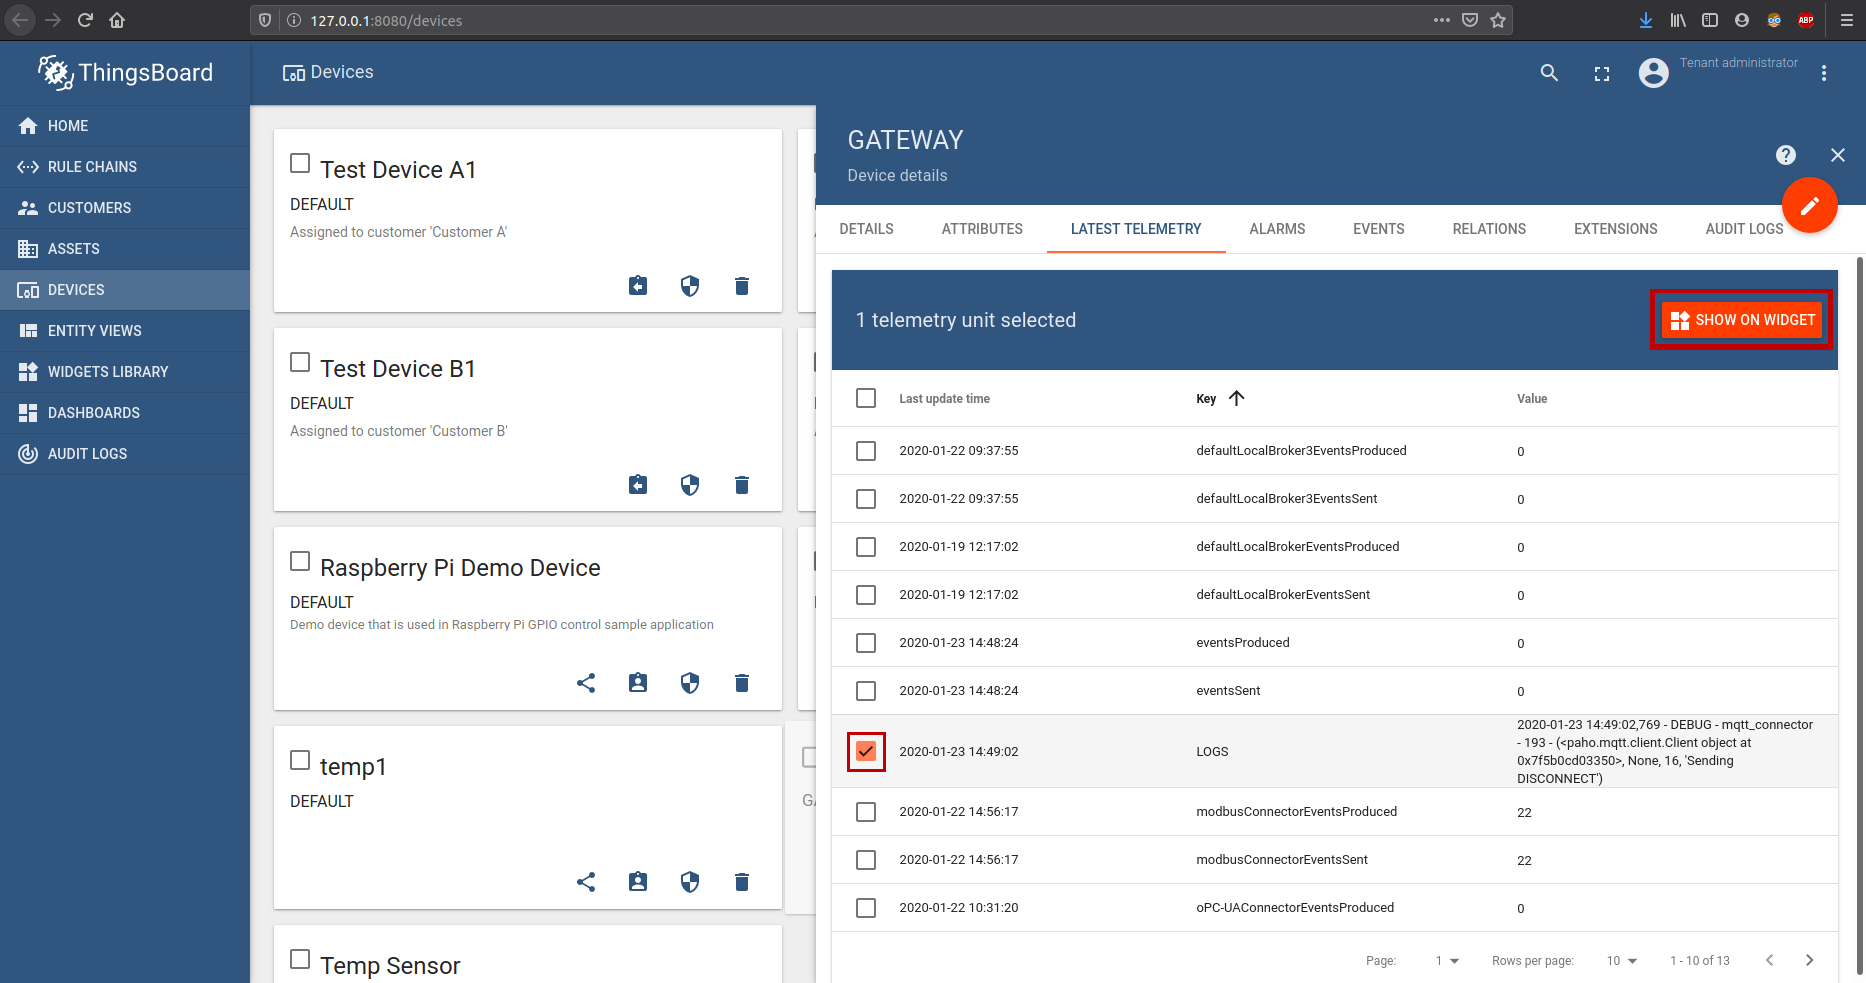
It may be not convenient to review logs in the Device details window. We should show them on a dashboard.
So we will be able to investigate all logs, not only the latest one.
To do this we use following steps:
- Check LOGS key and click SHOW IN WIDGET button:
- We will use the default Cards widget:
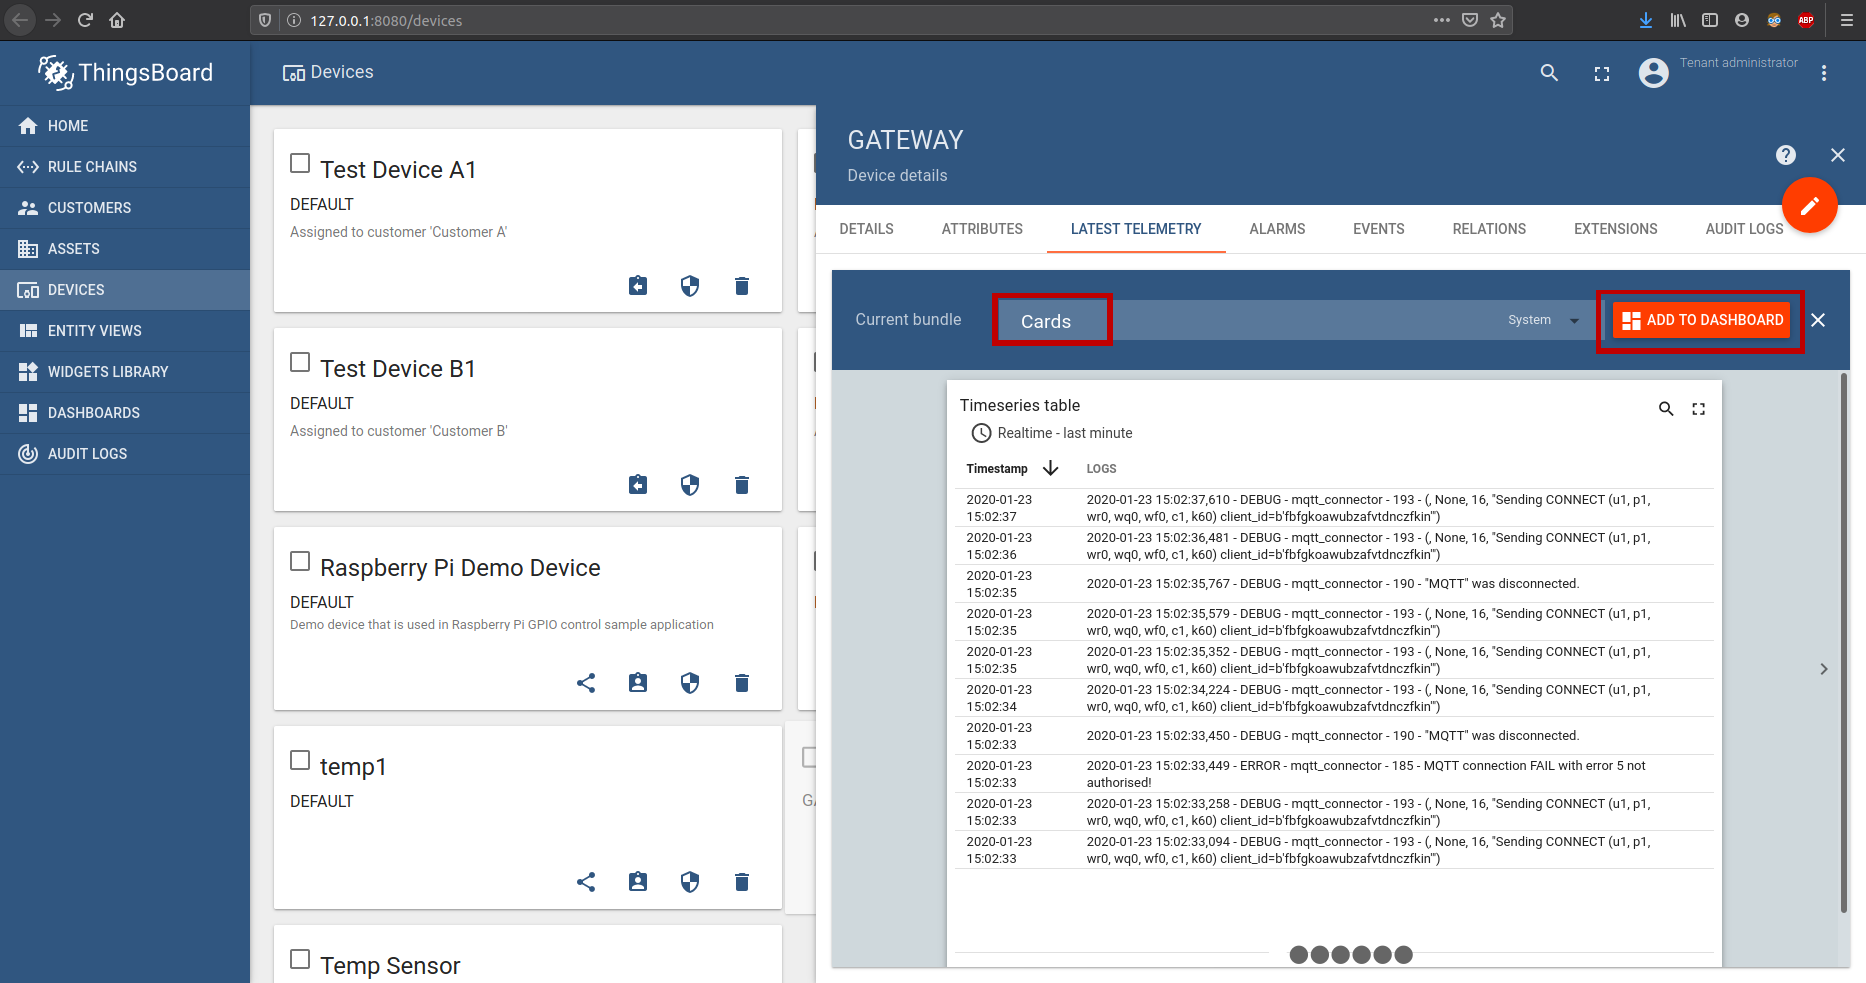
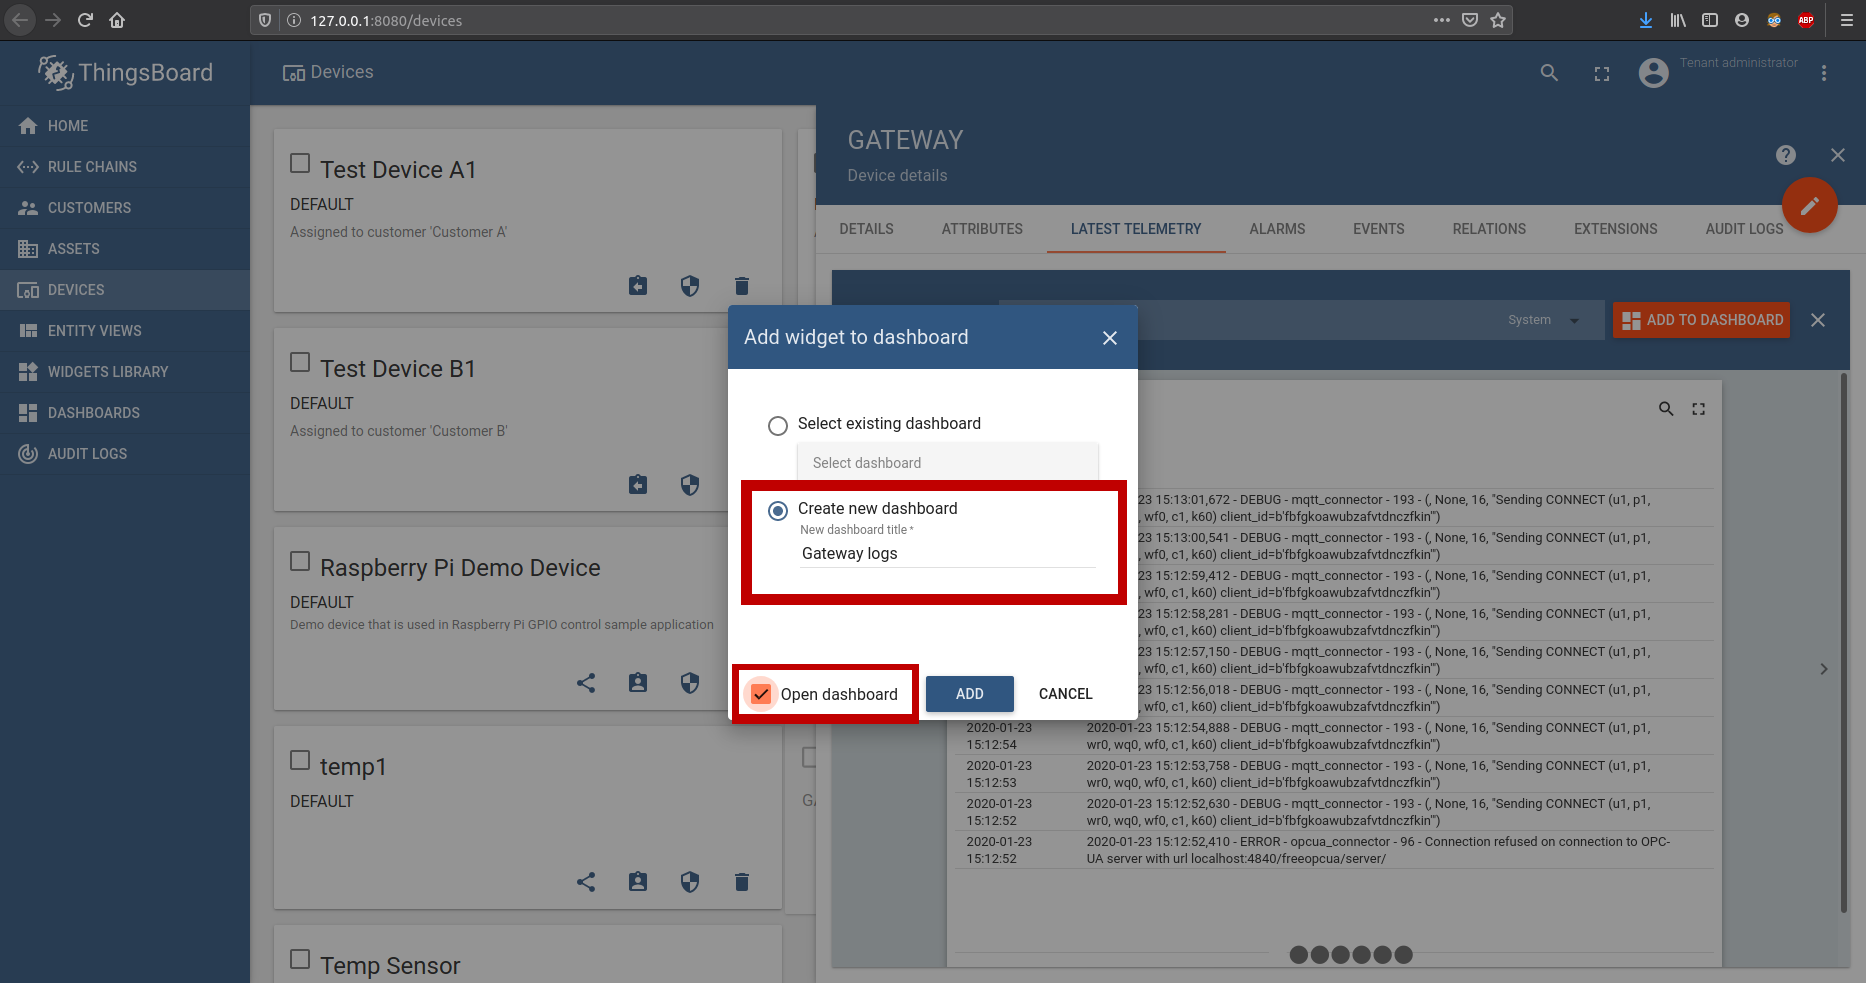
- Choose Timeseries table Card widget and add it to the Dashboard. It can be either the new one or the existing dashboard.
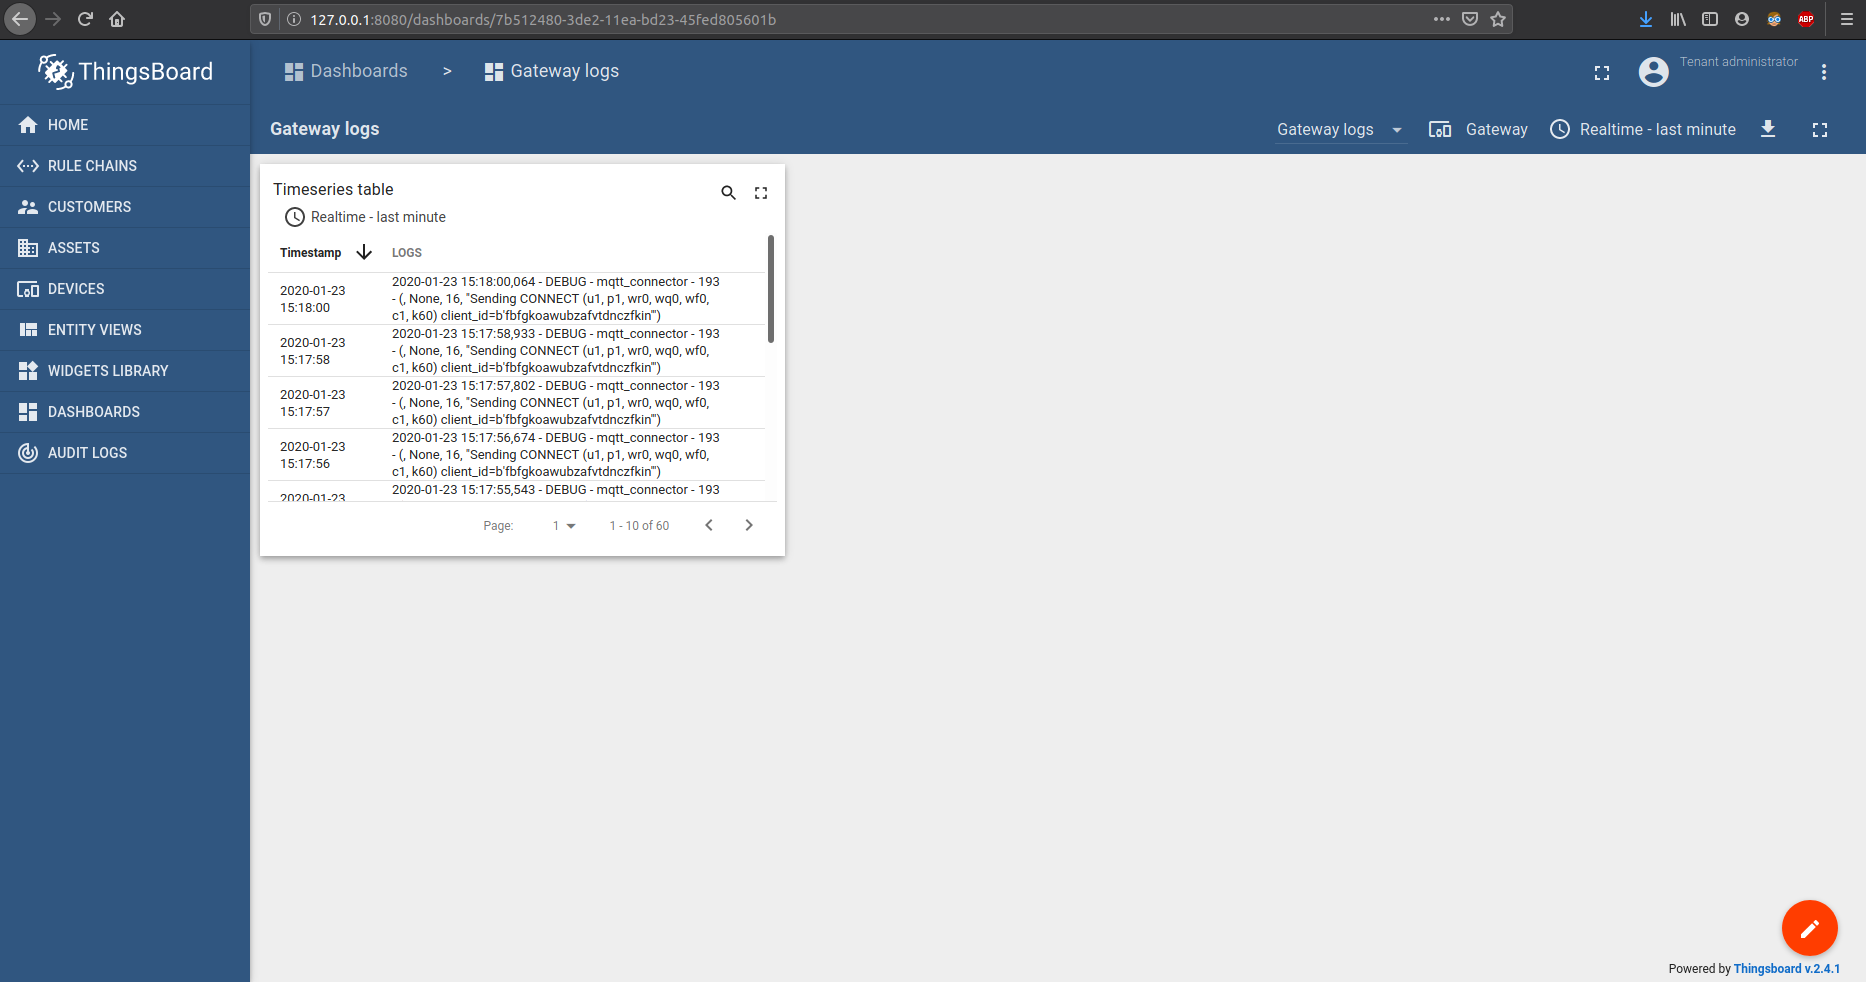
- As a result now we can monitor the status of the gateway device from ThingsBoard environment.
Next steps
Explore guides related to main ThingsBoard features:
- Data Visualization - how to visualize collected data.
- Device attributes - how to use device attributes.
- Telemetry data collection - how to collect telemetry data.
- Using RPC capabilities - how to send commands to/from devices.
- Rule Engine - how to use rule engine to analyze data from devices.

若有收获,就点个赞吧
0 人点赞
