基于 flink rest api 的 flink web admin,
支持任务持久化管理,JOB编辑、提交、启动、停止。
支持多集群发布任务,任务根据场景选择不同的集群。
支持手动Savepoint及指定Savepoint恢复任务。
支持数据源管理,加密保存数据源配置信息。
支持可视化的CDC数据同步任务,可视化配置单表,多表,全量及增量同步。 、
Flink1.13.2三种方式安装部署
https://www.aboutyun.com/forum.php?mod=viewthread&tid=31630&fromguid=hot
flink-admin 控制台
https://gitee.com/chongho/flink-admin.git
整合Apache Hudi+Mysql+FlinkCDC2.1+CDH6.3.0
一、环境准备
1.环境准备:
flink 1.13.1+hudi0.10+hive2.1.1+cdh6.3.0+mysql5.7+flinkcdc2.1+flink web平台
二.编译hudi(这个编译是以前的一个测试版本,编译大同小异)
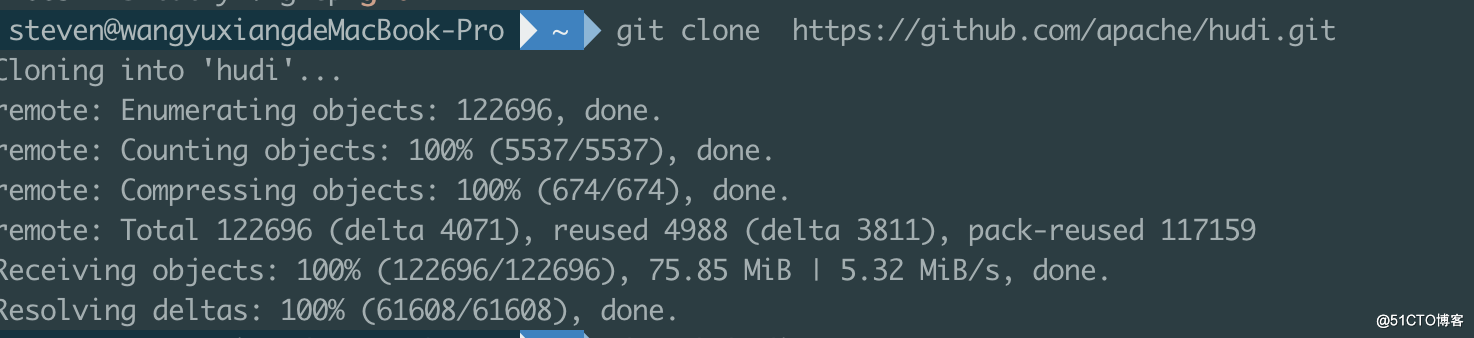
1.使用git命令下载hudi0.10的代码
steven@wangyuxiangdeMacBook-Pro ~ git clone https://github.com/apache/hudi.gitCloning into 'hudi'...remote: Enumerating objects: 122696, done.remote: Counting objects: 100% (5537/5537), done.remote: Compressing objects: 100% (674/674), done.remote: Total 122696 (delta 4071), reused 4988 (delta 3811), pack-reused 117159Receiving objects: 100% (122696/122696), 75.85 MiB | 5.32 MiB/s, done.Resolving deltas: 100% (61608/61608), done.
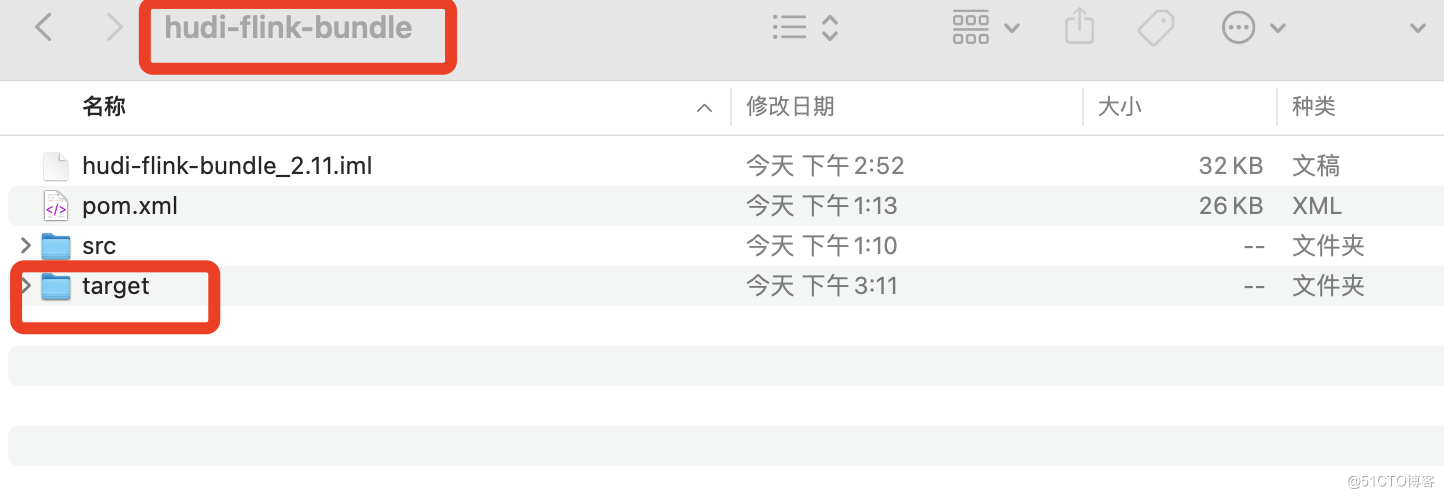
2.使用idea打开hudi更改packging—hudi-flink-bundle下的pom.xml,更改flink-bundel-shade-hive2下的hive-version更改为chd6.3.0的版本。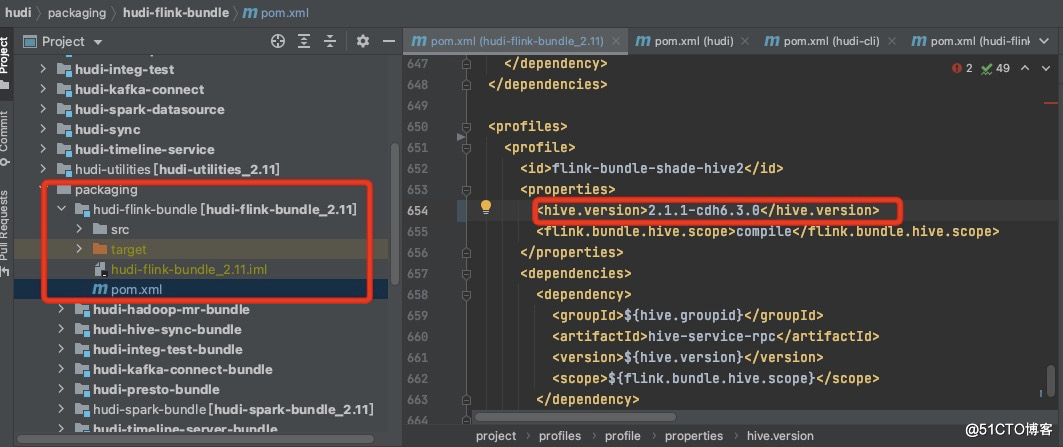
3.使用命令进行编译
mvn clean install -DskipTests -DskipITs -Dcheckstyle.skip=true -Drat.skip=true -Dhadoop.version=3.0.0 -Pflink-bundle-shade-hive21.因为chd6.3.0使用的是hadoop3.0.0,所以要指定hadoop的版本2.使用的是hive2.1.1的版本,也要指定hive的版本,不然使用sync to hive的时候,会报类的冲突问题。

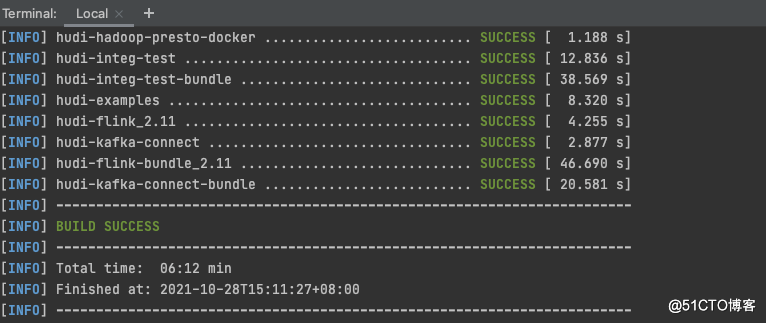
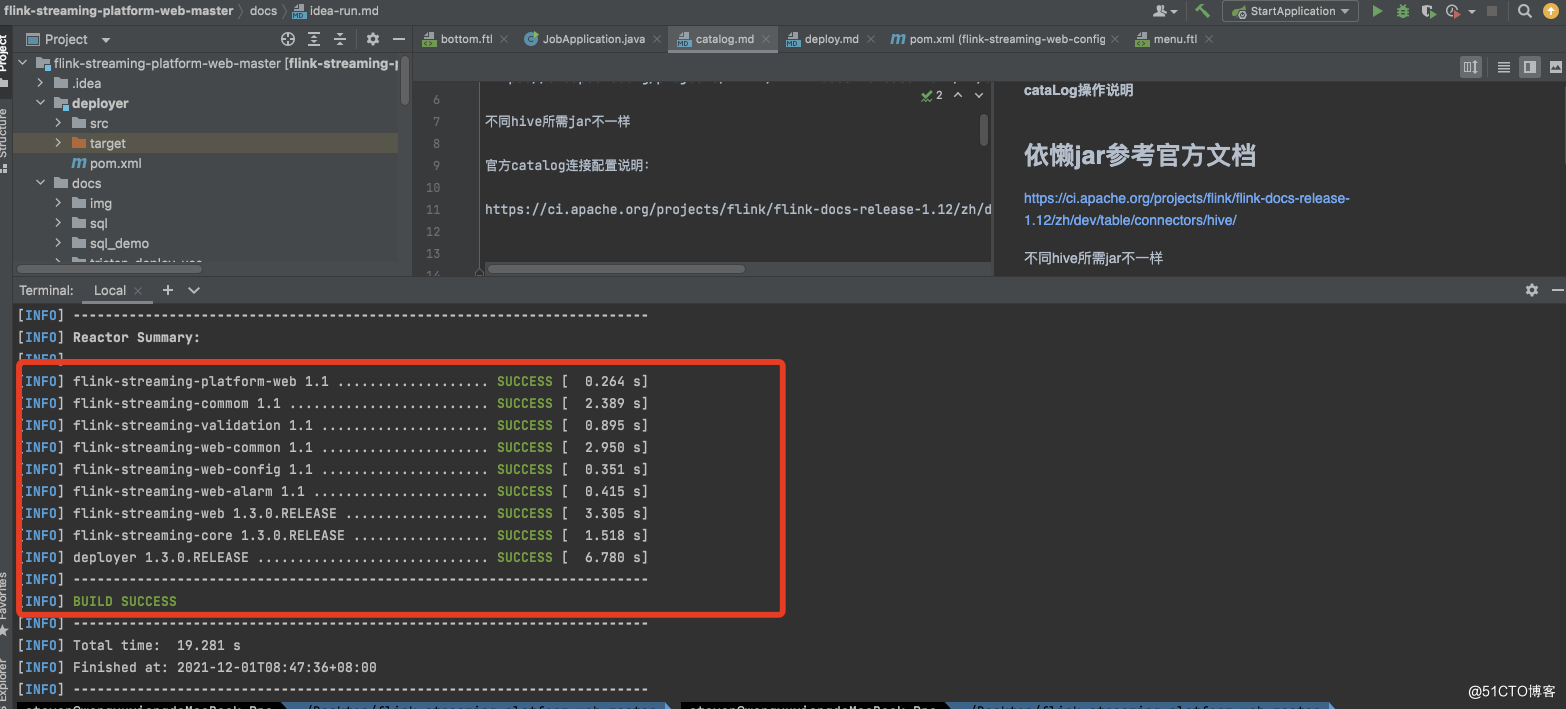
出现以上的证明编译成功。
5.在packaging下面各个组件中有编译好的jar包。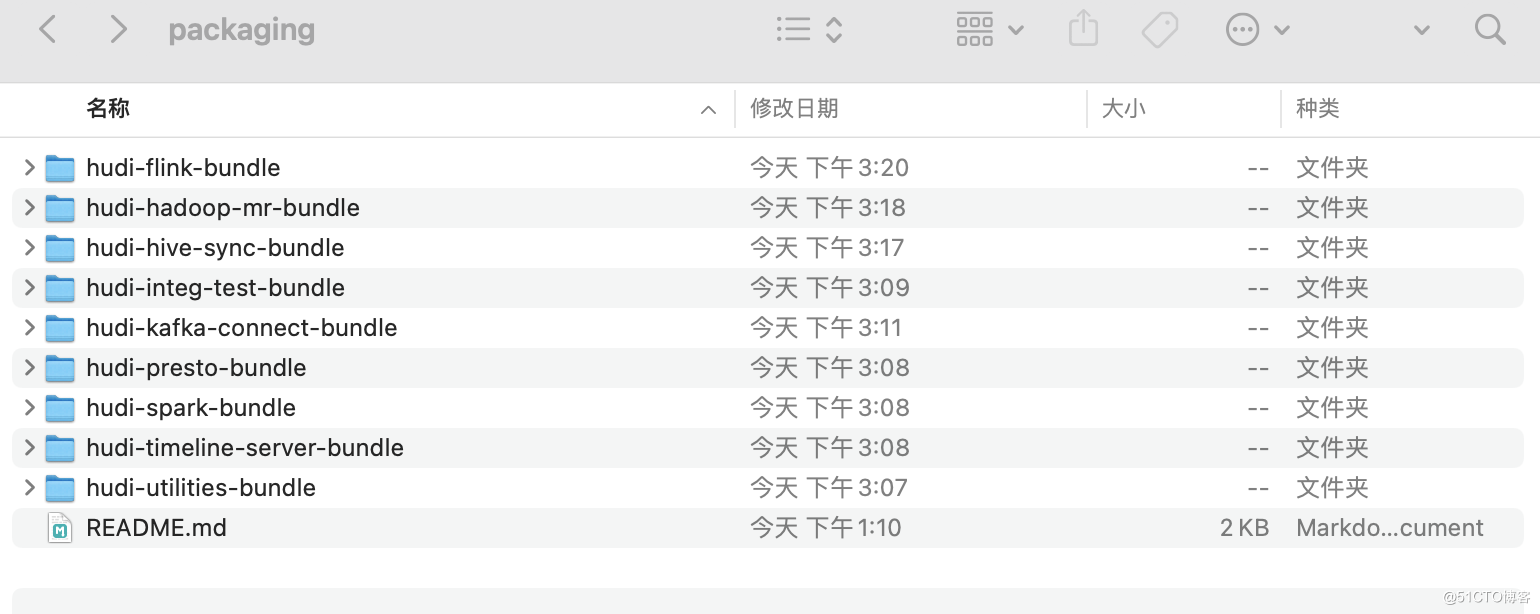
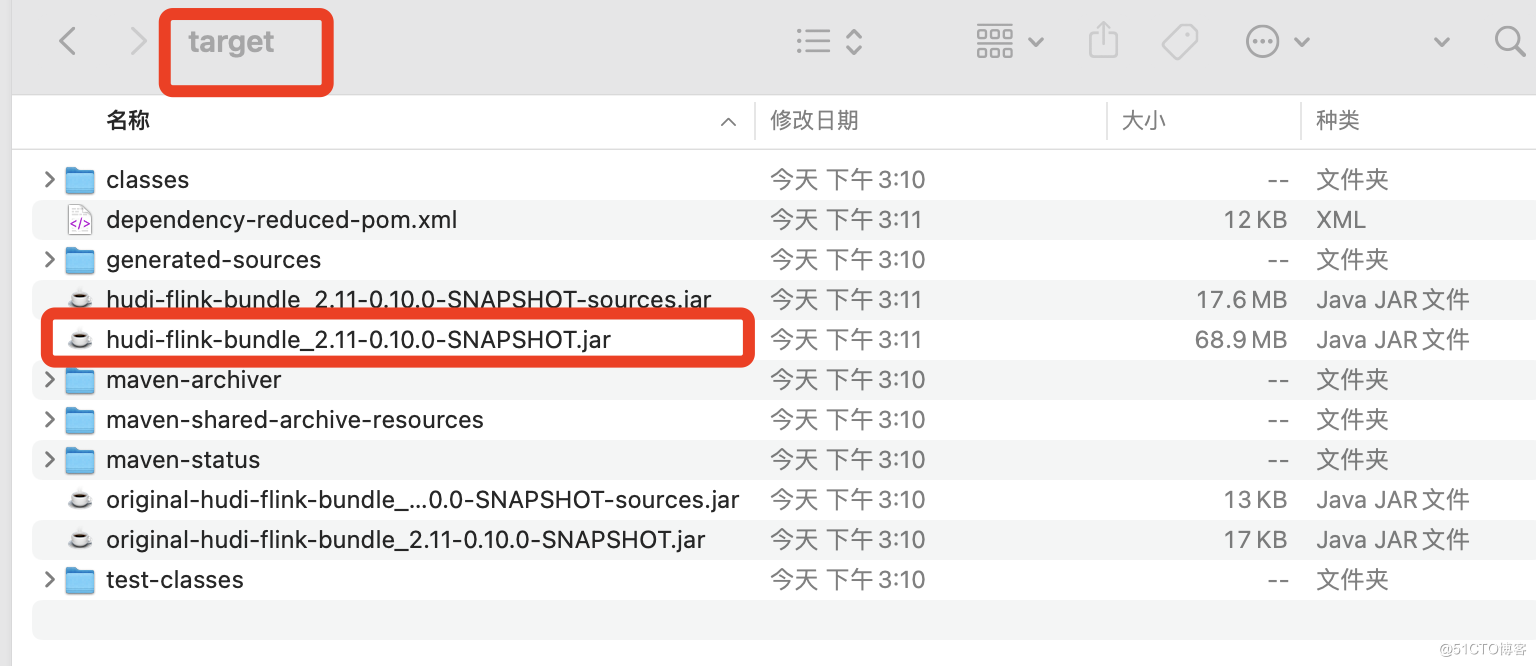
6.部署同步sync to hive的环境
将hudi-hadoop-mr-bundle-0.10.0-SNAPSHOT.jar包放入到以下路径
路径如下:
[flink@dbos-bigdata-test005 jars]$ pwd/opt/cloudera/parcels/CDH-6.3.0-1.cdh6.3.0.p0.1279813/jars


进入到hive的lib路径,每一台hive节点都要放[flink@dbos-bigdata-test005 lib]$ pwd/opt/cloudera/parcels/CDH-6.3.0-1.cdh6.3.0.p0.1279813/lib/hive/lib建立软链接[flink@dbos-bigdata-test005 lib]$ ln -s ../../../jars/hudi-hadoop-mr-bundle-0.10.0-SNAPSHOT.jar hudi-hadoop-mr-bundle-0.10.0-SNAPSHOT.jar

7.进入平台操作安装 YARN MapReduce 框架 JAR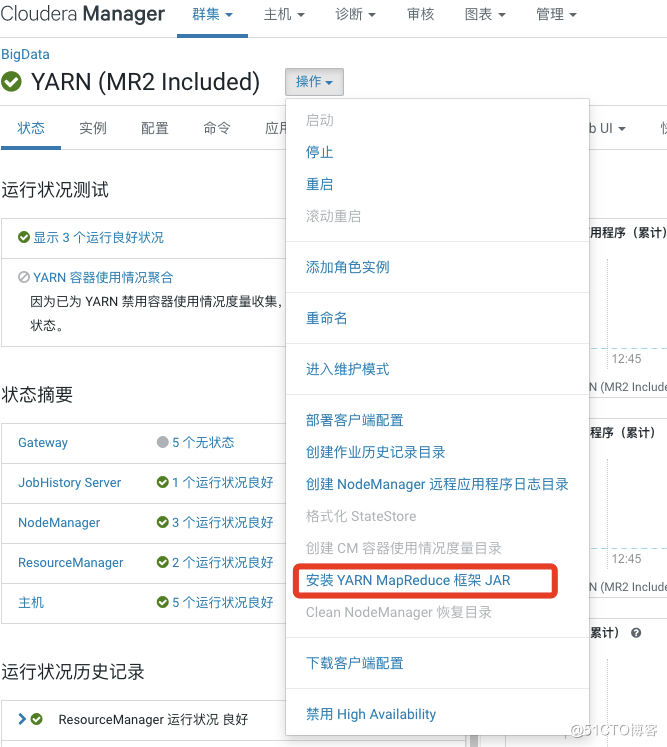
8.hive的辅助jar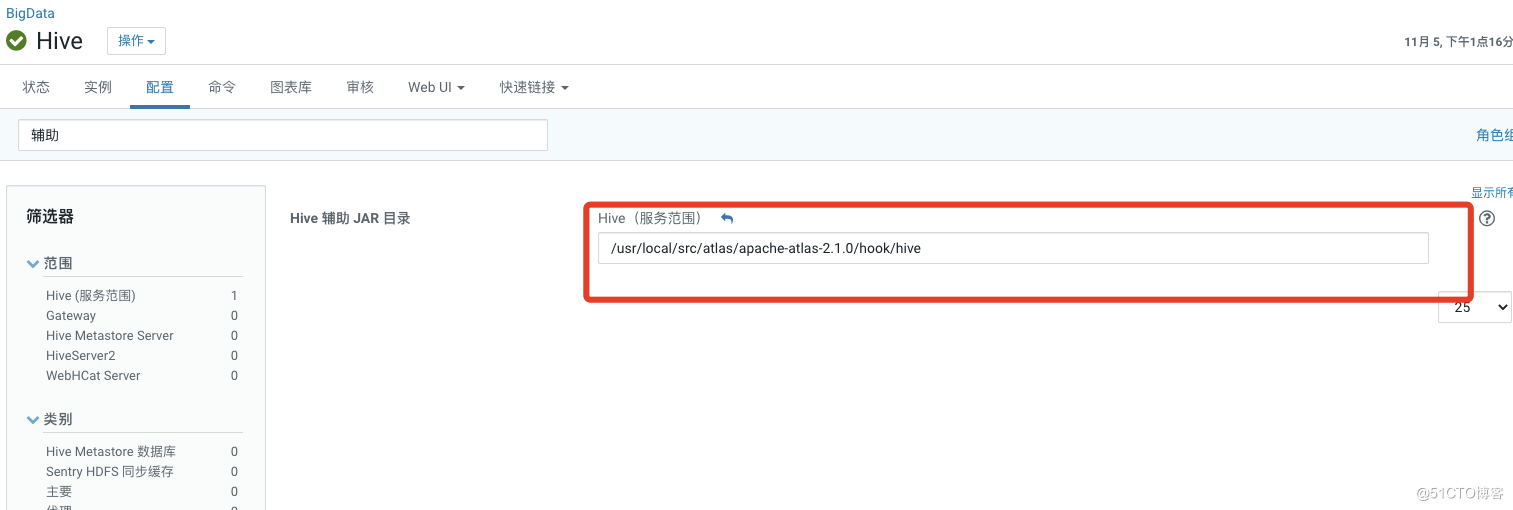
因为后面考虑到hudi的数据要存到oss上,所以要放这几个包进来(关于oss的配置详细可参考oss配置文档)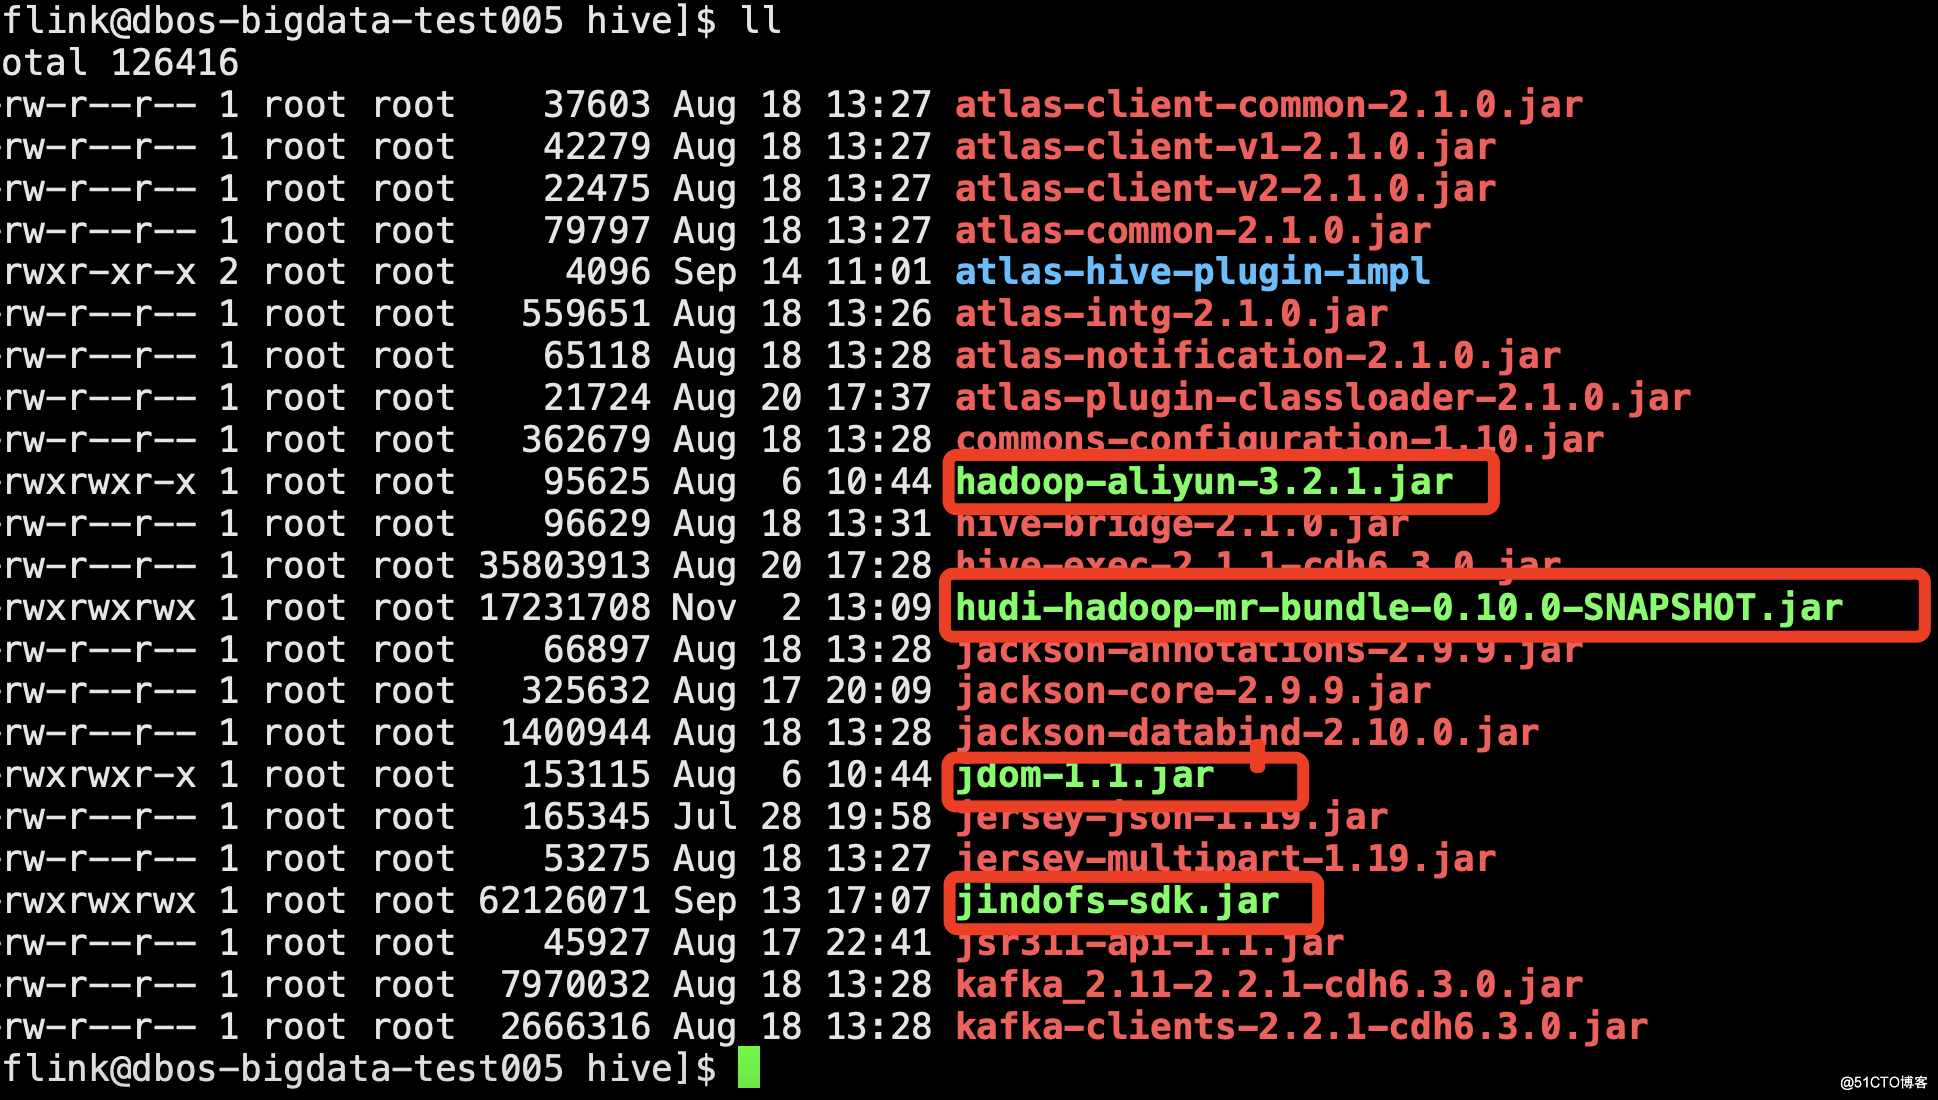
9.重启hive,使配置生效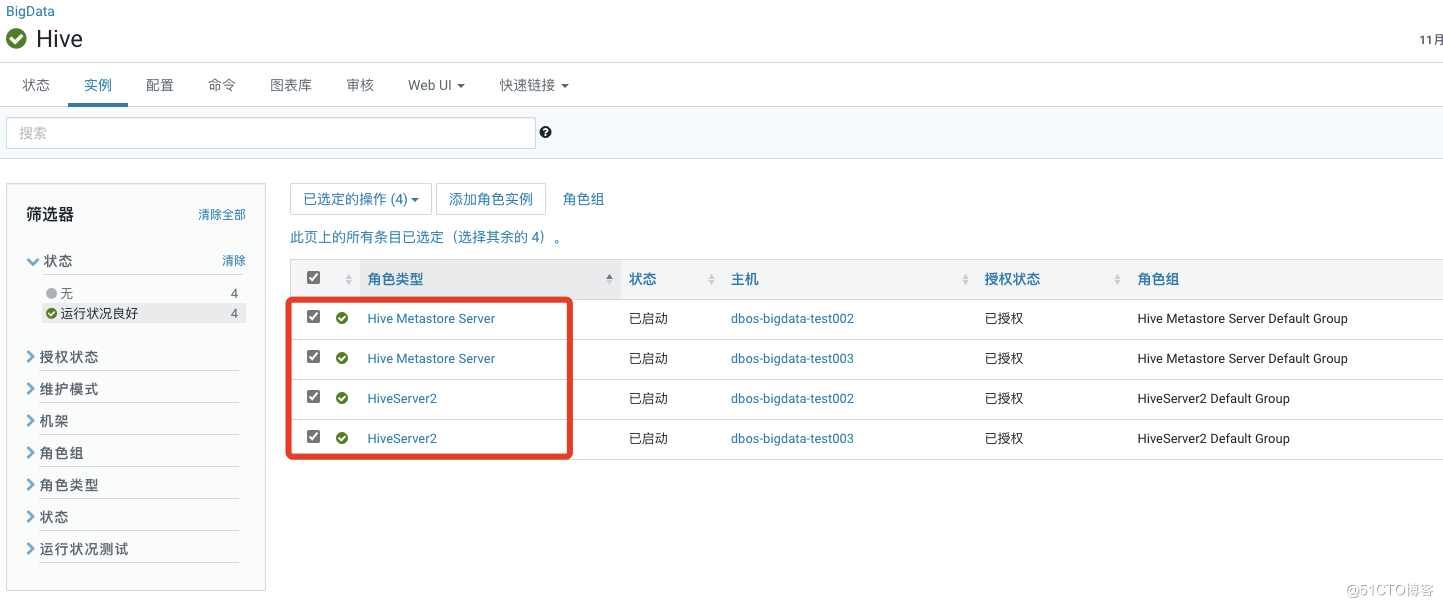
二、flink环境:
1.配置flink on yarn模式
配置如下:flink-conf.yaml的配置文件如下
################################################################################# Licensed to the Apache Software Foundation (ASF) under one# or more contributor license agreements. See the NOTICE file# distributed with this work for additional information# regarding copyright ownership. The ASF licenses this file# to you under the Apache License, Version 2.0 (the# "License"); you may not use this file except in compliance# with the License. You may obtain a copy of the License at## http://www.apache.org/licenses/LICENSE-2.0## Unless required by applicable law or agreed to in writing, software# distributed under the License is distributed on an "AS IS" BASIS,# WITHOUT WARRANTIES OR CONDITIONS OF ANY KIND, either express or implied.# See the License for the specific language governing permissions and# limitations under the License.#################################################################################==============================================================================## Execution##==============================================================================# execution.target: yarn-per-job#execution.target: localexecution.checkpointing.externalized-checkpoint-retention: RETAIN_ON_CANCELLATION#进行checkpointing的间隔时间(单位:毫秒)execution.checkpointing.interval: 30000execution.checkpointing.mode: EXACTLY_ONCE#execution.checkpointing.prefer-checkpoint-for-recovery: trueclassloader.check-leaked-classloader: false#==============================================================================# Common#==============================================================================# The external address of the host on which the JobManager runs and can be# reached by the TaskManagers and any clients which want to connect. This setting# is only used in Standalone mode and may be overwritten on the JobManager side# by specifying the --host <hostname> parameter of the bin/jobmanager.sh executable.# In high availability mode, if you use the bin/start-cluster.sh script and setup# the conf/masters file, this will be taken care of automatically. Yarn/Mesos# automatically configure the host name based on the hostname of the node where the# JobManager runs.jobmanager.rpc.address: dbos-bigdata-test005# The RPC port where the JobManager is reachable.jobmanager.rpc.port: 6123akka.framesize: 10485760b# The total process memory size for the JobManager.## Note this accounts for all memory usage within the JobManager process, including JVM metaspace and other overhead.jobmanager.memory.process.size: 1024m# The total process memory size for the TaskManager.## Note this accounts for all memory usage within the TaskManager process, including JVM metaspace and other overhead.#taskmanager.memory.process.size: 1728mtaskmanager.heap.size: 1024m# To exclude JVM metaspace and overhead, please, use total Flink memory size instead of 'taskmanager.memory.process.size'.# It is not recommended to set both 'taskmanager.memory.process.size' and Flink memory.## taskmanager.memory.flink.size: 1280m# The number of task slots that each TaskManager offers. Each slot runs one parallel pipeline.taskmanager.numberOfTaskSlots: 1# The parallelism used for programs that did not specify and other parallelism.parallelism.default: 1# The default file system scheme and authority.## By default file paths without scheme are interpreted relative to the local# root file system 'file:///'. Use this to override the default and interpret# relative paths relative to a different file system,# for example 'hdfs://mynamenode:12345'## fs.default-schemeenv.java.home key: /usr/java/jdk1.8.0_181-cloudera#==============================================================================# High Availability#==============================================================================# The high-availability mode. Possible options are 'NONE' or 'zookeeper'.#high-availability: zookeeper# The path where metadata for master recovery is persisted. While ZooKeeper stores# the small ground truth for checkpoint and leader election, this location stores# the larger objects, like persisted dataflow graphs.## Must be a durable file system that is accessible from all nodes# (like HDFS, S3, Ceph, nfs, ...)high-availability.storageDir: hdfs:///flink/ha/# The list of ZooKeeper quorum peers that coordinate the high-availability# setup. This must be a list of the form:# "host1:clientPort,host2:clientPort,..." (default clientPort: 2181)## high-availability.zookeeper.quorum: localhost:2181high-availability.zookeeper.quorum: dbos-bigdata-test003:2181,dbos-bigdata-test004:2181,dbos-bigdata-test005:2181# ACL options are based on https://zookeeper.apache.org/doc/r3.1.2/zookeeperProgrammers.html#sc_BuiltinACLSchemes# It can be either "creator" (ZOO_CREATE_ALL_ACL) or "open" (ZOO_OPEN_ACL_UNSAFE)# The default value is "open" and it can be changed to "creator" if ZK security is enabled## high-availability.zookeeper.client.acl: open#==============================================================================# Fault tolerance and checkpointing#==============================================================================# The backend that will be used to store operator state checkpoints if# checkpointing is enabled.## Supported backends are 'jobmanager', 'filesystem', 'rocksdb', or the# <class-name-of-factory>.#state.backend: filesystem# Directory for checkpoints filesystem, when using any of the default bundled# state backends.#state.checkpoints.dir: hdfs://bigdata/flink-checkpoints#state.checkpoints.dir: hdfs:///flink/checkpoints#state.savepoints.dir: hdfs:///flink/savepoints# Default target directory for savepoints, optional.## state.savepoints.dir: hdfs://namenode-host:port/flink-savepoints# Flag to enable/disable incremental checkpoints for backends that# support incremental checkpoints (like the RocksDB state backend).## state.backend.incremental: false# The failover strategy, i.e., how the job computation recovers from task failures.# Only restart tasks that may have been affected by the task failure, which typically includes# downstream tasks and potentially upstream tasks if their produced data is no longer available for consumption.jobmanager.execution.failover-strategy: region#==============================================================================# Rest & web frontend#==============================================================================# The port to which the REST client connects to. If rest.bind-port has# not been specified, then the server will bind to this port as well.##rest.port: 8081# The address to which the REST client will connect to##rest.address: 0.0.0.0# Port range for the REST and web server to bind to.## rest.bind-port: 65535-80900# The address that the REST & web server binds to##rest.bind-address: 0.0.0.0# Flag to specify whether job submission is enabled from the web-based# runtime monitor. Uncomment to disable.#web.submit.enable: false#==============================================================================# Advanced#==============================================================================# Override the directories for temporary files. If not specified, the# system-specific Java temporary directory (java.io.tmpdir property) is taken.## For framework setups on Yarn or Mesos, Flink will automatically pick up the# containers' temp directories without any need for configuration.## Add a delimited list for multiple directories, using the system directory# delimiter (colon ':' on unix) or a comma, e.g.:# /data1/tmp:/data2/tmp:/data3/tmp## Note: Each directory entry is read from and written to by a different I/O# thread. You can include the same directory multiple times in order to create# multiple I/O threads against that directory. This is for example relevant for# high-throughput RAIDs.## io.tmp.dirs: /tmp# The classloading resolve order. Possible values are 'child-first' (Flink's default)# and 'parent-first' (Java's default).## Child first classloading allows users to use different dependency/library# versions in their application than those in the classpath. Switching back# to 'parent-first' may help with debugging dependency issues.## classloader.resolve-order: child-first# The amount of memory going to the network stack. These numbers usually need# no tuning. Adjusting them may be necessary in case of an "Insufficient number# of network buffers" error. The default min is 64MB, the default max is 1GB.## taskmanager.memory.network.fraction: 0.1# taskmanager.memory.network.min: 64mb# taskmanager.memory.network.max: 1gb#==============================================================================# Flink Cluster Security Configuration#==============================================================================# Kerberos authentication for various components - Hadoop, ZooKeeper, and connectors -# may be enabled in four steps:# 1. configure the local krb5.conf file# 2. provide Kerberos credentials (either a keytab or a ticket cache w/ kinit)# 3. make the credentials available to various JAAS login contexts# 4. configure the connector to use JAAS/SASL# The below configure how Kerberos credentials are provided. A keytab will be used instead of# a ticket cache if the keytab path and principal are set.# security.kerberos.login.use-ticket-cache: true# security.kerberos.login.keytab: /path/to/kerberos/keytab# security.kerberos.login.principal: flink-user# The configuration below defines which JAAS login contexts# security.kerberos.login.contexts: Client,KafkaClient#==============================================================================# ZK Security Configuration#==============================================================================# Below configurations are applicable if ZK ensemble is configured for security# Override below configuration to provide custom ZK service name if configured# zookeeper.sasl.service-name: zookeeper# The configuration below must match one of the values set in "security.kerberos.login.contexts"# zookeeper.sasl.login-context-name: Client#==============================================================================# HistoryServer#==============================================================================# The HistoryServer is started and stopped via bin/historyserver.sh (start|stop)# Directory to upload completed jobs to. Add this directory to the list of# monitored directories of the HistoryServer as well (see below).#jobmanager.archive.fs.dir: hdfs:///completed-jobs/# The address under which the web-based HistoryServer listens.#historyserver.web.address: 0.0.0.0# The port under which the web-based HistoryServer listens.#historyserver.web.port: 8082# Comma separated list of directories to monitor for completed jobs.#historyserver.archive.fs.dir: hdfs:///completed-jobs/# Interval in milliseconds for refreshing the monitored directories.#historyserver.archive.fs.refresh-interval: 10000env.log.dir: /tmp/flinkhigh-availability.zookeeper.path.root: /flink
2.配置flink的环境变量
vim /etc/profile以下是环境变量,根据自己的版本进行更改#set default jdk1.8 envexport JAVA_HOME=/usr/java/jdk1.8.0_181-clouderaexport JRE_HOME=/usr/java/jdk1.8.0_181-cloudera/jreexport CLASSPATH=.:${JAVA_HOME}/lib:${JRE_HOME}/libexport HADOOP_CONF_DIR=/etc/hadoop/confexport HADOOP_CLASSPATH=`hadoop classpath`export HBASE_CONF_DIR=/etc/hbase/confexport FLINK_HOME=/opt/flinkexport HIVE_HOME=/opt/cloudera/parcels/CDH-6.3.0-1.cdh6.3.0.p0.1279813/lib/hiveexport HIVE_CONF_DIR=/etc/hive/confexport M2_HOME=/usr/local/maven/apache-maven-3.5.4export CANAL_ADMIN_HOME=/data/canal/adminexport CANAL_SERVER_HOME=/data/canal/deployerexport PATH=${JAVA_HOME}/bin:${JRE_HOME}/bin:${FLINK_HOME}/bin:${M2_HOME}/bin:${HIVE_HOME}/bin:${CANAL_SERVER_HOME}/bin:${CANAL_ADMIN_HOME}/bin:$PATH
3.查看flink是否能正常使用
4.hudi编译好的jar包和flinkcdc的jar包放到flink的lib下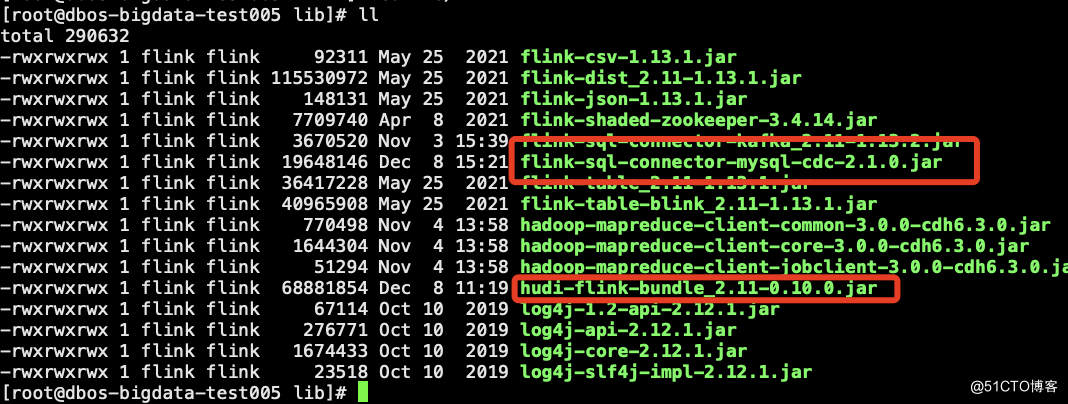
flinkcdc2.1的jar包下载地址
https://github.com/ververica/flink-cdc-connectors/releases
5.以下三个包也要放到flink的lib下,否则同步数据到hive的时候会报错。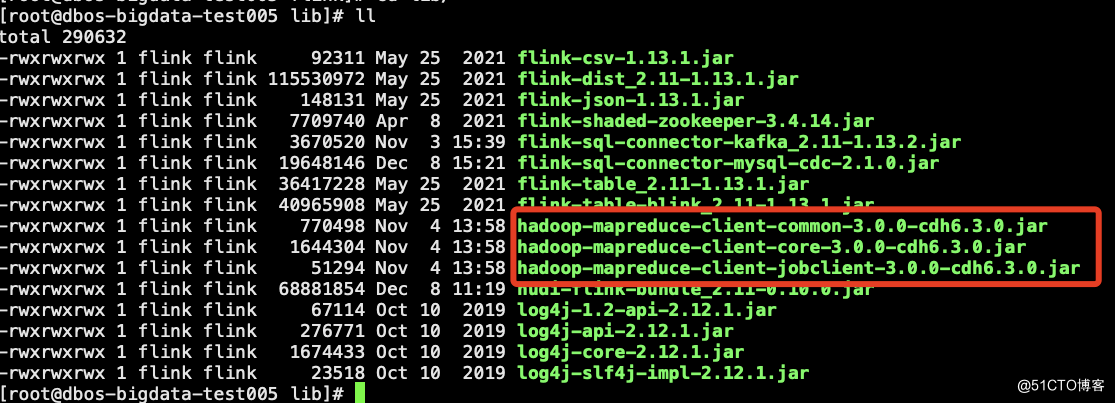
6.flink-sql的web的安装与部署
1.github上的下载地址https://github.com/zhp8341/flink-streaming-platform-web2.安装地址https://github.com/zhp8341/flink-streaming-platform-web/blob/master/docs/deploy.md
7.编译
mvn clean package -Dmaven.test.skip=true
8.部署
2、flink-streaming-platform-web安装(一定要和flink部署在同一台)a:下载最新版本 并且解压 https://github.com/zhp8341/flink-streaming-platform-web/releases/tar -xvf flink-streaming-platform-web.tar.gzb:执行mysql语句mysql 版本5.6+以上创建数据库 数据库名:flink_web执行表语句语句地址 https://github.com/zhp8341/flink-streaming-platform-web/blob/master/docs/sql/flink_web.sqlc:修改数据库连接配置/flink-streaming-platform-web/conf/application.properties改成上面建好的mysql地址关于数据库连接配置 需要看清楚你 useSSL=true 你的mysql是否支持 如果不支持可以直接 useSSL=falsed:启动webcd /XXXX/flink-streaming-platform-web/bin启动 : sh deploy.sh start停止 : sh deploy.sh stop日志目录地址: /XXXX/flink-streaming-platform-web/logs/一定 一定 一定 要到bin目录下再执行deploy.sh 否则无法启动e:登录http://${ip或者hostname}:9084/ 如 : http://hadoop003:9084/admin/index登录号:admin password: 123456-----------------------------------©著作权归作者所有:来自51CTO博客作者江南独孤客的原创作品,请联系作者获取转载授权,否则将追究法律责任整合Apache Hudi+Mysql+FlinkCDC2.1+CDH6.3.0https://blog.51cto.com/wang/4806267
最终的flink-web界面(支持流批一体和jar包)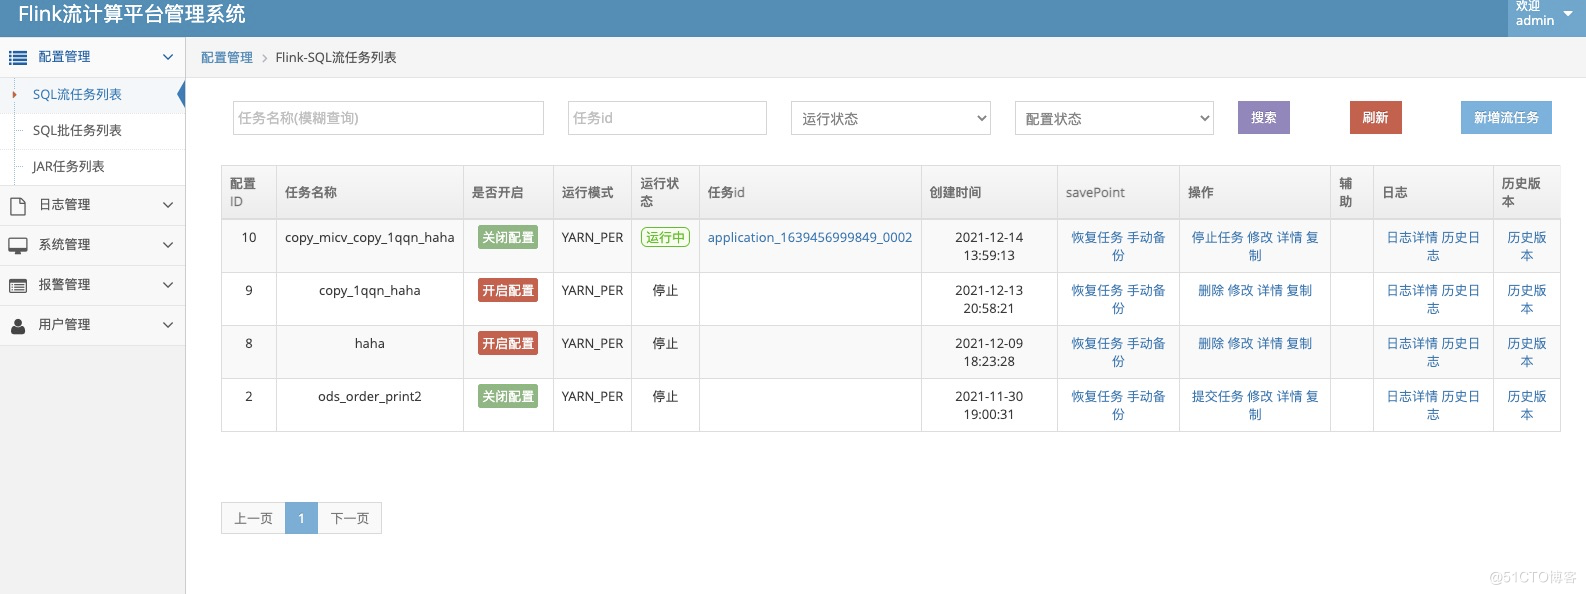
三.flink cdc到hudi的demo测试
1.mysql的建表语句
CREATE TABLE test_order_v4 (id int,username varchar(20),product varchar(20),price double,qty int,create_time TIMESTAMP,PRIMARY KEY (id));
2.插入的测试数据
Insert into test_order_v4 (id,username,product,price,qty,create_time) values(200,'王昱翔','芒果',12,25,current_timestamp());insert into test_order_v4 (id,username,product,price,qty,create_time) values(201,'王昱翔','芒果',12,26,current_timestamp());insert into test_order_v4 (id,username,product,price,qty,create_time) values(202,'王昱翔','芒果',12,27,current_timestamp());insert into test_order_v4 (id,username,product,price,qty,create_time) values(203,'王昱翔','芒果',12,28,current_timestamp());insert into test_order_v4 (id,username,product,price,qty,create_time) values(204,'王昱翔','芒果',12,29,current_timestamp());insert into test_order_v4 (id,username,product,price,qty,create_time) values(205,'王昱翔','芒果',12,30,current_timestamp());insert into test_order_v4 (id,username,product,price,qty,create_time) values(206,'王昱翔','芒果',12,31,current_timestamp());insert into test_order_v4 (id,username,product,price,qty,create_time) values(207,'王昱翔','芒果',12,32,current_timestamp());insert into test_order_v4 (id,username,product,price,qty,create_time) values(208,'王昱翔','芒果',12,33,current_timestamp());insert into test_order_v4 (id,username,product,price,qty,create_time) values(209,'王昱翔','芒果',12,34,current_timestamp());insert into test_order_v4 (id,username,product,price,qty,create_time) values(210,'王昱翔','芒果',12,35,current_timestamp());insert into test_order_v4 (id,username,product,price,qty,create_time) values(211,'王昱翔','芒果',12,36,current_timestamp());insert into test_order_v4 (id,username,product,price,qty,create_time) values(212,'王昱翔','芒果',12,37,current_timestamp());insert into test_order_v4 (id,username,product,price,qty,create_time) values(213,'王昱翔','芒果',12,38,current_timestamp());insert into test_order_v4 (id,username,product,price,qty,create_time) values(214,'王昱翔','芒果',12,39,current_timestamp());insert into test_order_v4 (id,username,product,price,qty,create_time) values(215,'王昱翔','芒果',12,40,current_timestamp());insert into test_order_v4 (id,username,product,price,qty,create_time) values(216,'王昱翔','芒果',12,41,current_timestamp());insert into test_order_v4 (id,username,product,price,qty,create_time) values(217,'王昱翔','芒果',12,42,current_timestamp());insert into test_order_v4 (id,username,product,price,qty,create_time) values(218,'王昱翔','芒果',12,43,current_timestamp());insert into test_order_v4 (id,username,product,price,qty,create_time) values(219,'王昱翔','芒果',12,44,current_timestamp());insert into test_order_v4 (id,username,product,price,qty,create_time) values(220,'王昱翔','芒果',12,45,current_timestamp());insert into test_order_v4 (id,username,product,price,qty,create_time) values(221,'王昱翔','芒果',12,46,current_timestamp());insert into test_order_v4 (id,username,product,price,qty,create_time) values(222,'王昱翔','芒果',12,47,current_timestamp());
3.flink-sql语句
1.创建flink cdc的表CREATE TABLE test_order_v4 (id INT,username STRING,product STRING,price DOUBLE,qty INT,create_time TIMESTAMP(0),PRIMARY KEY(id) NOT ENFORCED) WITH ('connector' = 'mysql-cdc','hostname' = '192.168.100.3','port' = '3306','username' = 'dmp','password' = 'wangyuxiang','server-time-zone' = 'Asia/Shanghai','debezium.snapshot.mode'='initial','database-name' = 'dmp','table-name' = 'test_order_v4');2.创建hudi表CREATE TABLE hudi_test_order_v4(id INT,username STRING,product STRING,price double,qty INT,create_time TIMESTAMP(0))WITH ('connector' = 'hudi', 'path' = 'hdfs://bigdata/hudi/hdm2_v4', 'hoodie.datasource.write.recordkey.field' = 'id' -- 主键, 'write.precombine.field' = 'create_time' -- 相同的键值时,取此字段最大值,默认ts字段, 'write.tasks' = '1', 'compaction.tasks' = '1', 'write.rate.limit' = '2000' -- 限制每秒多少条, 'table.type' = 'MERGE_ON_READ' -- 默认COPY_ON_WRITE, 'compaction.async.enabled' = 'true' -- 在线压缩, 'compaction.trigger.strategy' = 'num_commits' -- 按次数压缩, 'compaction.delta_commits' = '5' -- 默认为5, 'hive_sync.enable' = 'true' -- 启用hive同步, 'hive_sync.mode' = 'hms' -- 启用hive hms同步,默认jdbc, 'hive_sync.metastore.uris' = 'thrift://dbos-bigdata-test002:9083' -- required, metastore的端口, 'hive_sync.jdbc_url' = 'jdbc:hive2://dbos-bigdata-test002:10000' -- required, hiveServer地址, 'hive_sync.table' = 'hudi_test_order_v4' -- required, hive 新建的表名, 'hive_sync.db' = 'hudi2' -- required, hive 新建的数据库名, 'hive_sync.username' = 'hive' -- required, HMS 用户名, 'hive_sync.password' = '' -- required, HMS Password, 'hive_sync.skip_ro_suffix' = 'true' -- 去除ro后缀);insert into hudi_test_order_v4 select id,username,product,price,qty,create_time from test_order_v4;
4.提交并保存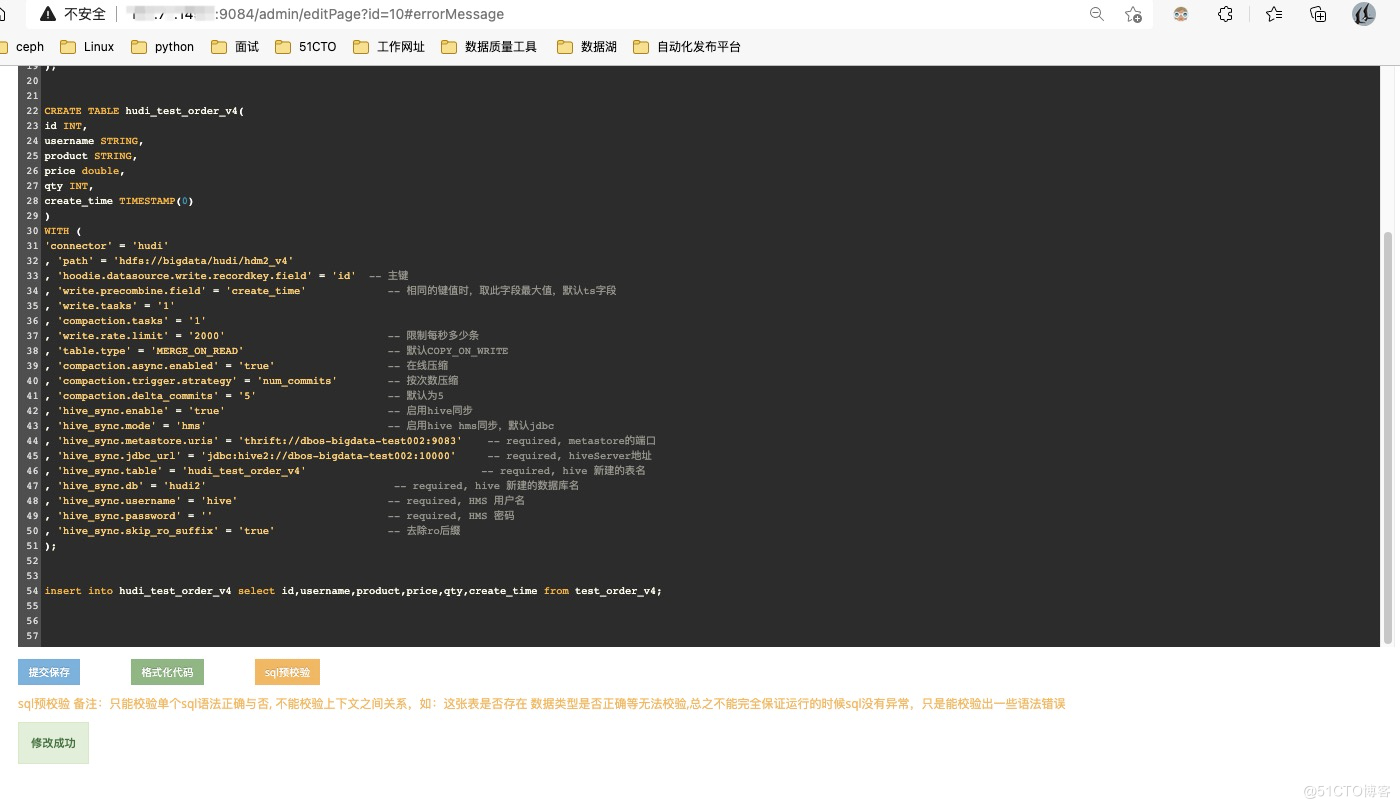
5.选择开启配置后提交任务
6.任务提交成功
7.yarn上已有这个任务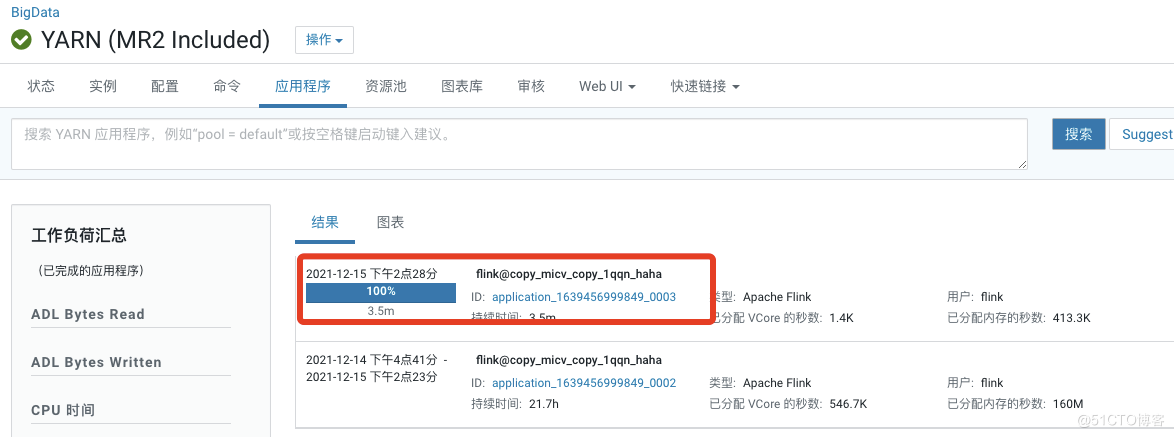
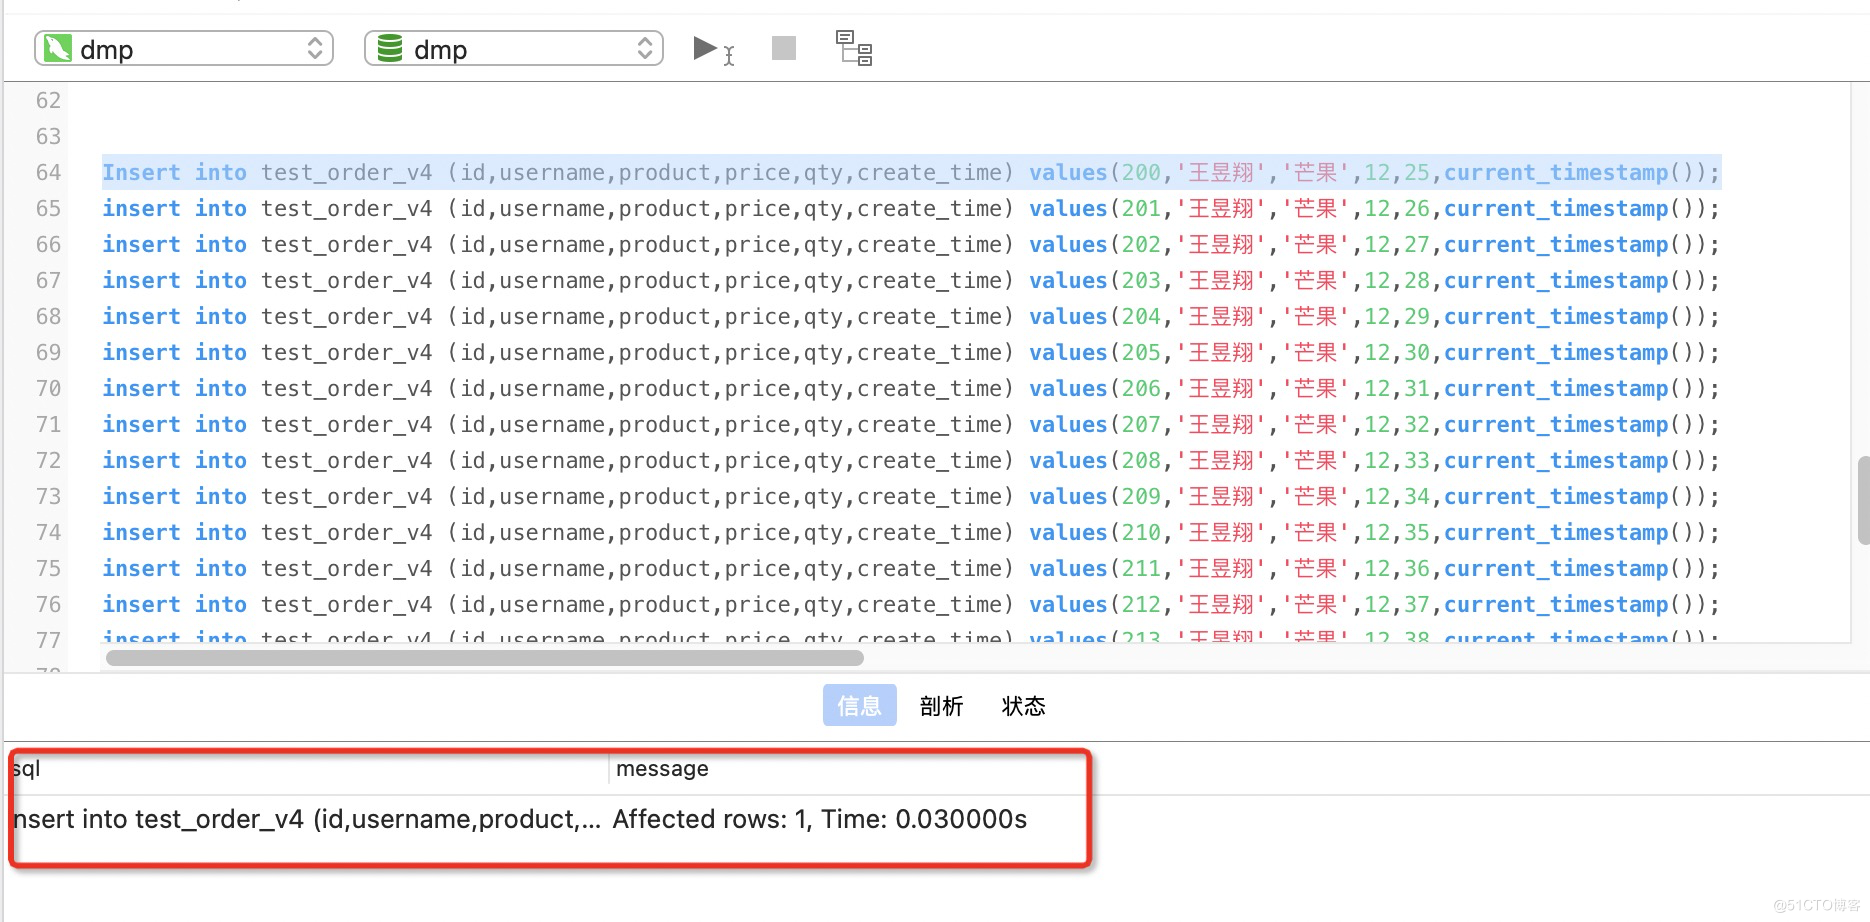
开始insert into插入数据测试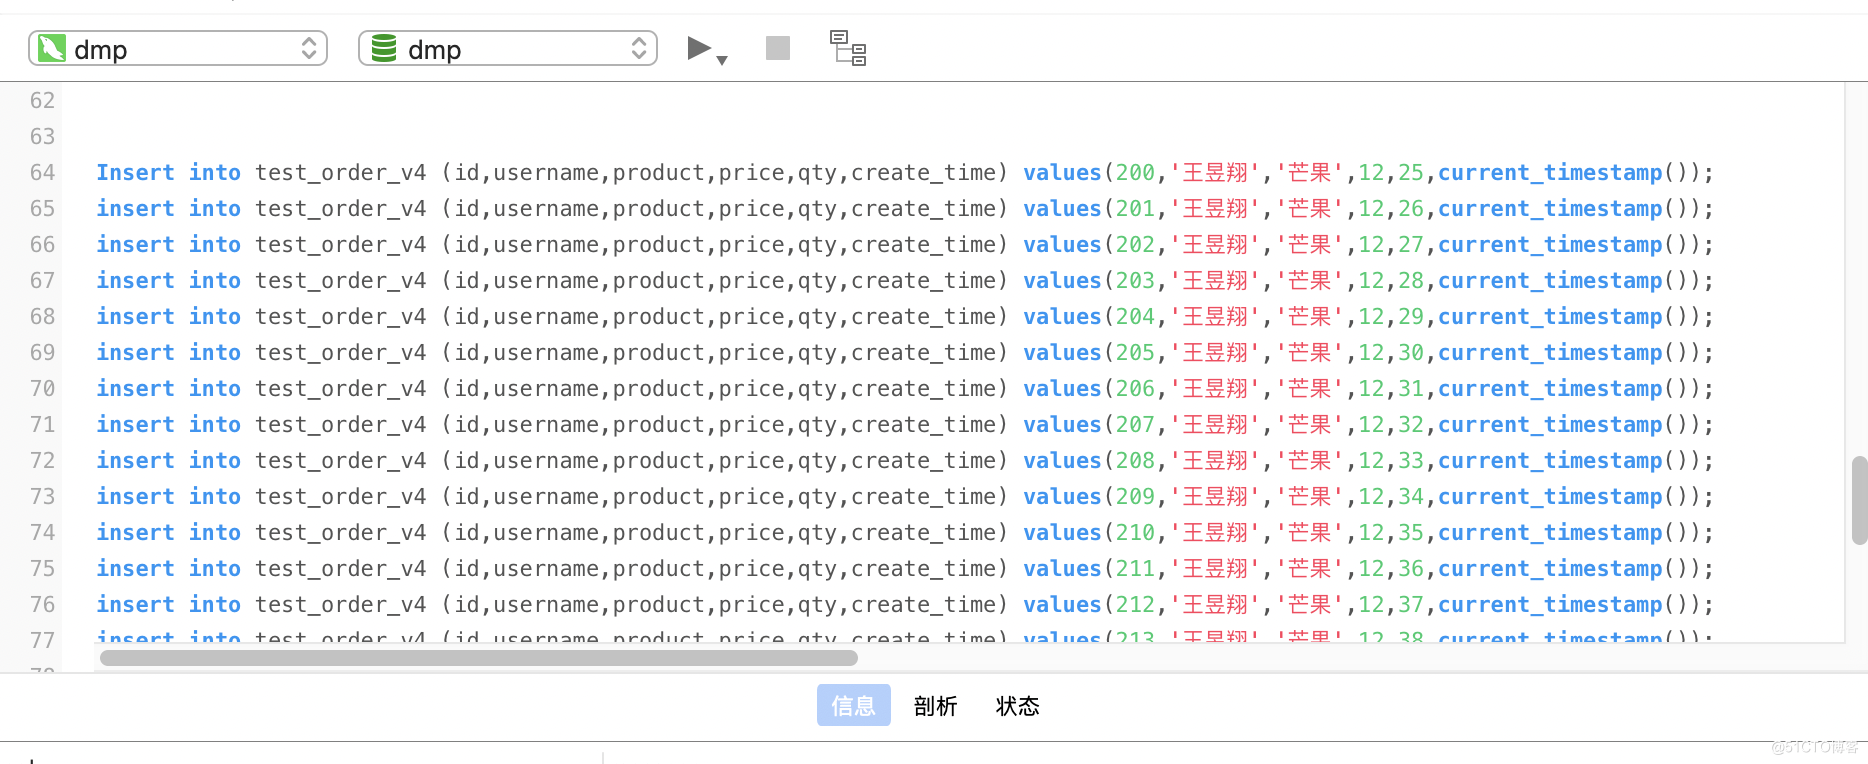
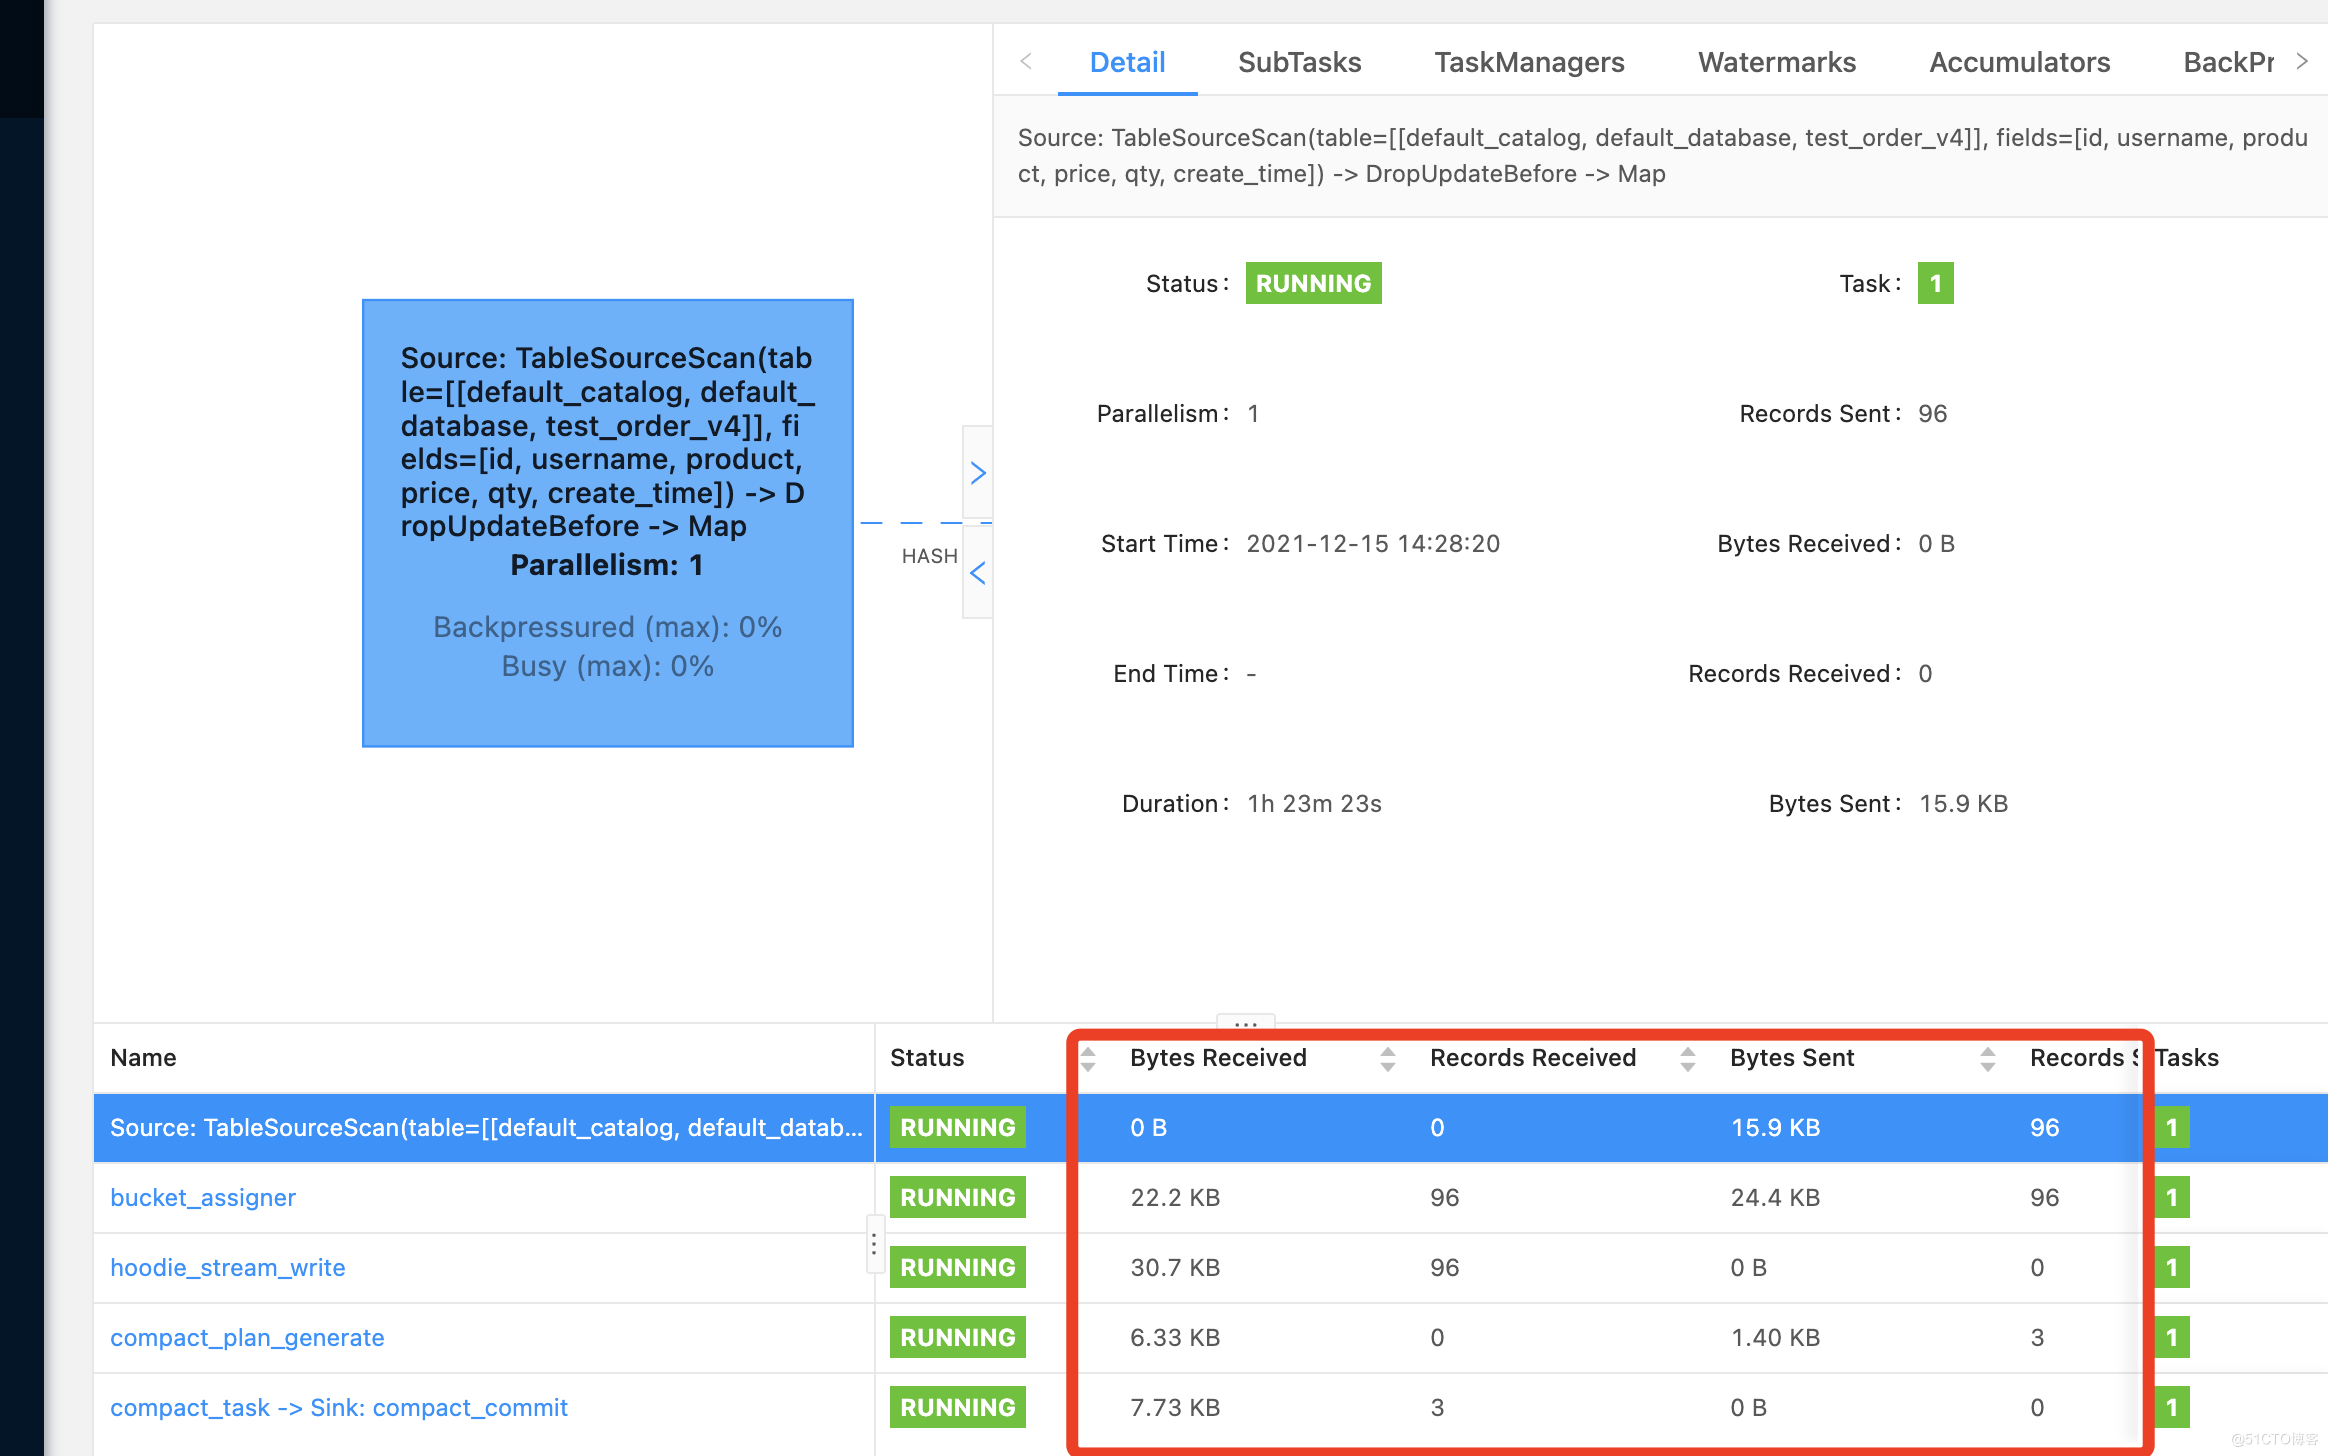
9.flink运行的DAG图上显示已插入条96数据压缩了3次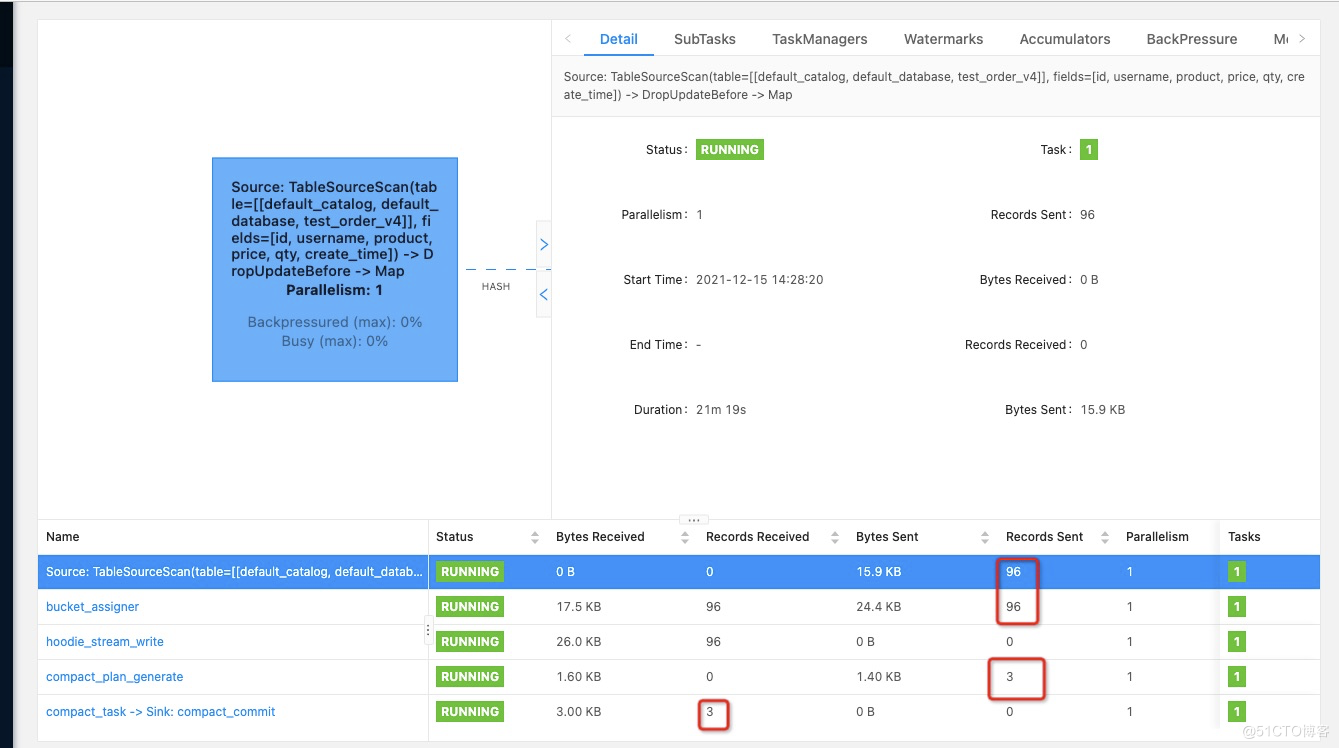
10.到hdfs上查看生成的文件
11.查看hive上是否生成表(已生成RO和RT表)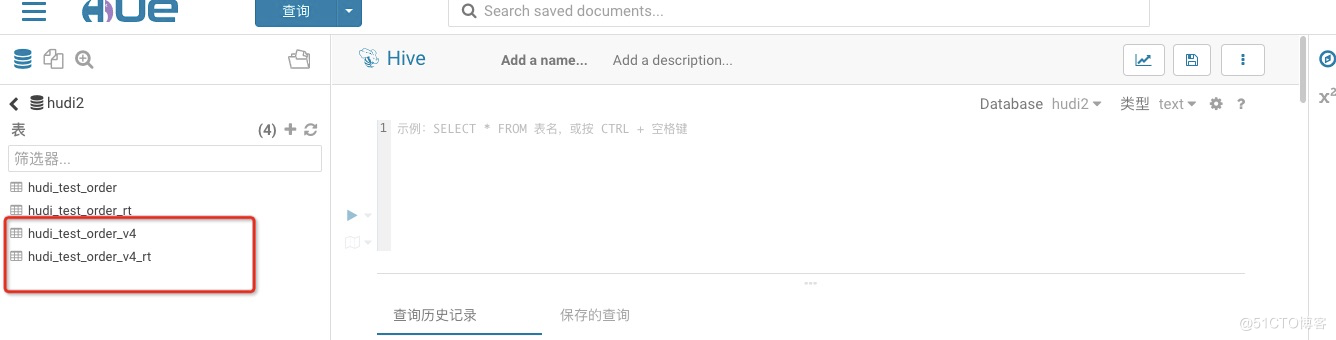
12.查询hive表中的数据
select * from hudi_test_order_v4_rt;select * from hudi_test_order_v4;
说明:已自动生产hudi MOR模式的
hudi_test_order_v4(这是一个ro表,因为我在代码中去ro后缀了)
hudi_test_order_v4_rt
以下数据证明mysqlbinlog—hudi—hive的链路是成功的
四:mysql的update操作
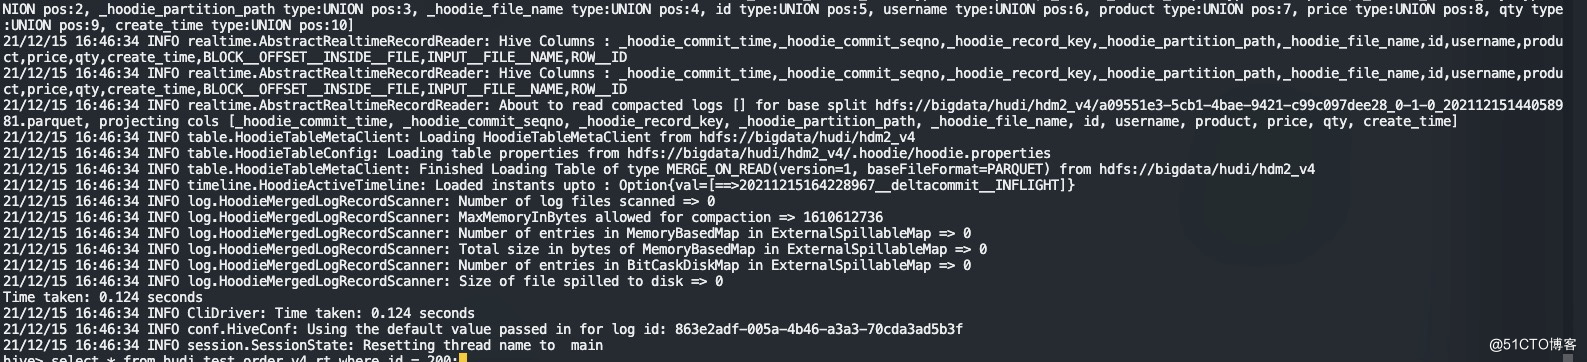
1.先查询mysql中ID为200的数据和flink DAG目前的状态 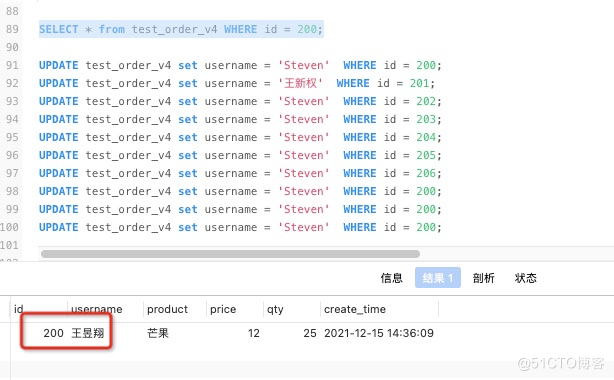
2.mysql做update
更新一条数据UPDATE test_order_v4 set username = 'Steven' WHERE id = 200;
SELECT * from test_order_v4 WHERE id = 200;
3.更新新一条语句后,提交数从96新增加到97,但是没有进行压缩。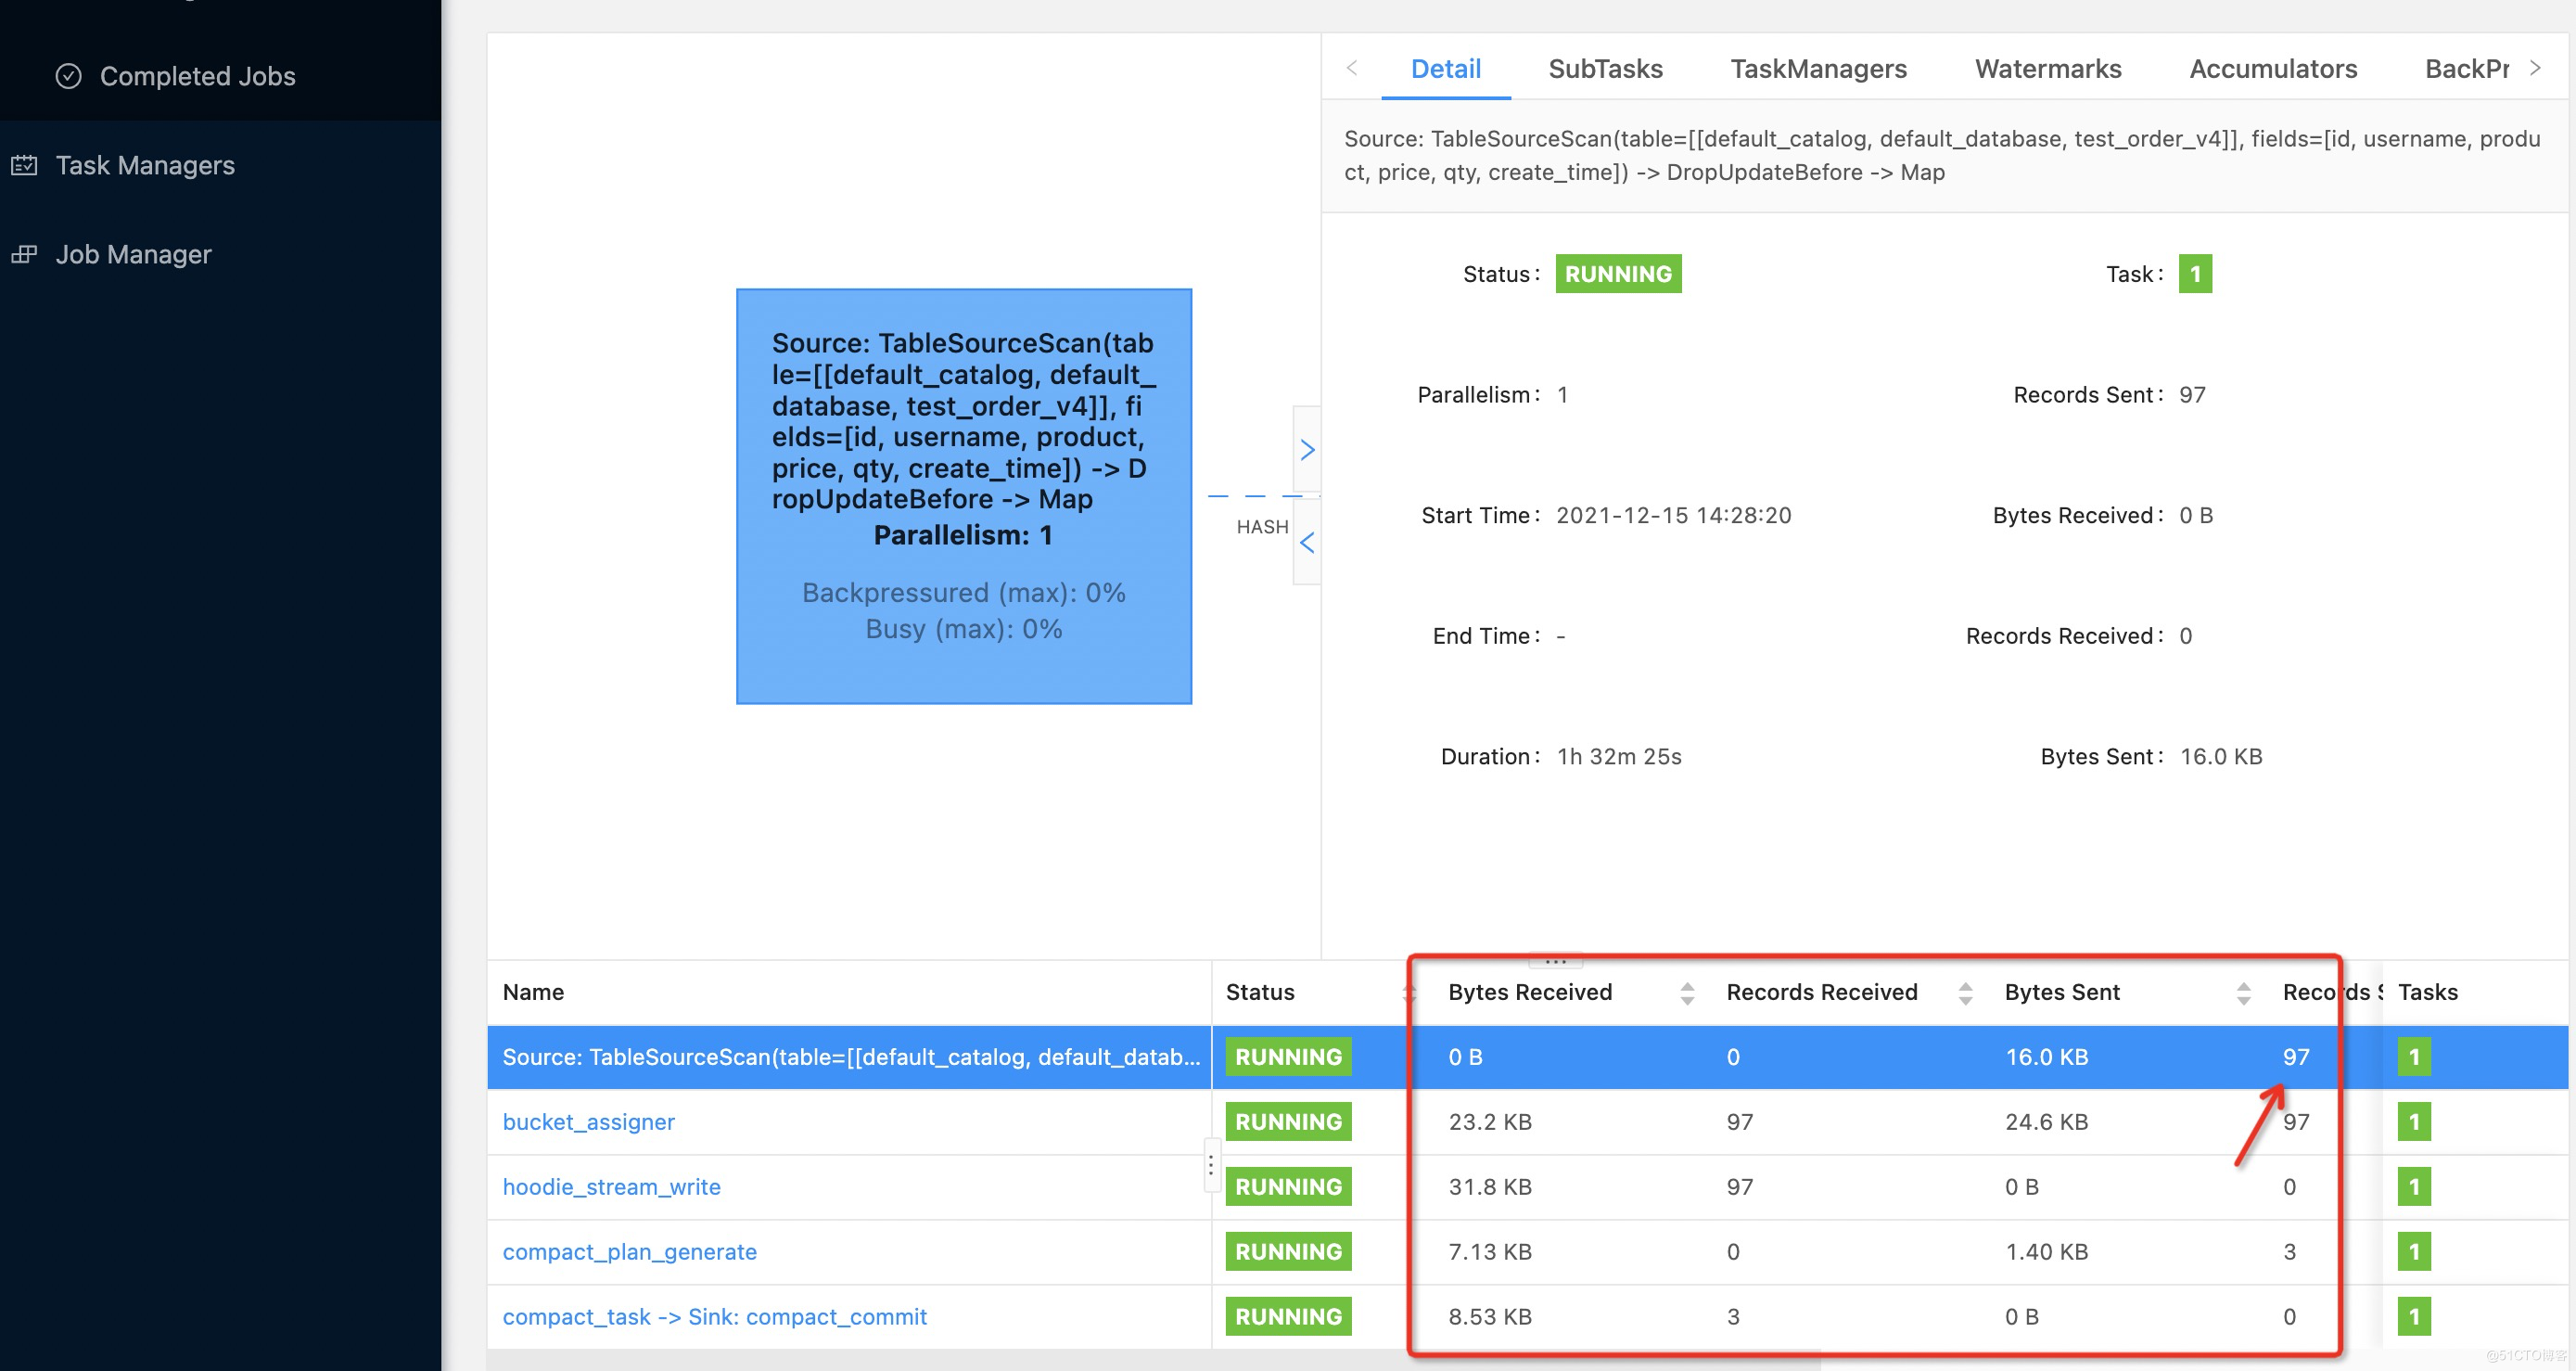
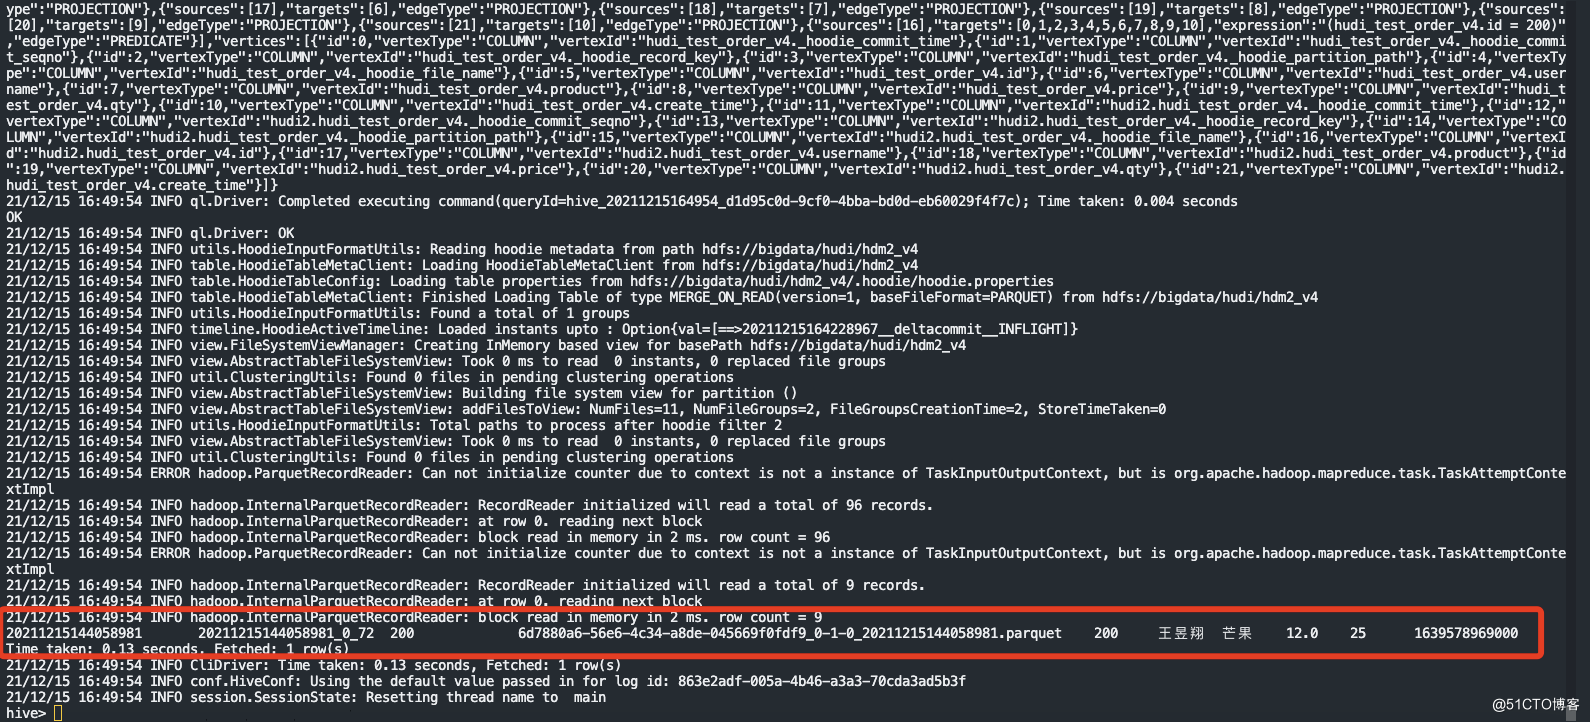
4.查询RT表中有此数据更新的记录
select * from hudi_test_order_v4_rt;

5.查询RO表中数据没有更新。
select * from hudi_test_order_v4;

五:mysql做delete的操作
1.flink DAG的状态提交97次
2.查询一条id为200的数据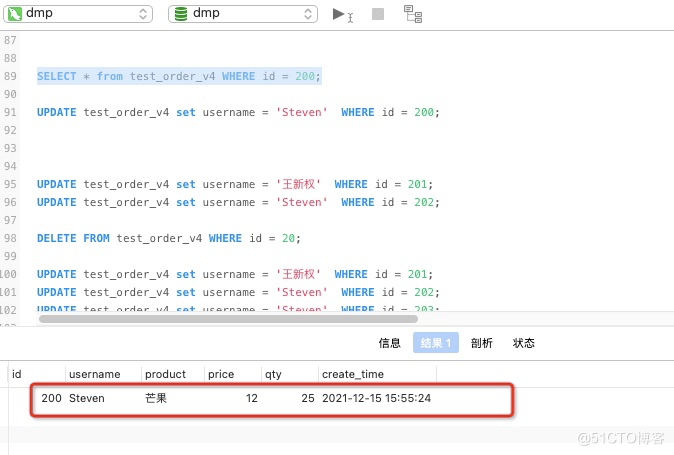
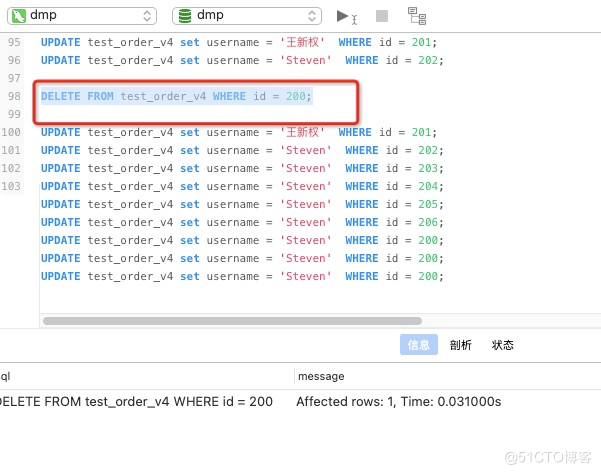
3.mysql中删除此数据
DELETE FROM test_order_v4 WHERE id = 200;
4.flink的DAG状态是提交了98次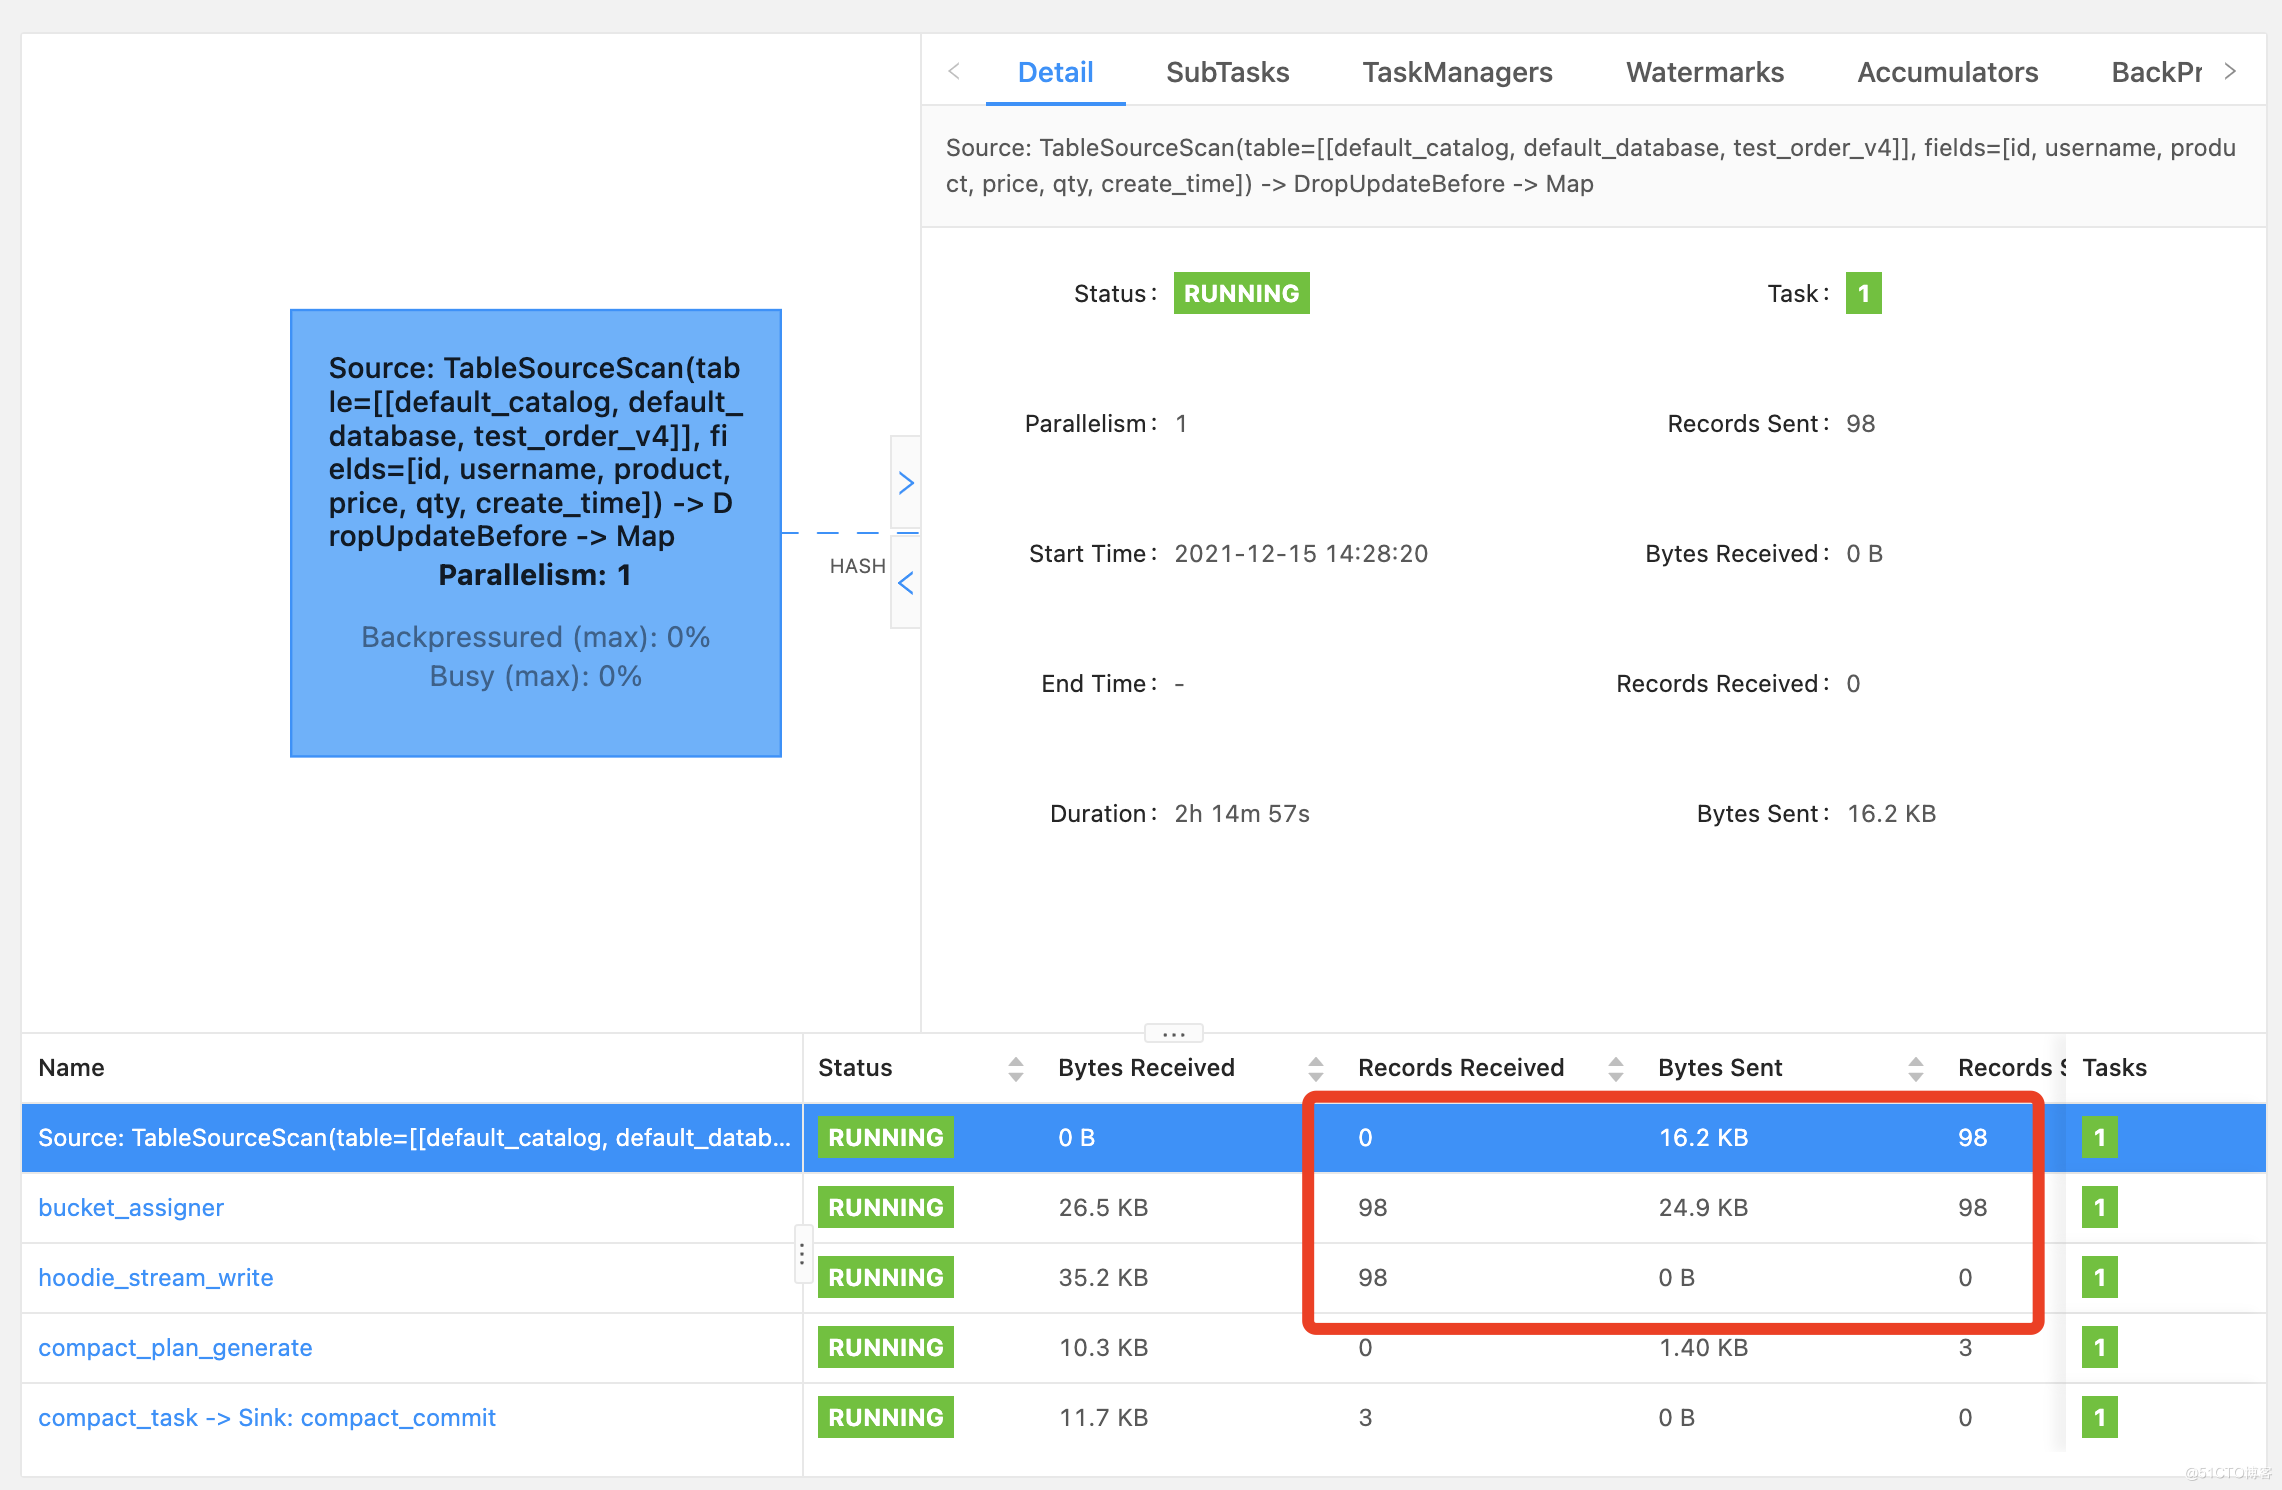
6.查询hive的rt表
select * from hudi_test_order_v4_rt where id = 200;hive中id=200的数据已经被删掉
7.查询hive的ro表
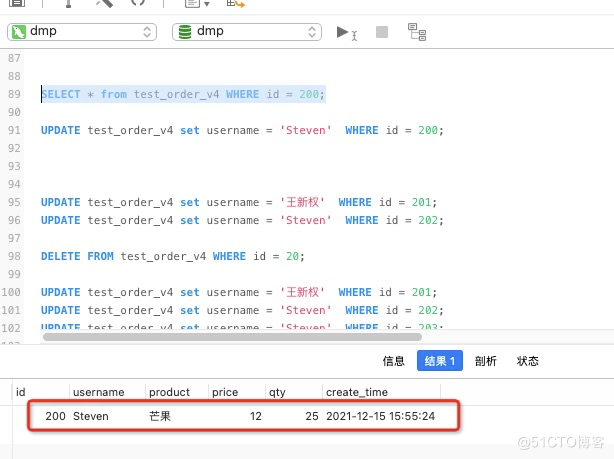
select * from hudi_test_order_v4 where id = 200;数据还是存在的,因为roge表没有达到触发压缩的条件,所以一直没有压缩更新
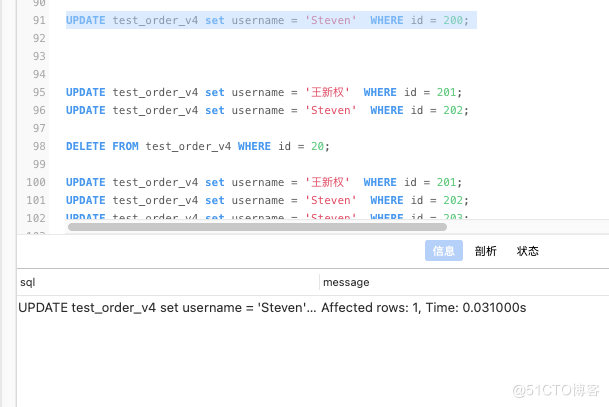
六:综合模拟频繁的更新、插入、删除测试,达到触发压缩的条件
insert into test_order_v4 (id,username,product,price,qty,create_time) values(224,'王昱翔','芒果',12,47,current_timestamp());UPDATE test_order_v4 set username = 'Steven' WHERE id = 201;UPDATE test_order_v4 set username = '王新权' WHERE id = 202;UPDATE test_order_v4 set username = 'Steven' WHERE id = 203;DELETE FROM test_order_v4 WHERE id = 210;DELETE FROM test_order_v4 WHERE id = 211;
1.已达到生成parquet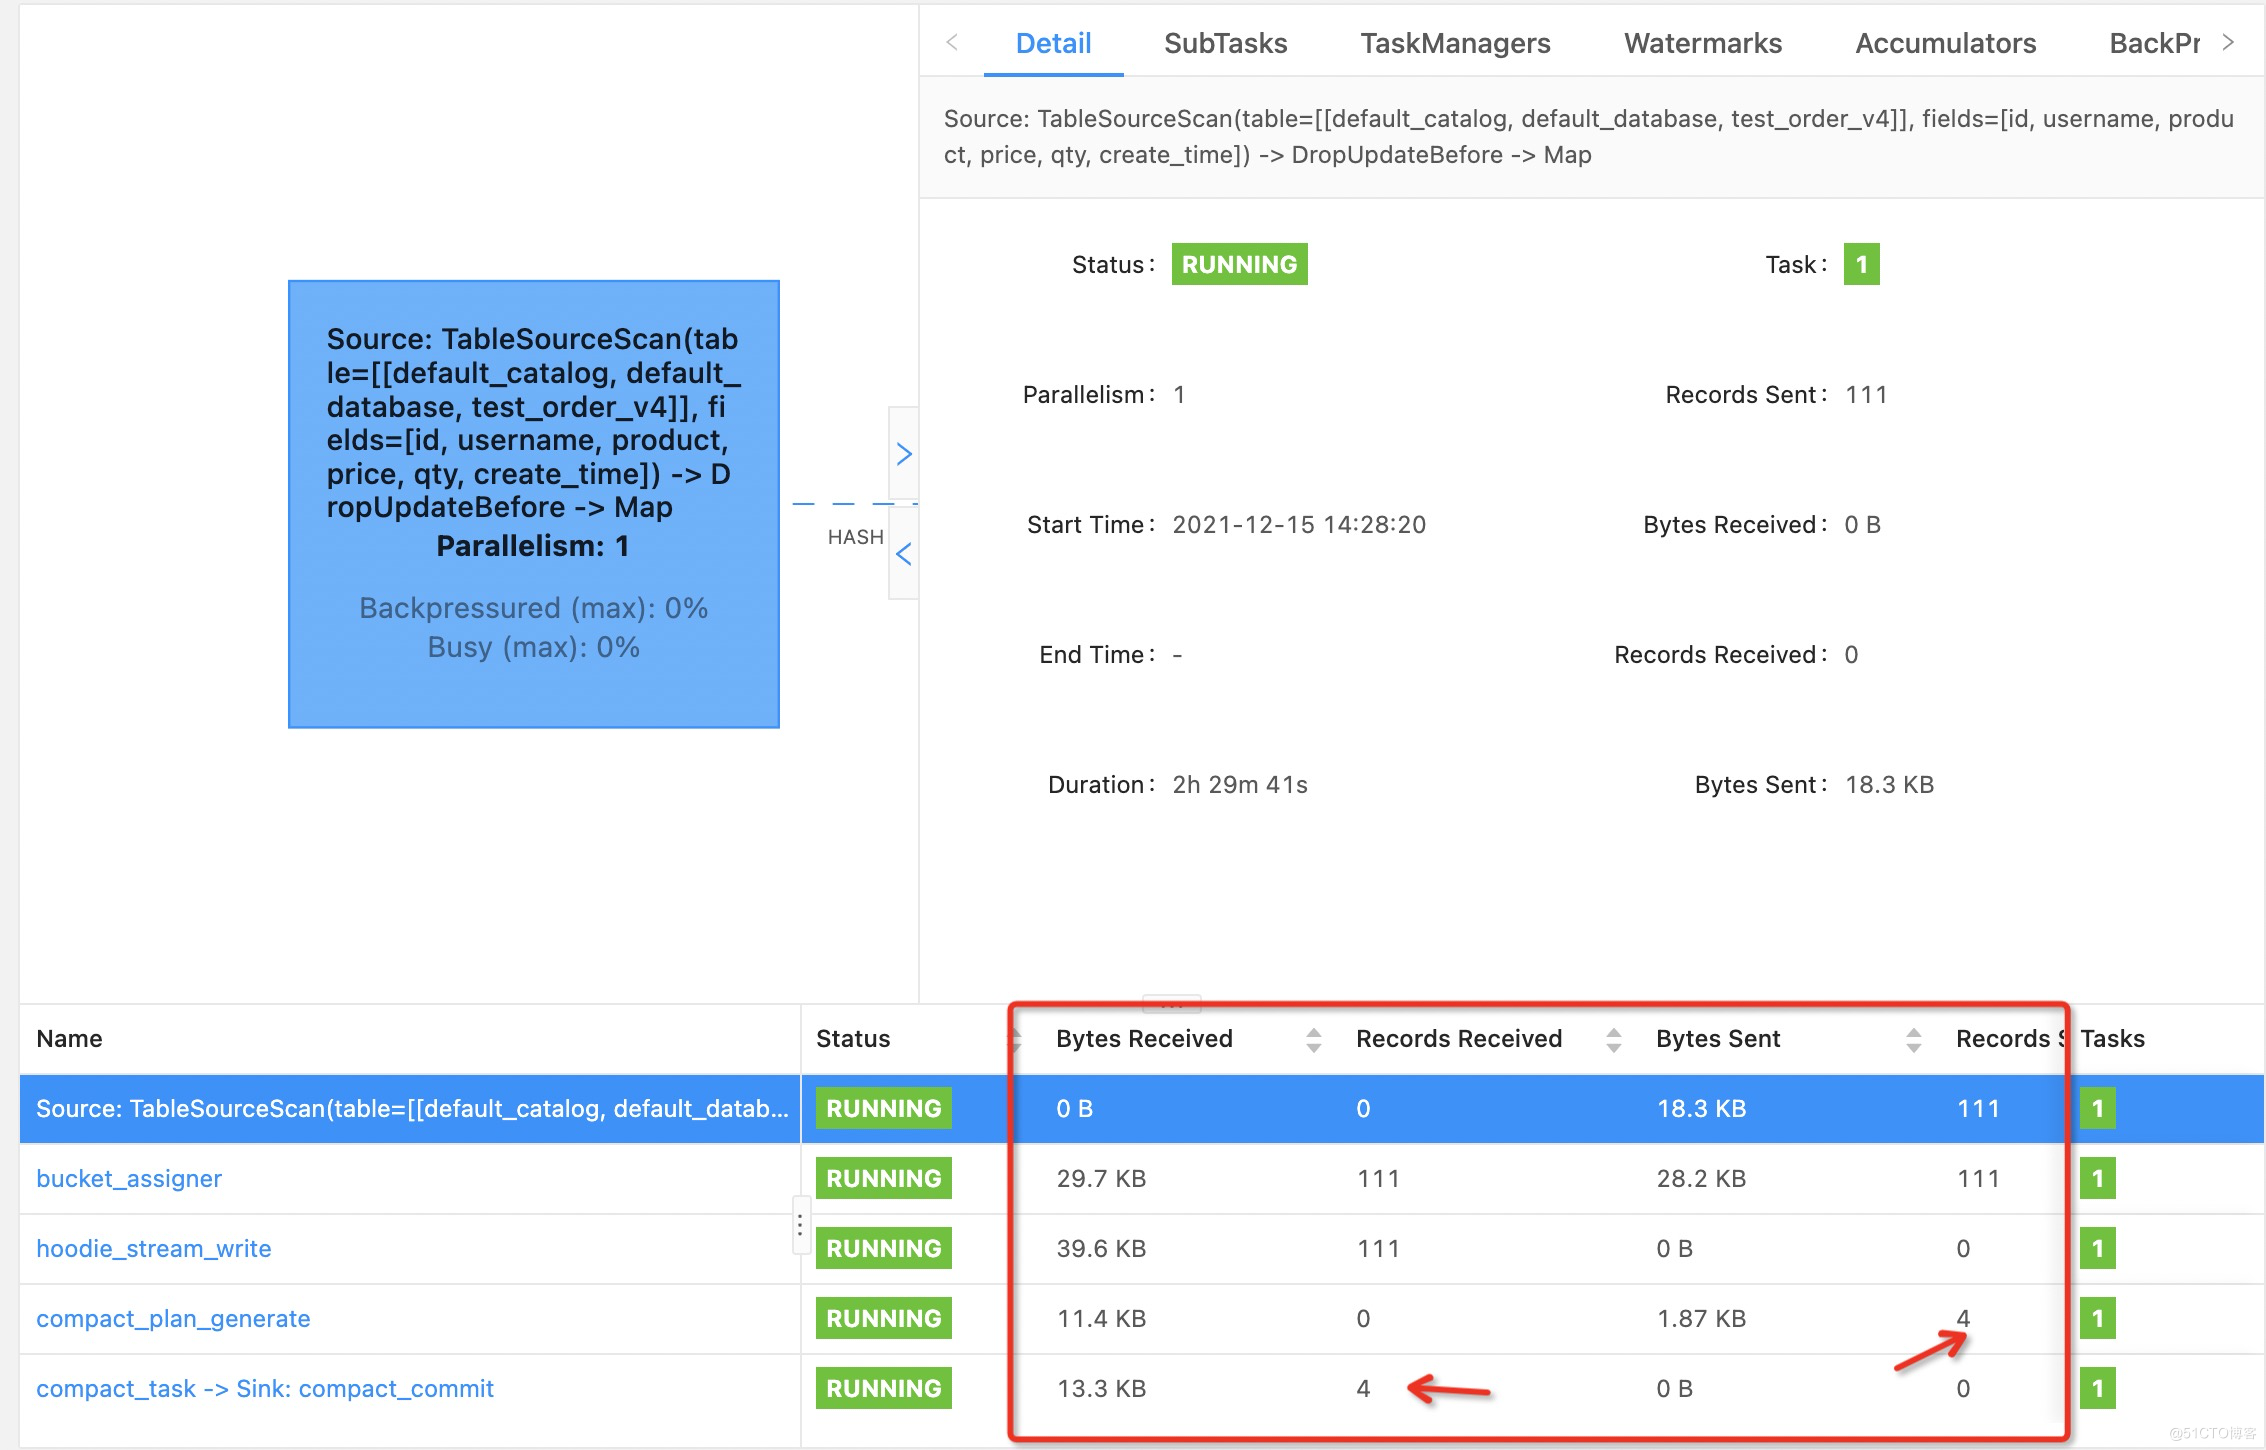
2.查询rt表
select * from hudi_test_order_v4_rt where username = '王昱翔';
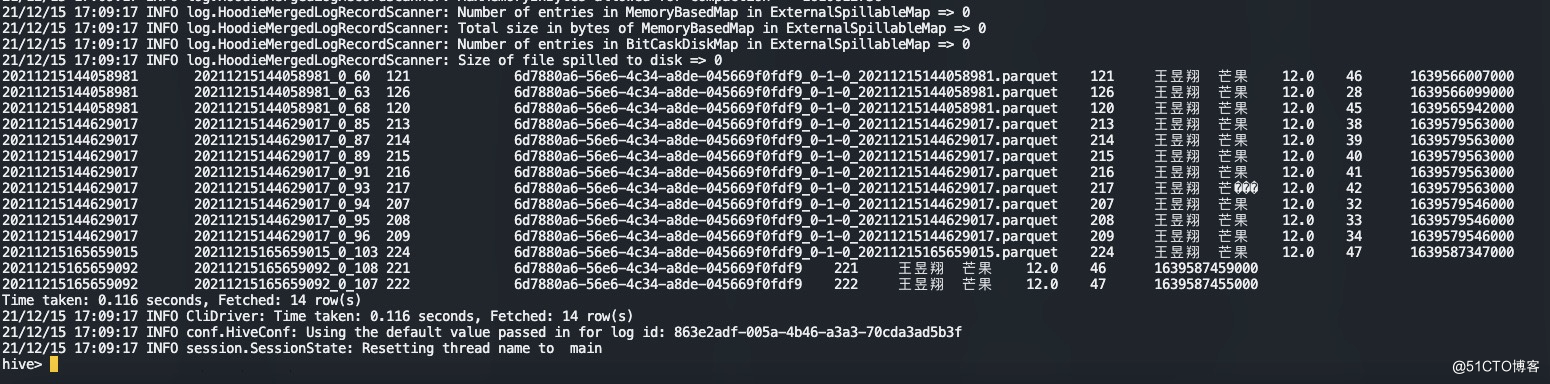
3.查询ro表
select * from hudi_test_order_v4 where username = '王昱翔';

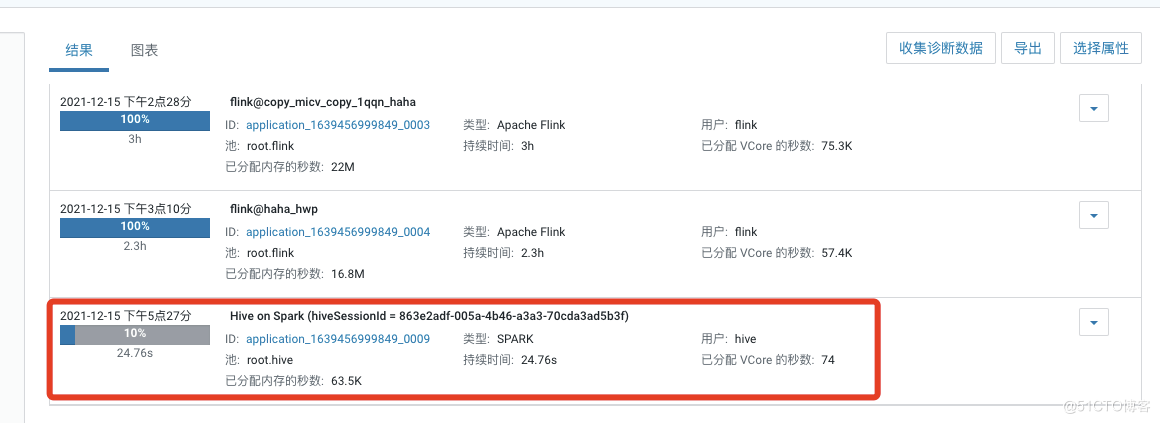
4.hudi同步到hive表中的数据做count测试
select count(1) from hudi_test_order_v4 where username = '王昱翔';
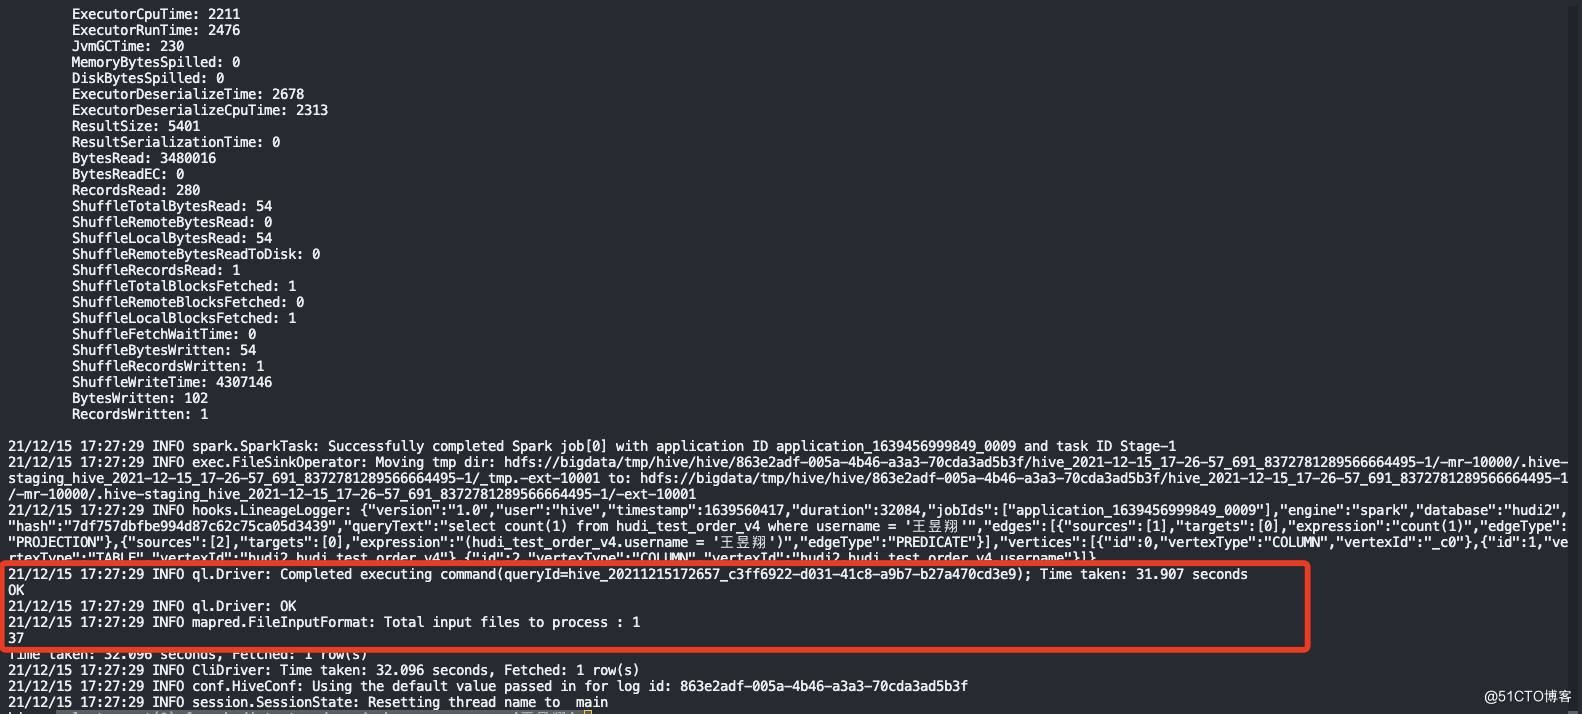
rt表比ro表多两条数据总结:Hudi 表分为 COW 和 MOR两种类型COW 表适用于离线批量更新场景,对于更新数据,会先读取旧的 base file,然后合并更新数据,生成新的 base file。MOR 表适用于实时高频更新场景,更新数据会直接写入 log file 中,读时再进行合并。为了减少读放大的问题,会定期合并 log file 到 base file 中。ro表和rt表区别:ro 表全称 read oprimized table,对于 MOR 表同步的 xxx_ro 表,只暴露压缩后的 parquet。其查询方式和COW表类似。设置完 hiveInputFormat 之后 和普通的 Hive 表一样查询即可;rt表示增量视图,主要针对增量查询的rt表;ro表只能查parquet文件数据, rt表 parquet文件数据和log文件数据都可查;-----------------------------------©著作权归作者所有:来自51CTO博客作者江南独孤客的原创作品,请联系作者获取转载授权,否则将追究法律责任整合Apache Hudi+Mysql+FlinkCDC2.1+CDH6.3.0https://blog.51cto.com/wang/4806267

若有收获,就点个赞吧
0 人点赞
