- Rancher 中文文档
- http://mirrors.aliyun.com/docker-ce/linux/centos/docker-ce.repo">安装必要的一些系统工具
sudo yum install -y yum-utils device-mapper-persistent-data lvm2 bash-completion
#添加Docker源信息
sudo yum-config-manager —add-repo \ http://mirrors.aliyun.com/docker-ce/linux/centos/docker-ce.repo - 查看docker的版本
yum list docker-ce —showduplicates | sort -r
# 安装docker 19.03.7版本
sudo yum -y install docker-ce-19.03.7-3.el7 docker-ce-cli-19.03.7-3.el7 containerd.io
#把当前用户加入docker组
sudo usermod -aG docker $NEW_USER
#设置开机自启并运行docker服务
sudo systemctl enable —now docker - 锁定Docker软件包
yum versionlock add docker-ce-19.03.7-3.el7 docker-ce-cli-19.03.7-3.el7 containerd.io - 查看已锁定的软件包
yum versionlock list - 解锁指定软件包
yum versionlock delete <软件包名称> - 解锁所有软件包
yum versionlock clear - 在rmaster01配置ssh单向无密码访问
ssh-copy-id rmaster01
ssh-copy-id rmaster02
ssh-copy-id rmaster03
ssh-copy-id node01
ssh-copy-id node02 - 测试
for i incat /etc/hosts | grep -v localhost | grep -Ev '^$|#' | awk '{print $2}';do ssh $i hostname;done
**
阿里云配置内网地址 - 配置用户文件
mkdir ~/.kube
cp /home/rancher/kube_config_cluster.yml ~/.kube/config - 若要将kubectl自动补全添加到当前shell
source <(kubectl completion bash)
Rancher 中文文档
https://docs.rancher.cn/
4C 8G Centos7.7 3 master+2 node
文件下载地址
http://mirror.cnrancher.com/
1. 安装RKE工具
master节点01部署
1.1 下载RKE工具到本地**
wget http://rancher-mirror.cnrancher.com/rke/v1.1.1/rke_linux-amd64
chmod +x rke_linux-amd64 && sudo mv rke_linux-amd64 /usr/bin/rke
1.2 查看当前RKE版本
rke —version
1.3 查看RKE支持的Kubernetes版本
rke config —list-version —all
1.4 查看RKE支持的image
rke config —system-images —all
[root@rmaster01 ~]# rke config --system-images --allINFO[0000] Generating images list for version [v1.17.9-rancher1-1]:rancher/coreos-etcd:v3.4.3-rancher1rancher/rke-tools:v0.1.59rancher/k8s-dns-kube-dns:1.15.0rancher/k8s-dns-dnsmasq-nanny:1.15.0rancher/k8s-dns-sidecar:1.15.0rancher/cluster-proportional-autoscaler:1.7.1rancher/coredns-coredns:1.6.5rancher/k8s-dns-node-cache:1.15.7rancher/hyperkube:v1.17.9-rancher1rancher/coreos-flannel:v0.12.0rancher/flannel-cni:v0.3.0-rancher6rancher/calico-node:v3.13.4rancher/calico-cni:v3.13.4rancher/calico-kube-controllers:v3.13.4rancher/calico-ctl:v3.13.4rancher/calico-pod2daemon-flexvol:v3.13.4weaveworks/weave-kube:2.6.4weaveworks/weave-npc:2.6.4rancher/pause:3.1rancher/nginx-ingress-controller:nginx-0.32.0-rancher1rancher/nginx-ingress-controller-defaultbackend:1.5-rancher1rancher/metrics-server:v0.3.6
2. Docker环境准备
2.1 安装Docker
#定义用户名
NEW_USER=rancher
#添加用户(可选)
sudo adduser $NEW_USER
#为新用户设置密码
echo rancher | sudo passwd $NEW_USER —stdin
#为新用户添加sudo权限
sudo echo “$NEW_USER ALL=(ALL) ALL” >> /etc/sudoers
#卸载旧版本Docker软件
sudo yum remove docker \
docker-client \
docker-client-latest \
docker-common \
docker-latest \
docker-latest-logrotate \
docker-logrotate \
docker-selinux \
docker-engine-selinux \
docker-engine \
container*
安装必要的一些系统工具
sudo yum install -y yum-utils device-mapper-persistent-data lvm2 bash-completion
#添加Docker源信息
sudo yum-config-manager —add-repo \ http://mirrors.aliyun.com/docker-ce/linux/centos/docker-ce.repo
查看docker的版本
yum list docker-ce —showduplicates | sort -r
# 安装docker 19.03.7版本
sudo yum -y install docker-ce-19.03.7-3.el7 docker-ce-cli-19.03.7-3.el7 containerd.io
#把当前用户加入docker组
sudo usermod -aG docker $NEW_USER
#设置开机自启并运行docker服务
sudo systemctl enable —now docker
2.2 锁定Docker版本
# 安装yum-plugin-versionlock插件
yum -y install yum-plugin-versionlock
锁定Docker软件包
yum versionlock add docker-ce-19.03.7-3.el7 docker-ce-cli-19.03.7-3.el7 containerd.io
查看已锁定的软件包
yum versionlock list
解锁指定软件包
yum versionlock delete <软件包名称>
解锁所有软件包
yum versionlock clear
3. 系统内核调优
cat >> /etc/sysctl.d/kubernetes.conf<
net.ipv4.ip_forward=1
# 避免cpu资源长期使用率过高导致系统内核锁
kernel.watchdog_thresh=30
# 开启iptables bridge
net.bridge.bridge-nf-call-iptables=1
# 调优ARP高速缓存
net.ipv4.neigh.default.gc_thresh1=4096
net.ipv4.neigh.default.gc_thresh2=6144
net.ipv4.neigh.default.gc_thresh3=8192
EOF
sysctl -p && systemctl restart docker
docker服务所有节点都部署
docker安装脚本
#! /bin/bash#安装Docker#定义用户名NEW_USER=rancher#添加用户(可选)sudo adduser $NEW_USER#为新用户设置密码echo rancher | sudo passwd $NEW_USER --stdin#为新用户添加sudo权限sudo echo "$NEW_USER ALL=(ALL) ALL" >> /etc/sudoers#安装必要的一些系统工具sudo yum install vim wget bash-completion lrzsz nmap nc tree htop iftop net-tools -ysudo yum install -y yum-utils device-mapper-persistent-data lvm2 bash-completion#添加Docker源信息sudo yum-config-manager --add-repo \http://mirrors.aliyun.com/docker-ce/linux/centos/docker-ce.repo#缓存docker源sudo yum makecache#安装docker 19.03.7版本sudo yum -y install docker-ce-19.03.7-3.el7 docker-ce-cli-19.03.7-3.el7 containerd.io#把当前用户加入docker组sudo usermod -aG docker $NEW_USER#设置开机自启并运行docker服务sudo systemctl enable --now docker#安装yum-plugin-versionlock插件yum -y install yum-plugin-versionlock#锁定Docker软件包yum versionlock add docker-ce-19.03.7-3.el7 docker-ce-cli-19.03.7-3.el7 containerd.io#关闭虚拟内存swapoff -ased -i 's/.*swap.*/#&/' /etc/fstab#系统内核调优cat >> /etc/sysctl.d/kubernetes.conf<<EOF# 开启路由功能net.ipv4.ip_forward=1# 避免cpu资源长期使用率过高导致系统内核锁kernel.watchdog_thresh=30# 开启iptables bridgenet.bridge.bridge-nf-call-iptables=1net.bridge.bridge-nf-call-ip6tables = 1# 调优ARP高速缓存net.ipv4.neigh.default.gc_thresh1=4096net.ipv4.neigh.default.gc_thresh2=6144net.ipv4.neigh.default.gc_thresh3=8192EOFsysctl -p && systemctl restart docker#配置加速器sudo tee /etc/docker/daemon.json <<-'EOF'{"max-concurrent-downloads": 3,"max-concurrent-uploads": 5,"registry-mirrors": ["https://0bb06s1q.mirror.aliyuncs.com"],"storage-driver": "overlay2","storage-opts": ["overlay2.override_kernel_check=true"],"log-driver": "json-file","log-opts": {"max-size": "100m","max-file": "3"}}EOF#重启dockersystemctl daemon-reload && systemctl restart docker && systemctl enable docker.service#查看docker版本信息sudo docker info
4. 同步/etc/hosts
# Kubernetes cluster demo1
192.168.31.130 rmaster01
192.168.31.131 rmaster02
192.168.31.132 rmaster03
192.168.31.133 node01
192.168.31.134 node02
master01节点操作
5. 配置rancher用户ssh单向无密码访问
# 所有节点执行,注意首先切换为rancher
su - rancher
ssh-keygen -t rsa
在rmaster01配置ssh单向无密码访问
ssh-copy-id rmaster01
ssh-copy-id rmaster02
ssh-copy-id rmaster03
ssh-copy-id node01
ssh-copy-id node02
测试
for i in cat /etc/hosts | grep -v localhost | grep -Ev '^$|#' | awk '{print $2}';do ssh $i hostname;done
**
阿里云配置内网地址
1.生成cluster.yml配置文件
cat << EOF > cluster.ymlnodes:- address: 172.31.53.130hostname_override: rmaster01internal_address:user: rancherrole: [controlplane,etcd]- address: 172.31.53.131hostname_override: rmaster02internal_address:user: rancherrole: [controlplane,etcd]- address: 172.31.53.132hostname_override: rmaster03internal_address:user: rancherrole: [controlplane,etcd]- address: 172.31.53.133hostname_override: node01internal_address:user: rancherrole: [worker]- address: 172.31.53.134hostname_override: node02internal_address:user: rancherrole: [worker]# 定义kubernetes版本kubernetes_version: v1.17.5-rancher1-1# 如果要使用私有仓库中的镜像,配置以下参数来指定默认私有仓库地址。#private_registries:# - url: registry.com# user: Username# password: password# is_default: trueservices:etcd:# 扩展参数extra_args:# 240个小时后自动清理磁盘碎片,通过auto-compaction-retention对历史数据压缩后,后端数据库可能会出现内部碎片。内部碎片是指空闲状态的,能被后端使用但是仍然消耗存储空间,碎片整理过程将此存储空间释放回文>件系统auto-compaction-retention: 240 #(单位小时)# 修改空间配额为6442450944,默认2G,最大8Gquota-backend-bytes: '6442450944'# 自动备份snapshot: truecreation: 5m0sretention: 24hkubelet:extra_args:# 支持静态Pod。在主机/etc/kubernetes/目录下创建manifest目录,Pod YAML文件放在/etc/kubernetes/manifest/目录下pod-manifest-path: "/etc/kubernetes/manifest/"# 有几个网络插件可以选择:flannel、canal、calico,Rancher2默认canalnetwork:plugin: canaloptions:flannel_backend_type: "vxlan"# 可以设置provider: none来禁用ingress controlleringress:provider: nginxnode_selector:app: ingressEOF
查看RKE支持的Kubernetes版本
rke config —list-version —all
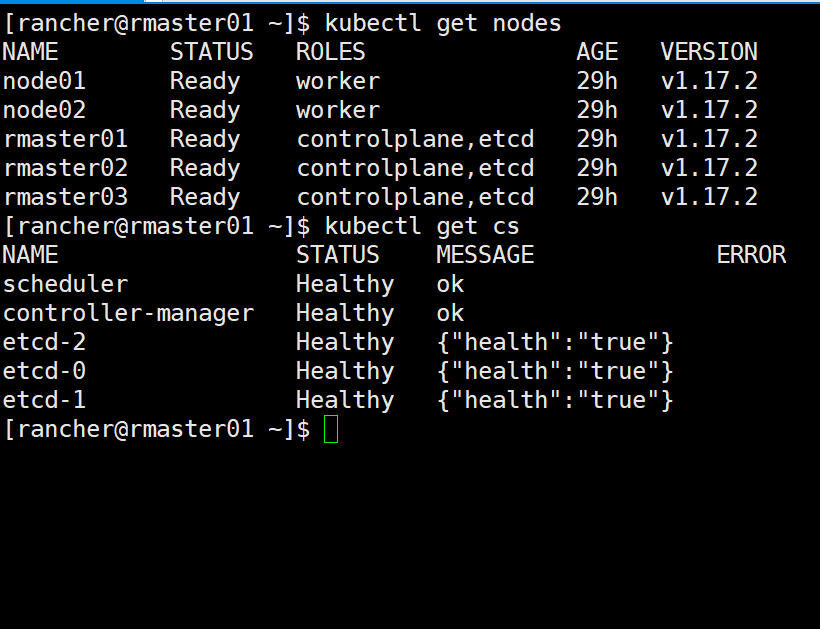
2. 部署kubernetes集群
rke up —config ./cluster.yml
3. kube配置文件
4.1 下载kubectl工具
访问: https://docs.rancher.cn/rancher2x/install-prepare/download/kubernetes.html 查询kubectl下载的版本
wget http://rancher-mirror.cnrancher.com/kubectl/v1.17.5/linux-amd64-v1.17.5-kubectl
chmod +x linux-amd64-v1.17.5-kubectl && sudo mv linux-amd64-v1.17.5-kubectl /usr/bin/kubectl
配置用户文件
mkdir ~/.kube
cp /home/rancher/kube_config_cluster.yml ~/.kube/config
4. kubectl 自动补全
# 将kubectl自动补全添加到配置文件中,可以在以后的shell中自动加载它
echo “source <(kubectl completion bash)” >> ~/.bashrc
若要将kubectl自动补全添加到当前shell
source <(kubectl completion bash)
helm 安装rancher
[rancher@rmaster01 ~]$ kubectl create namespace cattle-systemnamespace "cattle-system" created[rancher@rmaster01 ~]$ kubectl get nsNAME STATUS AGEcattle-system Active 5sdefault Active 23mingress-nginx Active 22mkube-node-lease Active 23mkube-public Active 23mkube-system Active 23m[rancher@rmaster01 ~]$ lltotal 122456-rw-r----- 1 rancher rancher 119466 May 7 09:10 cluster.rkestate-rw-rw-r-- 1 rancher rancher 561 May 7 09:07 cluster.yaml-rw-rw-r-- 1 rancher rancher 12925372 Apr 23 00:20 helm-v3.2.0-linux-amd64.tar.gz-rw-r----- 1 rancher rancher 5385 May 7 09:08 kube_config_cluster.yamldrwxr-xr-x 2 rancher rancher 4096 Apr 23 00:19 linux-amd64-rw-rw-r-- 1 rancher rancher 72497289 Apr 30 19:04 linux-amd64-v1.7.16-kubectl-rw-rw-r-- 1 rancher rancher 4798 Apr 30 19:13 rancher-2.3.6.tgz-rwxrwxr-x 1 rancher rancher 39818473 May 6 17:22 rke_linux-amd64[rancher@rmaster01 ~]$ tar xf rancher-2.3.6.tgz[rancher@rmaster01 ~]$[rancher@rmaster01 ~]$ lltotal 122460-rw-r----- 1 rancher rancher 119466 May 7 09:10 cluster.rkestate-rw-rw-r-- 1 rancher rancher 561 May 7 09:07 cluster.yaml-rw-rw-r-- 1 rancher rancher 12925372 Apr 23 00:20 helm-v3.2.0-linux-amd64.tar.gz-rw-r----- 1 rancher rancher 5385 May 7 09:08 kube_config_cluster.yamldrwxr-xr-x 2 rancher rancher 4096 Apr 23 00:19 linux-amd64-rw-rw-r-- 1 rancher rancher 72497289 Apr 30 19:04 linux-amd64-v1.7.16-kubectldrwxrwxr-x 3 rancher rancher 4096 May 7 09:35 rancher-rw-rw-r-- 1 rancher rancher 4798 Apr 30 19:13 rancher-2.3.6.tgz-rwxrwxr-x 1 rancher rancher 39818473 May 6 17:22 rke_linux-amd64[rancher@rmaster01 ~]$[rancher@rmaster01 ~]$ helm install rancher rancher/ --namespace cattle-system --set rancherImage=cnrancher/rancher --set service.type=NodePort --set service.ports.nodePort=30001 --set tls=internal --set privateCA=trueNAME: rancherLAST DEPLOYED: Thu May 7 09:35:56 2020NAMESPACE: cattle-systemSTATUS: deployedREVISION: 1TEST SUITE: NoneNOTES:Rancher Server has been installed.NOTE: Rancher may take several minutes to fully initialize. Please standby while Certificates are being issued and Ingress comes up.Check out our docs at https://rancher.com/docs/rancher/v2.x/en/Browse to https://Happy Containering![rancher@rmaster01 ~]$ kubectl get podNo resources found.[rancher@rmaster01 ~]$ kubectl get pod -n cattle-systemNAME READY STATUS RESTARTS AGErancher-5dd7f7dd8b-2twc7 0/1 ContainerCreating 0 27srancher-5dd7f7dd8b-4ks6m 0/1 ContainerCreating 0 27srancher-5dd7f7dd8b-xdxbl 0/1 ContainerCreating 0 27s

若有收获,就点个赞吧
0 人点赞
