第五节
1、路由导航守卫-判断用户是否已经登录
// 判断是否登录router.beforeEach((to) => {if (to.path !== '/login') {const token = localCache.getCache('token')if (!token) {return '/login'}}})
2、用户刷新页面后Pinia数据重载(第五节 后期)
import { createApp } from 'vue'import App from './App.vue'import router from './router'import { createPinia } from 'pinia'import { useLoginStore } from './store/login/login'import 'normalize.css'import './assets/css/index.less'const app = createApp(App)app.use(router)app.use(createPinia())// 每次刷新页面都加载本地信息,将本地信息同步到piniaconst loginStore = useLoginStore()loginStore.loadLocalLogin()app.mount('#app')
import { defineStore } from 'pinia'import localCache from '@/utils/cache'import router from '@/router'export const useLoginStore = defineStore('login', {state: () => ({token: '',userInfo: {},userMenus: []}),getters: {},actions: {// 这个方法要在main.ts中调用loadLocalLogin() {const token = localCache.getCache('token')if (token) {this.token = token}const userInfo = localCache.getCache('userInfo')if (userInfo) {this.userInfo = userInfo}const userMenus = localCache.getCache('userMenus')if (userMenus) {this.userMenus = userMenus}}}})
第六节
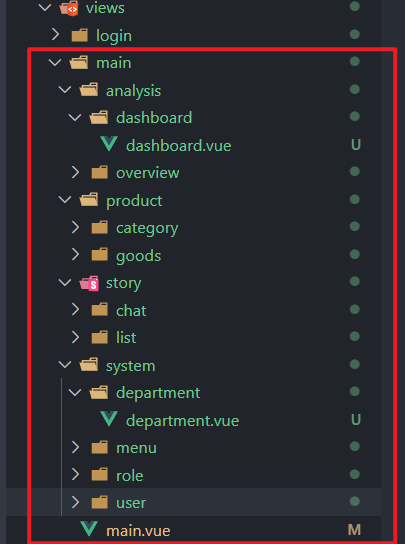
1、main页面目录结构设计
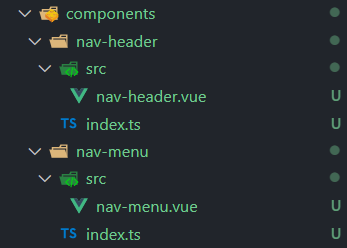 index.ts是专门做导出的
2、在模板中使用目录别名
<template><img src="~@/assets/logo.png" alt="logo" /></template>
3、菜单接口类型
{"code": 0,"data": {"list": [{"id": 1,"name": "系统管理","type": 1, // type=1:可以展开的菜单"url": "/main/system","icon": "el-icon-setting","sort": 2,"createAt": "2021-01-02T10:08:14.000Z","updateAt": "2021-08-20T07:00:08.000Z","children": [{"id": 2,"url": "/main/system/user","name": "用户管理","sort": 100,"type": 2, // type=2 页面选项"children": [{"id": 5,"url": null,"name": "创建用户","sort": null,"type": 3, // type=3 按钮权限"createAt": "2021-01-03 13:41:01.000000","parentId": 2,"updateAt": "2021-08-19 16:10:06.000000","permission": "system:users:create"}],"createAt": "2021-01-02 18:08:47.000000","parentId": 1,"updateAt": "2021-08-19 15:52:01.000000"}]},{"id": 38,"name": "系统总览","type": 1,"url": "/main/analysis","icon": "el-icon-monitor","sort": 1,"createAt": "2021-04-19T14:11:02.000Z","updateAt": "2021-08-20T06:59:55.000Z","children": [{"id": 39,"url": "/main/analysis/overview","name": "核心技术","sort": 106,"type": 2,"children": null,"createAt": "2021-01-02 18:09:11.000000","parentId": 38,"updateAt": "2021-08-19 15:54:41.000000"}]}]}}
对应的Element 展示模板
<template><div class="nav-menu"><div class="logo"><img class="img" src="~@/assets/img/logo.svg" alt="logo" /><span v-if="!collapse" class="title">Vue3+TS</span></div><!-- ======================菜单================= --><el-menudefault-active="2"class="el-menu-vertical":collapse="collapse"background-color="#0c2135"text-color="#b7bdc3"active-text-color="#0a60bd"><template v-for="item in userMenus" :key="item.id"><!-- 一级菜单 --><template v-if="item.type === 1"><!-- 一级菜单的可以展开的标题 --><el-submenu :index="item.id + ''"><!-- 一级菜单信息 --><template #title><i v-if="item.icon" :class="item.icon"></i><span>{{ item.name }}</span></template><!-- 遍历里面的item --><template v-for="subitem in item.children" :key="subitem.id"><el-menu-item :index="subitem.id + ''"><i v-if="subitem.icon" :class="subitem.icon"></i><span>{{ subitem.name }}</span></el-menu-item></template></el-submenu></template><!-- 二级菜单 --><template v-else-if="item.type === 2"><el-menu-item :index="item.id + ''"><i v-if="item.icon" :class="item.icon"></i><span>{{ item.name }}</span></el-menu-item></template></template></el-menu></div></template>
4、权限管理的原理
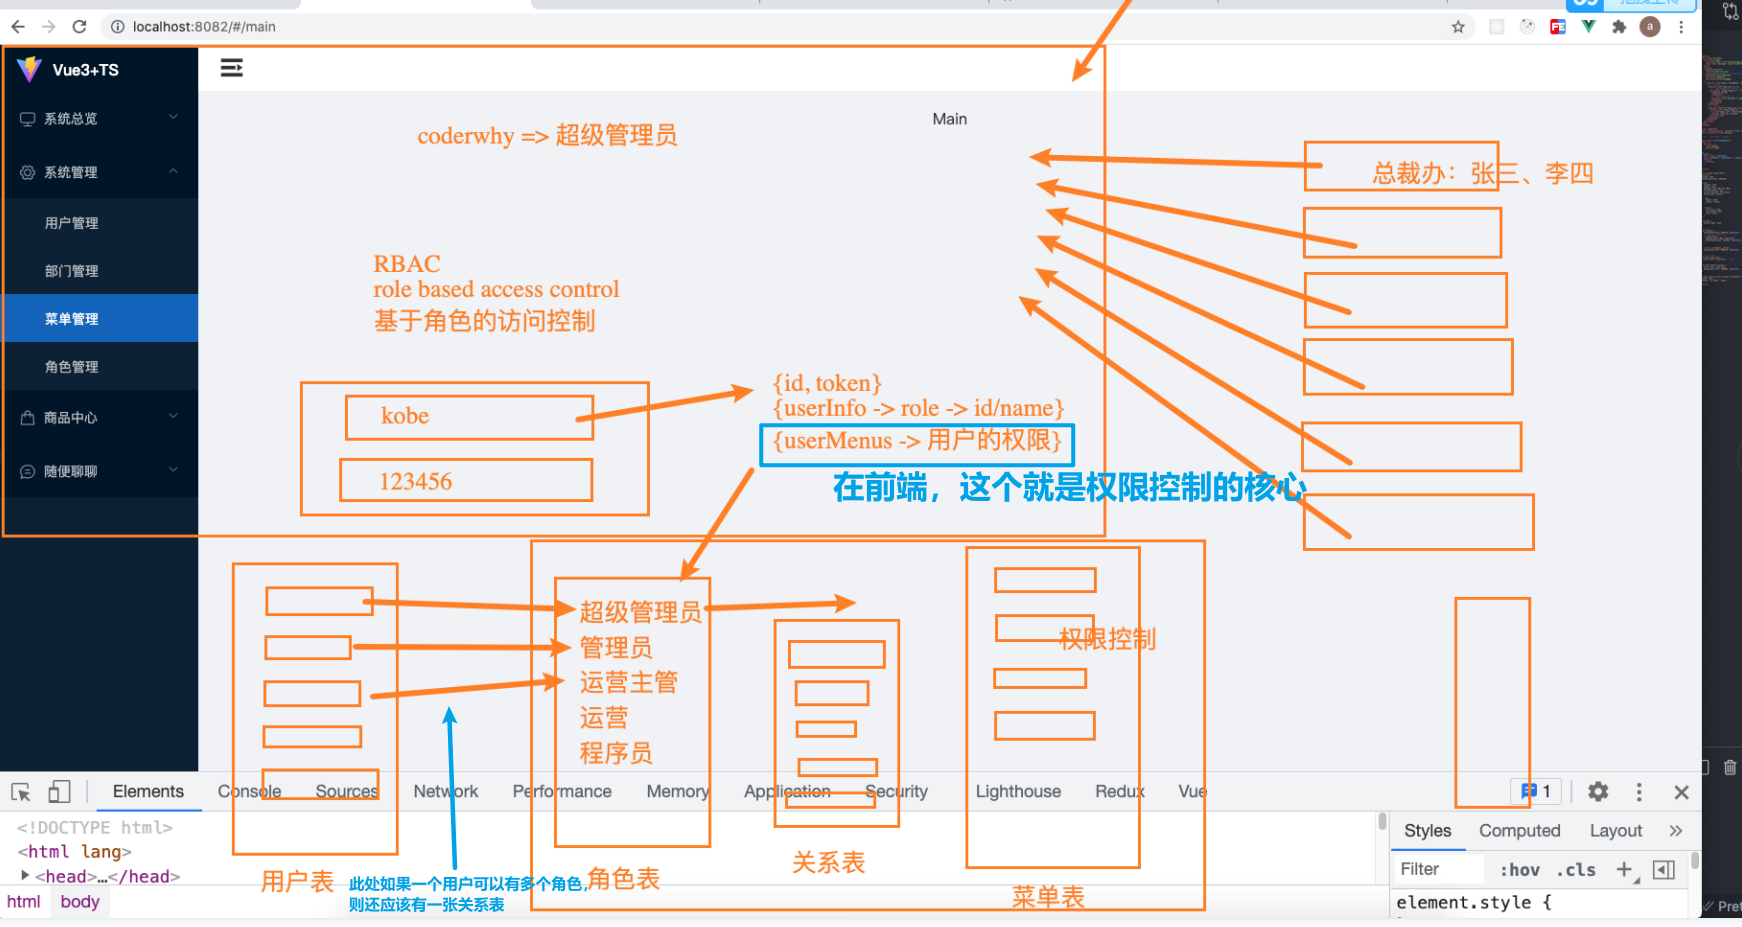
动态路由的几种方案
第一种
将所有的url映射都写出来,看看当前用户有什么菜单,就显示什么
缺点:如果用户直接输入url,会有风险!
第二种
缺点,角色是枚举出来的,映射是写死的,如果新添加角色,就得修改前端代码!!
第三种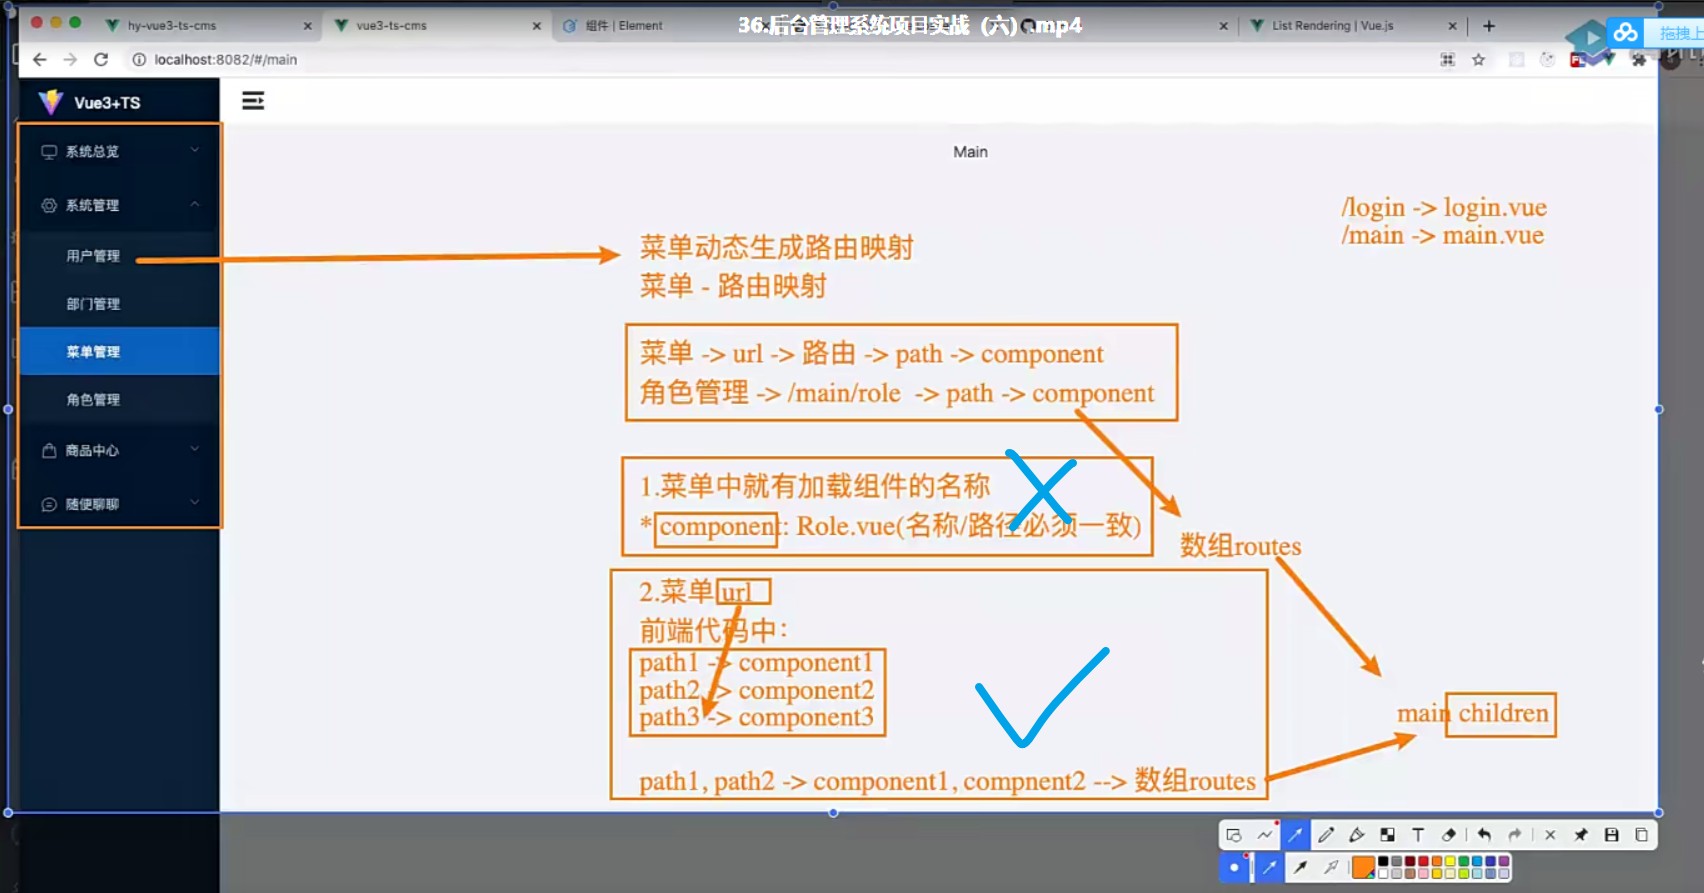
这里就需要后端的配合了!后端需要在数据库中为每个菜单存一个url!!!
第七节
1、高级组件封装
<script lang="ts">import { defineComponent, PropType } from 'vue'import { IFormItem } from '../types'export default defineComponent({props: {formItems: {type: Array as PropType<IFormItem[]>,default: () => [] // 默认值为数组或者对象时,要用箭头函数,和this有关系},labelWidth: {type: String,default: '100px'},itemStyle: {type: Object,default: () => ({ padding: '10px 40px' })},colLayout: {type: Object,default: () => ({xl: 6, // >1920px 4个lg: 8,md: 12,sm: 24,xs: 24})}},setup() {return {}}})</script>
第八节
1、一刷新就NotFound
app.use(router)// 每次刷新页面都加载本地信息,将本地信息同步到piniaconst loginStore = useLoginStore()loginStore.loadLocalLogin()
换一下顺序即可
const loginStore = useLoginStore()loginStore.loadLocalLogin()app.use(router)
2、路径映射出菜单
先写工具函数
// 这波递归很溜export function pathMapToMenu(userMenus: any[], currentPath: string): any {for (const menu of userMenus) {if (menu.type === 1) {const findMenu = pathMapToMenu(menu.children ?? [], currentPath) // 这里接住!if (findMenu) {return findMenu}} else if (menu.type===2 && menu.url === currentPath) {return menu // 这里返回}}}
然后使用
<template><div class="nav-menu"><div class="logo"><img class="img" src="~@/assets/img/logo.svg" alt="logo" /><span v-if="!collapse" class="title">Vue3+TS</span></div><el-menu :default-active="defaultValue" class="el-menu-vertical" :collapse="collapse" background-color="#0c2135"text-color="#b7bdc3" active-text-color="#0a60bd"><!--省略。。。--></el-menu></div></template><script lang="ts">import { defineComponent, computed, ref } from 'vue'import { useLoginStore } from '@/store/login/login'import { useRouter, useRoute } from 'vue-router'import { pathMapToMenu } from '@/utils/map-menus'// vuex - typescript => piniaexport default defineComponent({props: {collapse: {type: Boolean,default: false}},setup() {// storeconst store = useLoginStore()const userMenus = computed(() => store.userMenus)//router (学习一下是如何使用route和router的)const router = useRouter()const route = useRoute()const currentPath = route.path // 拿到当前路径// dataconst menu = pathMapToMenu(userMenus.value, currentPath) // 因为computed返回的是ref,所以要用其valueconst defaultValue = ref(menu.id + '') // 因为组件只接受字符串,所以这里加一个空字符串// 事件处理const handleMenuItemClick = (item: any) => {router.push({path: item.url ?? '/not-found'})}return {userMenus,defaultValue,handleMenuItemClick}}})</script>
尝试一下,问题解决,但是现在又有了另一个问题:
当尝试调到首页时,啥也不展示了,这是为什么呢?
很简单,因为main不对应任何一个菜单,上面的//data部分,获得的menu是空的,自然没有menu.id,这地方就报错了!
理想情况是:当用户访问首页时,我们定位到第一个菜单上:
只需在src\utils\map-menus.ts中定义一个firstMenu变量,在动态加载路由将其记录下来,然后再回到src\router\index.ts中,加一个全局的路由导航守卫就OK了。
router.beforeEach((to) => {if (to.path === '/main') {return firstMenu.url // 注意,是返回路由的url字符串,而非给to.path赋值!}})

若有收获,就点个赞吧
0 人点赞
