一、概述
Thymeleaf 是 Web 和独立环境的现代服务器端 Java 模板引擎,能够处理HTML,XML,JavaScript,CSS 甚至纯文本。
Thymeleaf 的主要目标是提供一种优雅和高度可维护的创建模板的方式。为了实现这一点,它建立在自然模板的概念上,将其逻辑注入到模板文件中,不会影响模板被用作设计原型。这改善了设计的沟通,弥补了设计和开发团队之间的差距。
Thymeleaf 也从一开始就设计了Web标准 - 特别是 HTML5 - 允许您创建完全验证的模板,Spring Boot 官方推荐使用 thymeleaf 而不是 JSP。
Spring Boot 中使用 Thymeleaf 模板引擎时非常简单,因为 Spring Boot 已经提供了默认的配置,比如解析的文件前缀,文件后缀,文件编码,缓存等等,程序员需要的只是写 html 中的内容即可
二、配置
<dependency><groupId>org.springframework.boot</groupId><artifactId>spring-boot-starter-thymeleaf</artifactId></dependency>
默认规则如下:
- 默认前缀:
DEFAULT_PREFIX = "classpath:/templates/" - 默认后缀:
DEFAULT_SUFFIX = ".html"
默认模板存储于 classpath:/templates 下, 后缀名为 .html, 这完全类似 Spring MVC 的映射规则,如果想修改这些配置只需要在全局配置文件中覆盖修改即可。
修改默认配置:
spring:
  thymeleaf:
    cache: false
    prefix: 'classpath:/pages/'
    suffix: '.tpl'
    encoding: UTF-8
比如修改为以上配置, 将模板文件存储于 classpath:/pages 下, 扩展名为 .tpl
三、使用
目录结构如下: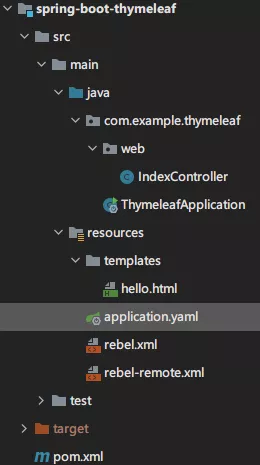
模板编写:classpath:/templates/hello.html
<!DOCTYPE html>
<html lang="en">
<head>
  <meta charset="UTF-8">
  <title>Hello</title>
</head>
<body>
  <h1 th:text="${message}">Hello World</h1>
</body>
</html>
控制器:
@RequestMapping("/")
public String index(ModelMap map) {
    map.addAttribute("message", "https://www.xiaoyulive.top");
    return "hello";
}
其中 map.addAttribute 为模板注入属性, 可以看到在 ${message} 中会替换为相应内容,如果控制器中没有设置值,则渲染为 Hello World
return "hello"; 返回模板文件的名字 hello.html
在 thymeleaf 中渲染模板内容使用 th: 前缀, 比如:
<h1 th:text="${message}"></h1>
<input th:value="${age gt 30 ? '中年':'年轻'}"/>
<a th:if="${flag eq 'yes'}" th:href="@{https://www.xiaoyulive.top/}"> xiaoyulive </a>
当访问 http://localhost:8080 时将渲染 hello.html 的内容
四、模板
判断
<input th:value="${age gt 30 ? '中年':'年轻'}"/>

<a th:if="${flag == 'yes'}" th:href="@{http://localhost/}"> home </a>

<a th:unless="${flag != 'no'}" th:href="@{https://www.xiaoyulive.top/}"> xiaoyulive </a>
循环
<table>
  <tr th:each="user,iterStat : ${users}">
    <td th:text="${user.name}">name</td>
    <td th:text="${user.age}">age</td>
    <td th:text="${user.pass}">pass</td>
    <td th:text="${iterStat.index}">index</td>
  </tr>
</table>
<div th:switch="${sex}">
  <p th:case="'woman'">她是一个姑娘...</p>
  <p th:case="'man'">这是一个爷们!</p>
  <!-- *: case的默认的选项 -->
  <p th:case="*">未知性别的一个家伙。</p>
</div>
五、静态资源
用以下方式引入静态资源, 比如样式:
<link rel="stylesheet" th:href="@{/css/bootstrap.min.css}" />
其中 @{/css/bootstrap.min.css} 映射到 classpath:/static/css/bootstrap.min.css
六、布局
th:fragment
指定一个片段layout/header.html
<!DOCTYPE html>
<html lang="en" xmlns:th="http://www.thymeleaf.org">
  <head>
    <meta charset="UTF-8" />
    <title>header</title>
  </head>
  <body>
    <header th:fragment="header">
      <h1>头部</h1>
    </header>
  </body>
</html>
th:replace
将会替换为指定片段或内容, 比如index.html
<div th:replace="layout/header :: header"></div>

<title th:replace="${title}">comm title</title>

<th:block th:replace="${links}"/>
th:insert
将会插入指定片段, 比如index.html
<div th:insert="layout/header :: header"></div>
layout:decorate
指定布局文件index.html
<html xmlns:th="http://www.thymeleaf.org" xmlns:layout="http://www.ultraq.net.nz/web/thymeleaf/layout"
      layout:decorate="layout">
<head>
  <meta charset="UTF-8" />
  <title>Home</title>
</head>
<body>
<div layout:fragment="content">
  <h2>内容</h2>
</div>
</body>
</html>
layout.html
<!DOCTYPE html>
<html lang="en" xmlns:th="http://www.thymeleaf.org" xmlns:layout="http://www.ultraq.net.nz/web/thymeleaf/layout">
  <head>
    <meta charset="UTF-8"/>
    <title>Layout</title>
  </head>
  <body>
    <div>
      <div th:replace="layout/header :: header"></div>
      <div th:replace="layout/left :: left"></div>
      <div layout:fragment="content"> content </div>
      <div th:replace="layout/footer :: footer"></div>
    </div>
  </body>
</html>
以上, 渲染出的内容为
header
left
内容
footer
由于 layout:fragment 为 content 的部分名称相同, 被替换为 index.html 对应部分
七、在js中获取thymeleaf传入的值
在标签中可以通过 th:text 获取thymeleaf传入的值,并填充标签内容。
如果在script标签内部,要在js中获取thymeleaf传入的值,使用以下方法:
<script th:inline="javascript">
  let userName = [[${user_name}]];
</script>
当然,也可在模板内容中使用:
<body th:inline="text">
  <p>Hello, [[${session.user.name}]]!</p>
</body>
八、其他模板引擎
由于平时开发基本都采用前后端分离 (比如 Vue、React), 所以就不详细介绍模板引擎了, 有兴趣的童鞋自行参考:
参考资料

若有收获,就点个赞吧
0 人点赞
