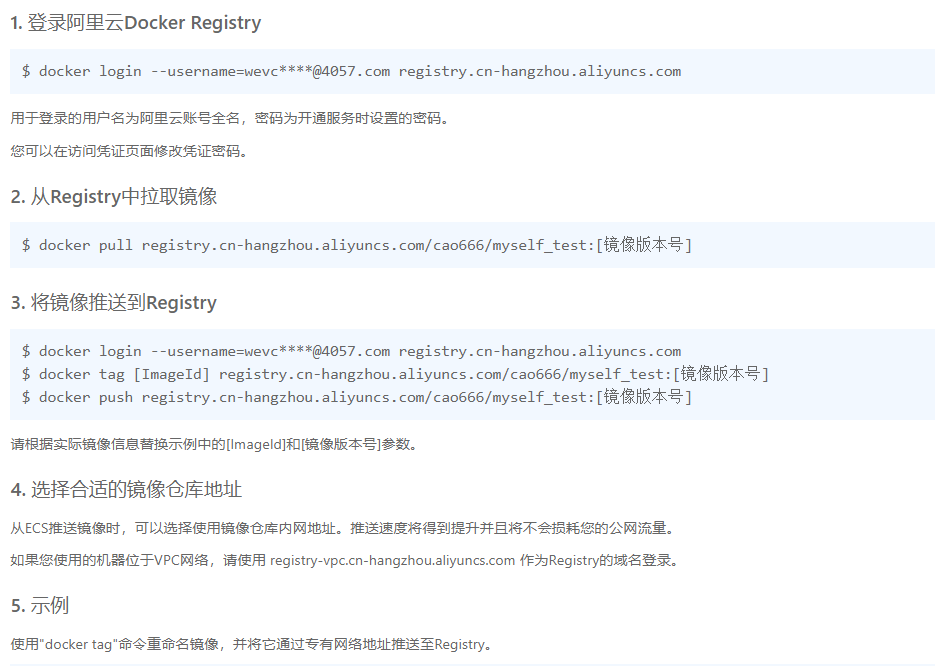
一、DockerHub发布
[root@localhost tmp]# docker login --helpUsage: docker login [OPTIONS] [SERVER]Log in to a Docker registry.If no server is specified, the default is defined by the daemon.Options:-p, --password string Password--password-stdin Take the password from stdin-u, --username string Username#登陆成功以后[root@localhost tmp]# docker push cao/centos:1.0出现报错解决办法:The push refers to repository [docker.io/cao/centos]An image does not exist locally with the tag: cao/centos重打标签:[root@localhost tmp]# docker imagesREPOSITORY TAG IMAGE ID CREATED SIZE<none> <none> 9f321222e8c9 46 minutes ago 584MBcentos latest 300e315adb2f 7 months ago 209MB[root@localhost tmp]# docker tag 300e315adb2f cao/centos:1.0[root@localhost tmp]# docker imagesREPOSITORY TAG IMAGE ID CREATED SIZE<none> <none> 9f321222e8c9 51 minutes ago 584MBcao/centos 1.0 300e315adb2f 7 months ago 209MBcentos latest 300e315adb2f 7 months ago 209MB
二、阿里云发布
官网:https://cr.console.aliyun.com/cn-hangzhou/instance/repositories
1、创建命名空间
2、创建容器镜像仓库==》仓库选本地
3、使用
三、本地打包本地导入
1、打包:
docker commit -p dc8c5254acc3 nginx:v1docker psdocker save nginx:v1 > nginx.tar
2、另一台加载使用:
将两个文件夹都放到Linux /home/目录下docker load -i nginx.tardocker psdocker run -itd --name nginx nginx:v1
注意:selenux要关闭、防火墙要关闭
四、局域网仓库registry
1、拉取运行本地仓库镜像
docker pull registry:2docker run -d -v /home/docker_registry:/var/lib/registry -p 5000:5000 --name myregistry registry:2访问地址:http://127.0.0.1:5000/v2/
2、仓库服务器打包上传镜像
docker commit -a "cao" -m "敏感人员" -p dc8c5254acc3 nginx:1.0docker commit -a "cao" -m "敏感人员" -p 3de6451a156a java:1.0docker commit -a "cao" -m "敏感人员" -p 256c979fcfcf redis:1.0docker commit -a "cao" -m "敏感人员" -p 05ef03502e7a mysql:1.0docker tag mysql:1.0 localhost:5000/mysql:1.0docker push localhost:5000/mysql:1.0
3、局域网服务器拉取镜像并使用
路径:/etc/docker/daemon.json修改内网的docker默认daemon:{"registry-mirrors":["http://192.168.0.253:5000"],"insecure-registries": ["192.168.0.253:5000"]}拉取镜像:docker pull 192.168.0.253:5000/nginx:1.0docker pull 192.168.0.253:5000/java:1.0docker pull 192.168.0.253:5000/redis:1.0docker pull 192.168.0.253:5000/mysql:1.0运行镜像:docker run -p 3306:3306 --name mysql --privileged=true --restart unless-stopped -v /home/docker-project/mysql/mysql:/etc/mysql -v /home/docker-project/mysql/logs:/logs -v /home/docker-project/mysql/data:/var/lib/mysql -v /etc/localtime:/etc/localtime -e MYSQL_ROOT_PASSWORD=root -d mysql:1.0


