1.IRule接口源码
public interface IRule{/** choose one alive server from lb.allServers or* lb.upServers according to key** @return choosen Server object. NULL is returned if none* server is available*/public Server choose(Object key);public void setLoadBalancer(ILoadBalancer lb);public ILoadBalancer getLoadBalancer();}
2.IRule类图关系结构
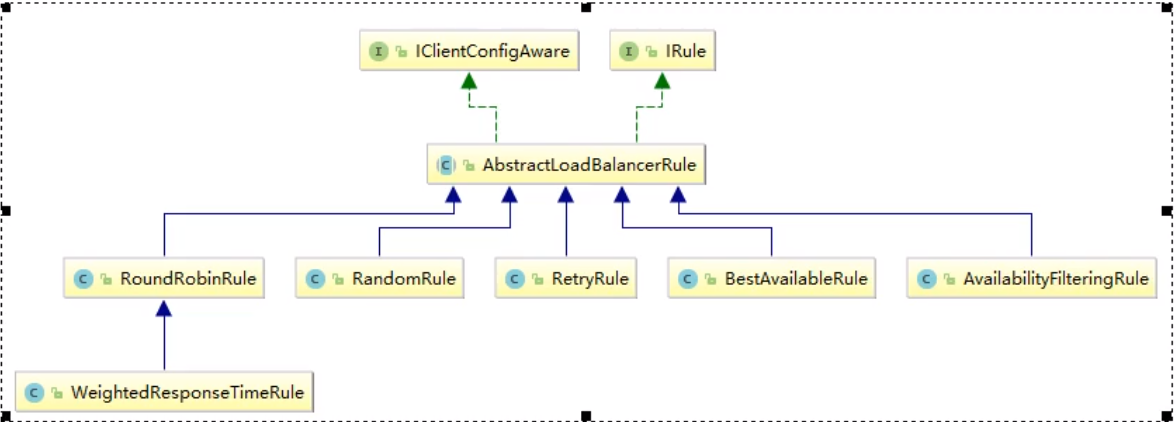
3.负载均衡策略
| 策略名 | 说明 |
|---|---|
| RoundRobinRule | 轮询规则(默认方法) |
| RandomRule | 随机 |
| AvailabilityFilteringRule | 先过滤掉由于多次访问故障而处于断路器跳闸状态的服务,还有并发的连接数量超过阈值的服务,然后对剩余的服务进行轮询 |
| WeightedResponseTimeRule | 根据平均响应时间计算服务的权重。统计信息不足时会按照轮询,统计信息足够会按照响应的时间选择服务 |
| RetryRule | 正常时按照轮询选择服务,若过程中有服务出现故障,在轮询一定次数后依然故障,则会跳过故障的服务继续轮询 |
| BestAvailableRule | 先过滤掉由于多次访问故障而处于断路器跳闸状态的服务,然后选择一个并发量最小的服务 |
| ZoneAvoidanceRule | 默认规则,符合判断server所在的区域的性能和server的可用性选择服务 |
4.更改Ribbon负载规则
官方文档明确给出了警告:自定义配置类不能放在@ComponentScan所扫描的当前包下以及子包下,否则我们自定义的这个配置类就会被所有的Ribbon客户端所共享,达不到特殊化定制的目的了。
在cloud-consumer-order80项目中创建myrule包,结构如下: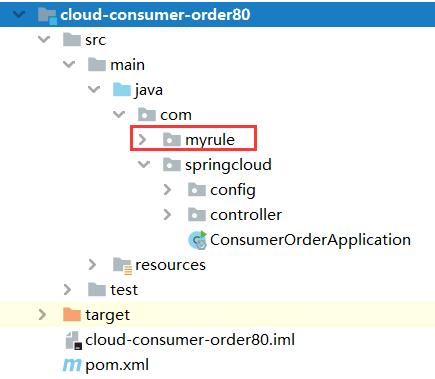
添加MySelfRule配置类
**将Ribbon的负载均衡规则修改成了随机规则
@Configurationpublic class MySelfRule {@Beanpublic IRule myRule() {return new RandomRule();}}
修改主启动类
添加@RibbonClient注解指定被调用的微服务名称和自定义配置的负载规则配置类
@EnableEurekaClient@SpringBootApplication@RibbonClient(name = "CLOUD-PAYMENT-SERVICE",configuration = MySelfRule.class)public class ConsumerOrderApplication {public static void main(String[] args) {SpringApplication.run(ConsumerOrderApplication.class, args);}}
启动Eureka注册中心:cloud-eureka-server7001,cloud-eureka-server7002
启动服务提供者:cloud-provider-payment8001,cloud-provider-payment8002
启动服务消费者:cloud-consumer-order80
浏览器输入:http://localhost/consumer/payment/get/1
随机调用服务提供者返回数据,观察端口号是从哪台服务提供者返回的数据
{"code":200,"message":"查询成功,serverPort: 8001","data":{"id":1,"serial":"哈哈哈"}}{"code":200,"message":"查询成功,serverPort: 8001","data":{"id":1,"serial":"哈哈哈"}}{"code":200,"message":"查询成功,serverPort: 8001","data":{"id":1,"serial":"哈哈哈"}}{"code":200,"message":"查询成功,serverPort: 8002","data":{"id":1,"serial":"哈哈哈"}}{"code":200,"message":"查询成功,serverPort: 8002","data":{"id":1,"serial":"哈哈哈"}}{"code":200,"message":"查询成功,serverPort: 8001","data":{"id":1,"serial":"哈哈哈"}}
5.Ribbon默认负载轮询算法原理
负载均衡算法:rest接口第几次请求数 % 服务器集群总数量 = 实际调用服务器位置下标,每次服务重启后rest接口计数从1开始
如:List[0] instances = 127.0.0.1:8002
List[1] instances = 127.0.0.1:8001
8001 + 8002 组合成为集群,它们共计2台机器,集群总数为2,按照轮询算法原理:
当总请求数为1时:1 % 2 = 1 对应下标位置为1,则获得服务地址为127.0.0.1:8001
当总请求数为2时:2 % 2 = 0 对应下标位置为0,则获得服务地址为127.0.0.1:8002
当总请求数为3时:3 % 2 = 1 对应下标位置为1,则获得服务地址为127.0.0.1:8001
当总请求数为4时:4 % 2 = 0 对应下标位置为0,则获得服务地址为127.0.0.1:8002
如此类推……..
6.自定义手写Ribbon负载均衡算法
1.修改cloud-provider-payment8001和cloud-provider-payment8002中的PaymentController增加如下内容
@GetMapping(value = "/payment/lb")
public String getPaymentLB(){
    return serverPort;
}
2.在cloud-consumer-order80项目中新建一个lb包然后在新建一个LoadBalance接口
public interface LoadBalancer {
    /**
     * 收集服务器总共有多少台能够提供服务的机器,并放到list里面
     * @param serviceInstances
     * @return
     */
    ServiceInstance instances(List<ServiceInstance> serviceInstances);
}
3.创建LoadBalancer接口的实现类
@Component
public class MyLB implements LoadBalancer {

    private AtomicInteger atomicInteger = new AtomicInteger(0);

    //坐标
    private final int getAndIncrement() {
        int current;
        int next;
        do {
            current = this.atomicInteger.get();
            next = current >= 2147483647 ? 0 : current + 1;
            //第一个参数是期望值,第二个参数是修改值是
        } while (!this.atomicInteger.compareAndSet(current, next));
        System.out.println("*******第几次访问,次数next: " + next);
        return next;
    }


    @Override
    public ServiceInstance instances(List<ServiceInstance> serviceInstances) {
        //得到服务器的下标位置
        int index = getAndIncrement() % serviceInstances.size();
        return serviceInstances.get(index);
    }
}
项目结构如下: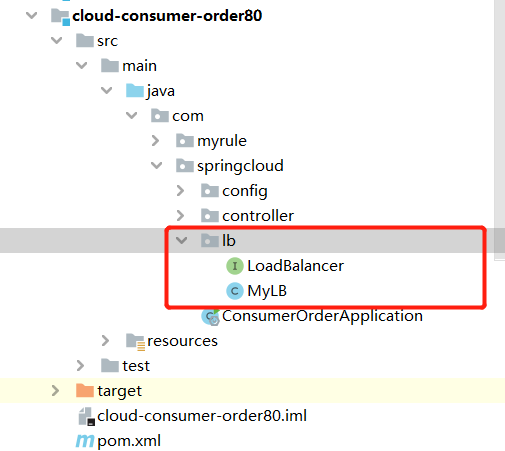
4.在cloud-consumer-order80项目中的OrderController增加如下内容:
@Resource
private DiscoveryClient discoveryClient;

@Resource
private LoadBalancer loadBalancer;

@GetMapping(value = "/consumer/payment/lb")
public String getPaymentLB() {
    List<ServiceInstance> instances = discoveryClient.getInstances("CLOUD-PAYMENT-SERVICE");
    if (instances == null || instances.size() <= 0) {
        return null;
    }
    ServiceInstance serviceInstance = loadBalancer.instances(instances);
    URI uri = serviceInstance.getUri();

    return restTemplate.getForObject(uri + "/payment/lb", String.class);
}
浏览器输入:http://localhost/consumer/payment/lb
返回内容:第一次:8002、第二次:8001、第三次:8002、第四次:8001、第五次:8002、第六次:8001

若有收获,就点个赞吧
0 人点赞
