1.新建cloud-consumer-feign-order80
项目名称:cloud-consumer-feign-order80
鼠标点击父工程项目右击 —> New —> Module
具体创建步骤参考【搭建EurekaServer端服务注册中心】
2.添加pom.xml
注意:spring-cloud-starter-openfeign依赖中已经包含了ribbon但是不是spring-cloud-starter-netflix-starter-ribbon依赖不会自动配置,之所以我们没有自己手动配置是因为spring-cloud-starter-netflix-eureka-client依赖中包含了spring-cloud-starter-netflix-starter-ribbon依赖会自动配置,如果单独使用openFeign需要自己配置ribbon的配置
<!--openfeign--><dependencies><dependency><groupId>org.springframework.cloud</groupId><artifactId>spring-cloud-starter-openfeign</artifactId></dependency><dependency><groupId>org.springframework.cloud</groupId><artifactId>spring-cloud-starter-netflix-eureka-client</artifactId></dependency><dependency><groupId>org.springframework.boot</groupId><artifactId>spring-boot-starter-web</artifactId></dependency><dependency><groupId>org.springframework.boot</groupId><artifactId>spring-boot-starter-actuator</artifactId></dependency><dependency><groupId>org.springframework.boot</groupId><artifactId>spring-boot-devtools</artifactId><scope>runtime</scope><optional>true</optional></dependency><dependency><groupId>org.projectlombok</groupId><artifactId>lombok</artifactId><optional>true</optional></dependency><dependency><groupId>org.springframework.boot</groupId><artifactId>spring-boot-starter-test</artifactId><scope>test</scope></dependency></dependencies>
3.添加application.yml配置文件
server:
  port: 80
spring:
  application:
    name: cloud-feign-order-service
eureka:
  client:
    #表示是否将自己注册进EurekaServer默认为true。
    register-with-eureka: true
    #是否从EurekaServer抓取已有的注册信息,默认为true。单节点无所谓,集群必须设置为true才能配合ribbon使用负载均衡
    fetchRegistry: true
    service-url:
      #单机
      #defaultZone: http://localhost:7001/eureka
      # 集群
      defaultZone: http://eureka7001.com:7001/eureka,http://eureka7002.com:7002/eureka
  instance:
    instance-id: consumerFeignOrder80
    #访问路径可以显示IP地址
    prefer-ip-address: true
    #Eureka客户端向服务端发送心跳的时间间隔,单位为秒(默认是30秒)
    #lease-renewal-interval-in-seconds: 1
    #Eureka服务端在收到最后一次心跳后等待时间上限,单位为秒(默认是90秒),超时将剔除服务
    #lease-expiration-duration-in-seconds: 2
4.添加主启动类
注解:@EnableFeignClients开启Feign客户端调用功能
@EnableFeignClients
@EnableEurekaClient
@SpringBootApplication
public class ConsumerFeignOrderApplication {

    public static void main(String[] args) {
        SpringApplication.run(ConsumerFeignOrderApplication.class, args);
    }

}
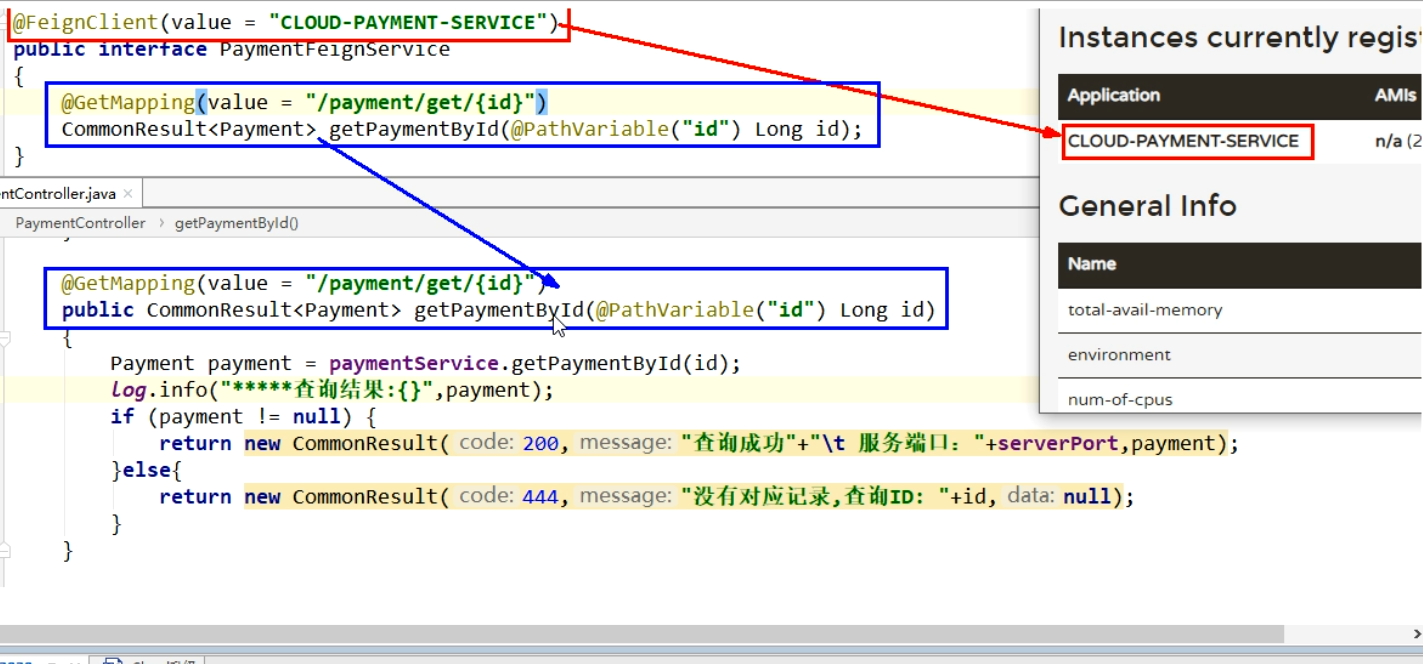
5.添加PaymentFeignService接口
注解:@FeignClient其中的value表示要调用哪个微服务的名称
@Component
@FeignClient(value = "CLOUD-PAYMENT-SERVICE")
public interface PaymentFeignService {

    @GetMapping(value = "/payment/get/{id}")
    CommonResult<Payment> getPaymentById(@PathVariable("id") Long id);

}
6.添加OrderFeignController
@RestController
@Slf4j
public class OrderFeignController {

    @Resource
    private PaymentFeignService paymentFeignService;

    @GetMapping(value = "/consumer/payment/get/{id}")
    public CommonResult<Payment> getPaymentById(@PathVariable("id") Long id){
        return paymentFeignService.getPaymentById(id);
    }

}
7.启动cloud-consumer-feign-order80
1.先启动2个eureka集群cloud-eureka-server7001,cloud-eureka-server7002
2.再启动2个微服务提供者cloud-provider-payment8001,cloud-provider-payment8002
3.最后启动cloud-consumer-feign-order80服务消费者
4.浏览器输入:http://localhost/consumer/payment/get/1
返回如下内容,表示已经使用feign调用服务成功了
{"code":200,"message":"查询成功,serverPort: 8002","data":{"id":1,"serial":"哈哈哈"}}
8.总结

若有收获,就点个赞吧
0 人点赞
