安装流程
1、终端运行 vue create demo-3 创建一个文件夹 demo-3 (编辑器打开上一目录创建)
2、选择自定义安装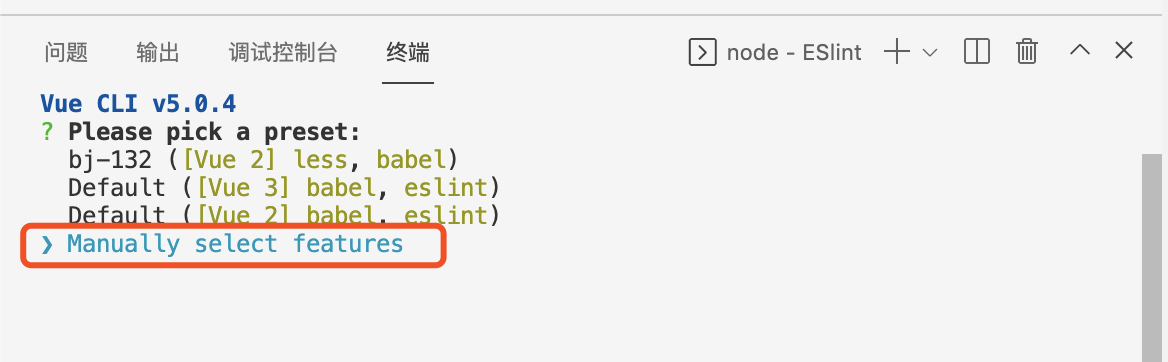
3、选择安装CSS ( 选择是按空格键 )
4、安装vue版本2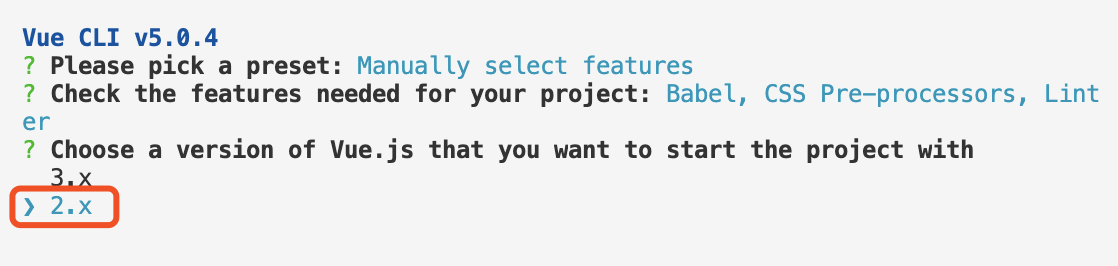
5、选择域处理器 选择Less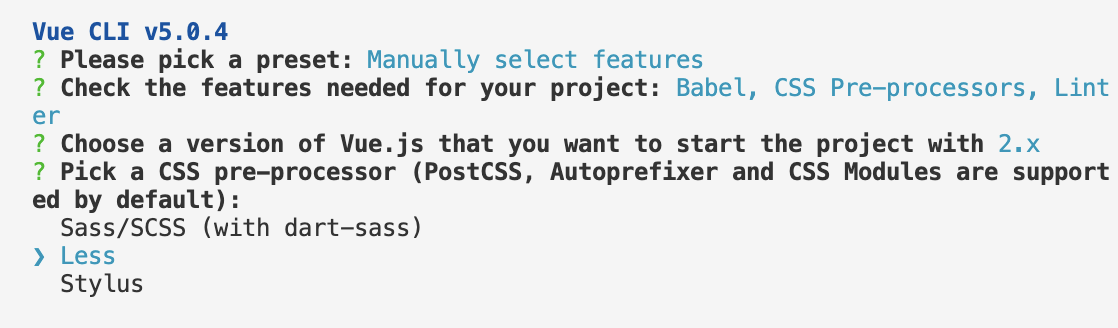
6、选择SElint 的那种规范 ( 选择标准规范 )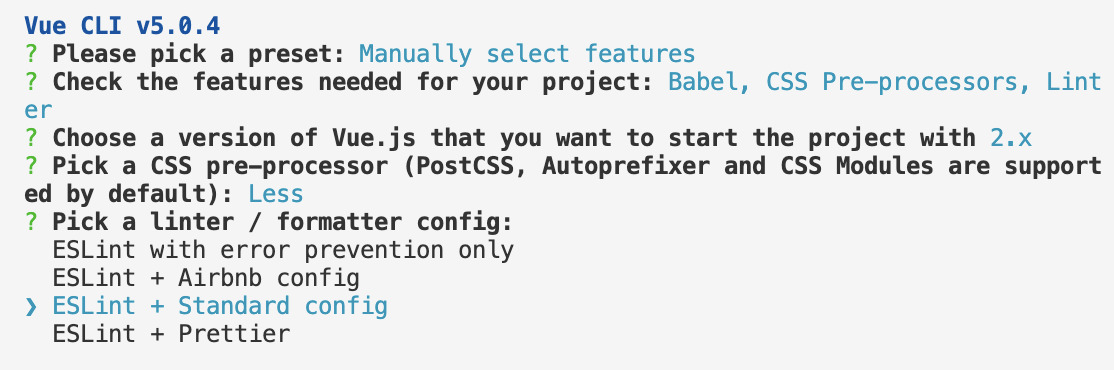
7、选择 保存的时候校错 第二个是全部写完在校错 所有选择第一个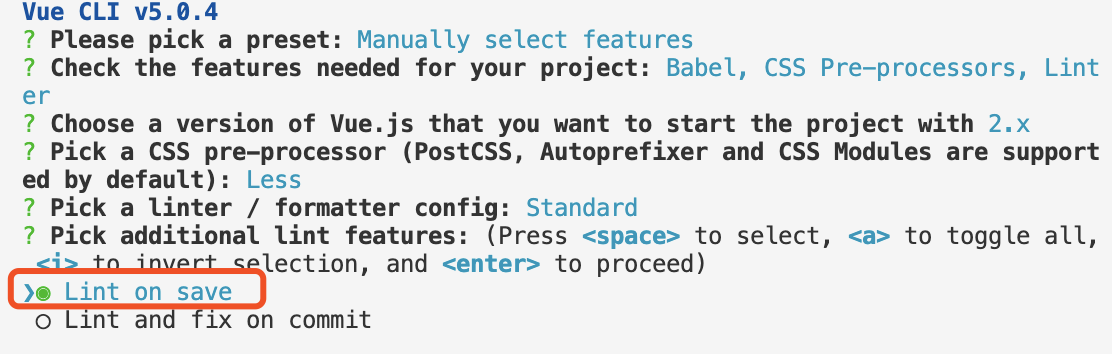
8、放在独立的配置里面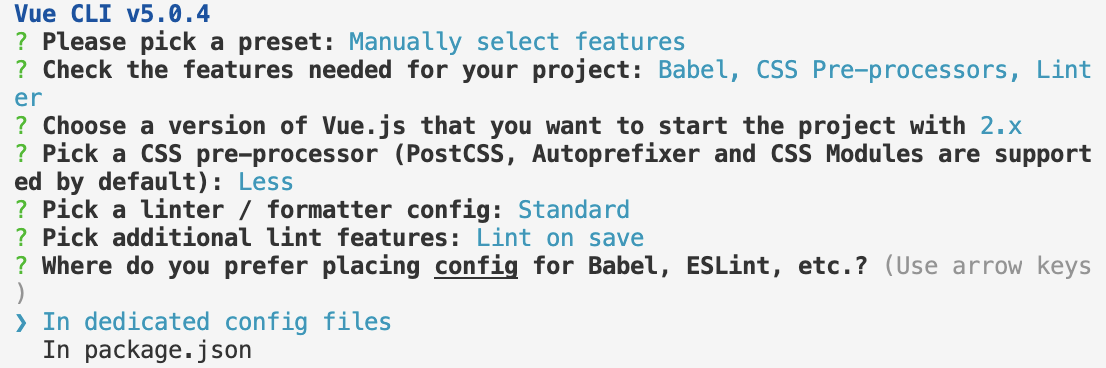
9、是否将刚才的预设存起来 (n为不存)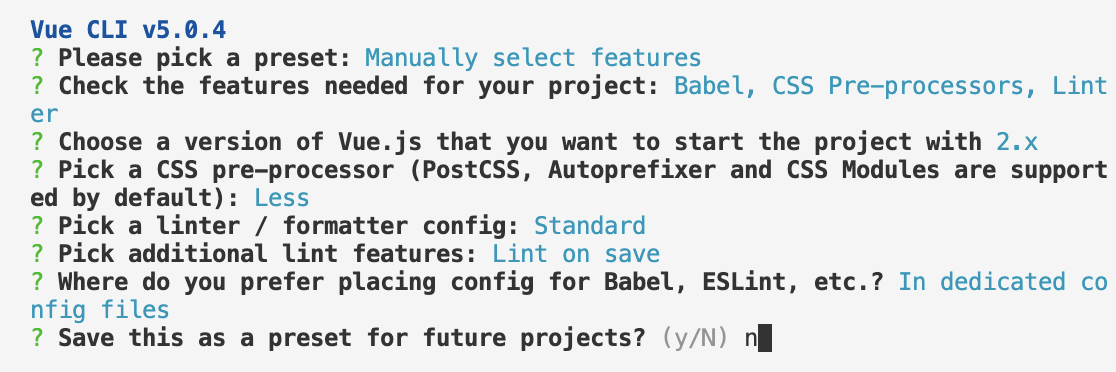
10、安装插件 

把axios挂载到vue原型上 main.js (不建议使用)
在终端运行 npm i axios -S 安装axios
import axios from 'axios'// 全局配置 axios 的请求根路径axios.defaults.baseURL = 'http://www.liulongbin.top:3006'// 把 axios 挂载到 Vue.prototype 上, 供每个 .vue 组件的实例直接使用Vue.prototype.$http = axios// 今后, 在每个 .vue组件中要发起请求, 直接调用 this.$http.xxx// 但是, 把 axios 挂载到 Vue原型上, 有一个缺点, 不利于 API 接口的复用!!!
<script>export default {methods: {async getInfo () {const { data: res } = await this.$http.get('/api/get')console.log(res)}}}</script>
<script>export default {methods: {async postInfo () {const { data: res } = await this.$http.post('/api/post', { name: 'zs', age: 20 })console.log(res)}}}</script>
把axios挂载到src -> 新建 utils文件 里面的request.js (建议使用)
第一步: 先在终端运行 npm i axios -S 安装axios
import axios from 'axios'const request = axios.create({// 指定请求的根路径baseURL: 'https://www.escook.cn'})export default request
<script>// 导入 request.jsimport request from '@/utils/request.js'export default {name: 'Home',data () {return {// 页面值page: 1,// 每页显示多少条数据limit: 10}},created () {this.initArticleList()},methods: {// 封装获取文章列表数据的方法async initArticleList () {// 发起 GET 请求, 获取文章的列表数据const { data: res } = await request.get('/articles', {// 请求参数params: {_page: this.page,_limit: this.limit}})console.log(res)}}}</script>
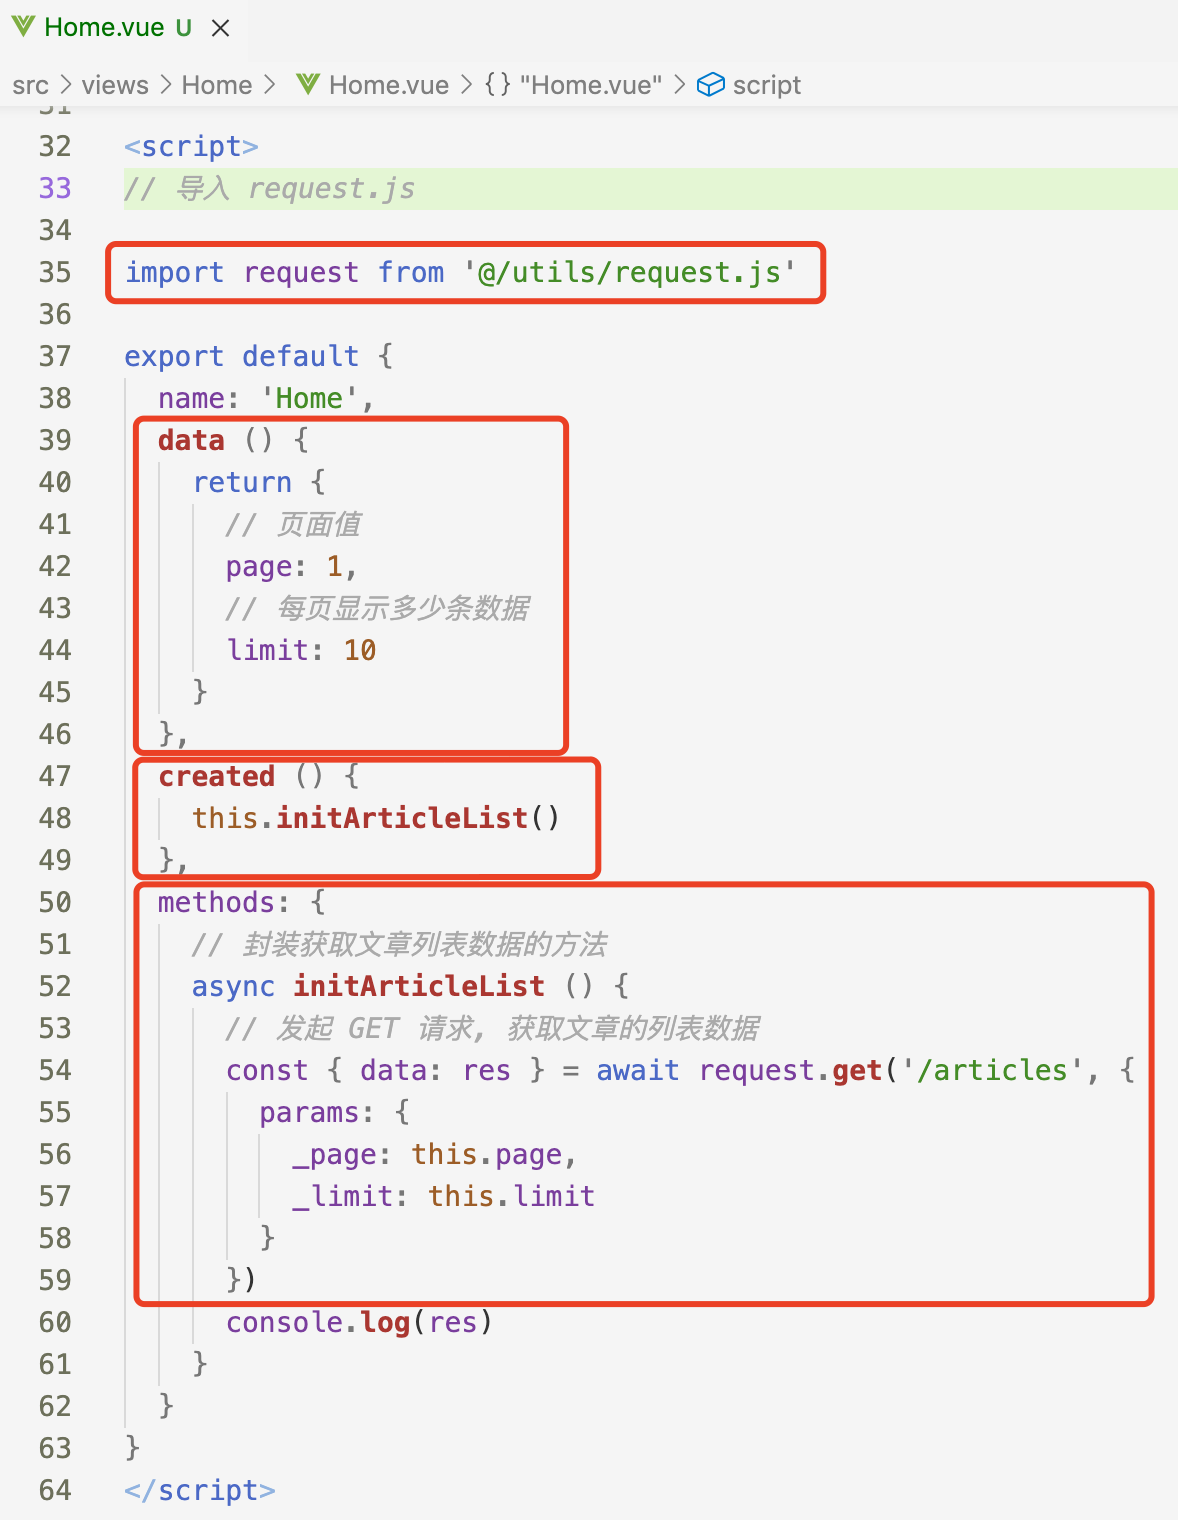
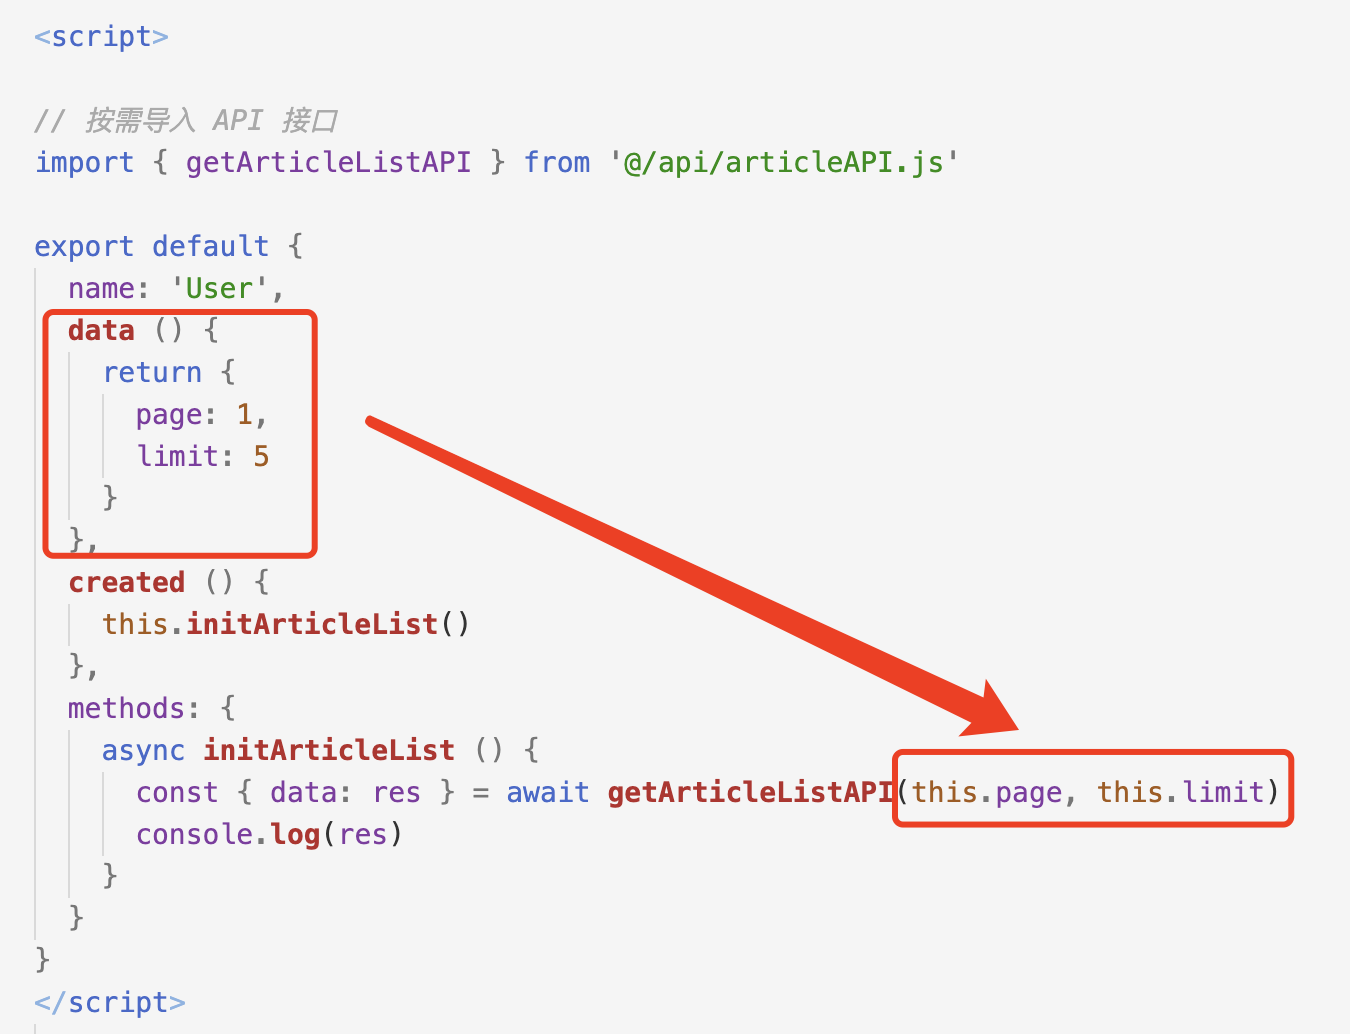
第二种 调用方法 更加适合 复用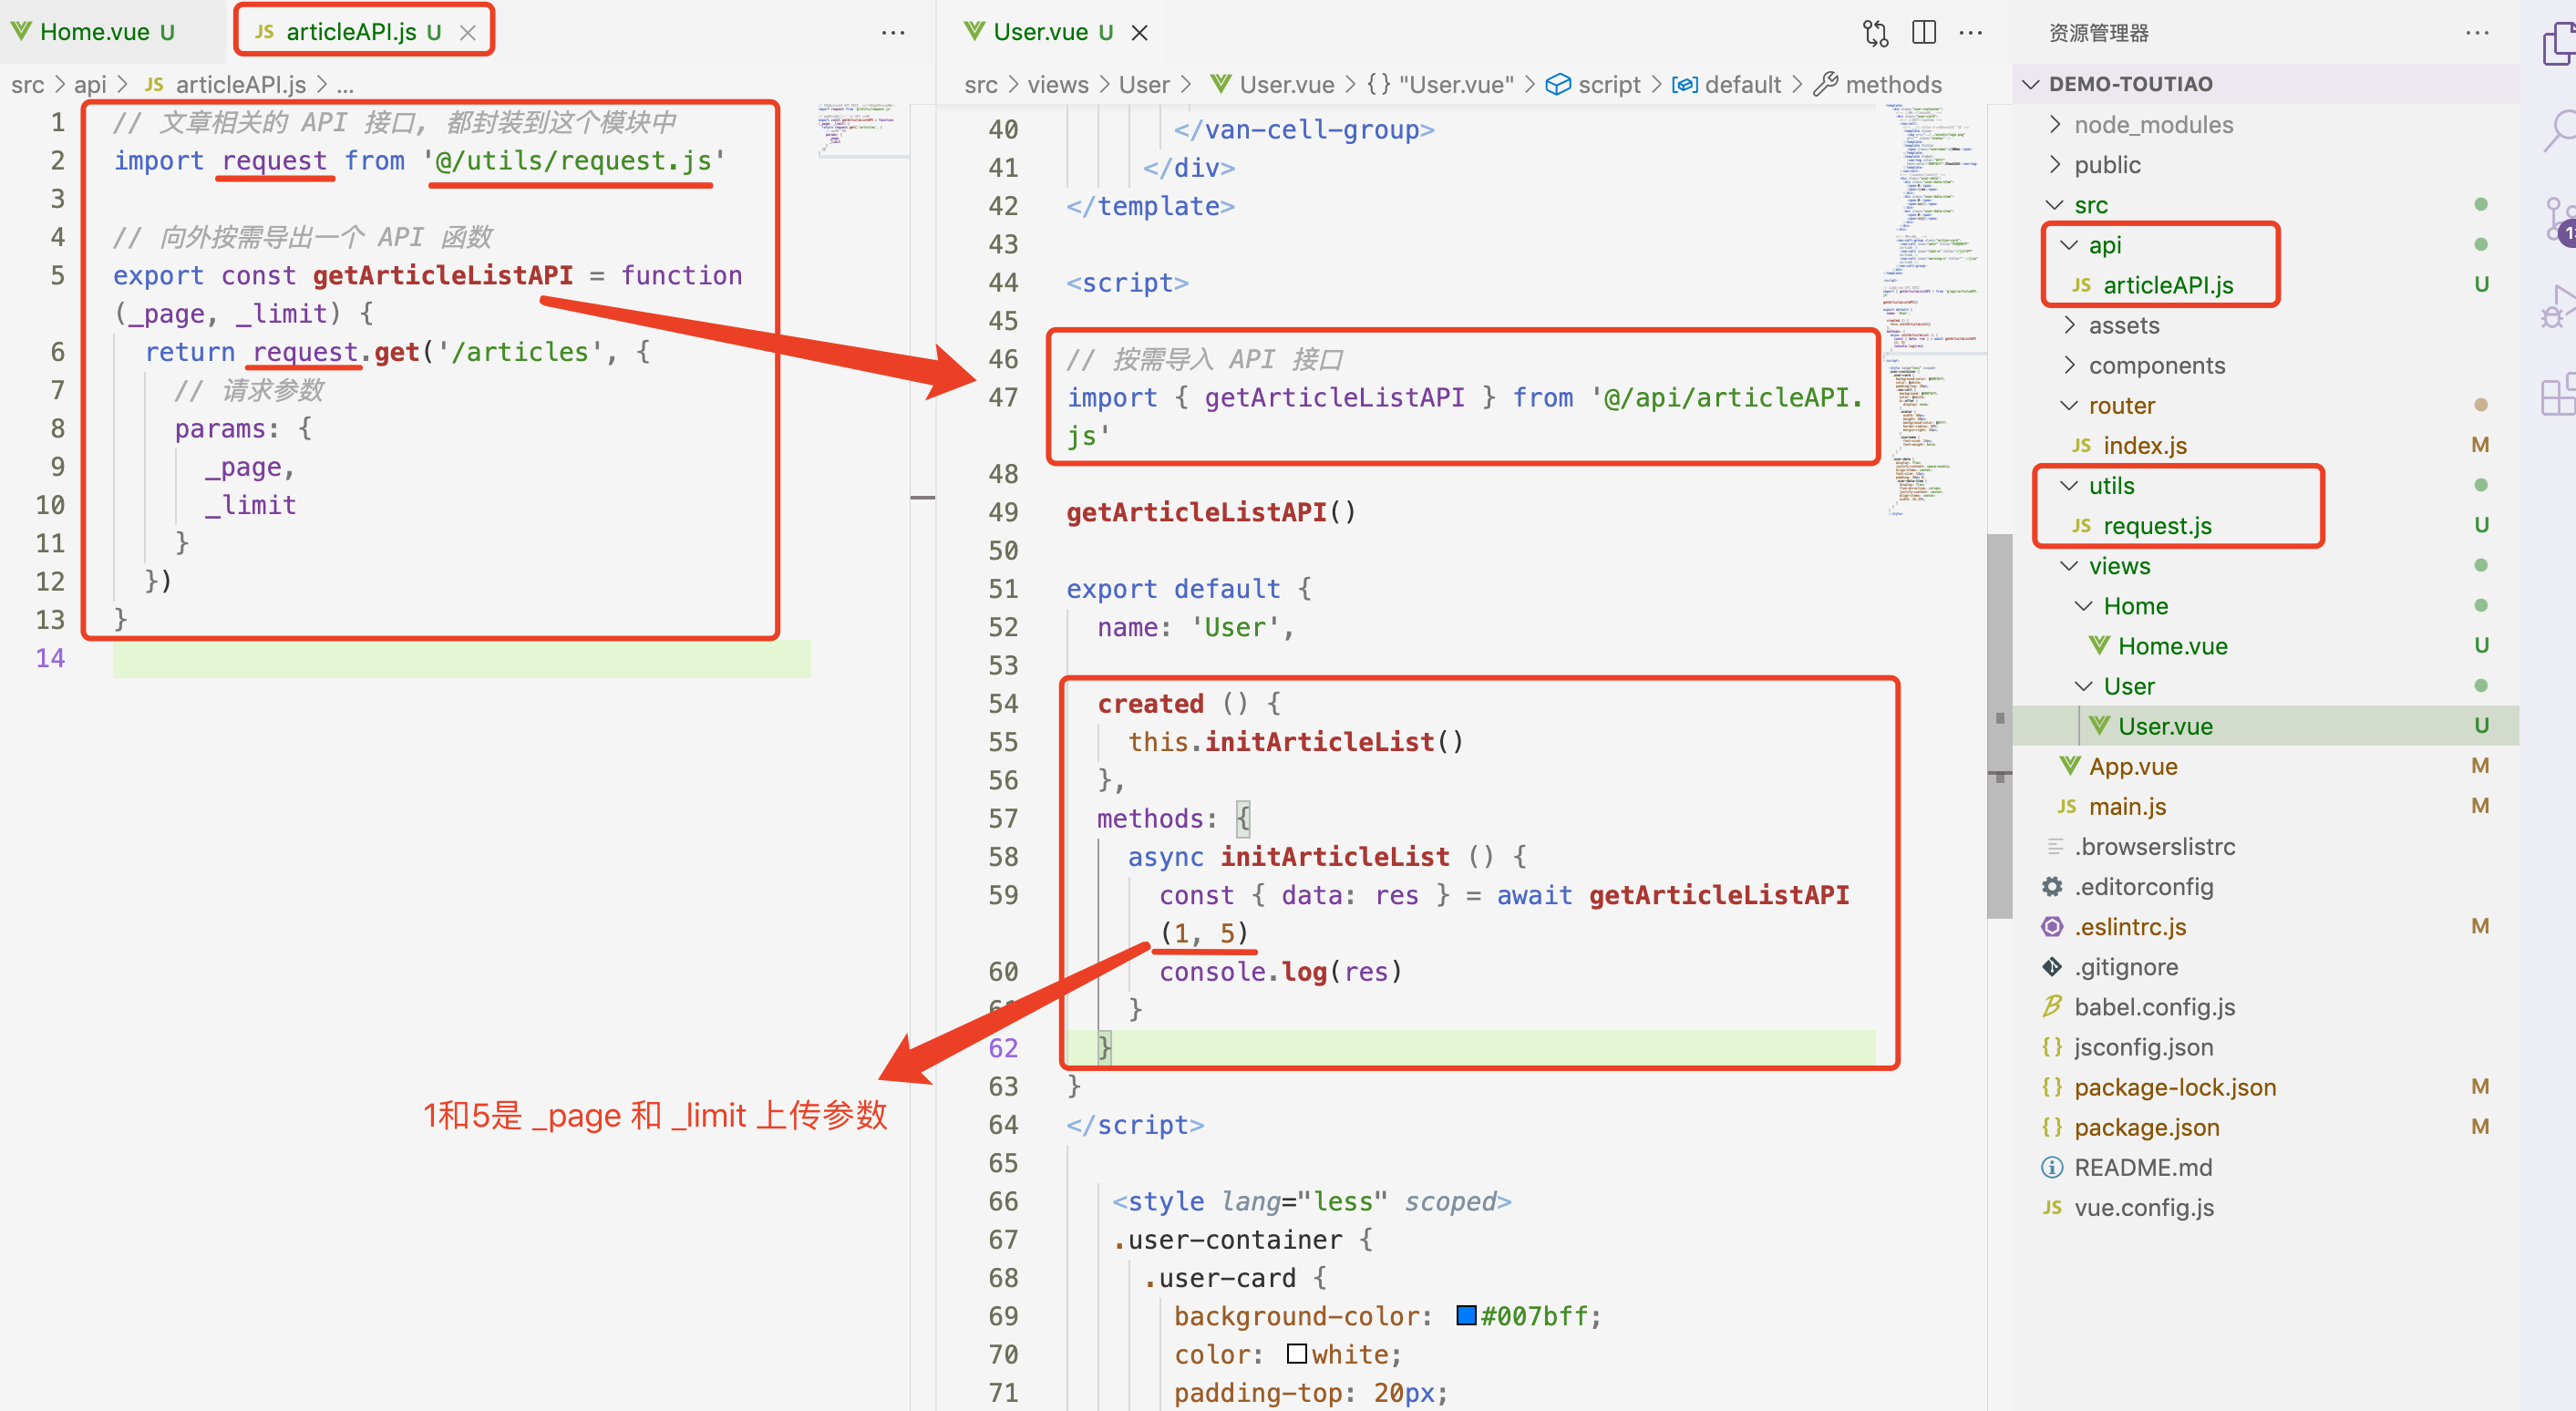

若有收获,就点个赞吧
0 人点赞
