一般修改原始程序,会利用代码注入的方式,注入代码就会选择利用FrameWork或dylib等三方库的方式注入。
注入原理
当运行重签名的App时,想让它触发当前项目中的代码,例如:写在ViewController的中代码,这是不可能的。因为项目中的App在安装时会被重签名App替换掉,它们根本不是一个MachO文件。
代码注入原理:
使用
MachOView分析可执行文件从
wx8.0.2.ipa中导出MachOView,可能会出现没有权限的错误提示
解决方法,使用
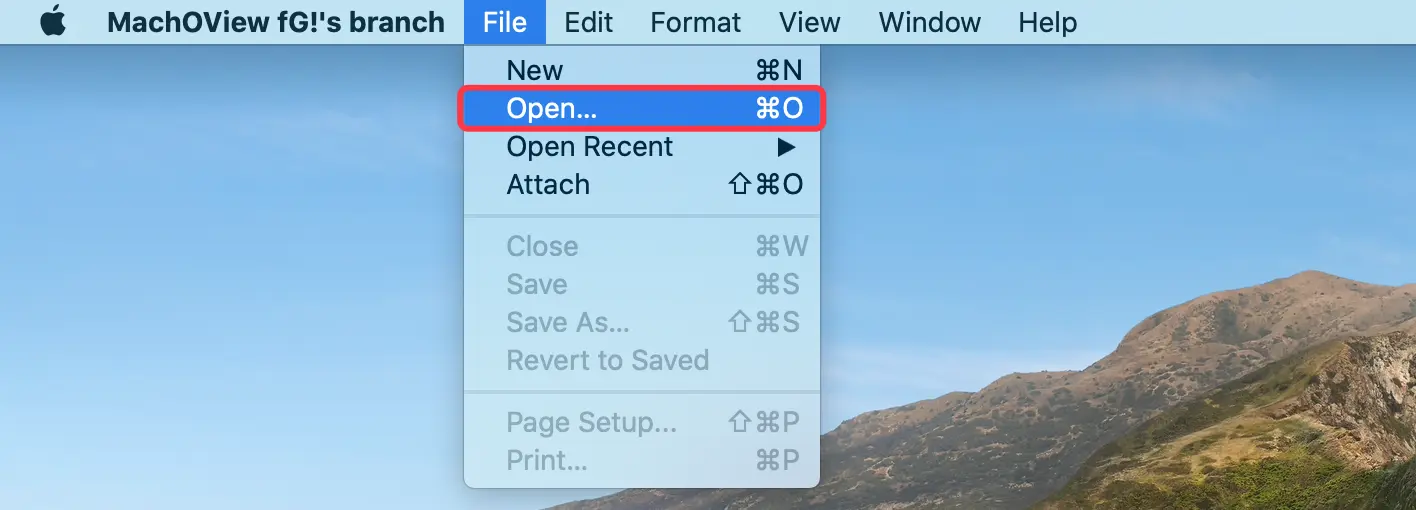
MachOView菜单中的File -> Open...
选择
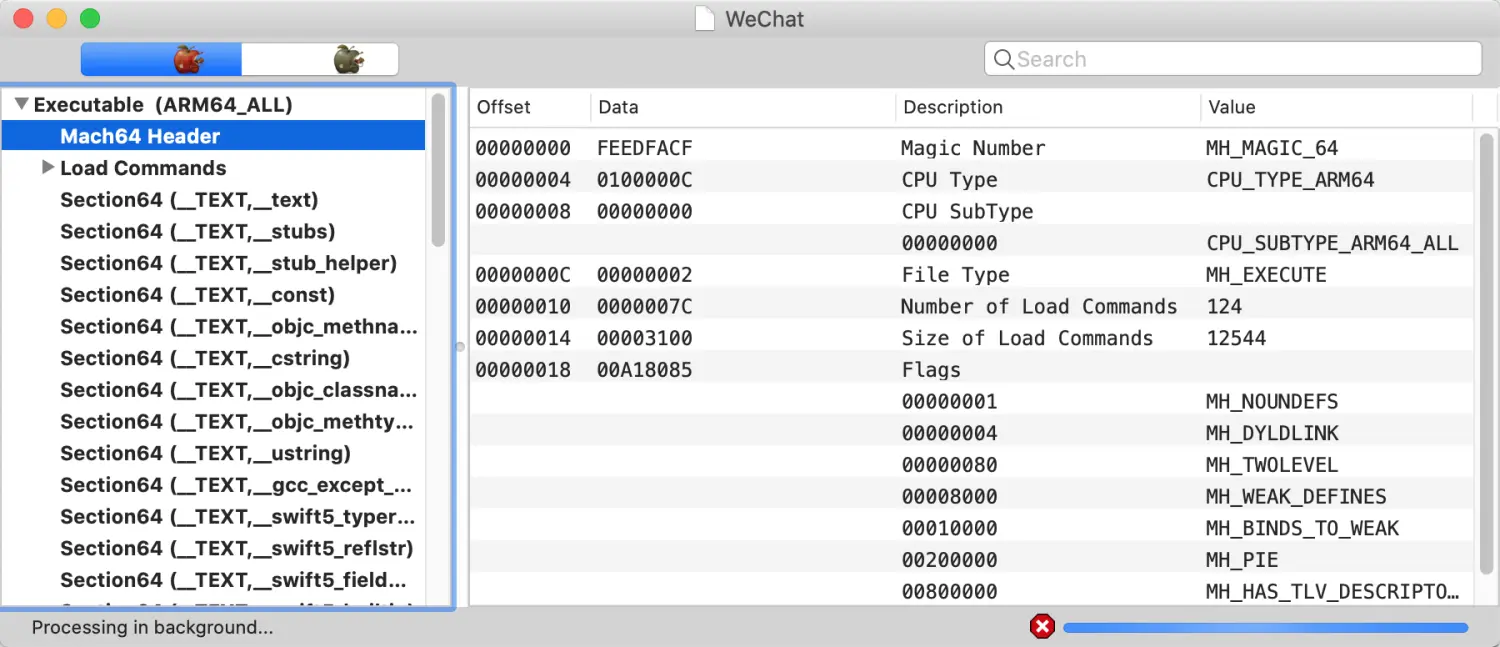
成功解析
当
dyld加载可执行文件时,先读取MachO中的Header,获取MachO类型。然后读取Load Commands,通过读取__PAGEZERO、__TEXT、__DATA、__LINKEDIT等段,可以得到MachO的大小,代码段和数据段的位置,告知dyld应该如何将MachO加载到内存中。当dyld读取代码段时,通过读取LC_MAIN找到程序入口。所以读取Load Commands几乎可以读取到MachO的所有信息
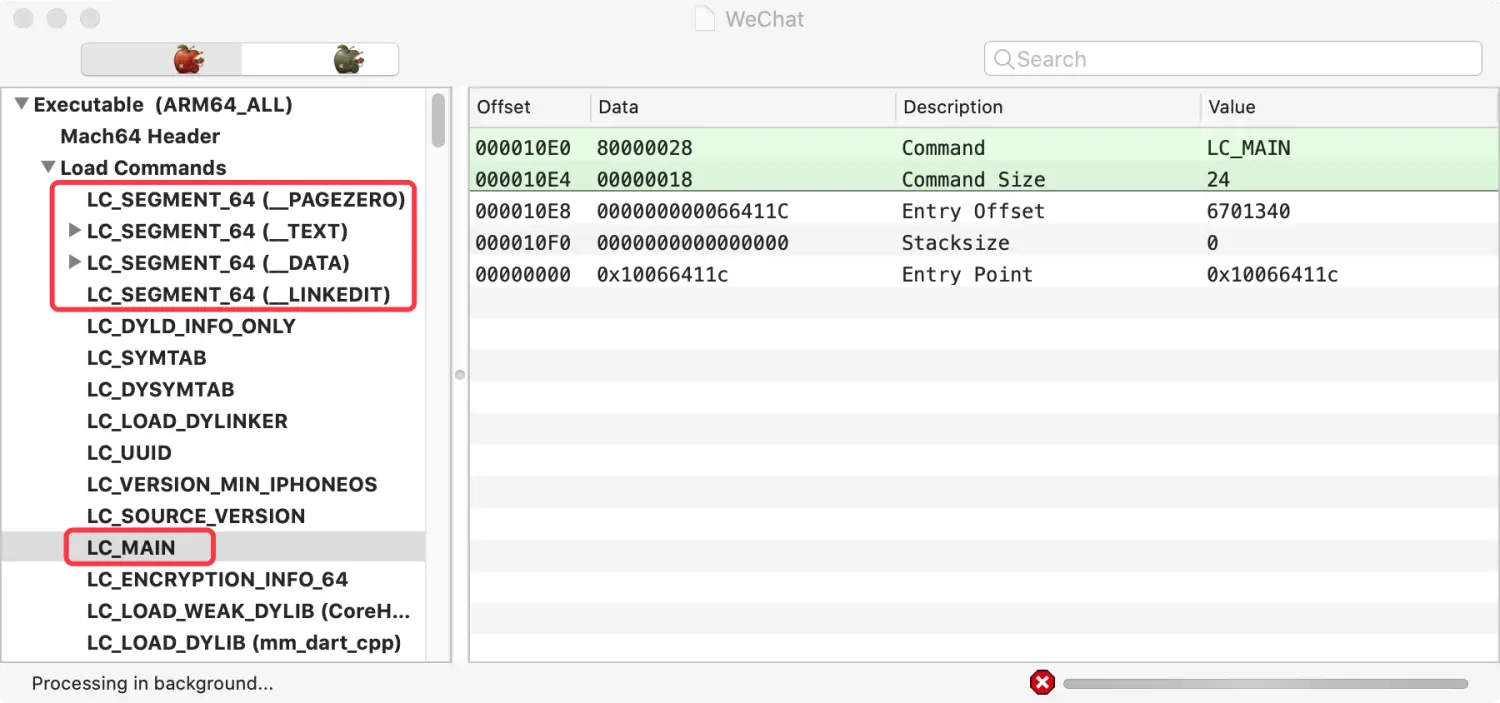
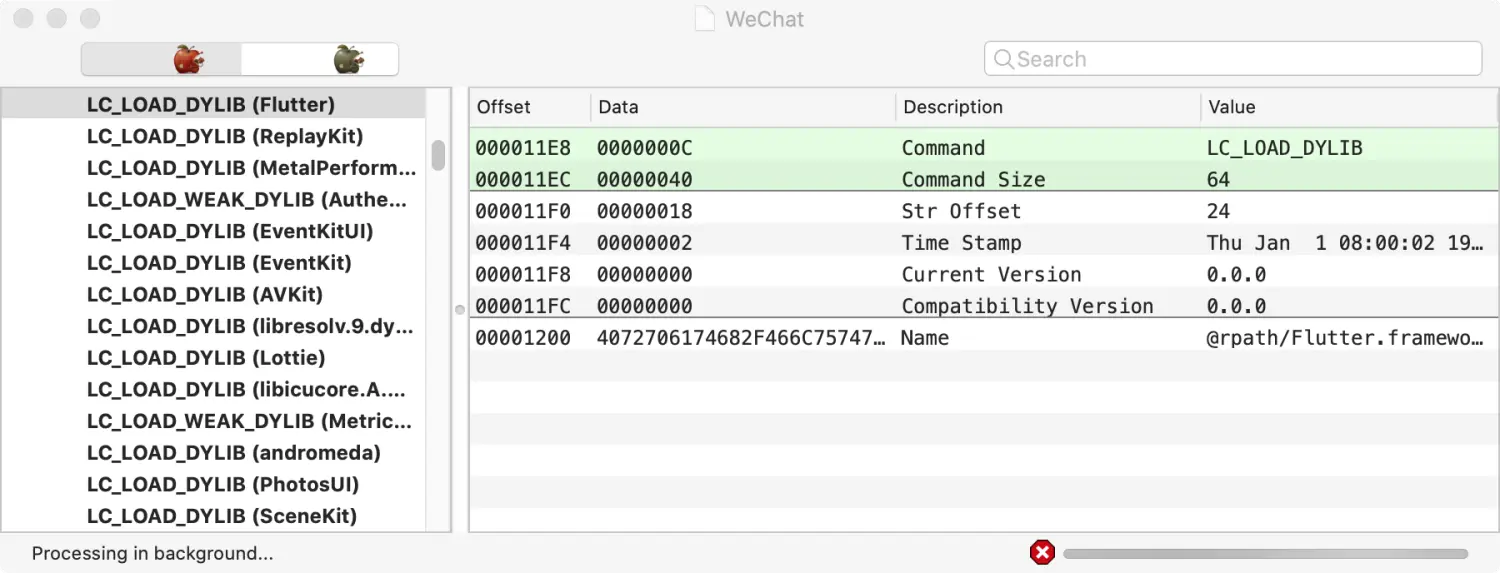
dyld除了加载MachO,还要加载UIkit、Foundation等系统库,以及Frameworks目录下的动态库
在
Load Commands中,列出MachO所依赖的所有系统库以及三方库
所以
dyld会加载Load Commands中包含的所有库。如果将注入的代码包装成一个动态库,将其插入到Load Commands中,理论上动态库可以被加载,注入的代码也可以被执行


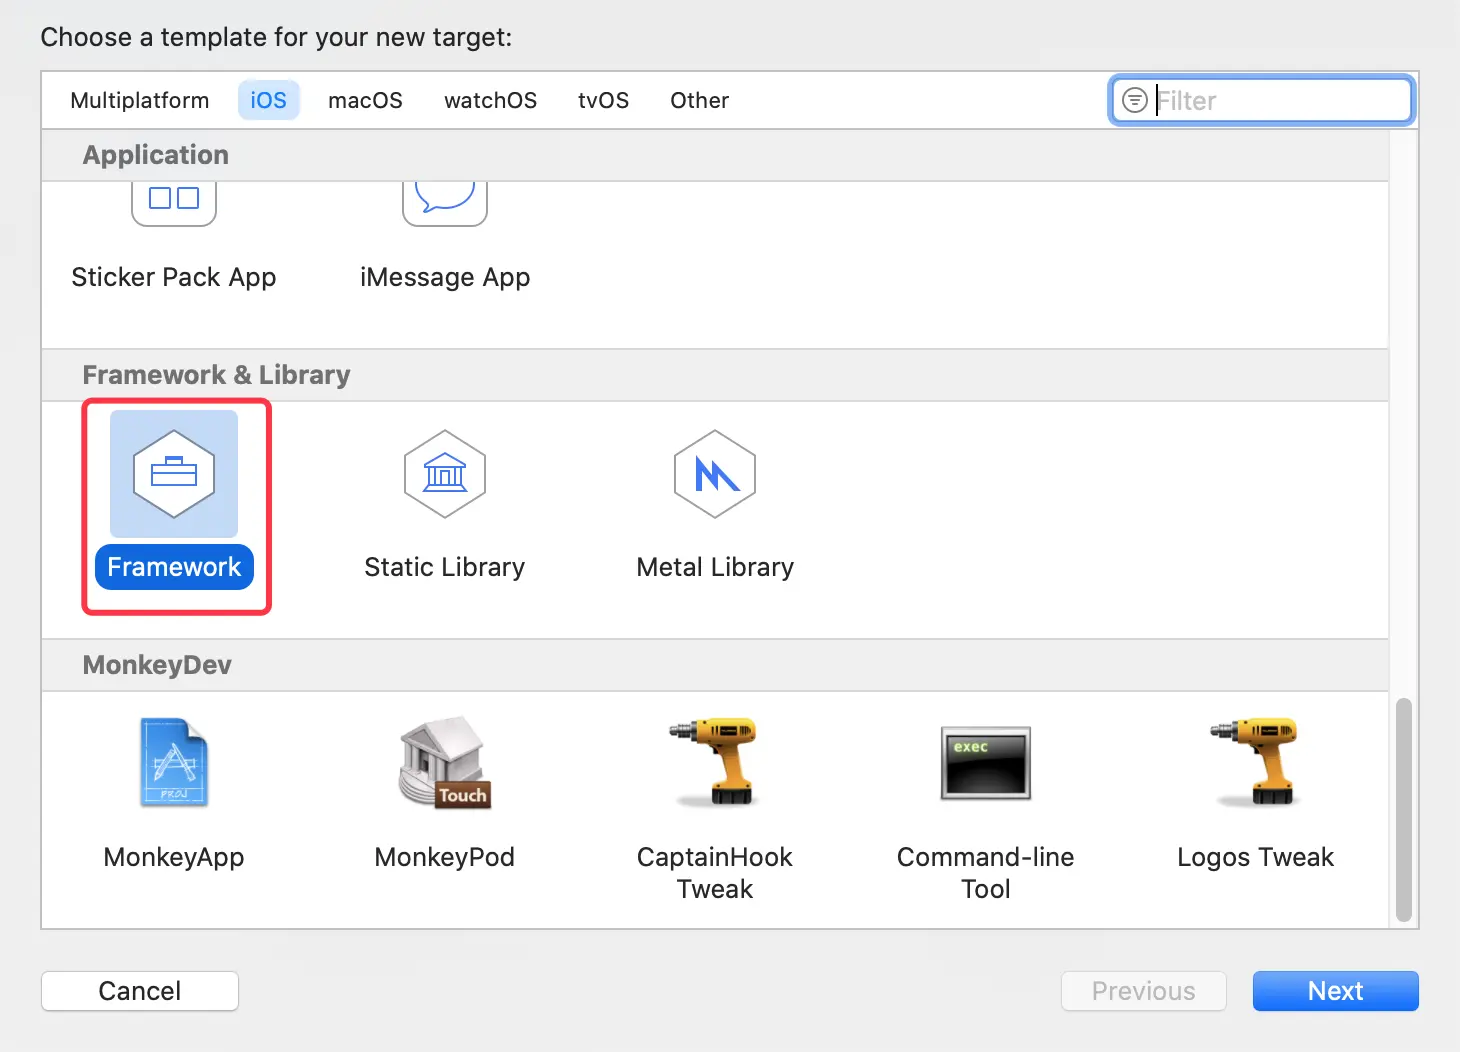
Framework注入
Framwork注入流程:
- 通过
Xcode新建Framwork,将库安装进入App包- 通过
yololib注入Framwork库路径
./yololib MachO文件路径 库路径
- 所有的
Framwork加载都是由dyld加载进入内存被执行的- 注入成功的库路径会写入到
MachO文件的LC_LOAD_DYLIB字段中案例1:
使用
Framework注入代码打开自动重签名
Framework动态库
命名
HOOK
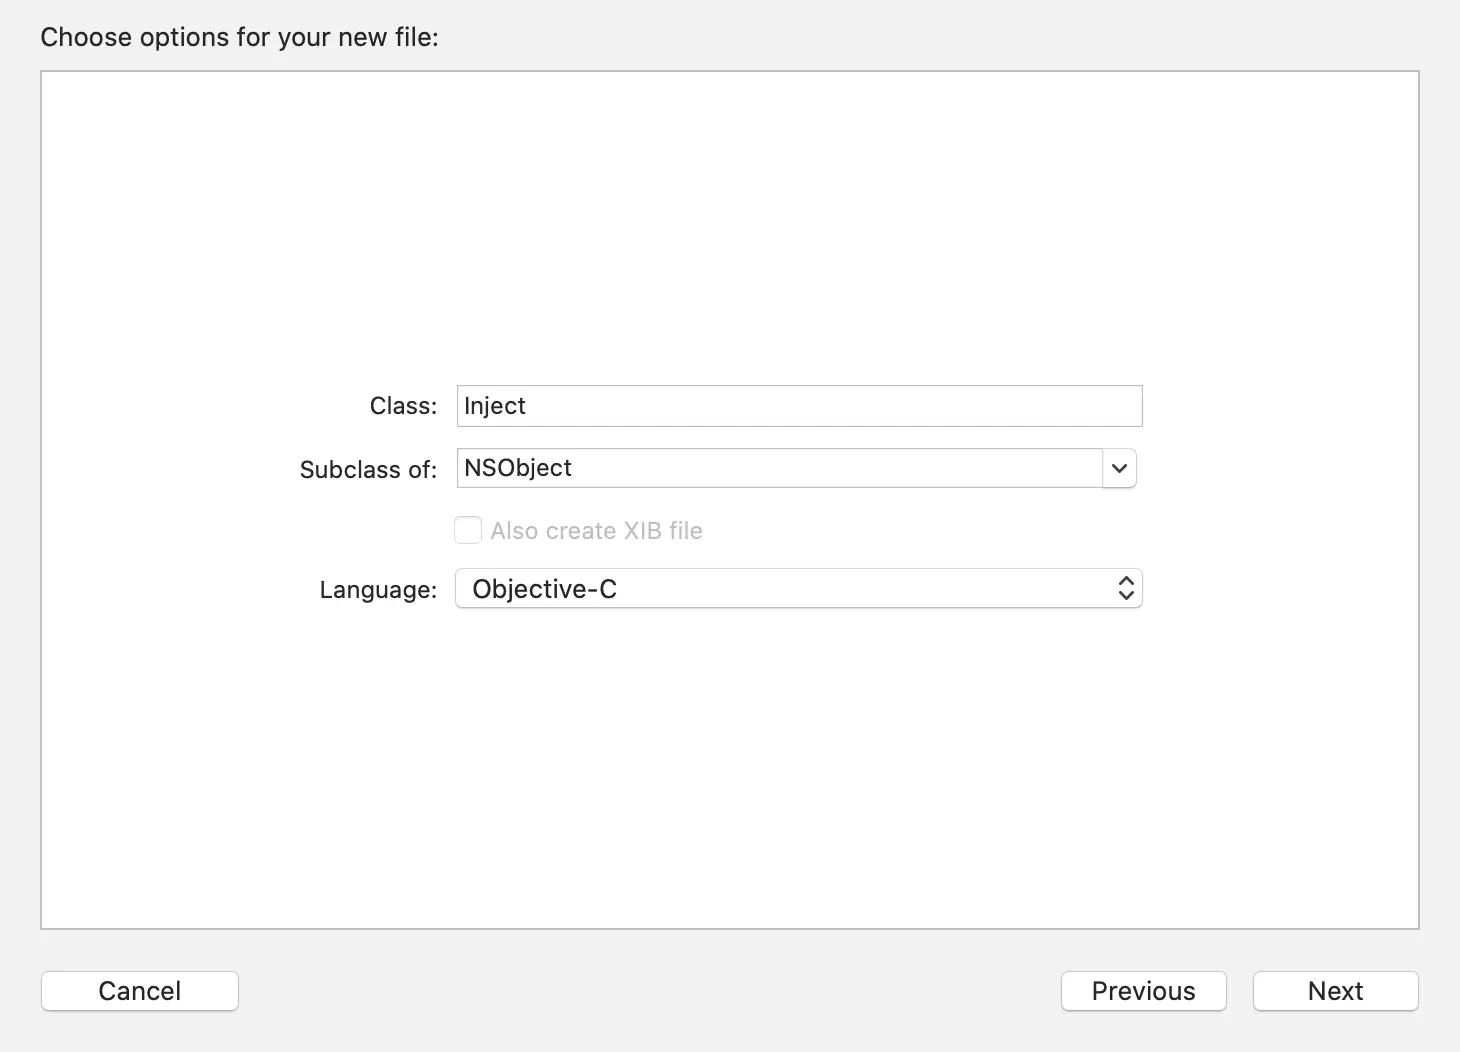
动态库中创建
Class,命名Inject
打开
Inject.m文件,写入以下代码:```
import “Inject.h”

@implementation Inject
+(void)load{ NSLog(@”\n\n\n\n\n🍺🍺🍺🍺🍺\n\n\n\n\n”); }
@end
> 编译项目,在`App`包中的`Frameworks`目录,可以找到`HOOK.framework`动态库<br />> 此时`HOOK`动态库中的代码还不能被执行,因为`MachO`的`Load Commands`中,还没有插入`HOOK`动态库的`LC_LOAD_DYLIB`字段> 使用`yololib`给`MachO`注入动态库> 将`MachO`文件,拷贝到`yololib`文件的同级目录<br />> 注入动态库>
./yololib WeChat Frameworks/HOOK.framework/HOOK
2021-04-22 17:14:52.339 yololib[22774:33058817] dylib path @executable_path/Frameworks/HOOK.framework/HOOK 2021-04-22 17:14:52.340 yololib[22774:33058817] dylib path @executable_path/Frameworks/HOOK.framework/HOOK Reading binary: WeChat
2021-04-22 17:14:52.341 yololib[22774:33058817] Thin 64bit binary! 2021-04-22 17:14:52.341 yololib[22774:33058817] dylib size wow 72 2021-04-22 17:14:52.341 yololib[22774:33058817] mach.ncmds 124 2021-04-22 17:14:52.341 yololib[22774:33058817] mach.ncmds 125 2021-04-22 17:14:52.341 yololib[22774:33058817] Patching mach_header.. 2021-04-22 17:14:52.399 yololib[22774:33058817] Attaching dylib..
2021-04-22 17:14:52.399 yololib[22774:33058817] size 71 2021-04-22 17:14:52.399 yololib[22774:33058817] complete!
> 查看`MachO`的`Load Commands`,成功将`HOOK`动态库插入到最后,路径是注入时设置的`参数2`<br />> 解压缩`wx8.0.2.ipa`,将`MachO`文件替换,然后重新打包`ipa`<br />> 将重新打包的`wx8.0.2.ipa`,拷贝到项目中`APP`目录<br />> 真机运行项目,`App`安装成功,正常运行,同时打印注入代码<br />#####dylib注入> `dylib`注入流程:> - 通过`Xcode`新建`dylib`库(注意:`dylib`属于`macOS`,所以需要修改属性)> - 添加`Target`依赖,让`Xcode`将自定义`dylib`文件打包进入`App`包> - 利用`yololib`进行注入> 案例1:> 使用`dylib`注入代码> 打开自动重签名`WeChat`项目,创建`dylib`动态库<br />> 命名`HOOK`<br />> 在`Build Settings`中,将`Base SDK`设置项修改为`iOS`<br />> 将`Code Signing Identity`设置项修改为`iOS Developer`<br />> 切换到`App`的`Target`,选择`Build Phases`,点击`+`,选择`New Copy Files Phase`<br />> 在`Copy Files`的`Destination`中,选择`Frameworks`<br />> 点击`+`,选择`libHOOK.dylib`<br />> 打开`HOOK.m`文件,写入以下代码>
import “HOOK.h”
@implementation HOOK
+(void)load{ NSLog(@”\n\n\n\n\n🍺🍺 dylib 🍺🍺\n\n\n\n\n”); }
@end
> 使用`脚本注入`动态库:将`yololib`文件,拷贝到项目根目录<br />> 打开`rsign.sh`文件,加入以下代码:>
./yololib “$TARGET_APP_PATH/$APP_BINARY” “Frameworks/libHOOK.dylib”
> 真机运行项目,`App`安装成功,正常运行,同时打印注入代码<br />#####Method Swizzle利用`OC`的`Runtime`特性,动态改变`SEL`(方法编号)和`IMP`(方法实现)的对应关系,达到`OC`方法调用流程改变的目的。主要用于`OC`方法。> 在`OC`中,`SEL`和`IMP`之间的关系,就好像一本书的“`目录`”<br />> - `SEL`是方法编号,就像“`标题`”一样> - `IMP`是方法实现的真实地址,就像“`页码`”一样> - 它们是一一对应的关系> `Runtime`提供了交换两个`SEL`和`IMP`对应关系的函数>
OBJC_EXPORT void method_exchangeImplementations(Method _Nonnull m1, Method _Nonnull m2) OBJC_AVAILABLE(10.5, 2.0, 9.0, 1.0, 2.0);
> 通过这个函数交换两个`SEL`和`IMP`对应关系的技术,我们称之为`Method Swizzle`(方法欺骗)<br />> 多种`HOOK`方式> - `class_addMethod`方式:让原始方法可以被调用,不至于因为找不到`SEL`而崩溃> - `class_replaceMethod`方式:直接给原始的方法替换`IMP`> - `method_setImplementation`方式:直接重新赋值新的`IMP`#####窃取登录密码> 案例1:> 点击登录按钮,输出用户输入的密码> 延用`Framwork`代码注入的案例> 打开`rsign.sh`文件,加入以下代码:>
./yololib “$TARGET_APP_PATH/$APP_BINARY” “Frameworks/HOOK.framework/HOOK”
> 真机运行项目,进入登录页,使用`Debug View Hierarchy`动态调试> 找到登录按钮的`Target`和`Action`<br />> - `Target`:`WCAccountMainLoginViewController`> - `Action`:`onNext`> 想要打印密码框的内容,必须先找到密码框的位置,然后通过控件的属性拿到内容> 【方式一】:动态调试> 找到密码框的位置,找到存储内容的`text`属性<br />> - 可以通过`响应链条`,根据左侧树状图结构,对`ViewController.view.subviews`进行递归遍历,找到符合条件的`WCUITextField`为止<br />> 使用动态调试,虽然也能找到密码框的位置,但寻找的过程太过繁琐,不推荐使用> 【方式二】:静态分析> 目前通过动态分析,可以确定登录按钮和密码框都在`WCAccountMainLoginViewController`中> 使用`class-dump`工具,通过`MachO`导出`OC`中所有类和方法列表以及成员变量> 将`MachO`文件,拷贝到`class-dump`文件的同级目录<br />> 导出`OC`中所有类和方法列表>
./class-dump -H WeChat -o ./headers/
2021-04-25 13:51:24.070 class-dump[31659:33427860] Warning: Parsing instance variable type failed, ready_ 2021-04-25 13:51:26.308 class-dump[31659:33427860] Warning: Parsing instance variable type failed, underlying 2021-04-25 13:51:26.308 class-dump[31659:33427860] Warning: Parsing instance variable type failed, enable … 2021-04-25 13:52:09.288 class-dump[31659:33427860] Warning: Parsing method types failed, getKeyExtensionList: 2021-04-25 13:52:09.292 class-dump[31659:33427860] Warning: Parsing method types failed, getKeyExtensionList: 2021-04-25 13:52:09.292 class-dump[31659:33427860] Warning: Parsing method types failed, getExtensionListForSelector:
> 打开`headers`目录,列出所有导出的文件列表,找到`WCAccountMainLoginViewController`文件<br />> 打开`WCAccountMainLoginViewController`文件,没有找到`WCUITextField`控件,但发现一个`WCAccountTextFieldItem`类型控件,名称为`_textFieldUserPwdItem`<br />> 打开`WCAccountTextFieldItem`文件,还是没有找到`WCUITextField`控件,但它继承自`WCBaseTextFieldItem`类,我们要找的控件很有可能在父类中<br />> 打开`WCBaseTextFieldItem`文件,找到`WCUITextField`控件<br />> 使用代码之前,可以先结合`动态调试`,验证能否顺利获取到用户密码<br />> 通过`动态调试`,成功获取密码框里的内容> 使用代码,获取用户密码> 打开`Inject`文件,写入以下代码:>
import “Inject.h”
import
import
@implementation Inject
+(void)load{ Method wx_onNext = class_getInstanceMethod(objc_getClass(“WCAccountMainLoginViewController”), @selector(onNext)); Method my_onNext = class_getInstanceMethod(self, @selector(hook_onNext)); method_exchangeImplementations(wx_onNext, my_onNext); }
-(void)hook_onNext{ UITextField txtPwd = (UITextField )[[self valueForKey:@”_textFieldUserPwdItem”] valueForKey:@”m_textField”]; NSLog(@”密码:%@”, txtPwd.text); }
@end
> 真机运行项目,点击登录按钮>
密码:123456
> 成功输出用户密码> 案例2:> 窃取密码后,希望可以调用原始的代码逻辑> 日常开发中,方法交互一般写在当前类的分类中。由于交互后`hook_onNext`指向了`onNext`的`IMP`,所以代码中直接调用`hook_onNext`即可> 打开`Inject`文件,修改`hook_onNext`方法:>
-(void)hook_onNext{ UITextField txtPwd = (UITextField )[[self valueForKey:@”_textFieldUserPwdItem”] valueForKey:@”m_textField”]; NSLog(@”密码:%@”, txtPwd.text);
[self hook_onNext]; }
> 但是,`HOOK`动态库中的`Inject`文件,和`WCAccountMainLoginViewController`类没有任何关联。虽然`hook_onNext`指向`onNext`的`IMP`,但是调用`objc_msgSend`函数时,给`VC`发送`hook_onNext`,程序会因为找不到`SEL`而崩溃<br />> 下面介绍三种方式,都可以解决上述问题> 【方式一】:`class_addMethod`> 既然`VC`中没有`hook_onNext`方法,可以使用`class_addMethod`函数给`VC`添加一个`hook_onNext`,调用时不会因为找不到`SEL`而崩溃> 打开`Inject`文件,写入以下代码:>
import “Inject.h”
import
import
@implementation Inject
+(void)load{ Method wx_onNext = class_getInstanceMethod(objc_getClass(“WCAccountMainLoginViewController”), @selector(onNext));
class_addMethod(objc_getClass(“WCAccountMainLoginViewController”), @selector(hook_onNext), hook_onNext, @”v@:”); Method my_onNext = class_getInstanceMethod(objc_getClass(“WCAccountMainLoginViewController”), @selector(hook_onNext));
method_exchangeImplementations(wx_onNext, my_onNext); }
void hook_onNext(id self, SEL _cmd){ UITextField txtPwd = (UITextField )[[self valueForKey:@”_textFieldUserPwdItem”] valueForKey:@”m_textField”]; NSLog(@”密码:%@”, txtPwd.text);
[self performSelector:@selector(hook_onNext)]; }
@end
> - 之前的`hook_onNext`方法,改为函数实现,增加`OC`方法的两个隐式参数> - 使用`class_addMethod`函数,给`VC`增加`hook_onNext`方法,函数名即是`IMP`> - 将`VC`下的`hook_onNext`和`onNext`进行方法交互> - 在`hook_onNext`函数中,如果直接调用函数,调用的不是替换后的`IMP`,而是`hook_onNext`的`IMP`,这样会形成递归。所以想调用原始方法,要使用`objc_msgSend`或`performSelector`方式调用> 真机运行项目,点击登录按钮,窃取密码后,调用原始的代码逻辑>
密码:123456
> > 【方式二】:`class_replaceMethod`> 将`VC`中`onNext`方法的`IMP`替换> 打开`Inject`文件,写入以下代码:>
import “Inject.h”
import
import
@implementation Inject
IMP (*oldImp)(id self, SEL _cmd);
+(void)load{ oldImp = class_replaceMethod(objc_getClass(“WCAccountMainLoginViewController”), @selector(onNext), hook_onNext, @”v@:”); }
void hook_onNext(id self, SEL _cmd){ UITextField txtPwd = (UITextField )[[self valueForKey:@”_textFieldUserPwdItem”] valueForKey:@”m_textField”]; NSLog(@”密码:%@”, txtPwd.text);
oldImp(self, _cmd); }
@end
> - 声明`IMP`类型的`oldImp`函数指针> - 使用`class_replaceMethod`函数,直接将`onNext`的`IMP`替换为`hook_onNext`的`IMP`,将返回的原始`IMP`赋值给`oldImp`> - 在`hook_onNext`函数中,想调用原始方法,直接调用`oldImp`并传入隐式参数即可> 【方式三】:`method_setImplementation`> 获取原始的`IMP`,重新赋值新`IMP`> 打开`Inject`文件,写入以下代码:>
import “Inject.h”
import
import
@implementation Inject
IMP (*oldImp)(id self, SEL _cmd);
+(void)load{ Method wx_onNext = class_getInstanceMethod(objc_getClass(“WCAccountMainLoginViewController”), @selector(onNext)); oldImp = method_getImplementation(wx_onNext);
method_setImplementation(wx_onNext, hook_onNext); }
void hook_onNext(id self, SEL _cmd){ UITextField txtPwd = (UITextField )[[self valueForKey:@”_textFieldUserPwdItem”] valueForKey:@”m_textField”]; NSLog(@”密码:%@”, txtPwd.text);
oldImp(self, _cmd); }
@end ```
- 使用
method_getImplementation函数,获取onNext的IMP,赋值给oldImp- 使用
method_setImplementation函数,直接赋值hook_onNext的IMP
总结
注入原理:
Xcode将注入的动态库打包进App包中MachO的Load Commands中,包含注入动态库的LC_LOAD_DYLIB字段- 由
DYLD加载注入的动态库注入方式:
Framework注入dylib注入
Framwork注入流程:
- 通过
Xcode新建Framwork,将库安装进入App包- 通过
yololib注入Framwork库路径
dylib注入流程:
- 通过
Xcode新建dylib库(注意:dylib属于macOS,所以需要修改属性)- 添加
Target依赖,让Xcode将自定义dylib文件打包进入App包- 利用
yololib进行注入案例,窃取登录密码:
- 分析思路
- 动态调试,界面入手
- 静态分析,使用
class-dump,通过MachO导出OC的类和方法列表
Method Swizzle
- 使用
method_exchangeImplementations交互SEL和IMP对应关系,此方式存在隐患,如果不在同一个类,无法调用原始方法,因为找不到SEL而崩溃- 使用
class_addMethod添加方法,不至于因为找不到SEL而崩溃。过程比较复杂,不推荐使用- 使用
class_replaceMethod替换SEL的IMP- 使用
method_getImplementation和method_setImplementation配合,直接重新赋值新的IMP。逻辑清晰,大部分HOOK框架使用此方式,推荐使用

若有收获,就点个赞吧
0 人点赞
