GitHub毕竟是公开的,而私有仓库又得花钱买。所以我们可以想办法搭建一个私有的,只自己公司使用的。GitLab是个不错的选择。在介绍它之前,先讲述一下命令行的Git服务器。
Gitlab 搭建
结合前面,新创建一台服务器,只配置好ip即可。
找一台服务器,先安装git
[root@localhost ~]# yum install -y git
配置基本信息
[root@localhost ~]# git config --global user.name "sxb"[root@localhost ~]# git config --global user.email "example@qq.com"
添加git用户,设置shell为/usr/bin/git-shell,目的是为了让git用户没有办法远程登陆。
[root@localhost ~]# useradd -s /usr/bin/git-shell git[root@localhost ~]# cd /home/git

创建文件,更改所属组和权限,存放客户端机器上的公钥。
[root@localhost git]# mkdir .ssh[root@localhost git]# touch .ssh/authorized_keys[root@localhost git]# chown -R git.git .ssh[root@localhost git]# chmod 600 .ssh/authorized_keys[root@localhost git]# ll /home/git/.ssh/authorized_keys-rw-------. 1 git git 0 8月 22 08:52 /home/git/.ssh/authorized_keys[root@localhost git]#

创建Git仓库目录。
[root@localhost git]# mkdir -p /data/gitpub[root@localhost git]# cd /data/gitpub[root@localhost gitpub]#
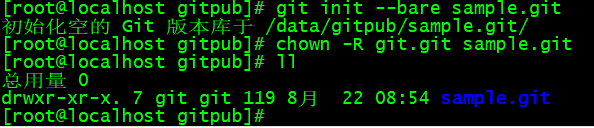
会创建一个裸仓库,裸仓库没有工作区,因为服务器上的Git仓库纯粹是为了共享,所以不让用户直接登录到服务器上去改工作区,并且服务器上的Git仓库通常都以.git结尾
[root@localhost gitpub]# git init --bare sample.git初始化空的 Git 版本库于 /data/gitpub/sample.git/[root@localhost gitpub]# chown -R git.git sample.git[root@localhost gitpub]# ll总用量 0drwxr-xr-x. 7 git git 119 8月 22 08:54 sample.git[root@localhost gitpub]#
以上操作是在Git服务器上操作,平时Git服务器是不需要开发人员登录修改代码的,# 它仅仅是充当着一个服务器的角色,就像GitHub一样,平时操作都是在我们自己的机器上操做的。
客户端操作
登录客户端,把客户端公钥放在git服务器/home/git/.ssh/authorized_keys 文件里
[root@localhost ~]# ssh-keygenGenerating public/private rsa key pair.Enter file in which to save the key (/root/.ssh/id_rsa):Created directory '/root/.ssh'.Enter passphrase (empty for no passphrase):Enter same passphrase again:Your identification has been saved in /root/.ssh/id_rsa.Your public key has been saved in /root/.ssh/id_rsa.pub.The key fingerprint is:SHA256:nzi45TT7eb4mQnTNF3ixUr/kixa8yCjTf5zmSJXVGXs root@localhost.localdomainThe key's randomart image is:+---[RSA 2048]----+| .oo || ..oo=|| o...*E|| . . +.* o|| .S. * o || .ooo.o + .|| .+*oo+.+.. || =+++.== || . oooB*o |+----[SHA256]-----+[root@localhost ~]# cd .ssh/[root@localhost .ssh]# lsid_rsa id_rsa.pub[root@localhost .ssh]# cat id_rsa.pubssh-rsa AAAAB3NzaC1yc2EAAAADAQABAAABAQCouRuWUB1k7Xd38qXfSJHcvAFu2L3RUcDS1oeDnizi1V+JpRksbC0JTINjZOT0HNhHbnuCMzt+E6ZwLfHVA28pt2bdQyO0XhuUYyvicXrtyd7XNlD6gU7HttAyVG8aTrctj/hbbdVVksMDVIzwtzjQThogk9qGHyUk91gHouTTDuIQOLa63/TQUU81oCb9BeiPe0+mxL7sxuCBpyyy+D3R9jnvZoBSHprkmVsmaR52SsyRfLyy1Ta6we28+T3Y6ZfHqQHT7kn2ObvfM3jTDpCKi6te2dLBmw7XCfgn4XO7zuopqMEX1rXDeaOQtjfKt+hN5bhnwadDUY1peX2ULa4v root@localhost.localdomain[root@localhost .ssh]#
把密钥写入服务端的/home/git/.ssh/authorized_keys 文件里
[root@localhost gitpub]# vim /home/git/.ssh/authorized_keysssh-rsa AAAAB3NzaC1yc2EAAAADAQABAAABAQCouRuWUB1k7Xd38qXfSJHcvAFu2L3RUcDS1oeDnizi1V+JpRksbC0JTINjZOT0HNhHbnuCMzt+E6ZwLfHVA28pt2bdQyO0XhuUYyvicXrtyd7XNlD6gU7HttAyVG8aTrctj/hbbdVVksMDVIzwtzjQThogk9qGHyUk91gHouTTDuIQOLa63/TQUU81oCb9BeiPe0+mxL7sxuCBpyyy+D3R9jnvZoBSHprkmVsmaR52SsyRfLyy1Ta6we28+T3Y6ZfHqQHT7kn2ObvfM3jTDpCKi6te2dLBmw7XCfgn4XO7zuopqMEX1rXDeaOQtjfKt+hN5bhnwadDUY1peX2ULa4v root@localhost.localdomain
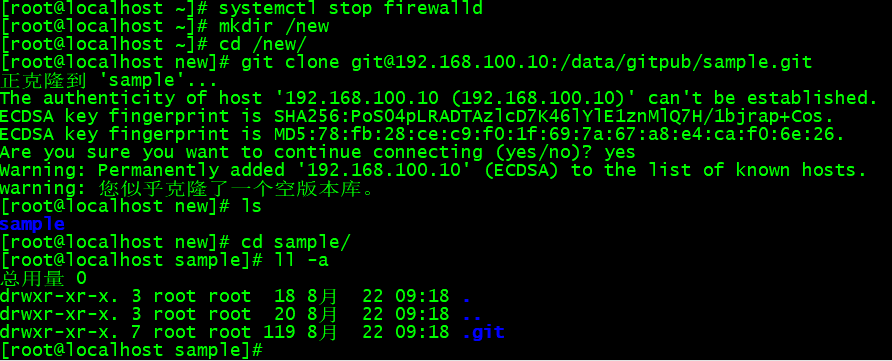
关掉两个服务器的防火墙
[root@localhost ~]# systemctl stop firewalld[root@localhost ~]#[root@localhost ~]# yum install -y git[root@localhost ~]# mkdir /new[root@localhost ~]# cd /new/[root@localhost new]# git clone git@192.168.100.10:/data/gitpub/sample.git正克隆到 'sample'...The authenticity of host '192.168.100.10 (192.168.100.10)' can't be established.ECDSA key fingerprint is SHA256:PoS04pLRADTAzlcD7K46lYlE1znMlQ7H/1bjrap+Cos.ECDSA key fingerprint is MD5:78:fb:28:ce:c9:f0:1f:69:7a:67:a8:e4:ca:f0:6e:26.Are you sure you want to continue connecting (yes/no)? yesWarning: Permanently added '192.168.100.10' (ECDSA) to the list of known hosts.warning: 您似乎克隆了一个空版本库。[root@localhost new]# lssample[root@localhost new]#此时就可以在当前目录下生成一个sample的目录,这个就是我们克隆的远程仓库了。进入到这里面,可以开发一些代码,然后push到远程,比如git push origin master。[root@localhost new]# cd sample/[root@localhost sample]# ll -a总用量 0drwxr-xr-x. 3 root root 18 8月 22 09:18 .drwxr-xr-x. 3 root root 20 8月 22 09:18 ..drwxr-xr-x. 7 root root 119 8月 22 09:18 .git[root@localhost sample]#
Gitlab的使用
[root@localhost gitpub]# vim /etc/yum.repos.d/gitlab.repo[gitlab-ce]name=Gitlab CE Repositorybaseurl=https://mirrors.tuna.tsinghua.edu.cn/gitlab-ce/yum/el$releasever/gpgcheck=0enabled=1[root@localhost gitpub]# yum clean all已加载插件:fastestmirror正在清理软件源: base extras gitlab-ce updatesCleaning up list of fastest mirrorsOther repos take up 9.6 M of disk space (use --verbose for details)[root@localhost gitpub]# yum repolist已加载插件:fastestmirrorDetermining fastest mirrors* base: mirrors.bfsu.edu.cn* extras: mirrors.bfsu.edu.cn* updates: mirrors.bfsu.edu.cnbase | 3.6 kB 00:00:00extras | 2.9 kB 00:00:00gitlab-ce | 2.9 kB 00:00:00updates | 2.9 kB 00:00:00(1/5): base/7/x86_64/group_gz | 153 kB 00:00:01(2/5): extras/7/x86_64/primary_db | 242 kB 00:00:01(3/5): updates/7/x86_64/primary_db | 9.6 MB 00:00:13(4/5): gitlab-ce/7/primary_db | 4.7 MB 00:00:16(5/5): base/7/x86_64/primary_db | 6.1 MB 00:00:22源标识 源名称 状态base/7/x86_64 CentOS-7 - Base 10,072extras/7/x86_64 CentOS-7 - Extras 498gitlab-ce/7 Gitlab CE Repository 730updates/7/x86_64 CentOS-7 - Updates 2,579repolist: 13,879[root@localhost gitpub]#[root@localhost gitpub]# yum install -y gitlab-ce重新加载,过程很长,需要等一会。[root@localhost gitpub]# gitlab-ctl reconfigure可以看到有很多的端口[root@localhost gitpub]# netstat -ntlpActive Internet connections (only servers)Proto Recv-Q Send-Q Local Address Foreign Address State PID/Program nametcp 0 0 127.0.0.1:8082 0.0.0.0:* LISTEN 4445/sidekiq 5.2.9tcp 0 0 127.0.0.1:9236 0.0.0.0:* LISTEN 1218/gitalytcp 0 0 0.0.0.0:22 0.0.0.0:* LISTEN 903/sshdtcp 0 0 127.0.0.1:25 0.0.0.0:* LISTEN 1061/mastertcp 0 0 0.0.0.0:8060 0.0.0.0:* LISTEN 1189/nginx: mastertcp 0 0 127.0.0.1:9121 0.0.0.0:* LISTEN 1193/redis_exportertcp 0 0 127.0.0.1:9090 0.0.0.0:* LISTEN 1198/prometheustcp 0 0 127.0.0.1:9187 0.0.0.0:* LISTEN 1202/postgres_exportcp 0 0 127.0.0.1:9093 0.0.0.0:* LISTEN 1200/alertmanagertcp 0 0 127.0.0.1:9100 0.0.0.0:* LISTEN 1186/node_exportertcp 0 0 127.0.0.1:9229 0.0.0.0:* LISTEN 1184/gitlab-workhortcp 0 0 127.0.0.1:8080 0.0.0.0:* LISTEN 1190/puma 5.3.2 (untcp 0 0 127.0.0.1:9168 0.0.0.0:* LISTEN 1195/rubytcp 0 0 0.0.0.0:80 0.0.0.0:* LISTEN 1189/nginx: mastertcp6 0 0 :::22 :::* LISTEN 903/sshdtcp6 0 0 ::1:25 :::* LISTEN 1061/mastertcp6 0 0 :::9094 :::* LISTEN 1200/alertmanagertcp6 0 0 ::1:9168 :::* LISTEN 1195/ruby[root@localhost gitpub]#查看浏览器默认密码Last login: Sun Aug 22 10:23:59 2021 from 192.168.100.1[root@localhost ~]# cat /etc/gitlab/initial_root_password# WARNING: This value is valid only in the following conditions# 1. If provided manually (either via `GITLAB_ROOT_PASSWORD` environment variable or via `gitlab_rails['initial_root_password']` setting in `gitlab.rb`, it was provided before database was seeded for the first time (usually, the first reconfigure run).# 2. Password hasn't been changed manually, either via UI or via command line.## If the password shown here doesn't work, you must reset the admin password following https://docs.gitlab.com/ee/security/reset_user_password.html#reset-your-root-password.Password: vLfF2uH7+Zz9L832/sC4chlfrwimw/ujUChNXD4MVm8=# NOTE: This file will be automatically deleted in the first reconfigure run after 24 hours.[root@localhost ~]#
在浏览器输入IP进行访问。 用户名 root 密码在/etc/gitlab/initial_root_password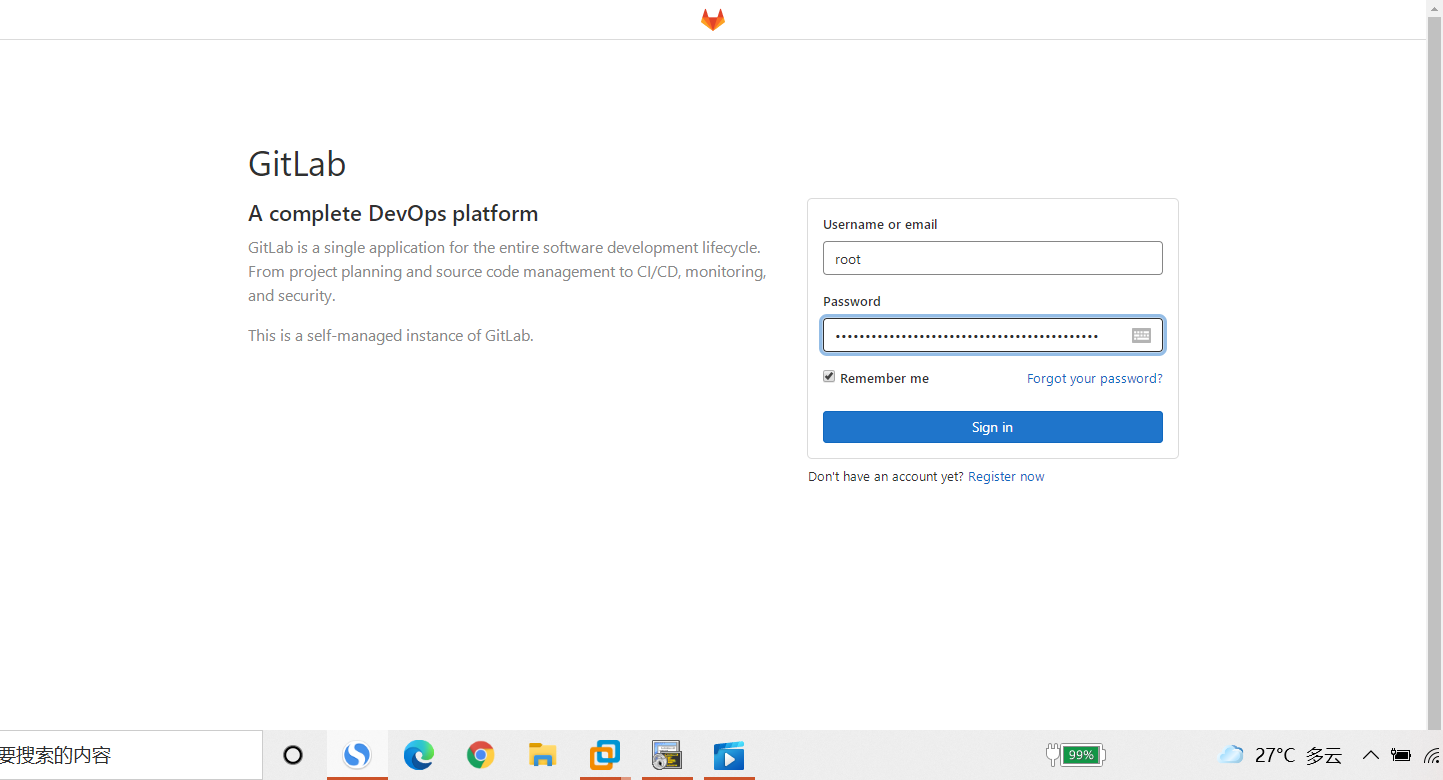
备份
[root@localhost ~]# gitlab-rake gitlab:backup:create备份目录在/var/opt/gitlab/backups[root@localhost ~]# ls /var/opt/gitlab/backups/1629600650_2021_08_22_14.1.3_gitlab_backup.tar[root@localhost ~]#GitLab恢复,需要先停服务[root@localhost ~]# gitlab-ctl stop unicorn ; gitlab-ctl stop sidekiqok: down: sidekiq: 0s, normally up[root@localhost ~]#恢复备份,这里是一个编号,即备份文件的前缀[root@localhost ~]# gitlab-rake gitlab:backup:restore BACKUP=1629600650_2021_08_22_14.1.3再启动服务[root@localhost ~]# gitlab-ctl startok: run: alertmanager: (pid 1200) 3639sok: run: gitaly: (pid 1176) 3639sok: run: gitlab-exporter: (pid 1195) 3639sok: run: gitlab-workhorse: (pid 1184) 3639sok: run: logrotate: (pid 5588) 39sok: run: nginx: (pid 1189) 3639sok: run: node-exporter: (pid 1186) 3639sok: run: postgres-exporter: (pid 1202) 3639sok: run: postgresql: (pid 1181) 3639sok: run: prometheus: (pid 1198) 3639sok: run: puma: (pid 1190) 3639sok: run: redis: (pid 1177) 3639sok: run: redis-exporter: (pid 1193) 3639sok: run: sidekiq: (pid 5619) 1s[root@localhost ~]#

若有收获,就点个赞吧
0 人点赞
