一、什么是Git
Git 是一个开源的分布式版本控制系统,用于敏捷高效地处理任何或小或大的项目。
Git 是 Linus Torvalds 为了帮助管理 Linux 内核开发而开发的一个开放源码的版本控制软件。
Git 与常用的版本控制工具 CVS, Subversion 等不同,它采用了分布式版本库的方式,不必服务器端软件支持。
二、单机使用Git
1、安装
[root@localhost ~]# yum install -y git
配置基本信息
[root@localhost ~]# git config --global user.name "sxb"[root@localhost ~]# git config --global user.email "example@qq.com"[root@localhost ~]#

初始化仓库
[root@localhost ~]# mkdir -p /data/gitroot[root@localhost ~]# cd /data/gitroot/[root@localhost gitroot]# git init初始化空的 Git 版本库于 /data/gitroot/.git/[root@localhost gitroot]#

2、使用
添加新文件
[root@localhost gitroot]# echo "hello word" >1.txt[root@localhost gitroot]# git add 1.txt[root@localhost gitroot]# git commit -m "add new file 1.txt"[master(根提交) 81dc46b] add new file 1.txt1 file changed, 1 insertion(+)create mode 100644 1.txt[root@localhost gitroot]#

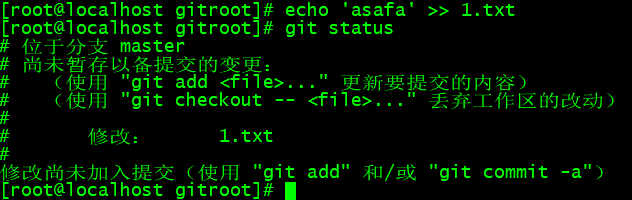
查看当前仓库状态是否有改动的文件
[root@localhost gitroot]# echo 'asafa' >> 1.txt[root@localhost gitroot]# git status# 位于分支 master# 尚未暂存以备提交的变更:# (使用 "git add <file>..." 更新要提交的内容)# (使用 "git checkout -- <file>..." 丢弃工作区的改动)## 修改: 1.txt#修改尚未加入提交(使用 "git add" 和/或 "git commit -a")[root@localhost gitroot]#
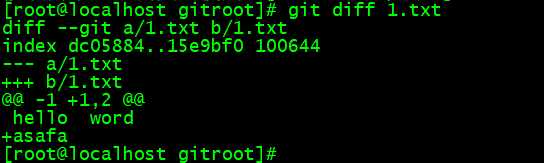
对比本次修改了什么内容
[root@localhost gitroot]# git diff 1.txtdiff --git a/1.txt b/1.txtindex dc05884..15e9bf0 100644--- a/1.txt+++ b/1.txt@@ -1 +1,2 @@hello word+asafa[root@localhost gitroot]#
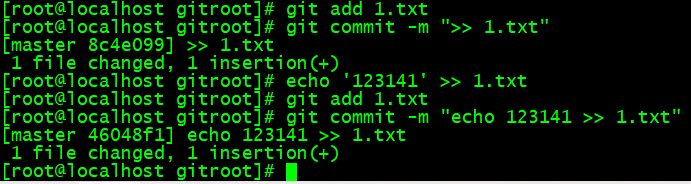
版本回退
[root@localhost gitroot]# git add 1.txt[root@localhost gitroot]# git commit -m ">> 1.txt"[master 8c4e099] >> 1.txt1 file changed, 1 insertion(+)[root@localhost gitroot]# echo '123141' >> 1.txt[root@localhost gitroot]# git add 1.txt[root@localhost gitroot]# git commit -m "echo 123141 >> 1.txt"[master 46048f1] echo 123141 >> 1.txt1 file changed, 1 insertion(+)[root@localhost gitroot]#
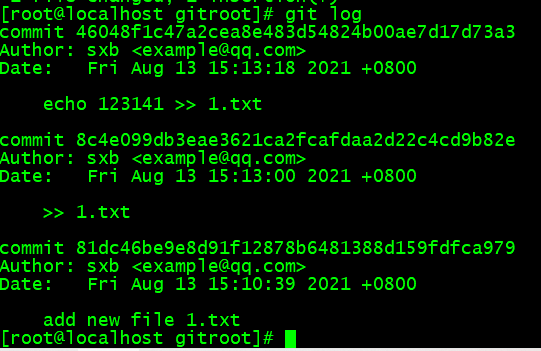
查看日志
[root@localhost gitroot]# git logcommit 46048f1c47a2cea8e483d54824b00ae7d17d73a3Author: sxb <example@qq.com>Date: Fri Aug 13 15:13:18 2021 +0800echo 123141 >> 1.txtcommit 8c4e099db3eae3621ca2fcafdaa2d22c4cd9b82eAuthor: sxb <example@qq.com>Date: Fri Aug 13 15:13:00 2021 +0800>> 1.txtcommit 81dc46be9e8d91f12878b6481388d159fdfca979Author: sxb <example@qq.com>Date: Fri Aug 13 15:10:39 2021 +0800add new file 1.txt[root@localhost gitroot]#
日志一行显示
[root@localhost gitroot]# git log --pretty=oneline46048f1c47a2cea8e483d54824b00ae7d17d73a3 echo 123141 >> 1.txt8c4e099db3eae3621ca2fcafdaa2d22c4cd9b82e >> 1.txt81dc46be9e8d91f12878b6481388d159fdfca979 add new file 1.txt[root@localhost gitroot]#

版本回退
[root@localhost gitroot]# git reset --hard 81dc46be9eHEAD 现在位于 81dc46b add new file 1.txt[root@localhost gitroot]# cat 1.txthello word[root@localhost gitroot]#

撤销修改
[root@localhost gitroot]# rm -f 1.txt[root@localhost gitroot]# git checkout -- 1.txt[root@localhost gitroot]# ls1.txt[root@localhost gitroot]# cat 1.txthello word

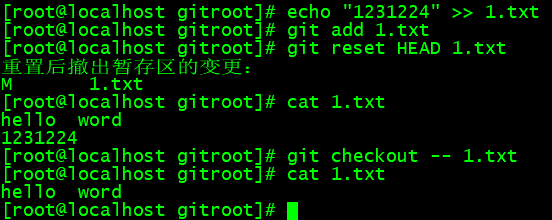
如果1.txt文件修改,add后但没有commit,再想回退到上一次提交的状态,#可以使用git reset HEAD 1.txt,再执行git checkout — 1.txt。
[root@localhost gitroot]# echo "1231224" >> 1.txt[root@localhost gitroot]# git add 1.txt[root@localhost gitroot]# git reset HEAD 1.txt重置后撤出暂存区的变更:M 1.txt[root@localhost gitroot]# cat 1.txthello word1231224[root@localhost gitroot]# git checkout -- 1.txt[root@localhost gitroot]# cat 1.txthello word[root@localhost gitroot]#
查看所有历史版本
[root@localhost gitroot]# git reflog81dc46b HEAD@{0}: reset: moving to 81dc46be9e46048f1 HEAD@{1}: commit: echo 123141 >> 1.txt8c4e099 HEAD@{2}: commit: >> 1.txt81dc46b HEAD@{3}: commit (initial): add new file 1.txt[root@localhost gitroot]#

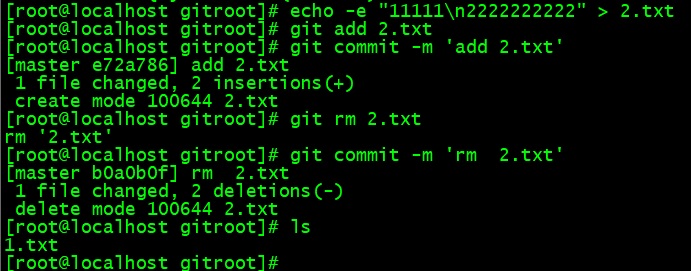
删除文件
[root@localhost gitroot]# echo -e "11111\n2222222222" > 2.txt[root@localhost gitroot]# git add 2.txt[root@localhost gitroot]# git commit -m 'add 2.txt'[master e72a786] add 2.txt1 file changed, 2 insertions(+)create mode 100644 2.txt[root@localhost gitroot]# git rm 2.txtrm '2.txt'[root@localhost gitroot]# git commit -m 'rm 2.txt'[master b0a0b0f] rm 2.txt1 file changed, 2 deletions(-)delete mode 100644 2.txt[root@localhost gitroot]# ls1.txt[root@localhost gitroot]#
三、gitee
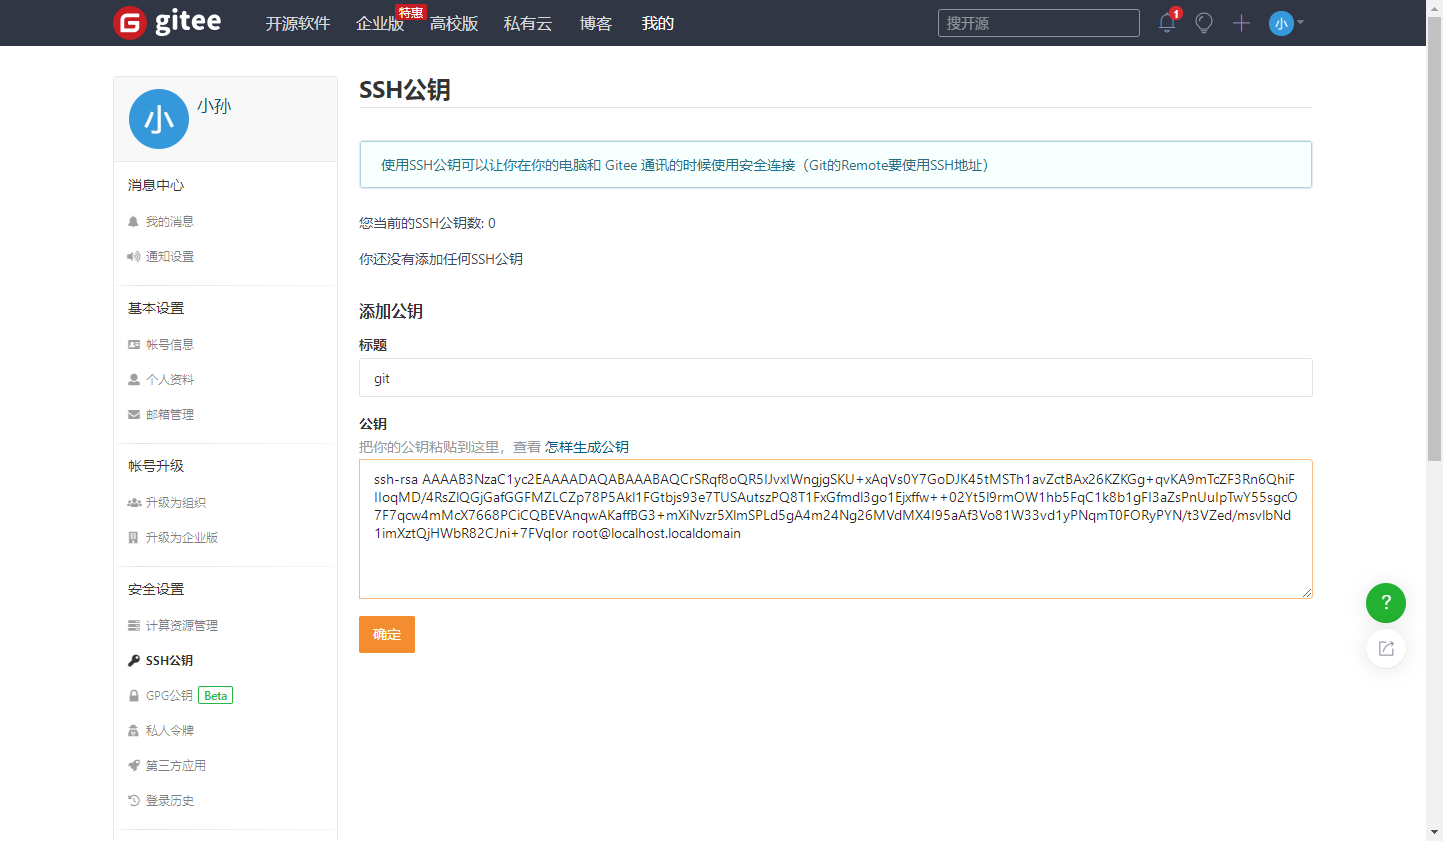
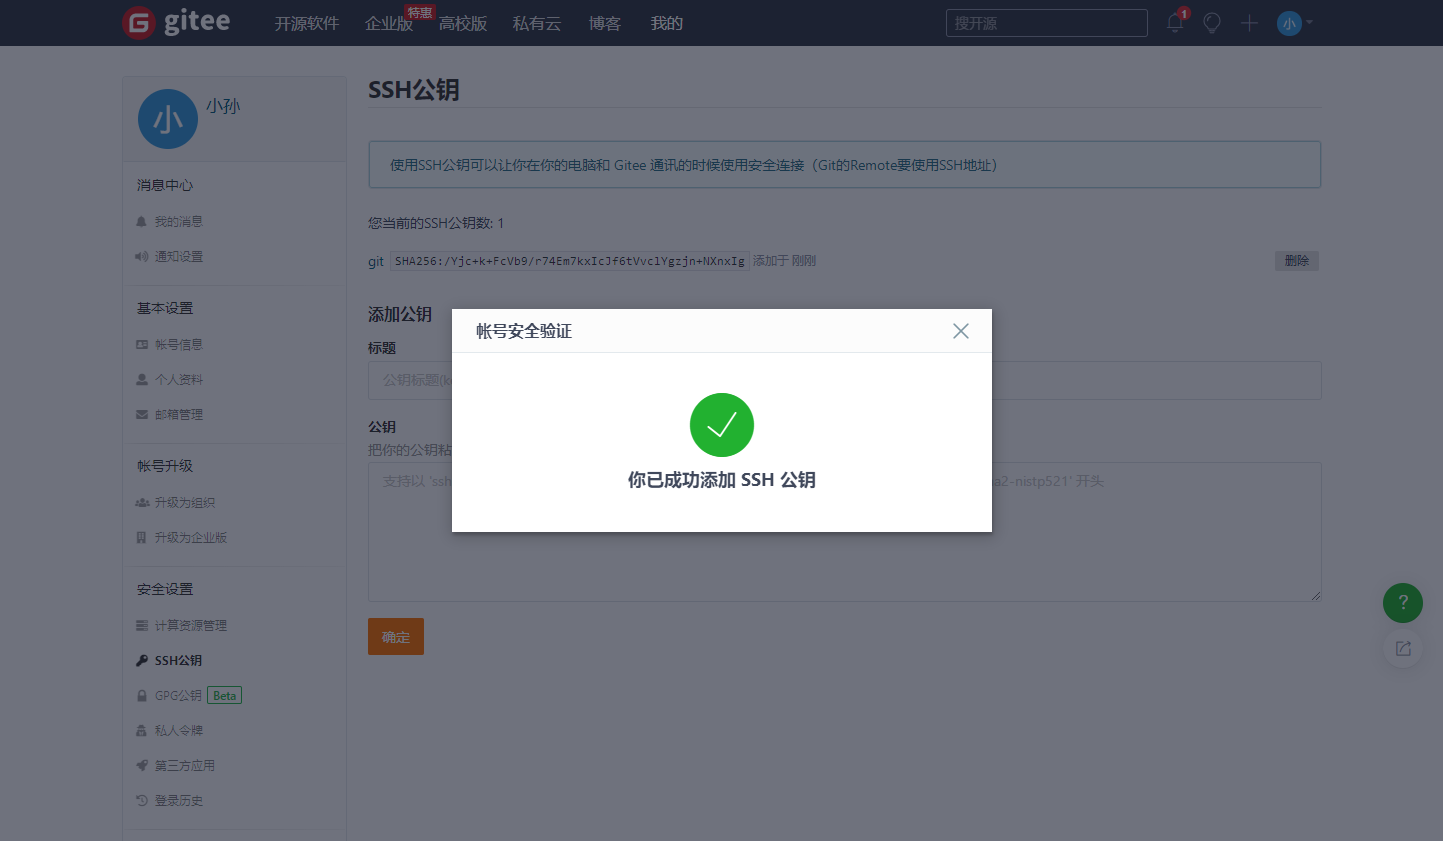
3.1添加公钥
先搜索gitee,注册
然后点击设置,选择ssh,把虚拟机的公钥复制上去
虚拟机的公钥
[root@localhost ~]# ssh-keygenGenerating public/private rsa key pair.Enter file in which to save the key (/root/.ssh/id_rsa):Created directory '/root/.ssh'.Enter passphrase (empty for no passphrase):Enter same passphrase again:Your identification has been saved in /root/.ssh/id_rsa.Your public key has been saved in /root/.ssh/id_rsa.pub.The key fingerprint is:SHA256:/Yjc+k+FcVb9/r74Em7kxIcJf6tVvclYgzjn+NXnxIg root@localhost.localdomainThe key's randomart image is:+---[RSA 2048]----+| o|| ..|| . o .|| . ..=. o|| S .o=o++o|| . o o=@+=B|| o o.Eo=*B|| . ..=++o|| ....o++++|+----[SHA256]-----+[root@localhost ~]# cd .ssh/[root@localhost .ssh]# lsid_rsa id_rsa.pub[root@localhost .ssh]#[root@localhost .ssh]# cat id_rsa.pubssh-rsa AAAAB3NzaC1yc2EAAAADAQABAAABAQCrSRqf8oQR5IJvxIWngjgSKU+xAqVs0Y7GoDJK45tMSTh1avZctBAx26KZKGg+qvKA9mTcZF3Rn6QhiFIIoqMD/4RsZlQGjGafGGFMZLCZp78P5Akl1FGtbjs93e7TUSAutszPQ8T1FxGfmdl3go1Ejxffw++02Yt5l9rmOW1hb5FqC1k8b1gFI3aZsPnUuIpTwY55sgcO7F7qcw4mMcX7668PCiCQBEVAnqwAKaffBG3+mXiNvzr5XlmSPLd5gA4m24Ng26MVdMX4I95aAf3Vo81W33vd1yPNqmT0FORyPYN/t3VZed/msvlbNd1imXztQjHWbR82CJni+7FVqIor root@localhost.localdomain[root@localhost .ssh]#
3.2创建仓库

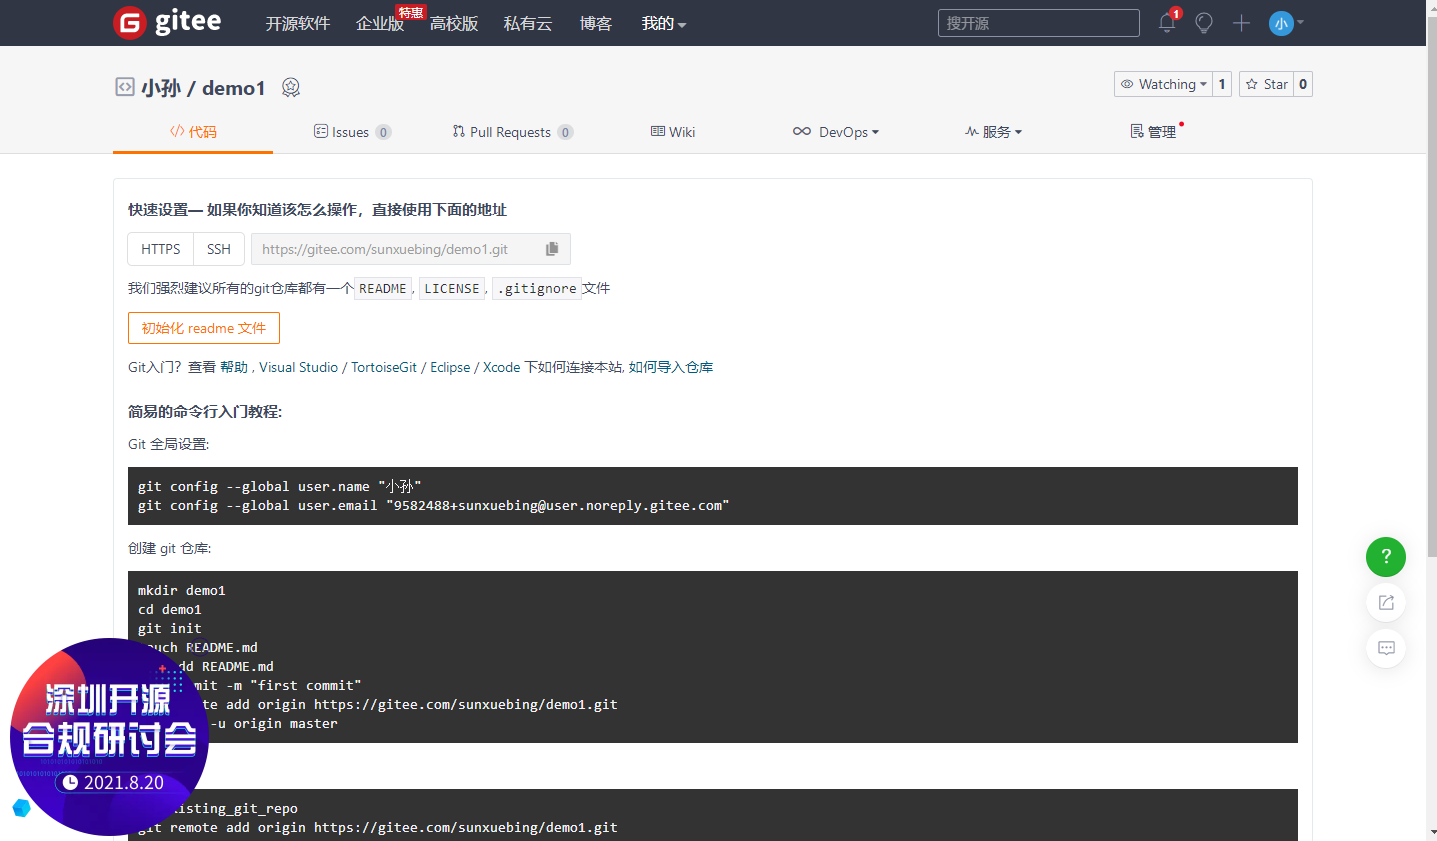
3.3连接远程仓库
[root@localhost .ssh]# cd /data/gitroot/[root@localhost gitroot]# git remote add origin https://gitee.com/sunxuebing/demo1.git[root@localhost gitroot]# ls1.txt[root@localhost gitroot]# git push -u origin masterUsername for 'https://gitee.com': 18747739721Password for 'https://18747739721@gitee.com':Counting objects: 7, done.Compressing objects: 100% (4/4), done.Writing objects: 100% (7/7), 528 bytes | 0 bytes/s, done.Total 7 (delta 1), reused 0 (delta 0)remote: Powered by GITEE.COM [GNK-6.0]To https://gitee.com/sunxuebing/demo1.git* [new branch] master -> master分支 master 设置为跟踪来自 origin 的远程分支 master。[root@localhost gitroot]#

3.4克隆远程仓库
从这里找仓库链接
[root@localhost gitroot]# cd /opt/[root@localhost opt]# git clone https://gitee.com/sunxuebing/demo1.git正克隆到 'demo1'...remote: Enumerating objects: 7, done.remote: Counting objects: 100% (7/7), done.remote: Compressing objects: 100% (4/4), done.remote: Total 7 (delta 1), reused 0 (delta 0), pack-reused 0Unpacking objects: 100% (7/7), done.[root@localhost opt]# lsdemo1[root@localhost opt]# cd demo1/[root@localhost demo1]# ls -a. .. 1.txt .git[root@localhost demo1]#
3.5推送远程服务端
[root@localhost demo1]# cd /data/gitroot/[root@localhost gitroot]# ls1.txt[root@localhost gitroot]# echo "1231224" >> 2.sh[root@localhost gitroot]# git add 2.sh[root@localhost gitroot]# git commit -m "add 2.sh"[master de63708] add 2.sh1 file changed, 1 insertion(+)create mode 100644 2.sh[root@localhost gitroot]# git pushwarning: push.default 未设置,它的默认值将会在 Git 2.0 由 'matching'修改为 'simple'。若要不再显示本信息并在其默认值改变后维持当前使用习惯,进行如下设置:git config --global push.default matching若要不再显示本信息并从现在开始采用新的使用习惯,设置:git config --global push.default simple参见 'git help config' 并查找 'push.default' 以获取更多信息。('simple' 模式由 Git 1.7.11 版本引入。如果您有时要使用老版本的 Git,为保持兼容,请用 'current' 代替 'simple' 模式)Username for 'https://gitee.com': 18747739721Password for 'https://18747739721@gitee.com':Counting objects: 4, done.Compressing objects: 100% (2/2), done.Writing objects: 100% (3/3), 264 bytes | 0 bytes/s, done.Total 3 (delta 0), reused 0 (delta 0)remote: Powered by GITEE.COM [GNK-6.0]To https://gitee.com/sunxuebing/demo1.gitb0a0b0f..de63708 master -> master[root@localhost gitroot]#

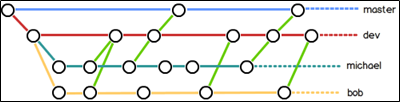
Git 分支
几乎所有的版本控制系统都以某种形式支持分支。 使用分支意味着你可以把你的工作从开发主线上分离开来,以免影响开发主线。 在很多版本控制系统中,这是一个略微低效的过程——常常需要完全创建一个源代码目录的副本。对于大项目来说,这样的过程会耗费很多时间。
有人把 Git 的分支模型称为它的“必杀技特性”,也正因为这一特性,使得 Git 从众多版本控制系统中脱颖而出。 为何 Git 的分支模型如此出众呢? Git 处理分支的方式可谓是难以置信的轻量,创建新分支这一操作几乎能在瞬间完成,并且在不同分支之间的切换操作也是一样便捷。 与许多其它版本控制系统不同,Git 鼓励在工作流程中频繁地使用分支与合并,哪怕一天之内进行许多次。 理解和精通这一特性,你便会意识到 Git 是如此的强大而又独特,并且从此真正改变你的开发方式。
1.分支创建切换
查看项目
[root@localhost gitroot]# ls1.txt 2.sh[root@localhost gitroot]# ls -a. .. 1.txt 2.sh .git
查看所有分支
[root@localhost gitroot]# git branch* master
创建分支
[root@localhost gitroot]# git branch sxb
查看分支
[root@localhost gitroot]# git branchmaster* sxb
切换分支
[root@localhost gitroot]# git checkout sxb切换到分支 'sxb'
在新分支下创建一个文件,提交
[root@localhost gitroot]# ls1.txt 2.sh[root@localhost gitroot]# echo "12141" > 123.txt[root@localhost gitroot]# git add 123.txt[root@localhost gitroot]# git commit -m "add 123.txt"[sxb defad3f] add 123.txt1 file changed, 1 insertion(+)create mode 100644 123.txt[root@localhost gitroot]# ls123.txt 1.txt 2.sh
切换回其他分支发现并没有新文件
[root@localhost gitroot]# git checkout master切换到分支 'master'[root@localhost gitroot]# ls1.txt 2.sh[root@localhost gitroot]#
2.分支的合并
如果master分支和lsk分支都对2.txt进行了编辑,当合并时会提示冲突,需先解决冲突才可以继续合并。
解决冲突的方法是在master分支下,编辑2.txt,改为lsk分支里面2.txt的内容。然后提交2.txt,再合并lsk分支。
但是这样有一个问题,万一master分支更改的内容是我们想要的呢?此时可以编辑2.txt内容,改为想要的,然后提交。切换到lsk分支,然后合并master分支到lsk分支即可(倒着合并)。
合并分支有一个原则,那就是要把最新的分支合并到旧的分支。也就是说merge后面跟的分支名字一定是最新的分支。
[root@localhost gitroot]# git checkout master切换到分支 'master'[root@localhost gitroot]# ls1.txt 2.sh[root@localhost gitroot]# git merge sxb更新 de63708..defad3fFast-forward123.txt | 1 +1 file changed, 1 insertion(+)create mode 100644 123.txt[root@localhost gitroot]# ls123.txt 1.txt 2.sh[root@localhost gitroot]#
3.分支删除
如果分支没有合并,删除之前会提示,那就不合并,强制删除
[root@localhost gitroot]# git branch -d sxb已删除分支 sxb(曾为 defad3f)。
强制删除
[root@localhost gitroot]# git branch -D sxb
4.分支使用原则
① master分支是非常重要的,线上发布代码用这个分支,平时我们开发代码不要在这个分支上。
②创建一个dev分支,专门用作开发,只有当发布到线上之前,才会把dev分支合并到master。
③开发人员应该在dev的基础上再分支成个人分支,个人分支(在自己PC上)里面开发代码,然后合并到dev分支。
5.远程分支
本地新建的分支如果不推送到远程,对其他人就是不可见的。
查看远程分支命令为git ls-remote origin,可以看到所有分支。
[root@localhost gitroot]# git ls-remote originde637084e60b9f81c98fd83cf17842d6a58b7683 HEADde637084e60b9f81c98fd83cf17842d6a58b7683 refs/heads/master[root@localhost gitroot]#
对于git push分支分两种情况:
①当本地分支和远程分支一致时
git push会把所有本地分支的变更一同推送到远程,如果想只推送一个分支,使用git push origin branch-name命令。
②当本地分支比远程分支多
默认git push只推送本地和远程一致的分支,想要把多出来的本地分支推送到远程时,使用git push origin branch-name命令如果推送失败,先用git pull抓取远程的新提交。
git clone的时候默认只把master分支克隆下来。如果想把所有分支都克隆下来,需要手动创建,在本地创建和远程分支对应的分支,使用git checkout -b branch-name origin/branch-name命令,需要注意本地和远程分支的名称要一致。
Git标签与别名
1.标签
标签类似于快照功能,可以给版本库打一个标签,记录某个时刻库的状态。也可以随时恢复到该状态
给master分支打一个标签[root@localhost gitroot]# git tag v1.0查看标签信息[root@localhost gitroot]# git show v1.0commit defad3fd21dba062bbdf57fc7717d1d848ccf43dAuthor: sxb <example@qq.com>Date: Wed Aug 18 18:19:44 2021 +0800add 123.txtdiff --git a/123.txt b/123.txtnew file mode 100644index 0000000..ca5cf1c--- /dev/null+++ b/123.txt@@ -0,0 +1 @@+12141[root@localhost gitroot]#查看所有的标签[root@localhost gitroot]# git tagv1.0Tag是针对commit来打标签的,所以可以针对历史的commit来打tag查看历史的commit[root@localhost gitroot]# git log --pretty=oneline --abbrev-commitdefad3f add 123.txtde63708 add 2.shb0a0b0f rm 2.txte72a786 add 2.txt81dc46b add new file 1.txt针对历史的commit打标签[root@localhost gitroot]# git tag v0.9 de63708可以对标签进行描述[root@localhost gitroot]# git tag -a v0.8 -m "add tag! " defad3f[root@localhost gitroot]# git tagv0.8v0.9v1.0[root@localhost gitroot]#删除标签[root@localhost gitroot]# git tag -d v0.8已删除 tag 'v0.8'(曾为 0d8a5da)[root@localhost gitroot]# git tagv0.9v1.0[root@localhost gitroot]#推送指定标签[root@localhost gitroot]# git push origin v1.0Username for 'https://gitee.com': 18747739721Password for 'https://18747739721@gitee.com':Counting objects: 4, done.Compressing objects: 100% (2/2), done.Writing objects: 100% (3/3), 290 bytes | 0 bytes/s, done.Total 3 (delta 0), reused 0 (delta 0)remote: Powered by GITEE.COM [GNK-6.0]To https://gitee.com/sunxuebing/demo1.git* [new tag] v1.0 -> v1.0[root@localhost gitroot]#推送所有标签[root@localhost gitroot]# git push --tag originUsername for 'https://gitee.com': 18747739721Password for 'https://18747739721@gitee.com':Total 0 (delta 0), reused 0 (delta 0)remote: Powered by GITEE.COM [GNK-6.0]To https://gitee.com/sunxuebing/demo1.git* [new tag] v0.9 -> v0.9[root@localhost gitroot]#本地远程都删除标签[root@localhost gitroot]# git tag v1.0 -d已删除 tag 'v1.0'(曾为 defad3f)[root@localhost gitroot]# git push origin :refs/tags/v1.0Username for 'https://gitee.com': 18747739721Password for 'https://18747739721@gitee.com':remote: Powered by GITEE.COM [GNK-6.0]To https://gitee.com/sunxuebing/demo1.git- [deleted] v1.0[root@localhost gitroot]#
2.Git别名
别名和Linux里的alias类似
设置别名
[root@localhost gitroot]# git config --global alias.ci commit[root@localhost gitroot]# git config --global alias.co checkout[root@localhost gitroot]# git config --global alias.br branch[root@localhost gitroot]# git config --list |grep aliasalias.ci=commitalias.co=checkoutalias.br=branch
使用别名
[root@localhost gitroot]# git br* master
小技巧 设置log
[root@localhost gitroot]# git config --global alias.lg "log --color --graph --pretty=format:'%Cred%h%Creset -%C(yellow)%d%Creset %s %Cgreen(%cr) %C(bold blue)<%an>%Creset' --abbrev-commit"
再查看日志
[root@localhost gitroot]# git lg* defad3f - (HEAD, master) add 123.txt (32 分钟之前) <sxb>* de63708 - (tag: v0.9, origin/master) add 2.sh (39 分钟之前) <sxb>* b0a0b0f - rm 2.txt (5 天之前) <sxb>* e72a786 - add 2.txt (5 天之前) <sxb>* 81dc46b - add new file 1.txt (5 天之前) <sxb>[root@localhost gitroot]#
取消别名
[root@localhost gitroot]# git config --global --unset alias.br[root@localhost gitroot]#

若有收获,就点个赞吧
0 人点赞
