Administrator is able to arrange the schedule for a whole school, also generate the schedule for each teacher or students through SIS.
- Support to Smart Scheduling for both administrative and elective classes at the same time.
- Support to preset some scheduling regulations that system can align with.
- Support to detect conflicts between teacher, ground and time period automatically.
- Support to adjust the results manually after Smart Scheduling
- Support to send notifications to teachers and students after validation of schedule.
Preparation Before Scheduling
1. Add Teaching Plan
There are two ways to add the Teaching Plan to SIS
① Add Teaching Plan on 【Teaching Configuration】-【Teaching Plan】
② Add Teaching Plan on 【Class】-【Administrative class】
2. Set Ground (Optional)
If you need to add ground information into schedule, please go to 【System Configuration】-【Ground】
3. Set Timetable
In this step, you need to go to 【System Configuration】-【Timetable】 to set timetable for classes that will be included in scheduling process, so that system can arrange the schedule according to the class sessions.
Smart scheduling
1. Create a new schedule
Step 1: go to 【Schedule】-【Manage Schedule】-【New Schedule】-【Save and Arrange】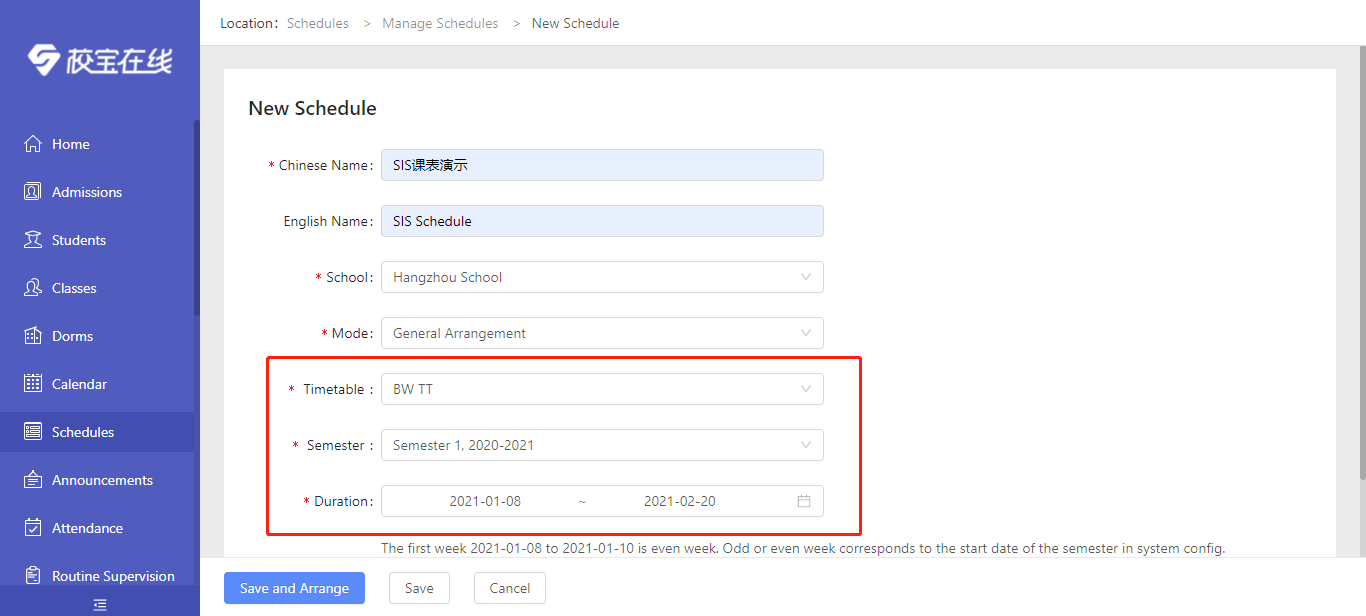
Notice: The first week is even week. Odd or even week corresponds to the start date of the semester in system config.
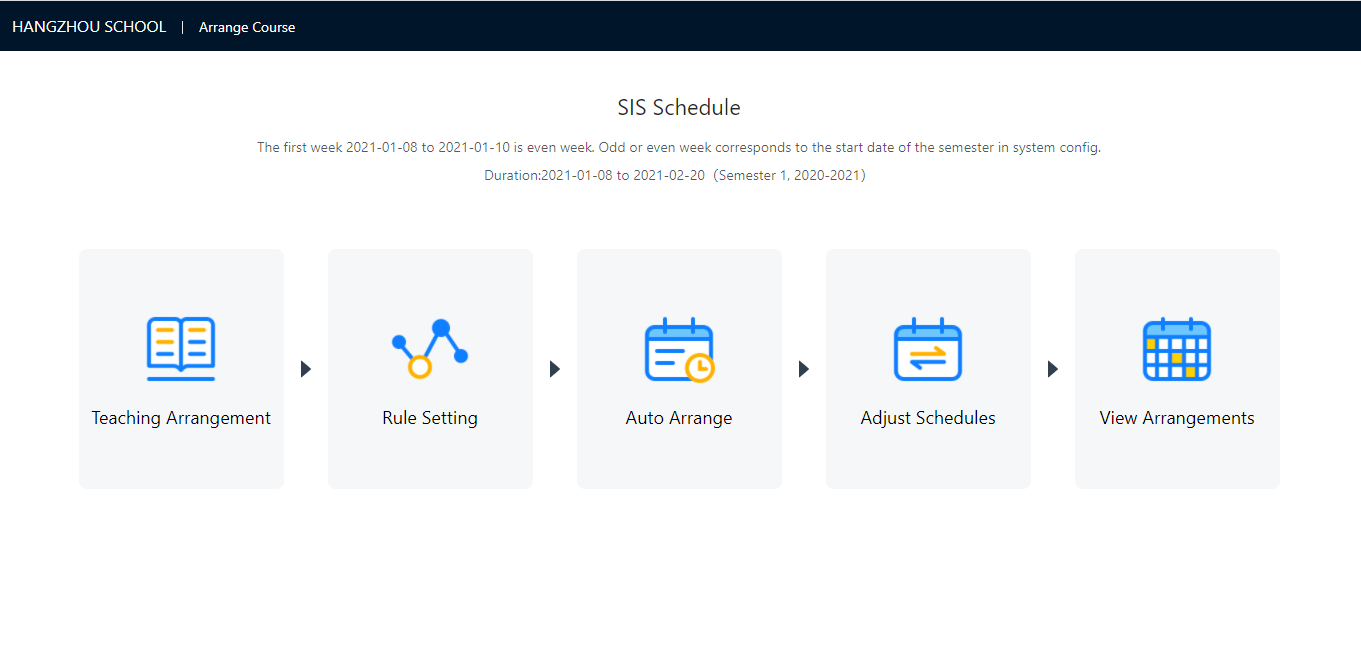
Step 2: The system will go to this page which suggest the scheduling process after you click【Save and Arrange】,
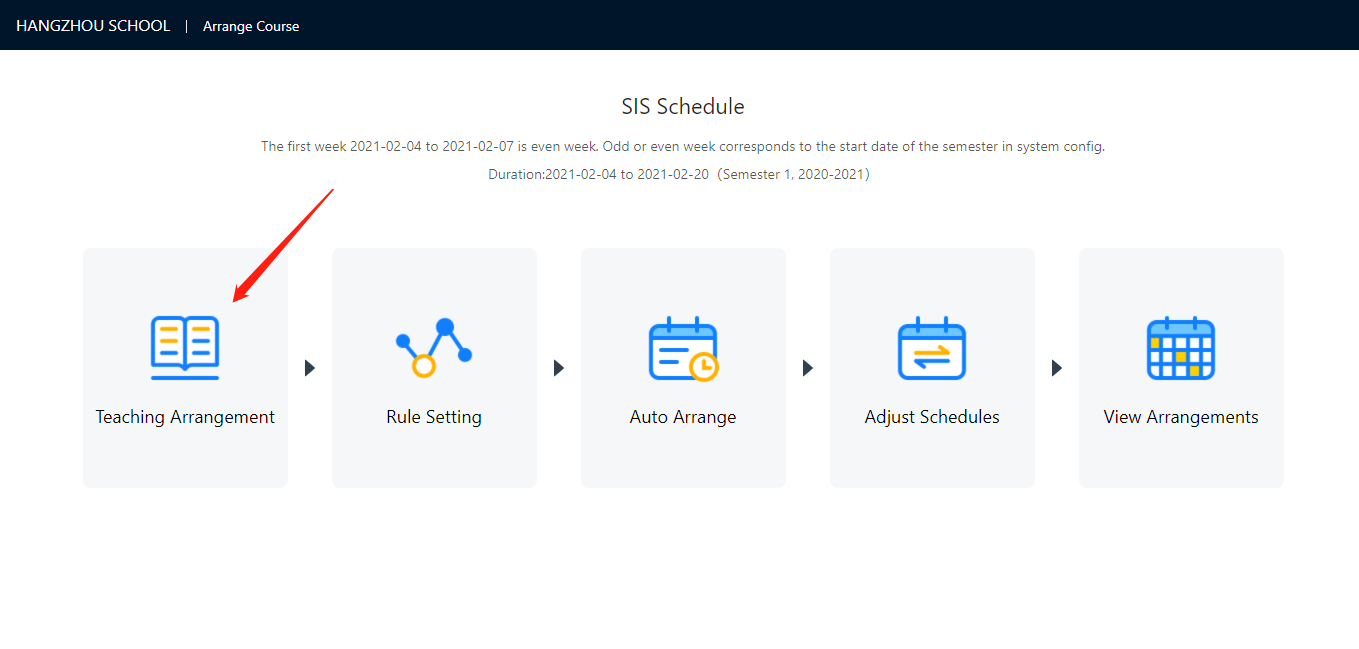
2. Teaching Arrangement
2.1 Add Classes
In this step, you need to go to【Teaching Arrangement】page, click the plus icon‘+’on the left top.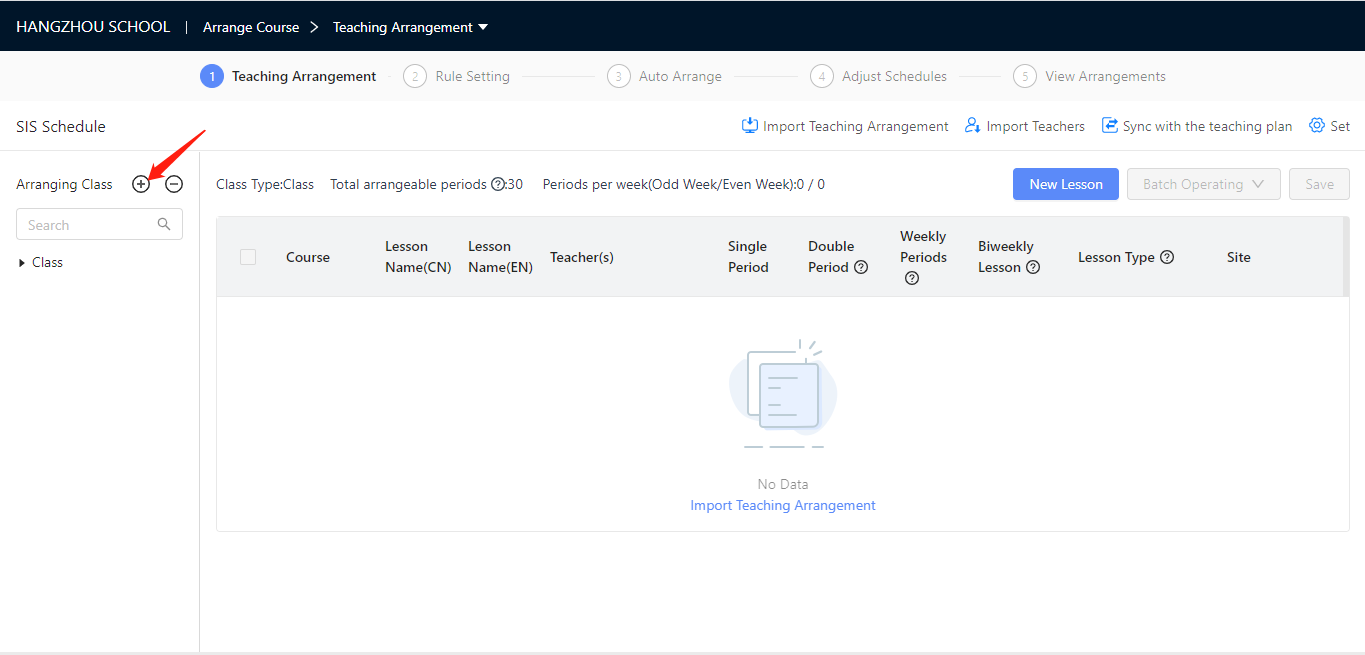
Then select the classes which need to be arranged in schedule, including administrative and elective ones.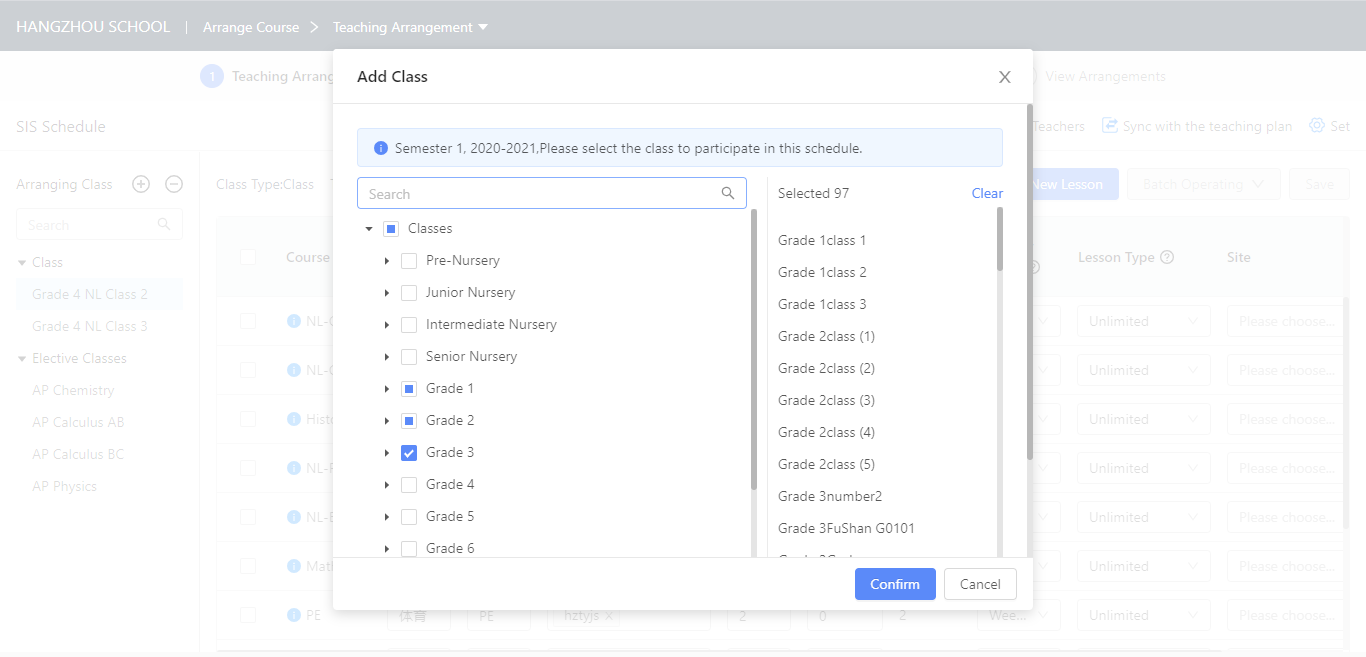
In order to detect conflicts between teachers and grounds, one schedule need to match one specific timetable. In other words,
If different grade or section are following different timetables, you need to separate them into several schedules, according to their timetable.
2.2 Set Teaching Plan
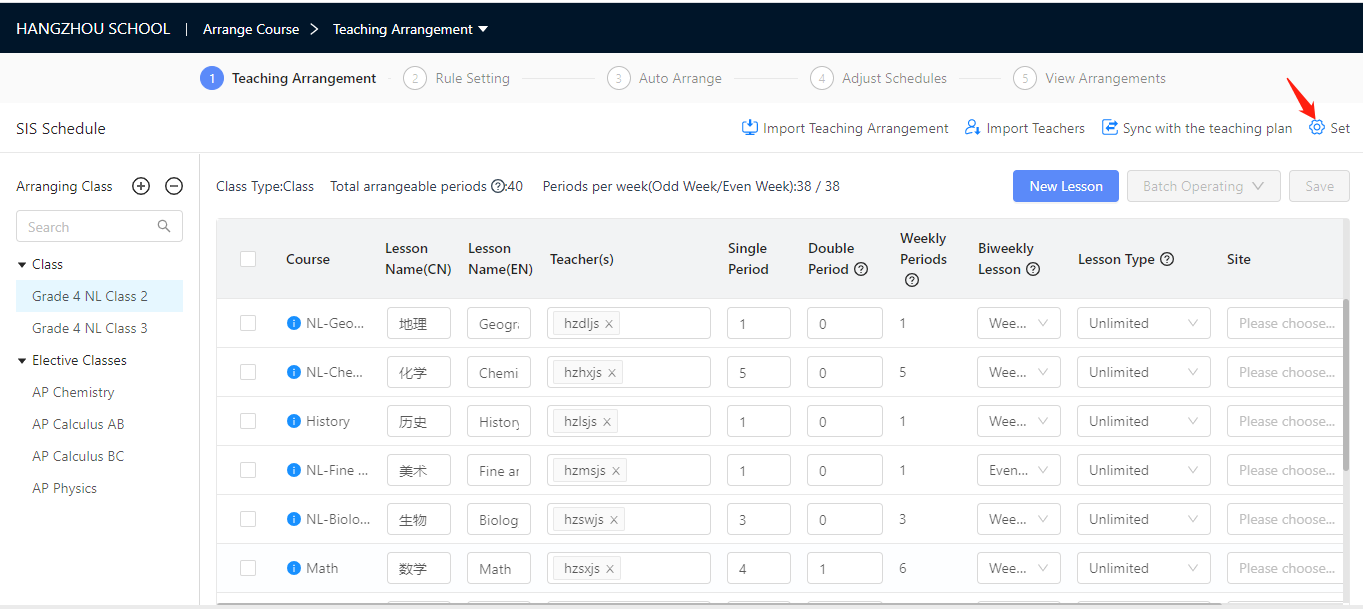
Stay in 【Teaching Arrangement】page,complete required information for teaching plan, e.g. teaching teacher, amount of lessons per week, lesson type.
Normally there are two options to complete the teaching arrangement: adding courses manually and importing teaching arrangement.
- Option 1: Add courses
Choose one class from list, then click 【New Lesson】to add all courses for this class, complete required information, e.g. teaching teacher, amount of lessons per week, lesson type.
After completing all the information, please remember to save.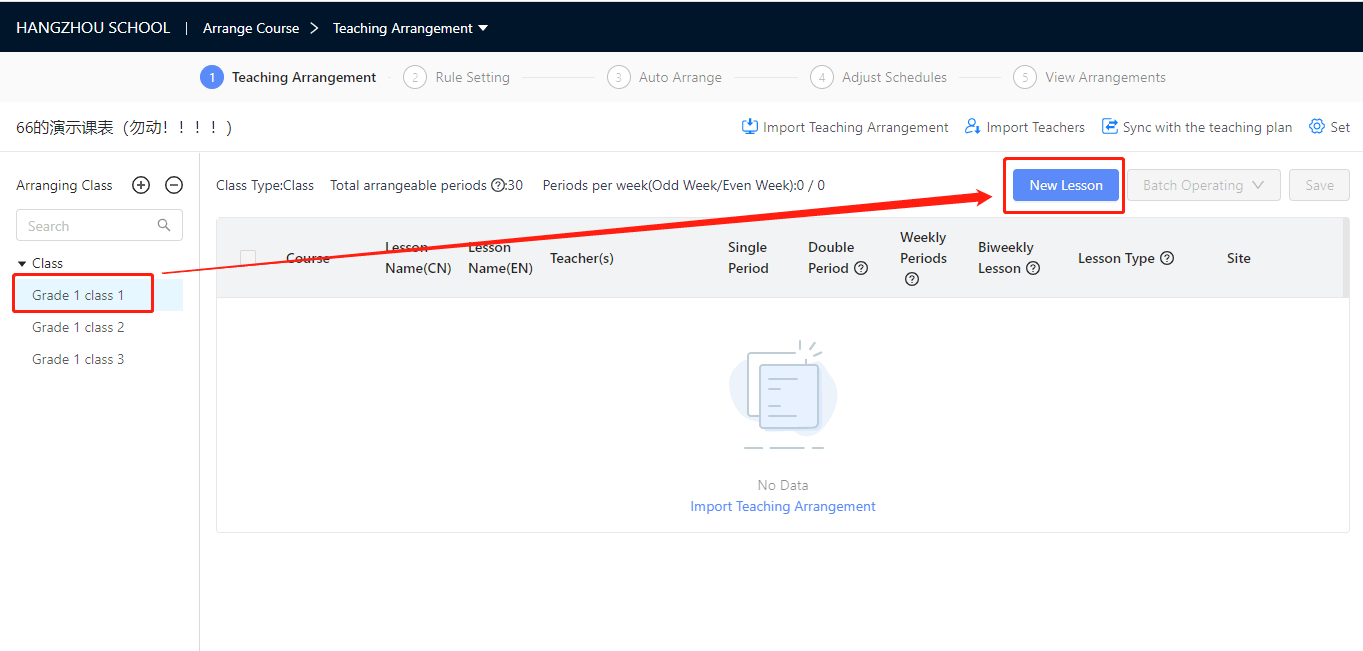
Tips: If teaching plans between classes are basically same, for example same course structure but only different to teachers, you can duplicate course to other classes rather than set them repetitively.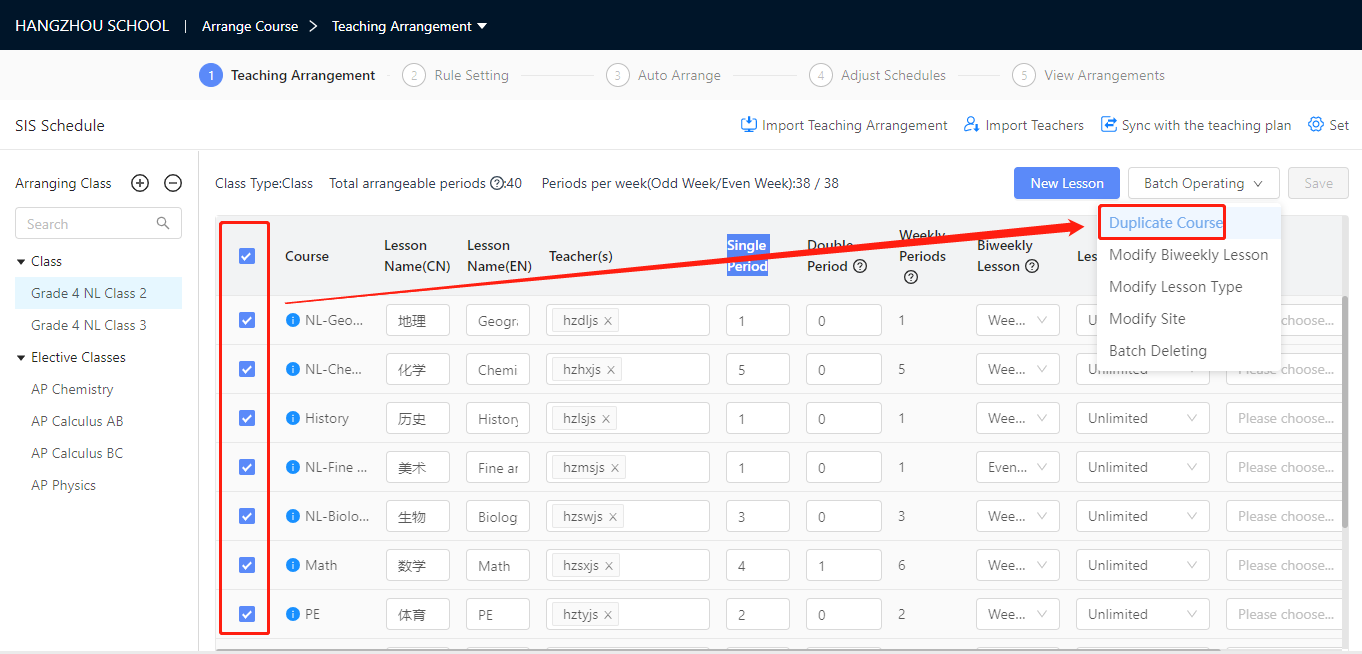
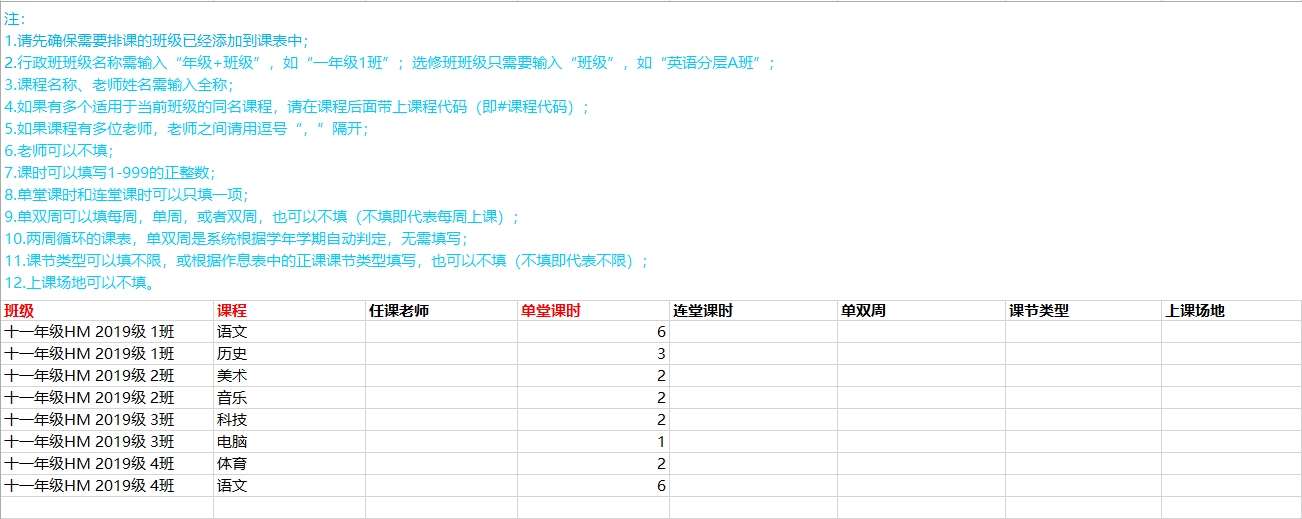
- Option 2: Import teaching arrangement
You can import teaching arrangement for a batch of classes by organizing and uploading excel form.
Scenario 1: When you already have the exact teaching arrangement, you can fill in the Excel template given by system and upload to system. Information of teaching teacher is not required here, but you can import teacher arrangement in later steps.
Scenario 2: When school has a great amount of elective classes, you can fill in the Excel template given by system and upload to system at once.
2.3 Set Teaching teacher
Teaching teacher for each course can be picked from the list, or import according to the template. You can set teaching teachers in a flexible way.
- Pick teaching teachers manually
After adding a course, you can pick one or more staff to be the teaching teachers of this course.
Notice: make sure all teachers are already existing in 【Staff】 module, and under correct department and school districts as well.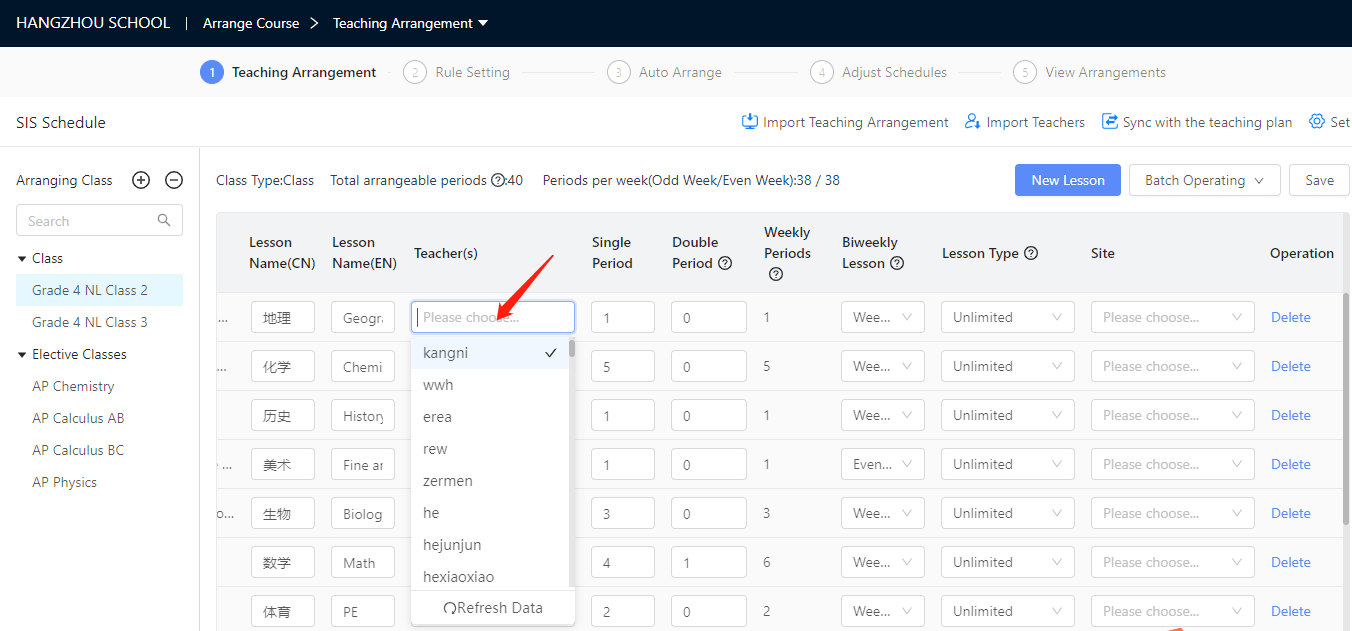
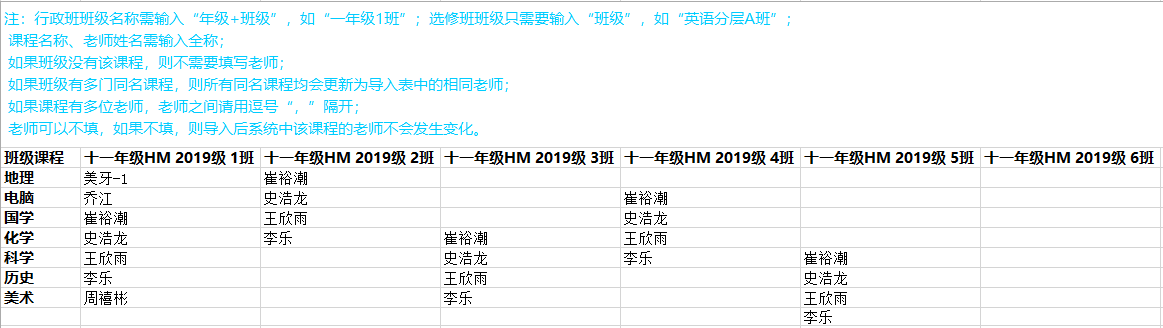
l Import teaching teacher
Click 【Import Teachers】 and download the template, organize the information then upload the Excel.
Tips: In Excel, the first row lists the courses of all classes, you only need to fill in the teachers ’name for classes that actually take these courses, and leave the block blank if not.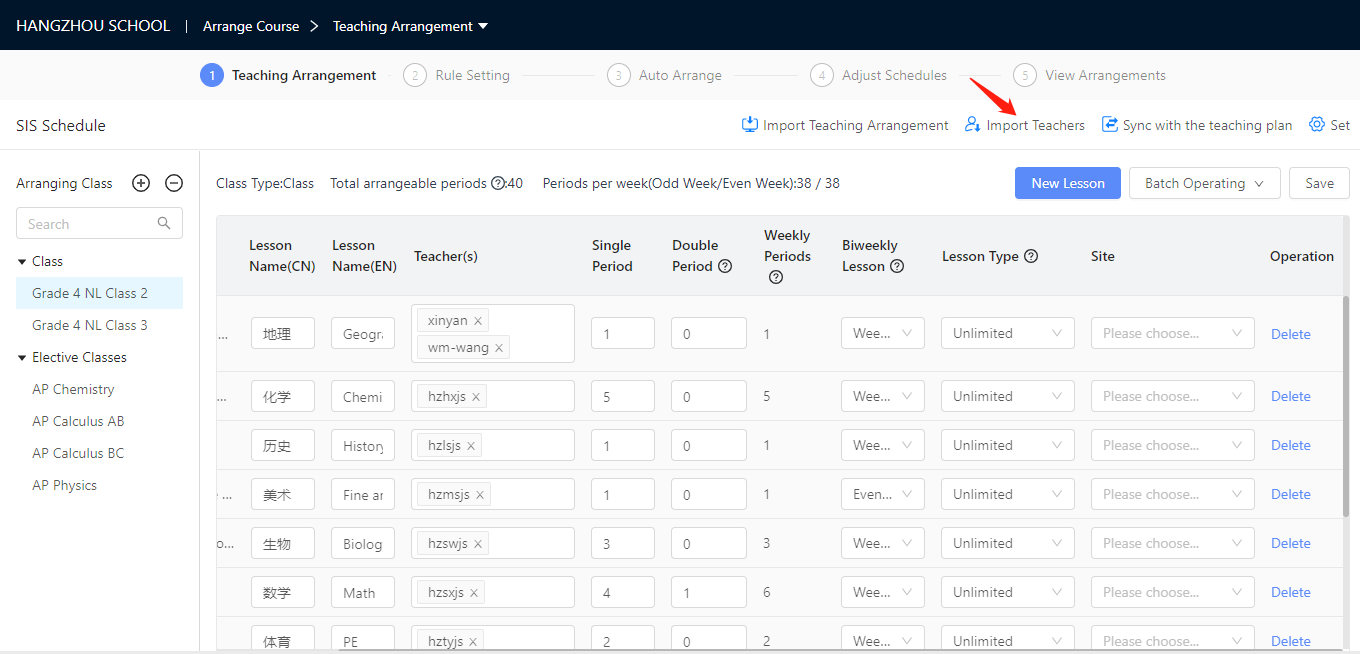
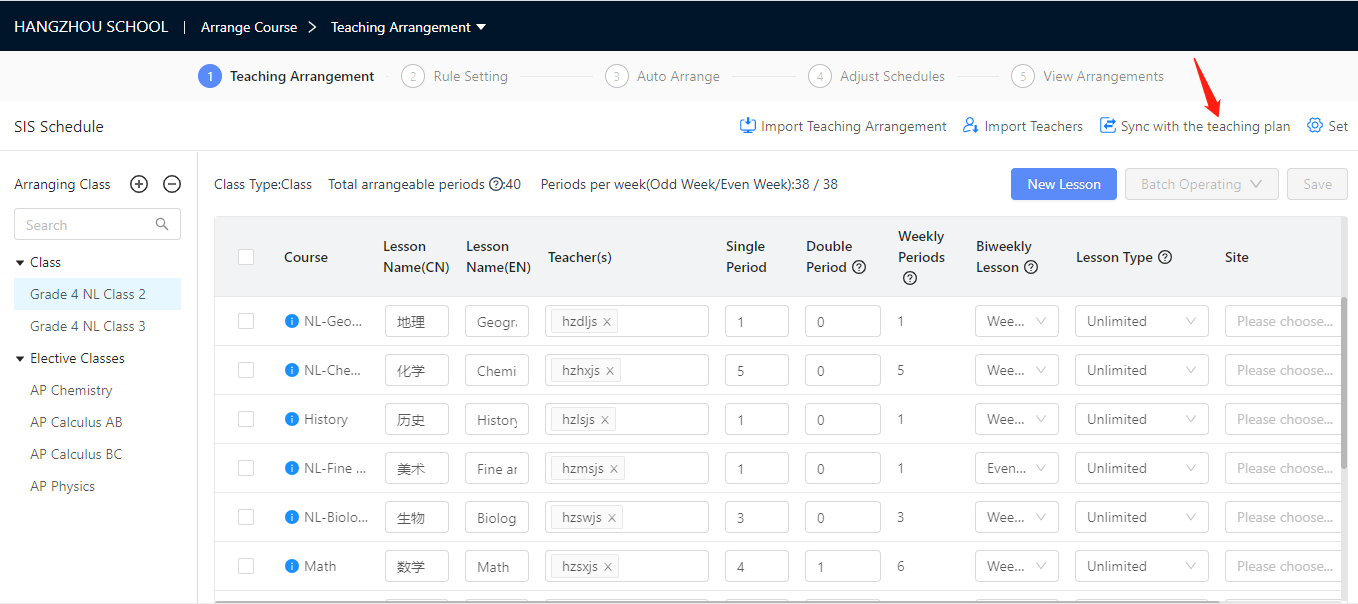
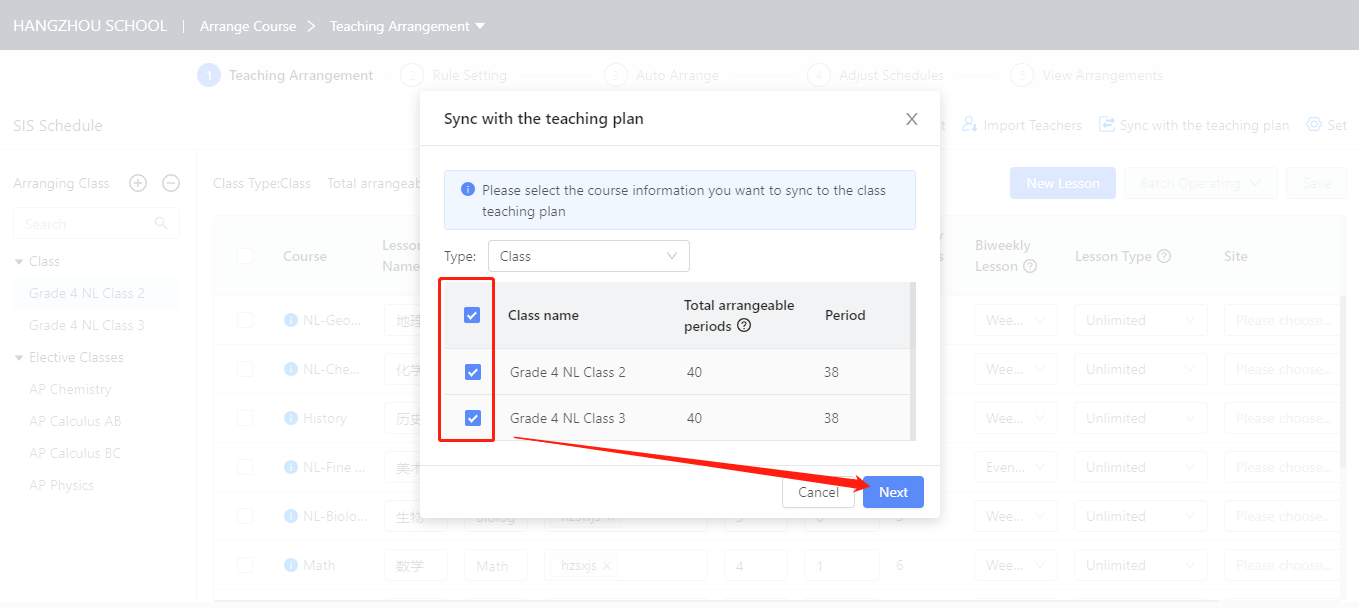
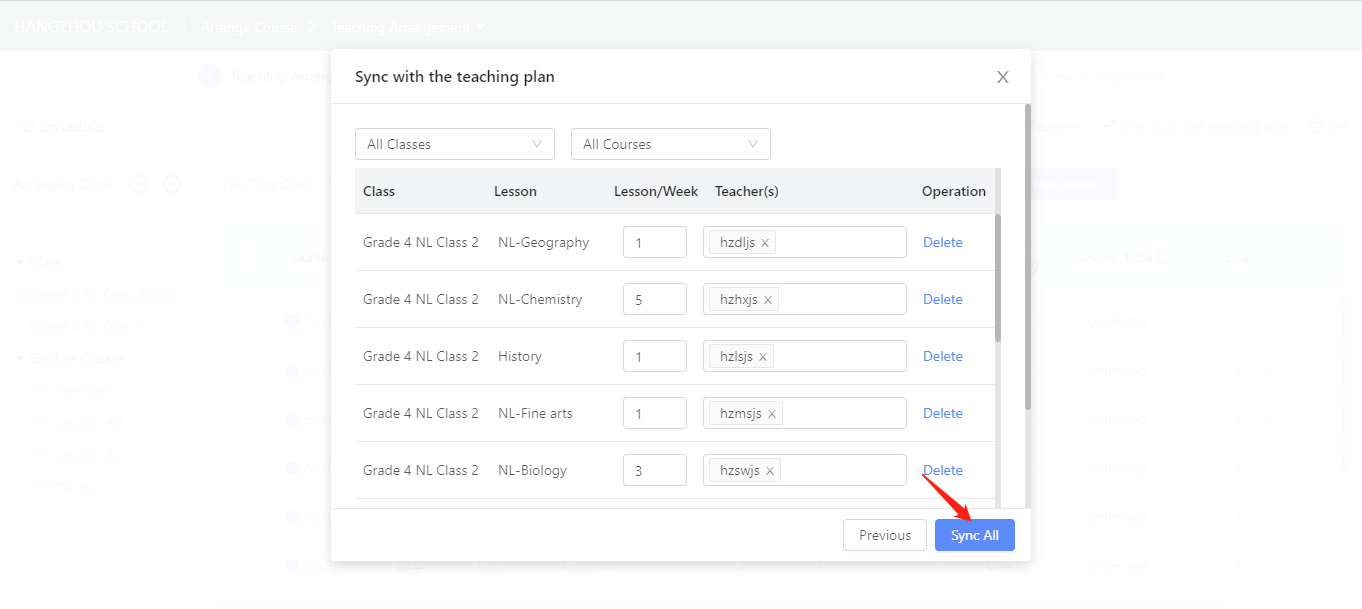
2.4 Sync with the teaching plan
- After you completing the teaching arrangement, you need to click 【Sync with the teaching plan】, in order to transfer data to 【Class】module.
- Teaching plan of class will influence on the functions of 【Assignment】,【Test】and 【Student】etc..
2.5 Batch Operation
· Duplicate Course: If teaching plans between classes are basically same, for example same course structure but only different to teachers, you can duplicate course to other classes rather than set them repetitively.
- Some operation like setting Biweekly lesson, lesson type, site and deleting courses can also be done in a batch.

2.6 Other settings
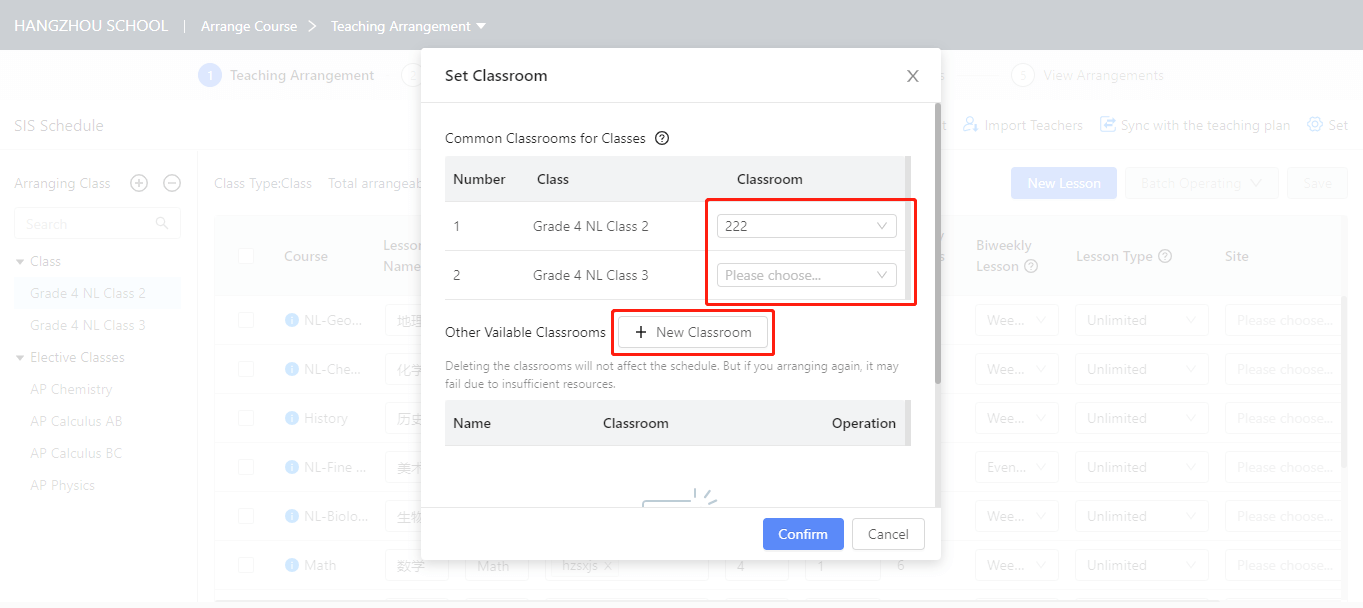
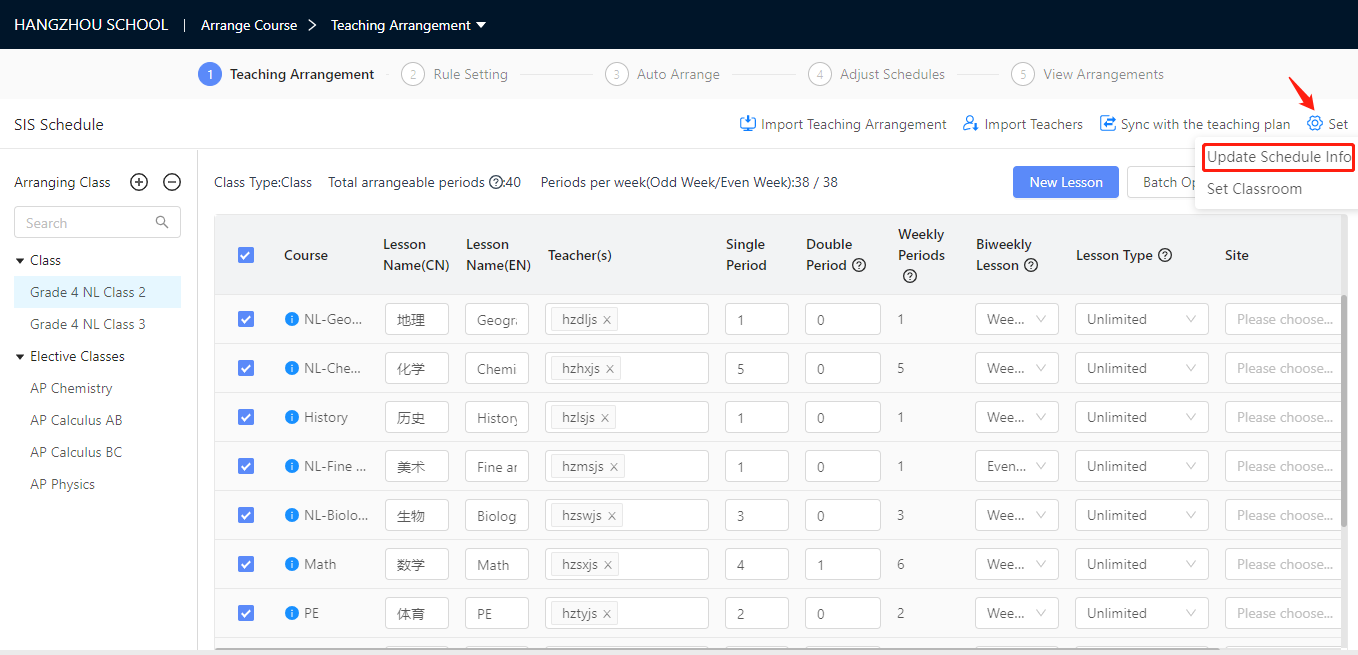
- Set site: Classroom could be allocated to each course on ‘site’. Also, system support to allocate classroom randomly in Smart Scheduling.
- Update schedule information: When you update either class or staff or ground information, please click 【Set】-【Update Schedule Info 】
3. Rule Setting
After finishing all steps of 【Teaching Arrangement】, Click 【Arrange Course】to go back to the main page, or click 【Rule Setting】to move to next step directly.
Flow 1: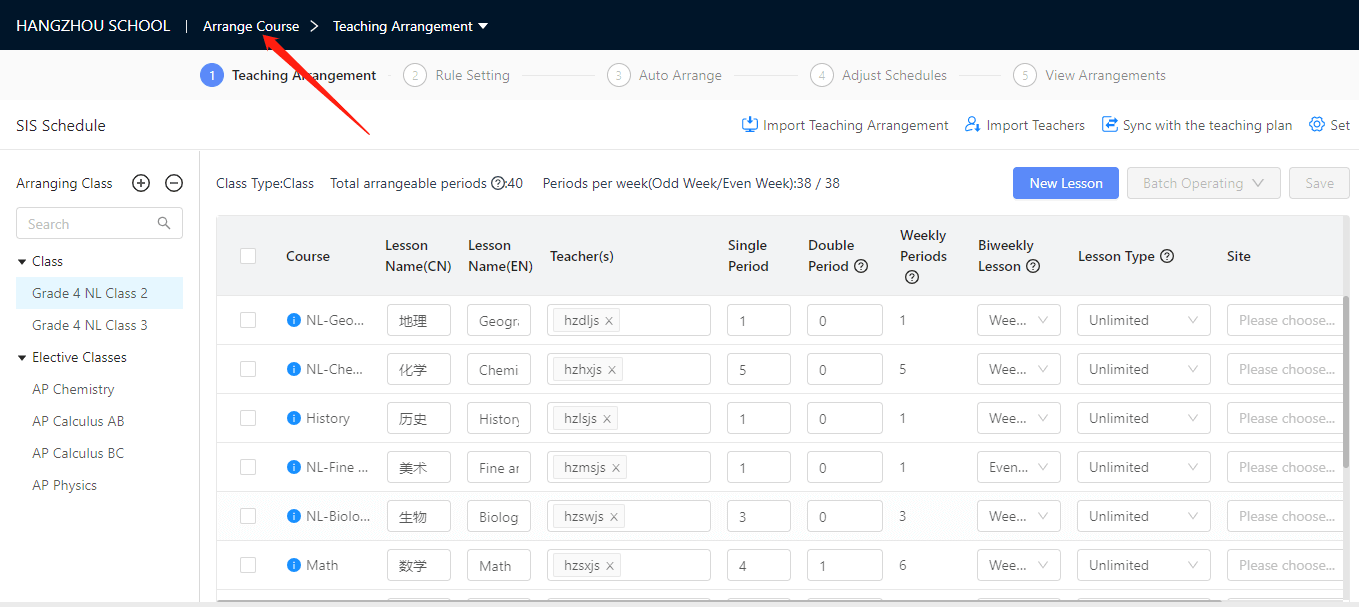
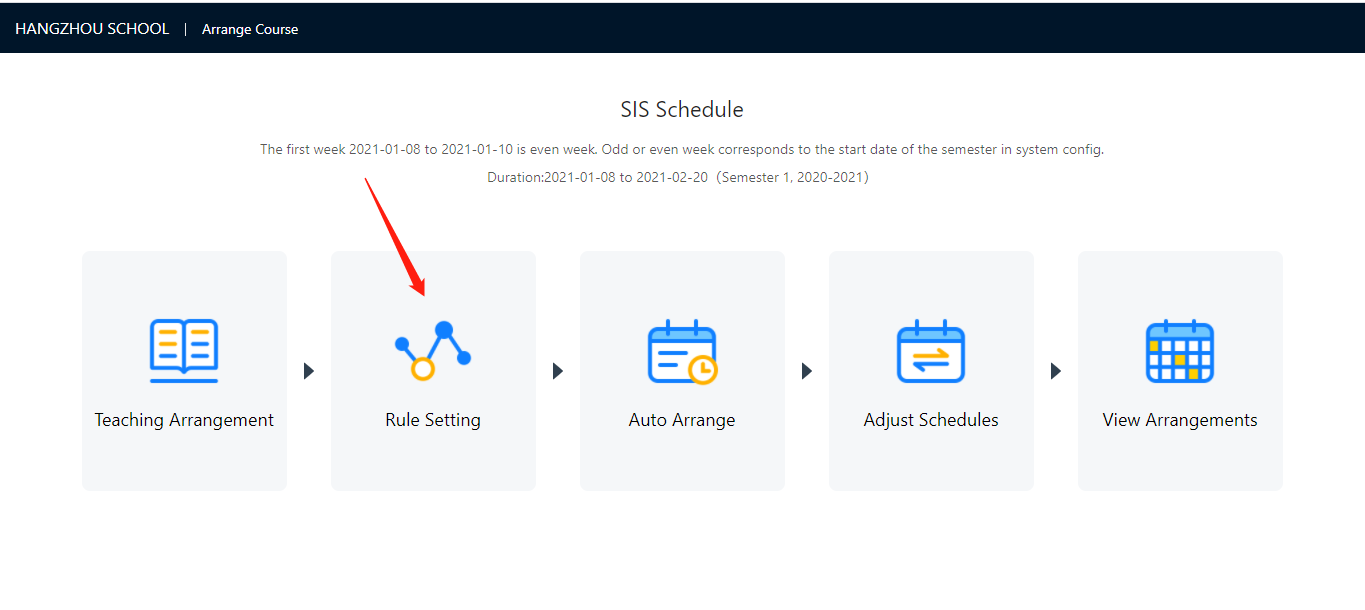
Flow 2: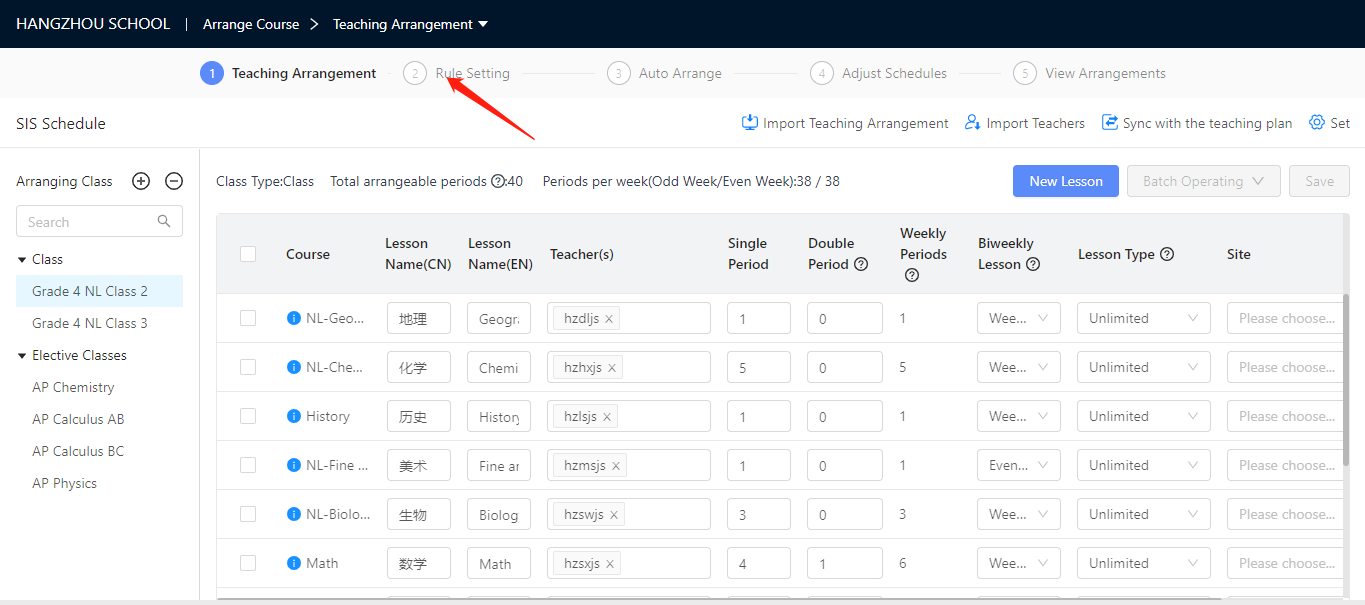
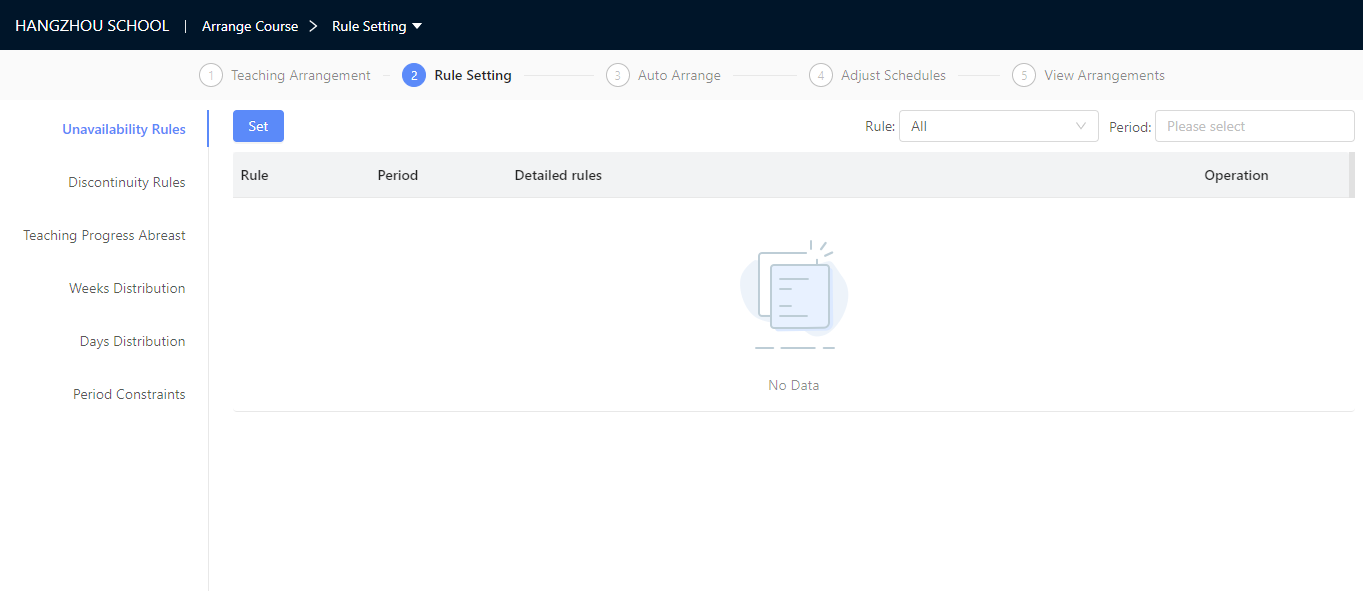
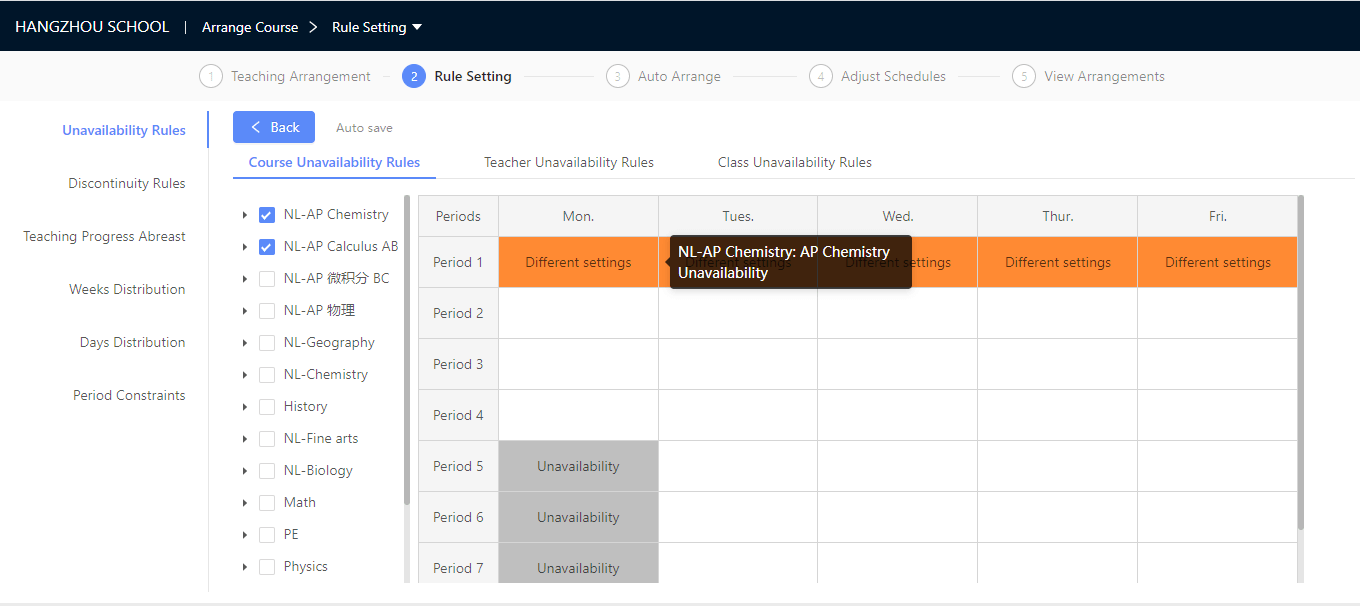
3.1 Unavailability Rules
Unavailability Rules consist of Course Unavailability Rules, Teacher Unavailability Rules and Class Unavailability Rules.
- Steps: you need to choose the object (course/teacher/class) first, then click the blocks in the table.
- Tips:
- Click any block to set the ‘Unavailability’, and re-click to cancel the setting.
- When you choosed more than one objects, if all of the objects are unavailable, the block will show as ‘Unavailability’, if not, there will be‘Different Settings’
3.2 Discontinuity Rules
Click 【Discontinuity Rules】on the left, and click the sessions that you want to keep discontinuous.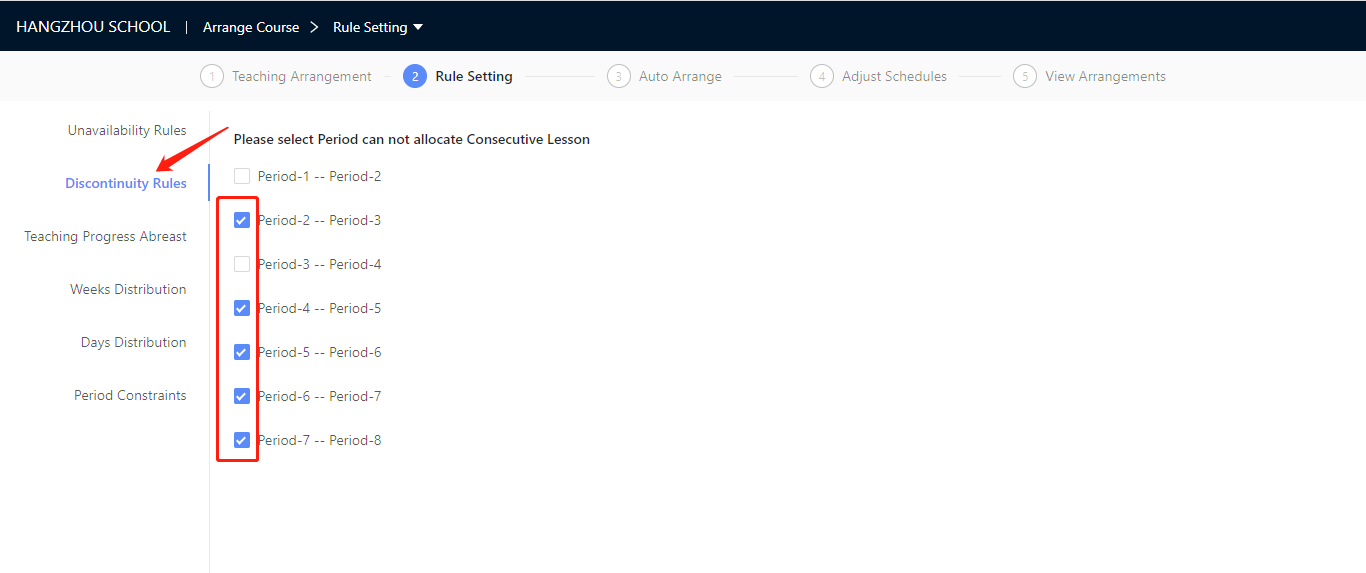
3.3 Other rules (Weak constrains)
You can choose to set other rules as Teaching Progress Abreast, Weeks Distribution, Days Distribution and Period Constraints if needed.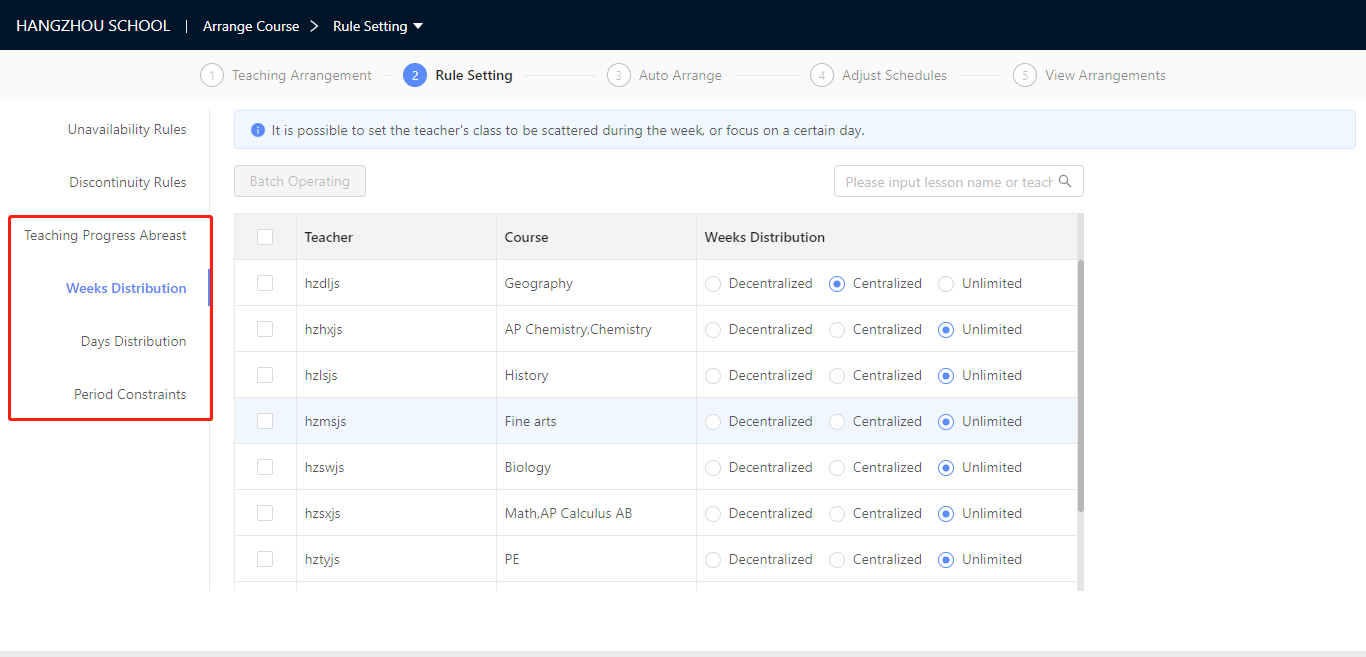
4. Smart Scheduling
After finishing all steps of 【Rule Setting】, Click 【Arrange Course】to go back to the main page, or click 【Auto Arrange】to move to next step directly.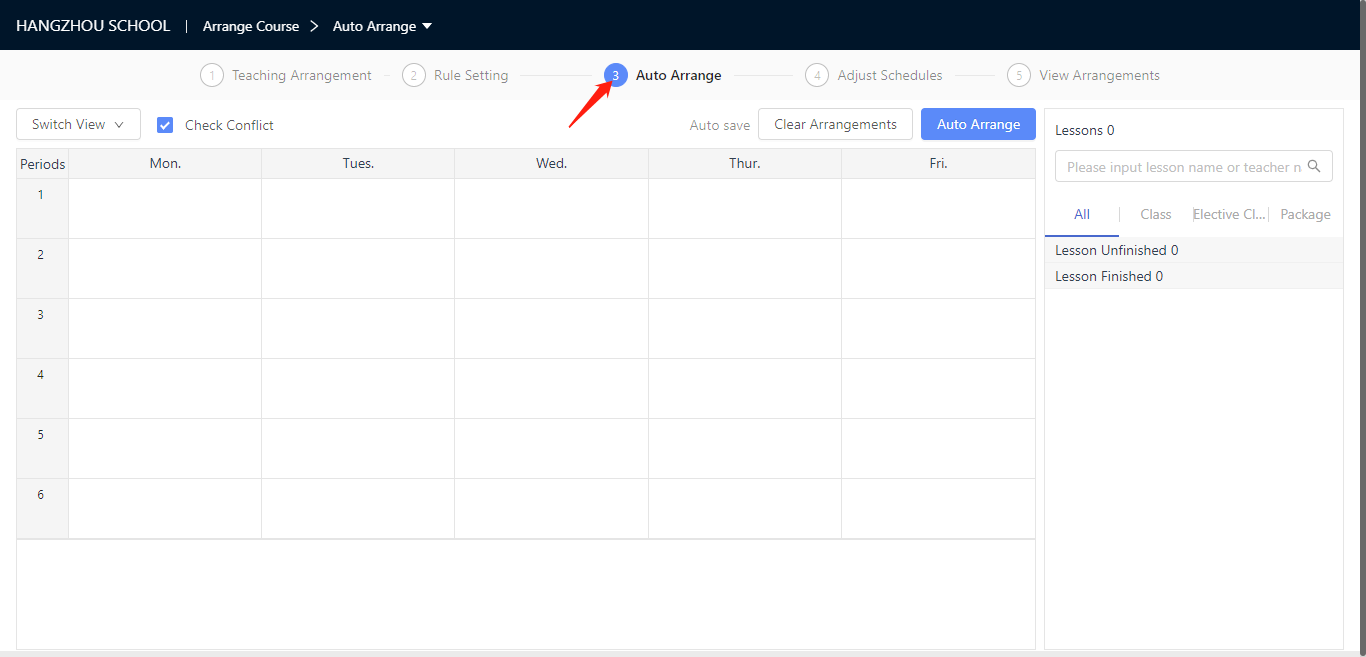
4.1 Make Lesson Package
Scenario: When some lessons of classes need to teach at the same time, we can use ‘Lesson Package’ to pack these lessons together. (For example, different classes take lessons together, students of one class attend different lesson at same time, biweekly lessons)
Steps: Click 【Package】-【Add Lesson Package】, administrative classes and elective classes need to be packed separately.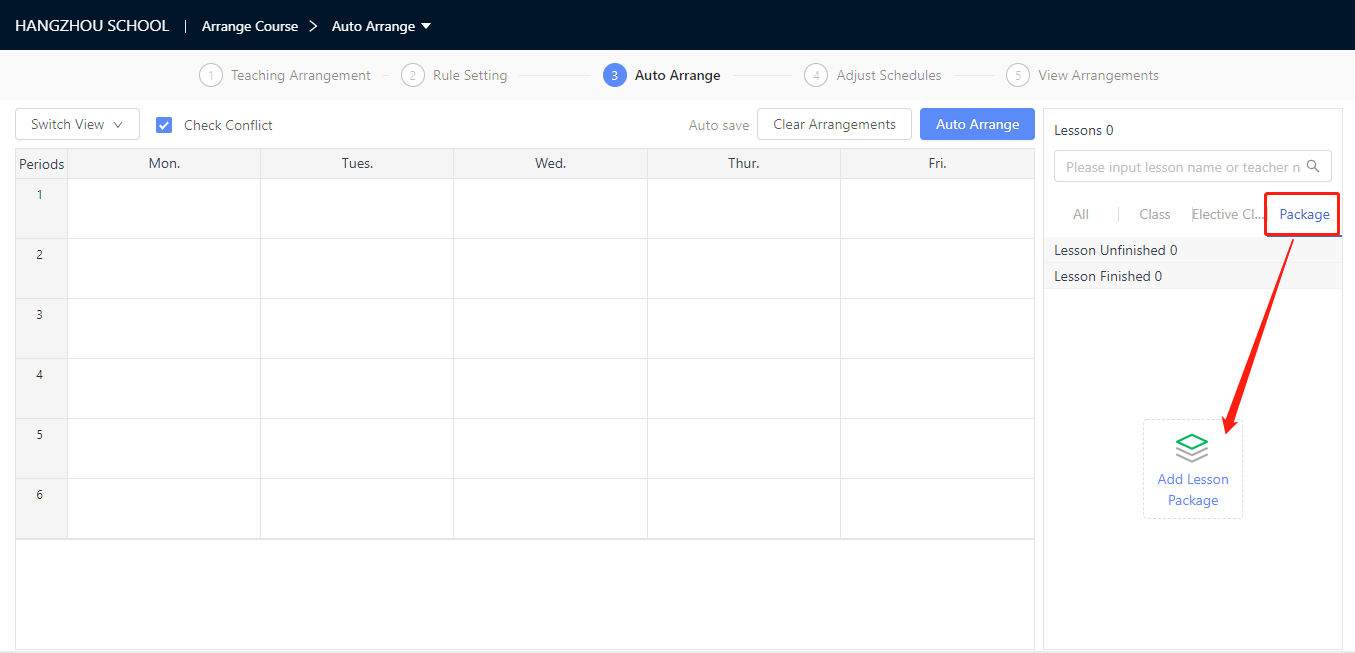
Administrative class lessons: Click the courses need to be packed - name the Lesson Package -Set the Packaged period(s)-Save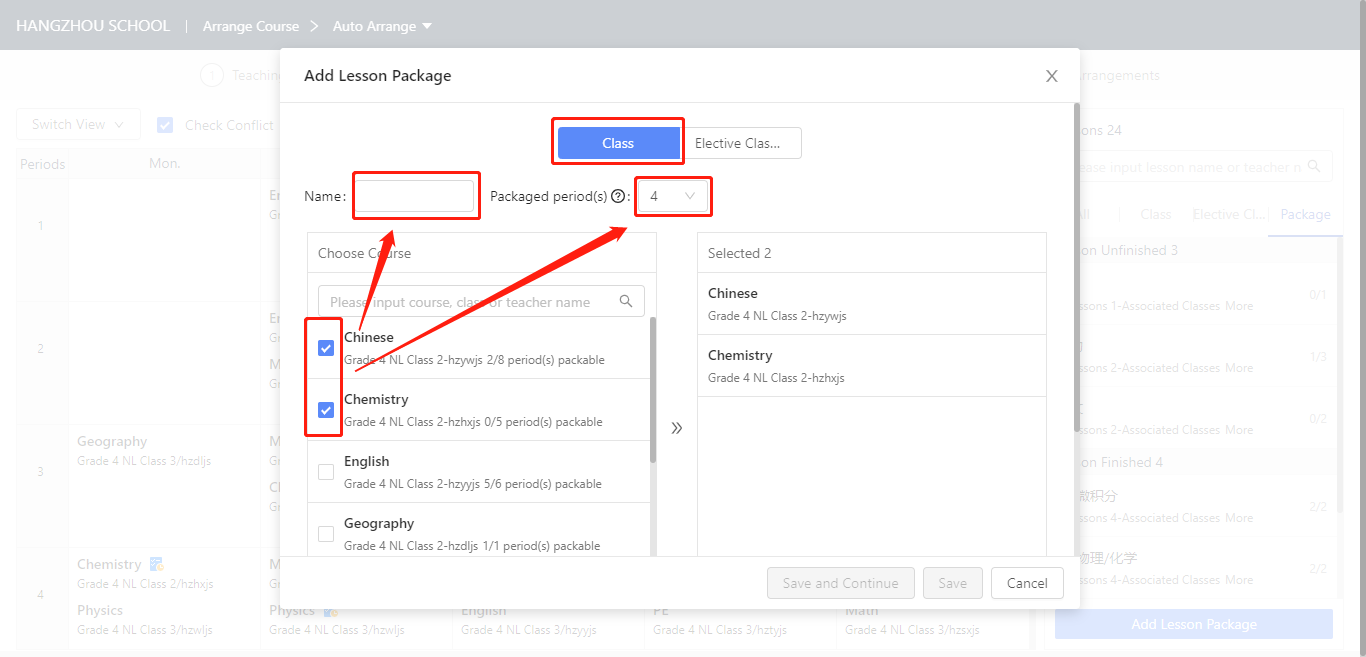
Elective class lessons: Click the courses need to be packed - name the Lesson Package -Set the Packaged period(s)-Save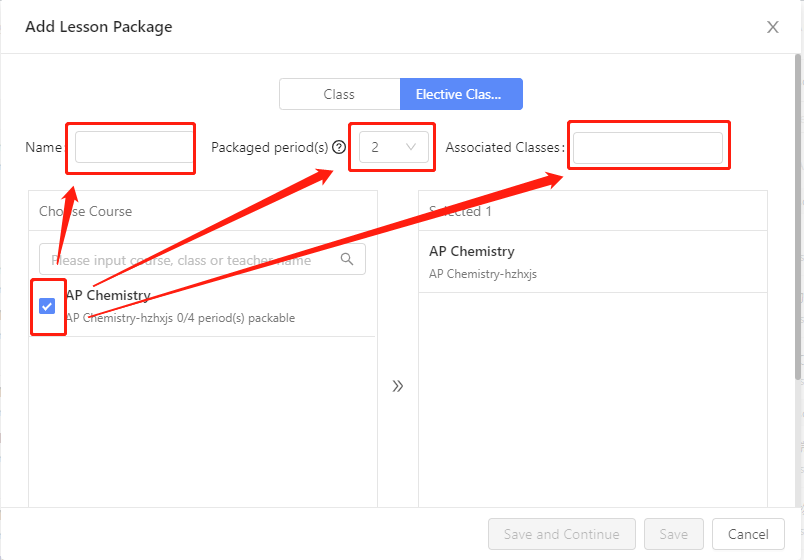
Tips: Elective class package could associate with Administrative class, in order to check the conflicts between these two. If you already add students to the elective classes, you could ignore the ‘Associated Classes’, as system could detect the conflicts according to individuals.
4.2 Preset manually
If some lessons have certain time to teach, you can click the lessons on right from ‘Lesson Unfinished’list, then click the block in schedule. So that the lesson could be put into schedule as presetting. Presetting will keep still while doing the Smart Scheduling.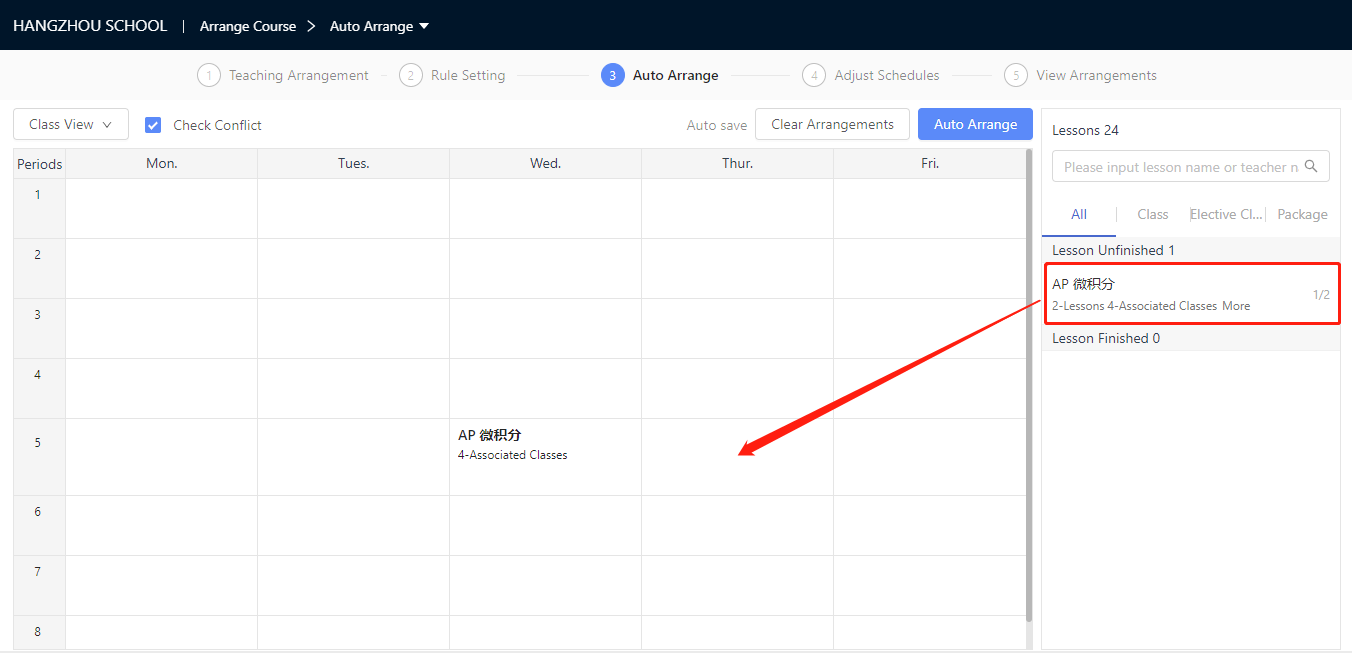
4.3 Smart Scheduling
After finishing all settings, click 【Smart Scheduling】 to choose the Complexity of algorithm execution, Dispersion degree within the course week and whether to do the Classroom Automatic Alground.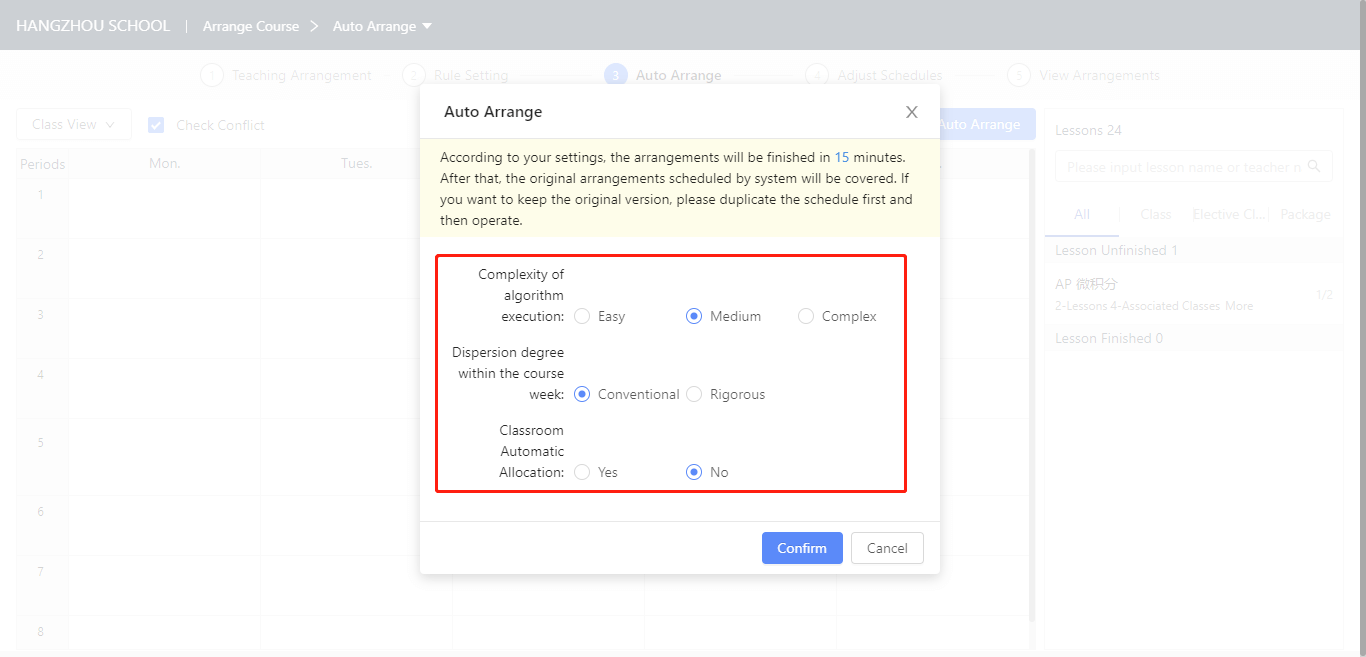
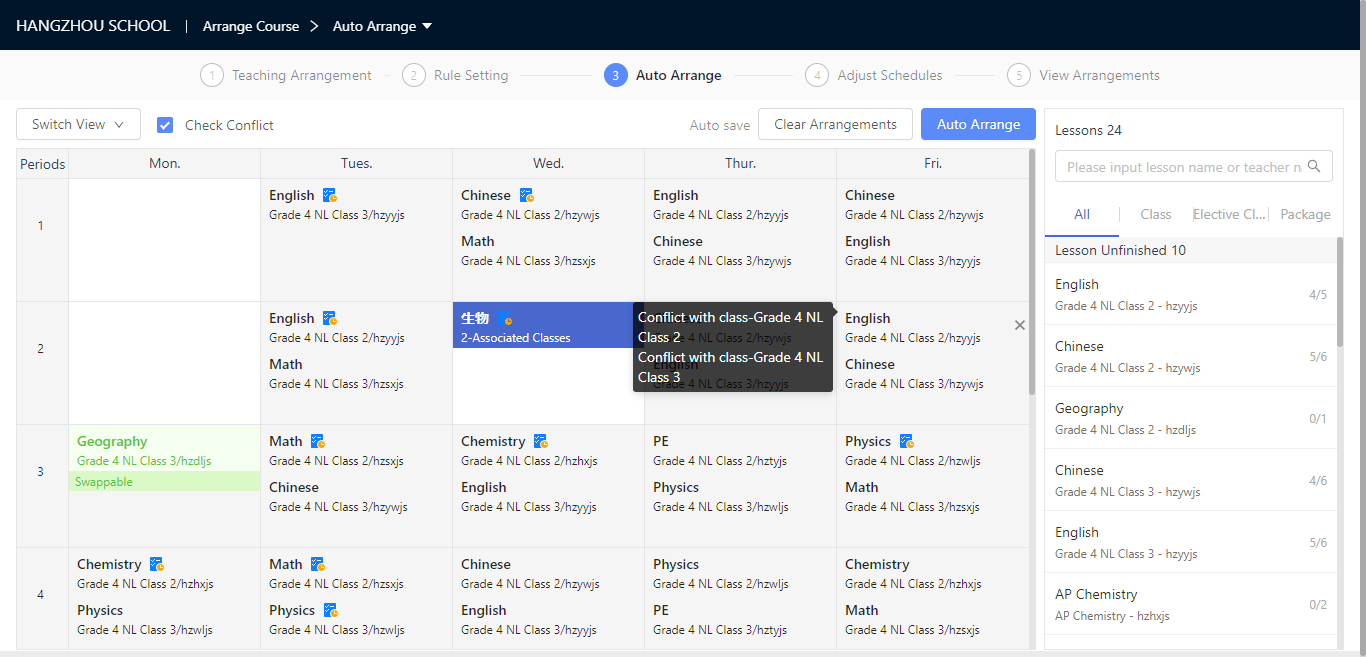
5. Adjust Schedules
After Smart Scheduling, you still can adjust schedules. Click 【Adjust Schedules】,and you can adjust schedules from different perspectives, e.g. Class, Teacher, General.
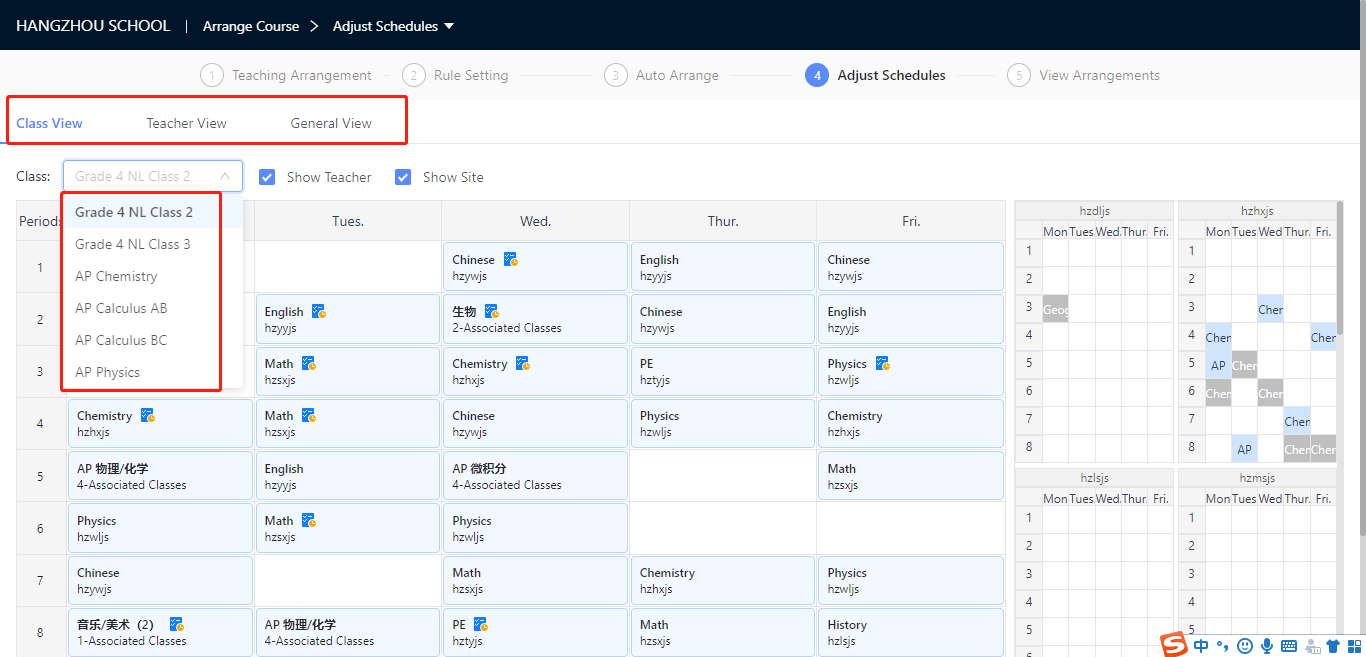
- Steps: Click the lesson that need to be adjusted, schedule will show the exchangeability between this lesson and others in schedule: exchangeable in green and unexchangeable in red.
Also, the individual schedule of this teaching teacher will show on the right as reference.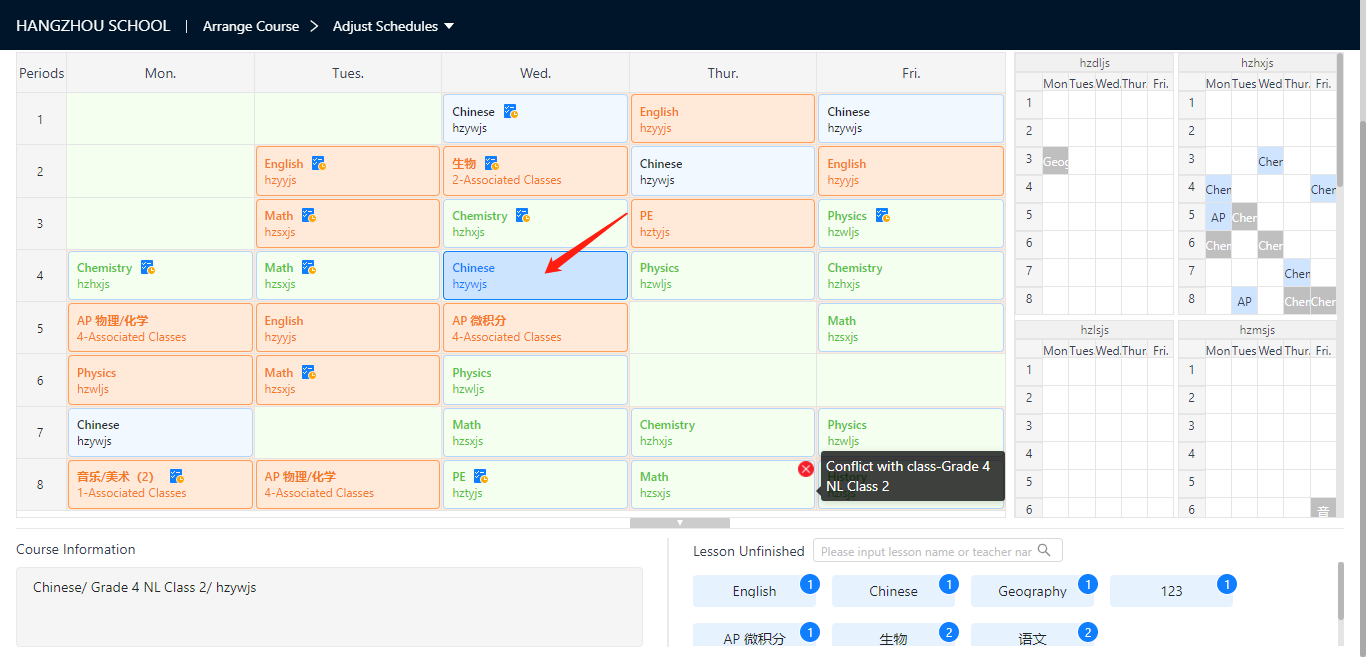
6. View Schedules
Click 【View Arrangements】, you can view schedules in several perspectives, e.g. Class Schedules, Teacher Schedules, Student Schedules, Ground Schedules, and Total Schedules.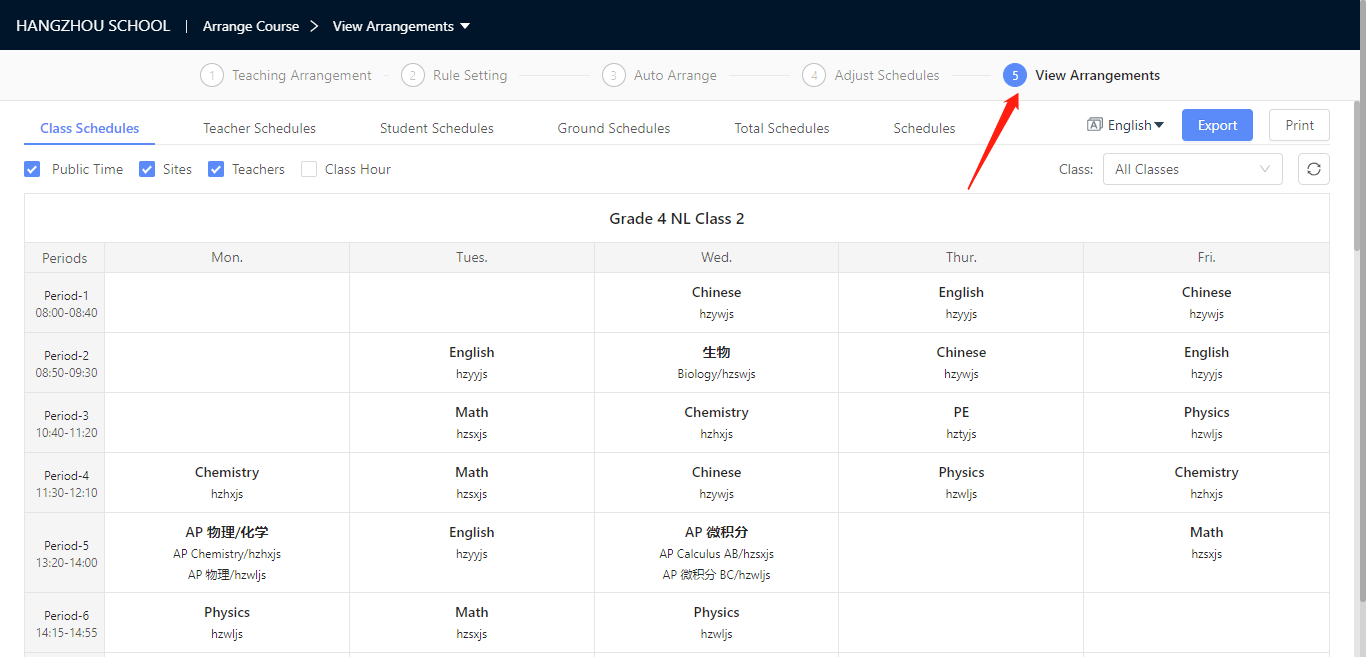
Also, Schedules support some customized settings, like languages, displayed items.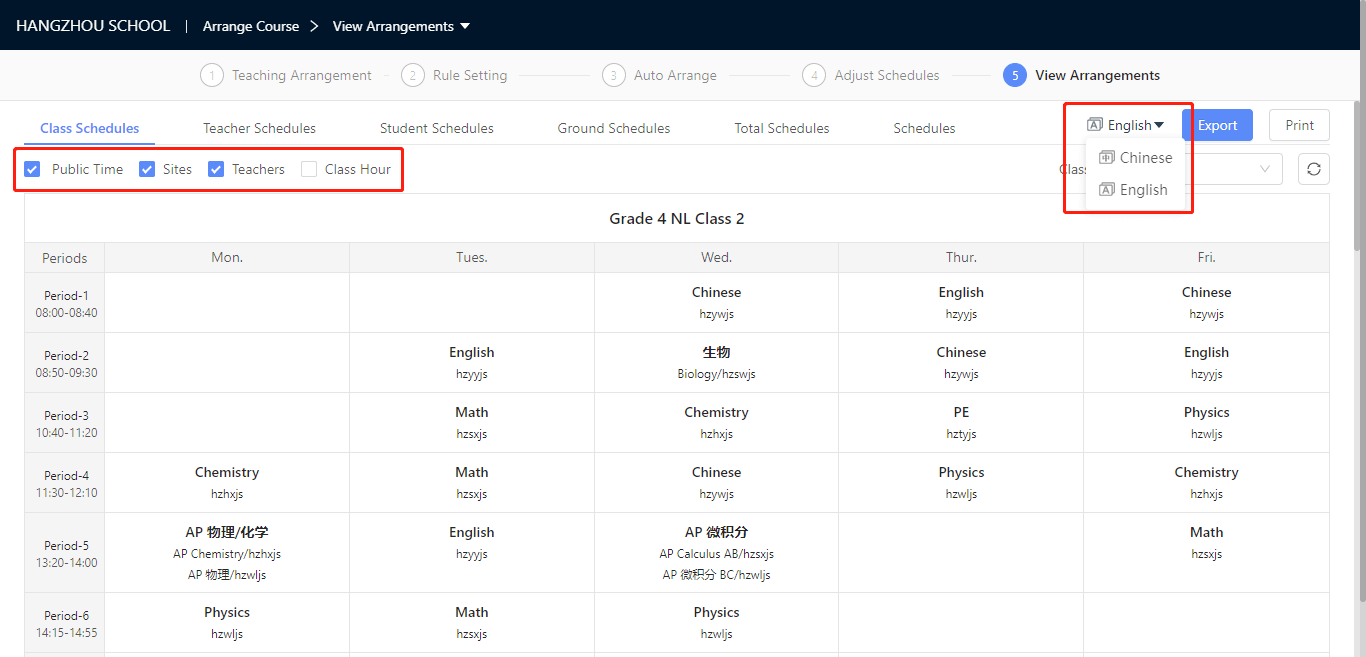
You can also click 【Export】or 【Print】to get schedules for further using.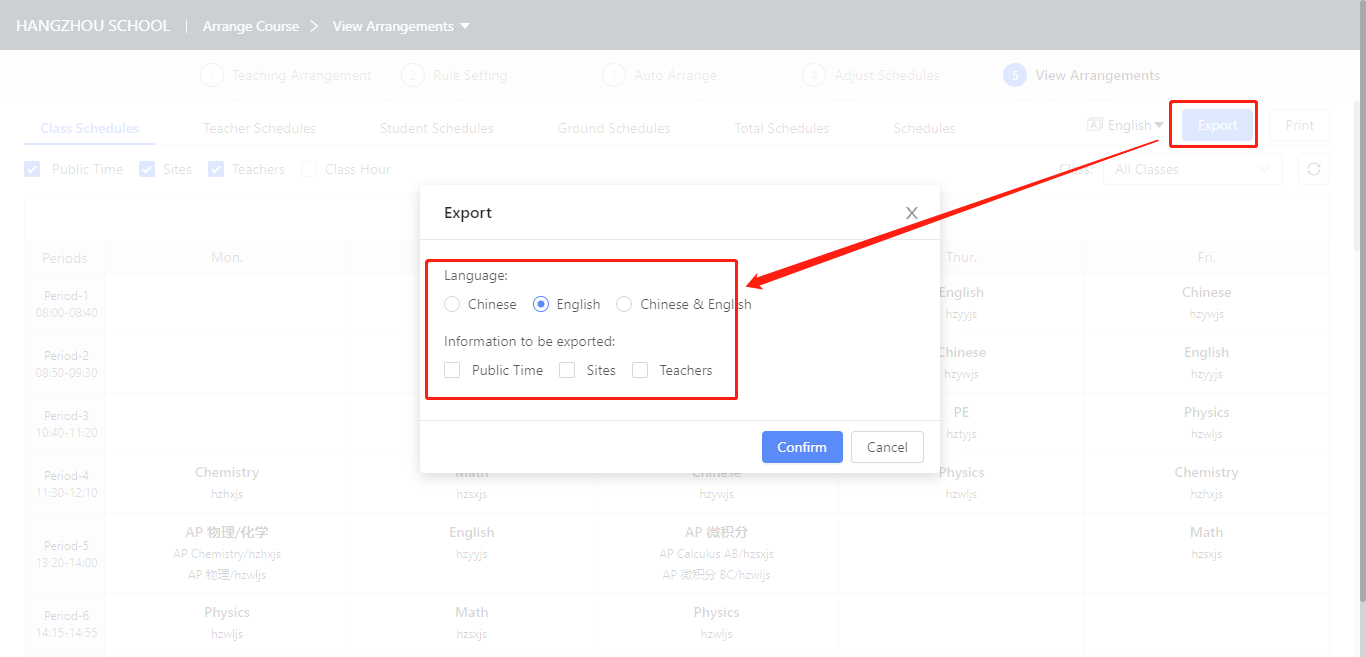
After Scheduling
1. Validate the Schedule
Click 【Schedule】-【Manage Schedules】-【More】-【Validate】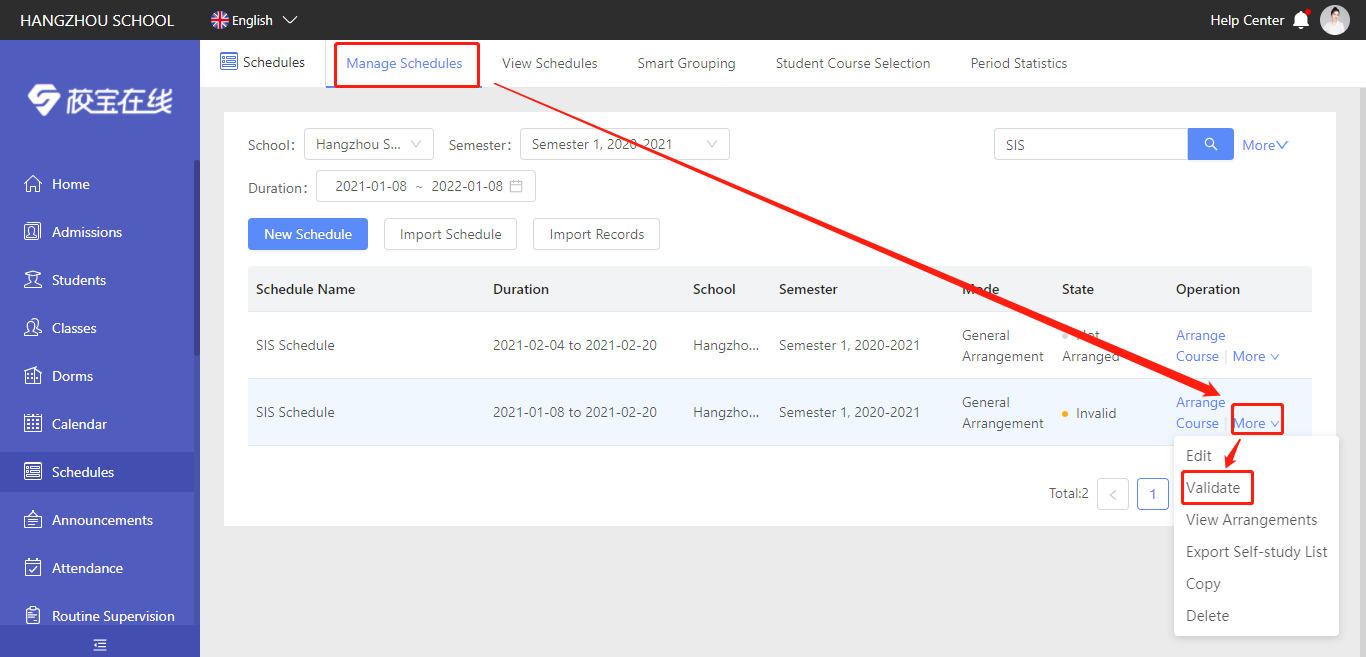
You could choose to whether send notifications to teachers and students, also you could Synchronize public time to calendar at one click.
After the 12pm of the day of validation, teachers and students are able to view their calendars.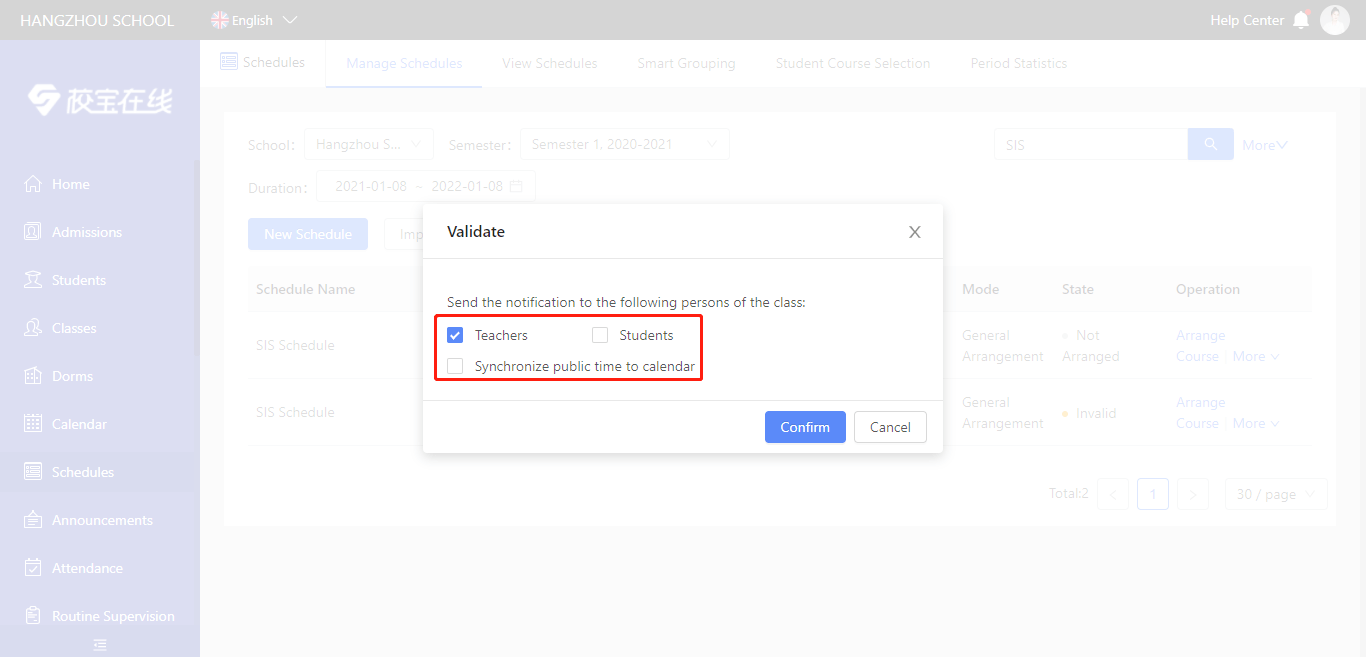
2. View Schedules
Click 【Schedule】-【View Schedule】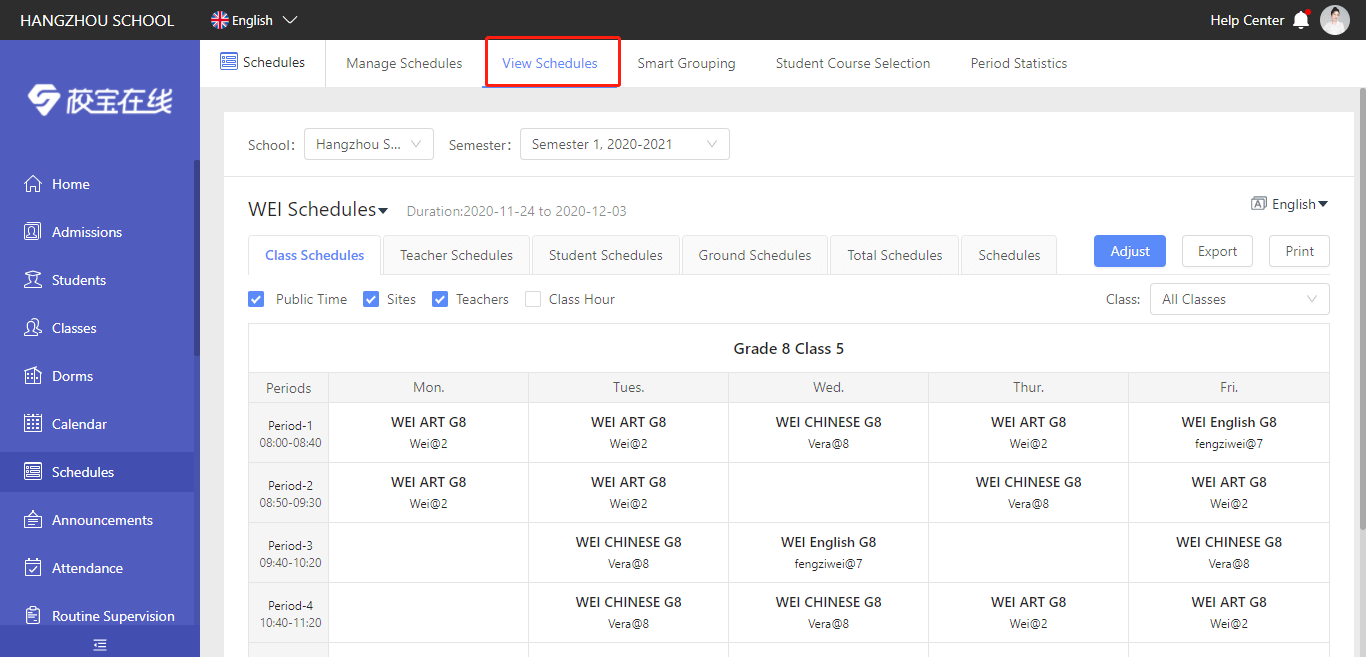
3. Adjust Schedules
If you want to adjust schedules after validation, you can click 【Arrange Course】directly, without invalidating.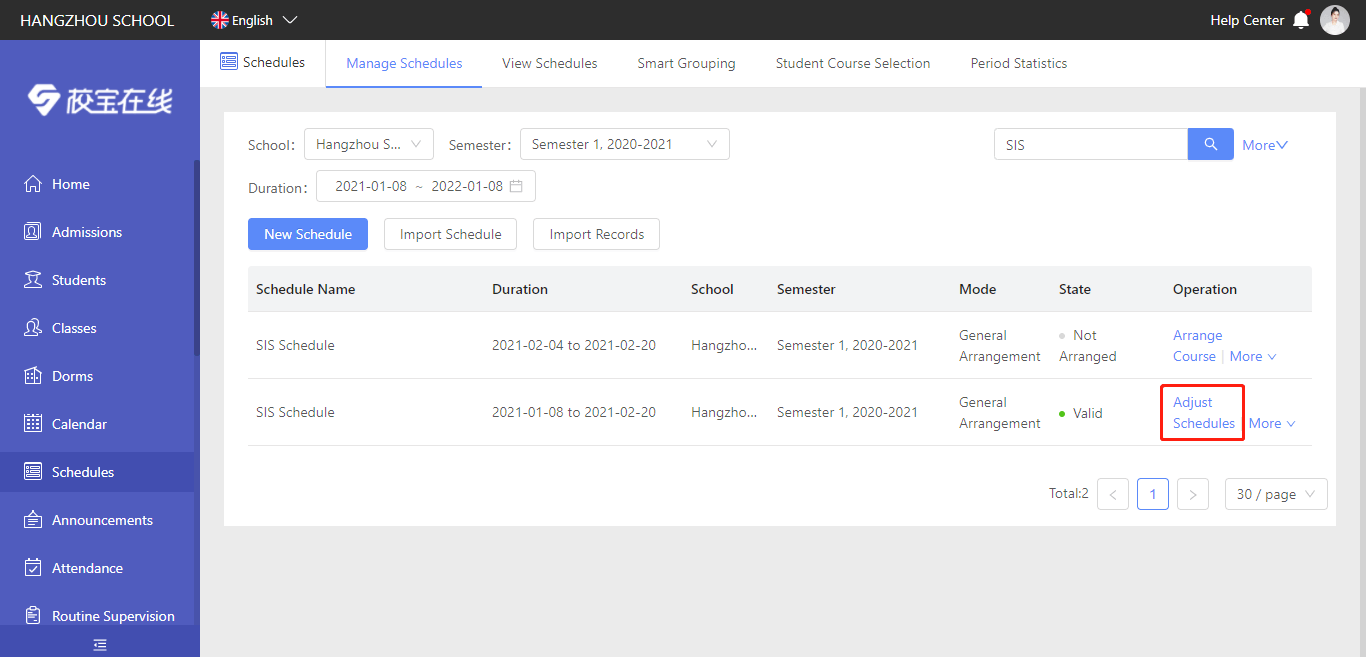
When lesson adjust done, do not forget to click 【Save & Validate】, so that calendar can align with the update in next day.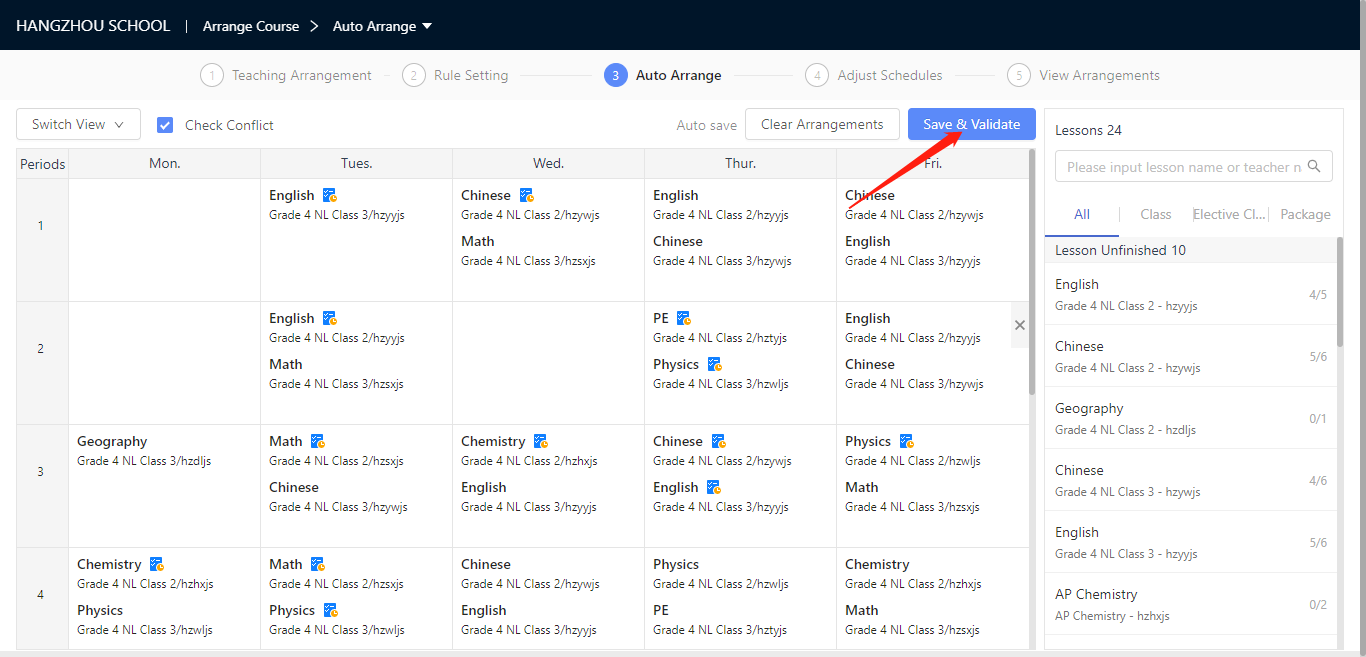

若有收获,就点个赞吧
0 人点赞
