 ">
"> 
Login
Step 1: Tap Dashboard
Step 2: Tap 校宝智慧校园 APP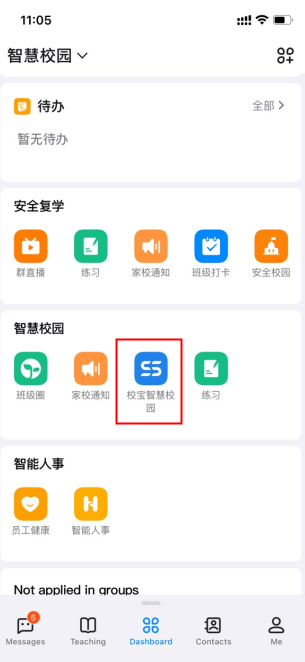
1. Language
The interface language corresponds to the language in the PC terminal. You can log in to the SchoolPal website first and then switch the language as illustrated below.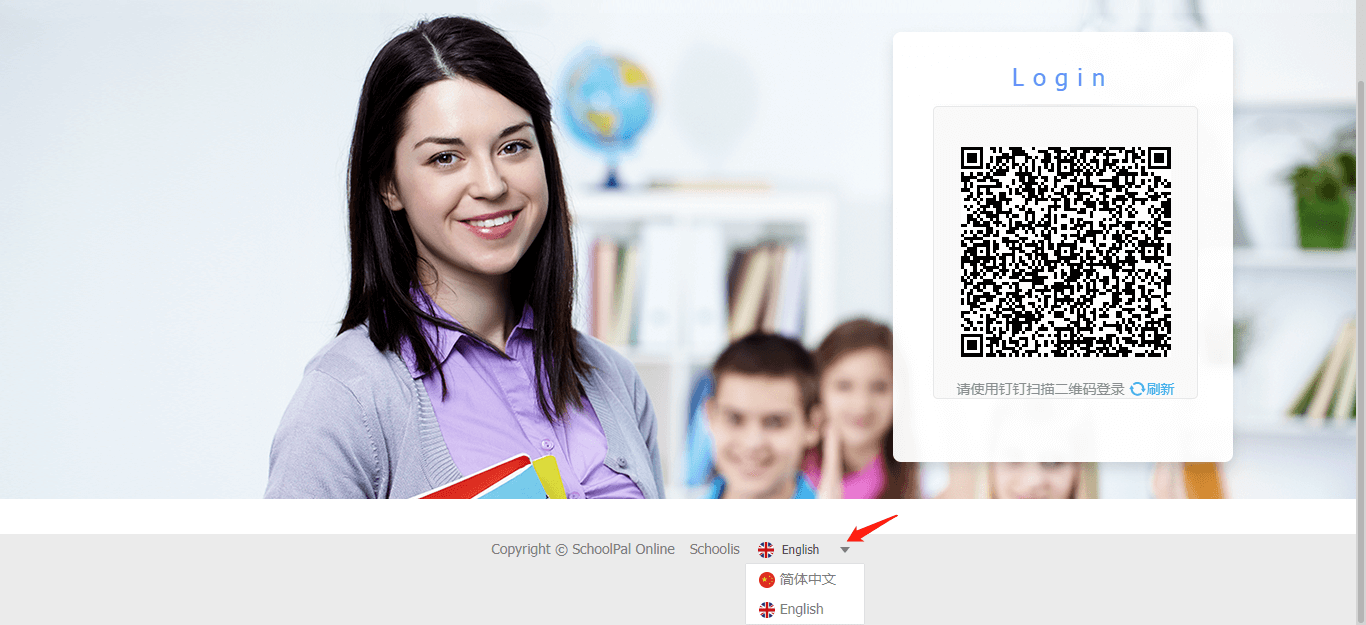
2. Switch Account Type
If you are both a teacher and a parent of students enrolled in the school. You are able to switch the role as below: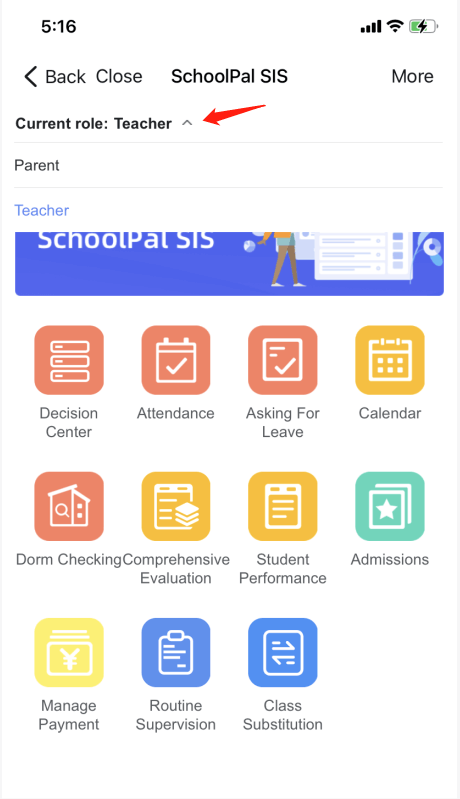
Sections
In SchoolPal DingTalk terminal, teachers can take attendance, initiate/approve leave requests, view calendars, do dorm inspections, record comprehensive evaluations, apply class substitution, check admission plans and payment progress of school tuitions.
1. Attendance
Attendance consists of records of student absences (both excused and unexcused). The system provides attendance solutions to class attendance, daily attendance and activity attendance. A teacher can mark the attendance status as “Present”, “Absent”, “Tardy”, or “Leave Early”. These status descriptions are configurable.
1.1Class attendance (taken by subject teacher)
Class attendance is an important part of the academic process and should be considered both a privilege and a responsibility. Subject teachers take class roll to evaluate student participation rate.
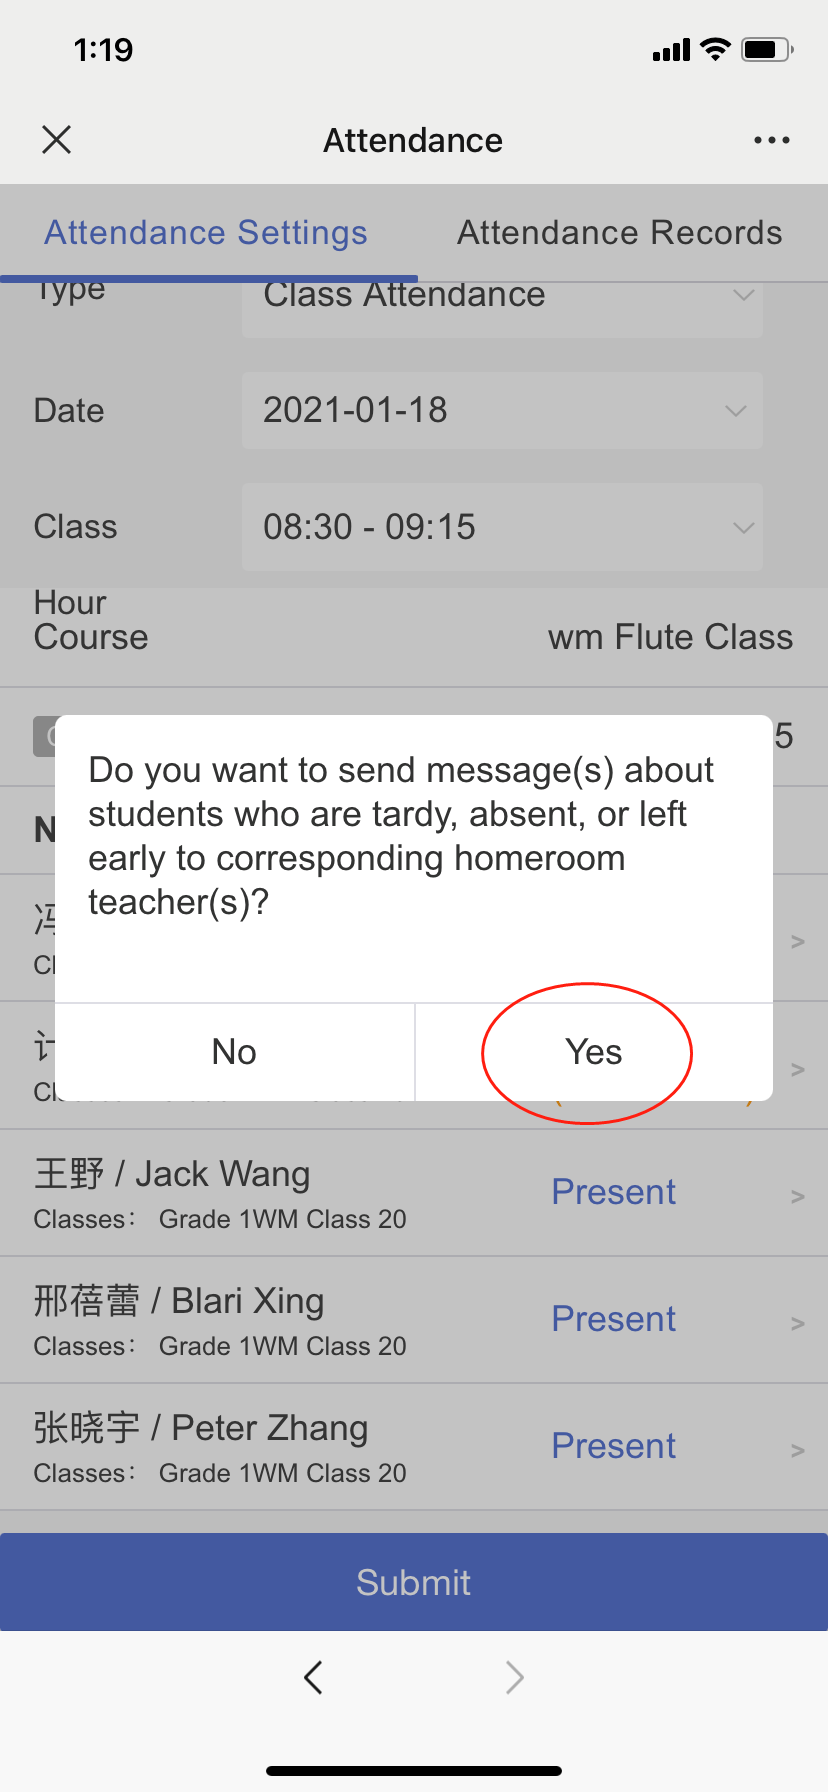
1.1.1 Take New Attendance
Step 1: Select Type as Class Attendance
Step 2: Select the class period
Step 3: Tap Present to change the status (Present as default status) > add remarks (optional) > Tap Confirm
Step 4: Tap Submit
Step 5: Tap Yes to notify the homeroom teacher on abnormal cases in the Popup
1.2 Daily attendance ( taken by homeroom teacher)
Daily attendance is a measure that homeroom teachers take to record students’ attendance randomly.
1.2.1 Take New Attendance
Step 1: Select the Type as Daily Attendance
Step 2: Select the class period
Step 3: Tap Present in the column of Attendancy to change the status (Present as default status) > add remarks (optional) > Tap Confirm
Step 4: Tap Submit
Note that a homeroom teacher can take multiple rolls per day if necessary.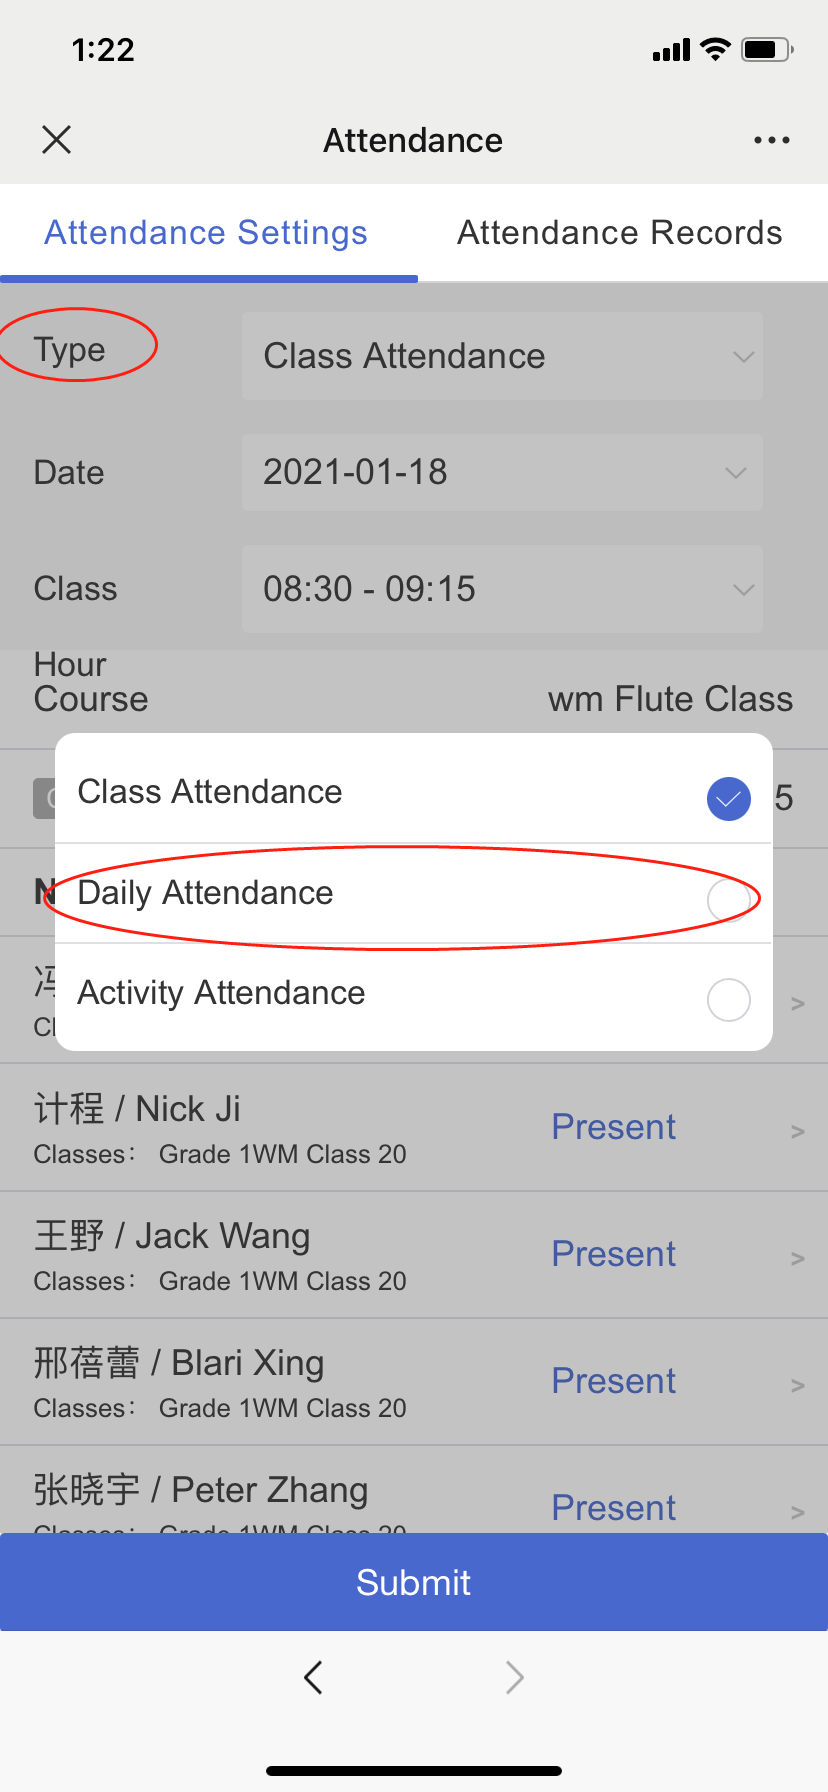
1.3 Activity attendance (taken by activity mentor)
Activity attendance is designed for teachers to take attendance out of class, such as outdoor volunteering activities.
1.3.1 Take New Attendance
Step 1: Select the Type as Activity Attendance > select Activity
Step 2: Tap Present > in the column of Attendancy to change the status (Present as default status) > > add remarks (optional) > Tap Confirm
Step 3: Tap Submit
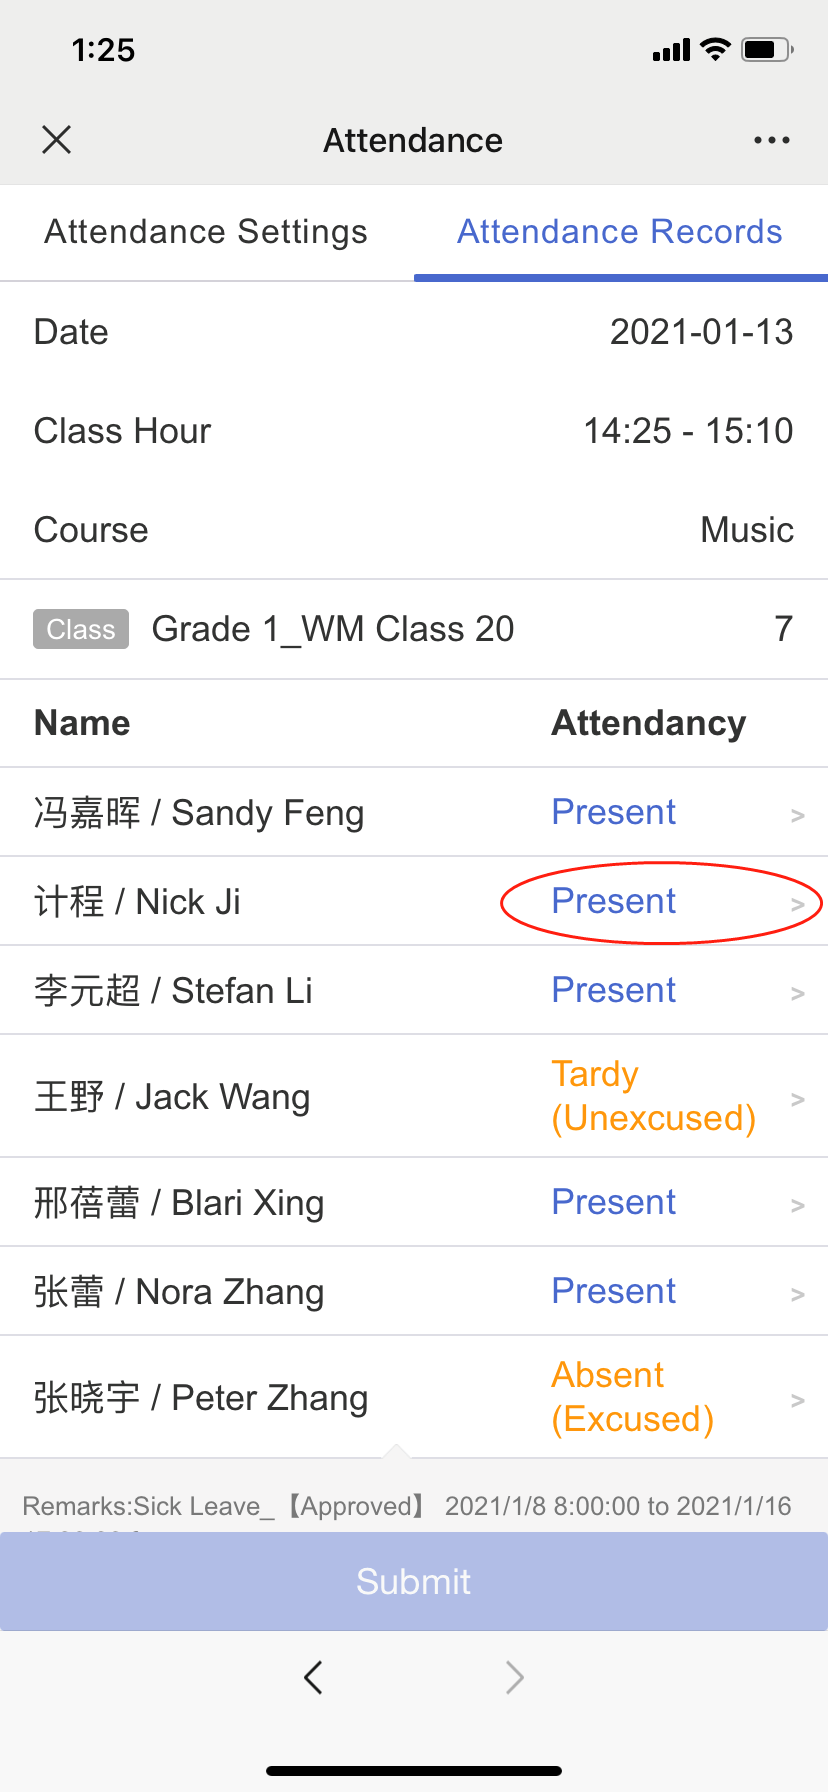
1.4 View/Revise attendance record
The students’ attendance records can be tracked and revised if necessary. For example, a student was absent when you took attendance and arrived at classroom 20 minutes later. In this case, the attendance status shoule be revised from absent to tardy.
Step 1: Tap Attendance Records
Step 2: Filter by type, grade, class or date
Step 3: Tap the single record you want to check or revise
Step 4: Tap the certain Attendency Status to change the status > Tap Confirm
Step 5: Tap Submit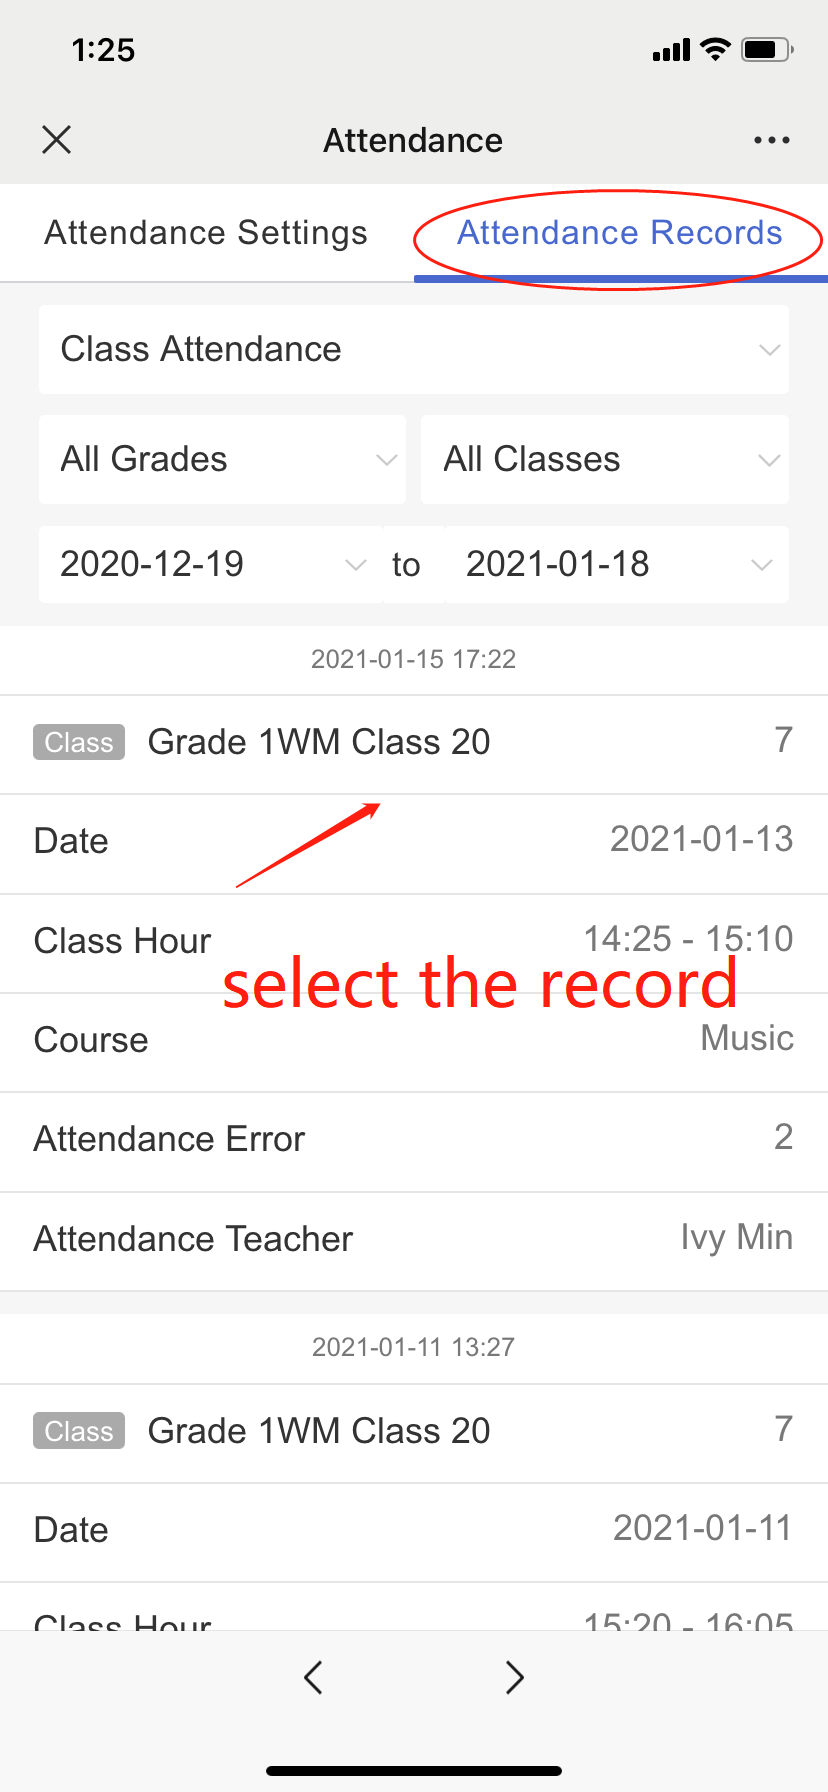
2. Asking for Leave
2.1 Submit a leave request
When parents are not able to apply for leave, the homeroom teacher can initiate the application instead. There will be no approval process needed.
Step 1: Go to Asking for Leave
Step 2: Tap Leave
Step 3: Select the grade and class > Select the student who will take a leave > tap Next
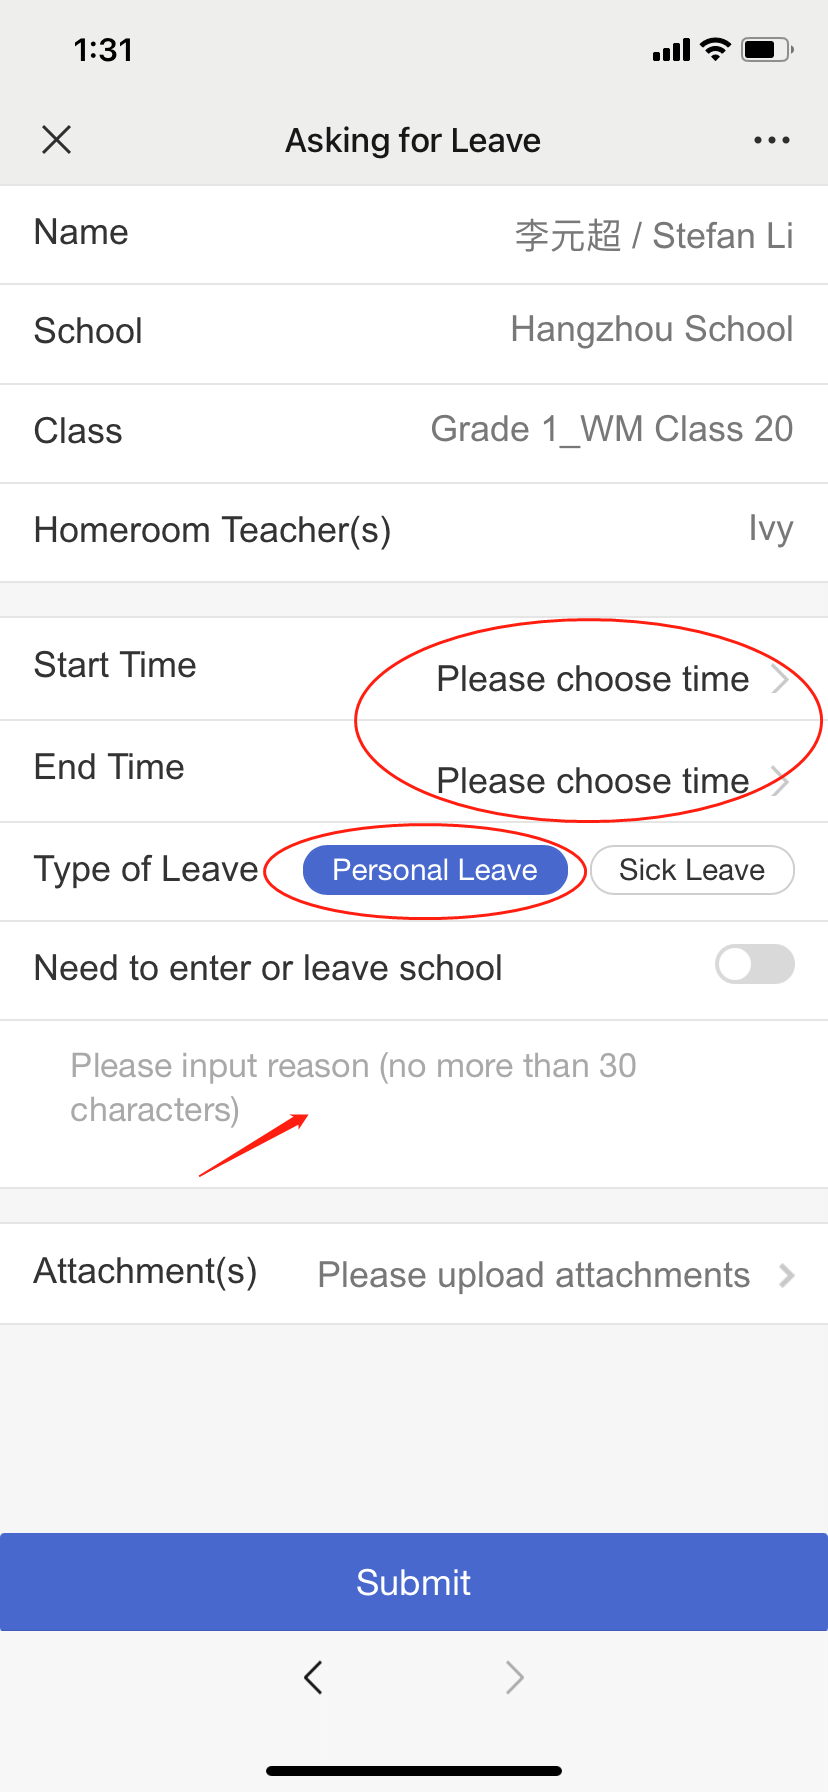
Step 4: Select leave period and type of leave > fill in the reason > tap Submit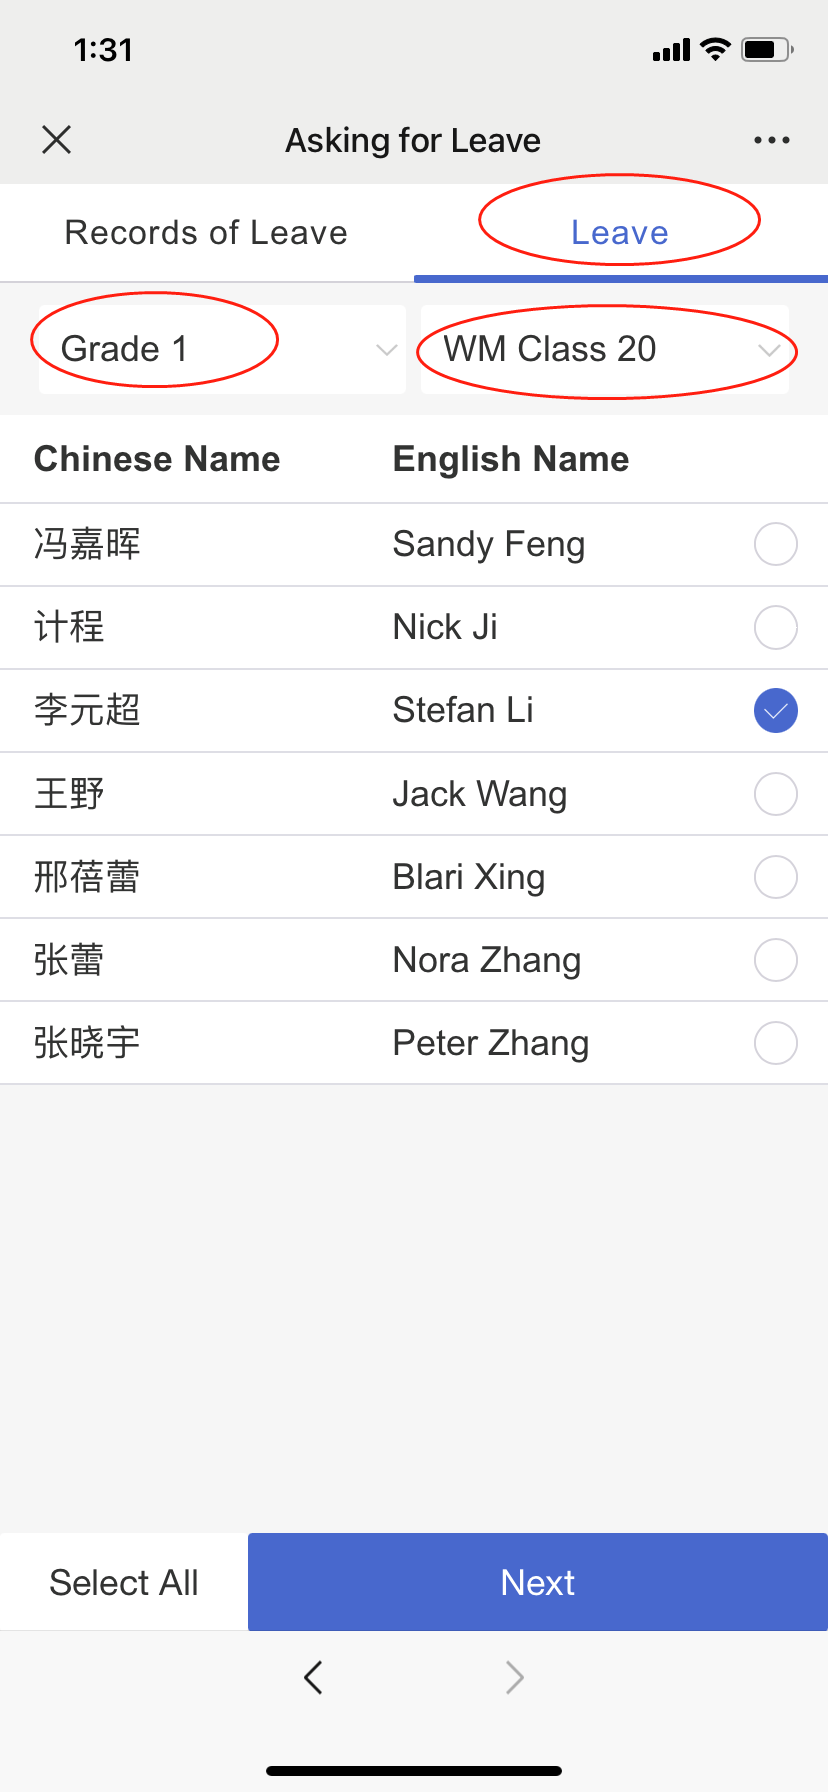
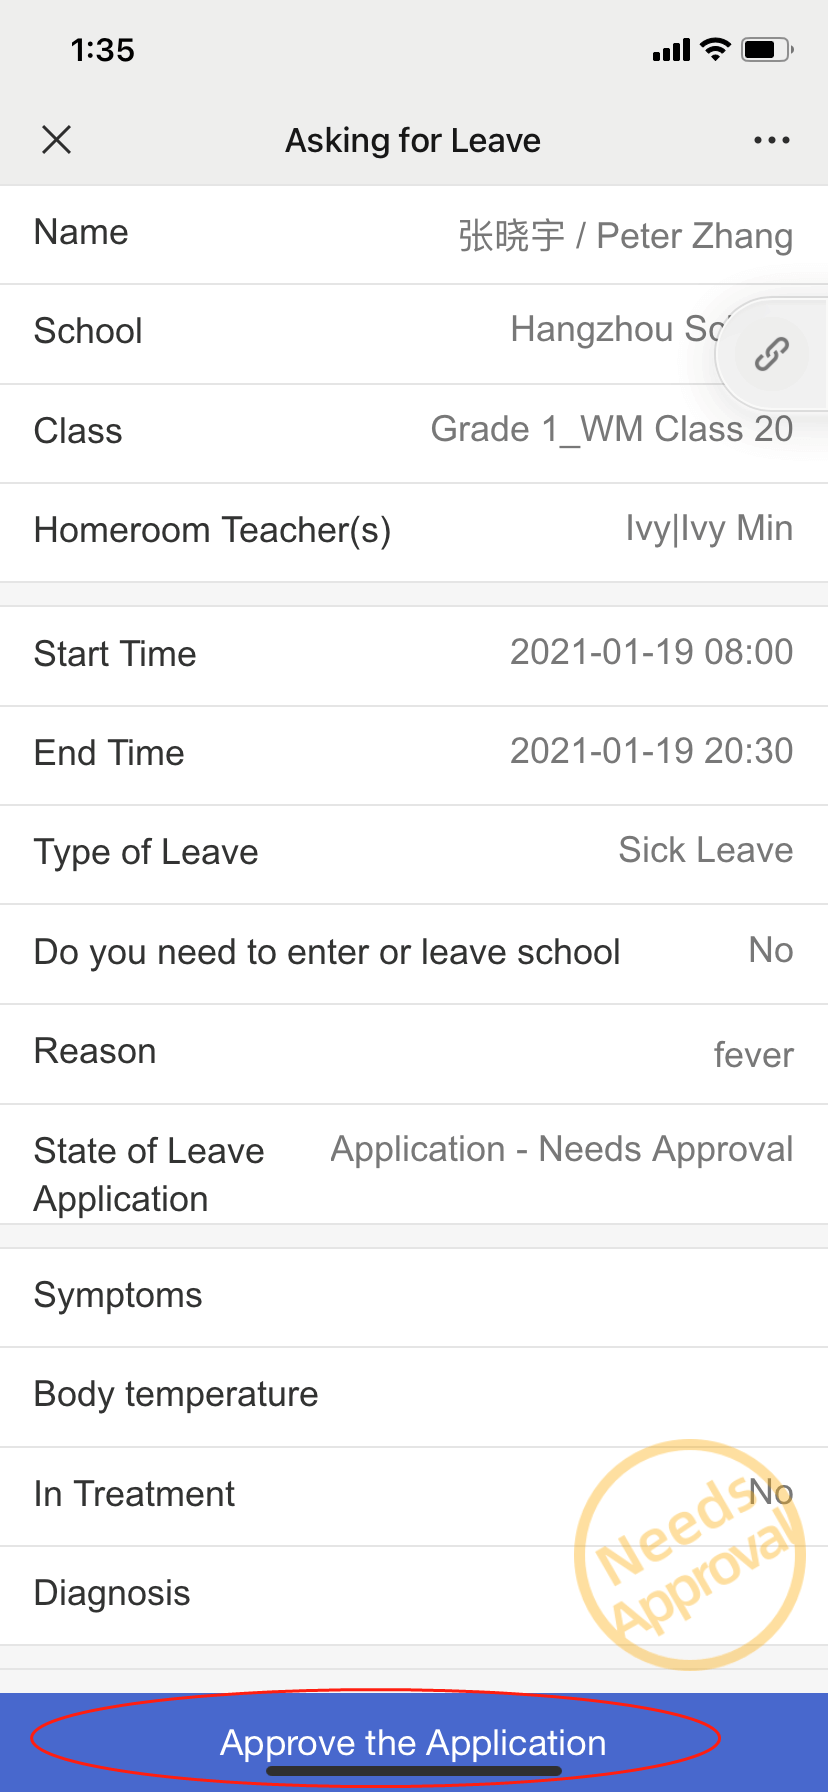
2.2 Approve a leave request
Students or parents initiate the leave requests, which have to be approved by the homeroom teacher.
Step 1: Tap the leave request notification
Step 2: Tap Approve the Application > tap Approve or Reject > tap Confirm
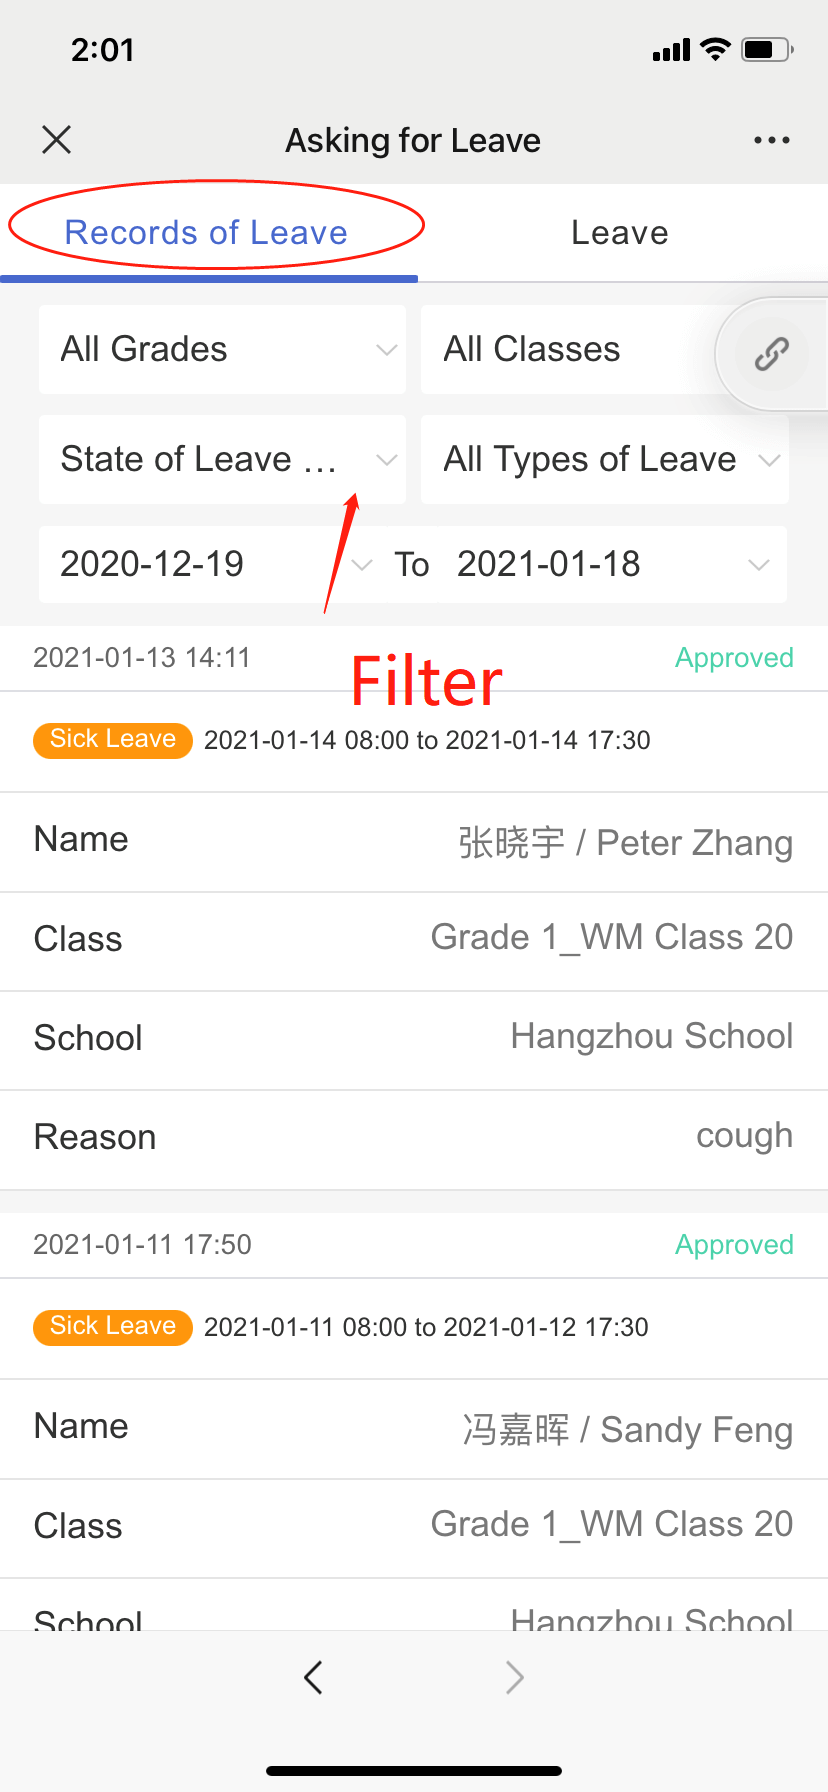
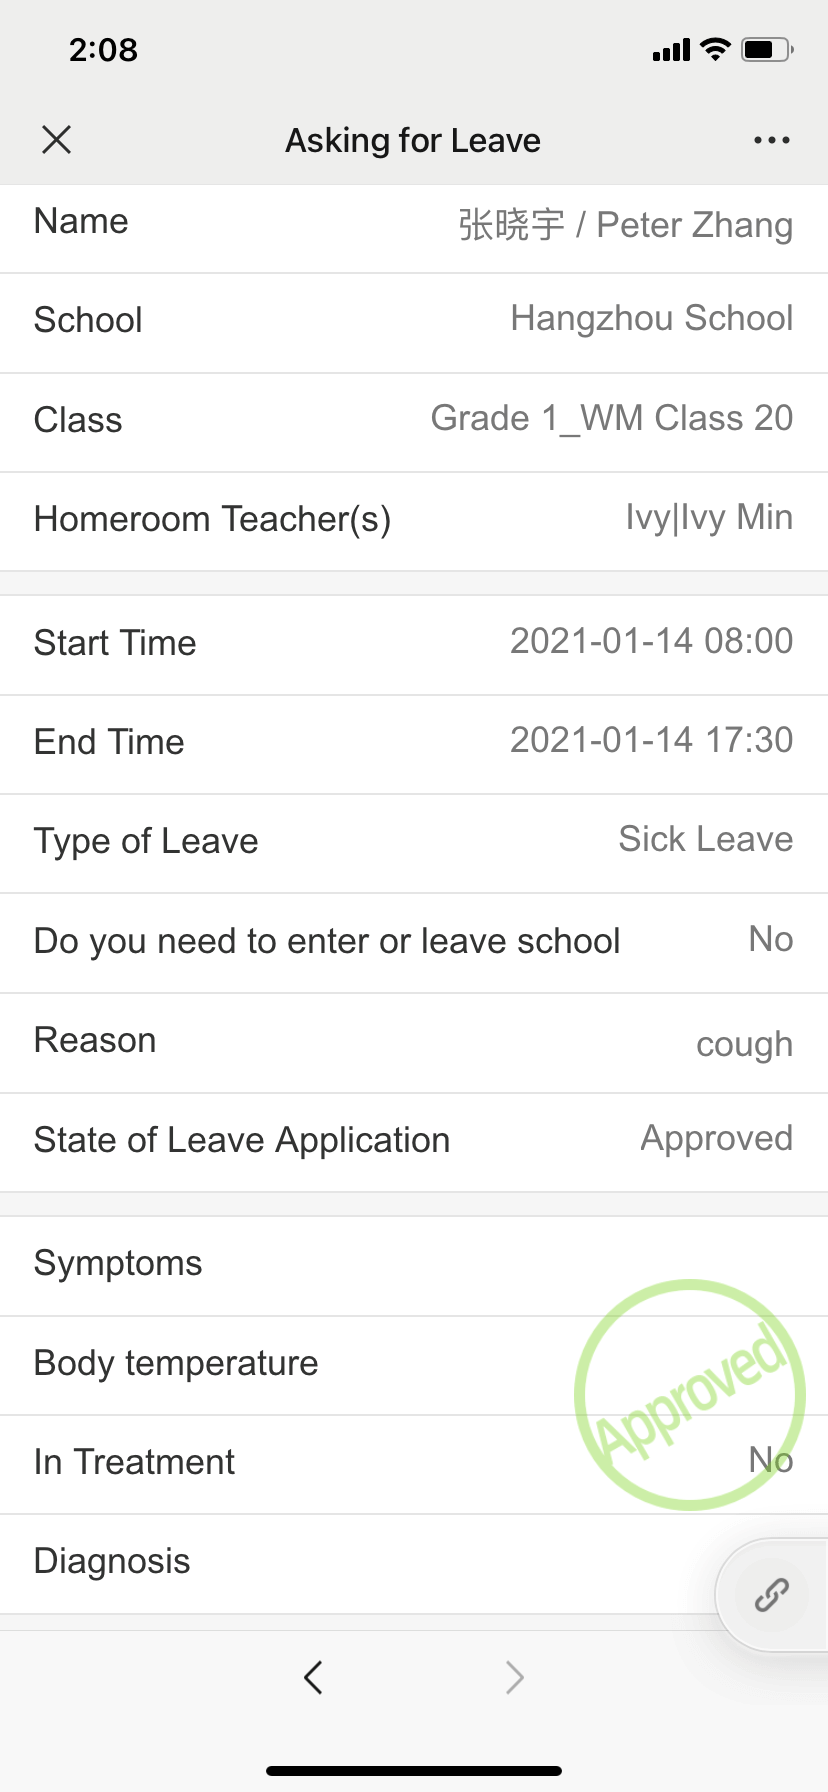
2.3 Check Approval Record
If you forget the exact leave date or student name who raised the request, you can go to Records of Leave to have a list view or tap to see the details.
3. Calendar
3.1 View Personal Schedule & Class Schedule
You can go to Calendar to check Personal Schedule or Class Schedule. 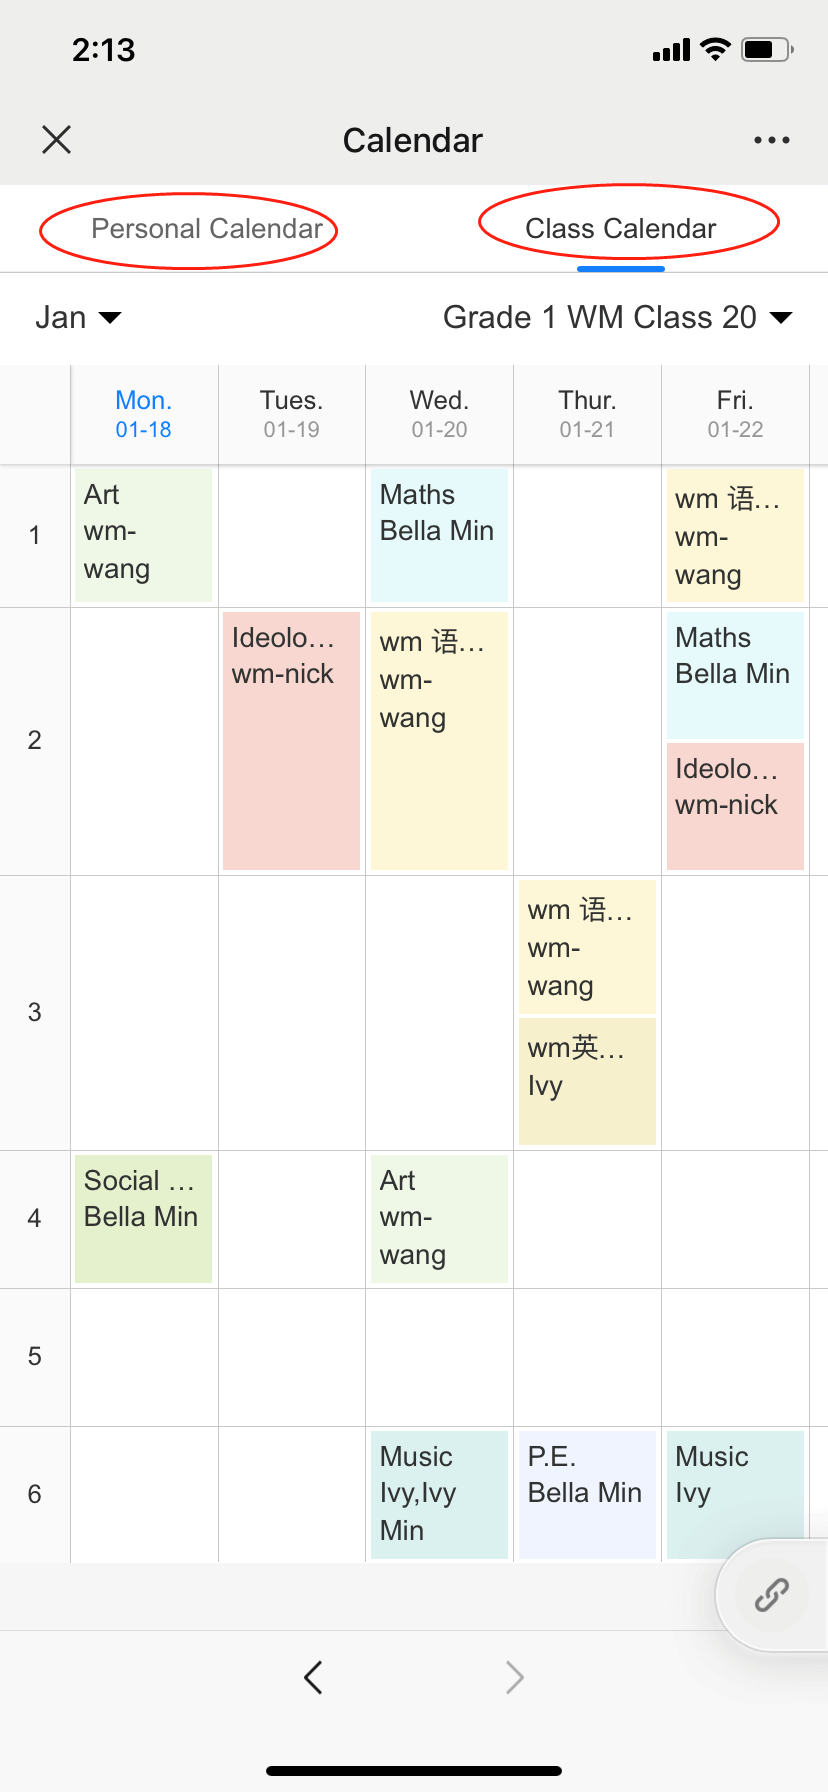
3.2 View School Event and Activity Schedule
Tap the exact date square to view the events or activities.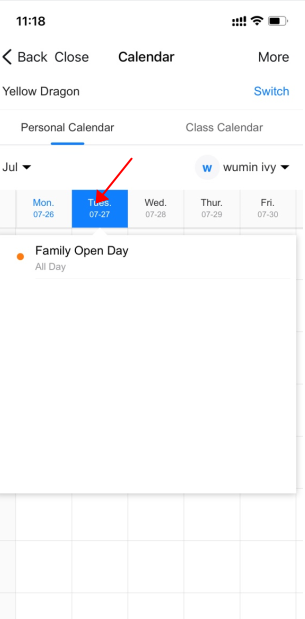
4. Dorm Checking
Dormitory supervisors can record inspection results for students who live in campus housing via SchoolPal Mobile end. The system will generate the weekly or monthly ranking report if rules are set in the PC end.
4.1 Have Dorm Inspection
Step 1: Select campus/school > Select date > Select checking item (multiple items checkable) > Tap Start to Check

Step 2: Select Dorm under your Supervision
Step 3: Select Students’ Performance or Overall Performance
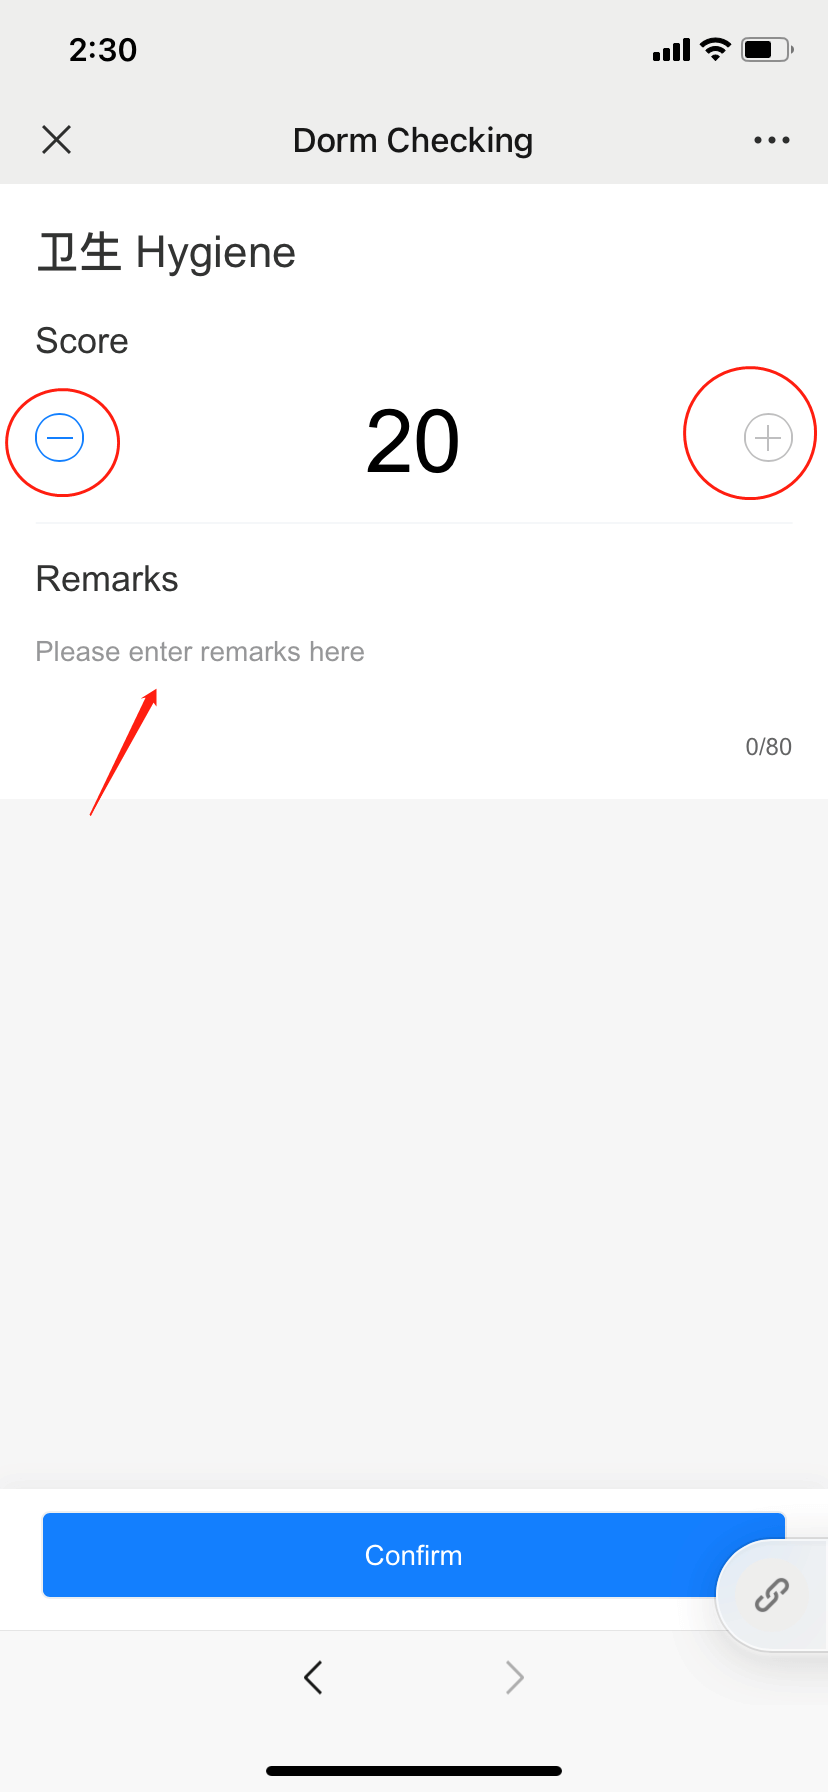
Step 4: Adjust scores and add remarks > tap Confirm
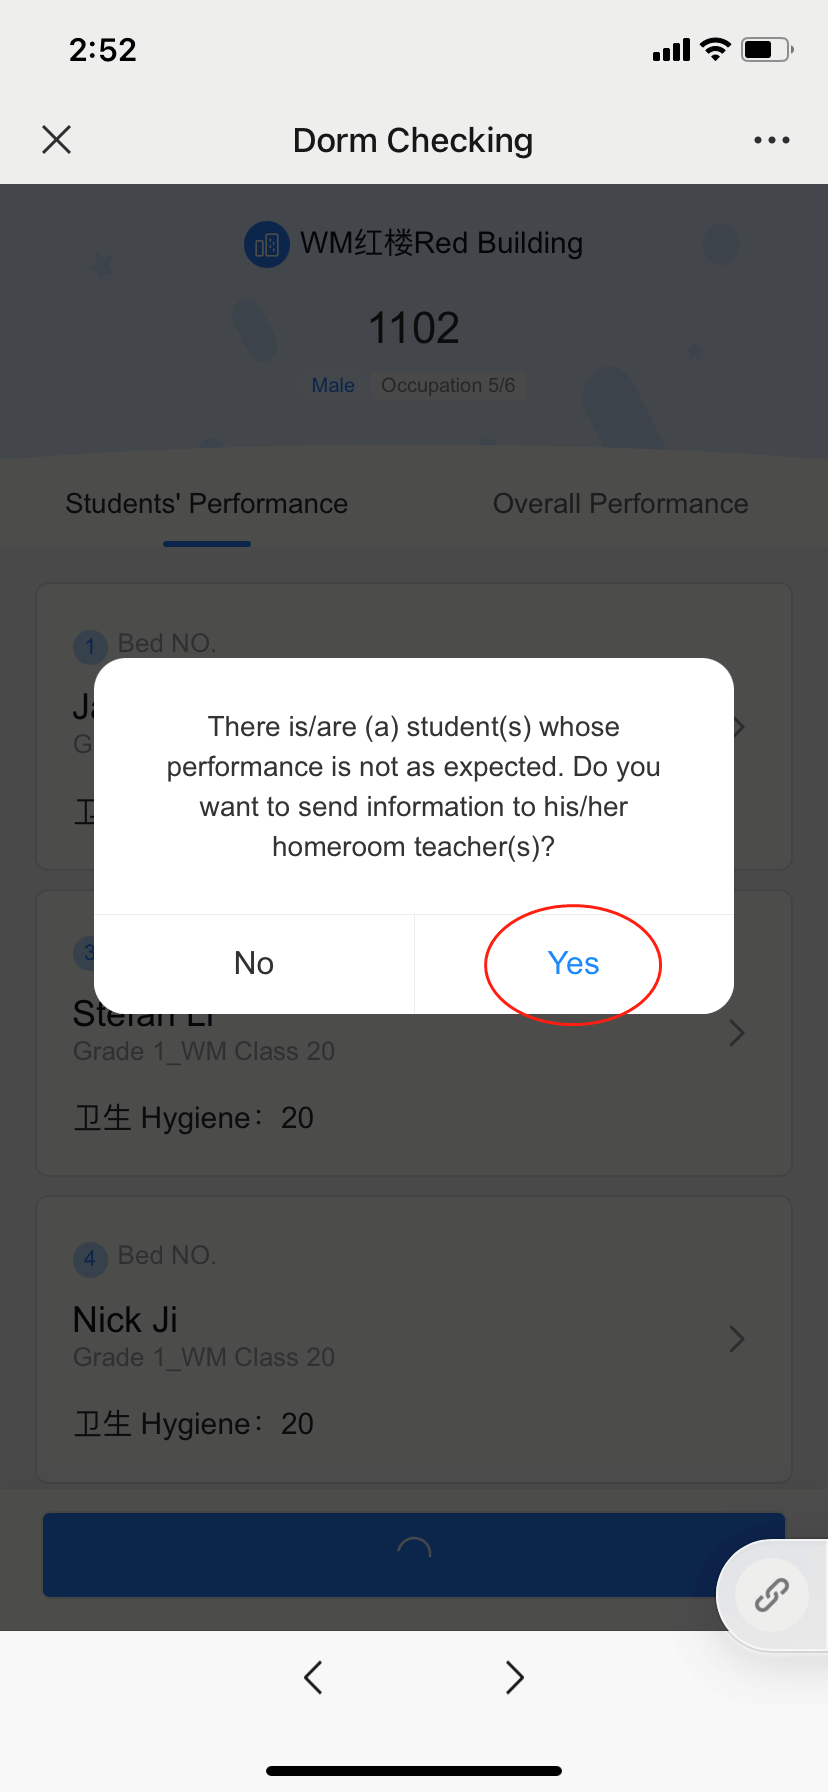
Step 5: Tap Submit > Tap Yes (to inform homeroom teacher about poor performance)
4.2 View or Revise Inspection Records
Step 1: Tap Records
Step 2: Unfold filter bar and select the dorm building and date
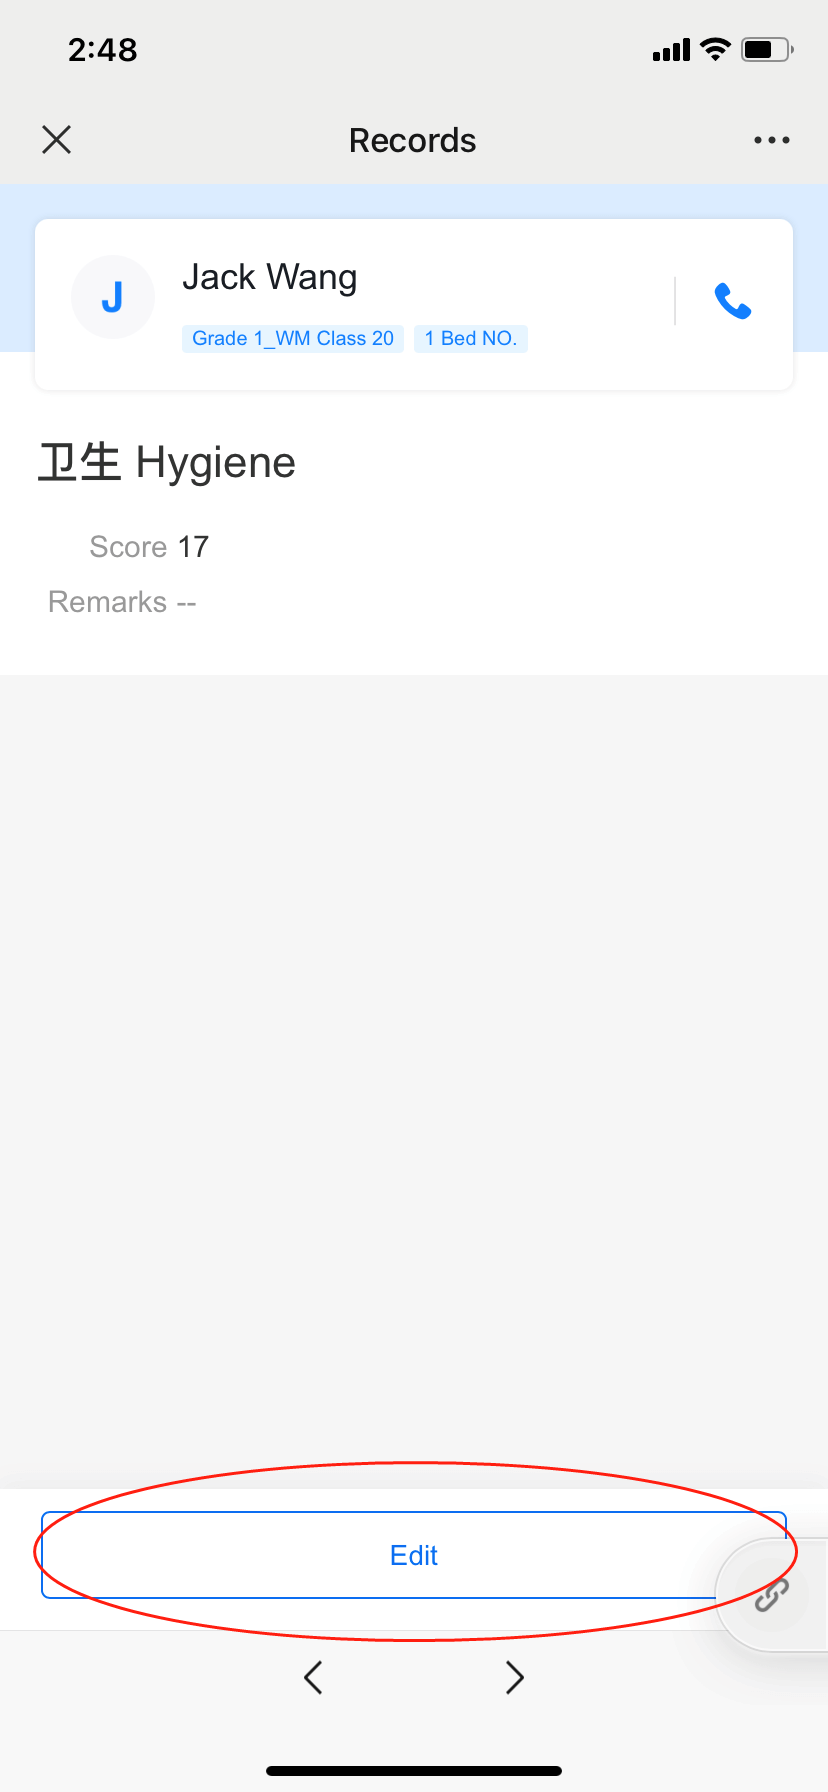
Step 3: View or edit the record same as 4.1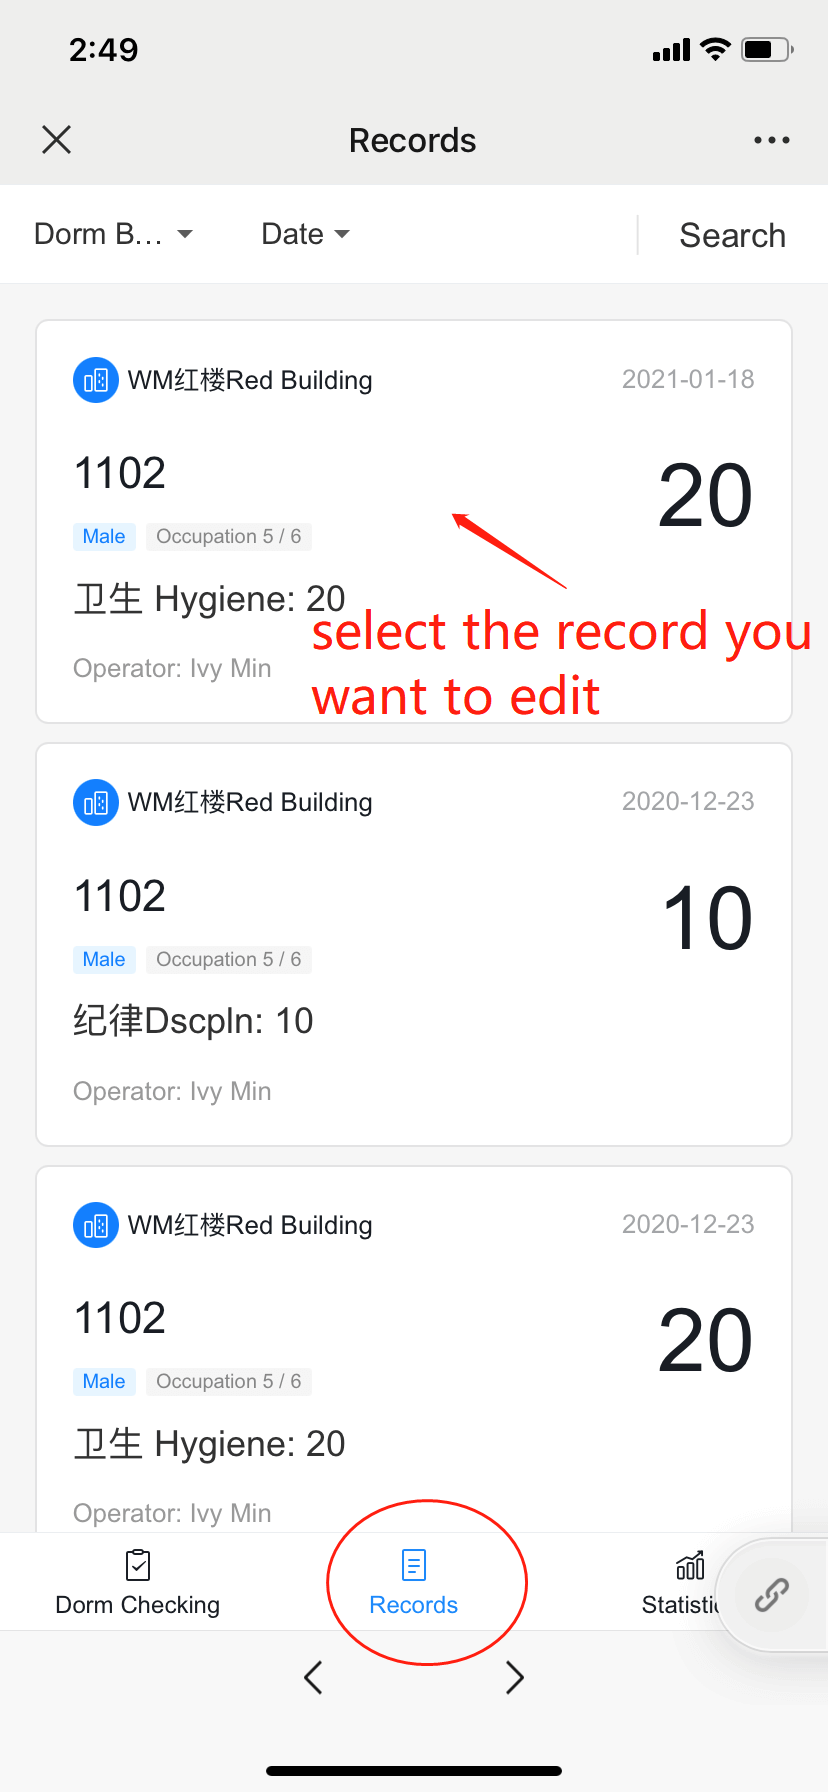
4.3 View Statistics
Teachers can check the dorm performance in the perspective of student or overall class.
5. Comprehensive Evaluation
Teachers can make records of students’ performance based on comprehensive evaluation items and analyze with data accumulated.
5.1 Record performance
Step 1: Tap “+” sign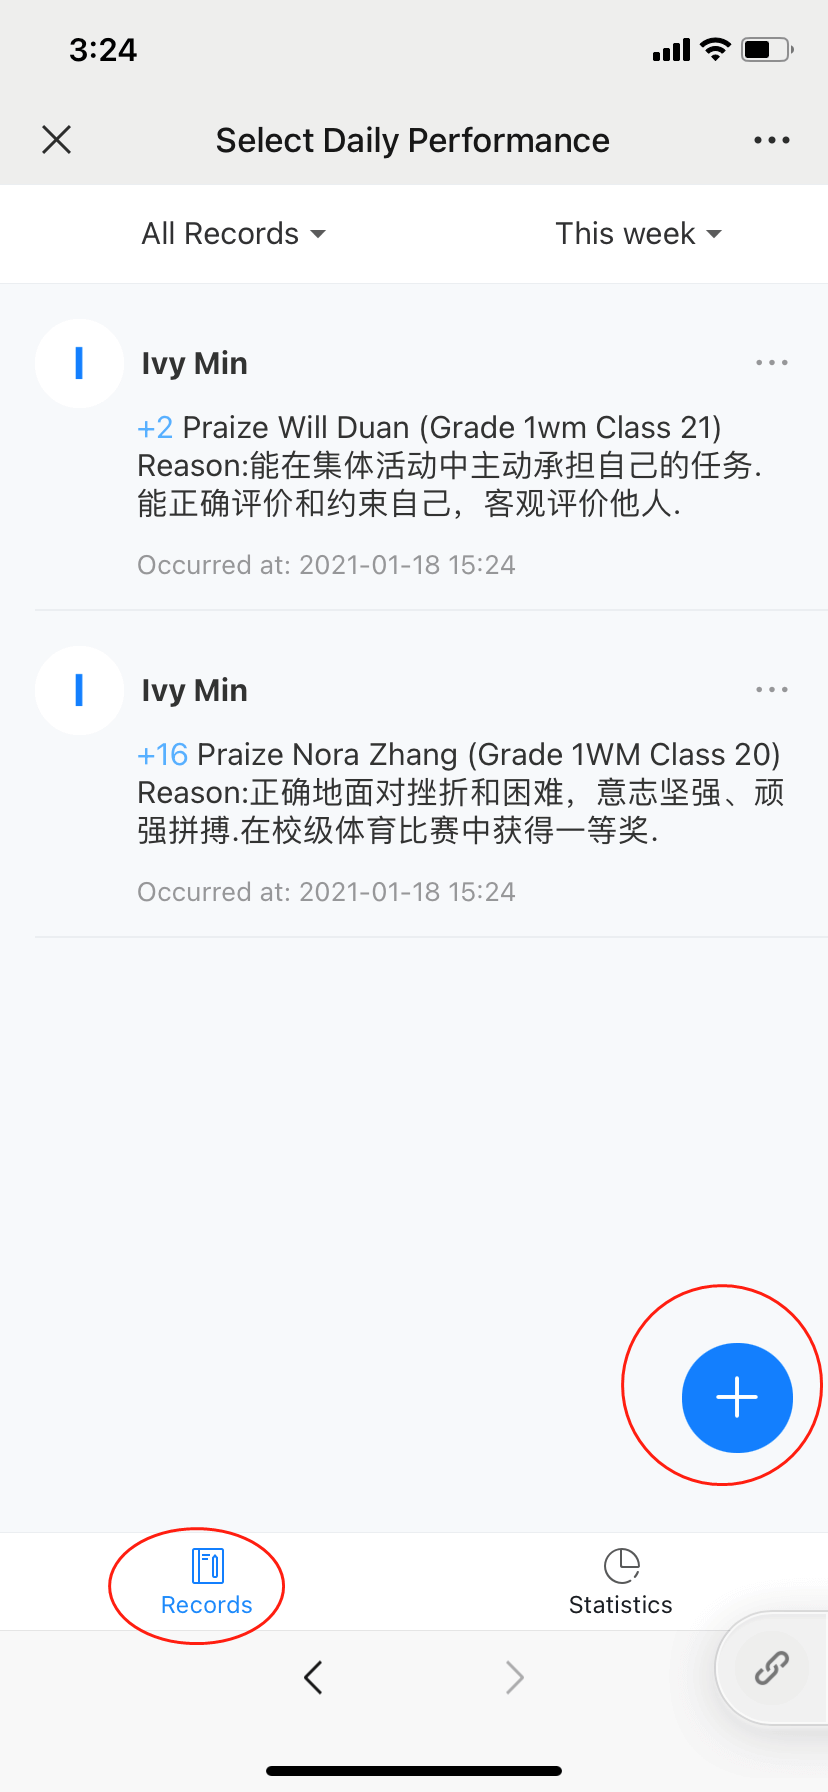
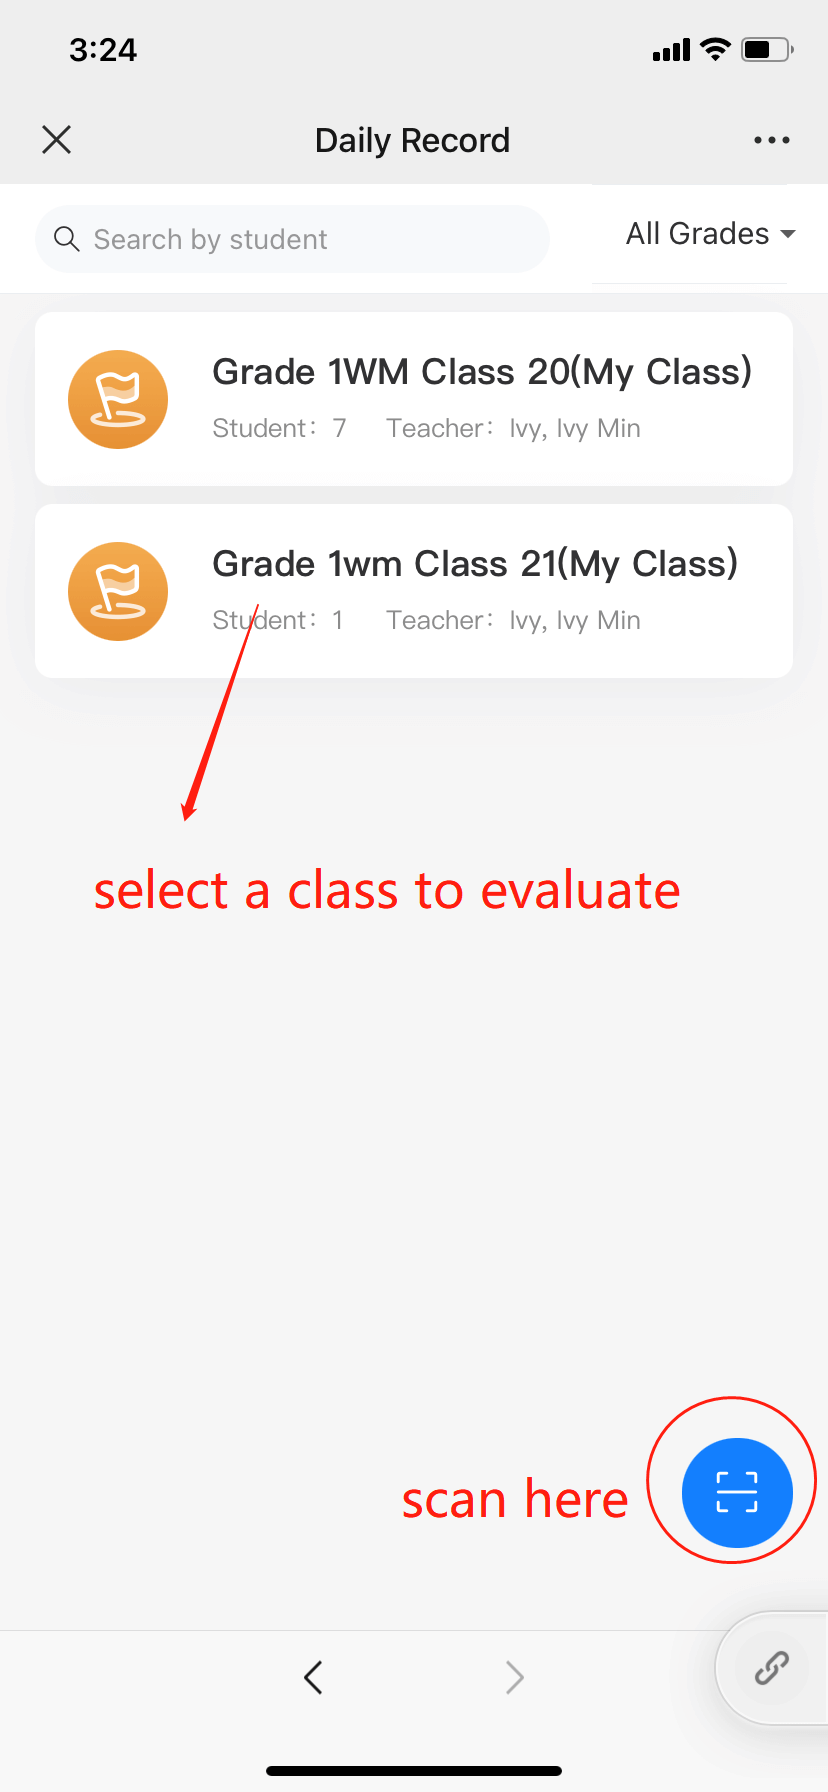
Step 2: Select class or tap scan sign ( if each student has a QR code)
Step 3: Select a single student or multiple students (tap Batch Operation to select more)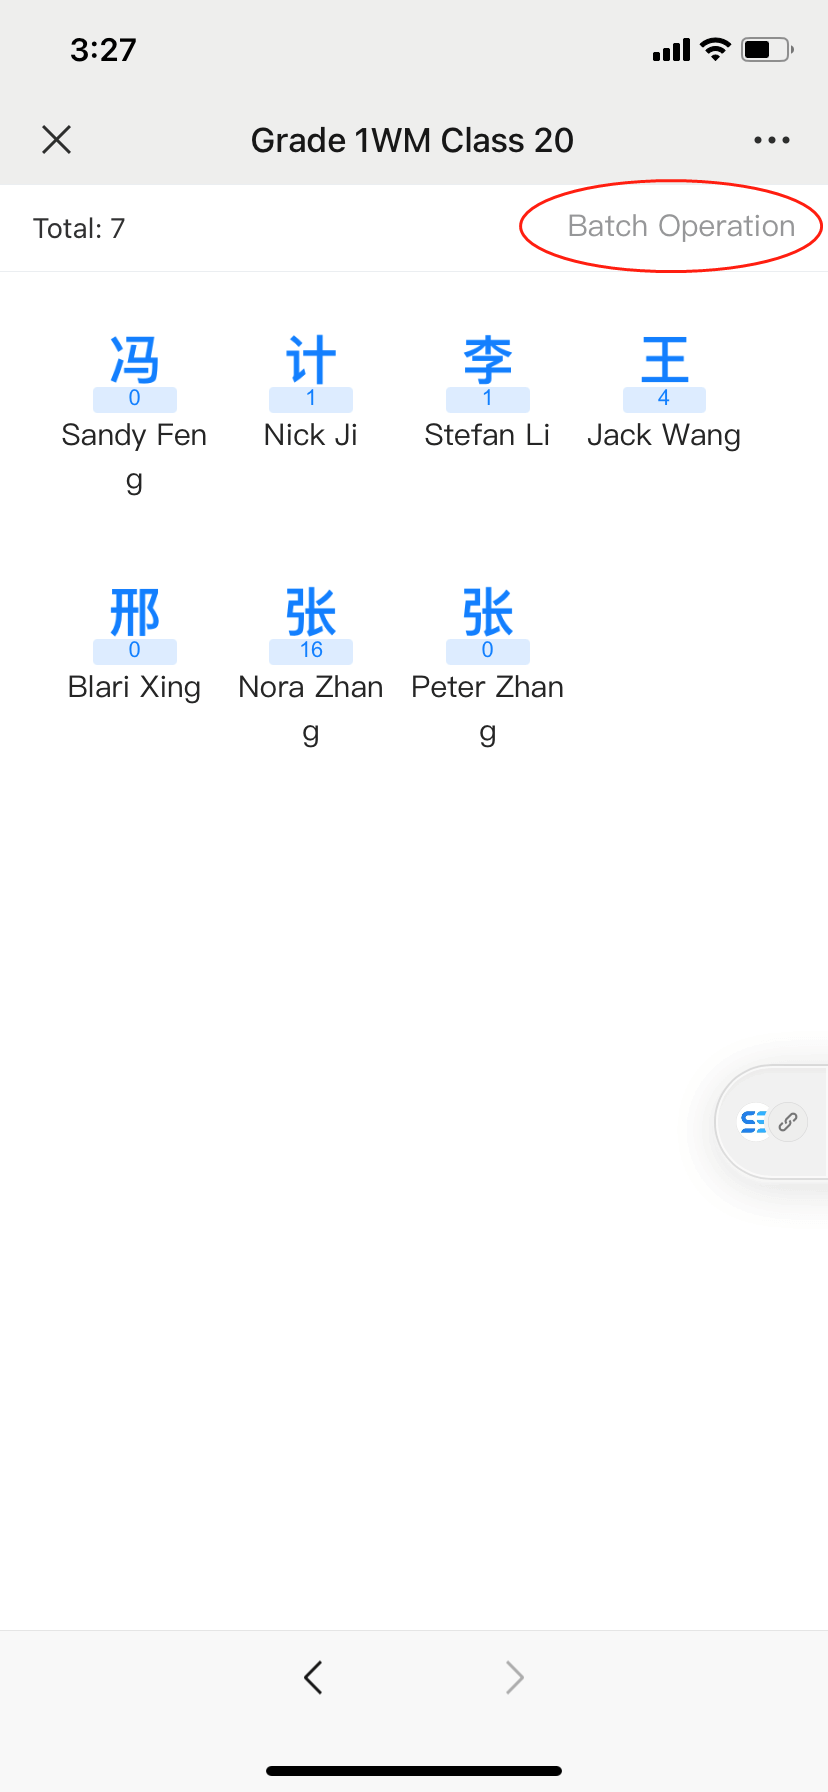
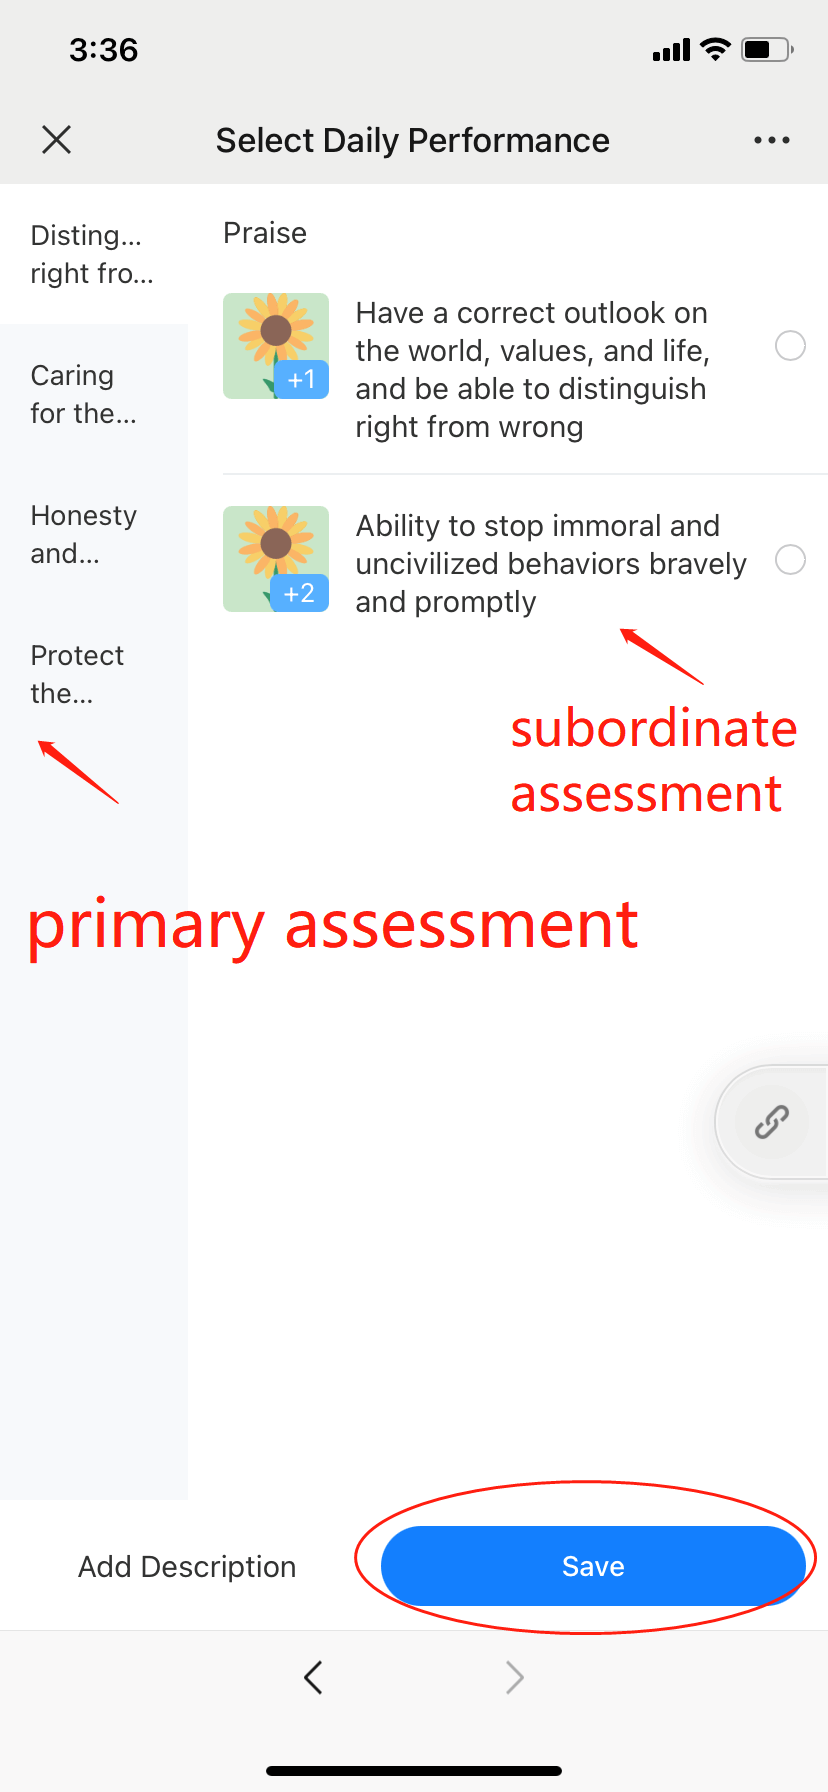
Step 4: Tap the assessment > tap subordinate assessment > select praise item or criticize item > add description(optional) > tap Save
Parents can receive a notification once a record of their child is generated. You can set the rule in PC end.
5.2 View Performance Record
You can filter the history records by filtering the creator, date and whether it related to My students.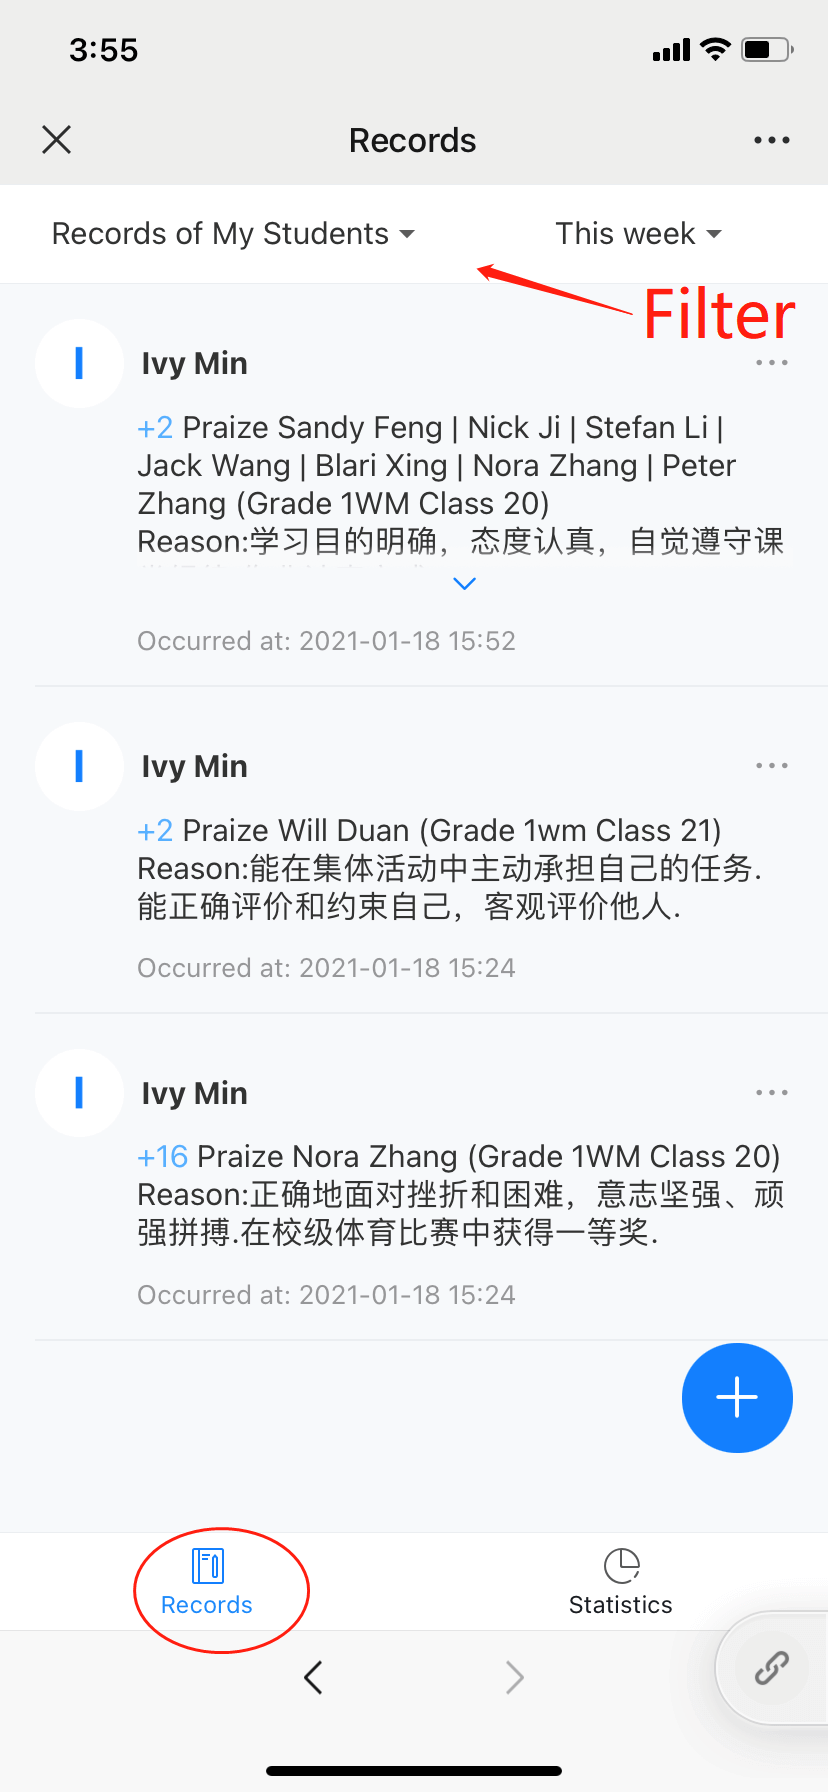
5.3 Statistics Analysis
In the Statistics column, you can view each student’s performance summary by filtering the class and time. 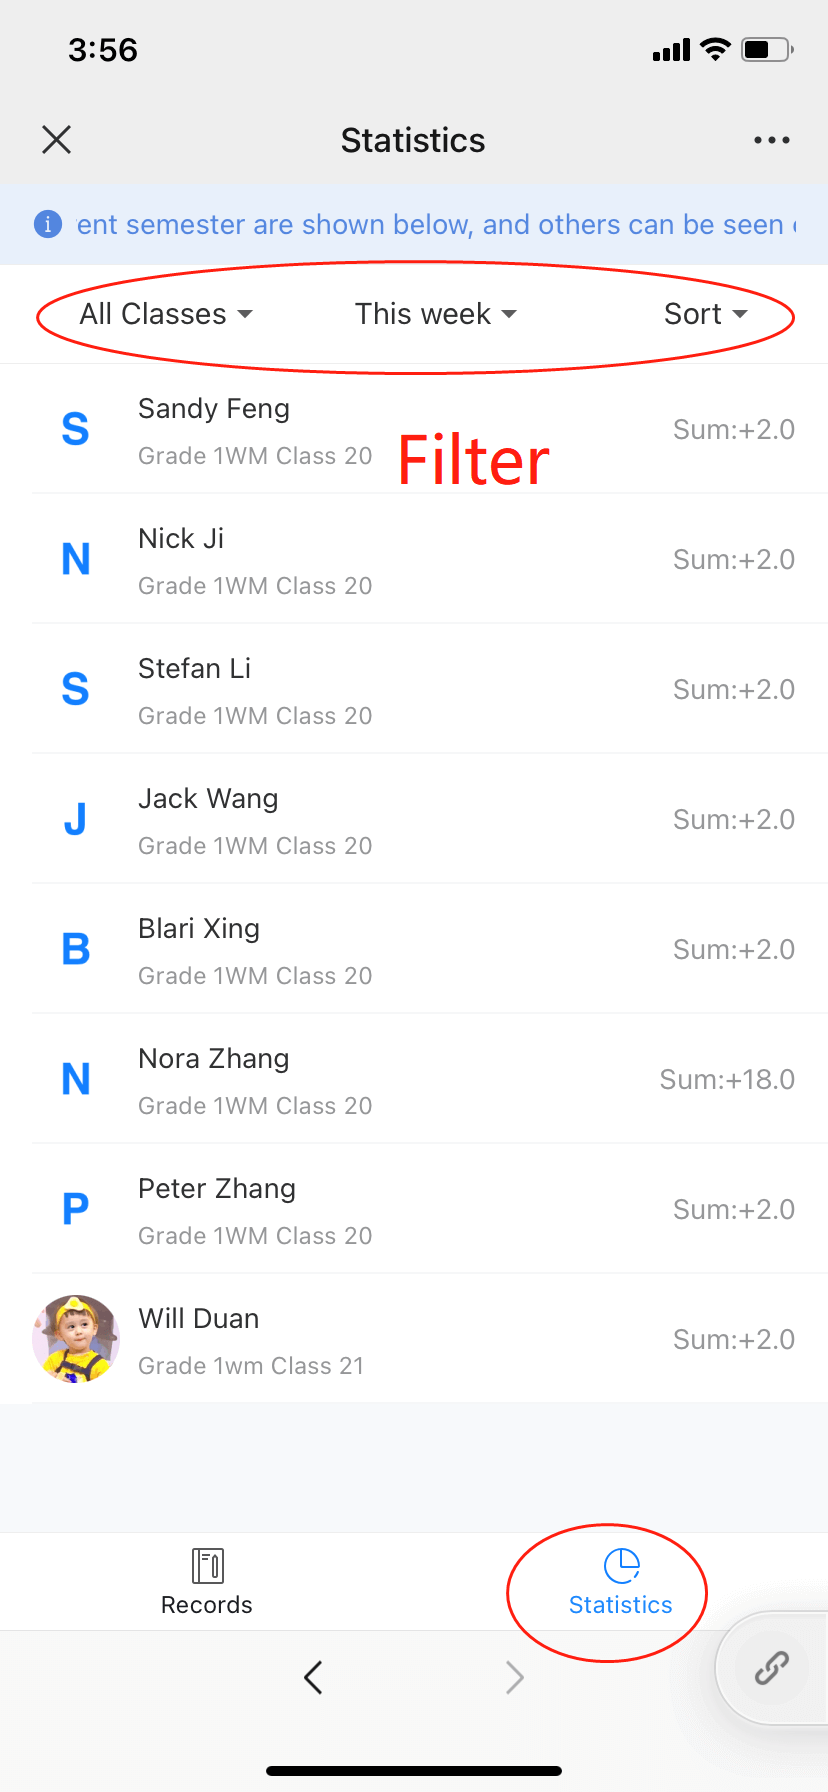

6. Class Substitution
A course substitution request is applied when a teacher can’t deliver a lecture scheduled at the beginning of the semester.
6.1 Initiate class substitution
6.1.1 For subject teachers
Step 1: Tap Apply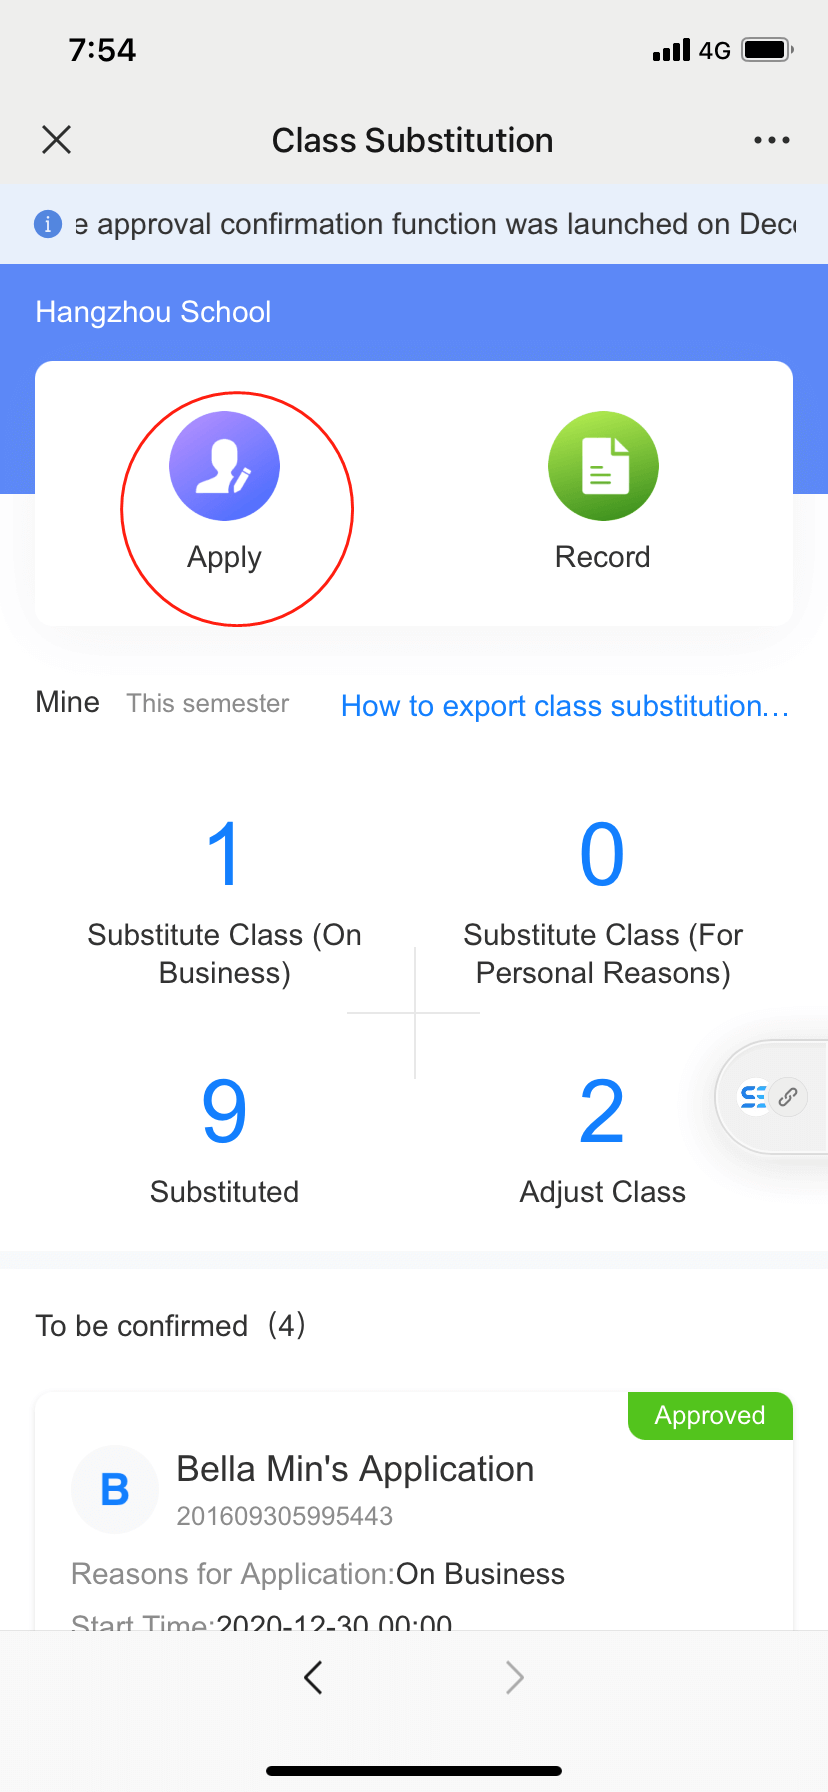
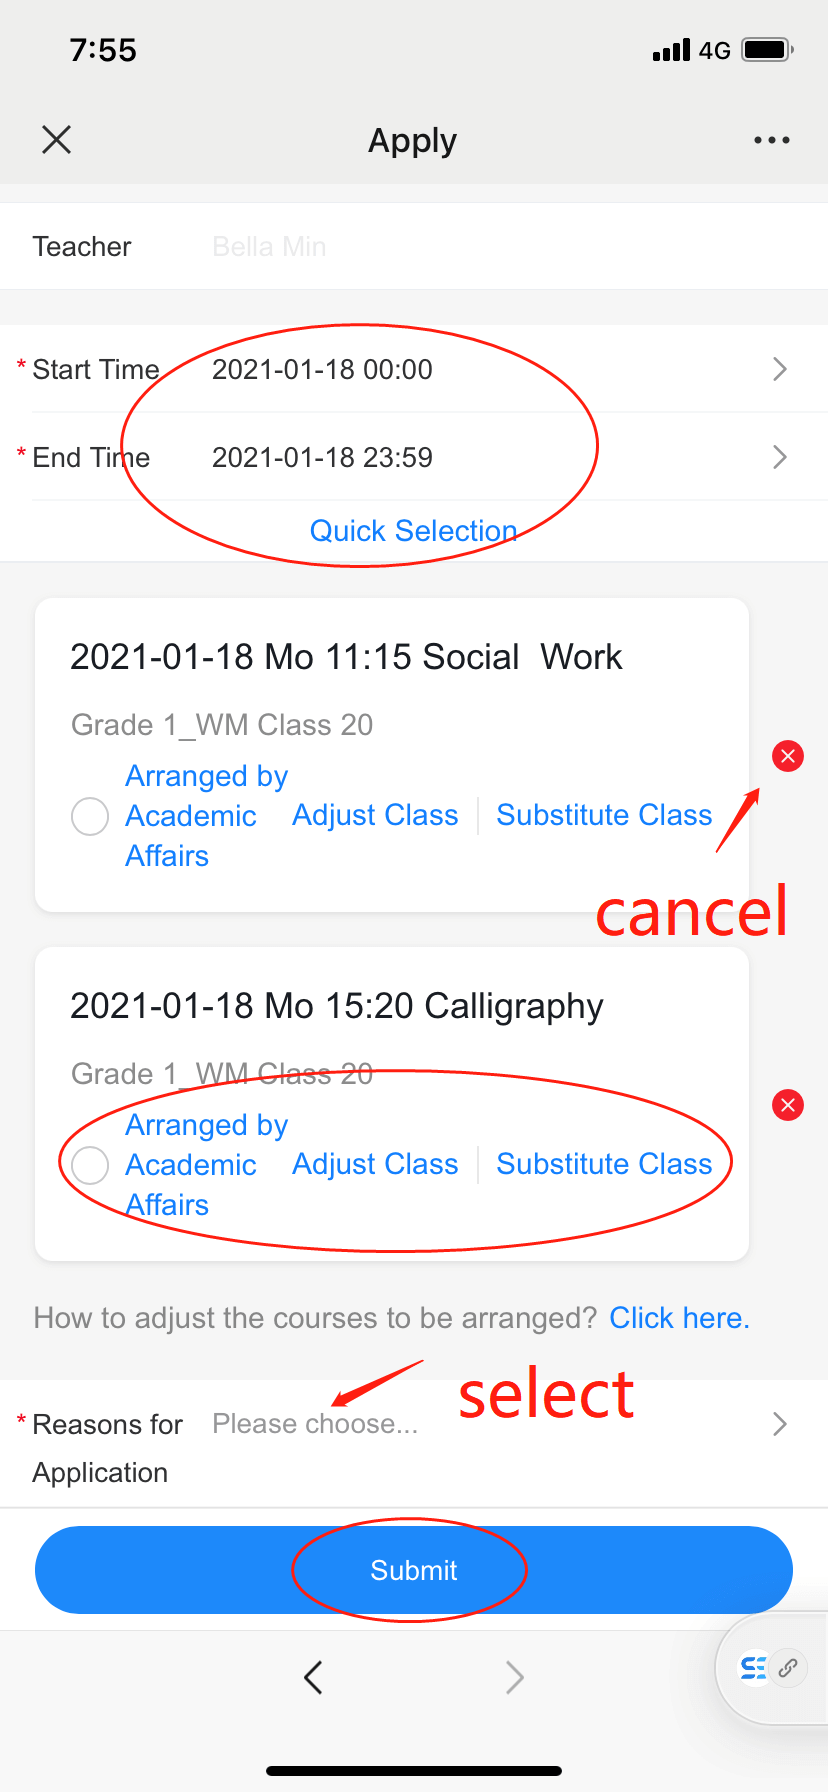
Step 2: Select the leave date > select class
Step 3: Select the class for substitution (other teacher will take over your class), adjustment (change the class period or date with others) or arranged by academics ( The office of acedemics will designate a teacher to take over your class or reschedule your class period)
Step 4: Select the reason type > add remarks or images
Step 5: tap Submit
The application needs approval from dean of studies until effectiveness. The applicant and teachers involved in this application will receive a Dingtalk notification.
6.1.2 For dean of studies ( who are authorized to be the approver)
Step 1: Tap Apply
Step 2: Select teacher > select date > select class
Step 3: Select the class for substitution (other teacher to take over the class) or adjustment (change the class period or date with others)
Step 4: Select the reason type > add remarks or images
Step 5: Submit
The application will be approved by default. Teachers involved in this application will receive a Dingtalk notification when approved.
6.2 View /Modify/Revoke substitution application
6.2.1 For applicant
Step 1: tap Record to view all the history applications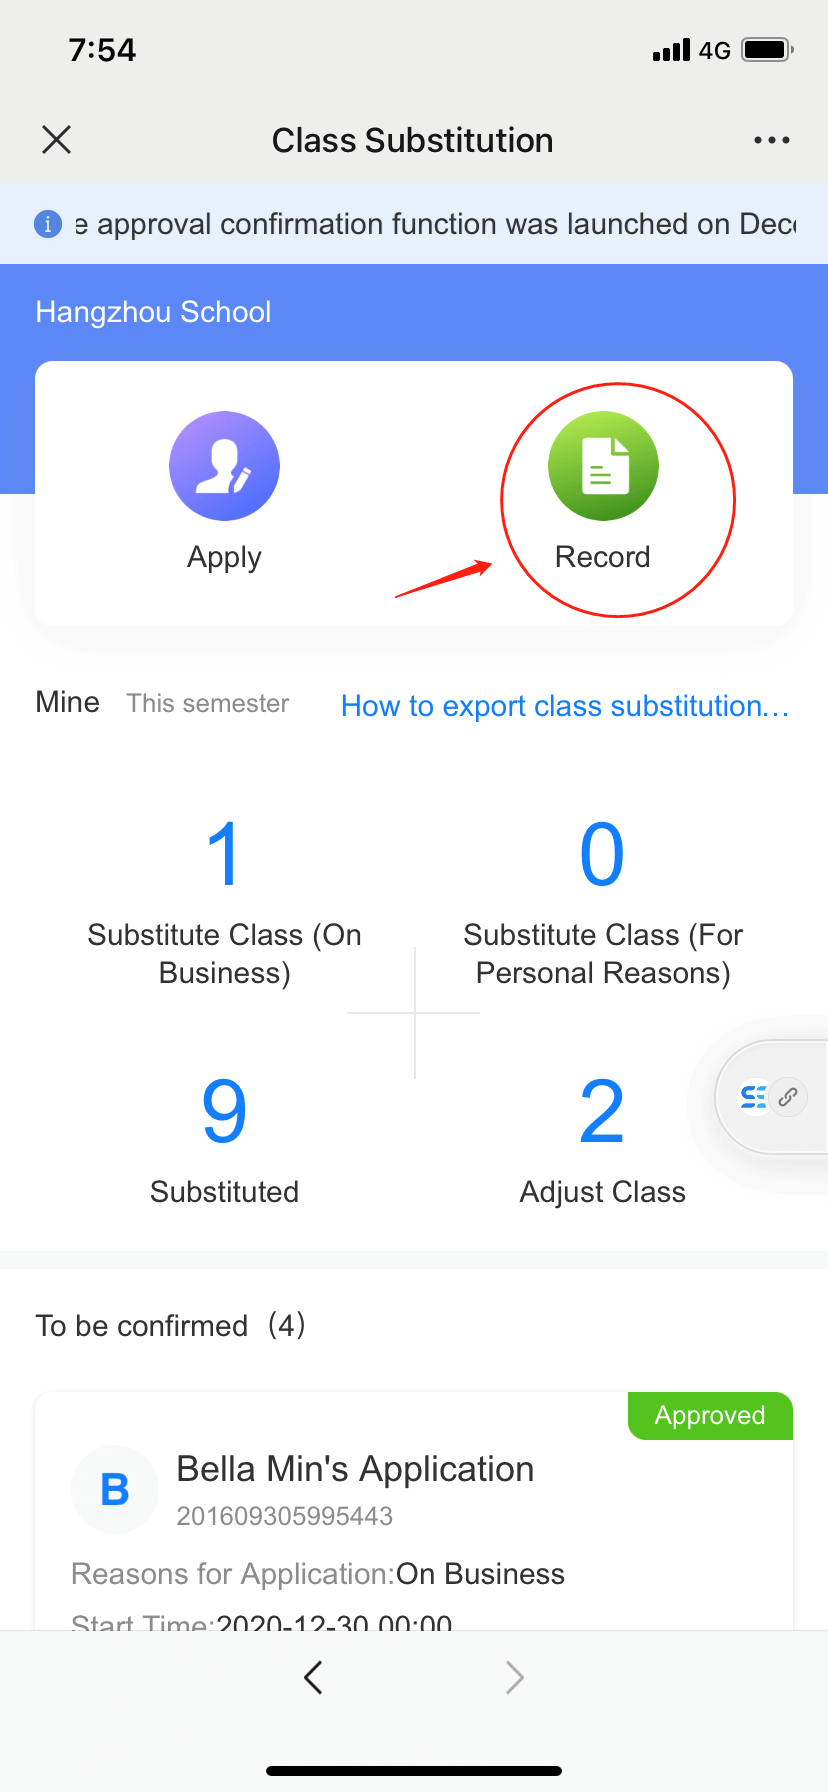
Step 2: Search by teacher name/application number, or filter by date/approval status
Step 3:
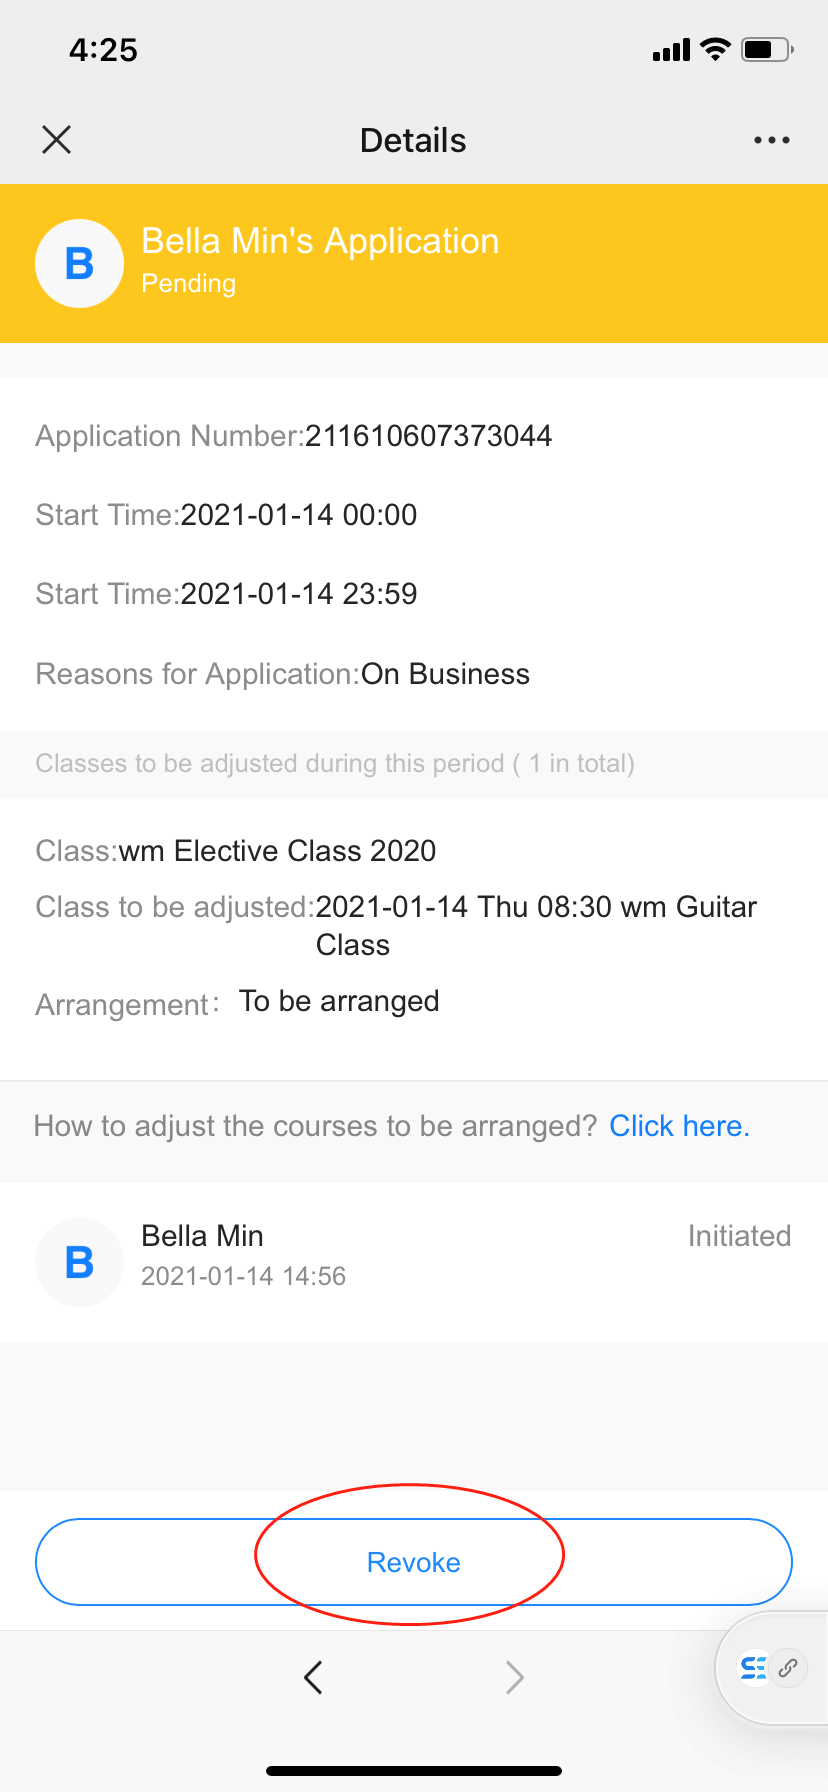
- Pending application
Tap the application > tap Revoke
6.2.2 For Approver
Step 1: Tap Record or Approval list to view all the history applications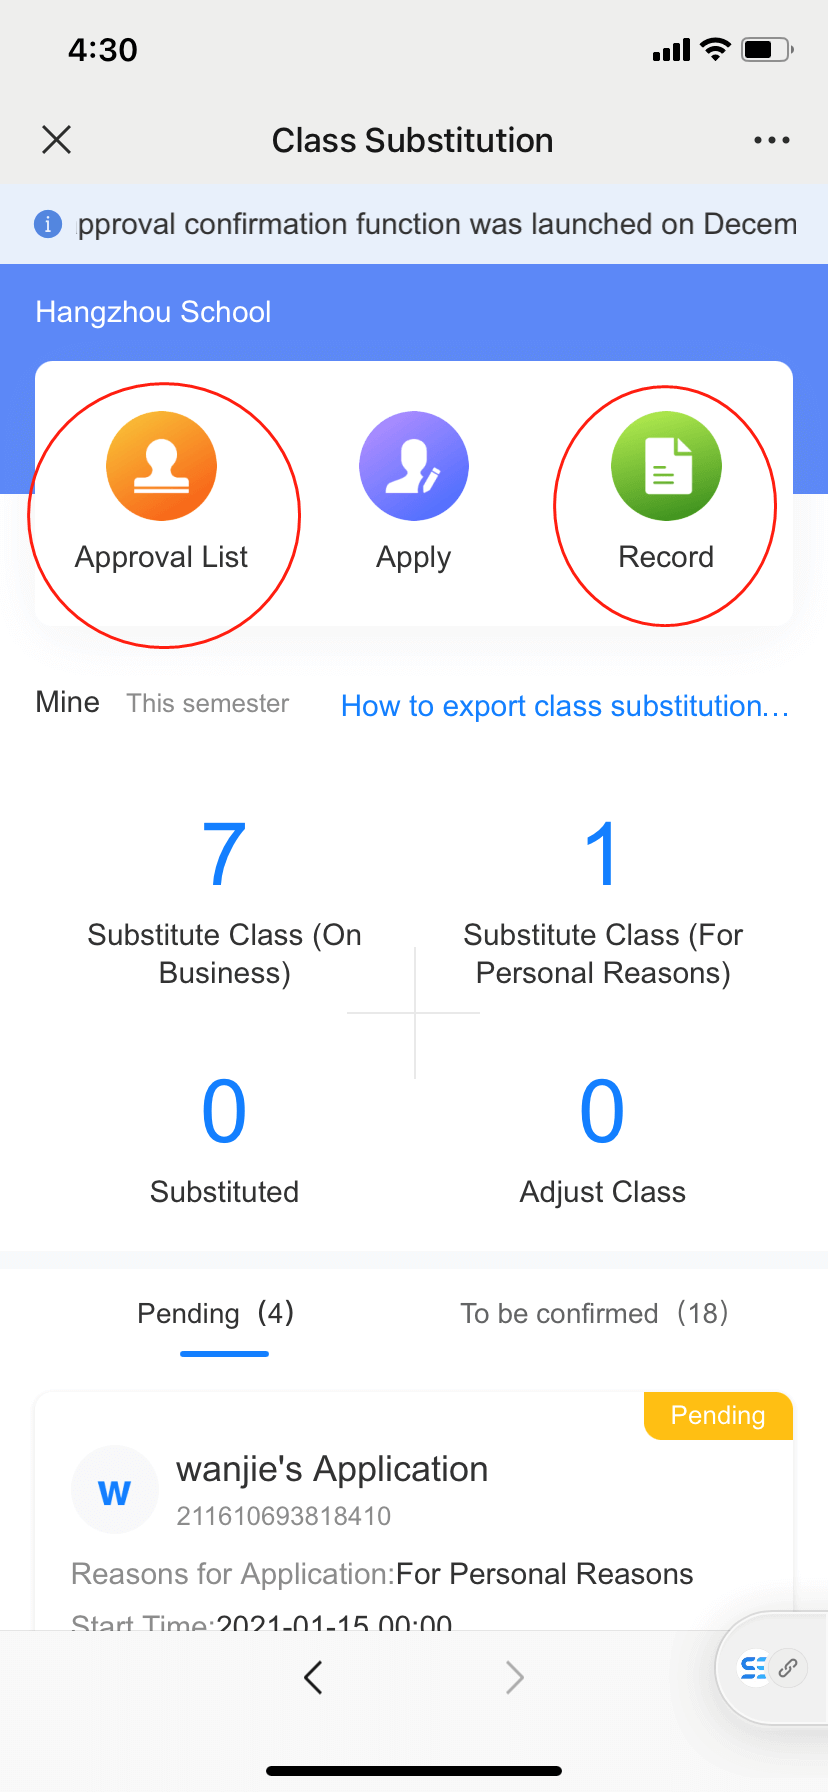
Step 2: Search by teacher name/application number, or filter by date/approval status (only avaiblable in Record)
Step 3:
- Pending application
Tap the application > Refuse or Agree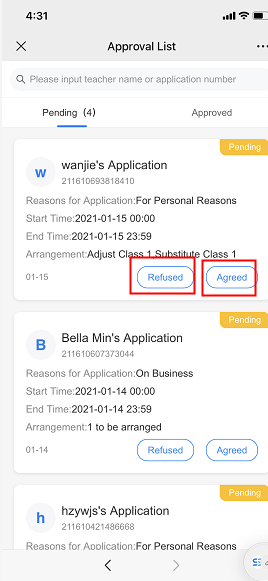
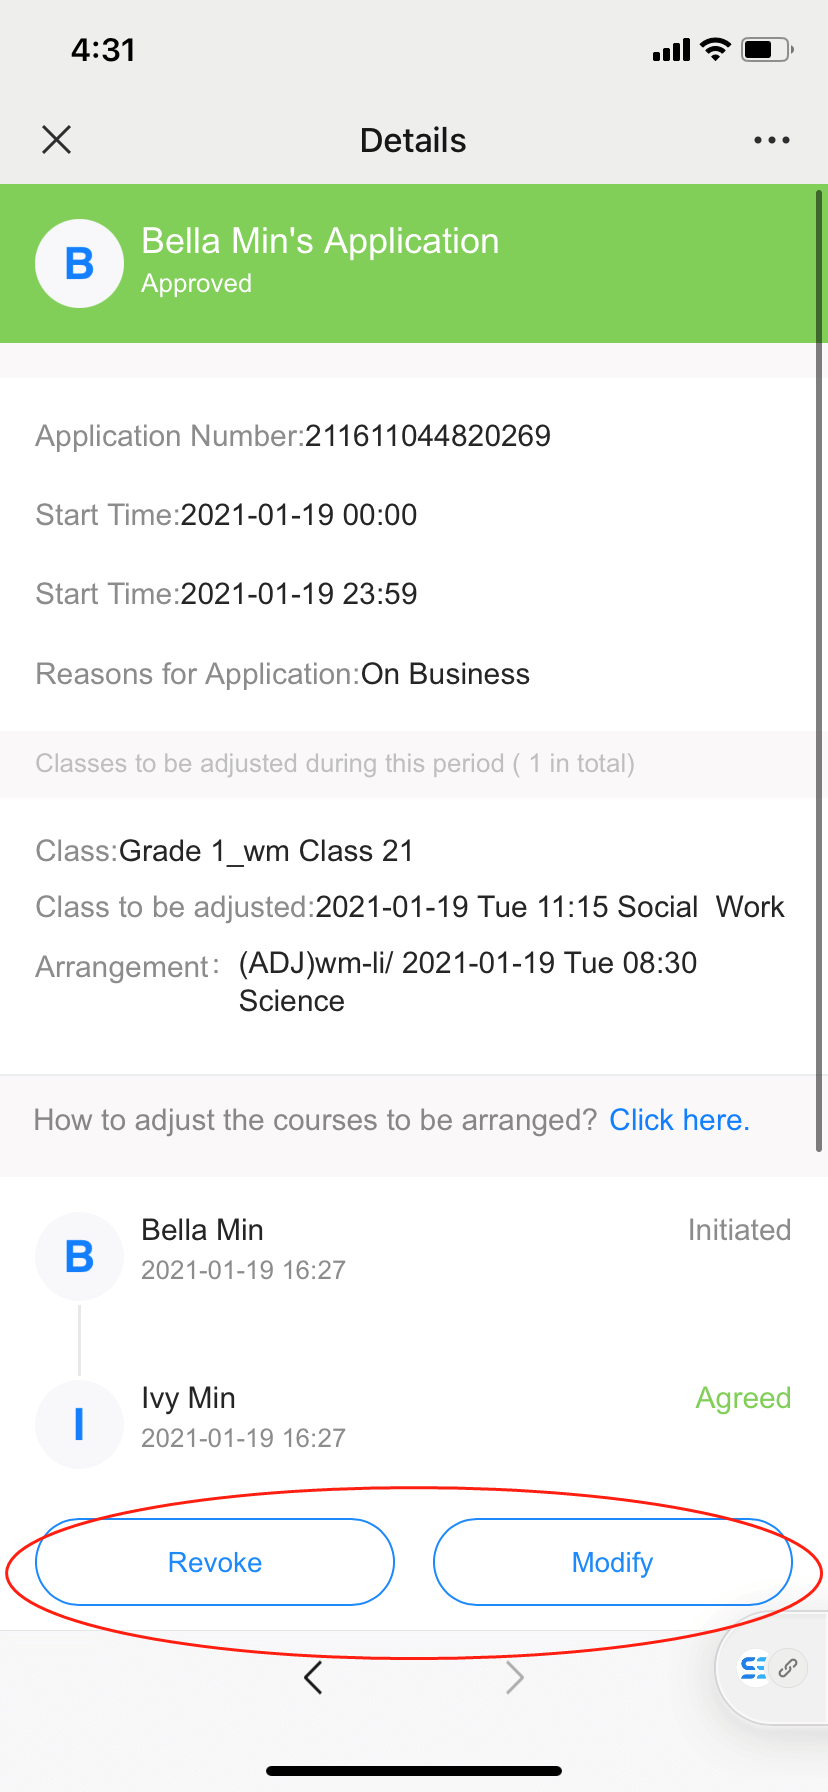
- Approved application
Tap the application > Modify (reschedule the class period or change the substitute teacher) or Revoke ( the applicant can deliver the class as scheduled)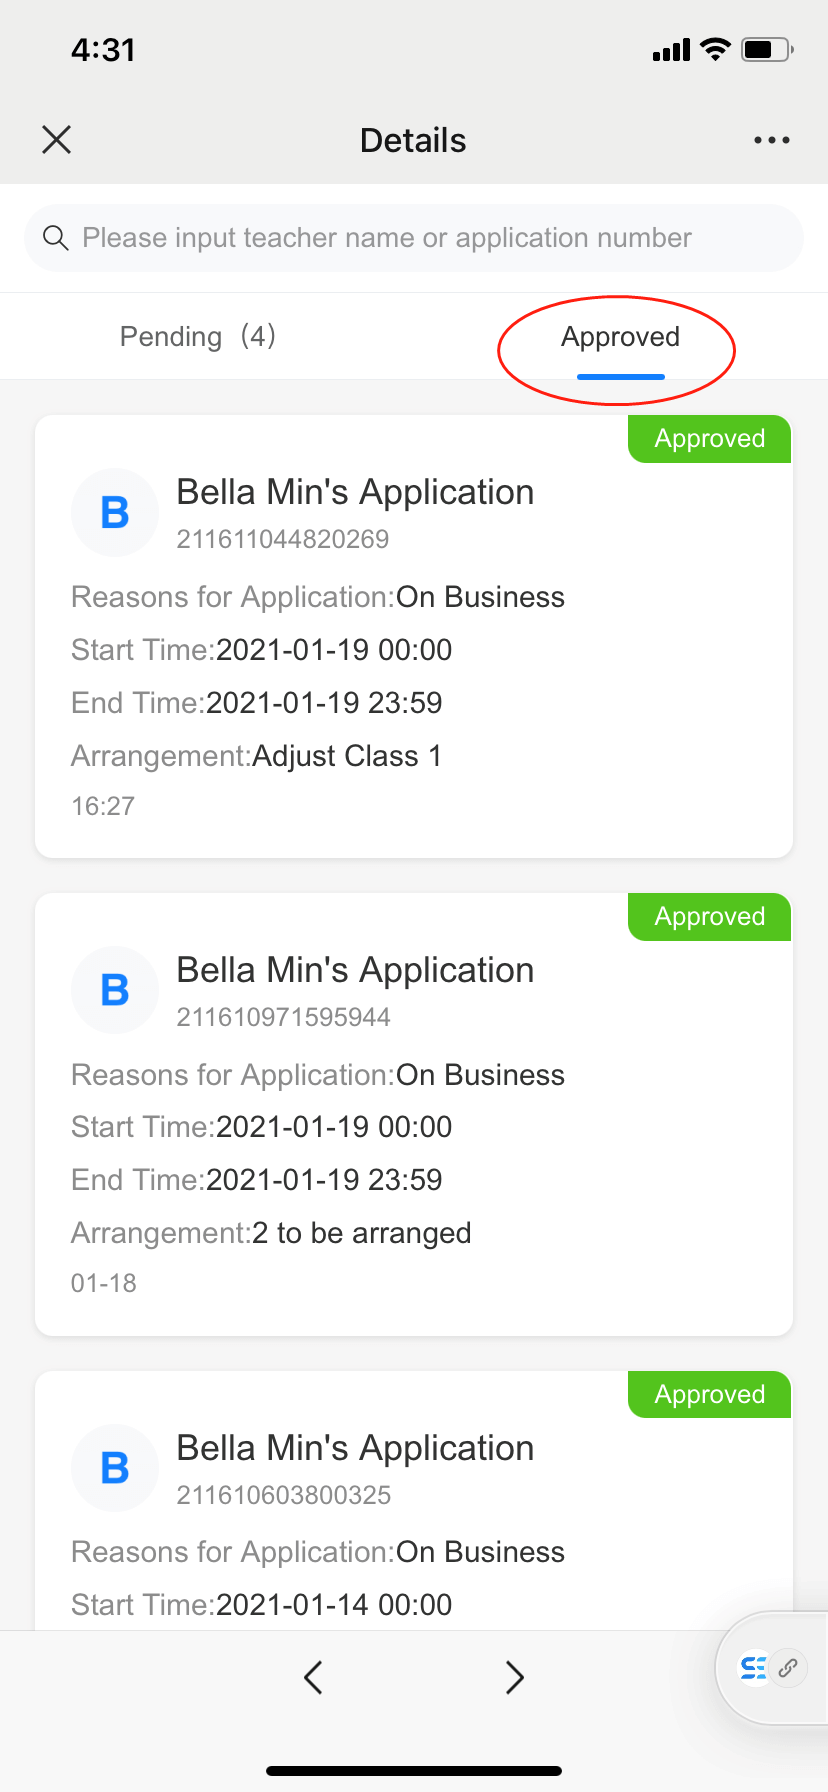
6.3 Approve/Reject substitution request
When the subject teacher submits a substitution request, the approver will receive a Dingtalk notification.
Step 1: Tap the notification
Step 2:
- The applicant chose to be arranged by academics
Tap Adjust > tap Adjust class or Substitute class > tap Confirm > tap Agree
- The applicant already submitted with the alternatives
Tap Agree or tap Adjust (when you find the alternatives are not proper)
You can reject the application if necessary by tap Refused.
7. Admissions
7.1 View Leads
Step 1: select Applicants and you will see all the leads designated to you.
Step 2: tap the lead and you will see the details of each lead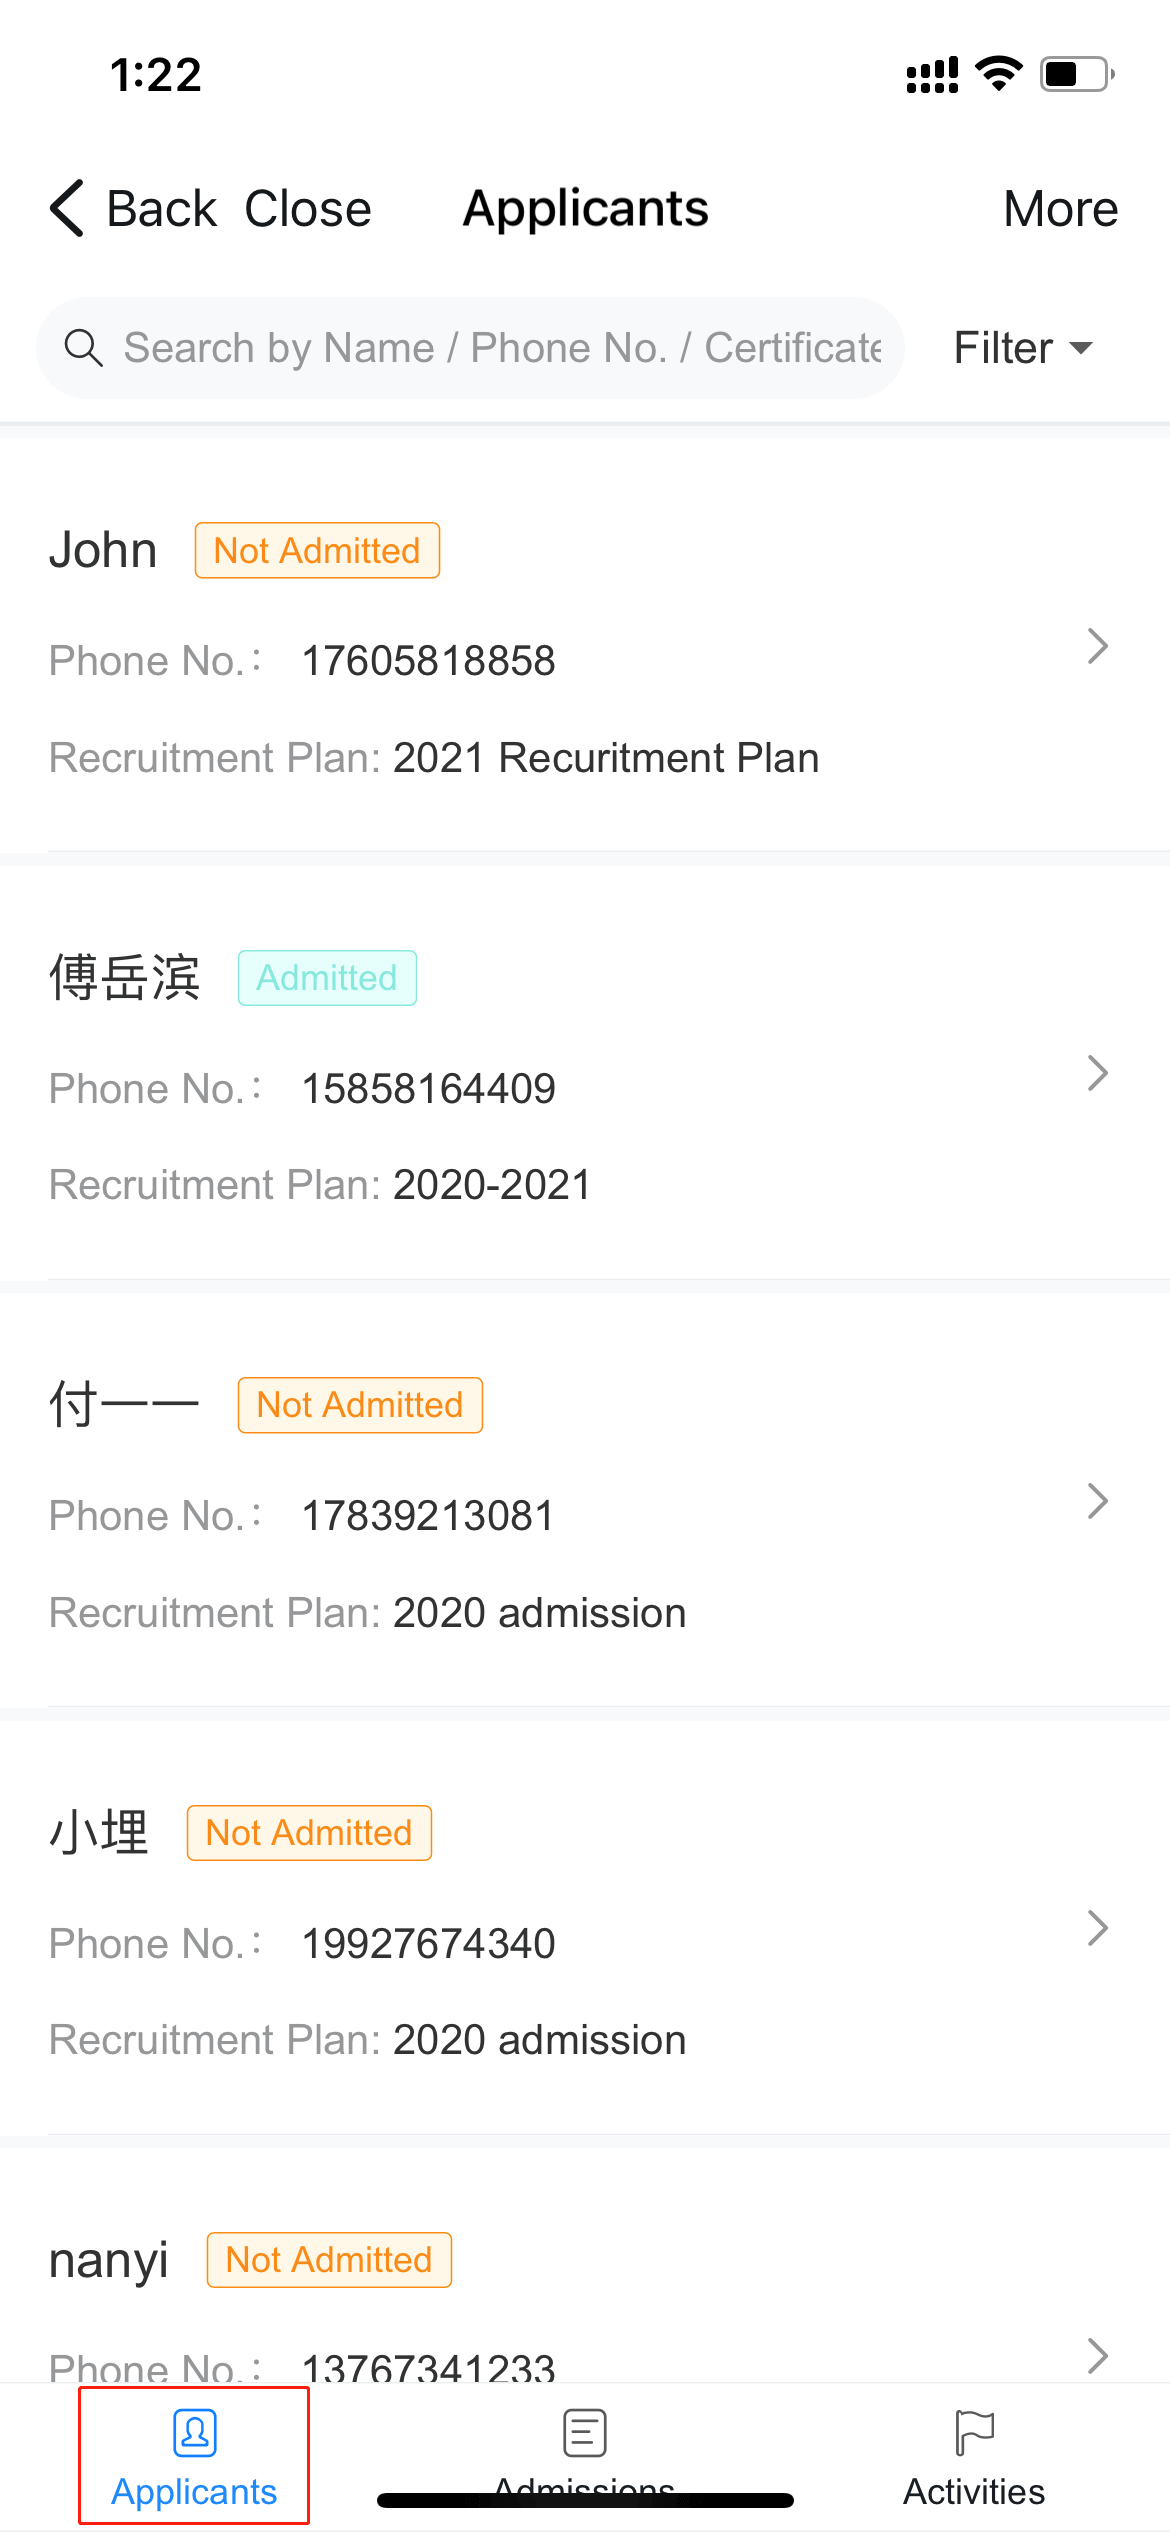
7.2 Check Personal QR Code
Step 1: select Admission on the bottom bar and you will see all the forms listed.
Step 2: each form is connected to a recruitment plan. Tap the form and you will see the code of your own.
Step 2: you can download the QR code or copy link to share with others as instructed in the screenshot.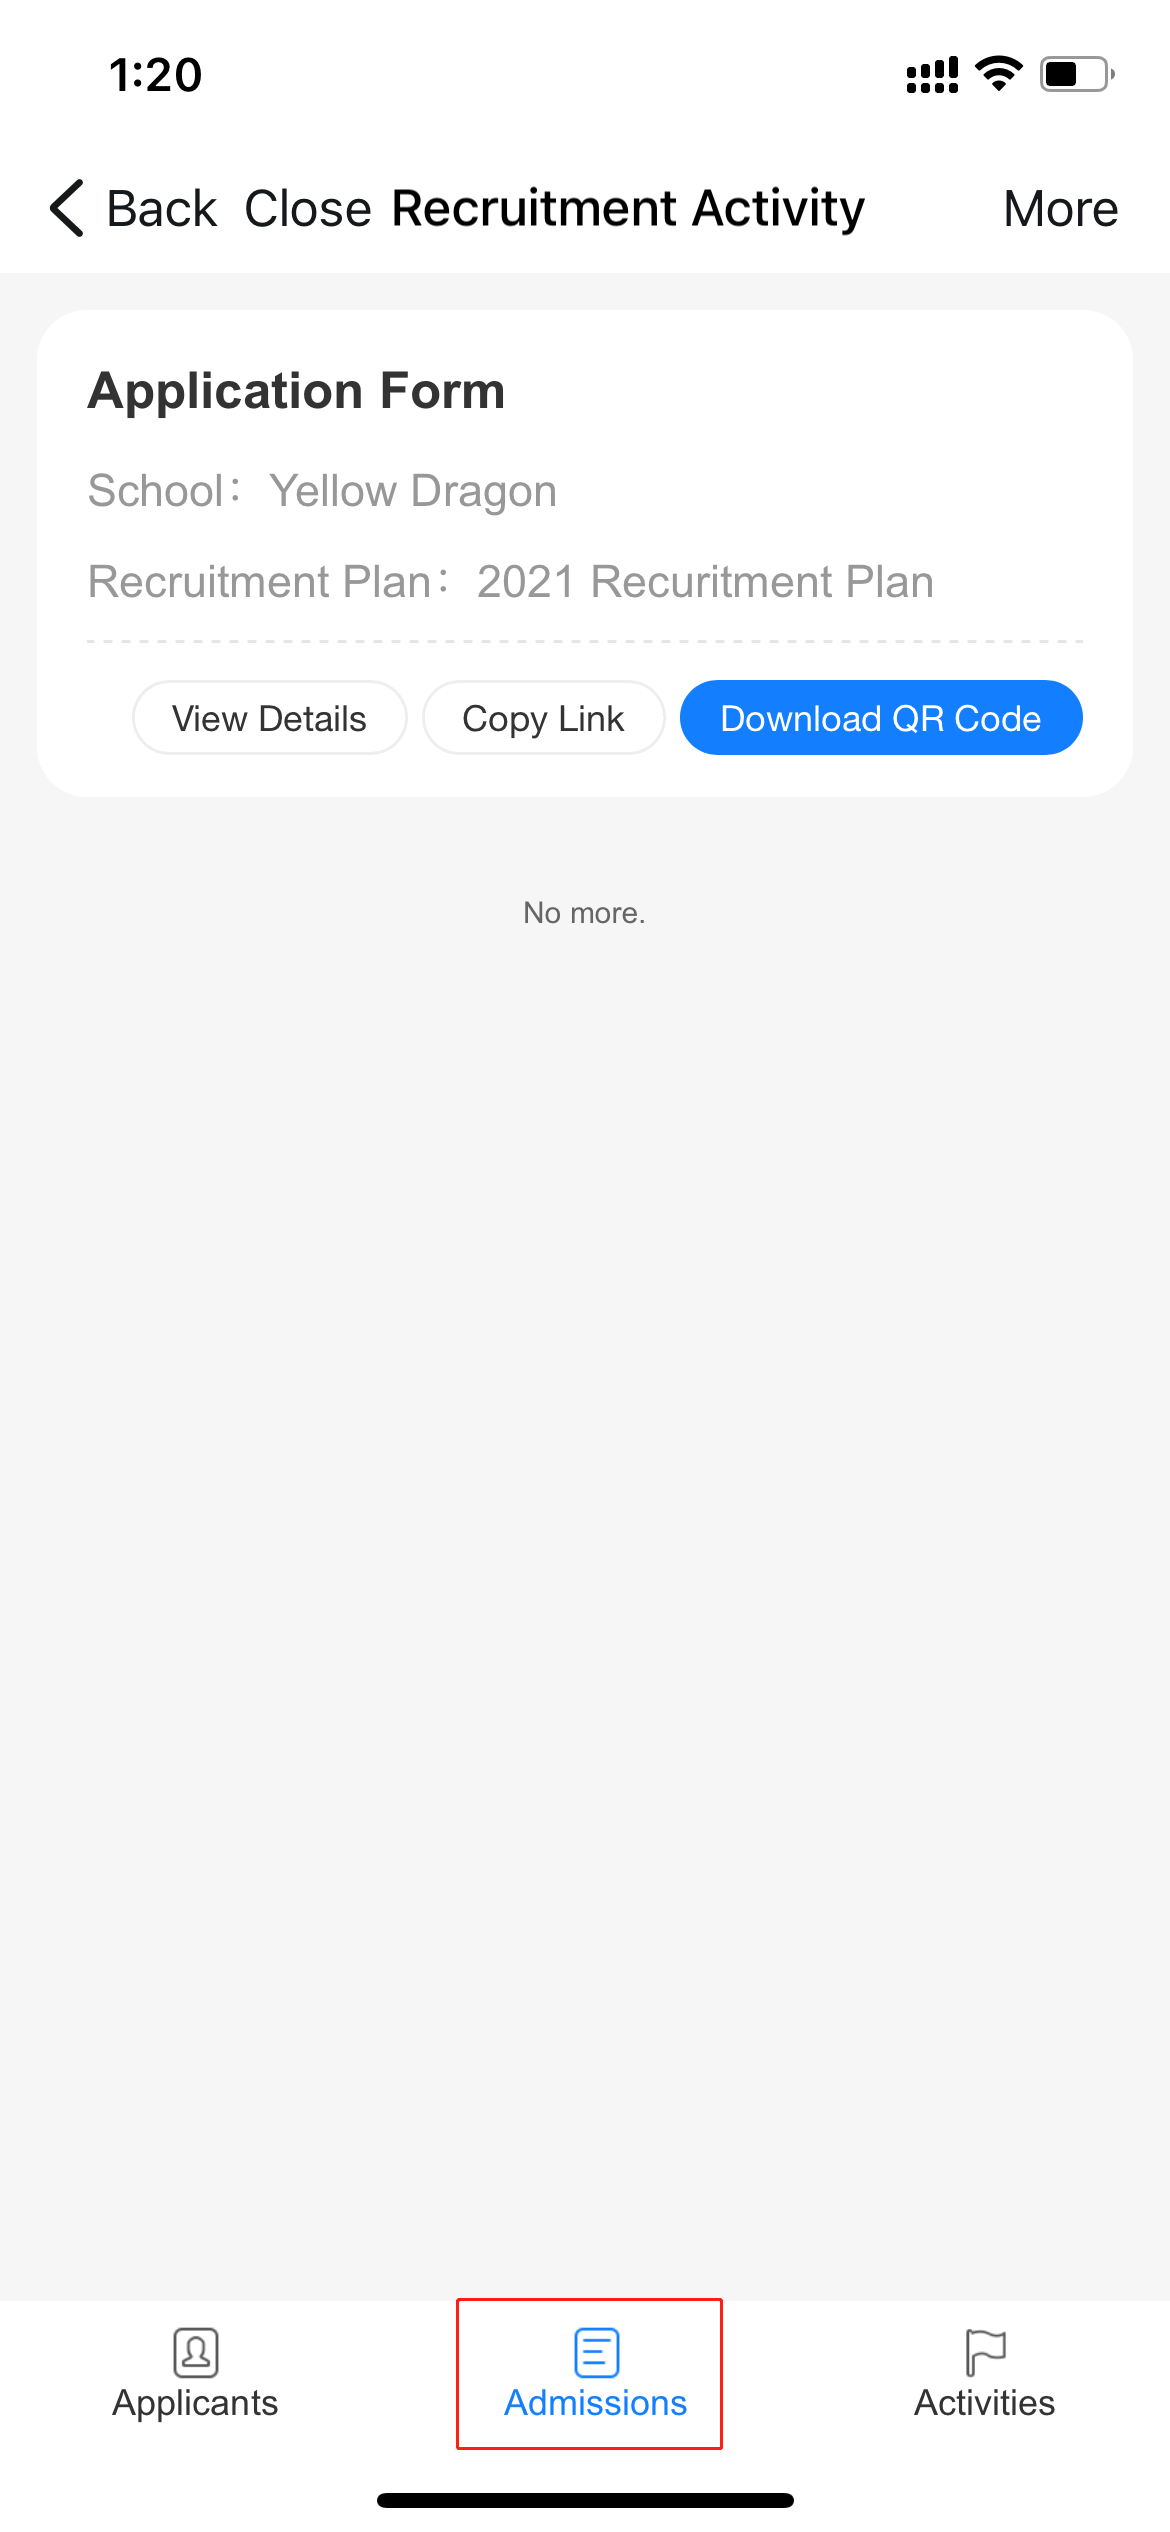

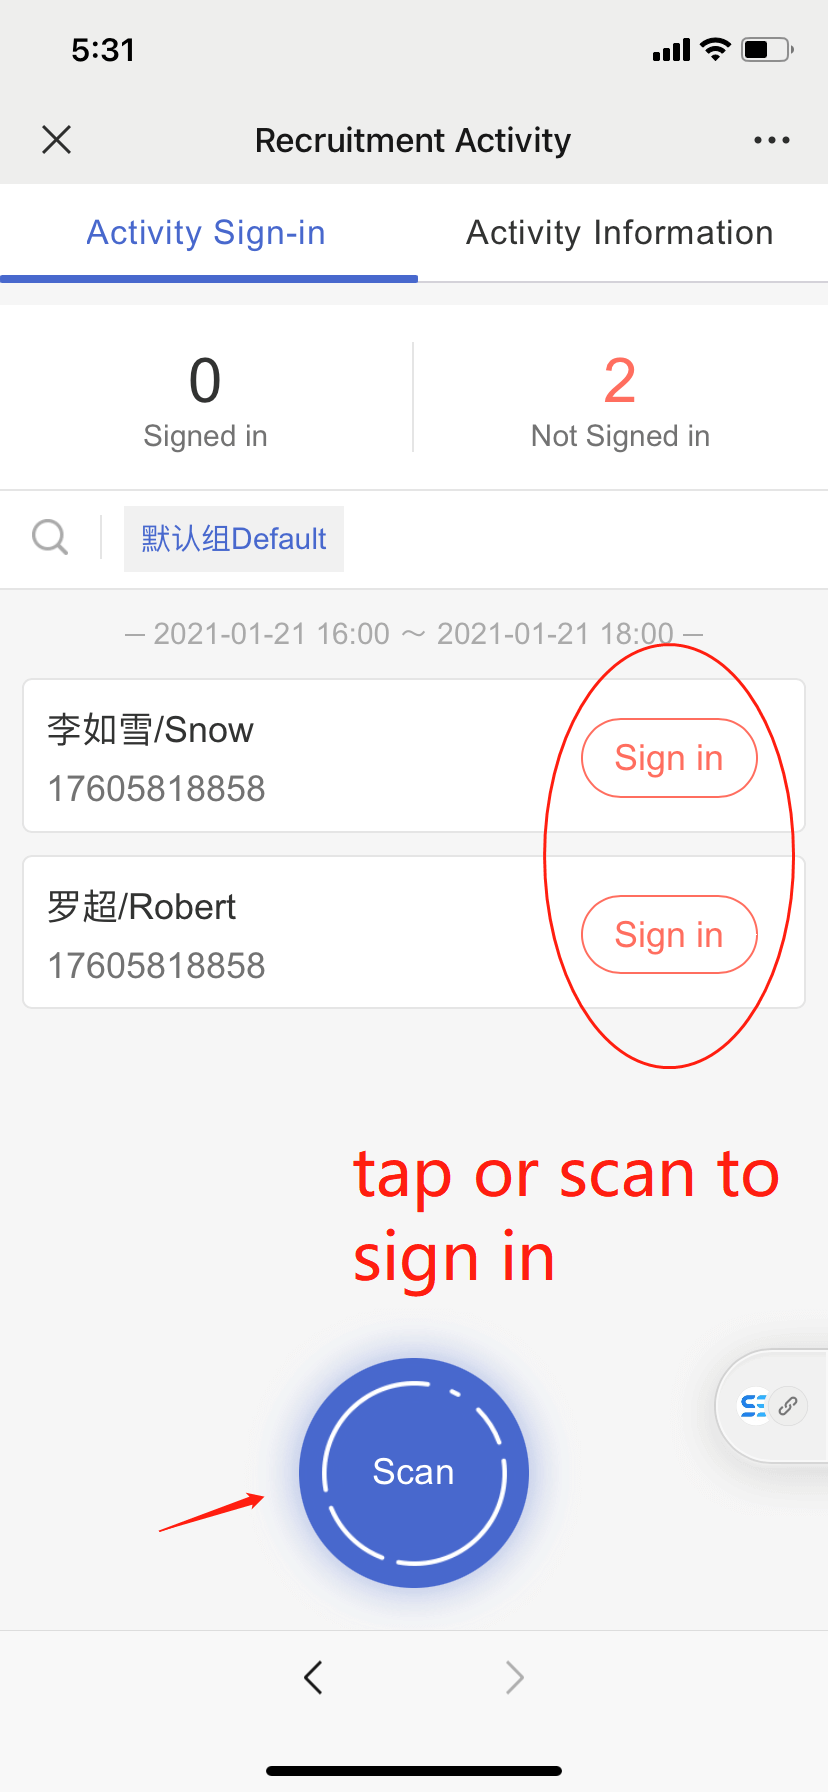
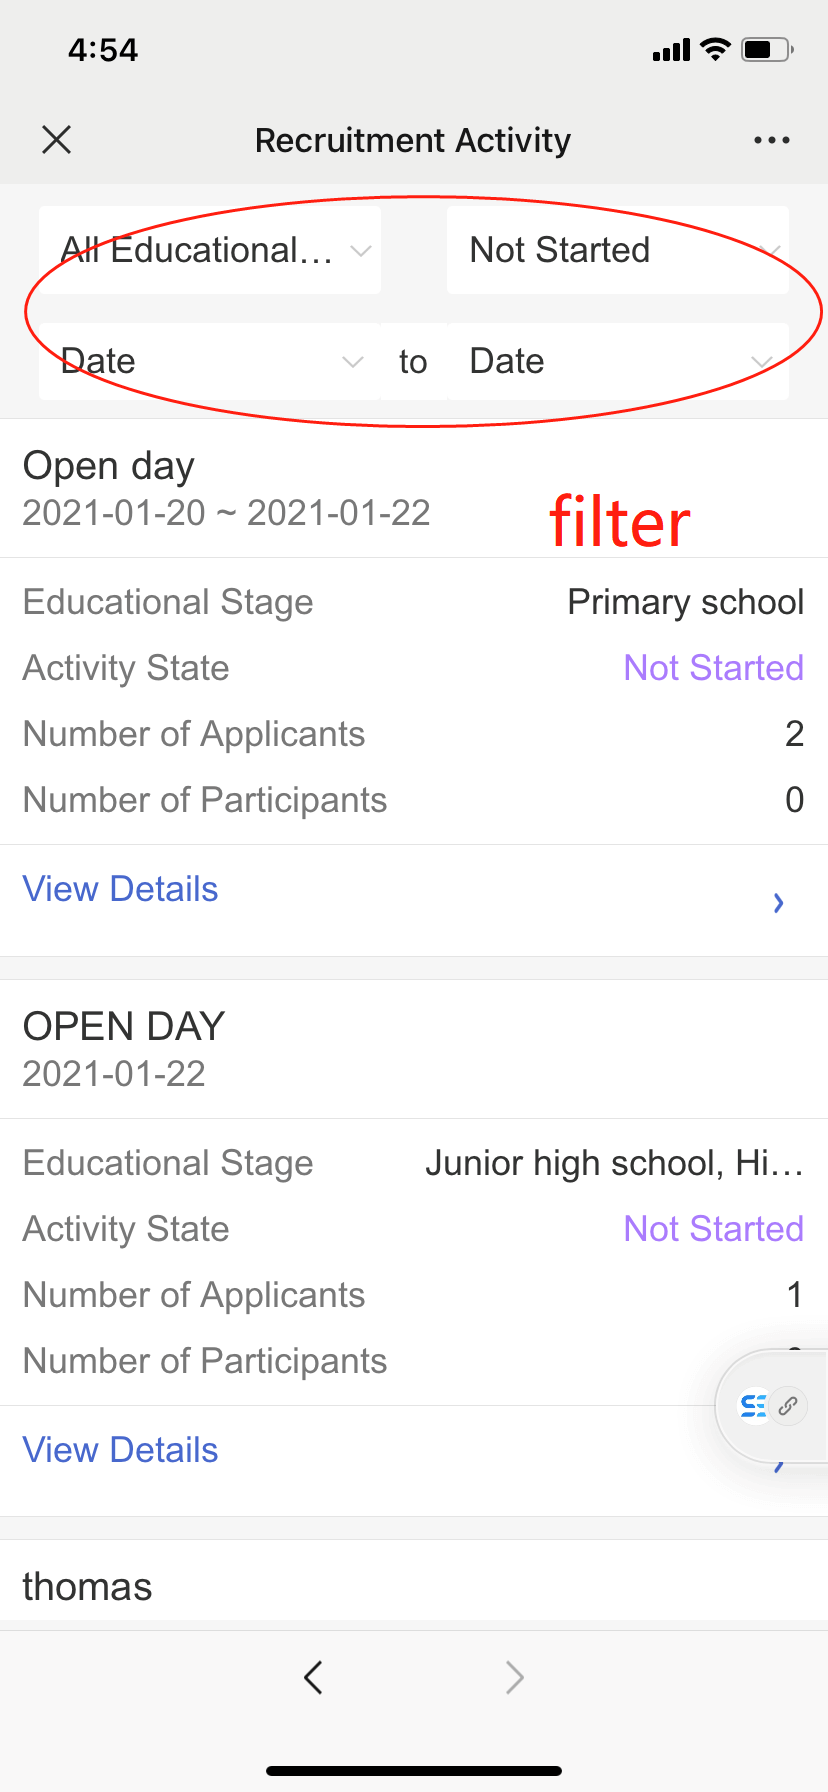
7.3 View Recruitment Activities
This module contains all the recruitment activities offline, which can be filtered by grade, status, and date in this section. Scanning QR codes to sign in is also supported.
8. Manage Payment
This module helps homeroom teachers to have an overview of tuition fee status from the perspective of classes. You can send a reminder to parents who haven’t completed the payment.
Step 1:Filter out the payment you want to check

Step 2: Tap the payment and head to the details with each student’s payment status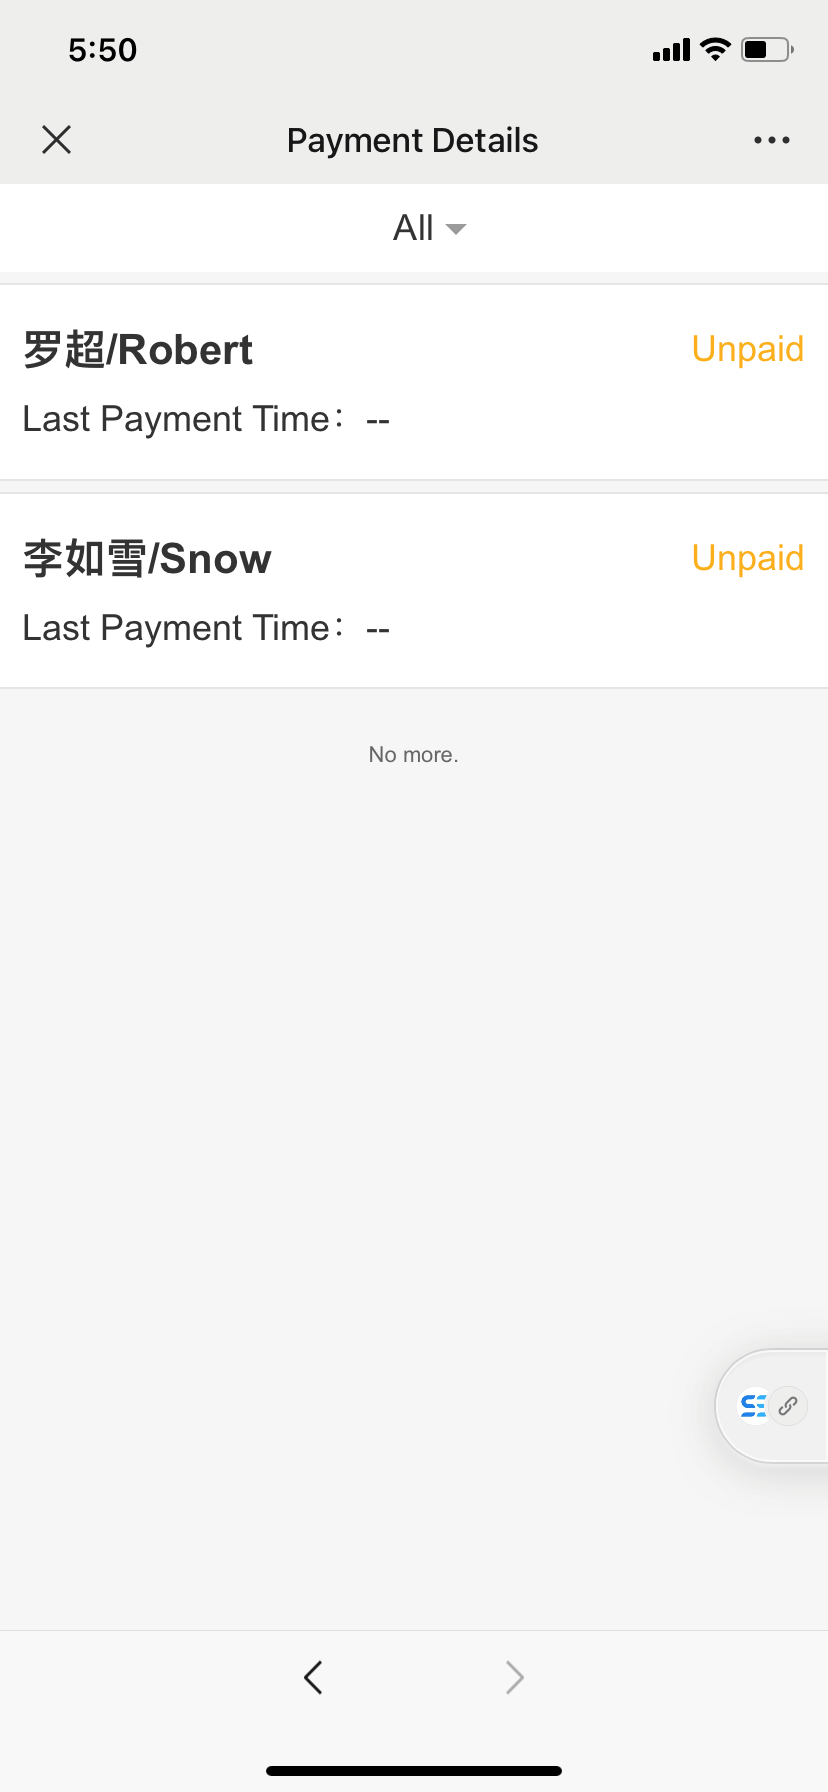
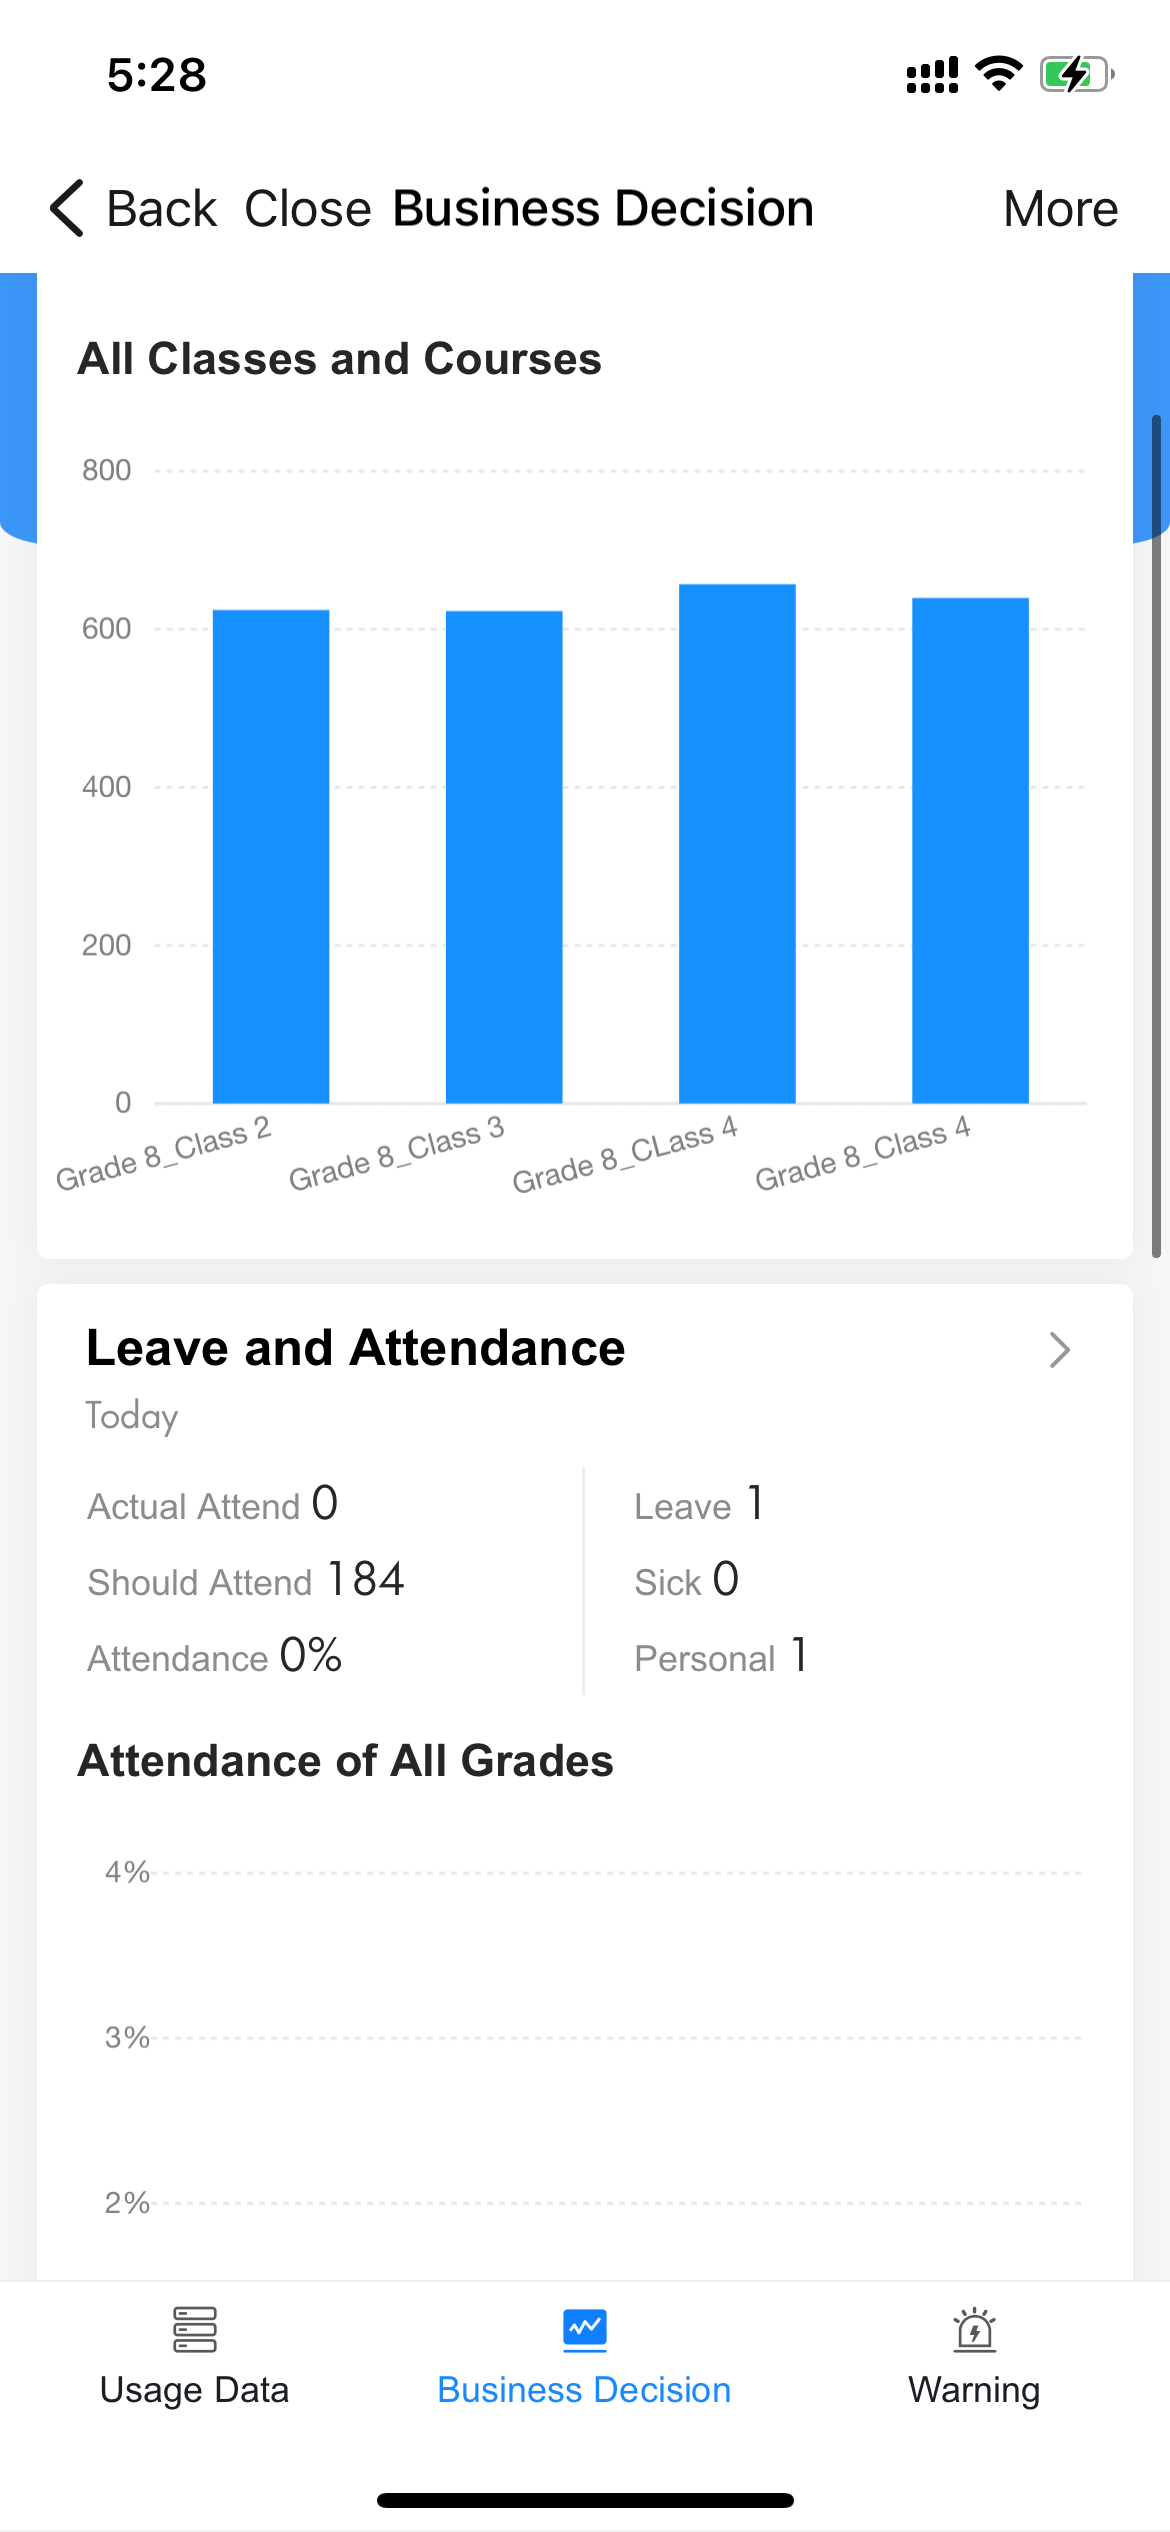
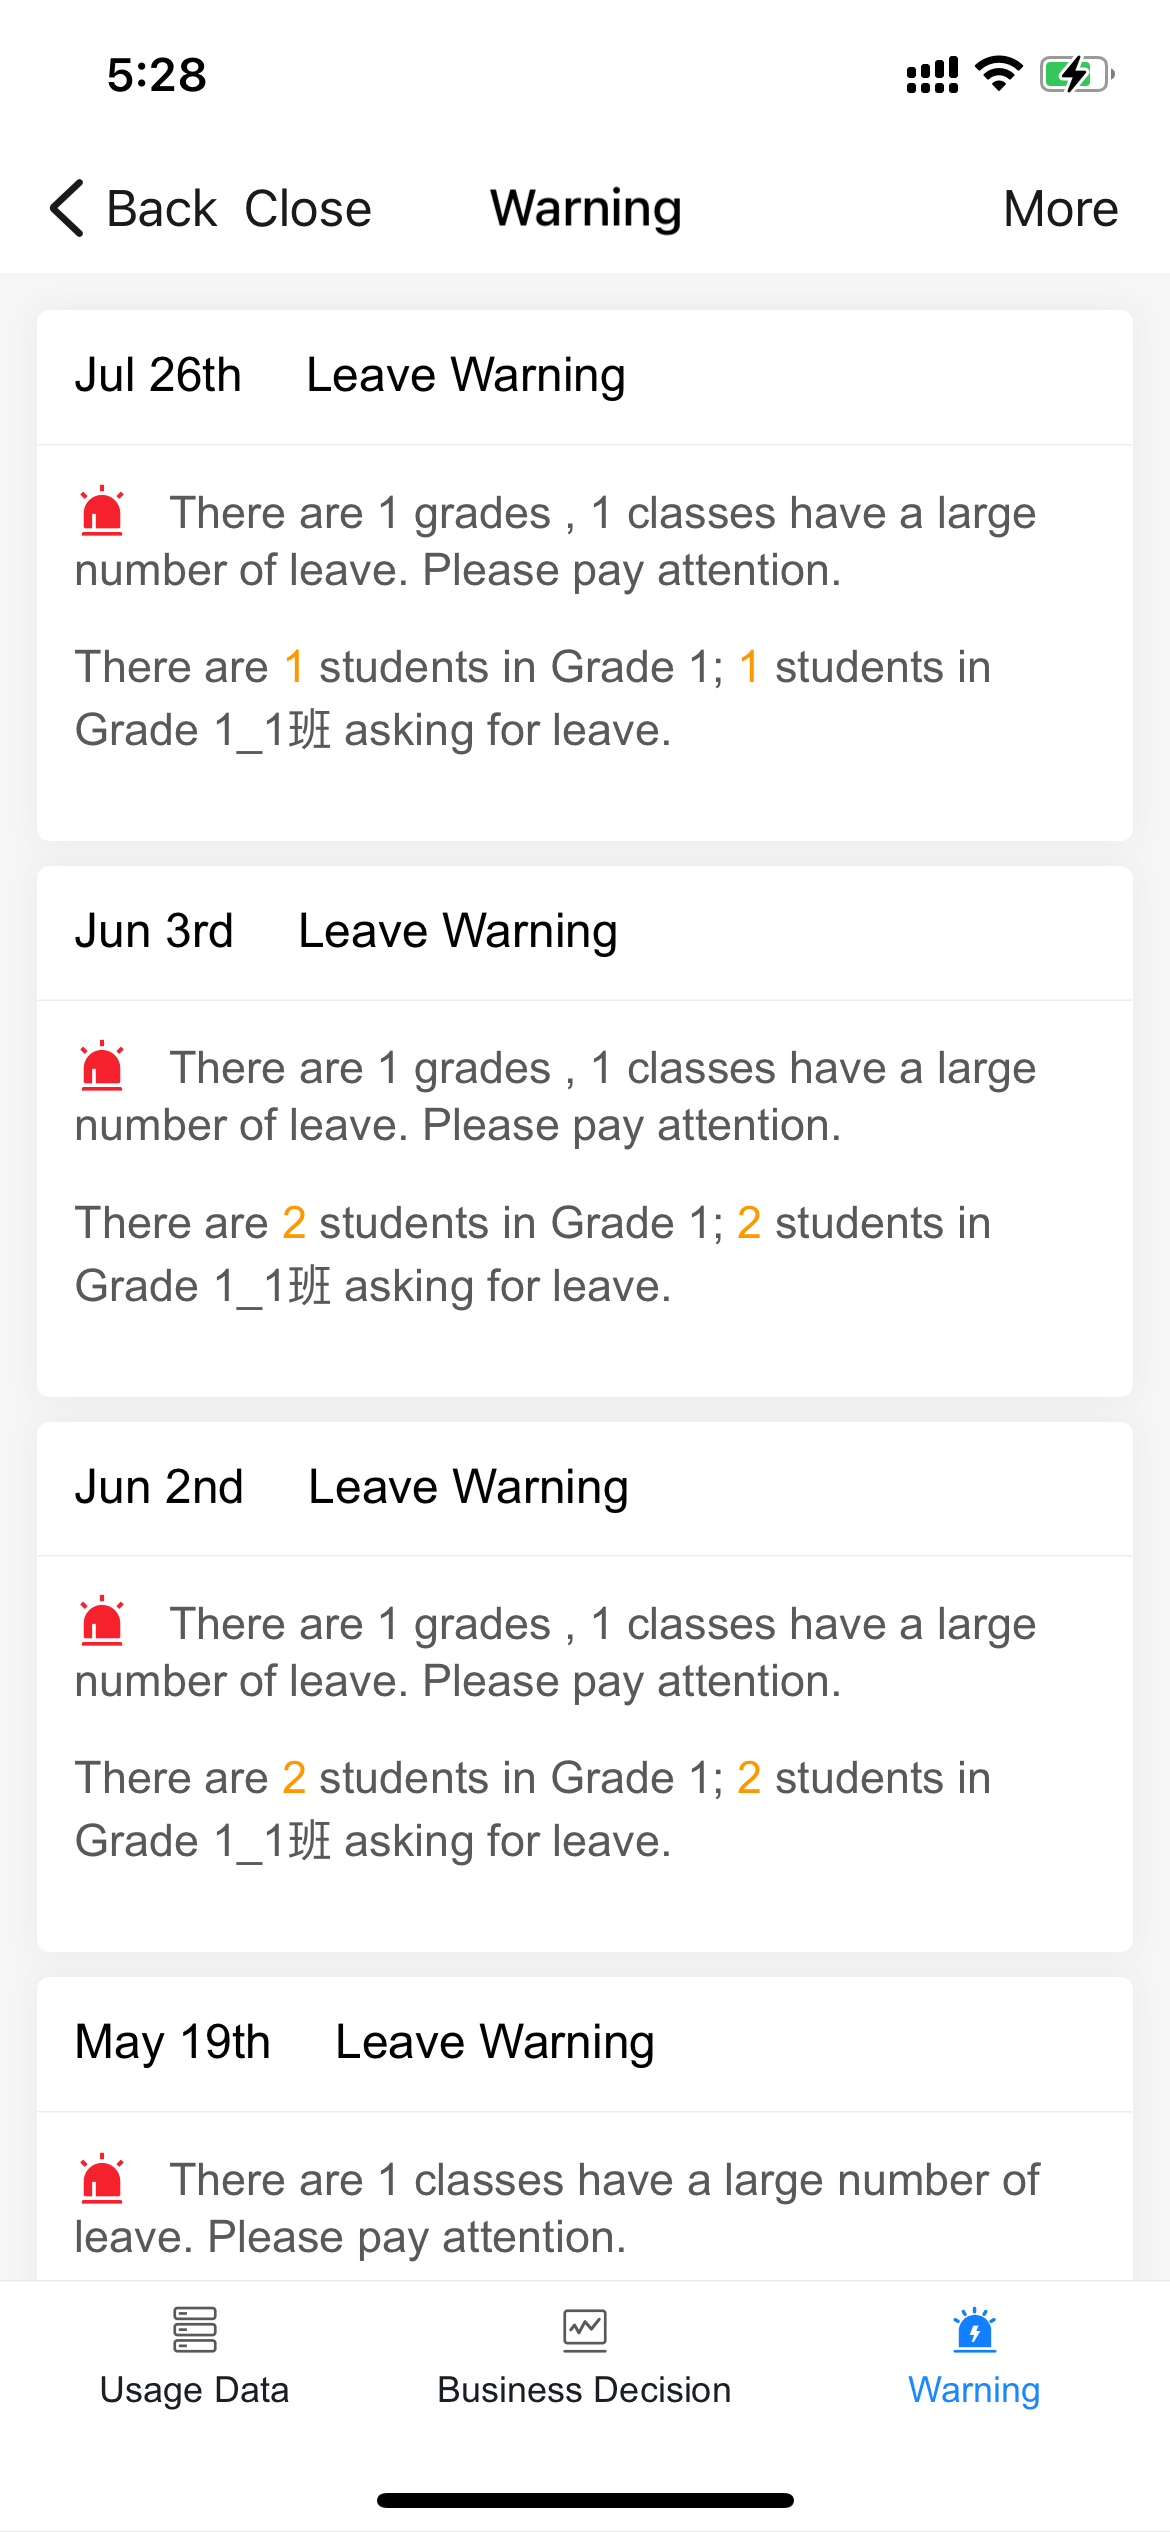
9. Decision Center
Decision Center contains 3 sections: usage data, business decision and warning. You can view the overall data of school operation, including the number of staff, students and courses, attendance summary and leave warning. 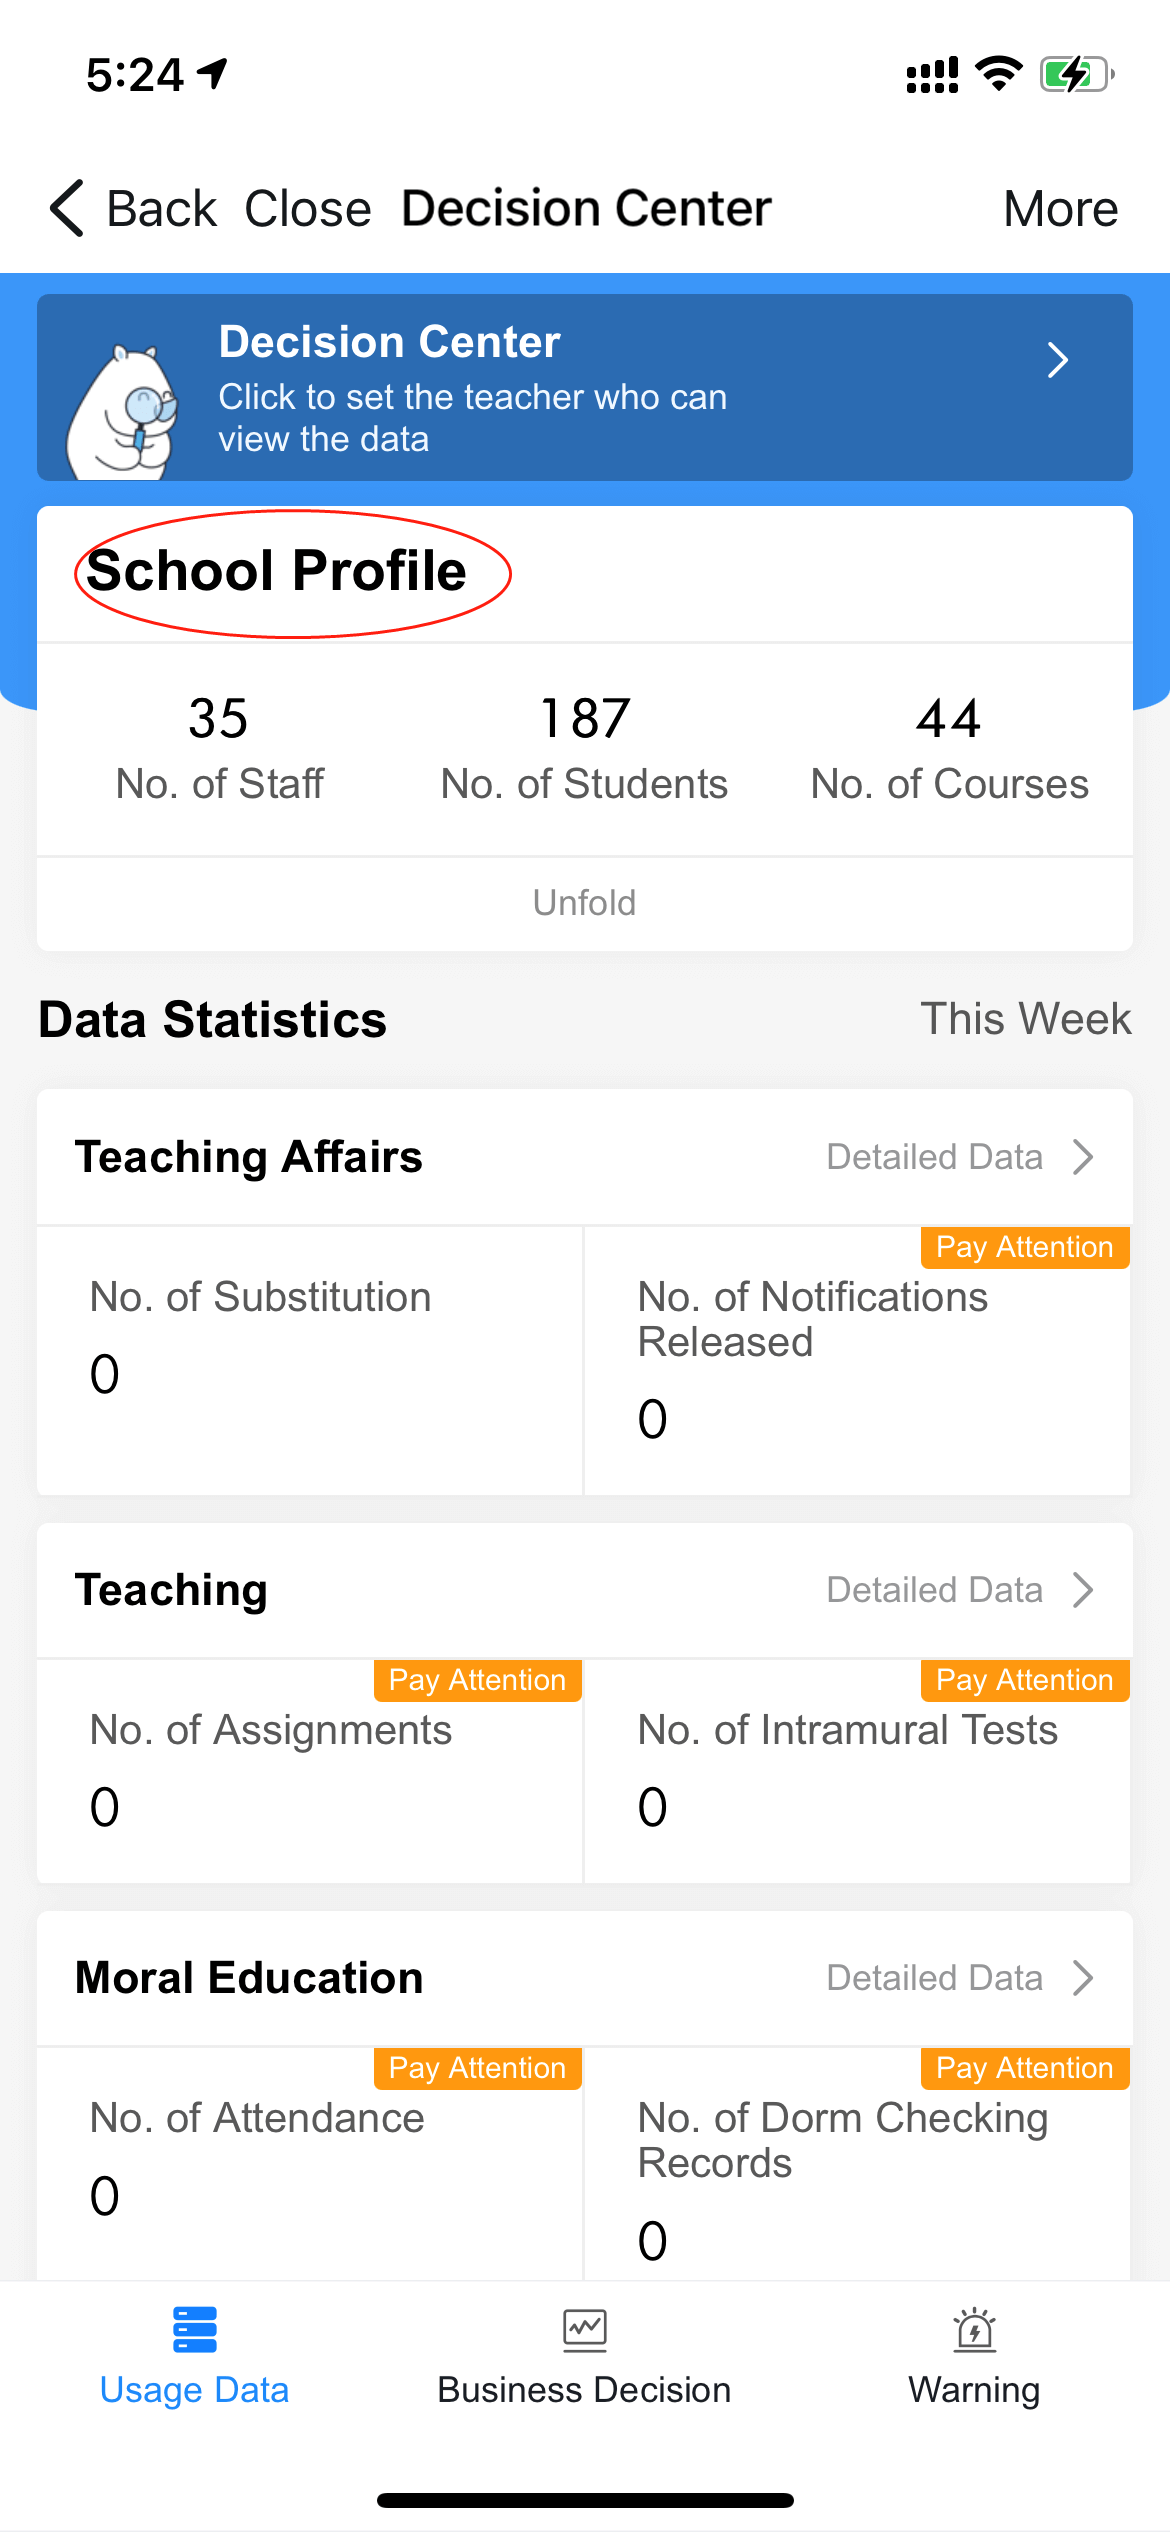
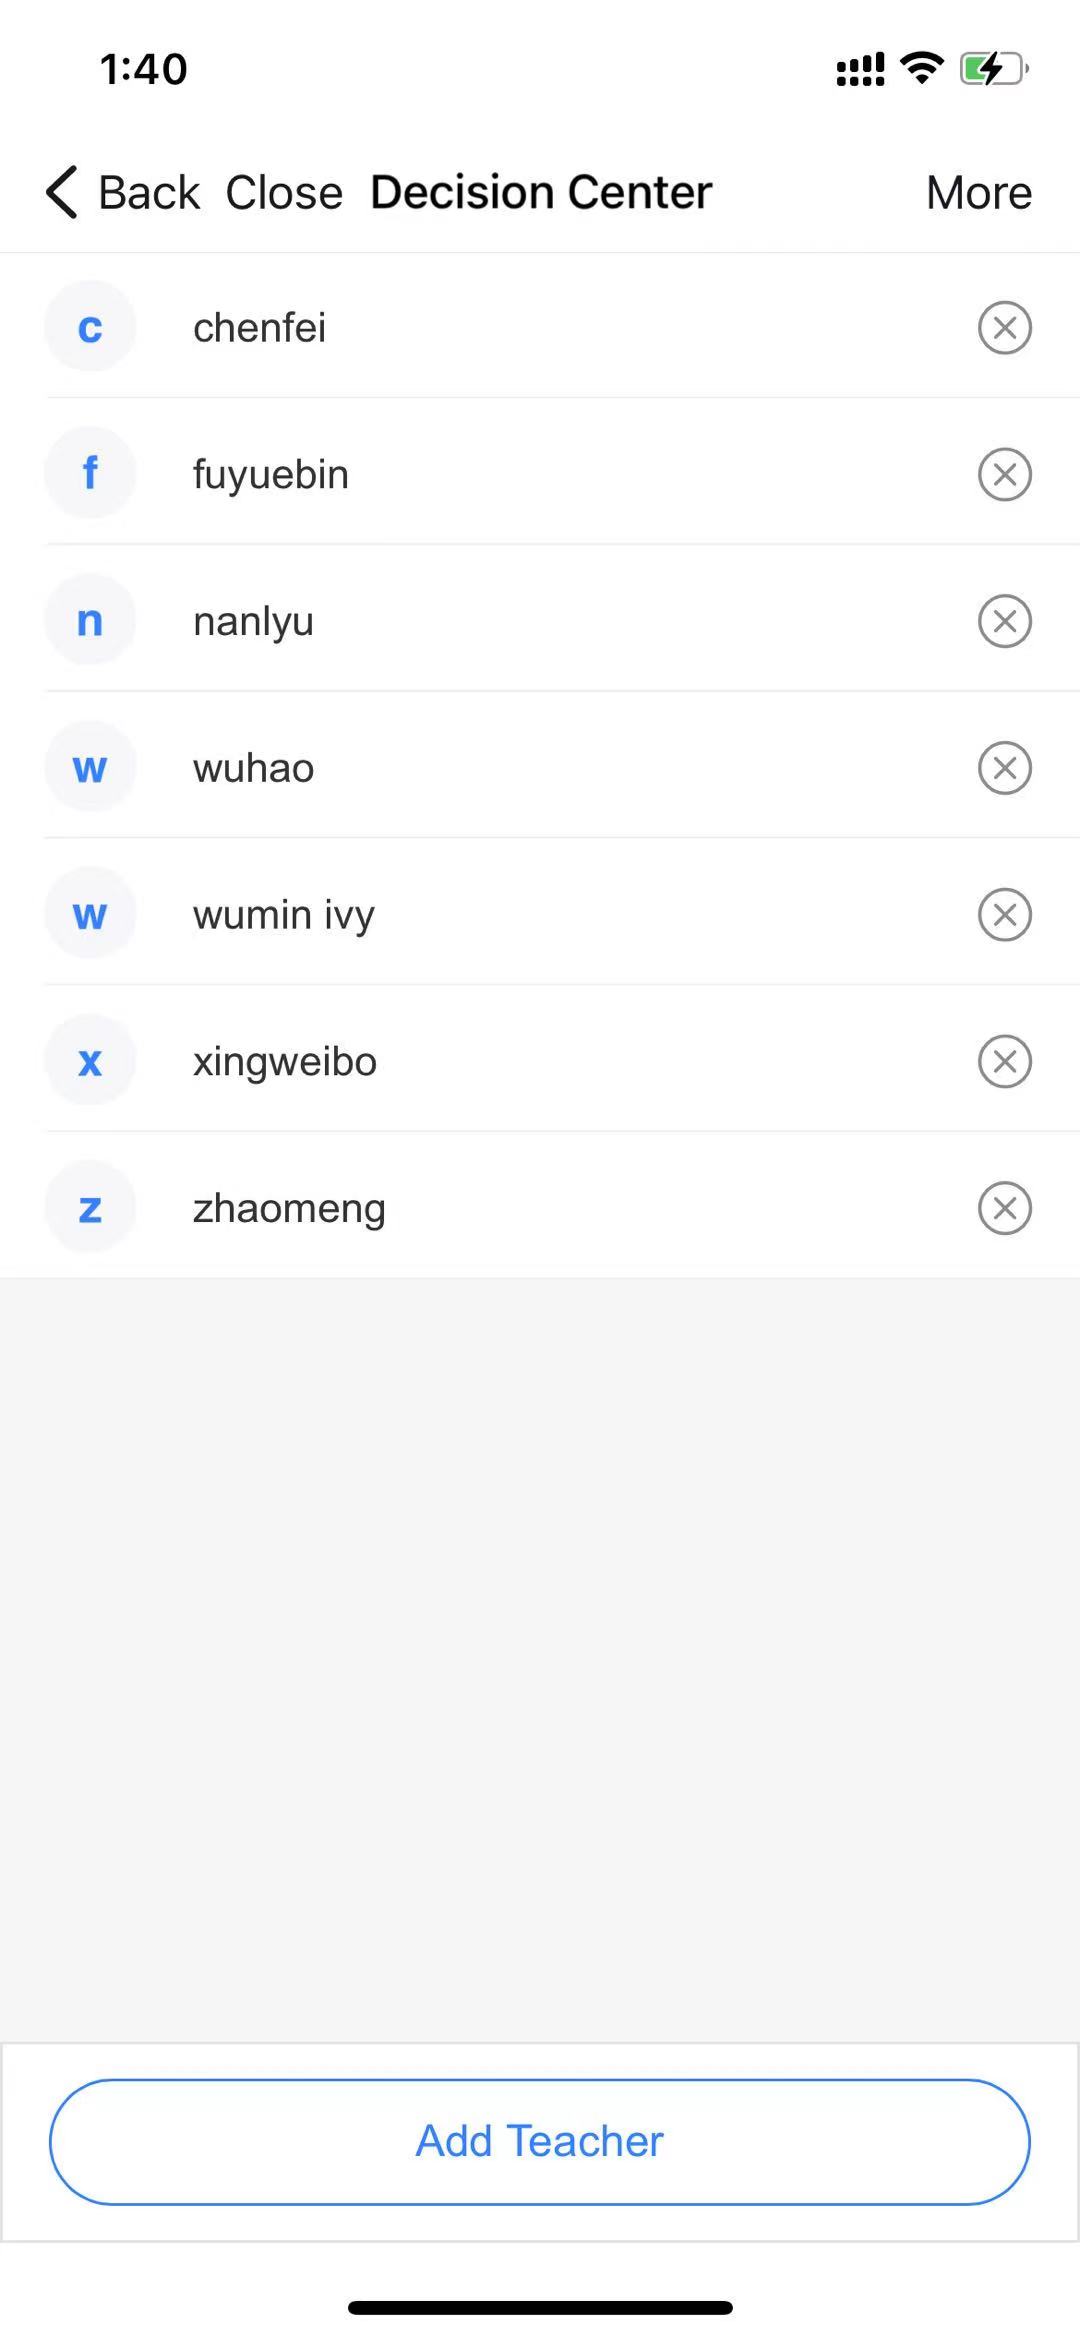
9.1 Access to Decision Center
If more staffs need access to Decision Center, Admin should follow the below steps:
Step 1: Tap Decision Center in the top
Step 2: Tap Add Teacher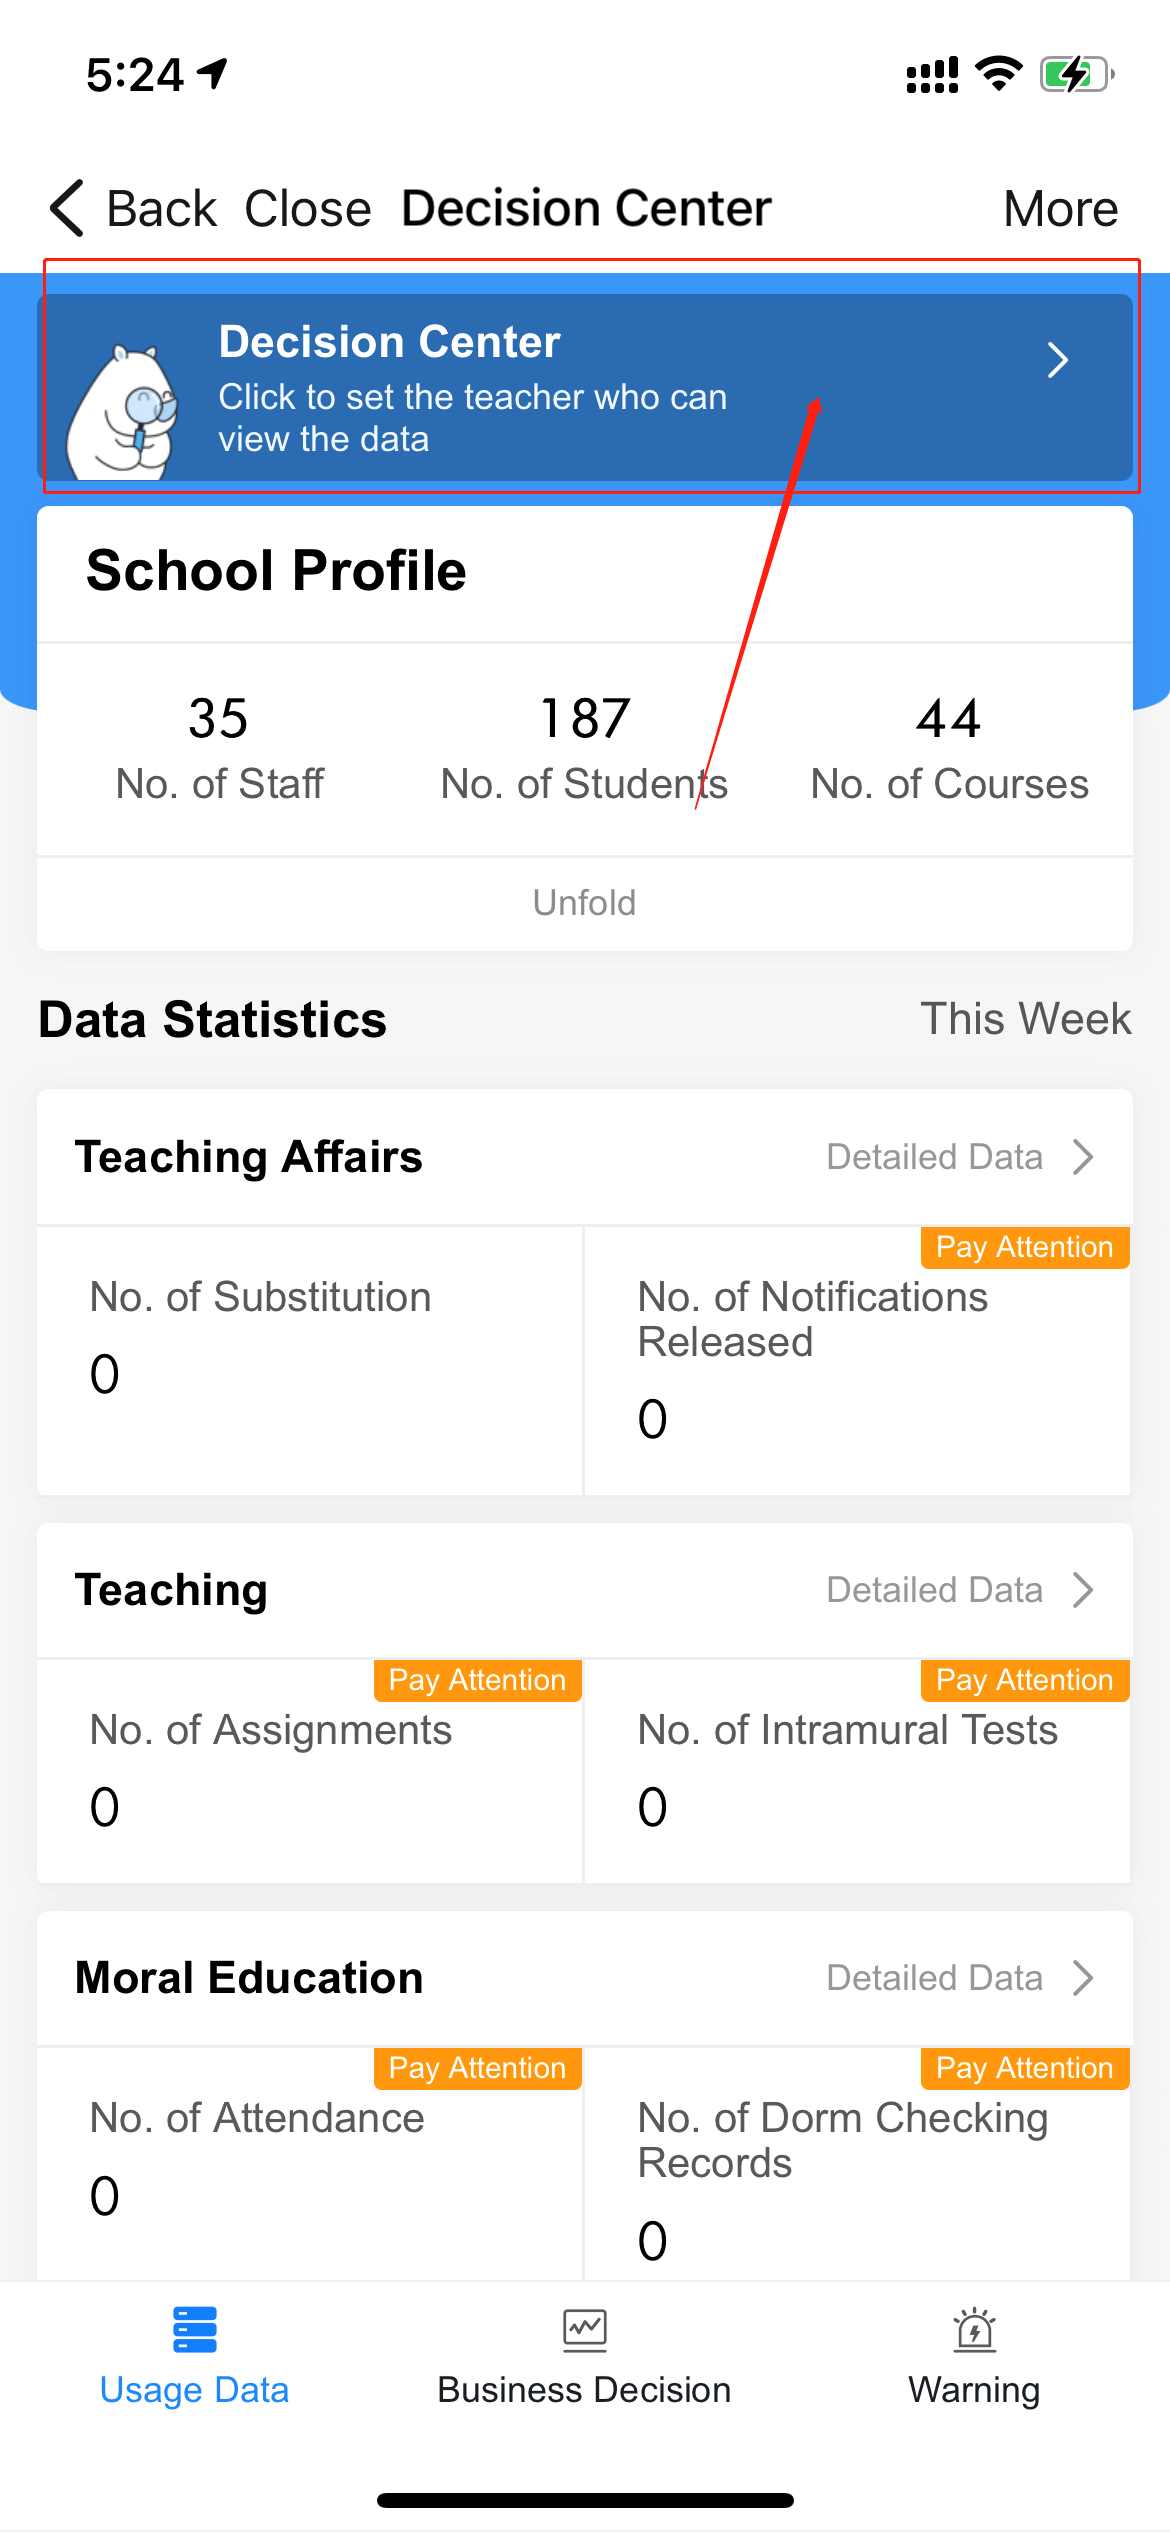

若有收获,就点个赞吧
0 人点赞
