IPSecVPN
项目说明
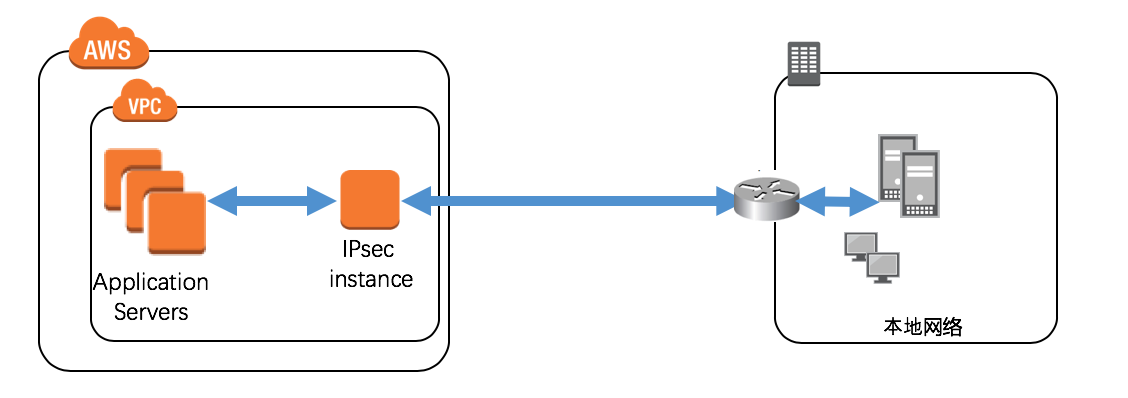
- 适用于AWS中国区域与您的本地私有网络通过IPSecVPN互通场景。此场景要求您的本地办公网络具有支持IPSecVPN功能的路由器或网关。
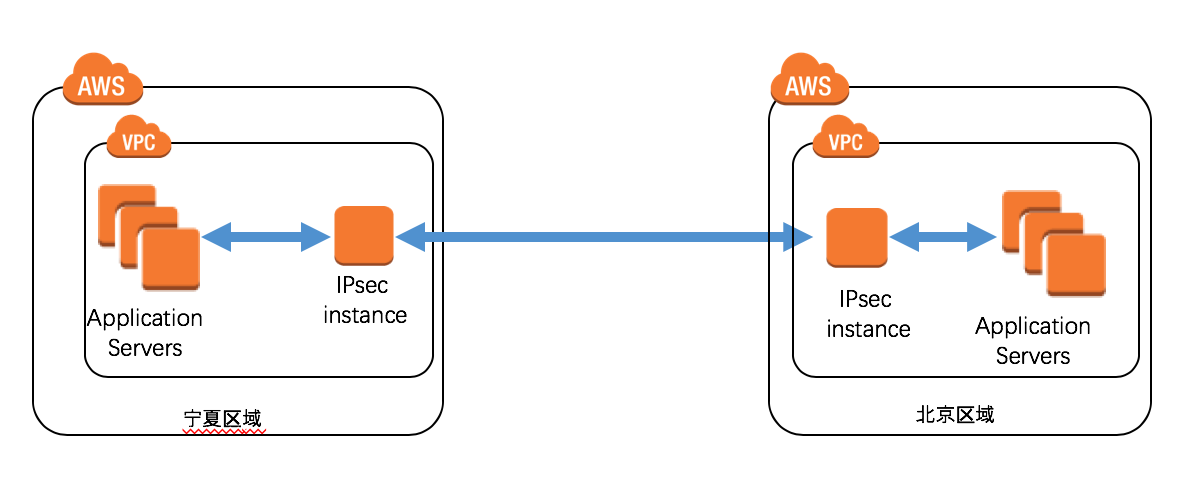
- 适用于您在AWS中国区域内有多个VPC,两个VPC之间需要互相访问的场景。
AWS端配置
1.创建弹性IP
2.在AWS CloudFormation控制台中启动模板,上传准备好的vpn.yaml模板文件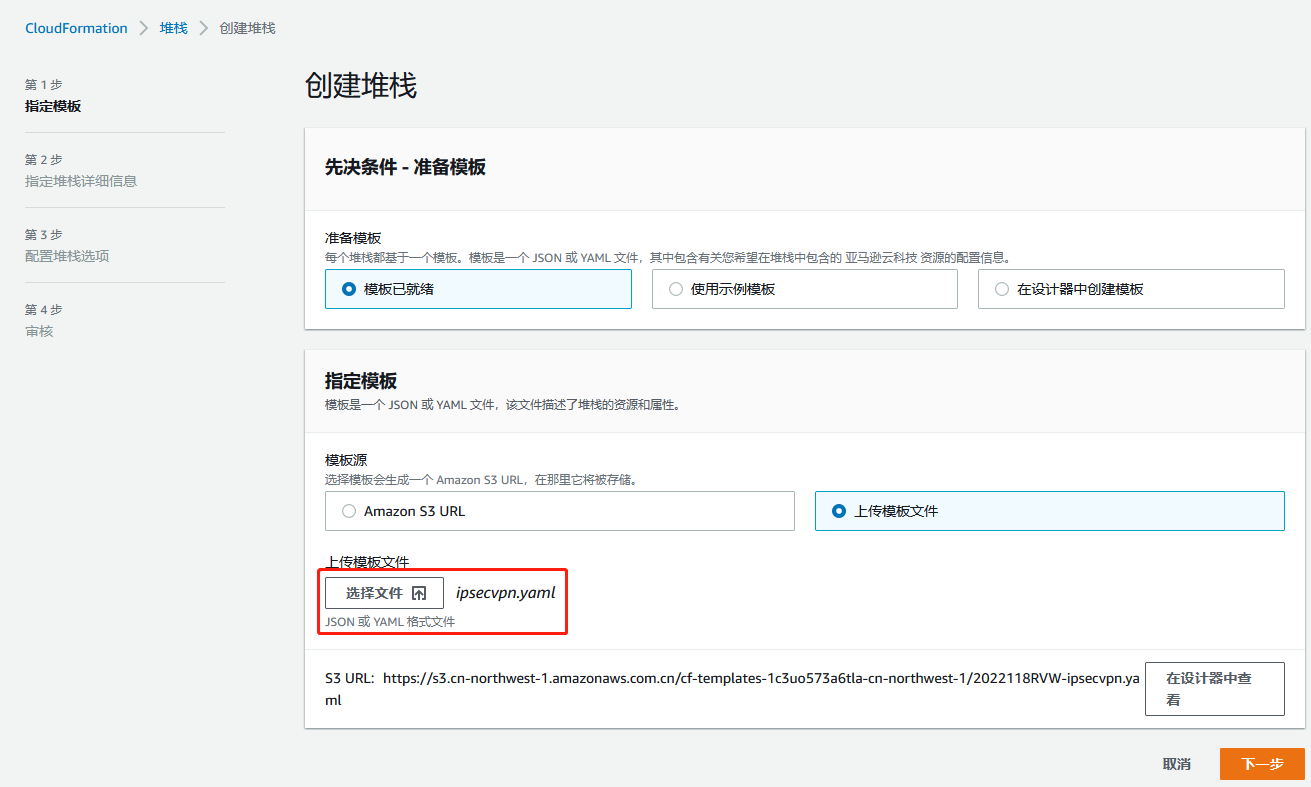
参数说明
| 参数名称 | 参数含义 | 取值 |
|---|---|---|
| InstanceType | 实例类型 | 下拉选择:t2.micro(测试使用),c5.large(正式使用) |
| KeyName | EC2登陆密钥对名称 | 下拉选择 |
| LeftIp | 本端IP | 文本框:本端公网地址 |
| LeftSubnet | 本端VPC网段地址 | 文本框: 地址网段 |
| PSK | PreSharedKey | 文本框:字符串 |
| RightIP | 对端IP | 文本框: 对端公网地址 |
| RightSubnet | 对端网段地址 | 文本框: 地址网段 |
| SubnetId | EC2所属子网 | 下拉选择 |
| VpcId | EC2所属VPC | 下拉选择 |
配置好之后就创建一台ec2,里面就按照yaml写的,安装并配置好了ipsec
ipsecvpn.yaml
AWSTemplateFormatVersion: 2010-09-09Parameters:KeyName:Description: Name of an existing EC2 KeyPair to enable SSH access to the instanceType: 'AWS::EC2::KeyPair::KeyName'ConstraintDescription: must be the name of an existing EC2 KeyPair.InstanceType:Description: IpsecVPN EC2 instance typeType: StringDefault: t2.microAllowedValues:- t2.micro- c4.large- c5.largeConstraintDescription: must be a valid EC2 instance type.VpcId:Type: 'AWS::EC2::VPC::Id'Description: VpcId of your existing Virtual Private Cloud (VPC)ConstraintDescription: must be the VPC Id of an existing Virtual Private Cloud.SubnetId:Type: 'AWS::EC2::Subnet::Id'Description: SubnetId of an existing public subnet in your Virtual Private Cloud (VPC)ConstraintDescription: must be an existing public subnet in the selected Virtual Private Cloud.PSK:Type: StringDescription: Pre Shared KeyLeftIp:Type: StringDescription: Left static public ip addressLeftSubnet:Type: StringDescription: Left EC2 Subnet used for IPSecVPNRightIp:Type: StringDescription: Peering public ip addressRightSubnet:Type: StringDescription: Peering Subnet used for IPSecVPNMappings:AWSInstanceType2Arch:t2.micro:Arch: HVM64c4.large:Arch: HVM64c5.large:Arch: HVM64AWSRegionMap:cn-north-1: # Beijing (China)HVM64: ami-071e0769a839a3f0d # latest amzn2 ami# HVM64: ami-03ae67ee227d997beAWSARN: aws-cncn-northwest-1: # Ningxia (China)HVM64: ami-0934e7d625575bb7c # latest amzn2 ami# HVM64: ami-00d2f9d34d345da04AWSARN: aws-cnResources:SecurityGroup:Type: 'AWS::EC2::SecurityGroup'Properties:VpcId: !Ref VpcIdGroupDescription: Enable tcp udp accessSecurityGroupIngress:- IpProtocol: '-1'FromPort: '-1'ToPort: '-1'CidrIp: !Ref RightSubnet- IpProtocol: '50'FromPort: '-1'ToPort: '-1'CidrIp: 0.0.0.0/0- IpProtocol: udpFromPort: '4500'ToPort: '4500'CidrIp: 0.0.0.0/0- IpProtocol: icmpFromPort: '-1'ToPort: '-1'CidrIp: 0.0.0.0/0- IpProtocol: udpFromPort: '500'ToPort: '500'CidrIp: 0.0.0.0/0- IpProtocol: tcpFromPort: '22'ToPort: '22'CidrIp: 0.0.0.0/0EC2Instance:Type: 'AWS::EC2::Instance'Properties:ImageId: !FindInMap- AWSRegionMap- !Ref 'AWS::Region'- !FindInMap- AWSInstanceType2Arch- !Ref InstanceType- ArchInstanceType: !Ref InstanceTypeKeyName: !Ref KeyNameSourceDestCheck: 'false'Tags:- Key: NameValue: IpsecInstanceNetworkInterfaces:- AssociatePublicIpAddress: "true"DeviceIndex: "0"GroupSet:- Ref: "SecurityGroup"SubnetId:Ref: "SubnetId"UserData:Fn::Base64: !Sub- |#!/bin/bash -xeyum -y install openswanecho "${LeftIp} ${RightIp} : PSK \"${PSK}\"" > /etc/ipsec.secretsecho "config setupplutostderrlog=/tmp/pluto.logconn lan-to-lanauto=start #automatically start if detectedtype=tunnel #tunnel mode/not transport###THIS SIDE###left=%defaultrouteleftid=${LeftIp}leftsubnet=${LeftSubnet}leftnexthop=%defaultroute###PEER SIDE###right=${RightIp}rightsubnet=${RightSubnet}#phase 1 encryption-integrity-DiffieHellmankeyexchange=ikeikev2=yesike=aes128-sha1;modp1024ikelifetime=86400sauthby=secret #use presharedkeyrekey=yes #should we rekey when key lifetime is about to expire#phase 2 encryption-pfsgroupphase2=esp #esp for encryption | ah for authentication only#phase2alg=aes192-sha1;modp1024phase2alg=aes256-sha1#phase2alg=aes128-sha1;modp1024pfs=no#forceencaps=yesdpddelay=10dpdtimeout=60dpdaction=restart_by_peersalifetime=86400s" > /etc/ipsec.confcat > /etc/sysctl.conf <<EOFnet.ipv4.ip_forward = 1net.ipv4.conf.all.accept_redirects = 0net.ipv4.conf.all.send_redirects = 0net.ipv4.conf.default.send_redirects = 0net.ipv4.conf.eth0.send_redirects = 0net.ipv4.conf.default.accept_redirects = 0net.ipv4.conf.eth0.accept_redirects = 0EOFsystemctl enable ipsecsystemctl start ipseciptables -t mangle -A FORWARD -o eth0 -p tcp --tcp-flags SYN,RST SYN -j TCPMSS --set-mss 1387-PSK: !Ref PSKLeftIp: !Ref LeftIpRightIp: !Ref RightIpLeftSubnet: !Ref LeftSubnetRightSubnet: !Ref RightSubnet
将刚准备好的弹性IP绑定到新创建的ipsecvpn服务器,注意这个ip是刚配置的本端公网ip,不是就要改回来,ec2中ipsec.conf的本端公网ip也是这个
修改VPN服务器所在的路由表,添加到对端的路由
腾讯云端配置
1.创建对端网关 (对端公网ip就是aws vpn服务器的公网ip)
2.创建VPN网关 (选择Ipsec 和 对应vpc或云企业网)
3.创建VPN通道 (I选择刚创建的对端网关和VPN网关,IKE配置、Ipsec配置、密钥等都要跟 aws vpn配置的对应上)
VPN服务器
配置文件和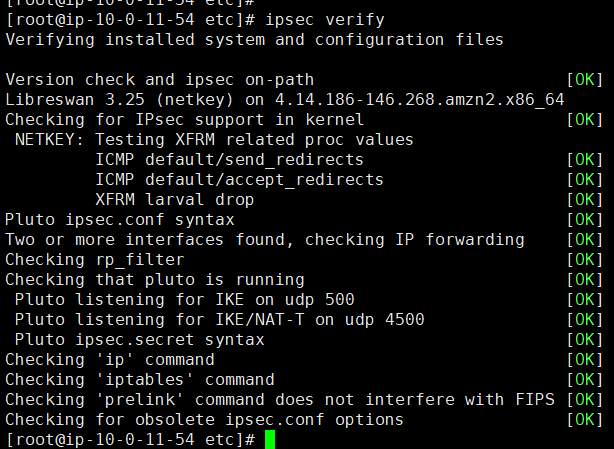

若有收获,就点个赞吧
0 人点赞
