背景
vscode是我们前端最常用的编辑器,它的功能很强大,比如说我们可以用vscode生成代码片段,让我们高度复用的代码通过输入匹配来自动插入,就像输入某一个标签一样简单
效果

发布
准备工作
环境:
- node
- npm
- yeoman sudo npm i yo -g
- gernerator-code sudo npm i generator-code -g
- 安装 sudo npm install -g vsce
账号:
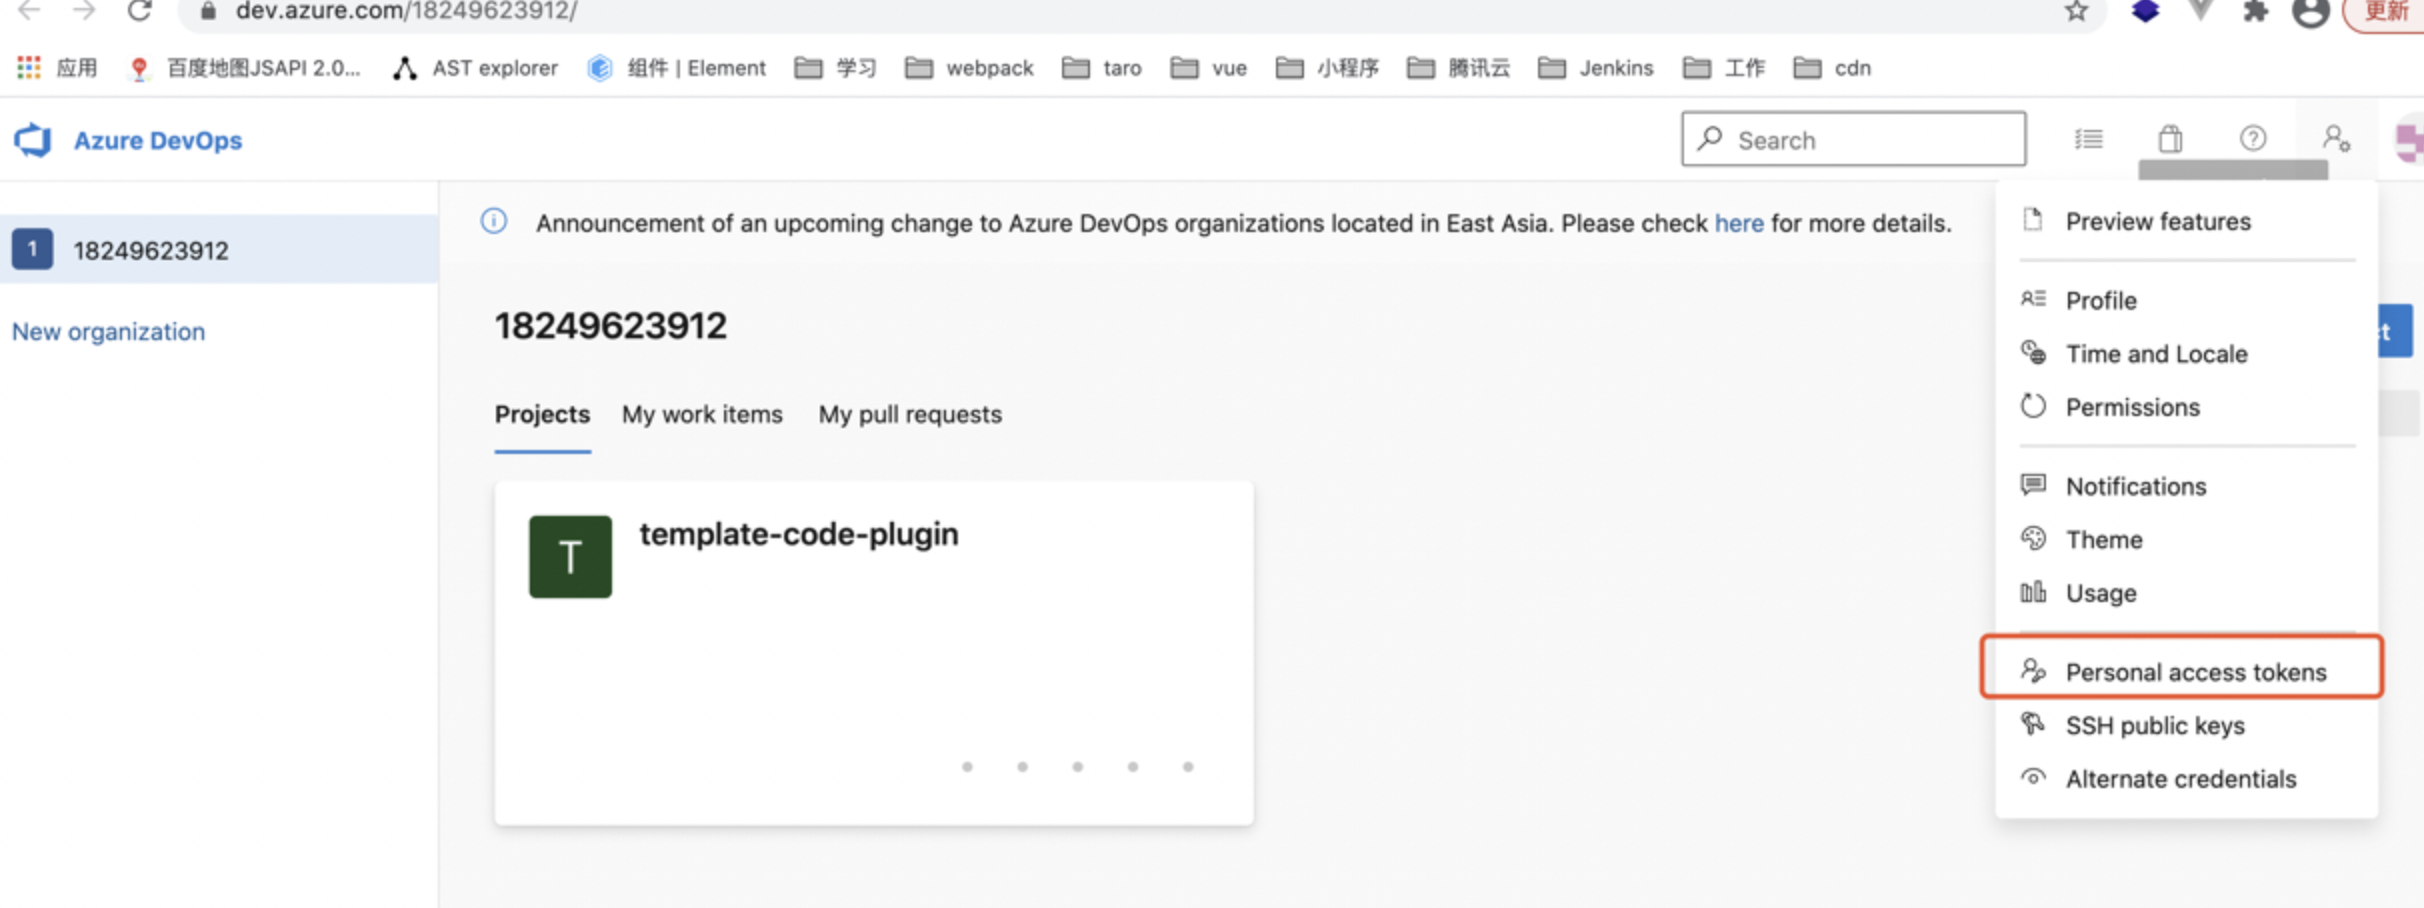
第一步:开发者账号:Visual Studio Team Services,可以使用github账号:https://docs.microsoft.com/zh-cn/azure/devops/organizations/accounts/create-organization?view=azure-devops#create-an-organization
- 选择或者创建一个组织(new organization)。
- 在该组织下创建一个项目(new project)。
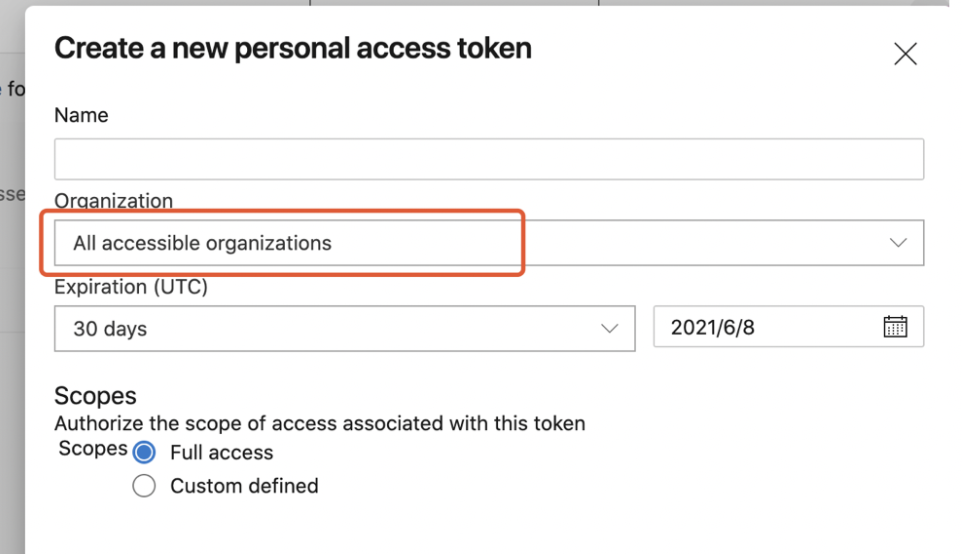
- 创建tokens
第二步:注册vscode开发者账号,注册保证name和id一致,并且只需要填写这两个就可以了。https://aka.ms/vscode-create-publisher
开发
搭建项目
第一步:终端输入 yo code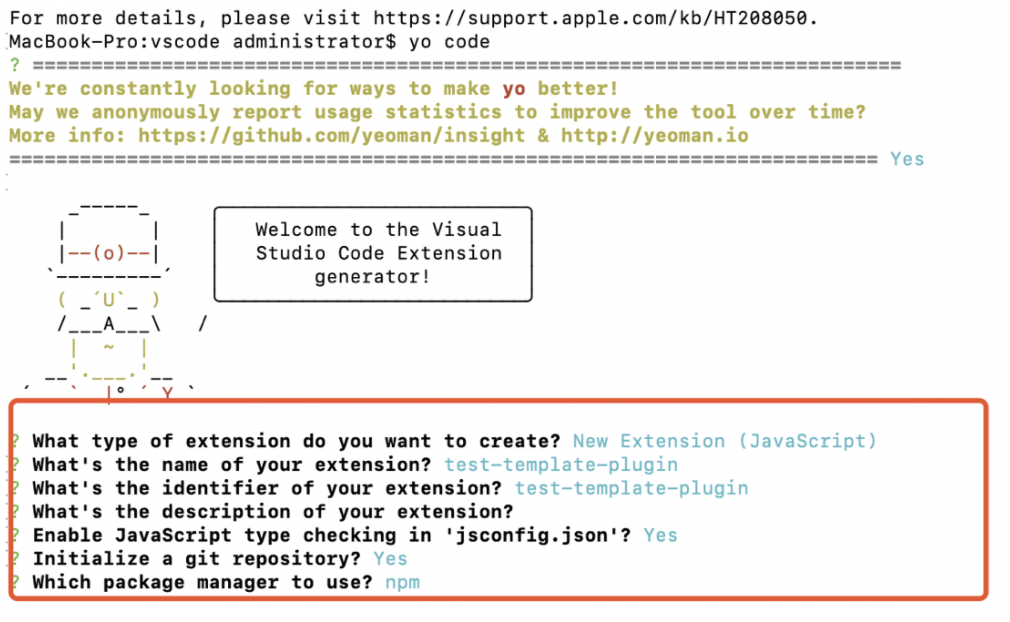
第二步:改造项目,打开package.json文件
{"name": "test-template-plugin","displayName": "test-template-plugin","description": "","version": "0.0.1",// 新添加,vscode开发者账号"publisher": "xiejiaxin007","engines": {// !!! 这个版本号很重要,必须和当前你vscode编辑器的版本一致,否则无法生效"vscode": "^1.56.0"},"categories": [// 新添加,代码片段"Snippets","Other"],"activationEvents": ["onCommand:test-template-plugin.helloWorld"],"main": "./extension.js","contributes": {"commands": [{"command": "test-template-plugin.helloWorld","title": "Hello World"}],// 新添加,代码片段自动补全功能"snippets": [{// 文件类型,如果是js,则会有自动补全功能"language": "javascript",// 新增的code.json文件,里面有补全功能描述,具体看下面"path": "./snippets/code.json"},{"language": "typescript","path": "./snippets/code.json"}]},// 建议填写,打包插件的时候也会提示你是否需要填写repository"repository": {"type": "git","url": "https://github.com/xxxx.git"},// 建议填写,打包插件的时候也会提示你是否需要填写repository"homepage": "https://github.com/xxx/README.md"// ...}
第三步:开发自动补全功能
- 新增snippets文件,新建一个code.json文件,路径和上面配置一致!!
json文件写法
{"hahahahahTest": {// 输入xxxjx会有自动补全,匹配"prefix": "xxxjx",// 回车后补全的代码"body": ["setTimeout(function() {","\t${0:// body}","}, ${1:1000});"],"description": "i am xjx"}}
第四步:调试
command+shift+D开启调试
会新开一个vscode界面,保存为一个js文件(跟进你配置的补全功能来定,具体应该是什么后缀的文件),输入x,正常就会有提示了,如图:
回车后即出现我们设置的补全代码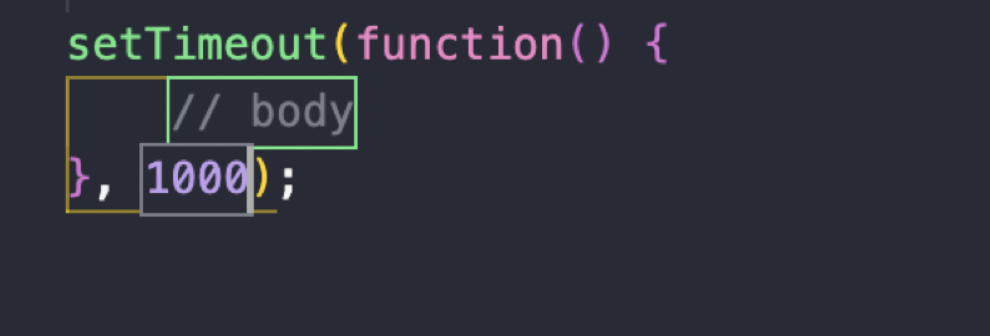
第五步:发布登录:vsce login (publisher name)
- 打包:vsce package
- 发布:vsce publish
等几分钟后,就可以了
发布后展示:


若有收获,就点个赞吧
0 人点赞
