编写代码
新建Maven项目
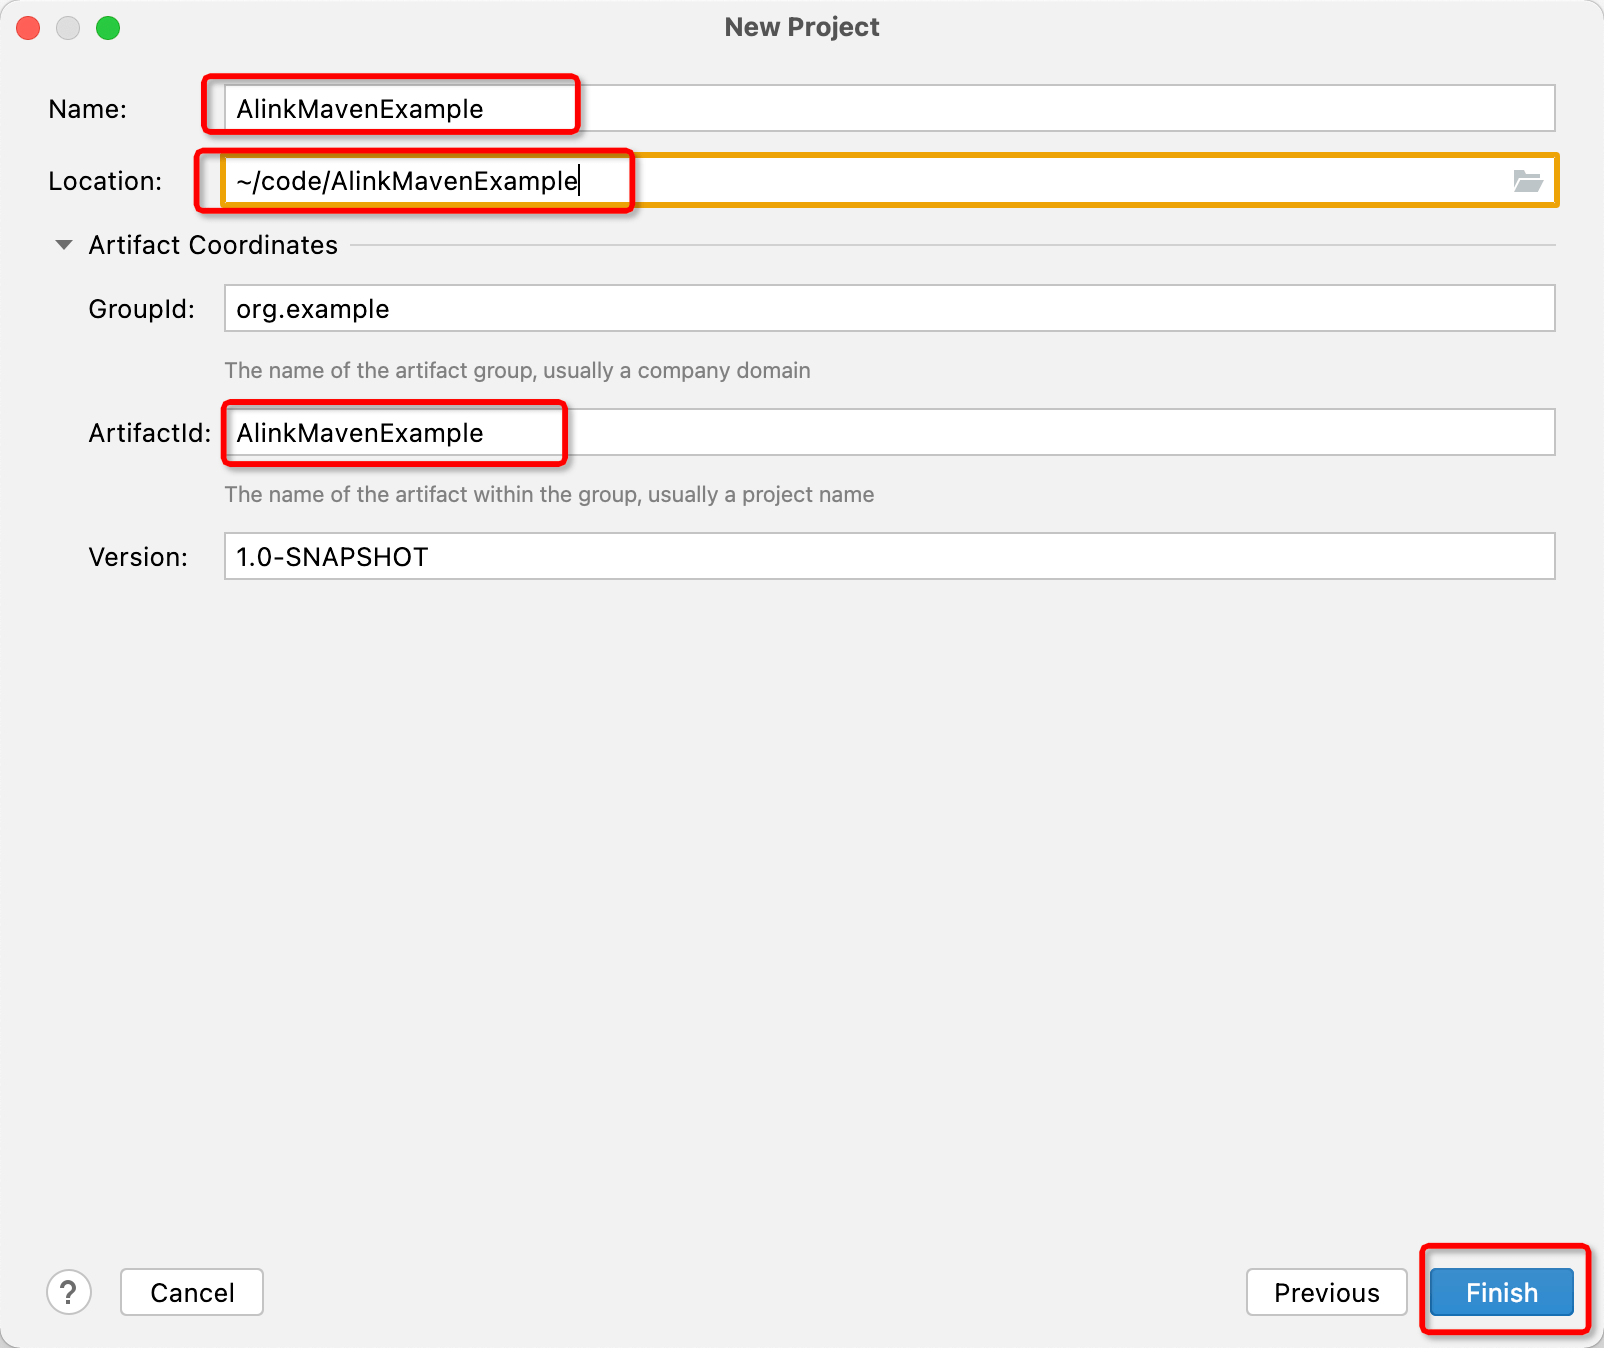
- Intellij中点击菜单 File -》new -> Project,弹出如下界面

- 点击 Next, 有如下界面,填写好项目名字,这里叫 AlinkMavenExample, 点击 Finish,完成项目创建
修改 pom.xml
这里依赖 Flink 1.13 版本,写文章时 Flink 全托管支持的版本最新为 vvr-4.0.12-flink-1.13, 不要使用其他Flink 1.11 版本及以下版本,会在启动作业时超时报错,https://help.aliyun.com/document_detail/169596.html
<?xml version="1.0" encoding="UTF-8"?><project xmlns="http://maven.apache.org/POM/4.0.0"xmlns:xsi="http://www.w3.org/2001/XMLSchema-instance"xsi:schemaLocation="http://maven.apache.org/POM/4.0.0 http://maven.apache.org/xsd/maven-4.0.0.xsd"><modelVersion>4.0.0</modelVersion><groupId>org.example</groupId><artifactId>AlinkMavenExample</artifactId><version>1.0-SNAPSHOT</version><dependencies><dependency><groupId>com.alibaba.alink</groupId><artifactId>alink_core_flink-1.13_2.11</artifactId><version>0.1-patches-flink-1.13-SNAPSHOT</version></dependency><dependency><groupId>org.apache.flink</groupId><artifactId>flink-streaming-scala_2.11</artifactId><version>1.13.0</version><scope>provided</scope></dependency><dependency><groupId>org.apache.flink</groupId><artifactId>flink-table-planner_2.11</artifactId><version>1.13.0</version><scope>provided</scope></dependency><dependency><groupId>org.apache.flink</groupId><artifactId>flink-clients_2.11</artifactId><version>1.13.0</version><scope>provided</scope></dependency></dependencies><build><plugins><plugin><groupId>org.apache.maven.plugins</groupId><artifactId>maven-compiler-plugin</artifactId><configuration><source>1.8</source><target>1.8</target></configuration></plugin><!-- Scala Compiler --><plugin><groupId>net.alchim31.maven</groupId><artifactId>scala-maven-plugin</artifactId><version>3.2.0</version><executions><execution><id>scala-compile-first</id><phase>process-resources</phase><goals><goal>compile</goal></goals></execution><execution><id>scala-test-compile-first</id><phase>process-test-resources</phase><goals><goal>testCompile</goal></goals></execution></executions></plugin><!-- 直接加上 shade 过程,这样可以使用生成的jar包 --><plugin><groupId>org.apache.maven.plugins</groupId><artifactId>maven-shade-plugin</artifactId><executions><execution><id>post-shade</id><phase>package</phase><goals><goal>shade</goal></goals><configuration><minimizeJar>false</minimizeJar><shadedArtifactAttached>true</shadedArtifactAttached><transformers><transformer implementation="org.apache.maven.plugins.shade.resource.ServicesResourceTransformer"/></transformers></configuration></execution></executions></plugin></plugins></build></project>
编写 main 函数
这里以读 http csv 数据源并写系统 oss 为例:
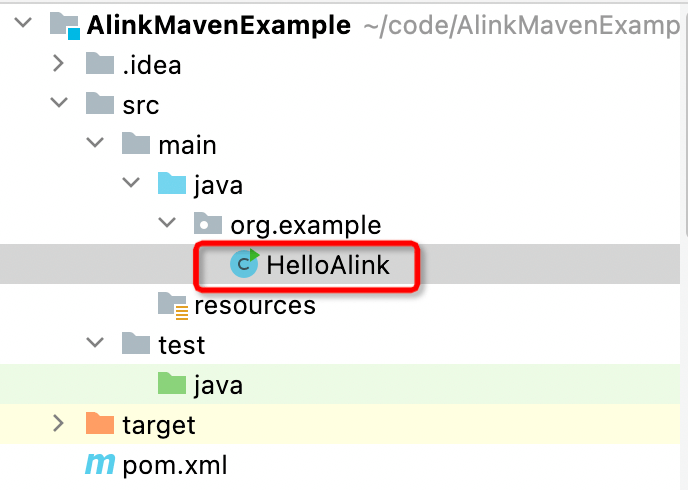
- 在 org.example 中新建 Java 类 HelloAlink
- 编写代码 ```java package org.example;
import com.alibaba.alink.common.io.filesystem.FilePath; import com.alibaba.alink.common.io.filesystem.FlinkFileSystem; import com.alibaba.alink.operator.batch.BatchOperator; import com.alibaba.alink.operator.batch.sink.CsvSinkBatchOp; import com.alibaba.alink.operator.batch.source.CsvSourceBatchOp;
public class HelloAlink {
public static void main(String[] args) throws Exception {runOssSink();}public static void runOssSink() throws Exception {CsvSourceBatchOp source = new CsvSourceBatchOp().setFilePath("https://alink-test-data.oss-cn-hangzhou.aliyuncs.com/iris.csv").setSchemaStr("sepal_length double, sepal_width double, petal_length double, petal_width double, category string");CsvSinkBatchOp sink = new CsvSinkBatchOp()// 修改 xxx 为新建的 oss bucket.setFilePath(new FilePath("/alink_data/iris_new.csv", new FlinkFileSystem("oss://xxx"))).setOverwriteSink(true);source.link(sink);BatchOperator.execute();}
}
3. 编译为 shade 的 jar 包点击 maven 中 package<br />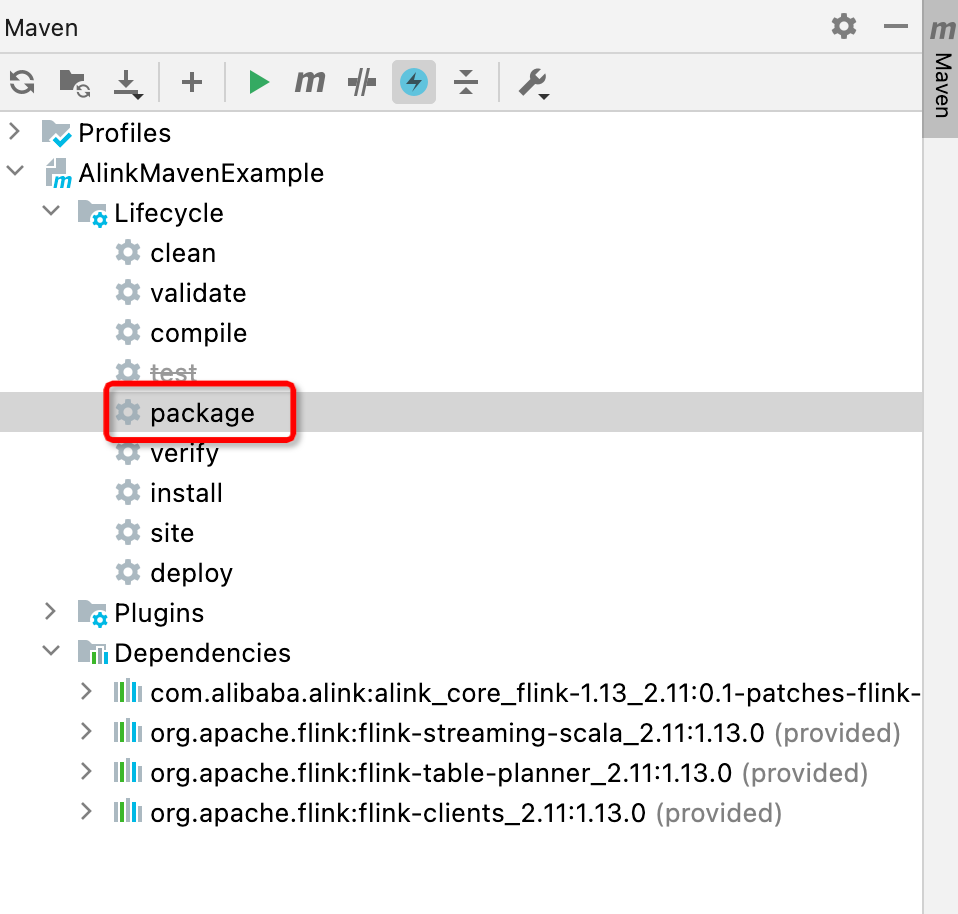<br />在 target 目录中找到生成的 shade 包<br />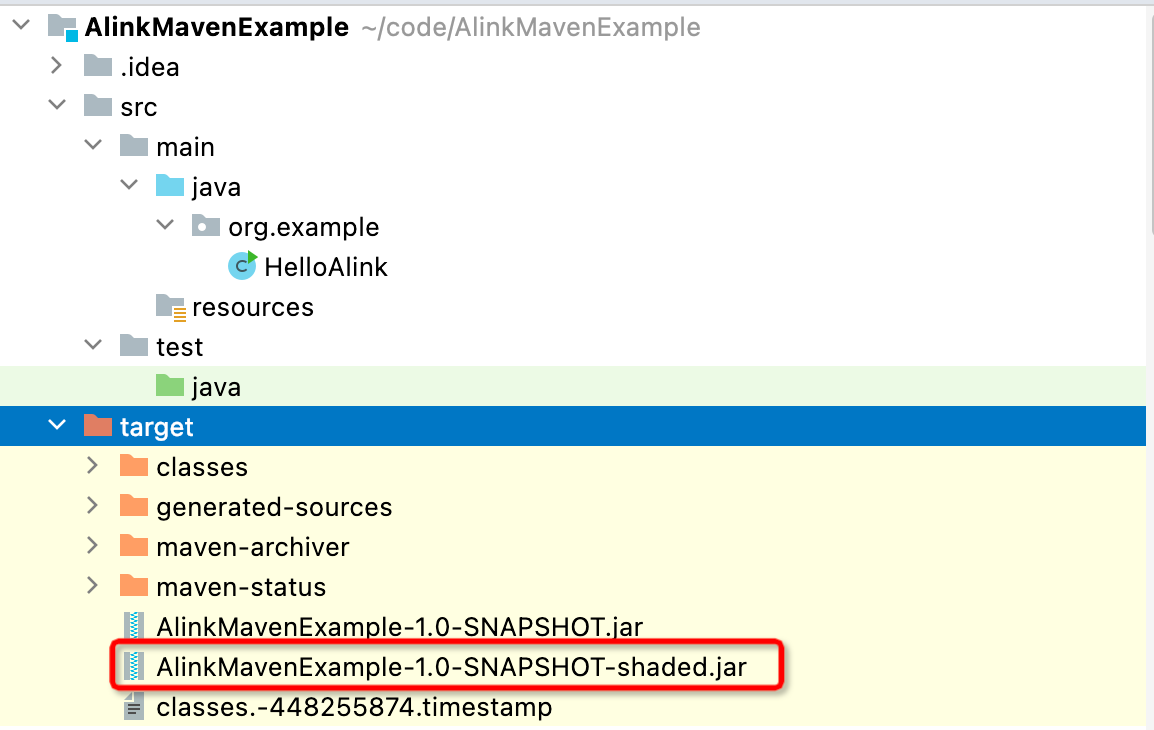<a name="g1j5k"></a># 上传 jar 包将上一步生成的jar,作为资源上传到 Flink 全托管集群上<br />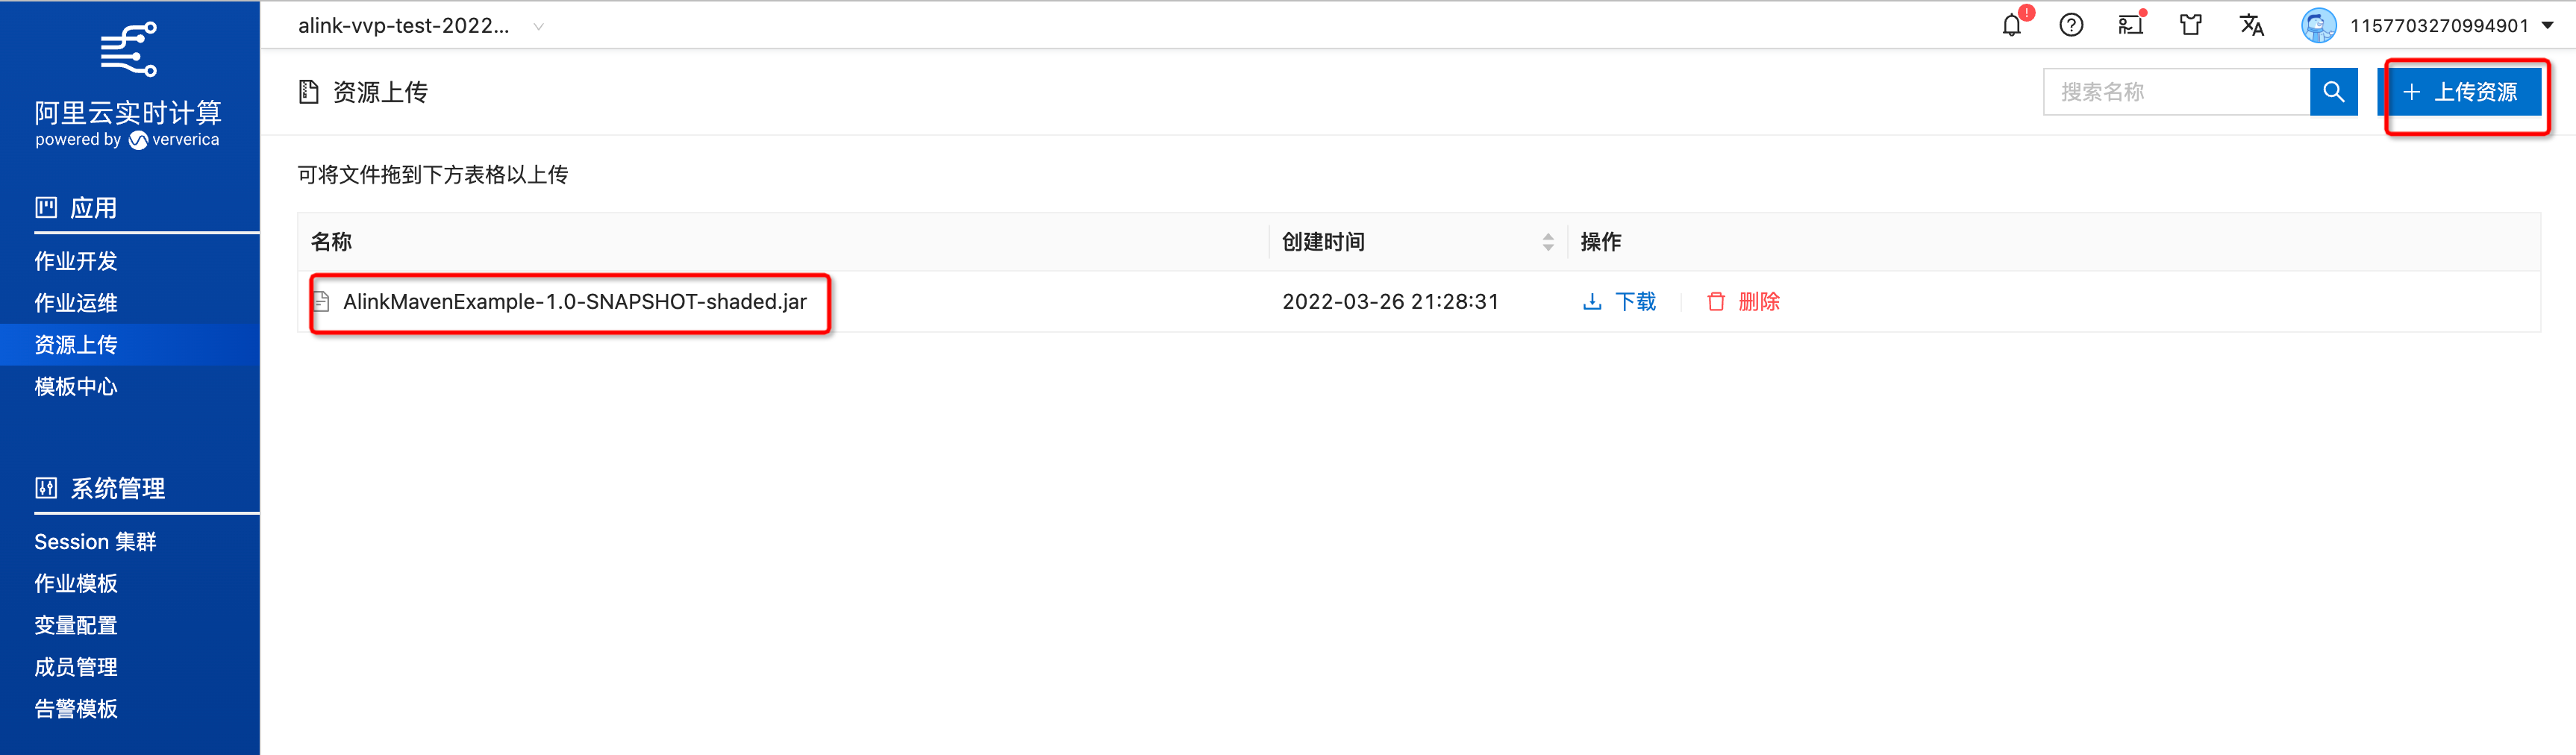<a name="CRpD0"></a># 作业开发<a name="cVT1N"></a>## 新建作业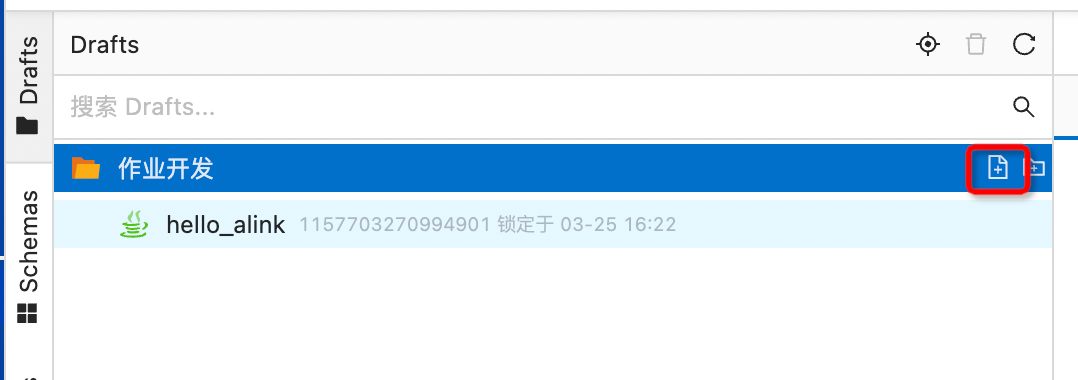<a name="JybWO"></a>## 输入作业信息这里名字定为 hello_alink , 文件类型为 流作业 / JAR ,部署目标为默认,存储位置为默认<br />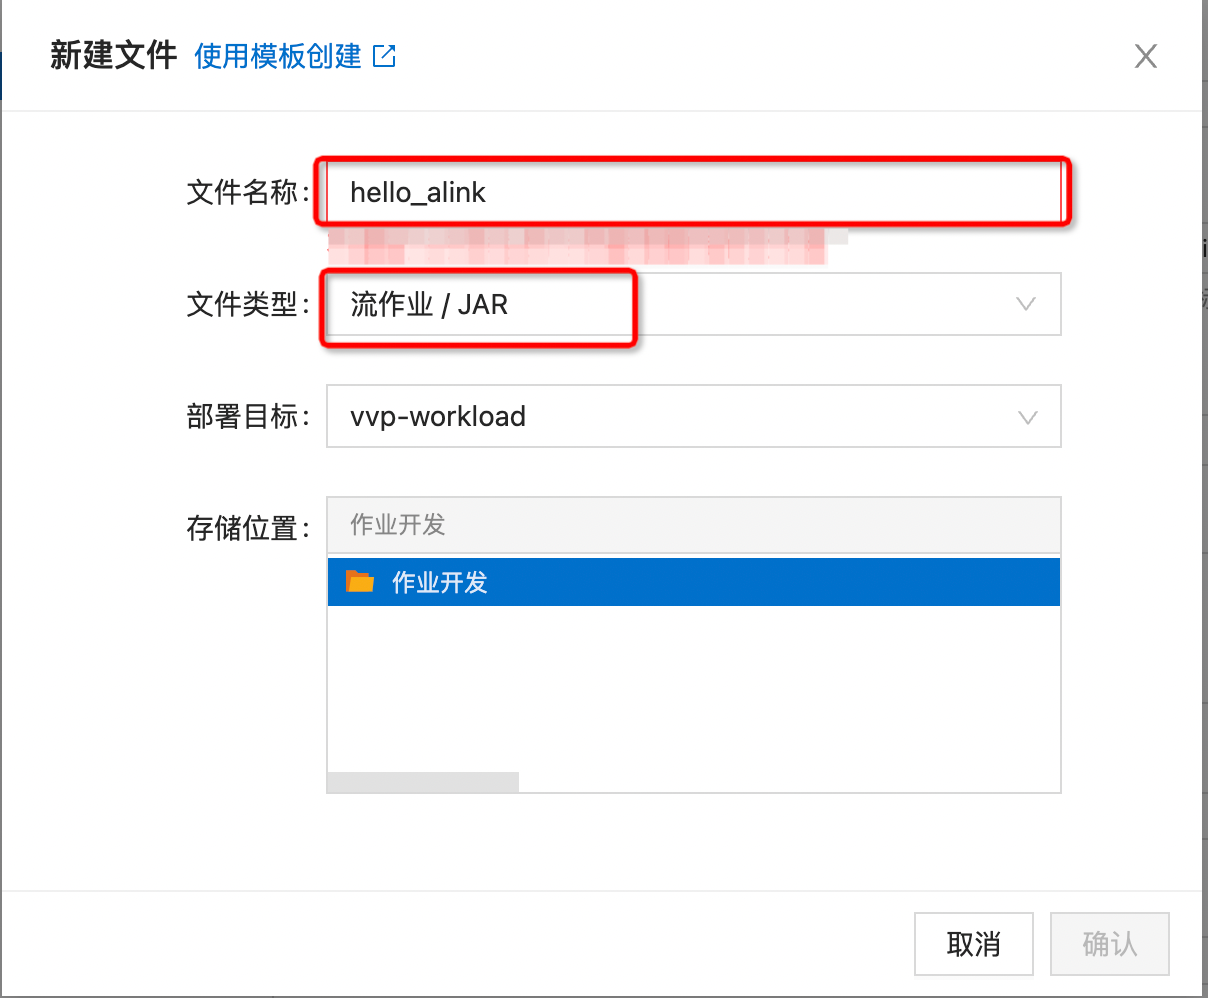<a name="SDvkS"></a>## 配置作业将图中红框框选的内容,填入合适的内容,这里注意几项1. Entry Point Class 为 org.example.HelloAlink,参考代码中 main 函数的位置1. 并行度这里我们设置为 1 , 因为这里是一个很小的任务,为了省资源,填写最小值1. 引擎版本选择 vvr-4.0.12-flink-1.13 ,原因可以参考 "修改 pom.xml" 章节1. Flink 重启策略配置选择 No Restarts ,因为我们提交的为一个批任务,如果一直重启的话,会造成任务失败,不结束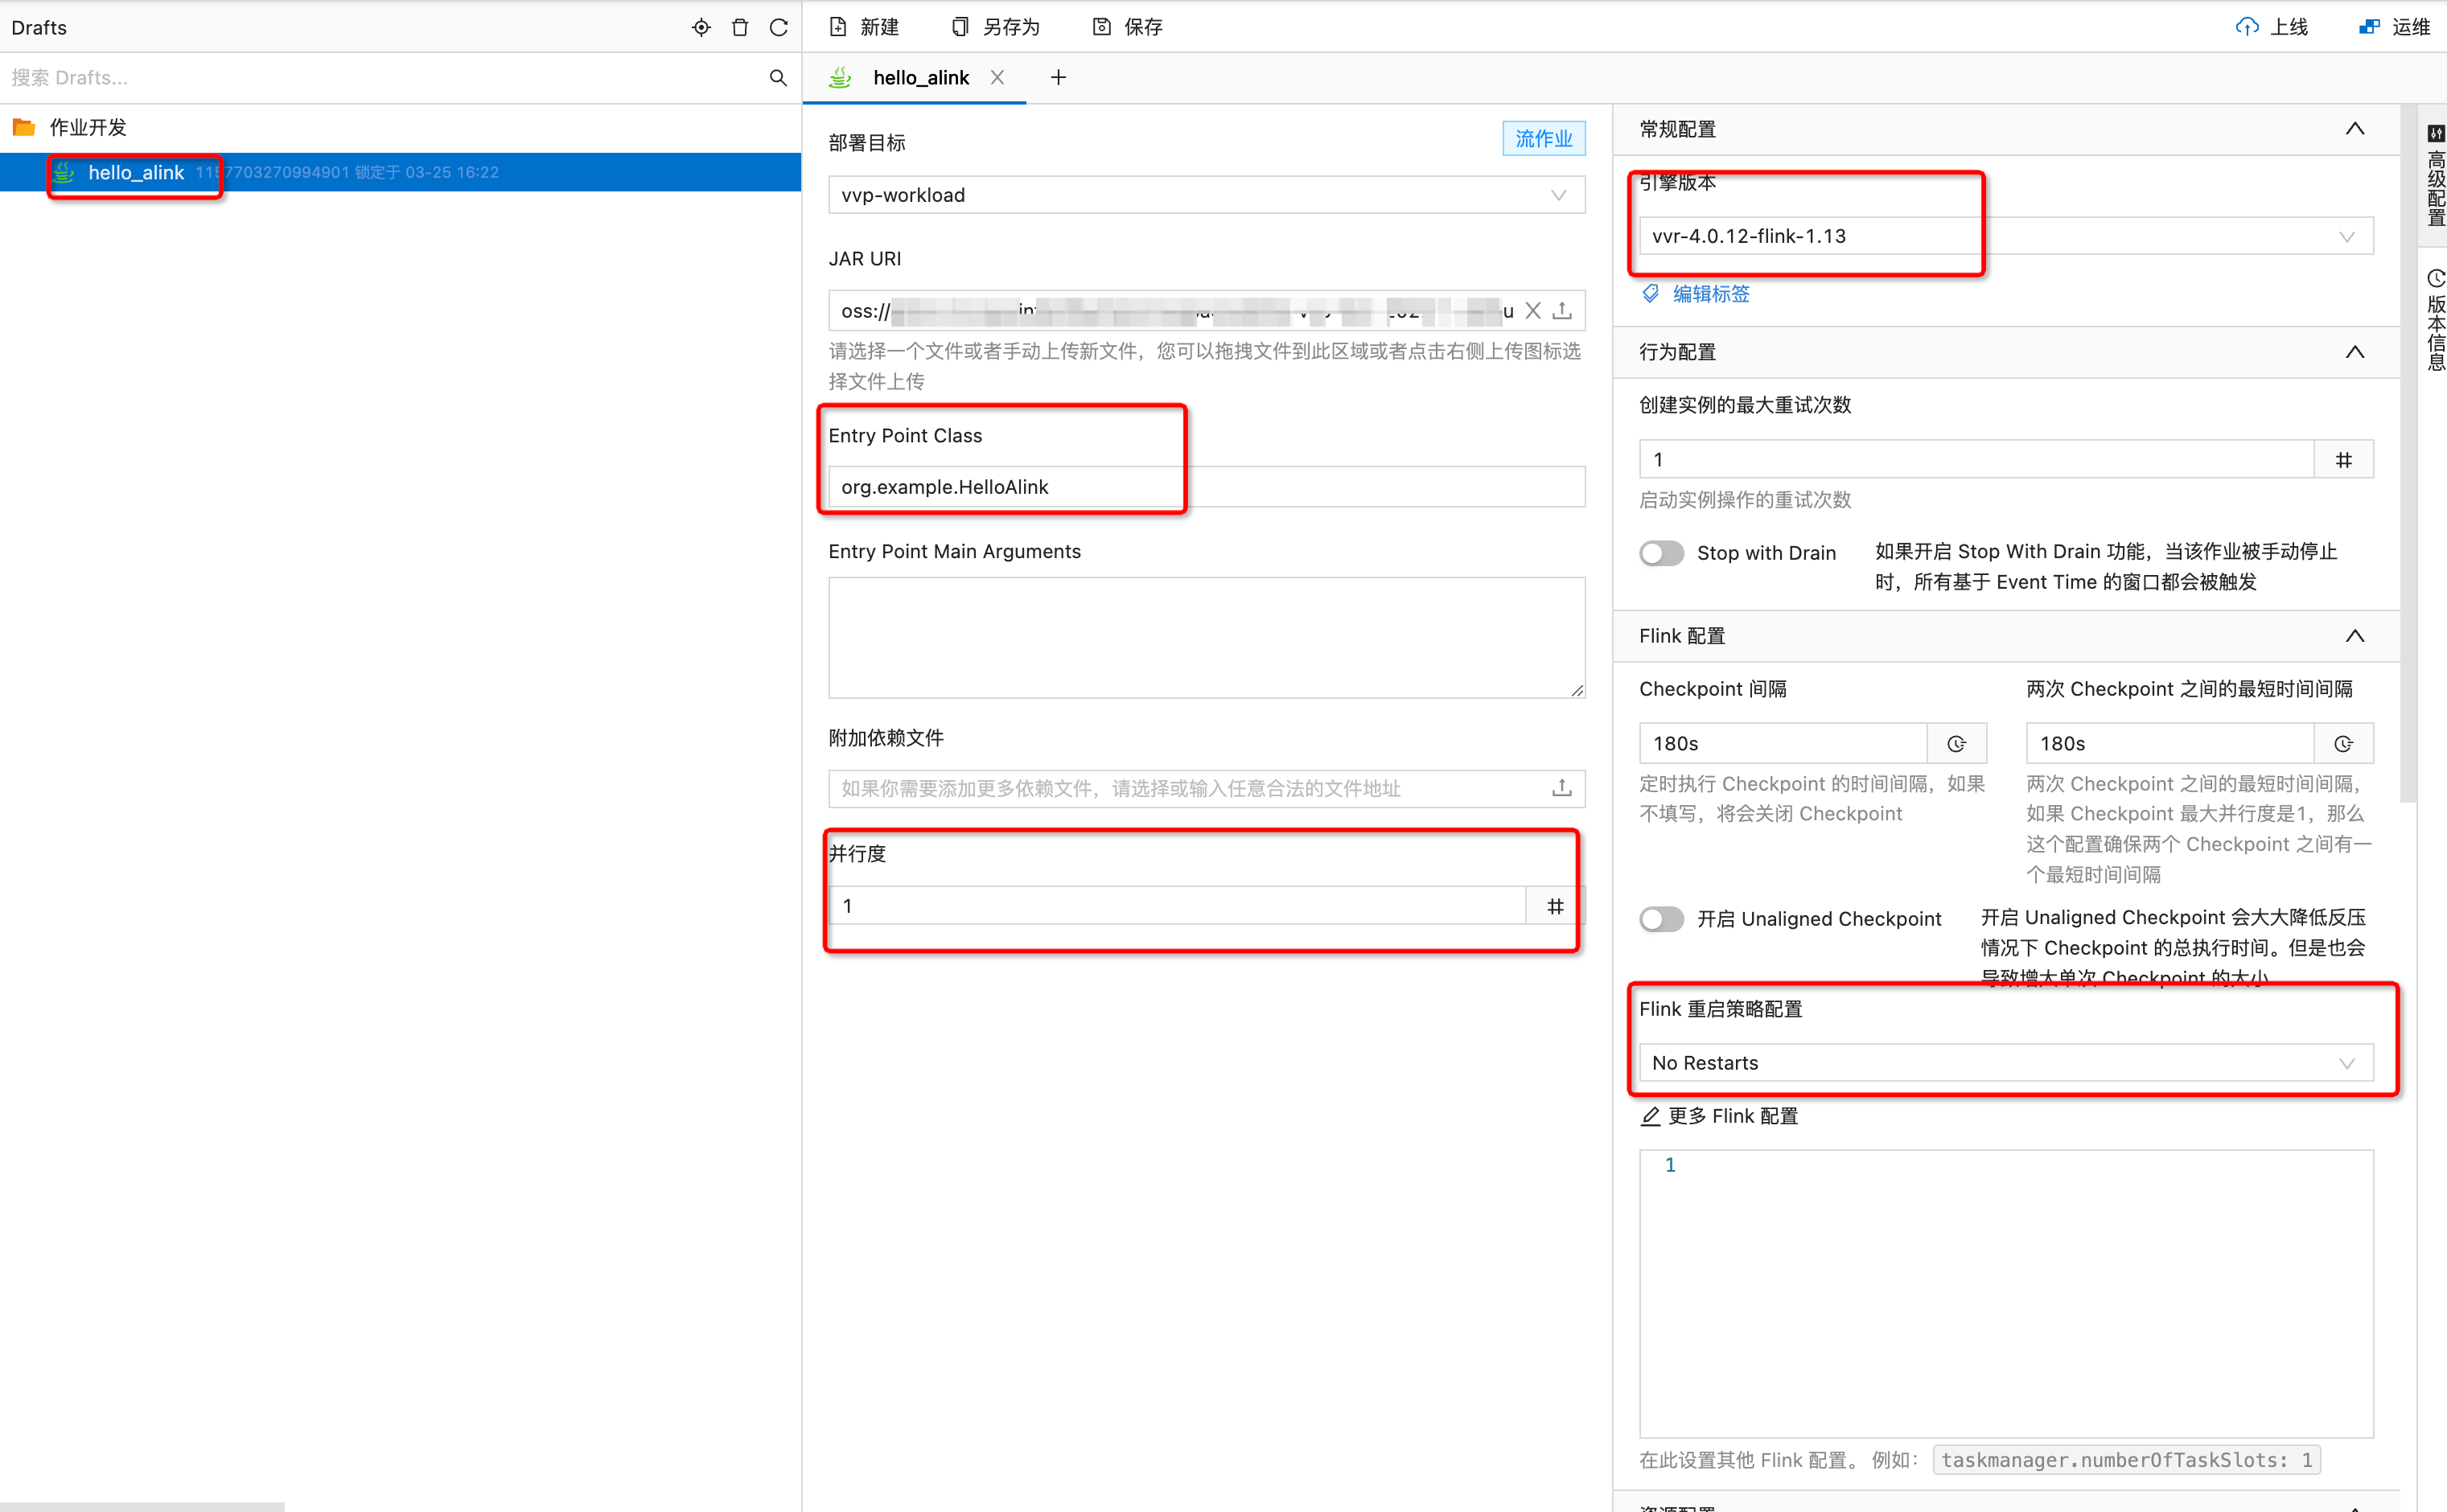<a name="eoeaz"></a>## 上线点击如图按钮即可<br /><a name="LwtzL"></a># 作业运维<a name="C5Qcb"></a>## 启动作业点击下图中红框中按钮即可启动作业<br /><a name="yWdoF"></a>## 日志查看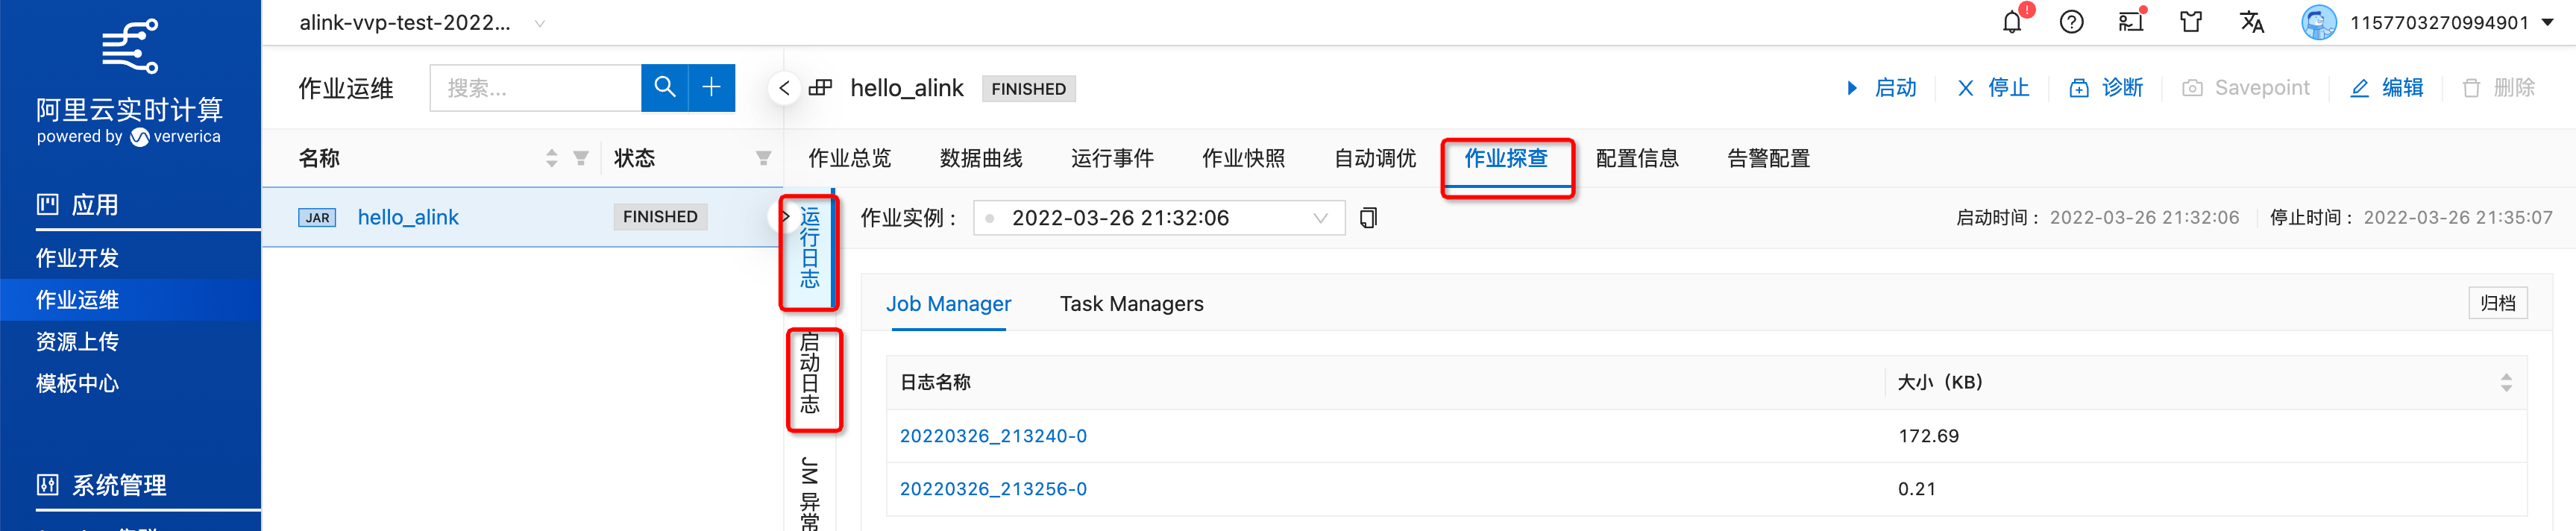<a name="x33XG"></a># 结果查看当前任务为将iris数据写入新建的 oss bucket 路径中,所以当任务完成是,我们可以使用 oss 客户端查看是否写入数据<br /><a name="kY6bd"></a># Alink实例<a name="YShpn"></a>## 读 Http 写入到 自定义 Oss 中1. 选择Oss BucketOSS Region和Endpoint对照表: [https://help.aliyun.com/document_detail/31837.html](https://help.aliyun.com/document_detail/31837.html),这里因为使用的是和 Flink 全托管集群相同 Region,所以 Endpoint 选择了内网Endpoint: [http://oss-cn-beijing-internal.aliyuncs.com/](http://oss-cn-beijing-internal.aliyuncs.com/)2. 代码如下:```javapackage org.example;import com.alibaba.alink.common.io.filesystem.FilePath;import com.alibaba.alink.common.io.filesystem.OssFileSystem;import com.alibaba.alink.operator.batch.BatchOperator;import com.alibaba.alink.operator.batch.sink.CsvSinkBatchOp;import com.alibaba.alink.operator.batch.source.CsvSourceBatchOp;public class HelloAlink {public static void main(String[] args) throws Exception {runOthersOssSink();}public static void runOthersOssSink() throws Exception {// 填写好 EndPoint,Bucket,AccessKeyID,AccessKeySecretOssFileSystem oss =new OssFileSystem("3.4.1","EndPoint","Bucket","AccessKeyID","AccessKeySecret");CsvSourceBatchOp source = new CsvSourceBatchOp().setFilePath("https://alink-test-data.oss-cn-hangzhou.aliyuncs.com/iris.csv").setSchemaStr("sepal_length double, sepal_width double, petal_length double, petal_width double, category string");CsvSinkBatchOp sink = new CsvSinkBatchOp().setFilePath(new FilePath("/alink_data/iris_new_oss_filesystem.csv", oss)).setOverwriteSink(true);source.link(sink);BatchOperator.execute();}}
读 Http 写入到 MaxCompute 中
- 选择 MaxCompute project
MaxCompute EndPoint: https://help.aliyun.com/document_detail/34951.html,这里选择的是外网Endpoint: http://service.cn-beijing.maxcompute.aliyun.com/api
- 代码如下: ```java package org.example;
import org.apache.flink.ml.api.misc.param.Params; import org.apache.flink.table.catalog.ObjectPath;
import com.alibaba.alink.common.io.catalog.OdpsCatalog; import com.alibaba.alink.operator.batch.BatchOperator; import com.alibaba.alink.operator.batch.sink.CatalogSinkBatchOp; import com.alibaba.alink.operator.batch.source.CsvSourceBatchOp; import com.alibaba.alink.params.io.HasCatalogObject.CatalogObject; import com.alibaba.alink.params.shared.HasOverwriteSink;
public class HelloAlink {
public static void main(String[] args) throws Exception {runSinkOdps();}public static void runSinkOdps() throws Exception {// 填写好 EndPoint,AccessKeyID,AccessKeySecret, Project。 RunningProject 填写和 Project 相同OdpsCatalog odpsCatalog = new OdpsCatalog("odps", "default","0.36.4-public", "AccessKeyID", "AccessKeySecret","Project","EndPoint","RunningProject");CsvSourceBatchOp source = new CsvSourceBatchOp().setFilePath("https://alink-test-data.oss-cn-hangzhou.aliyuncs.com/iris.csv").setSchemaStr("sepal_length double, sepal_width double, petal_length double, petal_width double, category string");CatalogSinkBatchOp sink = new CatalogSinkBatchOp().setCatalogObject(new CatalogObject(odpsCatalog,// 填写好 Projectnew ObjectPath("Project", "test_alink_iris"),new Params().set(HasOverwriteSink.OVERWRITE_SINK, true)));source.link(sink);BatchOperator.execute();}
} ```

若有收获,就点个赞吧
0 人点赞
